Duo Ventures

Friday, February 12, 2016

The Garage: Extra Paint Storage

We worked on some garage organization projects at the beginning of last year, including a DIY ceiling storage solution & a wall track system.  Both projects have helped tremendously, but we still had a lot of smaller areas to work on - including our paint storage & organization.

All in all, our initial setup wasn't too bad:

The problem was that the shelf was filling up pretty quickly & it was hard to see what we had on hand.  In most cases, we had gallon paint cans that were less than half full.

Another issue we had, was the dreaded rust that formed along the top of many of the rims, which always led to rust particles falling into the can every time we wanted to paint something (this was the worst one, but most of the other cans still had a good amount of rust):


Sunday, February 15, 2015

The Garage: Ceiling Storage

While finishing the nursery is our main priority right now, we are also working on a couple of organizational projects in the garage.  We installed a peg board last January, but we haven't touched the rest of the garage since then.

Before we installed the peg board, we had to shift all the shelving units to the right & next to the wall in order to fit the 3 pegboard panels on the left side of the wall (where that white wire shelf unit is located in the photo).  That meant all the wood, drywall, & extra building materials that were stuffed in that gap had to come out:

Since then, all those extra building materials have been leaning on the wall & scattered throughout the garage - taking up space & looking very cluttered.

  First, my dad helped me sort through everything to determine what was 'trash' versus 'keep' & then we discussed a storage solution.  I knew I wanted to take advantage of our ceiling for storage - particularly in the space between the ceiling & the garage door track (we do not use a garage door opener @ this point so that's a non-issue).

Apologies in advance for the poor lighting & photo documenting of the building process - I should have moved the giant piece of 2" x 8" & drywall off of the garage door rails so you could see better.  Anyways, this is the area I'm talking about:

The first thing my dad did was find the studs in the ceiling:

After taking some measurements, he designed a simple storage solution - all made out of 2 x 4's.  We made a list of what we needed, ran to Home Depot for supplies, & started building.

He cut 2 long pieces and then:
(1) attached a middle brace piece on each board
(2) pre-drilled some holes in the long boards (to attach them to the ceiling):

Then he screwed them into the studs:

(don't mind that piece of wood on the left end of the board he's attaching - he used it for measurement purposes):

Next, he attached 2 more of the long boards to the bottom of the middle pieces:

Finally, he screwed in shorter pieces to all four ends:

That was it!  Then we just slid all the materials into the our new storage solution:

On the left side, we stored some plywood, wire shelves, & a longer 2" x 4".
We placed all the smaller scrap sheets of drywall & trim on the right side:

Here it is with the garage door open:

A couple of important notes:
1.  we chose to keep the left side of the opening wide enough to accommodate a 4' x 8' stock sheet of plywood, etc.
2.  make sure your garage door will still open - on our first test run, the garage door wouldn't open because the door handle was jutting out
3.  keep in mind that you most likely will not be able to install a garage door opener with this specific ceiling storage configuration

It was a small project, but makes all the difference by clearing up a lot of wall & floor space for us!

In our next garage project, we'll be installing a wall track system (like this or this) to get the rest of those miscellaneous items up & off of the floor and out of the way...

Mel
:)

Thursday, January 9, 2014

Organizing: Tool Pegboard

Project Garage Organization is in the works this month & I'm starting with our tools & supplies!

To give you an idea of where everything was originally stored...
here's what our garage looked like in December, post-holiday decorating:
On the black shelving unit (hiding behind the leaning pegboard) is where most of our tools were stored.  You can see other supplies were stored in various plastic bins.
My goal was to get the following three categories onto the pegboard:
1.  small hand tools & drills
2.  painting tools & supplies
3.  gardening tools

We felt the best way to organize these items was by utilizing a pegboard.  If you'd like to know how we hung the pegboard itself, you can check out more on that here.
So here's where we left off in the last post:

  We bought a variety of pegboard hooks @ Home Depot &
I just played around with the placement until everything fit:


On the left side of the pegboard I hung all of our basic & most commonly used hand tools & drills:
After looking at these photos, I realize that we don't have that many tools - we don't even own a set of wrenches or screwdrivers.  Is that weird?  I guess it's because we have one of each that is adjustable/changeable?  Anyways...

In the middle section, I hung up all of our painting supplies & putty knives:

All of our smaller gardening tools are hung on the bottom right side of the pegboard.
On the top, I hung our hand saws (since that was the only space I had left):
There were 2 shelf brackets included in one of our pegboard kits - 
so for now I'm using a scrap piece of 2'x6' as a shelf for some pots.


Some of the hooks came with black peg locks which keep the hooks from pulling out of the board.  I would highly suggest using these locks.
Otherwise, every time you take something off...the hook pops out.  And that's just annoying:

We hung the hook rail a couple of years ago to organize some of our larger gardening tools & brooms:

For now we plan on storing our larger power tools on the shelving unit.  Eventually, we would like to DIY a work bench to fit underneath the pegboard.  And, of course, I need to finish organizing the garage...

Anybody else have the 'new year organizing bug'?

Mel
:)

Tuesday, January 7, 2014

How to Hang a Pegboard

Like many people, the new year brought out the urge to get more organized.
One area of our house that needs some organizing attention is our garage.
More specifically: our tool storage system.

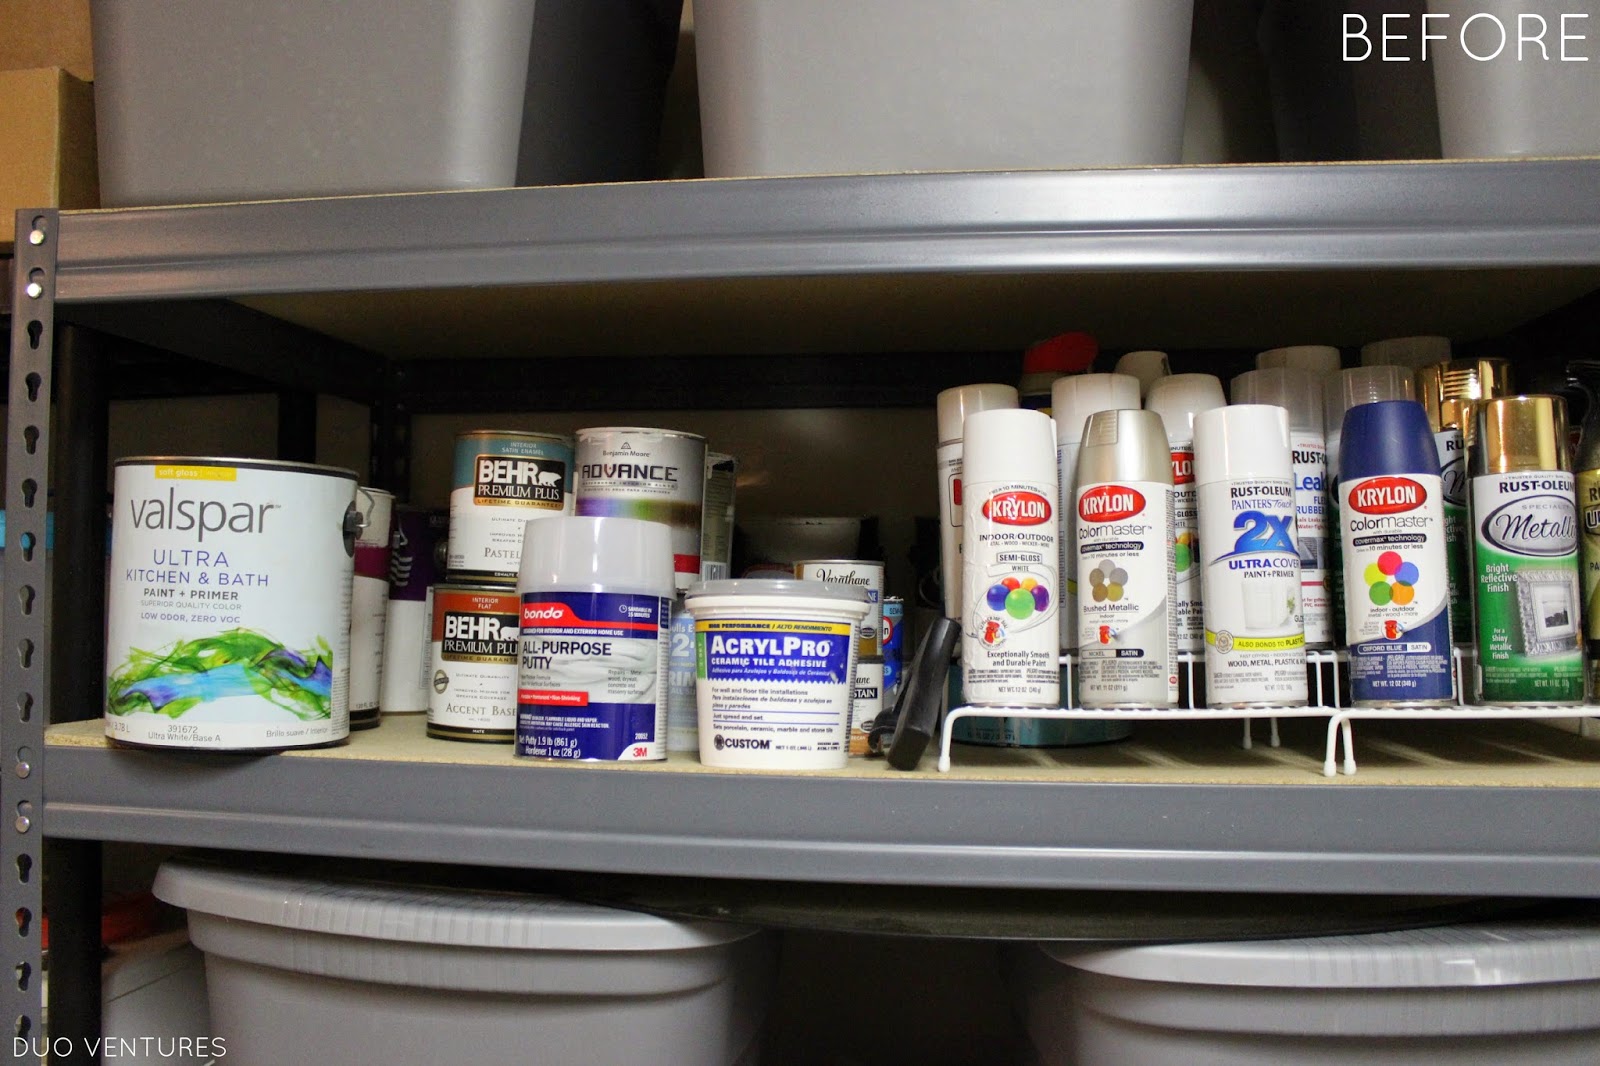
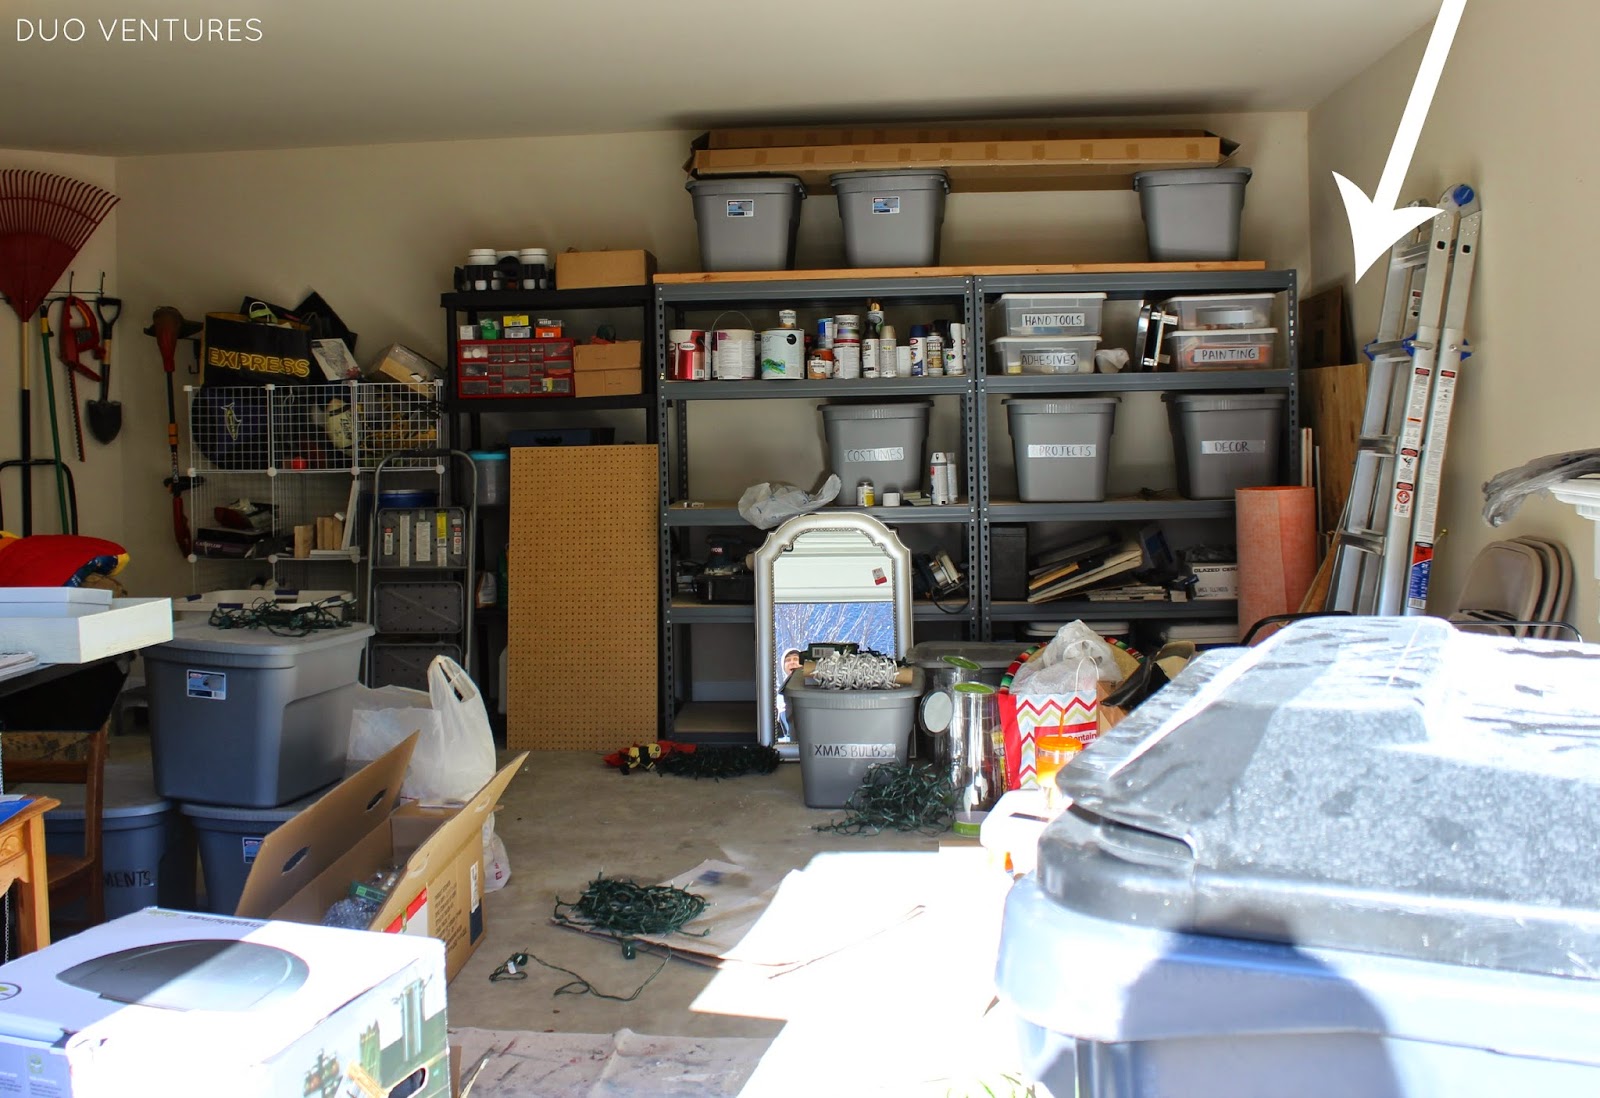
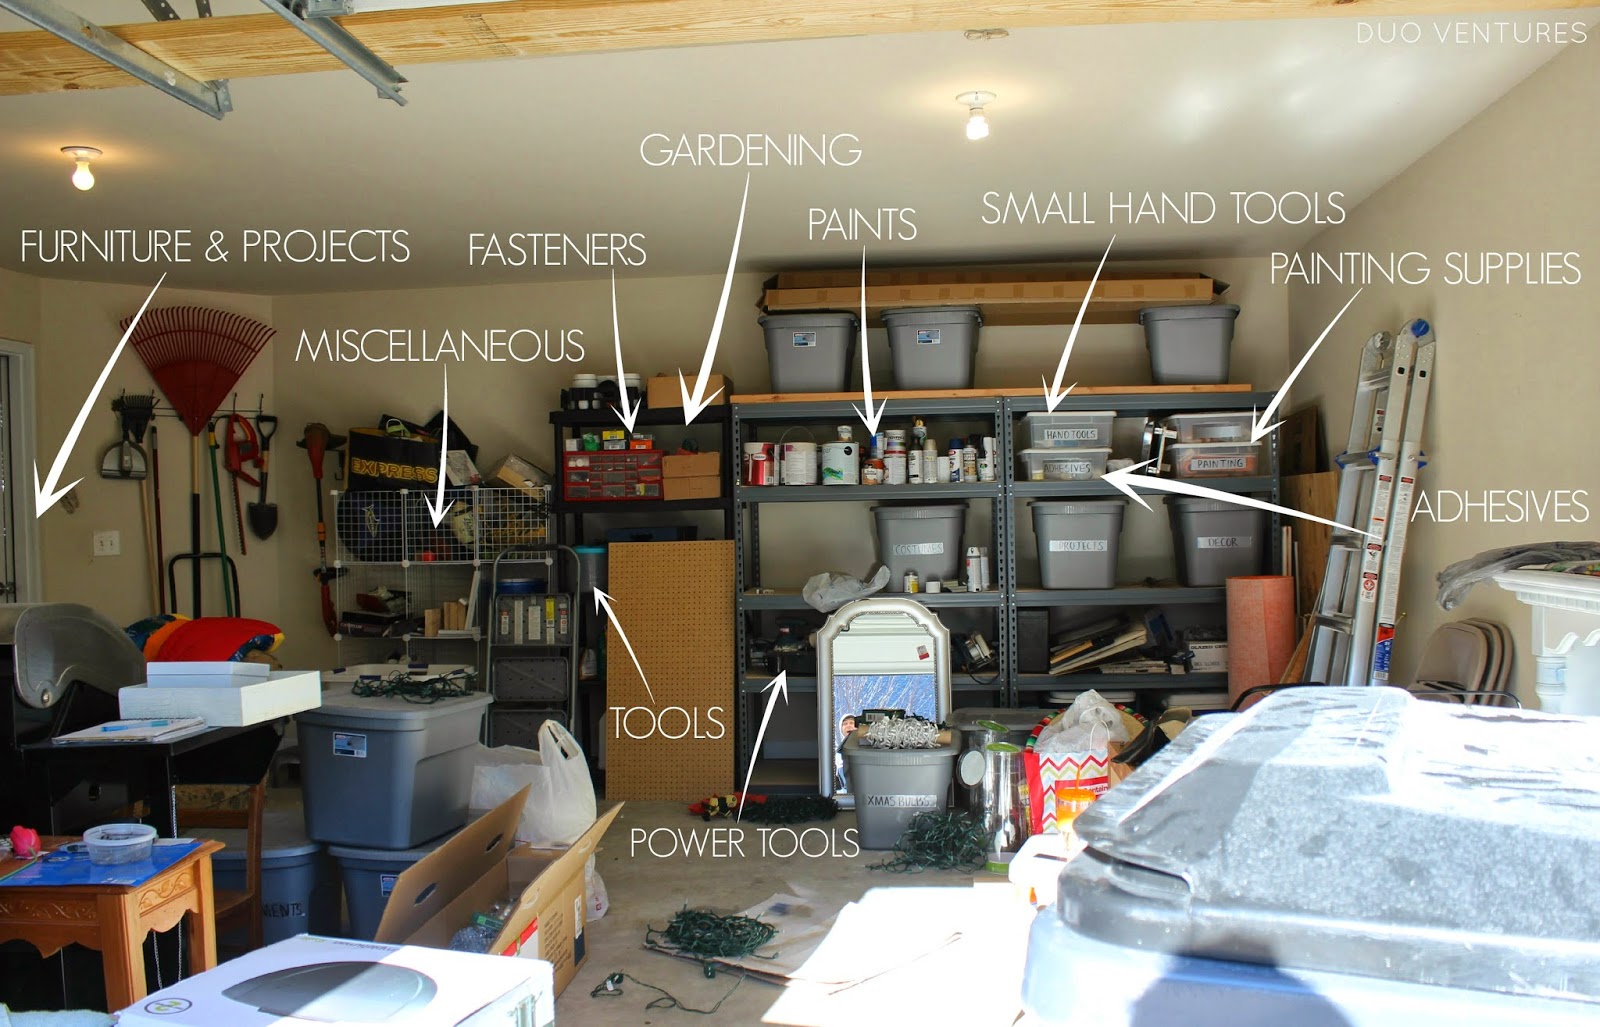
This is what it looked like during our holiday decorating spree in December:
If you overlook the messy explosion that was our garage, you can see that some things were somewhat organized & labeled in bins.  However, it wasn't very functional - we had to constantly pull out bins & dig around to find certain tools or supplies.  It wasn't a terrible system - just simply not the best solution for us.

We felt the best way to organize all of our tools & supplies would be by installing a pegboard onto our garage wall.  We don't know if there is necessarily a right or wrong way to hang a pegboard,
but here's how we did it...

First up, we made a stop @ Home Depot & picked up some pegboard.  We bought three 2'x4' white panels which were $8.45 each.  We also purchased an assortment of pegboard hooks & brackets.

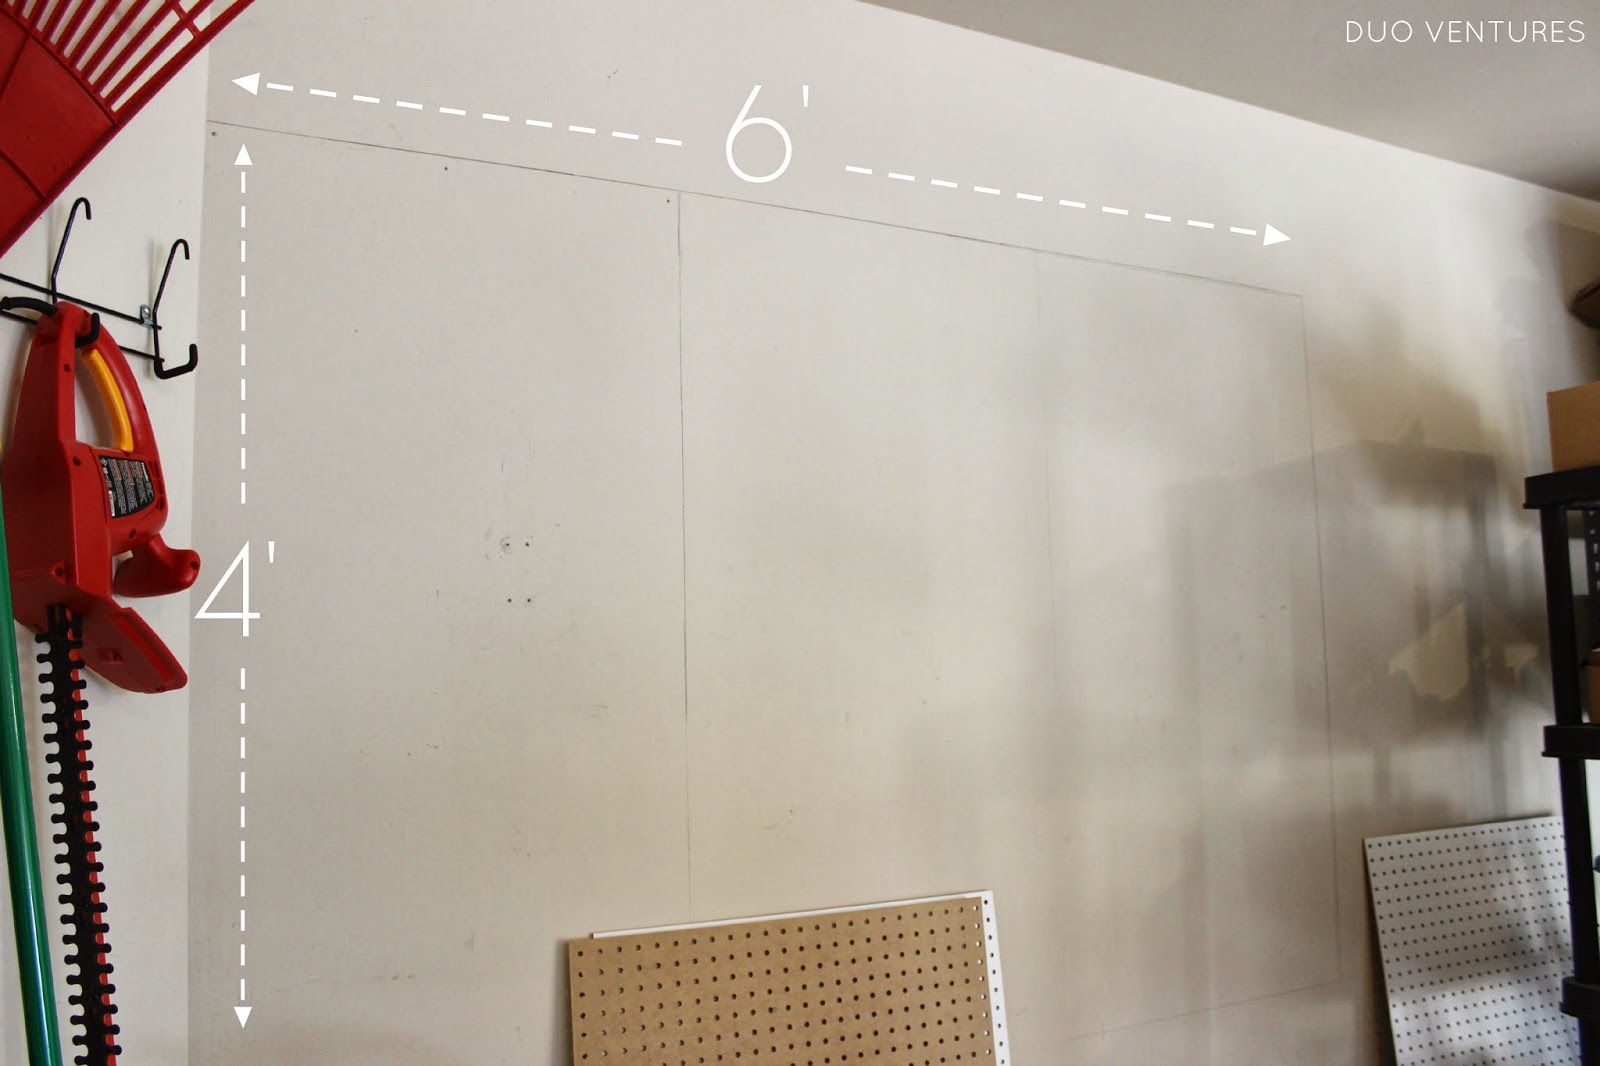
Once we got home, the first thing we did was draw a level outline of the boards onto the wall - Nader held the boards up while Mel traced them.  Our total pegboard size would be 4'x6':

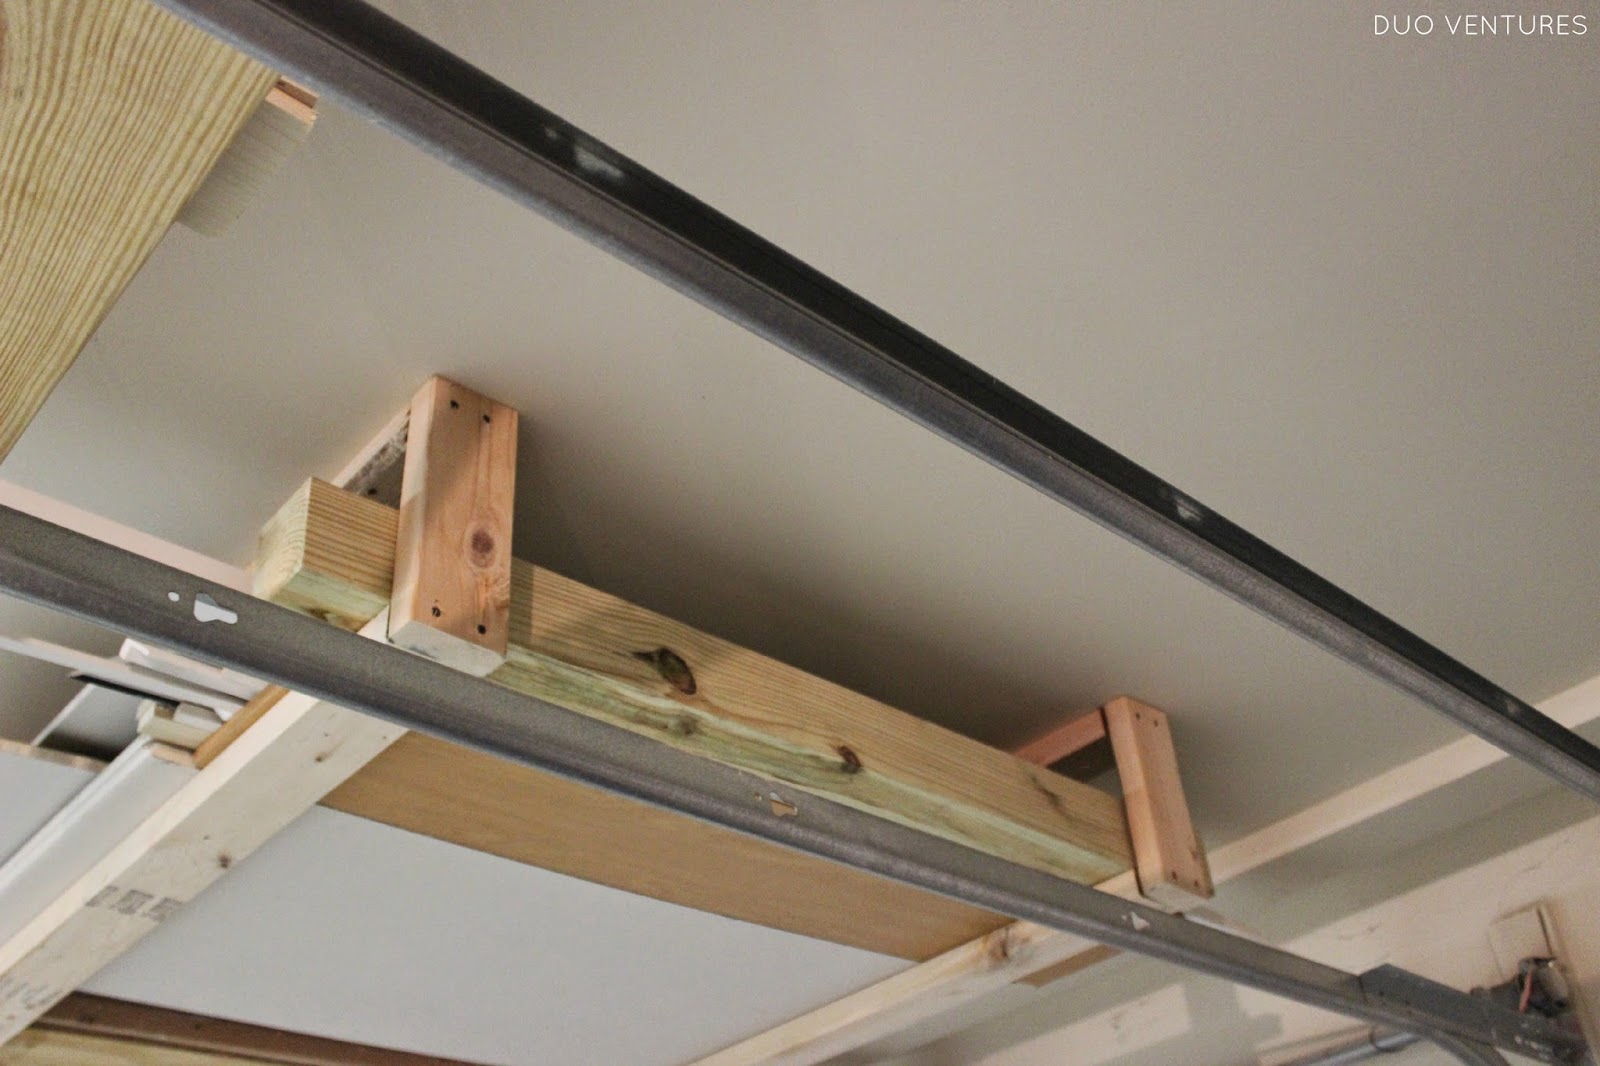
Next, we had to decide on a way to hang the pegboard panels.  Pegboard can obvioulsy not be hung directly onto the wall because there needs to be space behind the boards so that the hooks can be attached. 

So first, we had to attach some sort of frame to the wall.  Through some online browsing, we saw that there are many ways to hang pegboard.  Some people built an entire frame for the board, but we 
A) didn't think that was necessary & B) didn't have enough scrap wood for that anyways.  

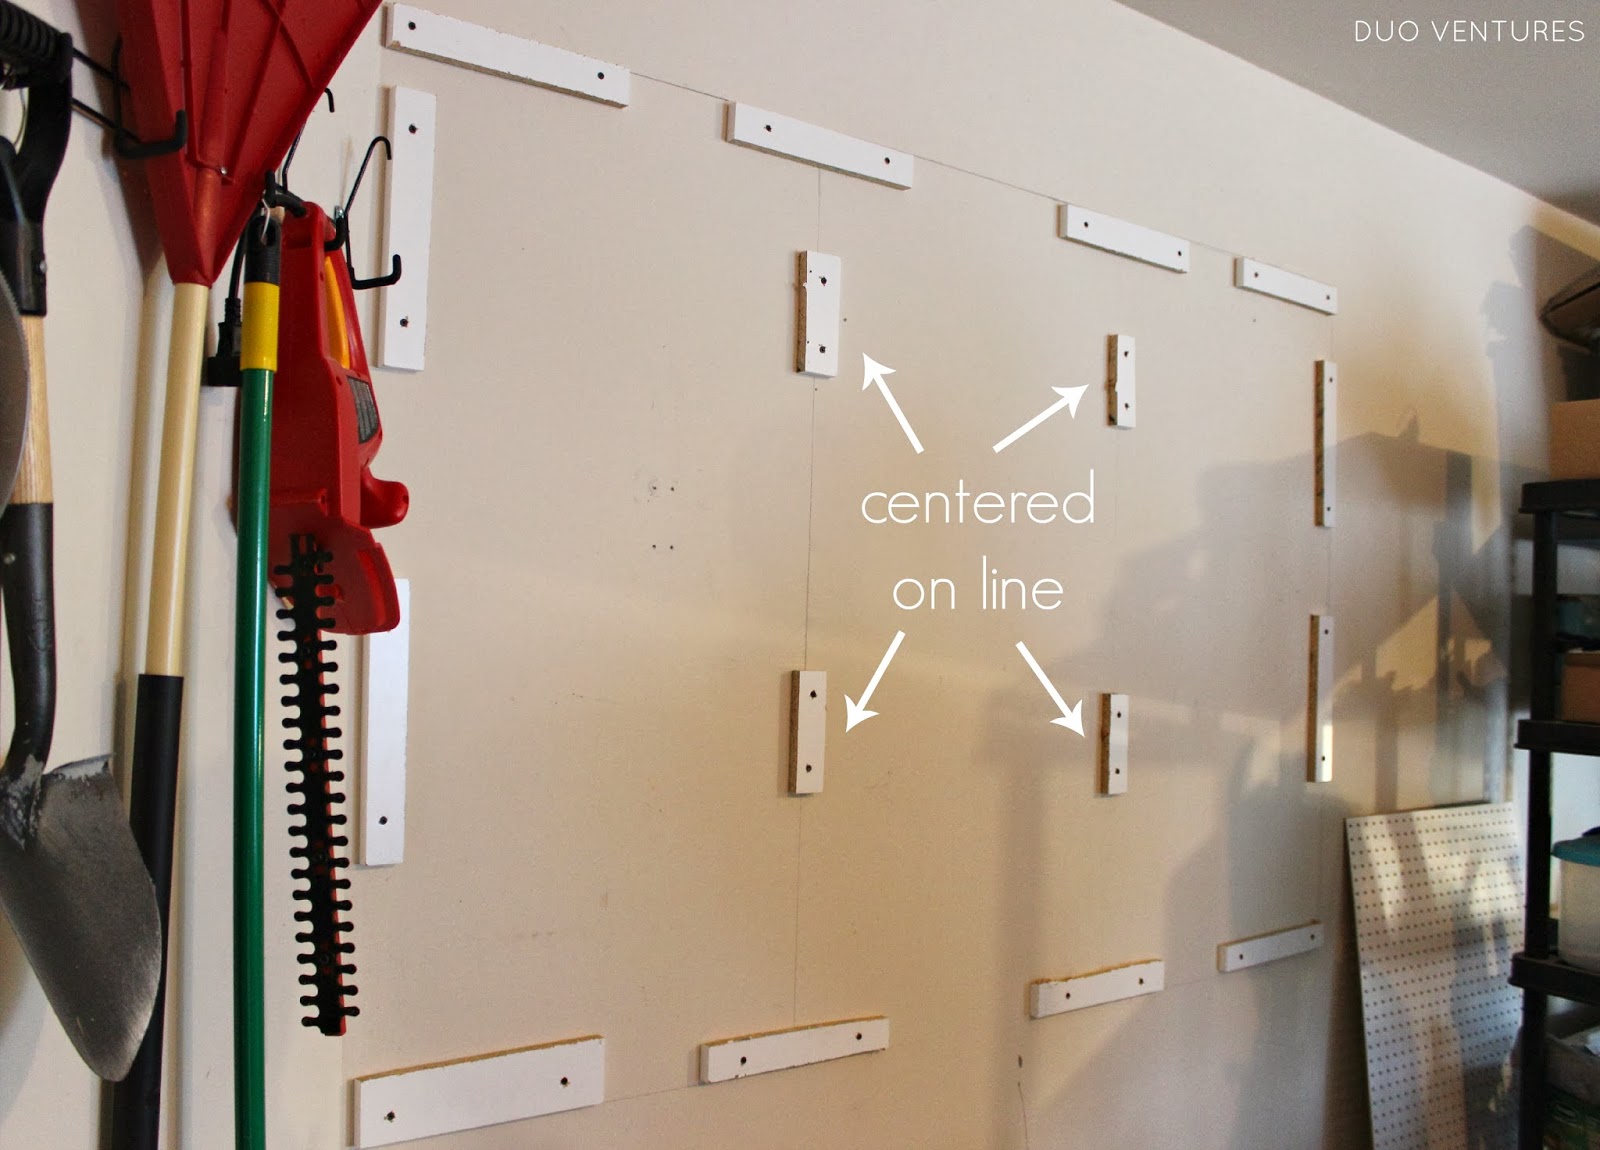
We did, however, have some leftover scrap wood from our laundry room & creativity closet makeovers.  During those shelving projects, we had to trim down several white melamine shelves & were subsequently left with a bunch of  2"x12" scraps.  Turns out the shelves were the perfect thickness too - about 5/8".  This meant our pegboard would be raised off the wall enough to attach the hooks, but it wouldn't jut out super far (like it would have if we had used 2'x4's for example).

Using drywall screws, we attached 12 of these scraps onto the perimeter of the outline.  Some scraps screwed into actual studs - but not all of them (there won't be a lot of weight on our pegboard so we didn't think it was necessary).  We also attached 4 smaller scraps in the middle to support the area where the boards would meet.  We made sure to center those four pieces so each pegboard would have room to attach on either side of the frame piece:

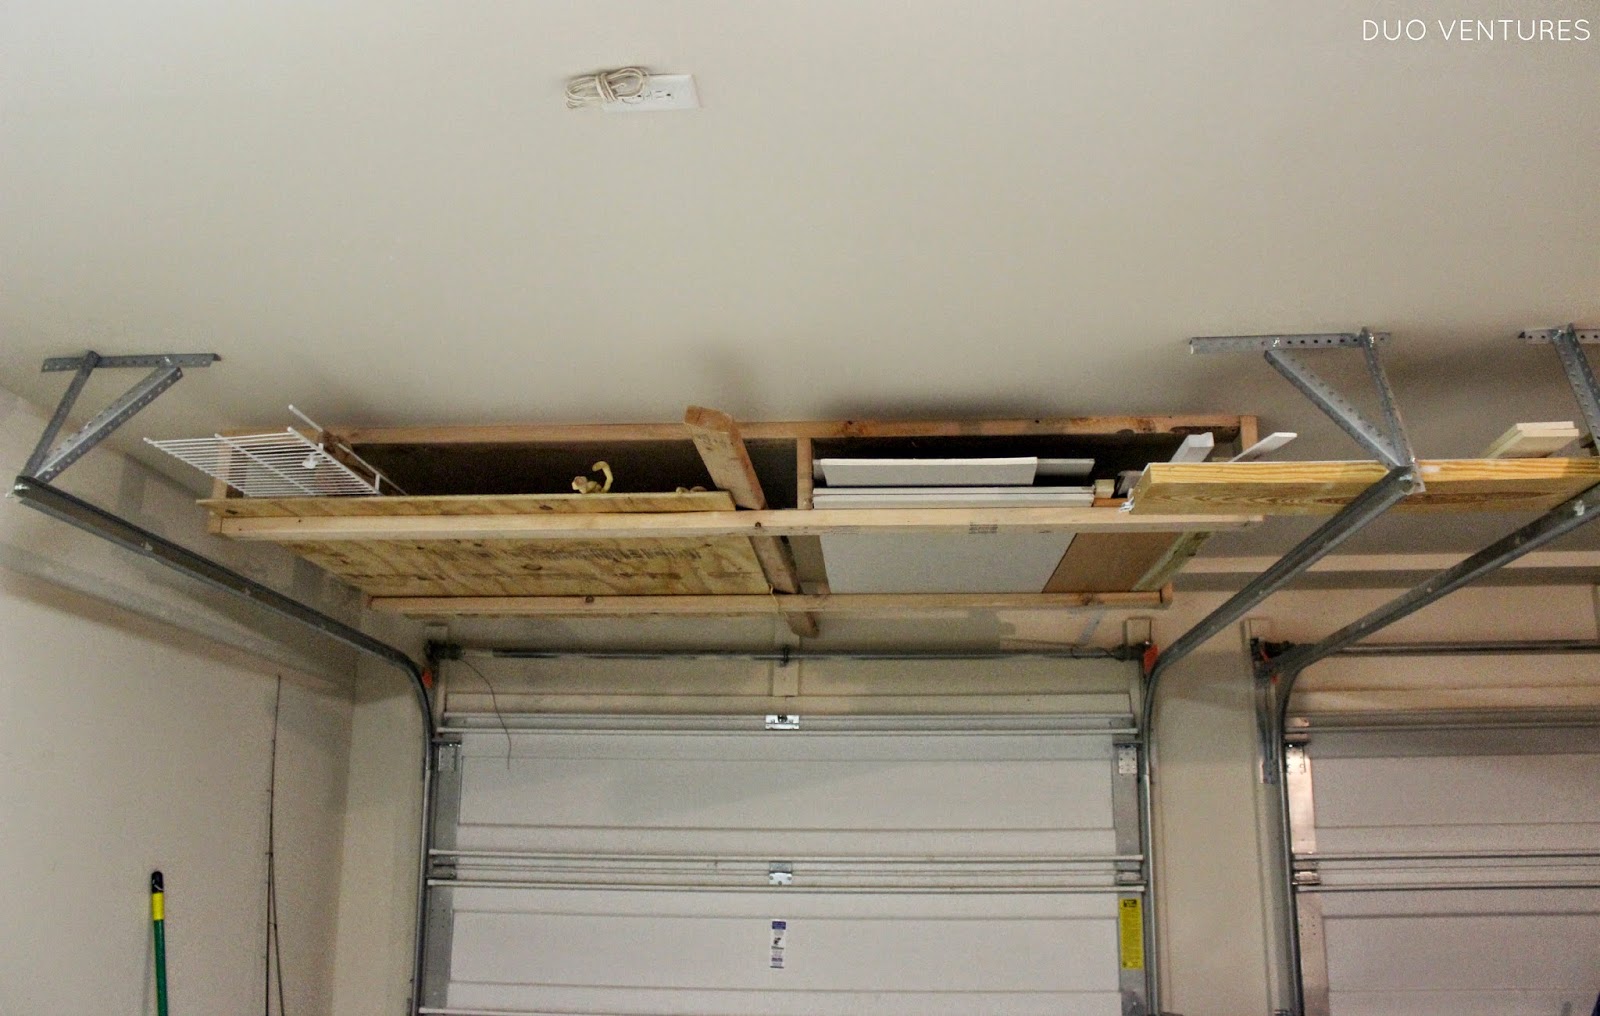
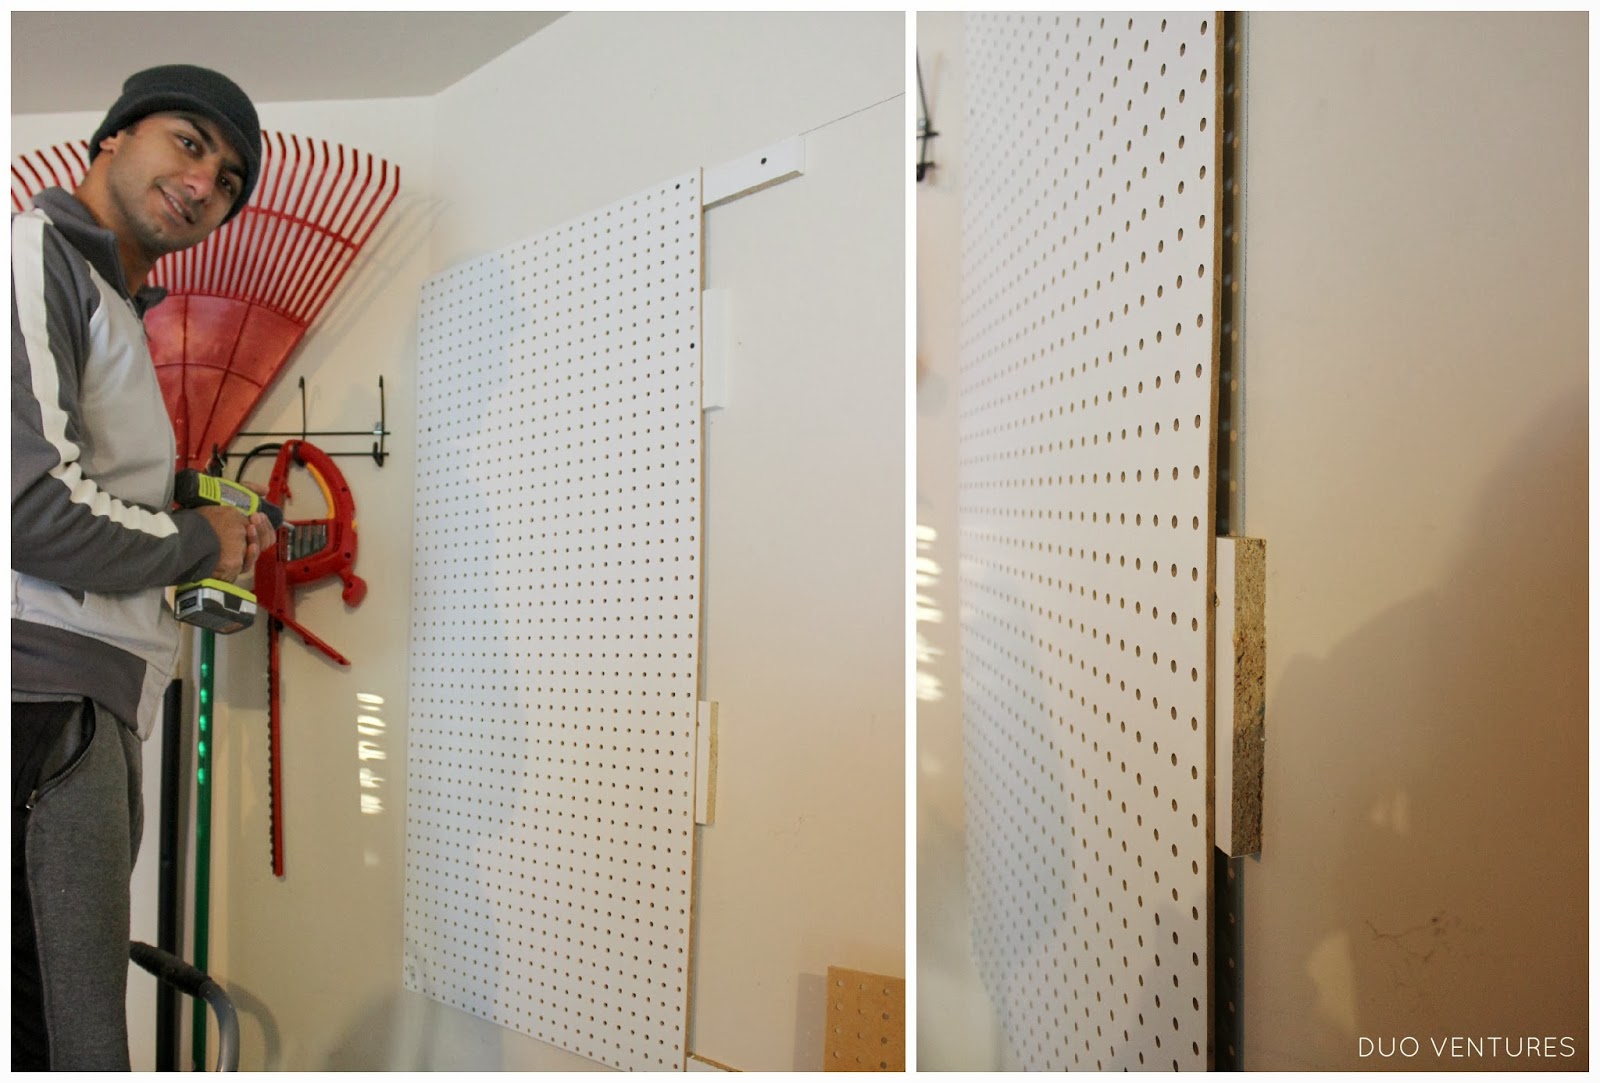
Once we had all the frame pieces in place, we hung the first pegboard onto the left side.
You can see how there is still room on the frame pieces for the second board to attach to:

 *Tip*: make sure your screw heads are larger than the pegboard holes OR use a washer when you attach the pegboard.

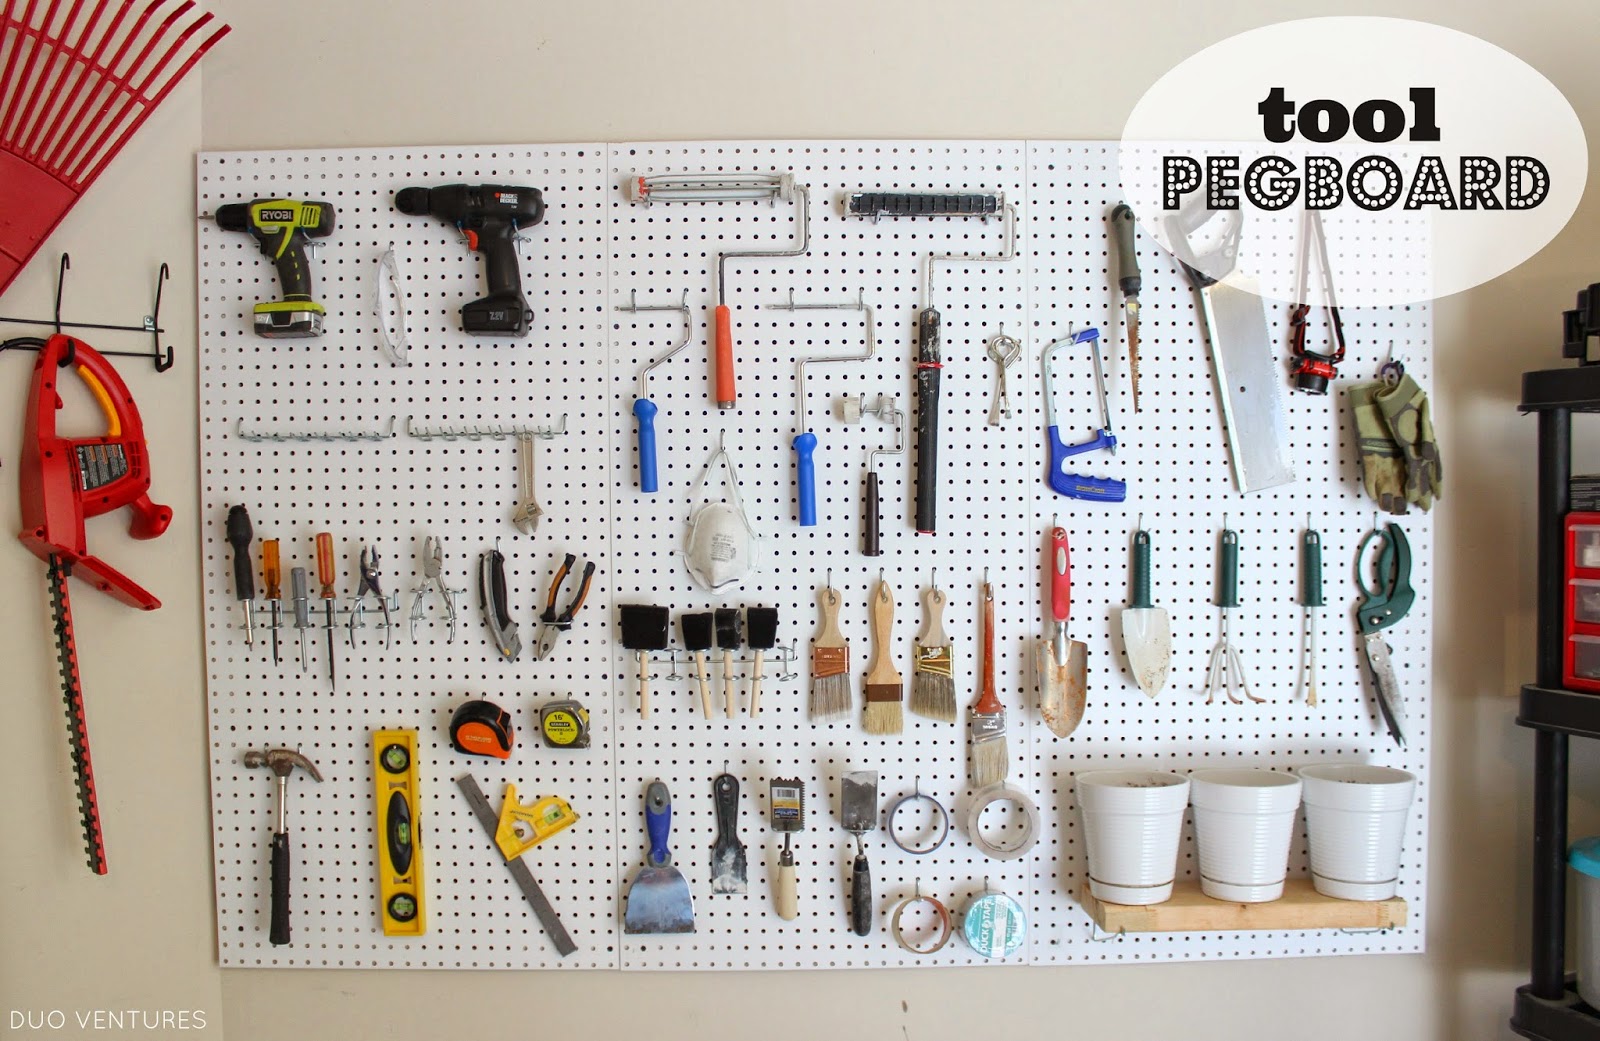
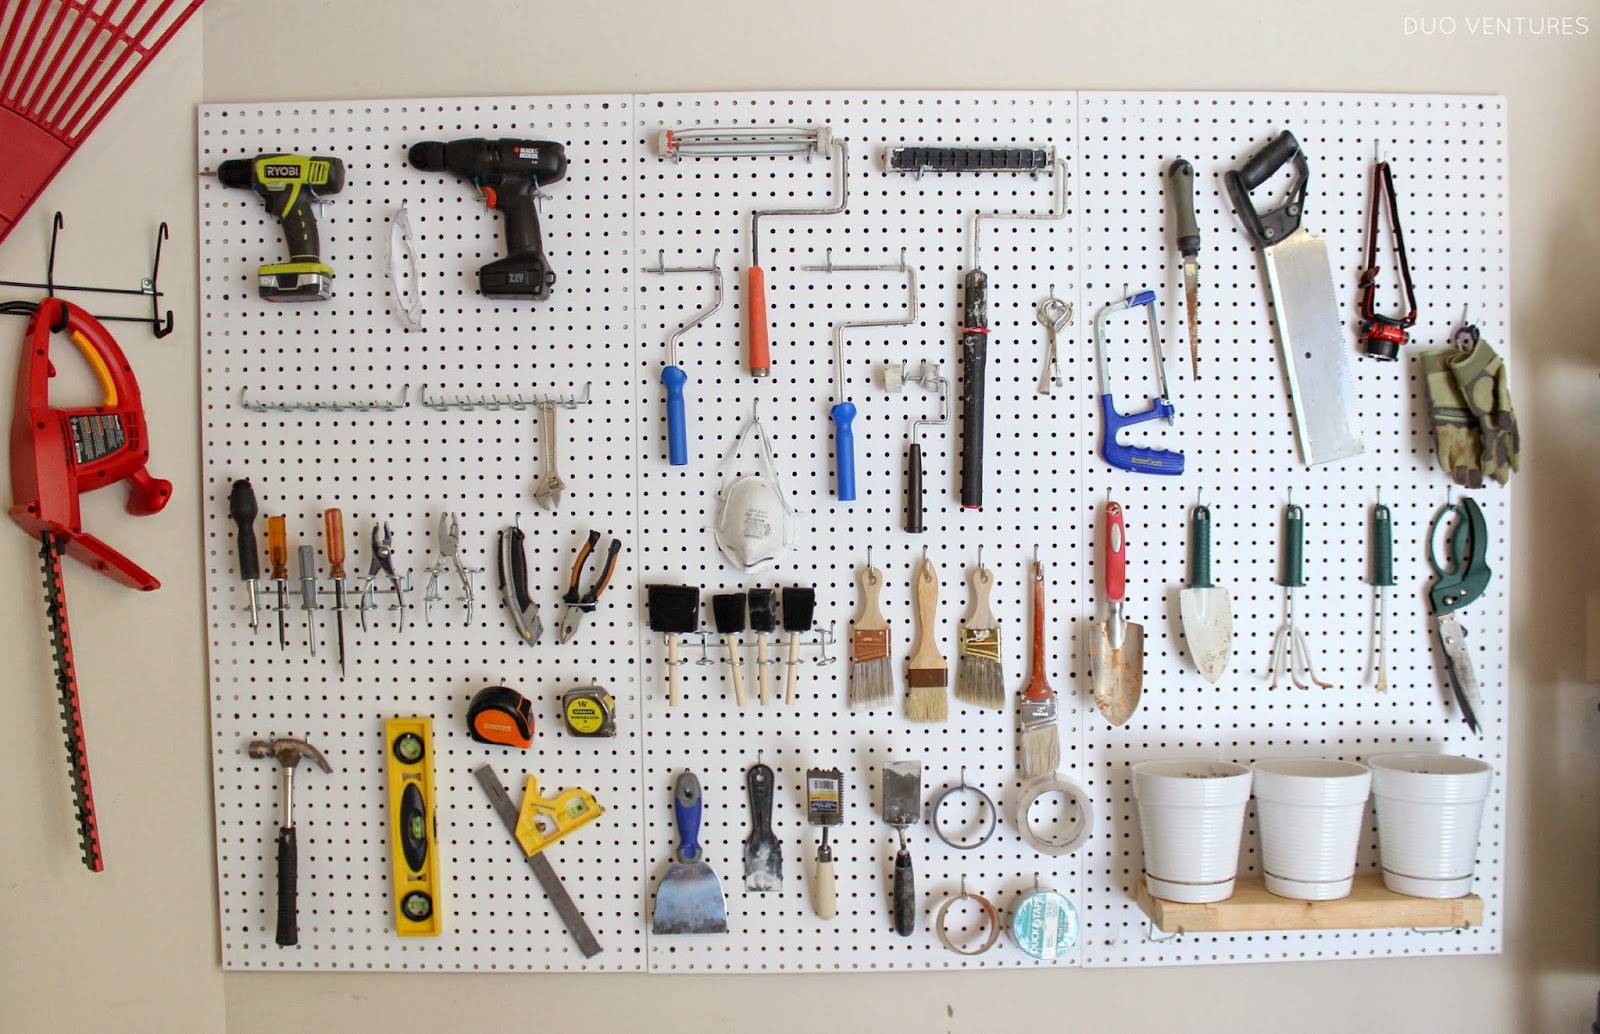
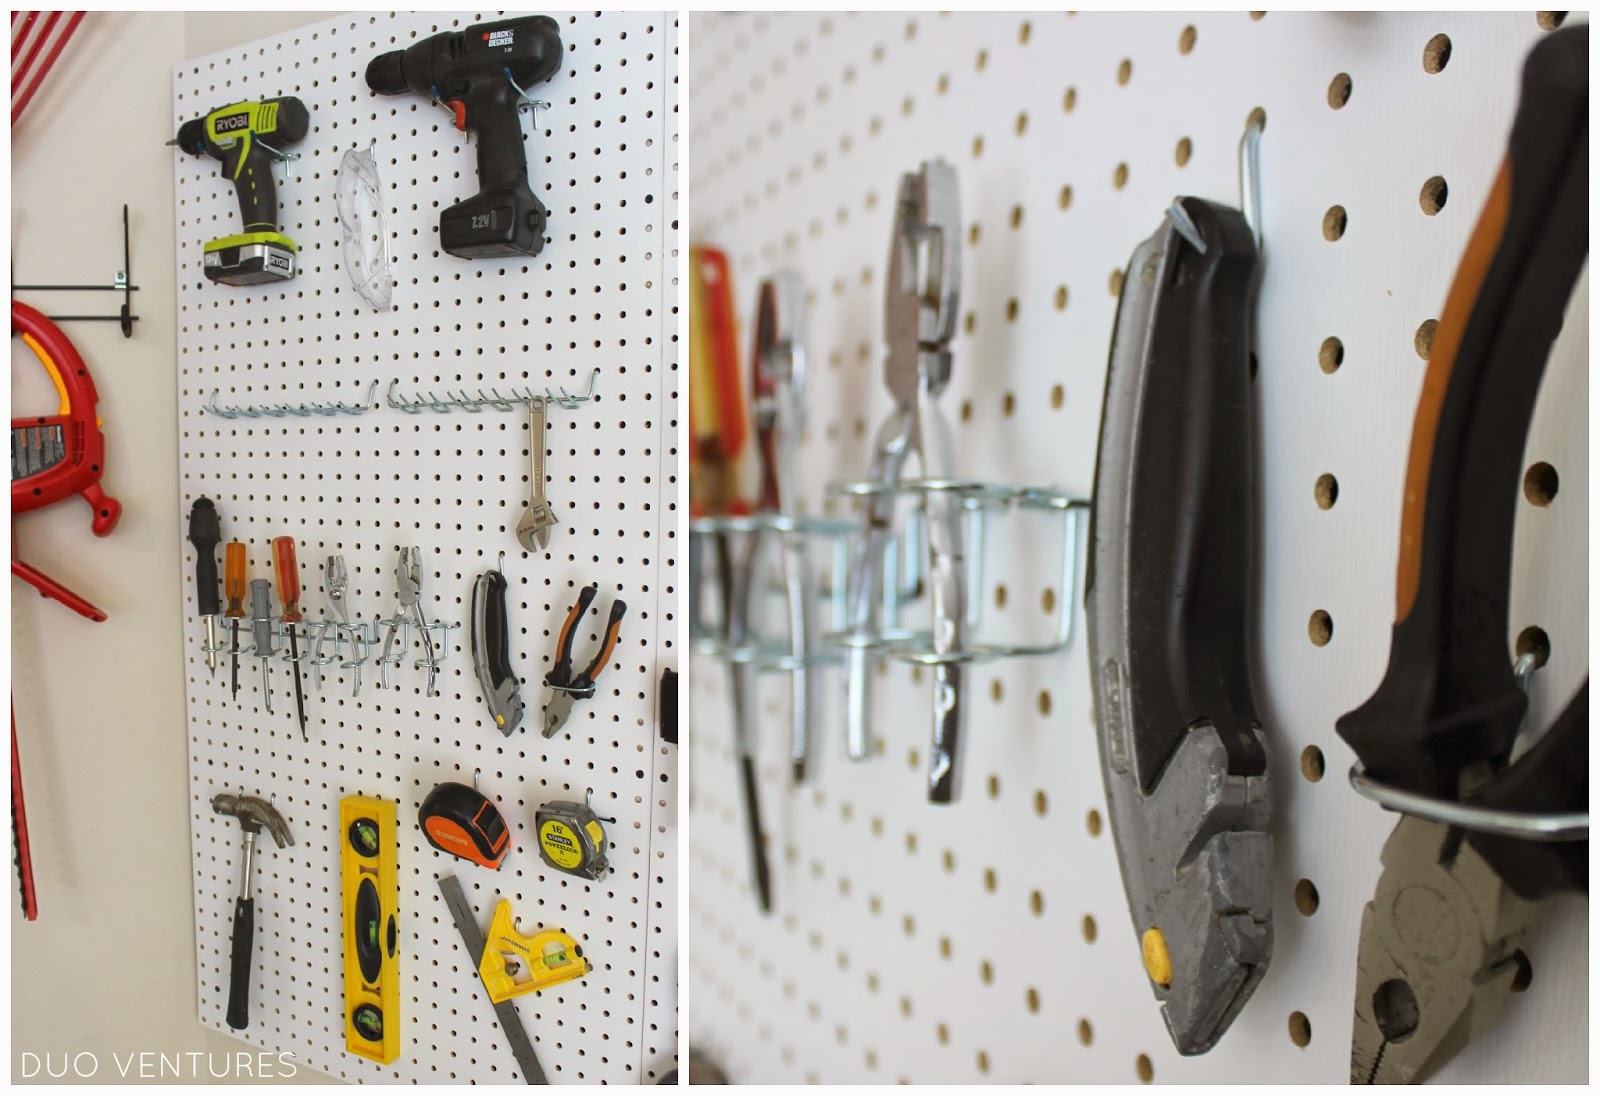
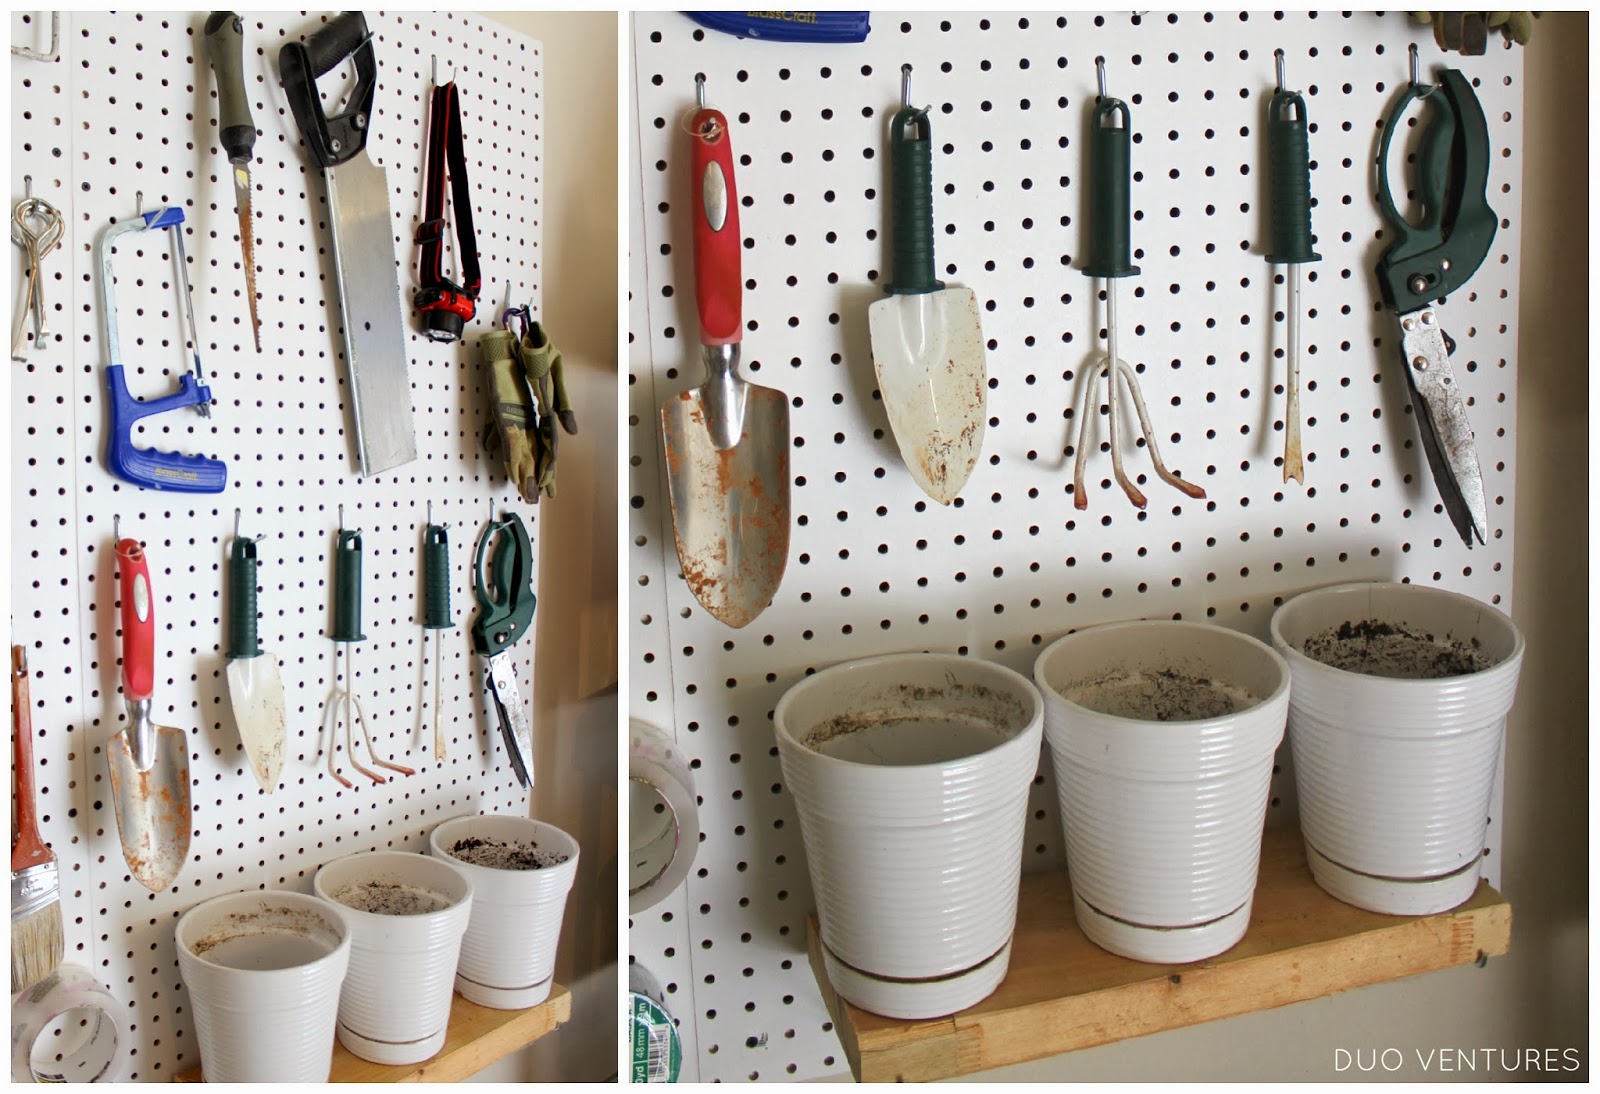
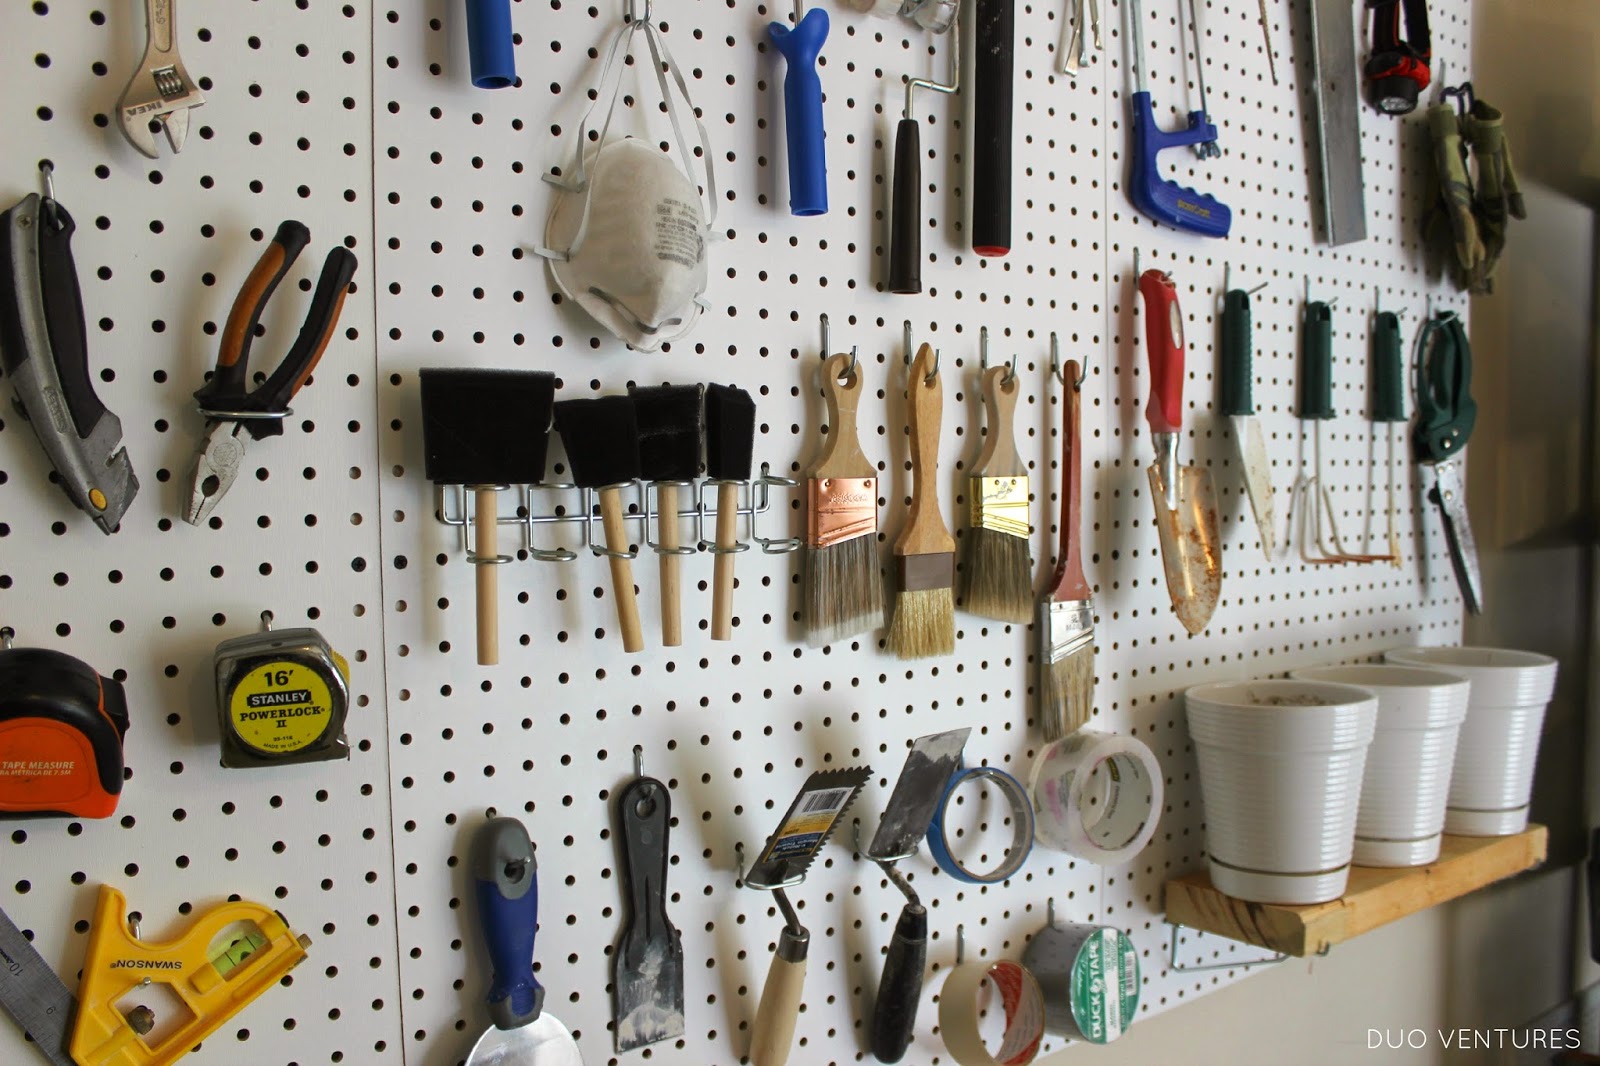
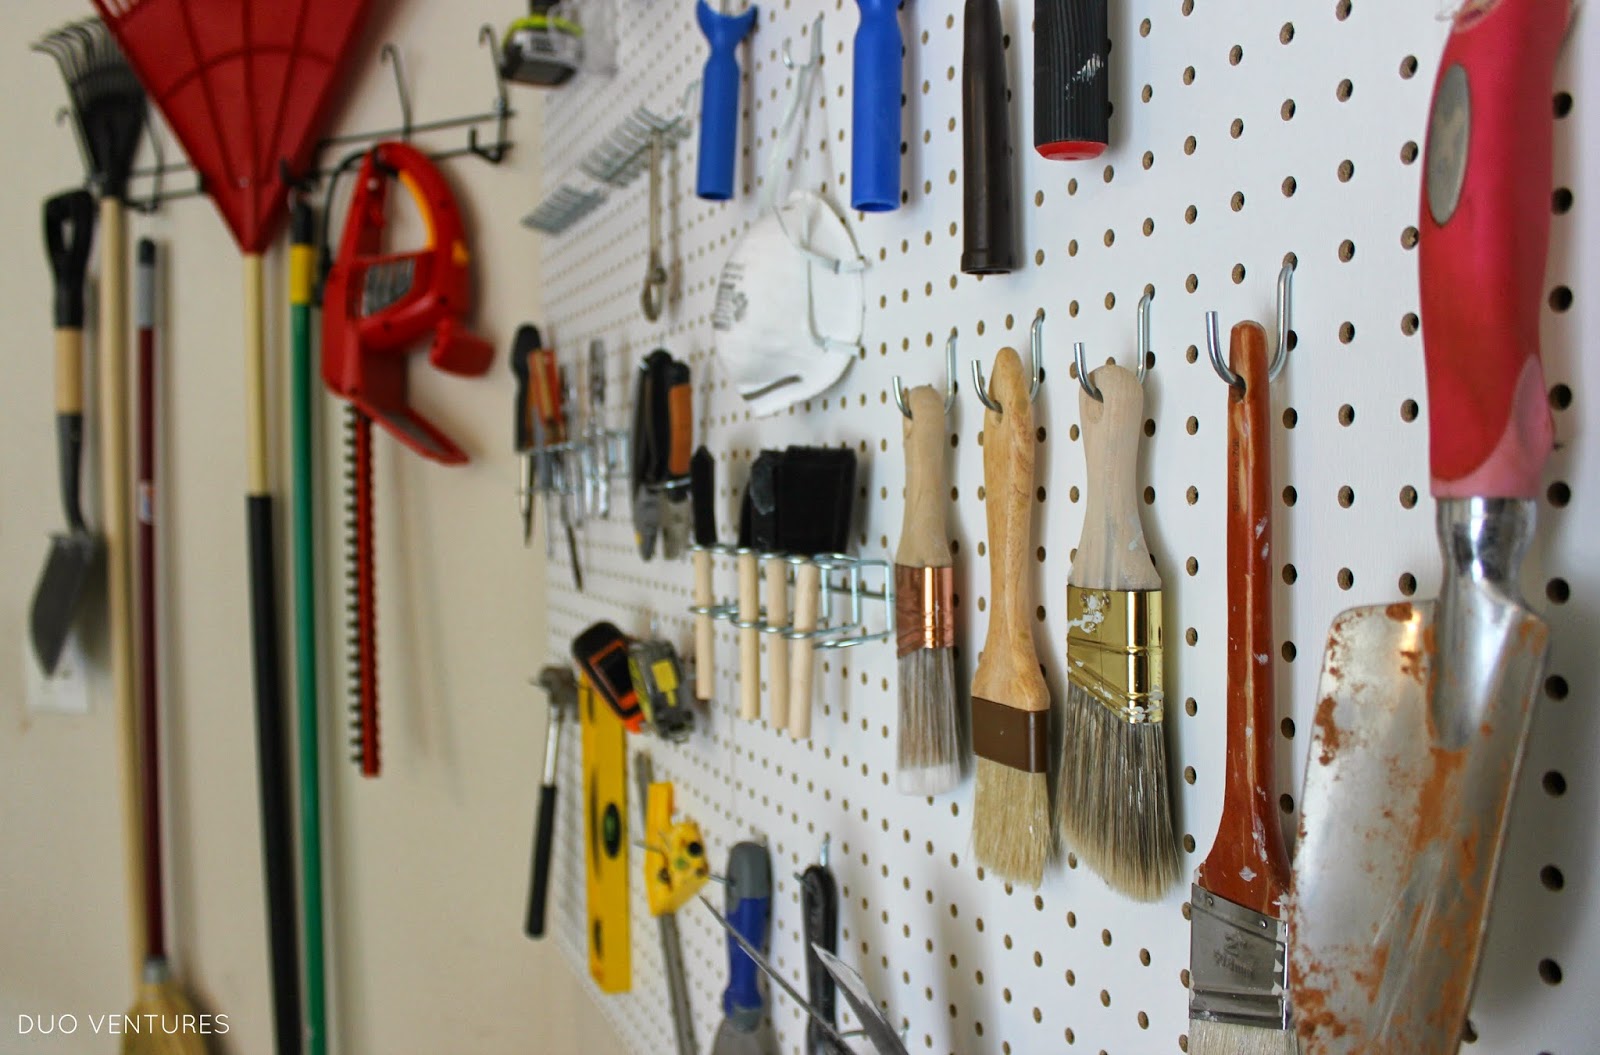
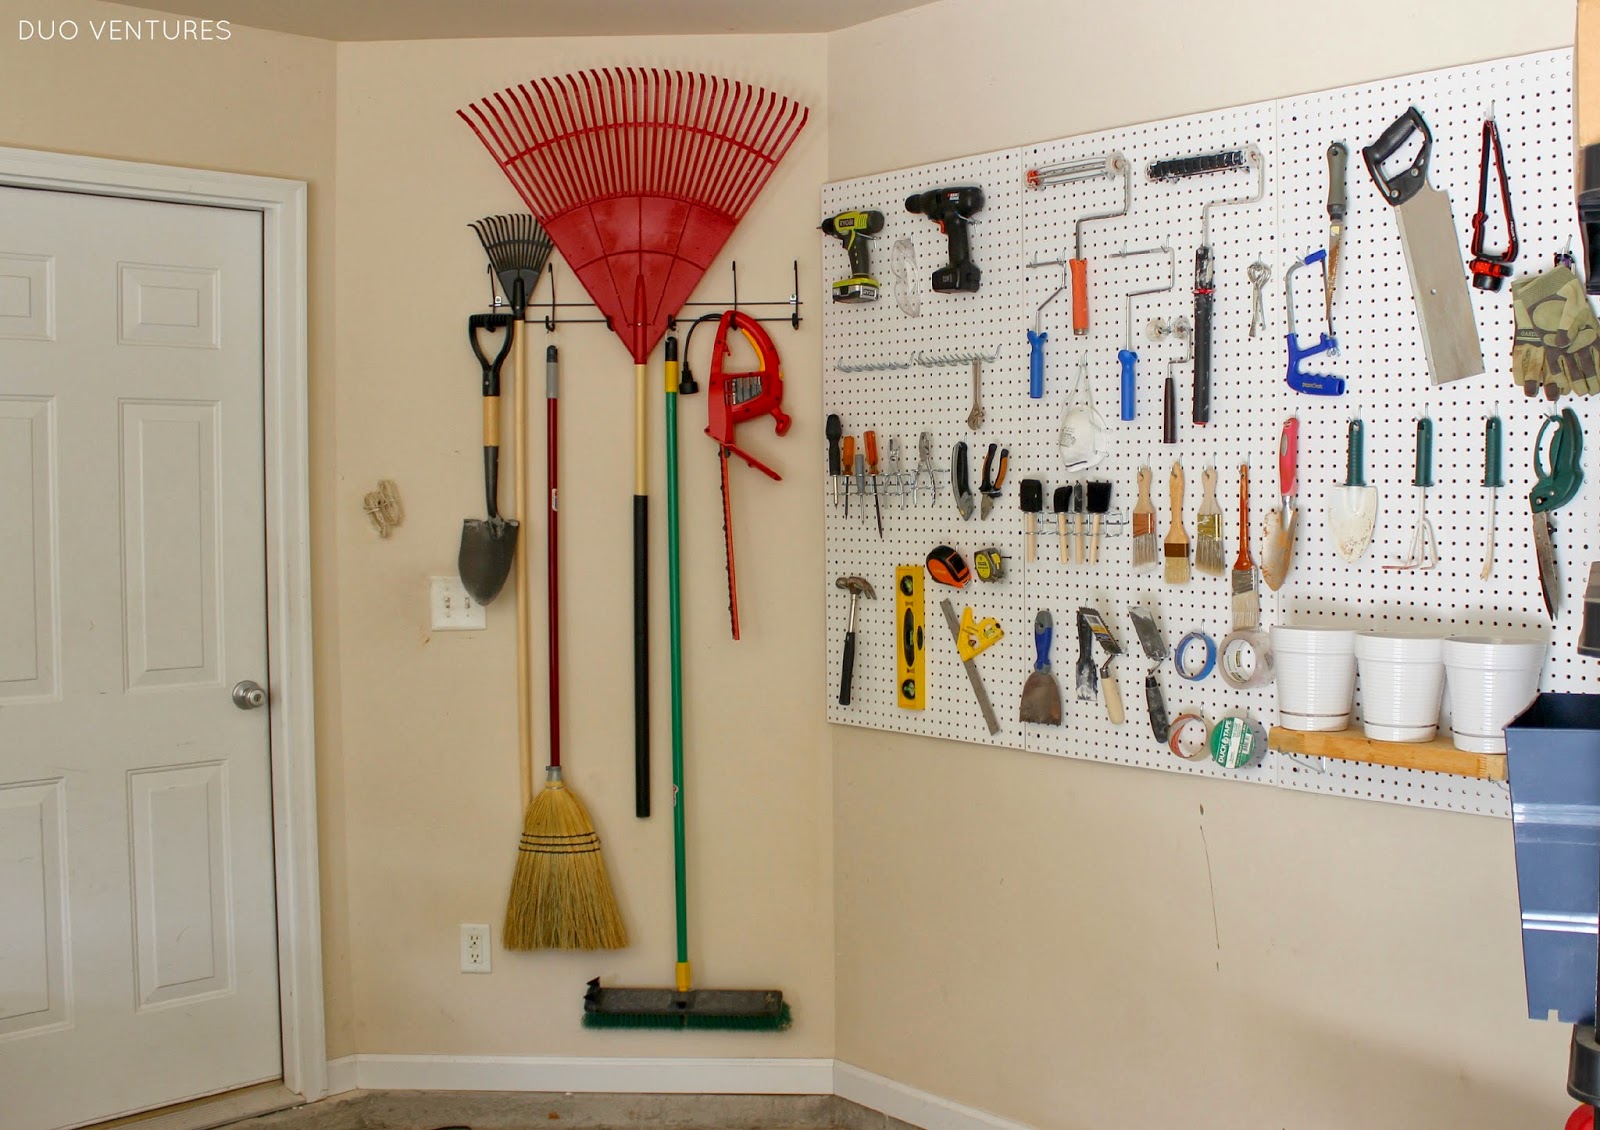
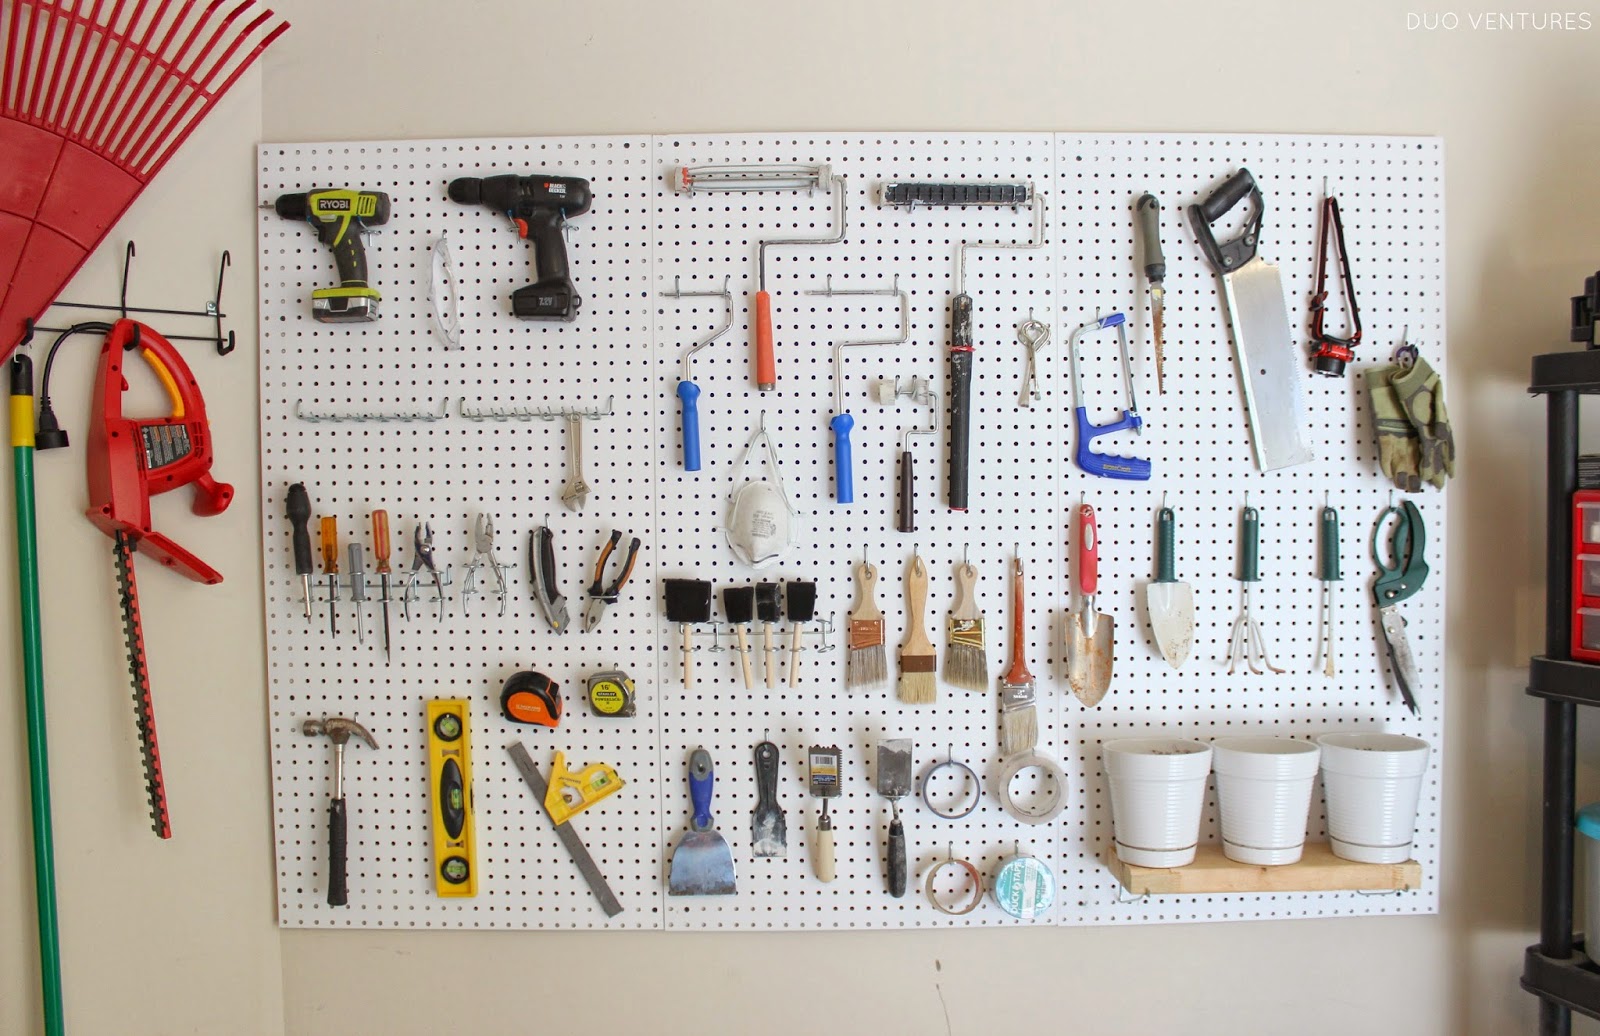
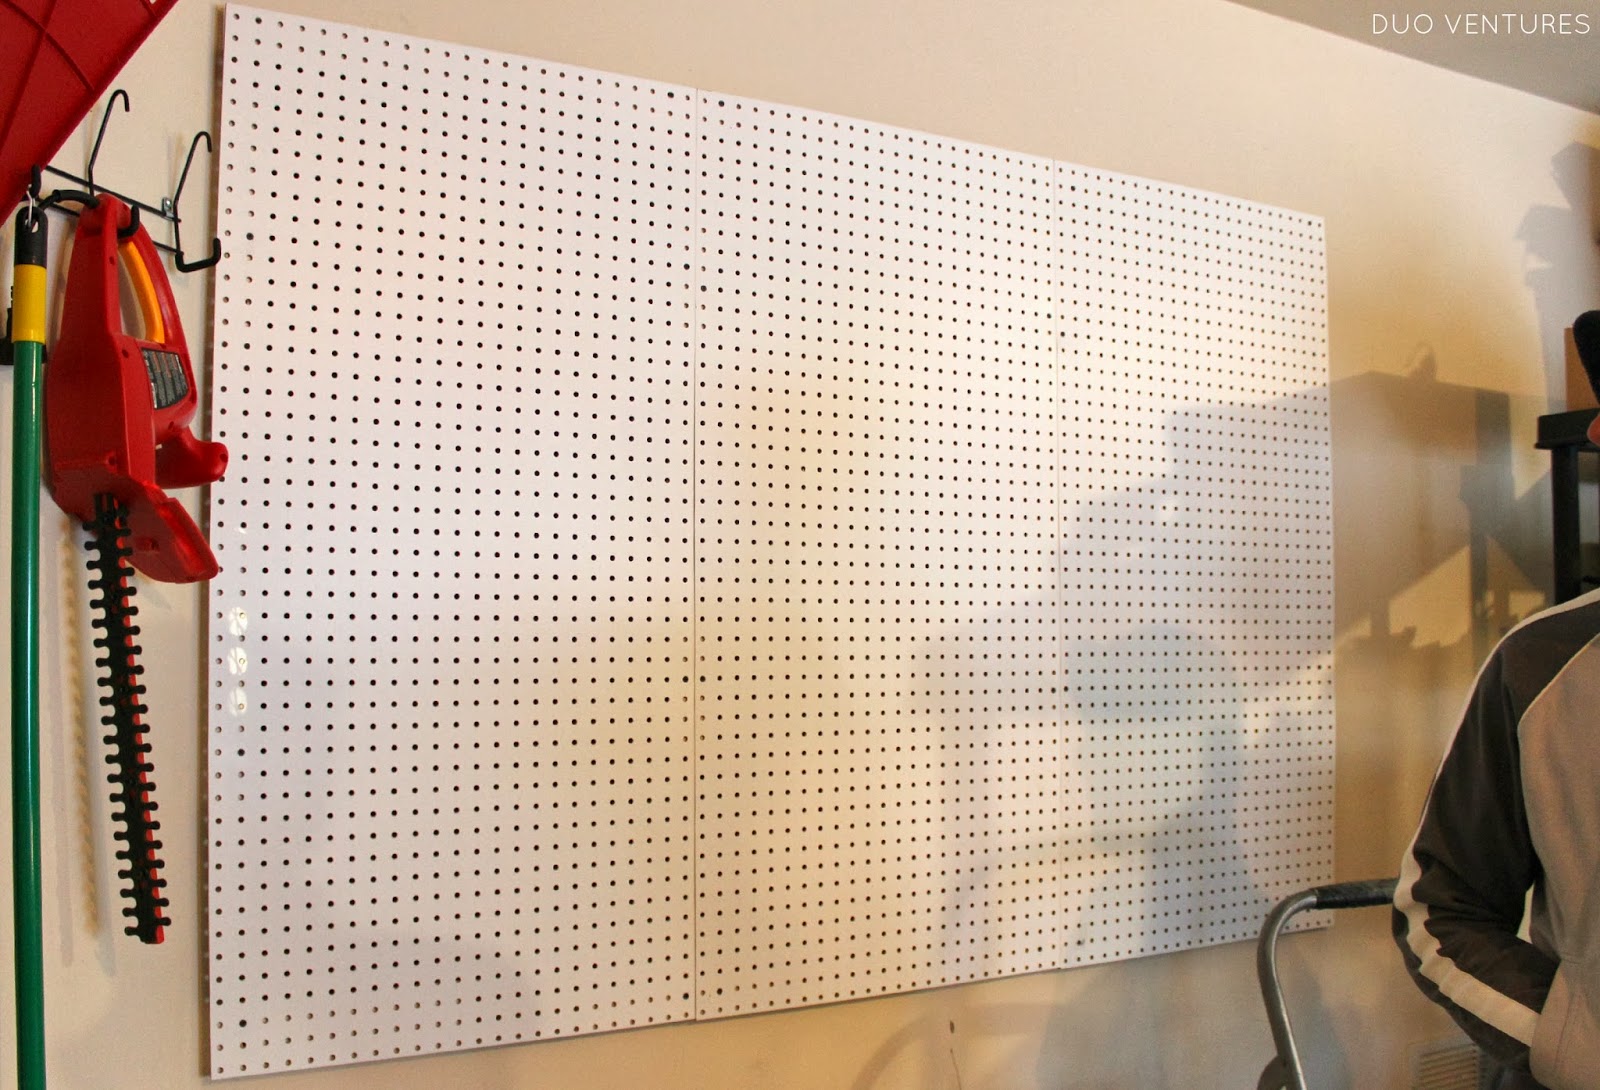
Here it is all finished:
It was a fairly quick & easy project, but we think it will make a world of difference for us.
Now that the pegboard is hung, it's time for Mel to organize all of our tools.

Until then, check out Mel's Pinterest Garage Page for some finished garage organization inspiration!

Mel & Nader