Tuesday, January 24, 2017


Wednesday, January 18, 2017

Tuesday, January 10, 2017

Friday, February 12, 2016
The Garage: Extra Paint Storage
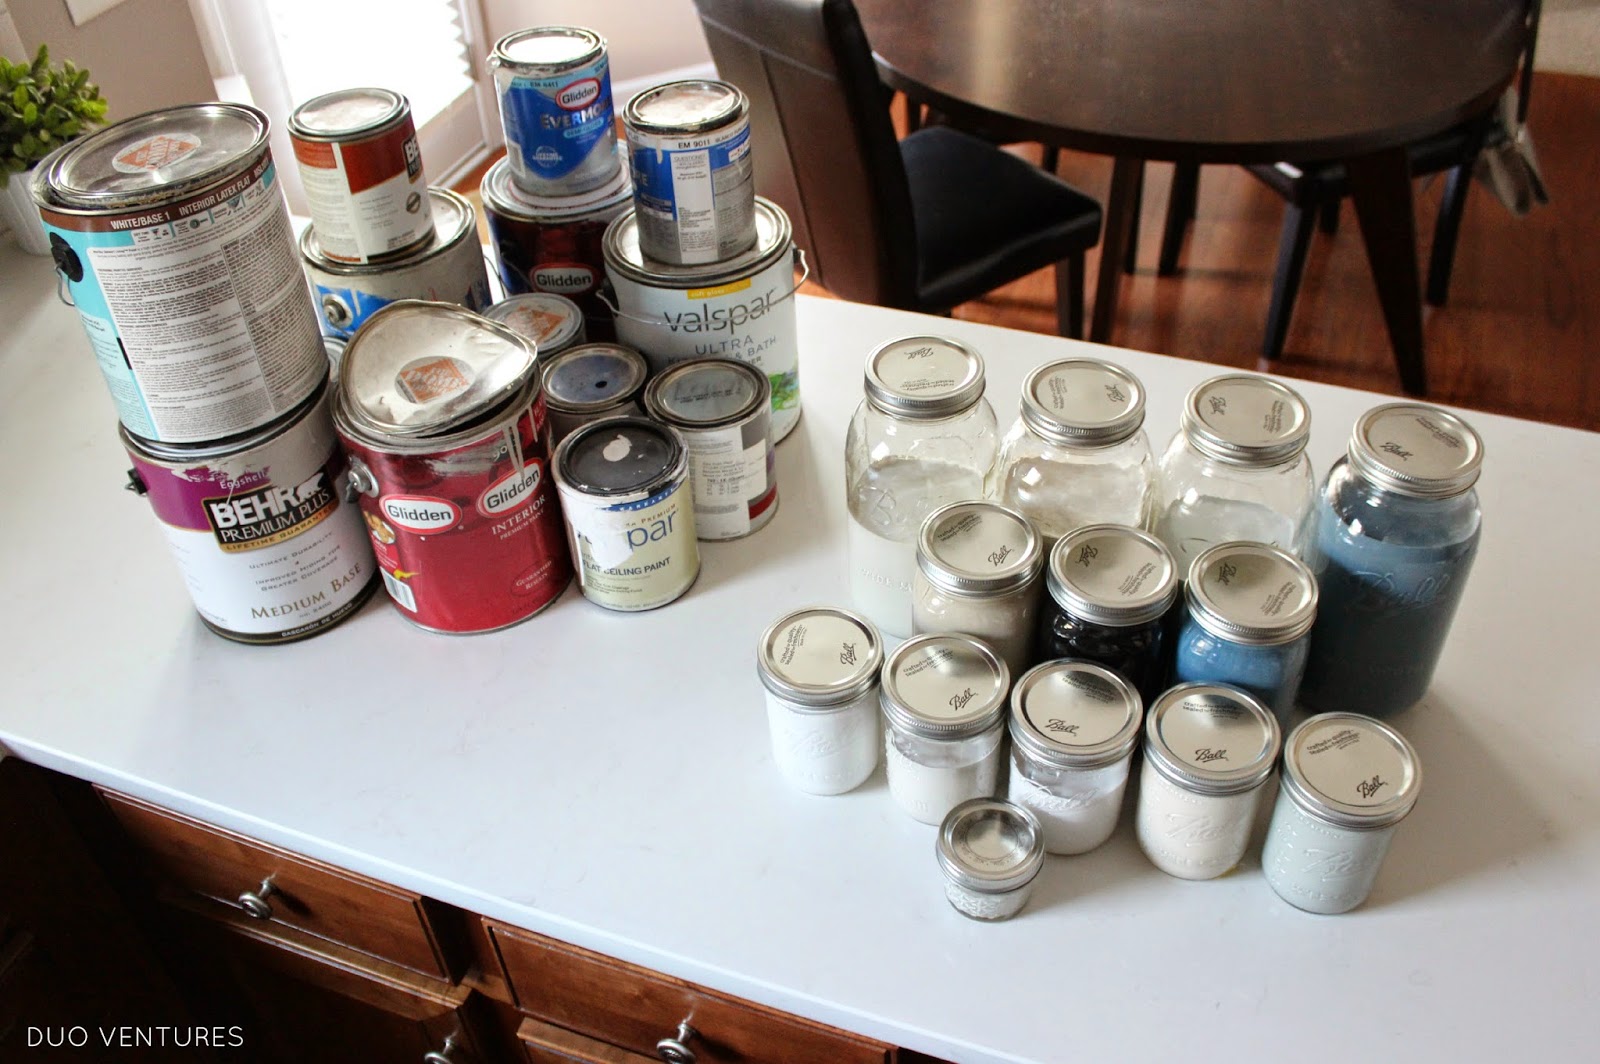
All in all, our initial setup wasn't too bad:
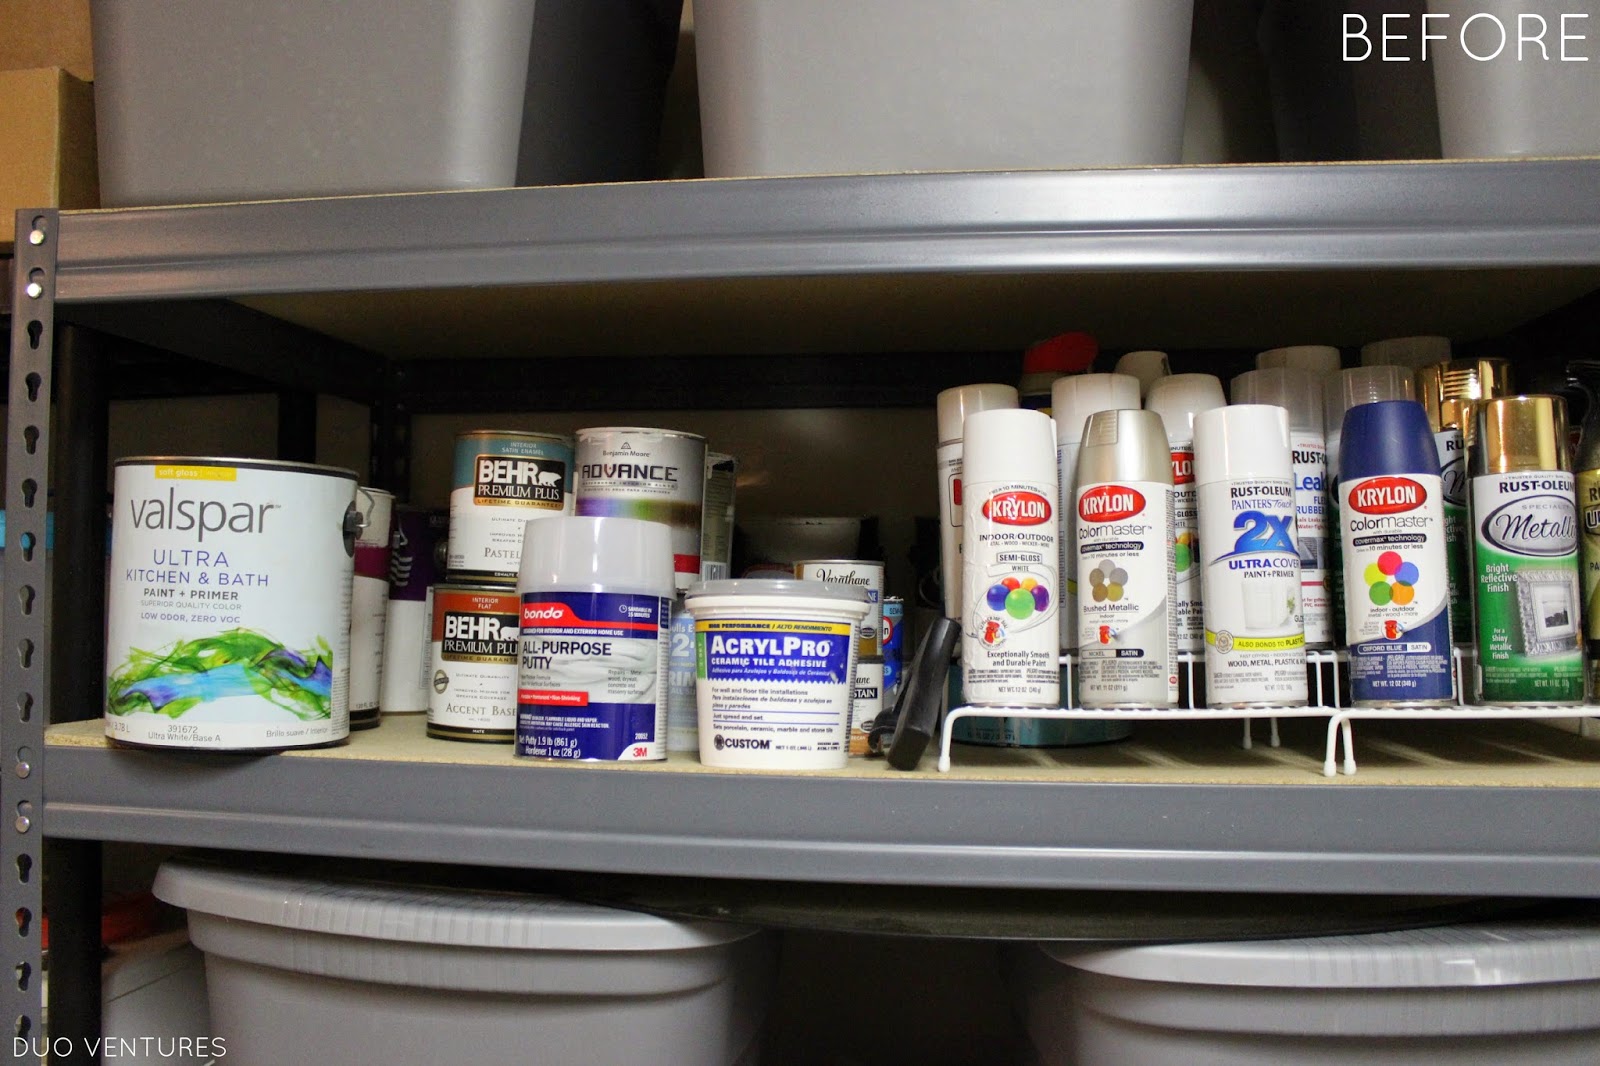
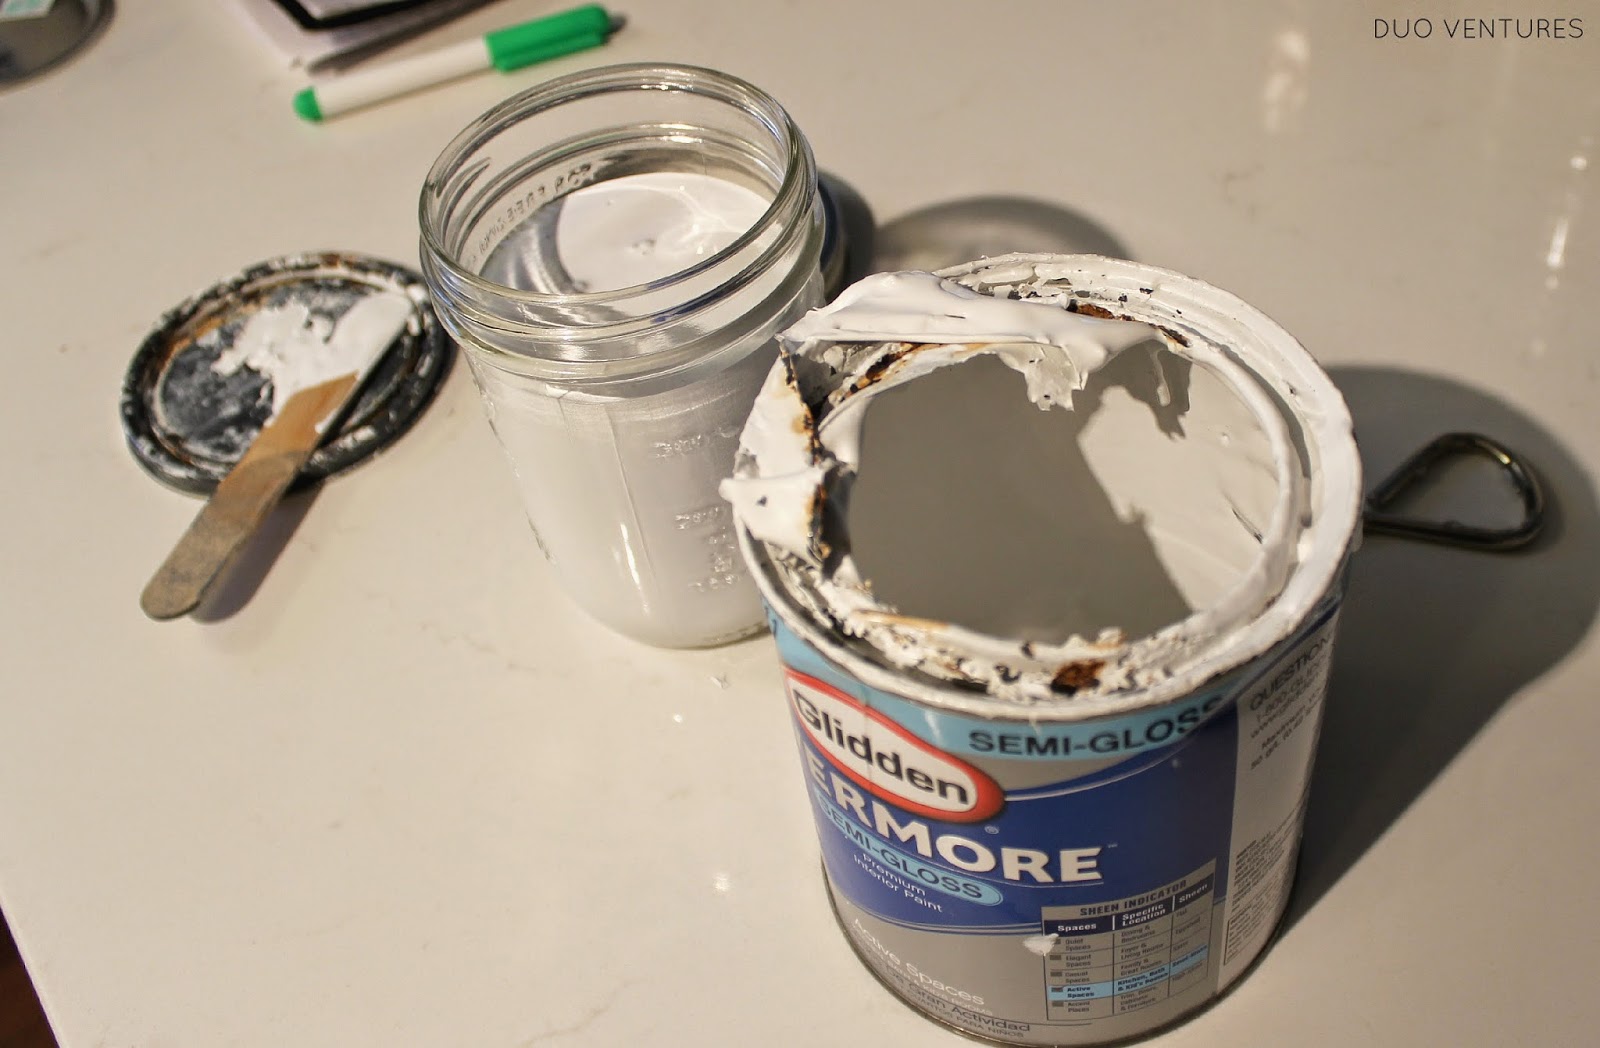
The problem was that the shelf was filling up pretty quickly & it was hard to see what we had on hand. In most cases, we had gallon paint cans that were less than half full.
Another issue we had, was the dreaded rust that formed along the top of many of the rims, which always led to rust particles falling into the can every time we wanted to paint something (this was the worst one, but most of the other cans still had a good amount of rust):
Monday, March 2, 2015

Sunday, February 15, 2015
The Garage: Ceiling Storage

Before we installed the peg board, we had to shift all the shelving units to the right & next to the wall in order to fit the 3 pegboard panels on the left side of the wall (where that white wire shelf unit is located in the photo). That meant all the wood, drywall, & extra building materials that were stuffed in that gap had to come out:
Since then, all those extra building materials have been leaning on the wall & scattered throughout the garage - taking up space & looking very cluttered.
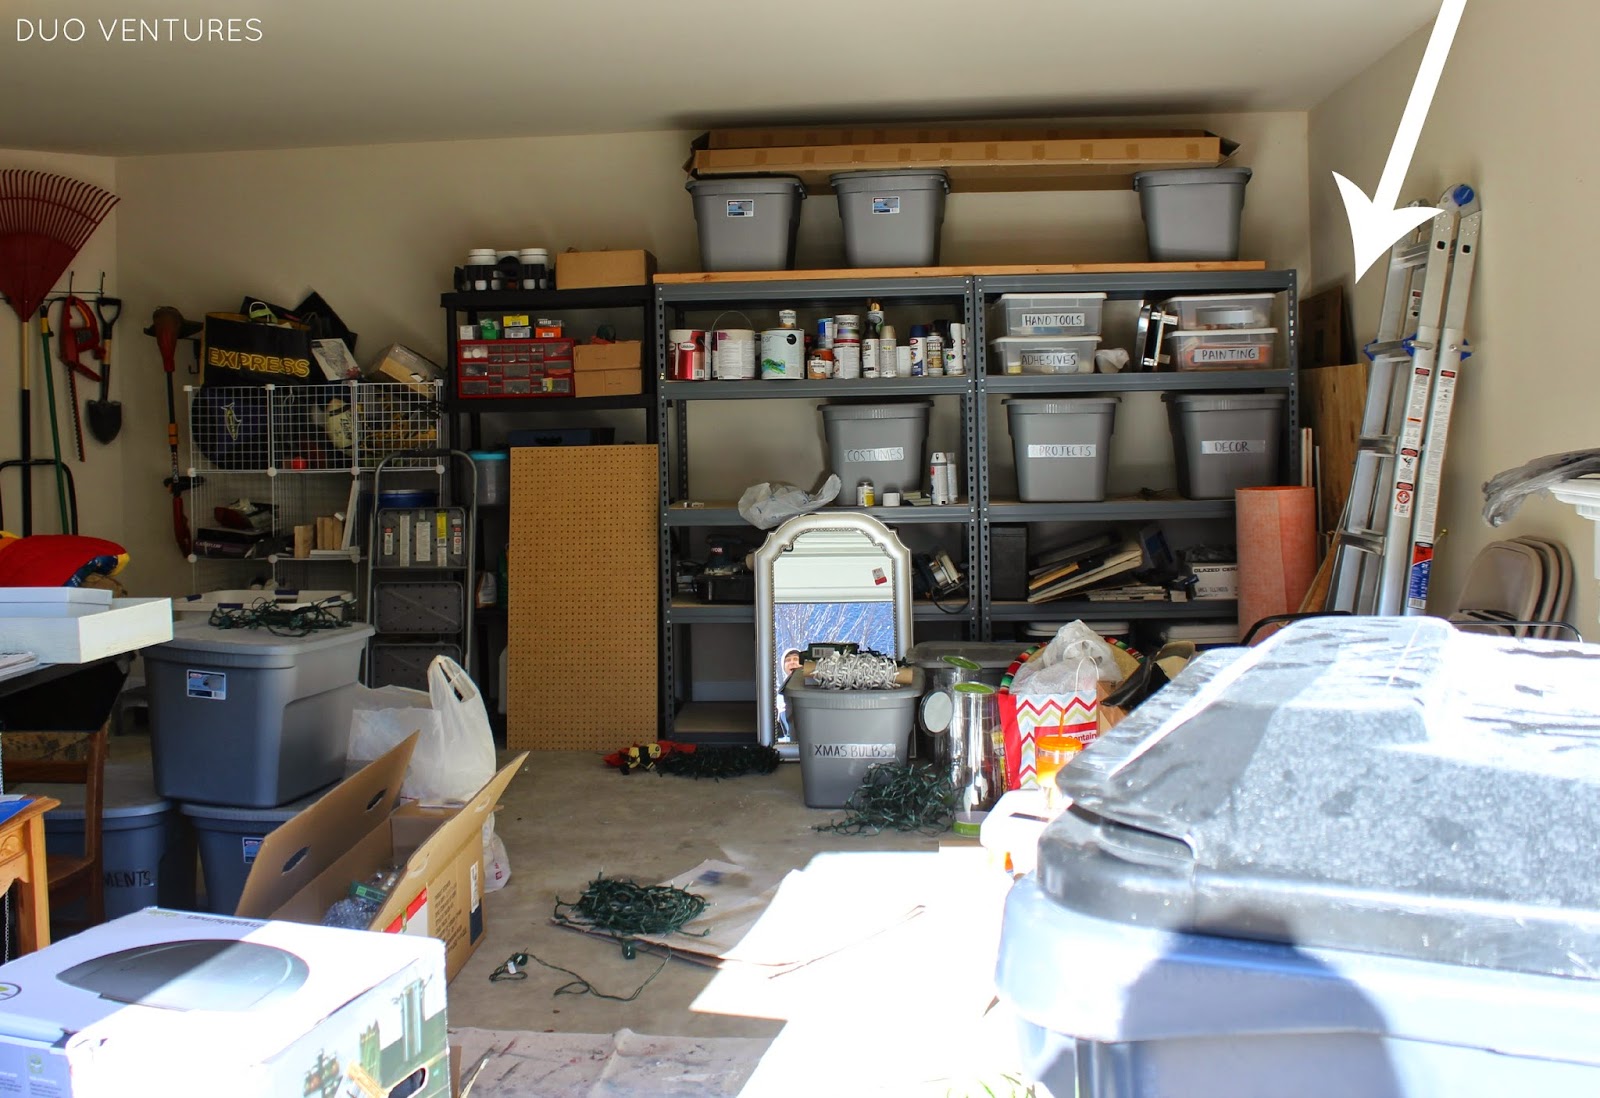
First, my dad helped me sort through everything to determine what was 'trash' versus 'keep' & then we discussed a storage solution. I knew I wanted to take advantage of our ceiling for storage - particularly in the space between the ceiling & the garage door track (we do not use a garage door opener @ this point so that's a non-issue).
First, my dad helped me sort through everything to determine what was 'trash' versus 'keep' & then we discussed a storage solution. I knew I wanted to take advantage of our ceiling for storage - particularly in the space between the ceiling & the garage door track (we do not use a garage door opener @ this point so that's a non-issue).
Apologies in advance for the poor lighting & photo documenting of the building process - I should have moved the giant piece of 2" x 8" & drywall off of the garage door rails so you could see better. Anyways, this is the area I'm talking about:
The first thing my dad did was find the studs in the ceiling:
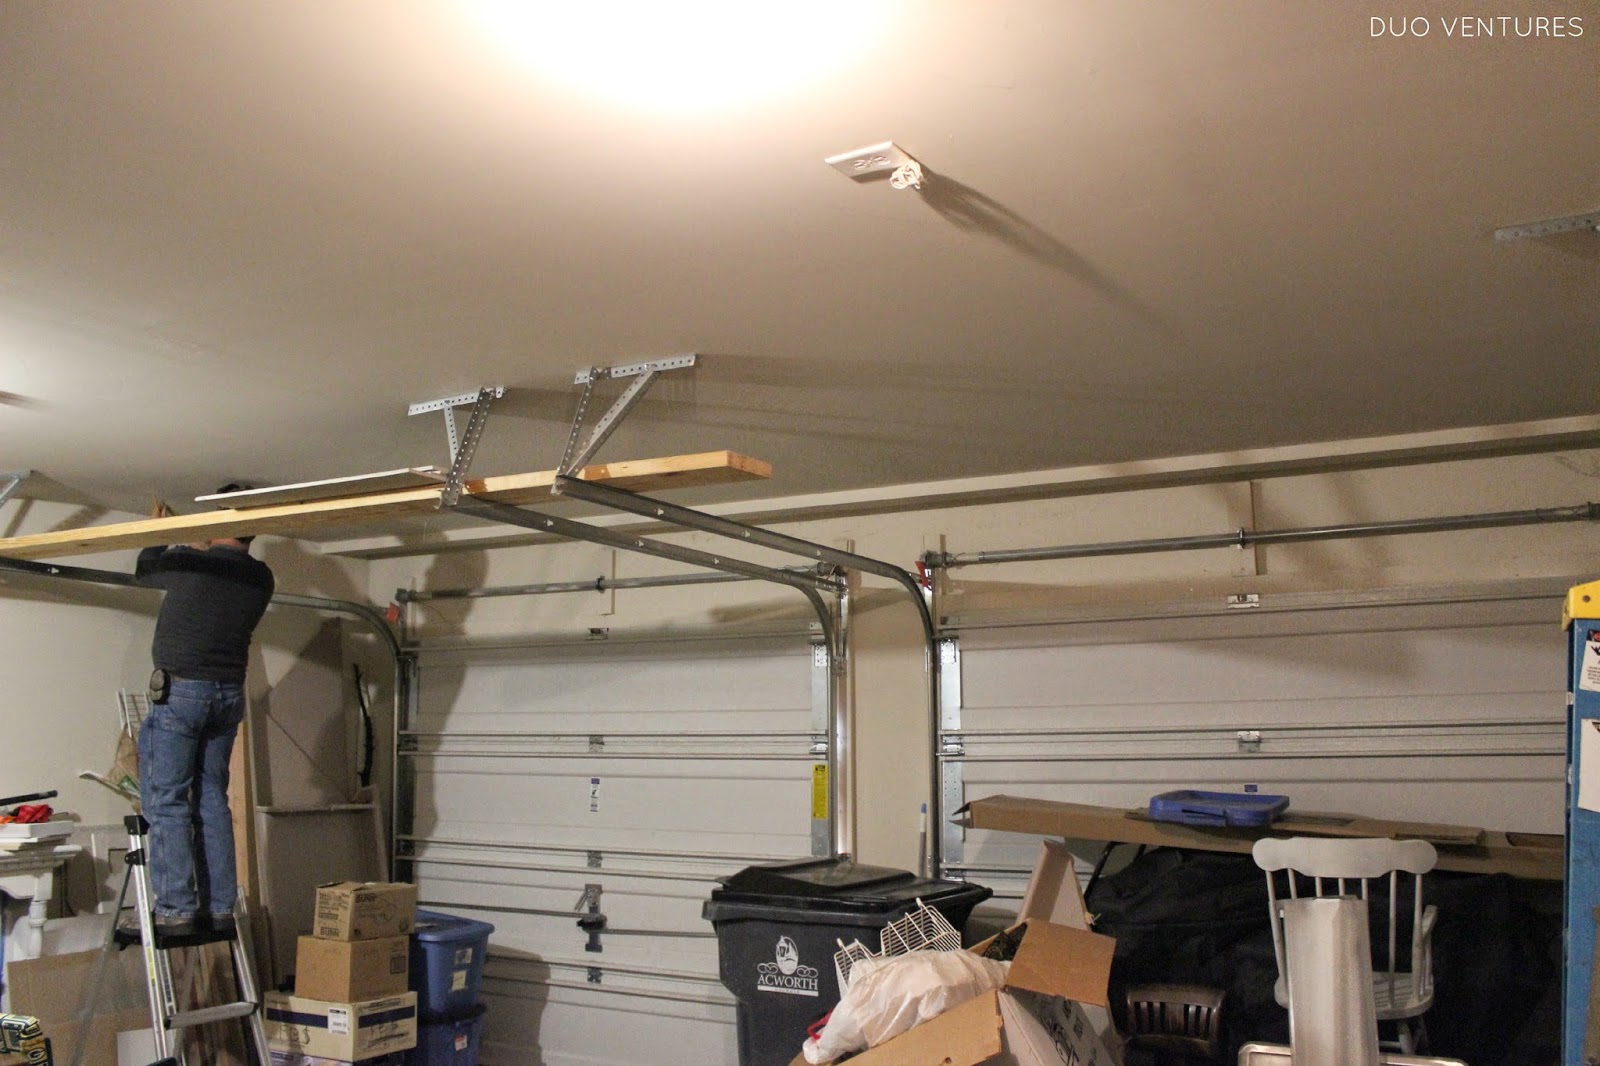
After taking some measurements, he designed a simple storage solution - all made out of 2 x 4's. We made a list of what we needed, ran to Home Depot for supplies, & started building.
He cut 2 long pieces and then:
(1) attached a middle brace piece on each board
(2) pre-drilled some holes in the long boards (to attach them to the ceiling):

Then he screwed them into the studs:
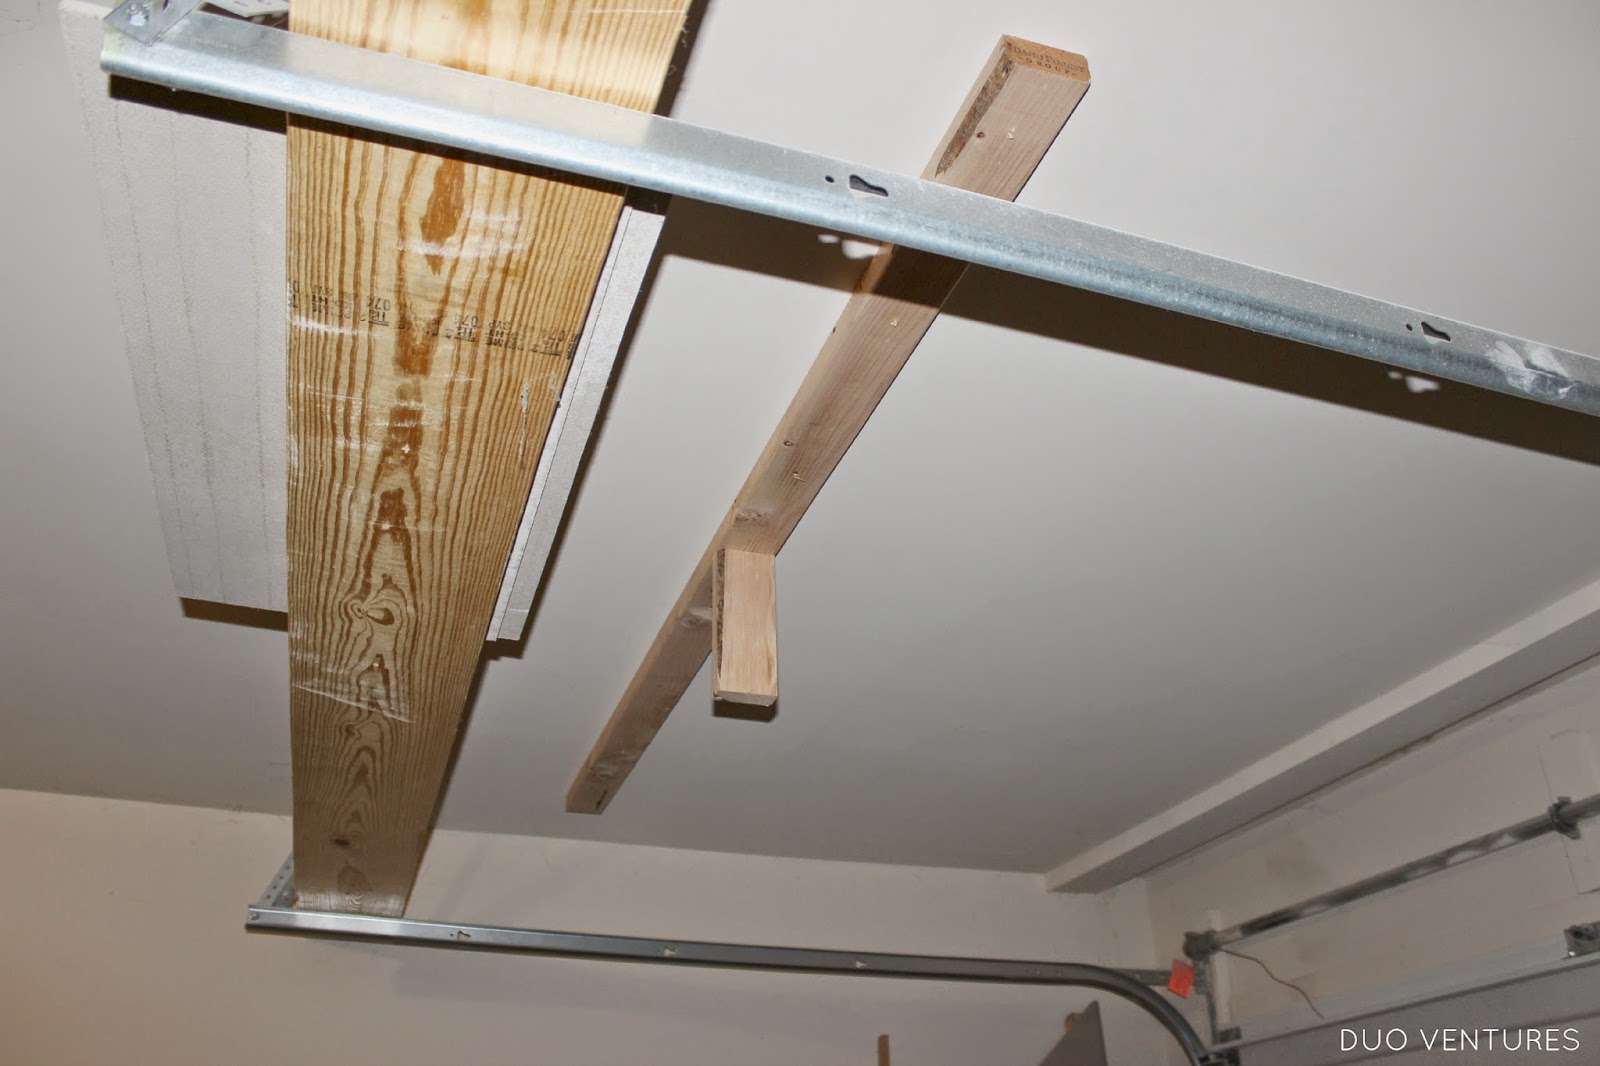
(don't mind that piece of wood on the left end of the board he's attaching - he used it for measurement purposes):

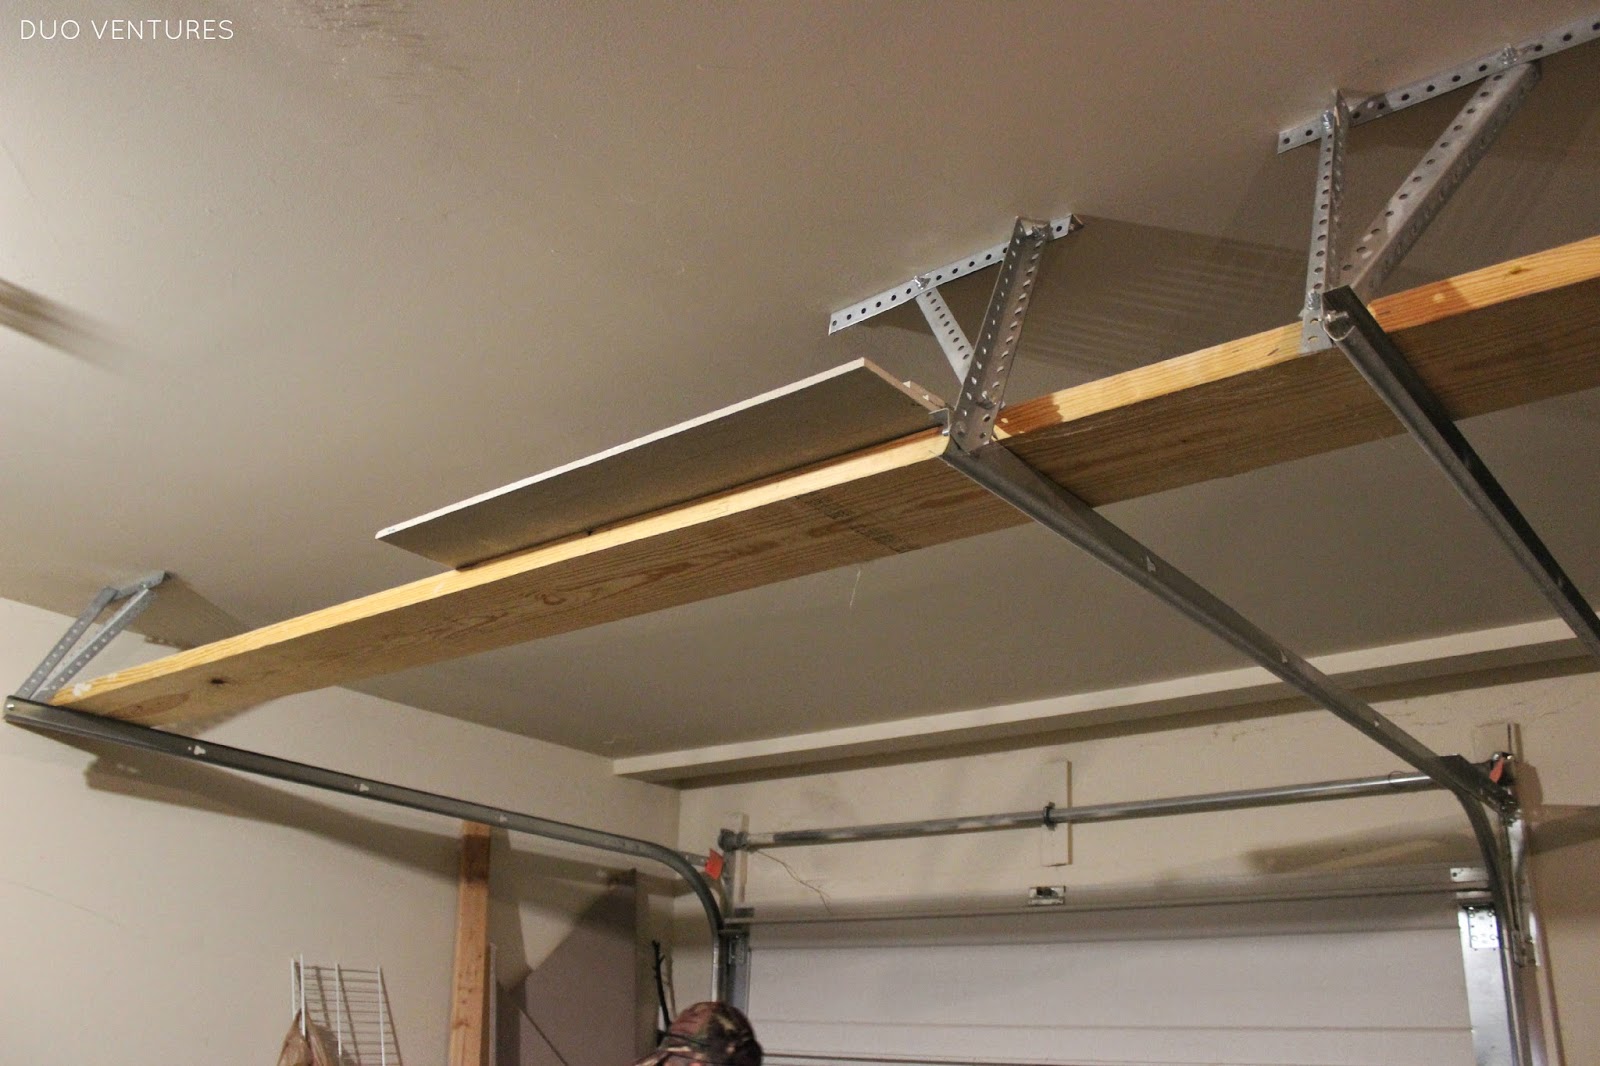
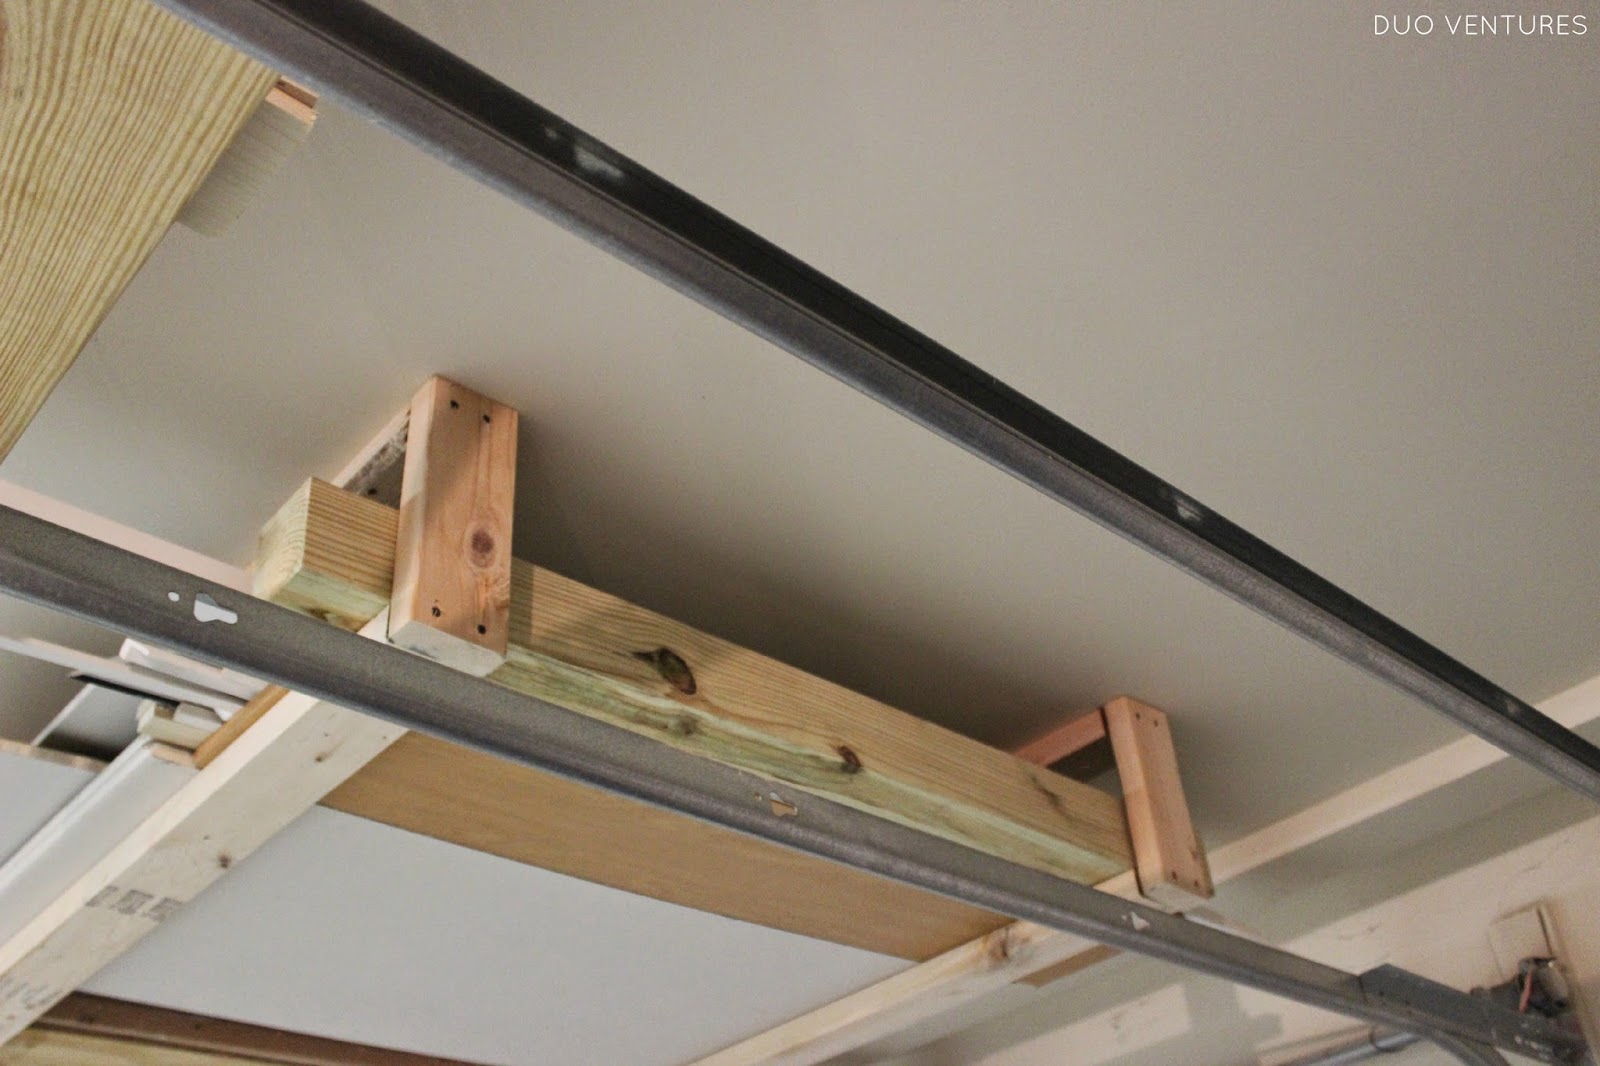
Next, he attached 2 more of the long boards to the bottom of the middle pieces:

Finally, he screwed in shorter pieces to all four ends:

That was it! Then we just slid all the materials into the our new storage solution:
On the left side, we stored some plywood, wire shelves, & a longer 2" x 4".
We placed all the smaller scrap sheets of drywall & trim on the right side:
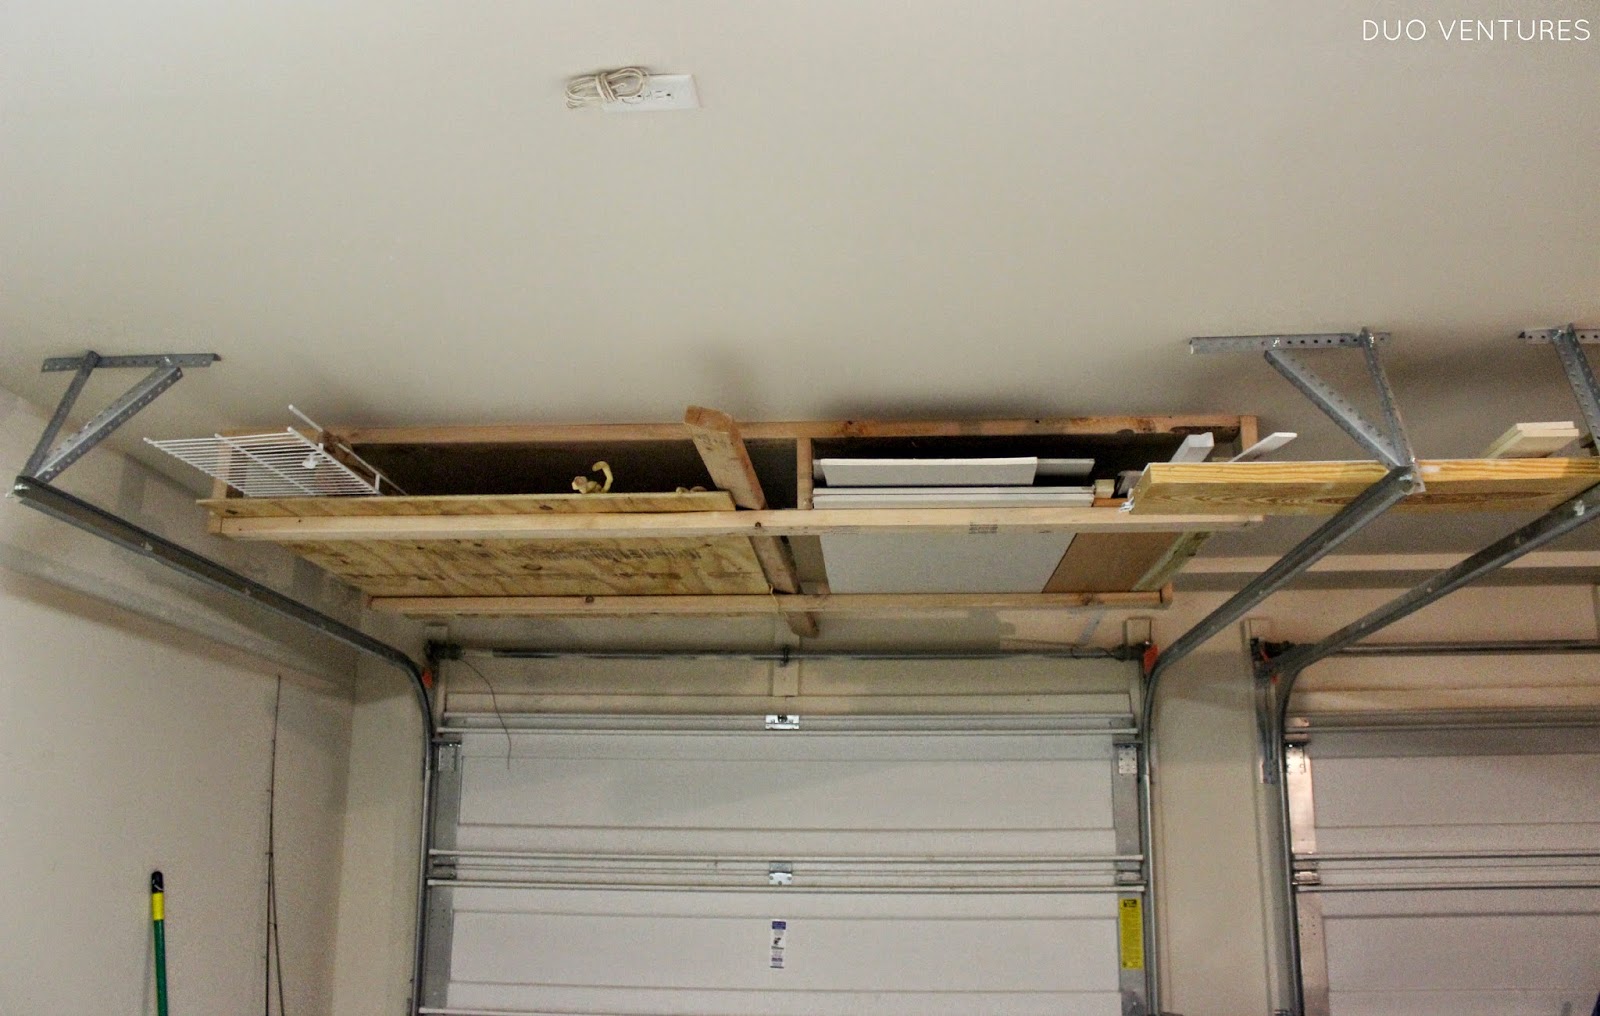
Here it is with the garage door open:

A couple of important notes:
1. we chose to keep the left side of the opening wide enough to accommodate a 4' x 8' stock sheet of plywood, etc.
2. make sure your garage door will still open - on our first test run, the garage door wouldn't open because the door handle was jutting out
3. keep in mind that you most likely will not be able to install a garage door opener with this specific ceiling storage configuration
It was a small project, but makes all the difference by clearing up a lot of wall & floor space for us!
In our next garage project, we'll be installing a wall track system (like this or this) to get the rest of those miscellaneous items up & off of the floor and out of the way...
Mel
:)
Wednesday, June 25, 2014
Organizing: The Bathroom

It's about time for some more organizing! While we did complete a mini makeover on our master bathroom, it remained somewhat cluttered & disorganized behind the cabinets. Toiletries & products didn't have designated homes, so we began aimlessly throwing things into drawers & cabinets -
and you know how that goes...
Over time, it evolved into a huge mess:
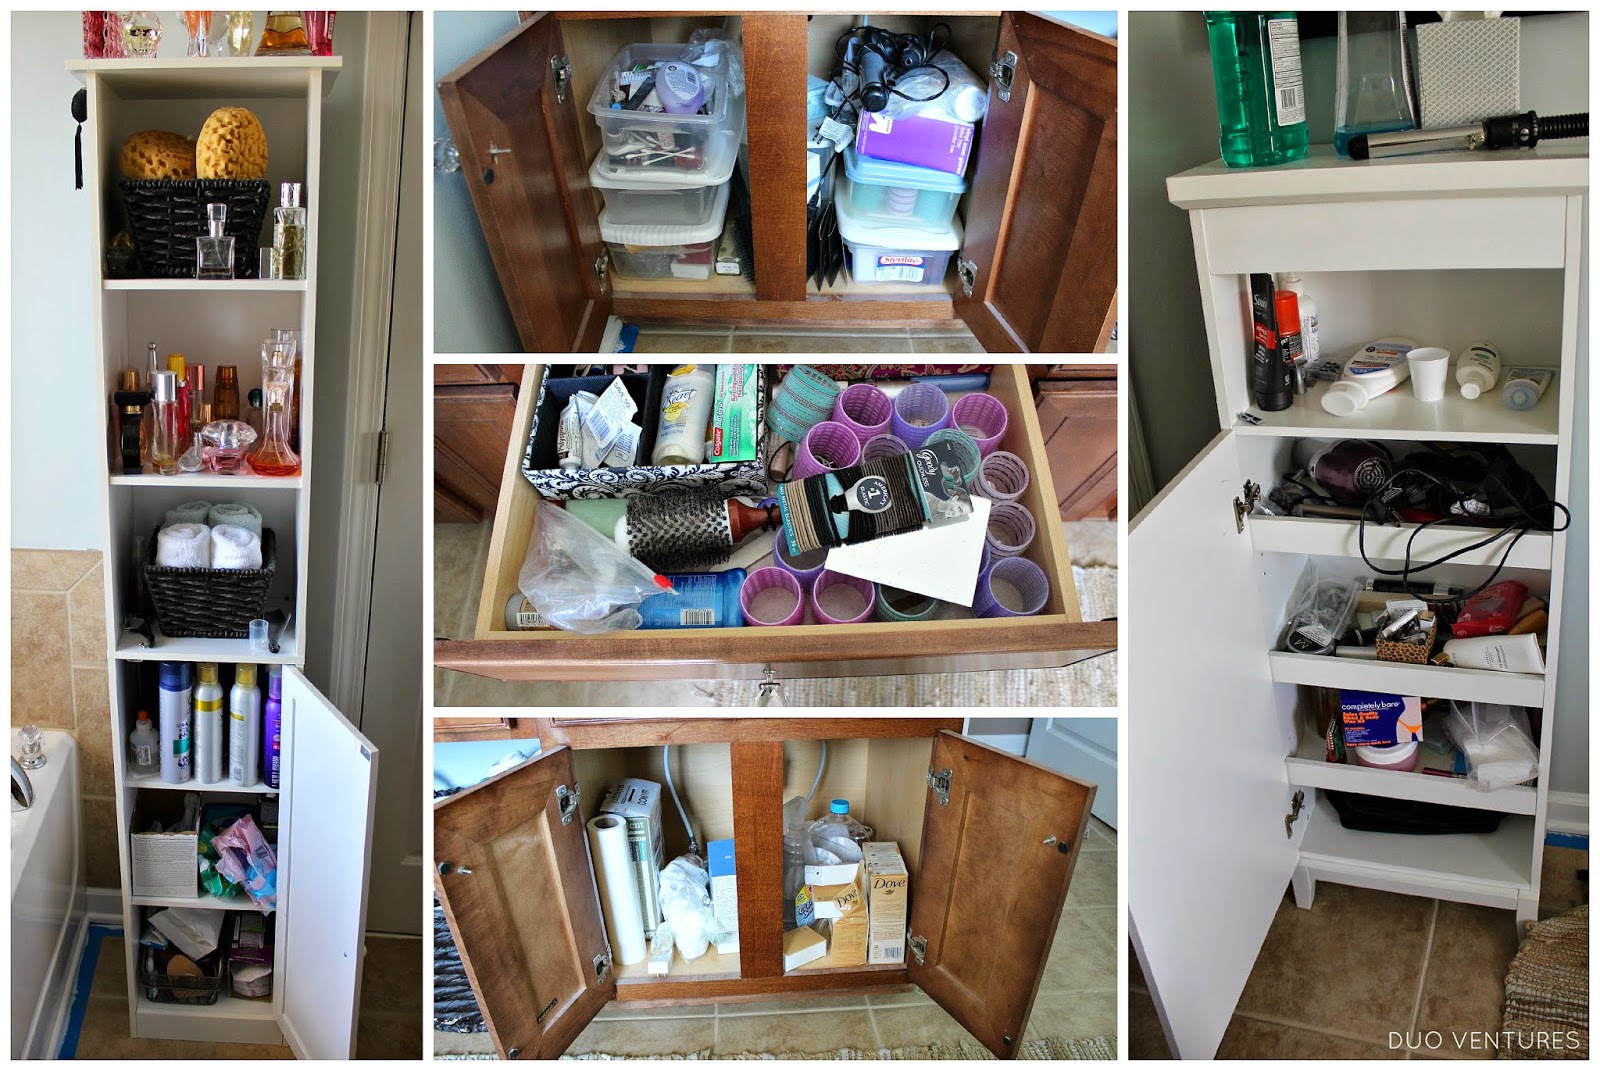
First, as with every organizational project I tackle, I removed every single item from the bathroom & sorted everything into like piles on our bed (I laid an old sheet down to protect our duvet from any leaking products). As I sorted, I threw out any expired items or things we don't need or use anymore. It's amazing to me how we can hold on to certain items, even when it's been ages since we used them last!
After everything was in piles, I gave the entire bathroom a good cleaning, Next, I started planning where everything would be placed & made a list of some drawer dividers, organizers, & baskets that I would need to purchase.
Also, I always measure all the drawers & cabinets before I head to the store so that I know for certain which baskets/organizers will fit (I even bring a little measuring tape with me to the store, in case measurements are not on the product tag).
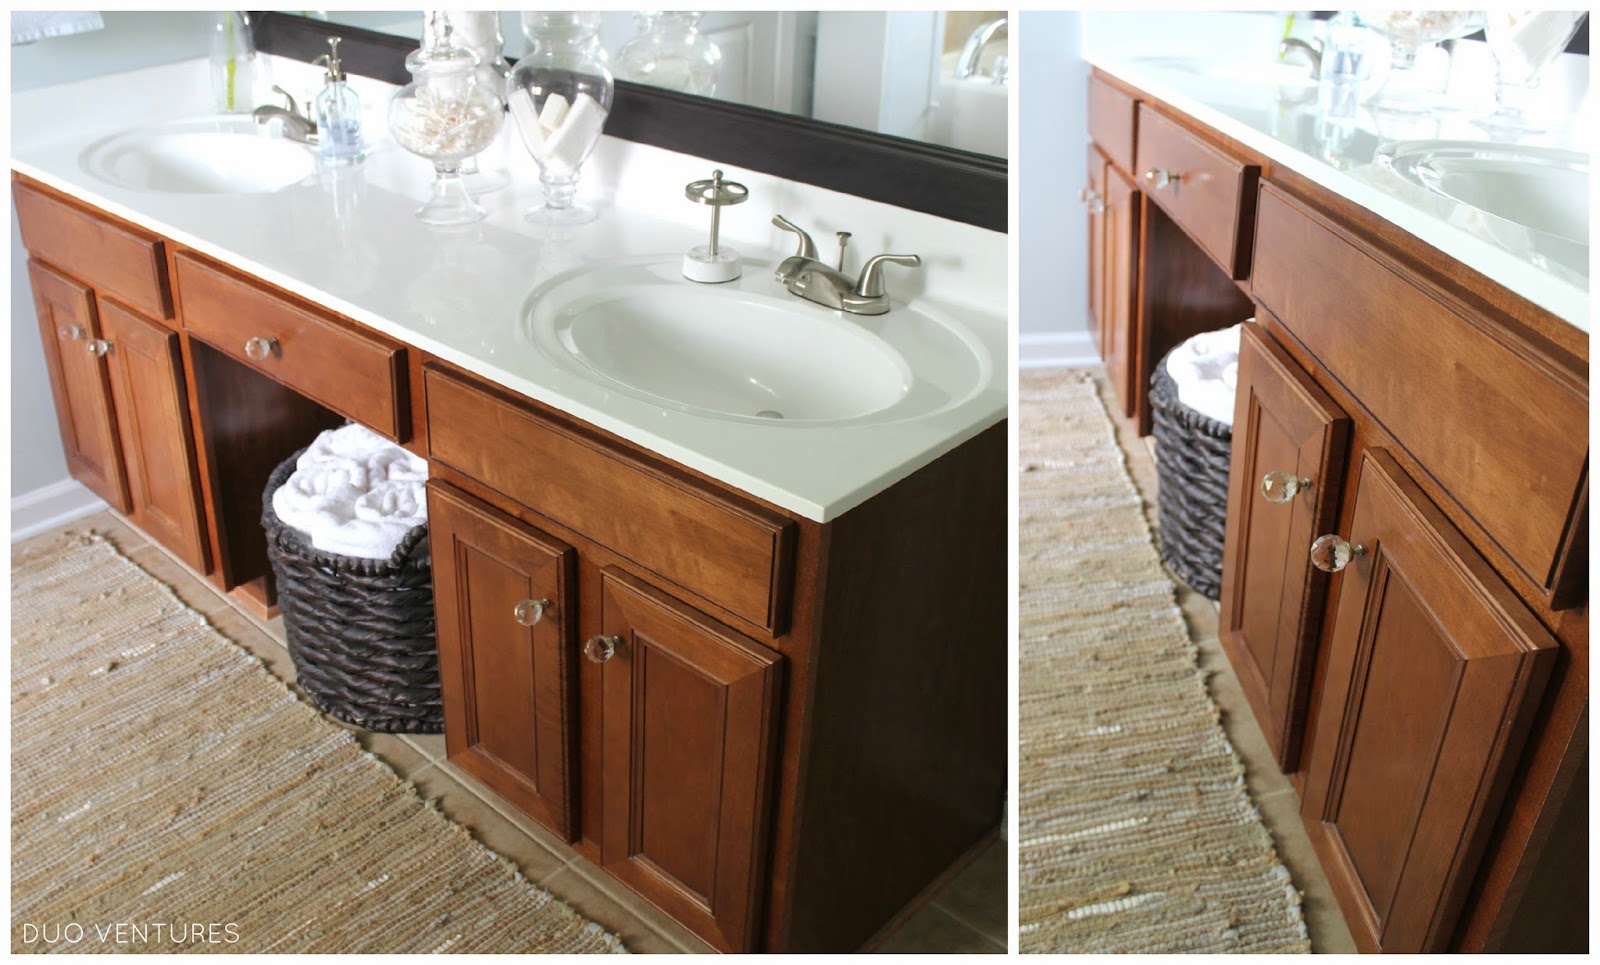
So here are the "before" & "after" photos - starting with our vanity:
On Nader's side of the vanity, we had items organized in plastic bins stacked on top of each other underneath the sink. Which, by the way, were all my things (nothing that he actually used on a daily basis). Not to mention, the collection of items made no sense & it was always a pain to
pull out the middle & bottom containers:

So in this case, I decided to start from scratch & I designated this side for Nader's items only. The door openings are pretty narrow (about 9" wide x 16" tall).
Luckily, I found a metal drawer organizer from Target that fit perfectly:


Next up: my side of the vanity, which was just as unorganized:
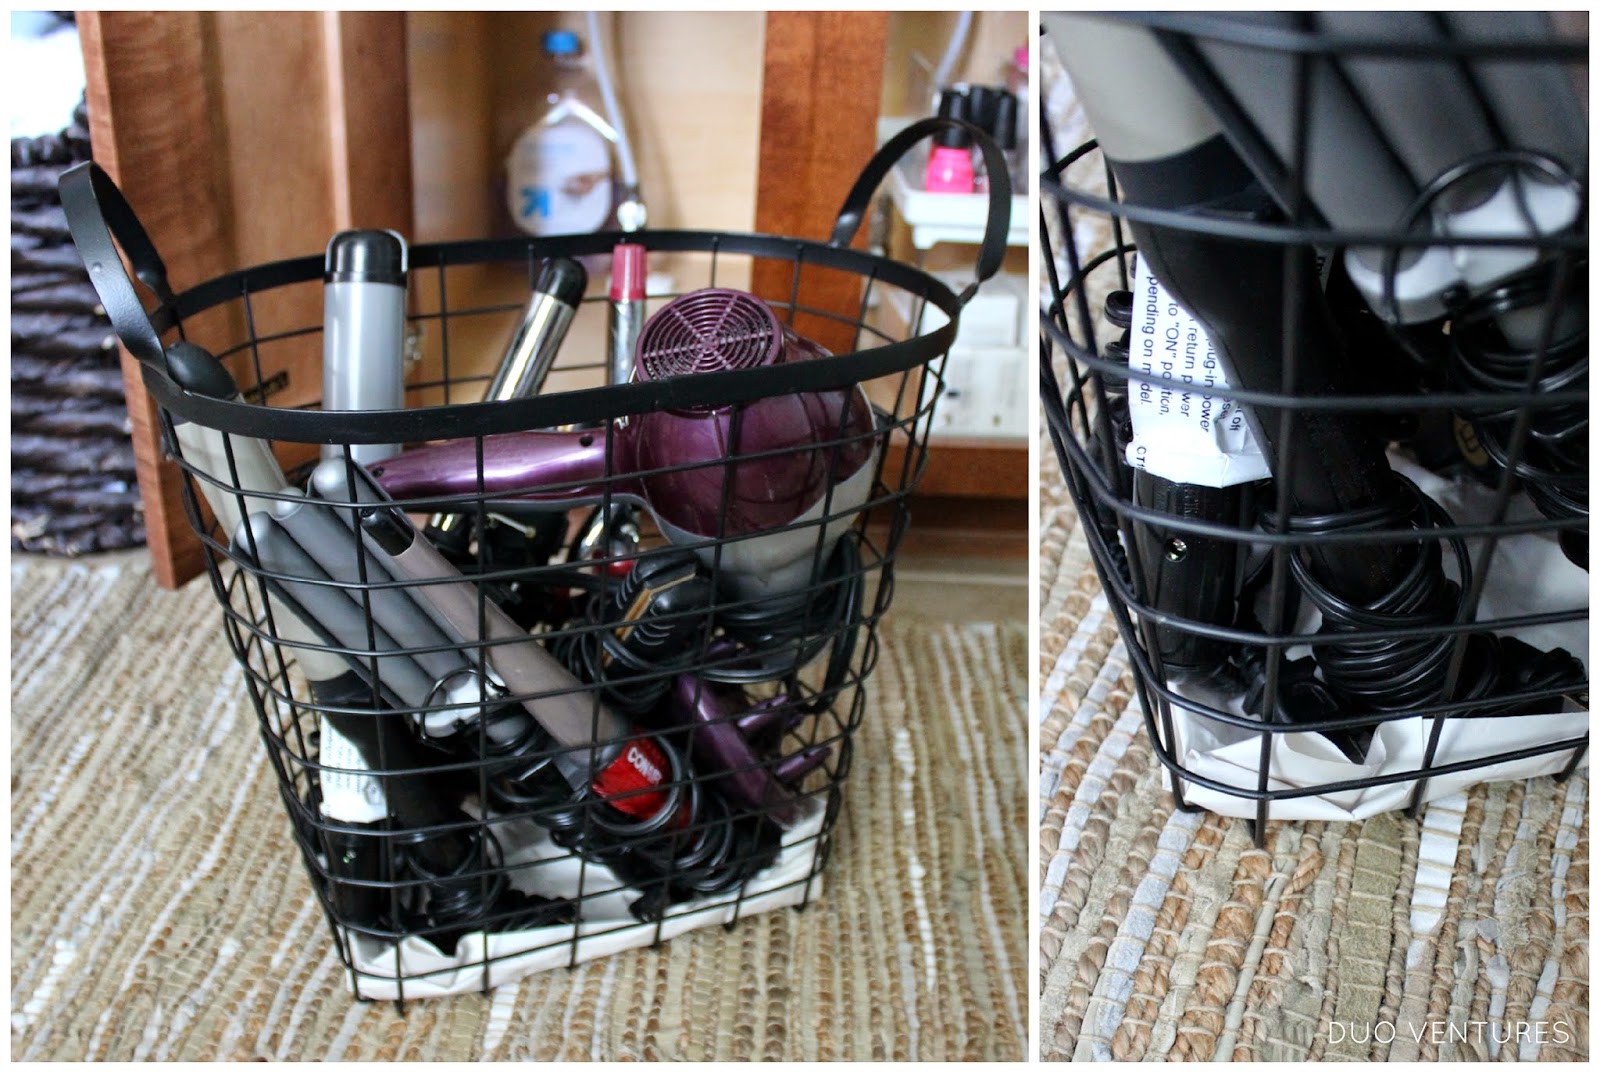
Now, this cabinet is home to all of my hot tools, nail polish, & some extra soap:

I decided to store all of my hot tools here since I couldn't fit them all in the storage unit where they were previously located. This black wire basket from Home Goods fits perfectly.
I love that it has a handle, so I can just slide it out when I need something:
I love that it has a handle, so I can just slide it out when I need something:
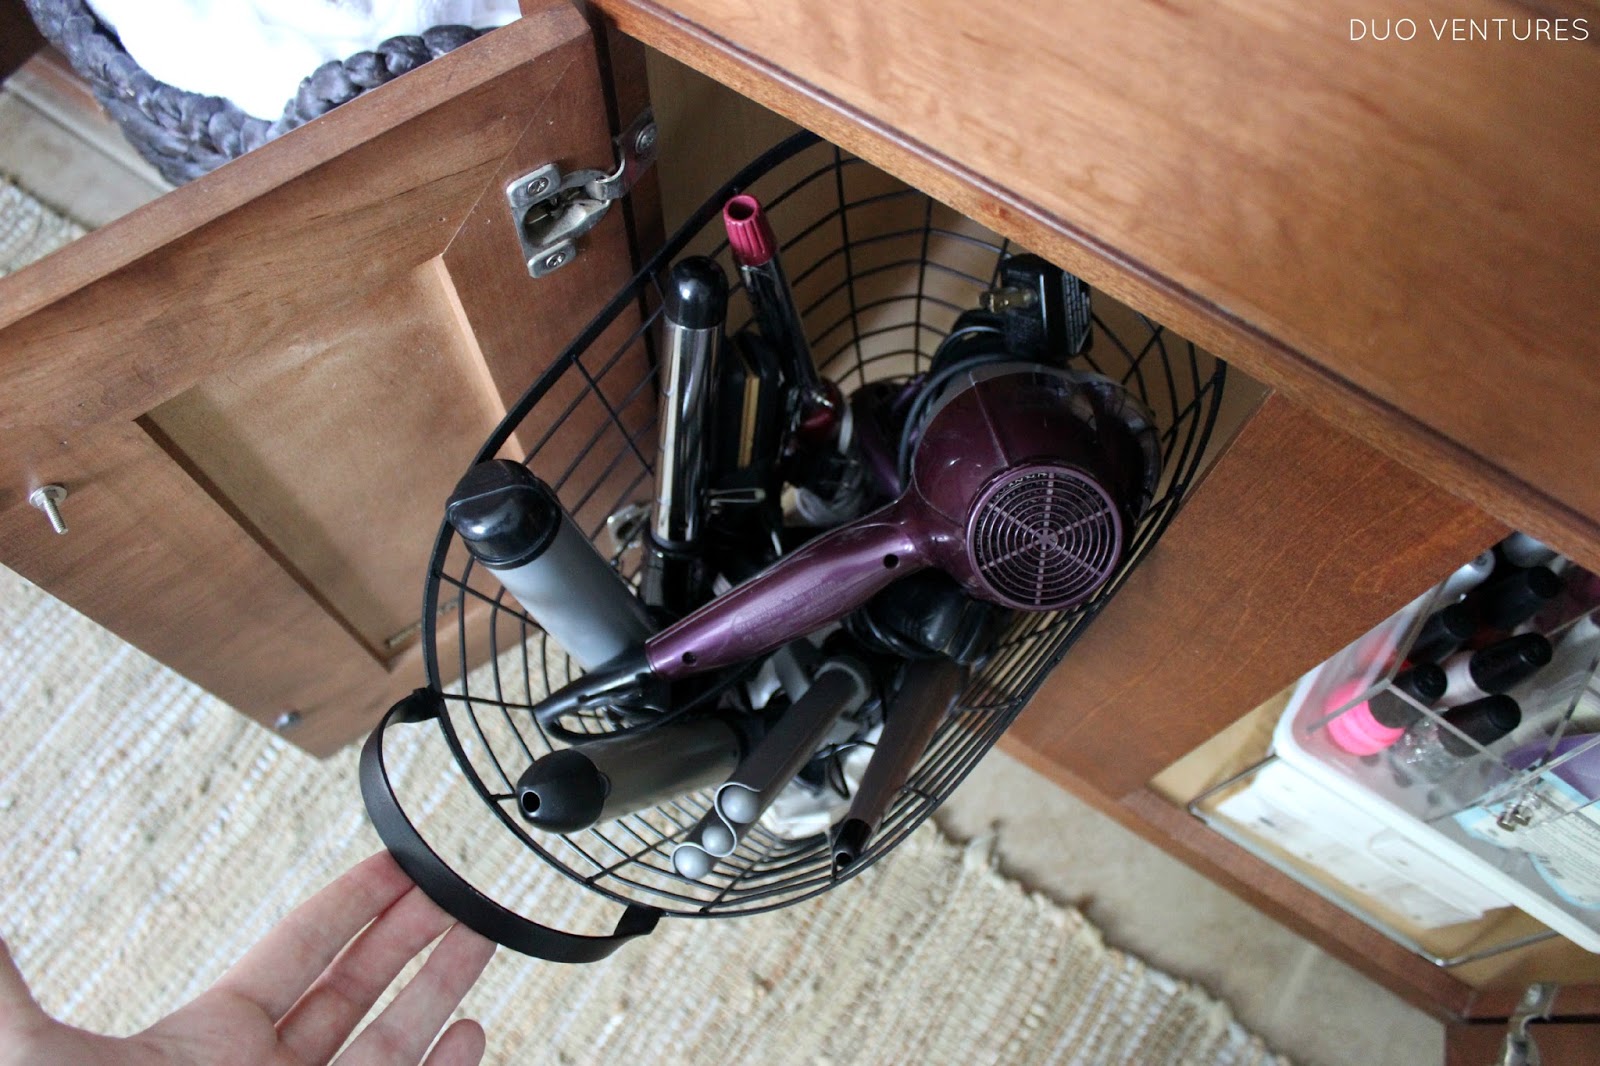
I did have to place a piece of paper into the bottom of the basket so nothing would fall through:
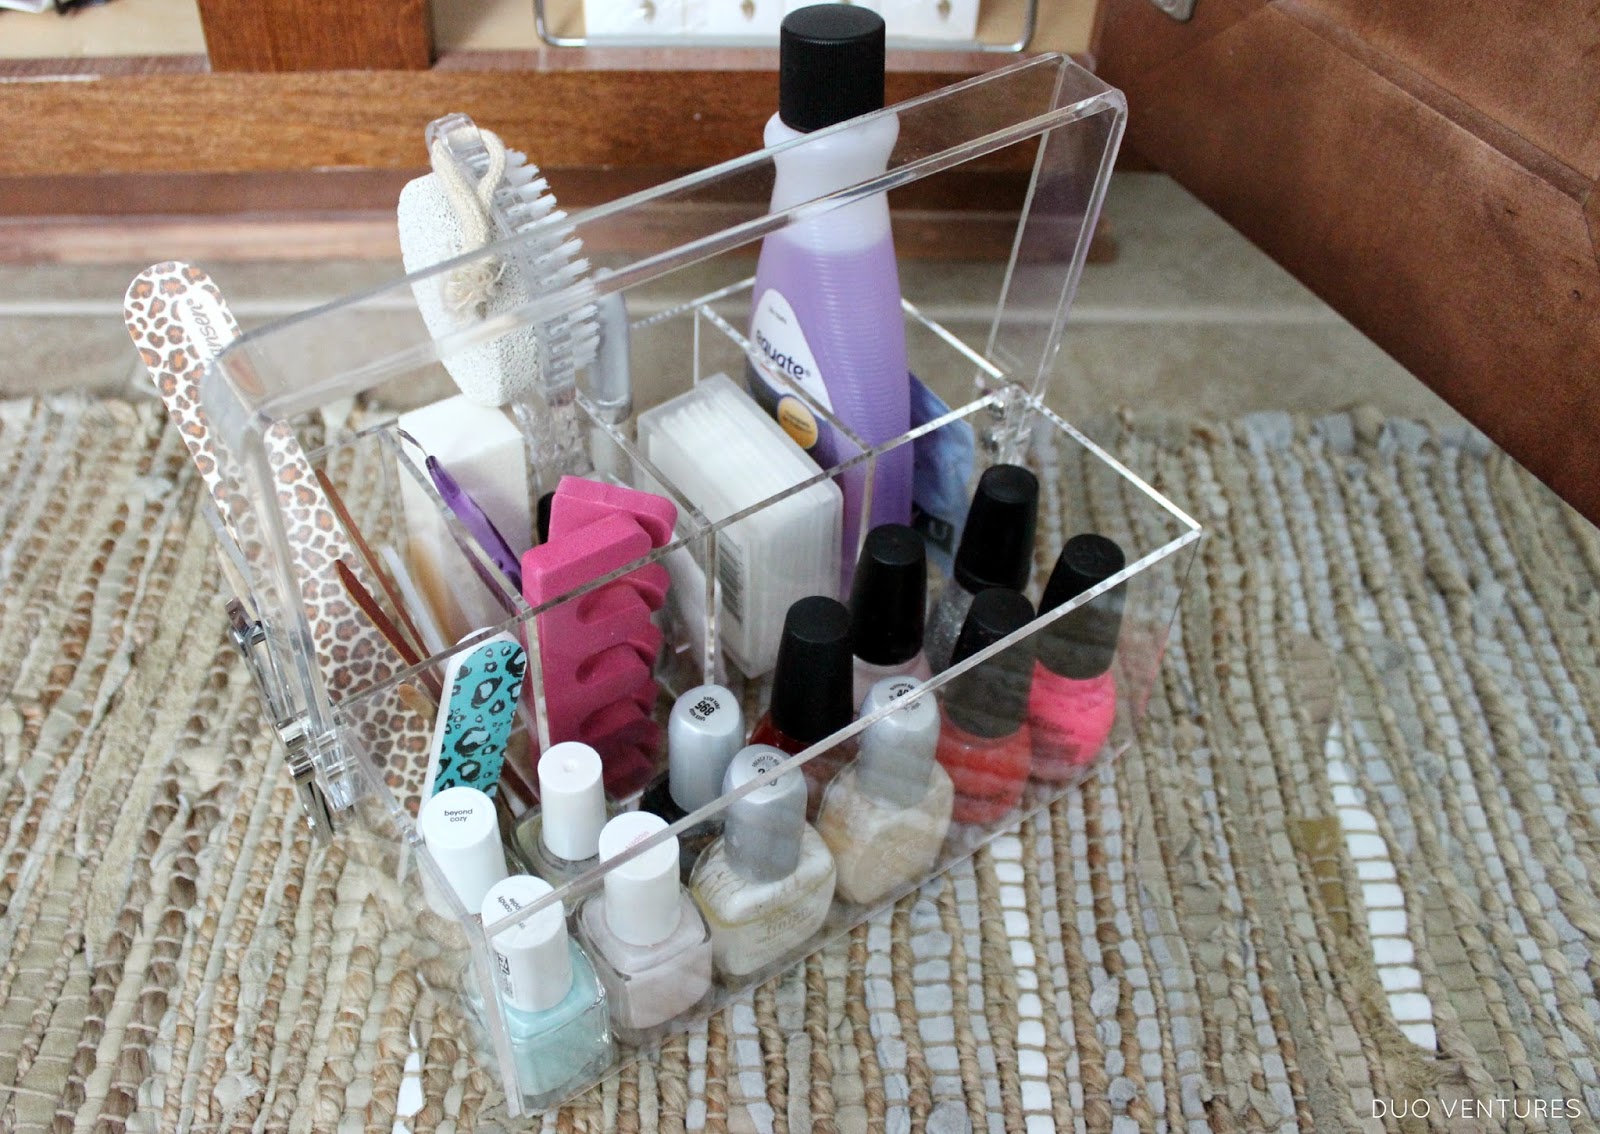
To the right, I have all my nail polish & supplies, which are stored in an acrylic caddy from HG:
Clearly, they were not working:

Now, this drawer is only storing toiletries that we use daily or on a more regular basis. I bought 2 acrylic drawer dividers from HG to organize & divide the drawer contents. Now, everything has a home & it doesn't slide around everywhere - and I was able to reuse the organizers that were originally there for another bedside table project:


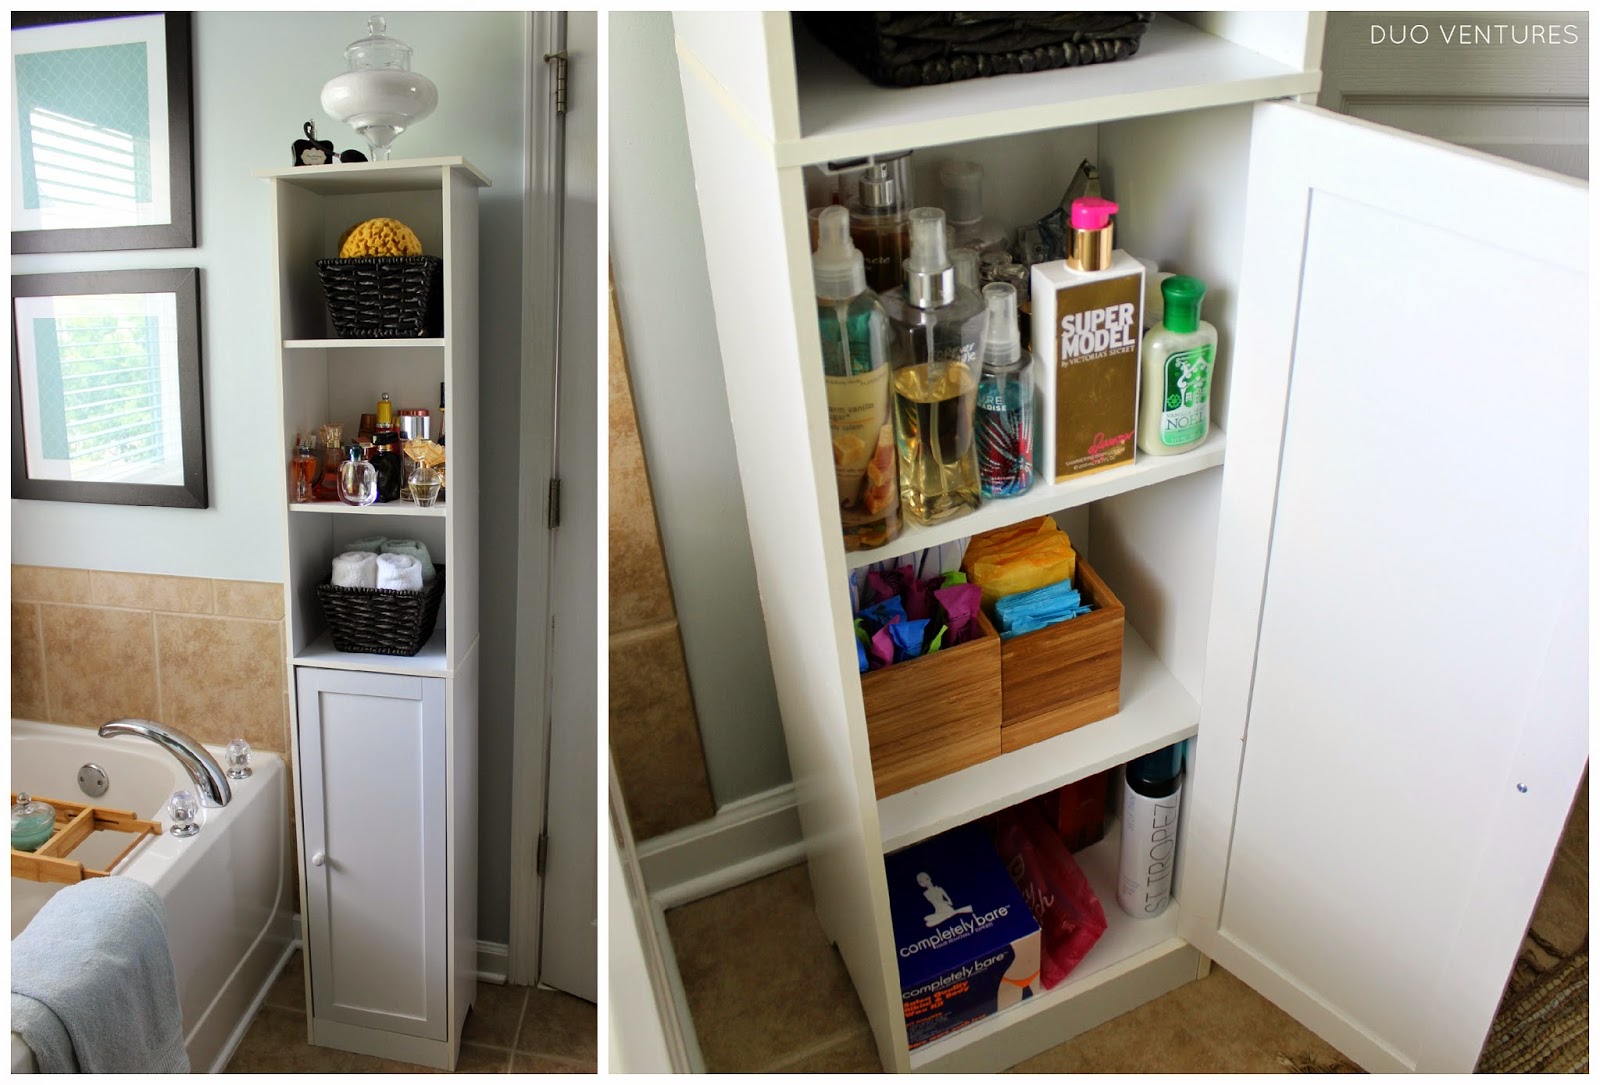
This storage unit is now holding all hair & makeup related items:
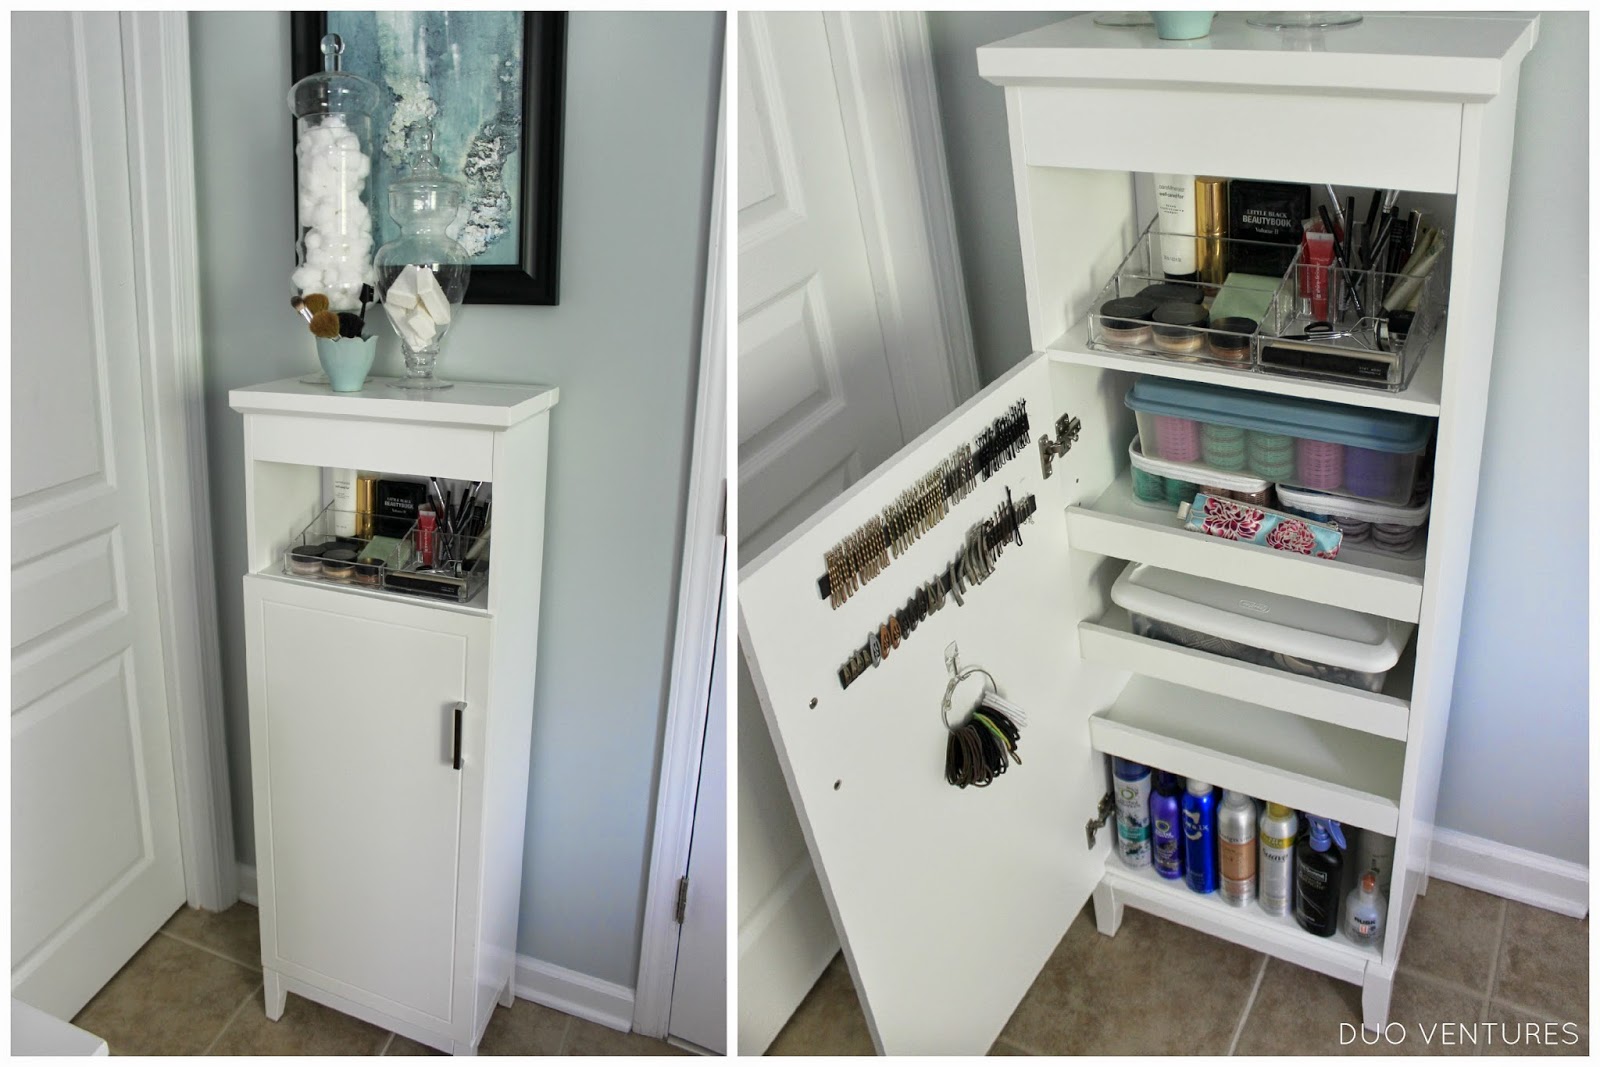
I found an acrylic organizer to store my makeup which fits perfectly in the open shelf:

Since I couldn't fit my brushes in the organizer, I popped them in a cute little green dish I found @ HG:

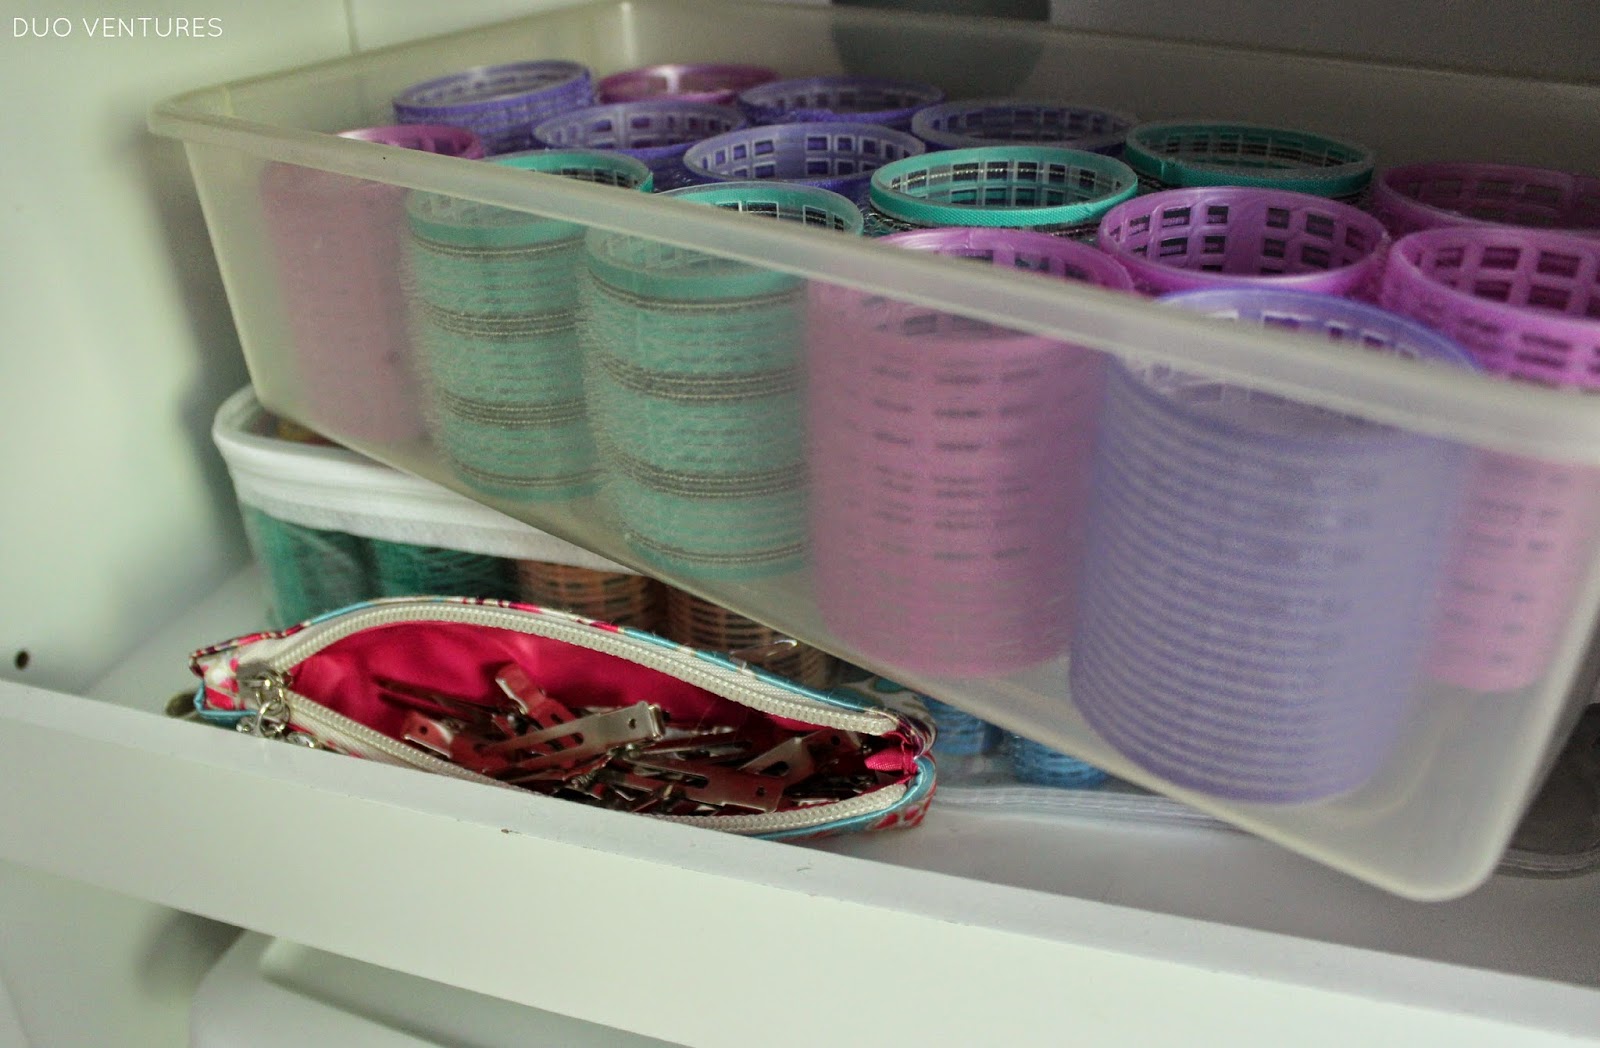
I lowered the top shelf on the inside of the unit to accommodate my velcro rollers & clips. Since I really only use the largest size rollers, I placed them all in a plastic bin so they would be easy to access.
The rest of the smaller rollers went back in their original packaging:
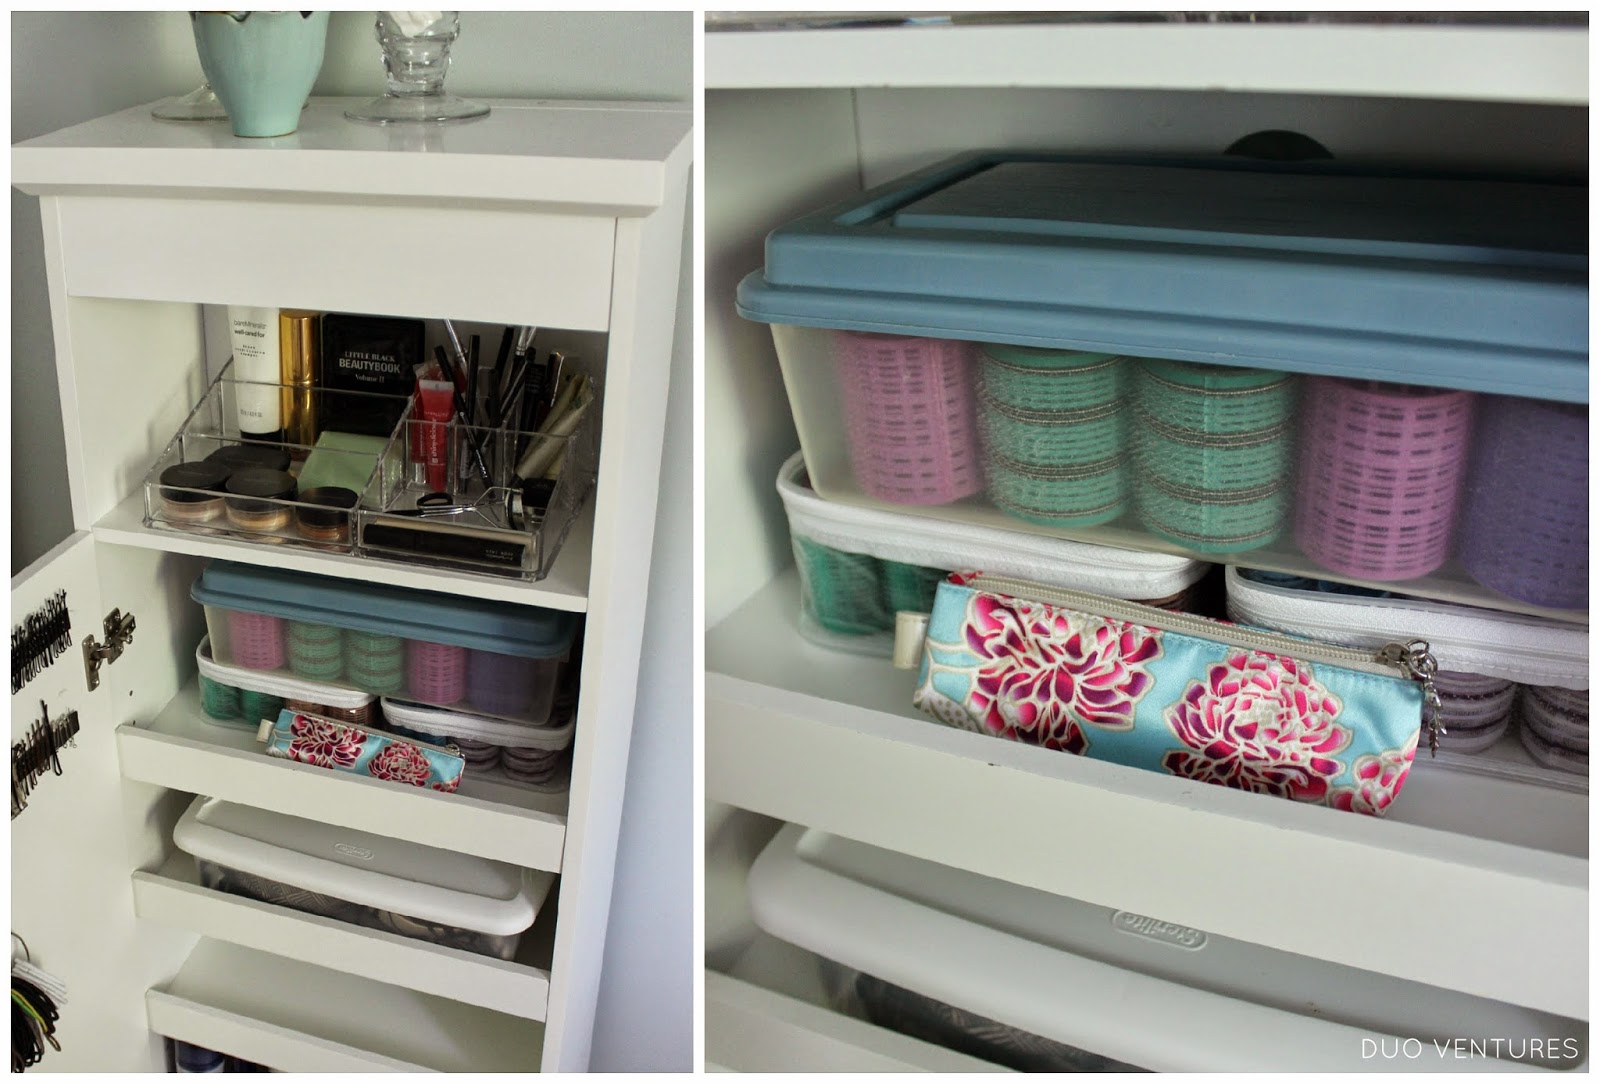
I placed all of the clips inside of a little zippered pouch I had laying around:
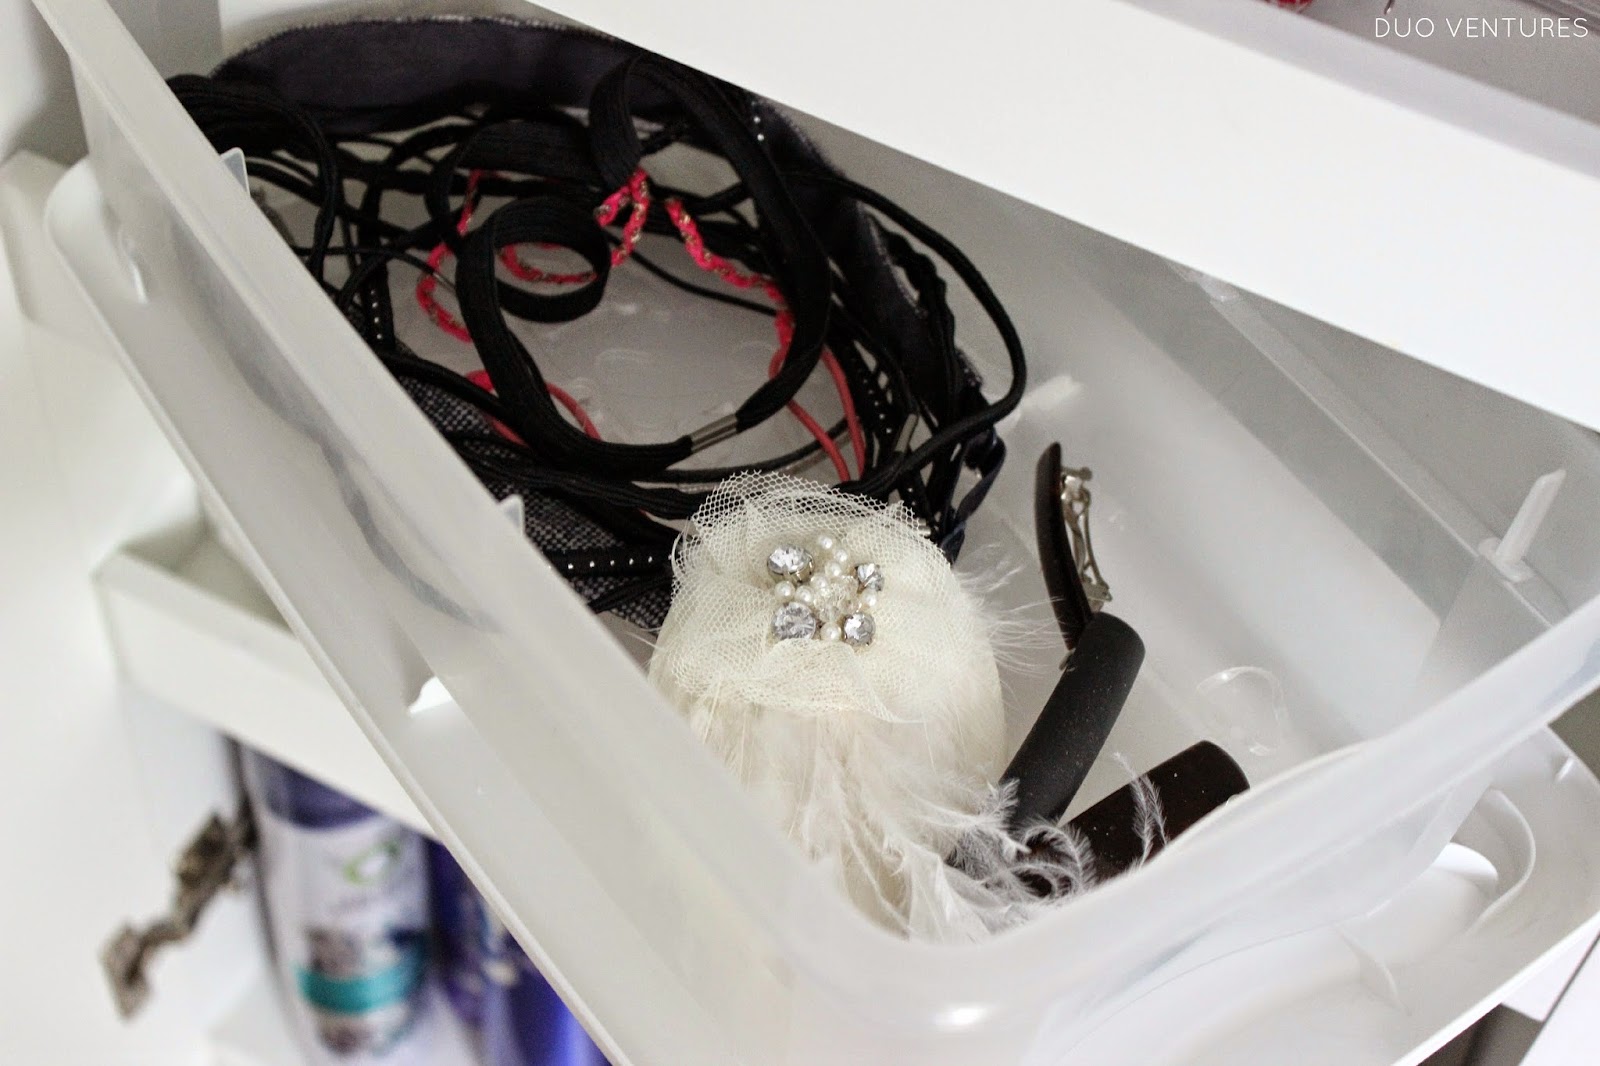
On the next shelf down, I corralled all of my headbands & larger clips into a plastic bin:
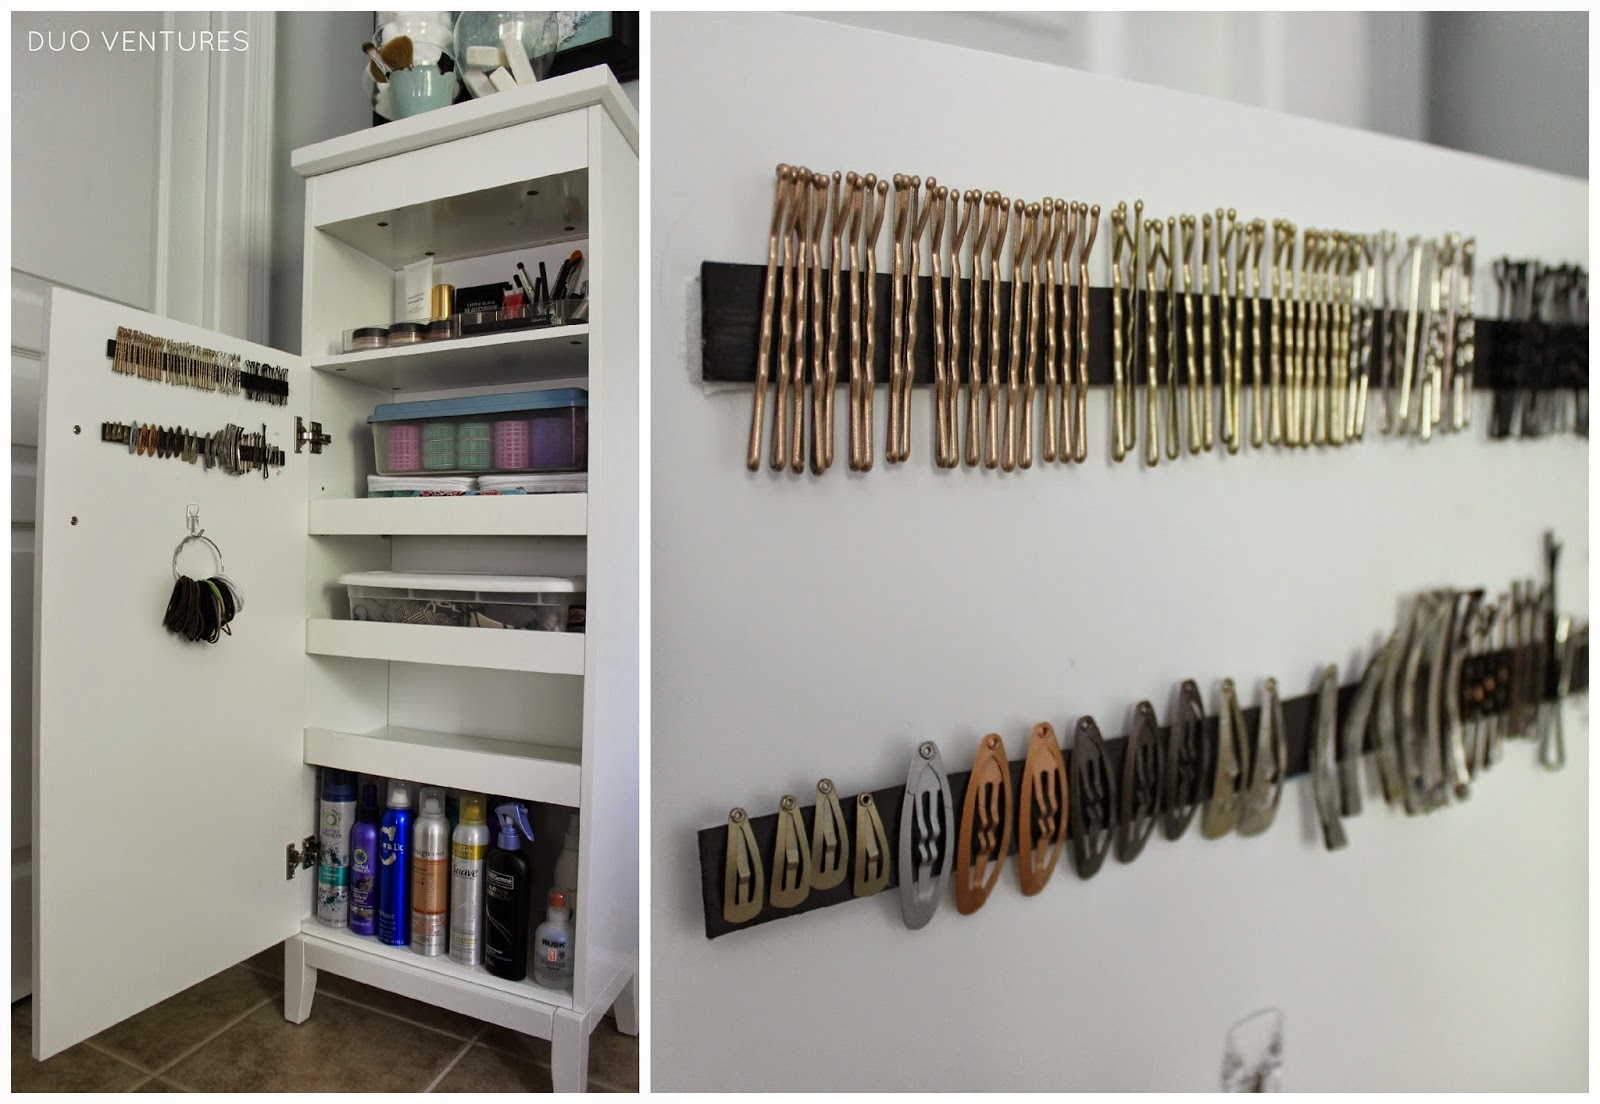
The next shelf down is empty for now - and on the bottom shelf, I placed all my hair care products:

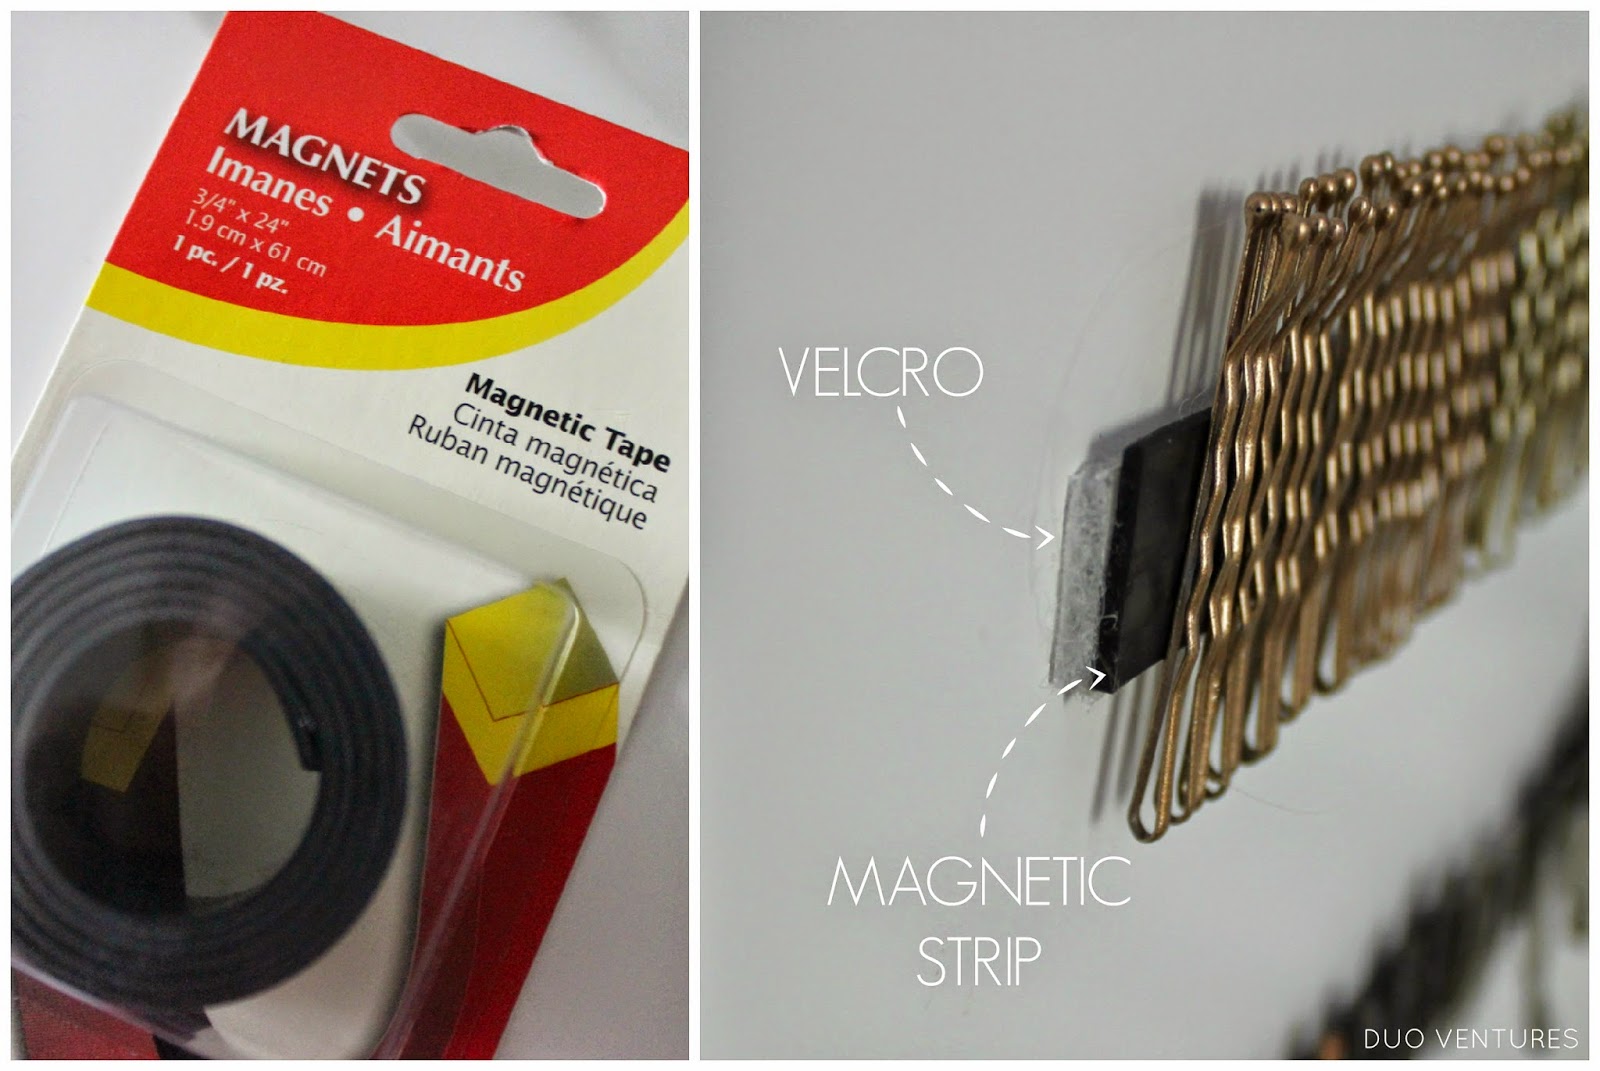
Lastly, I implemented an idea I had seen on Pinterest. I bought 2 adhesive magnetic strips from Lowe's & attached the strips to the inside of the cabinet to hold all those bobby pins & clips:

Then I used a tiny command strip hook to hold a ring of hair ties:

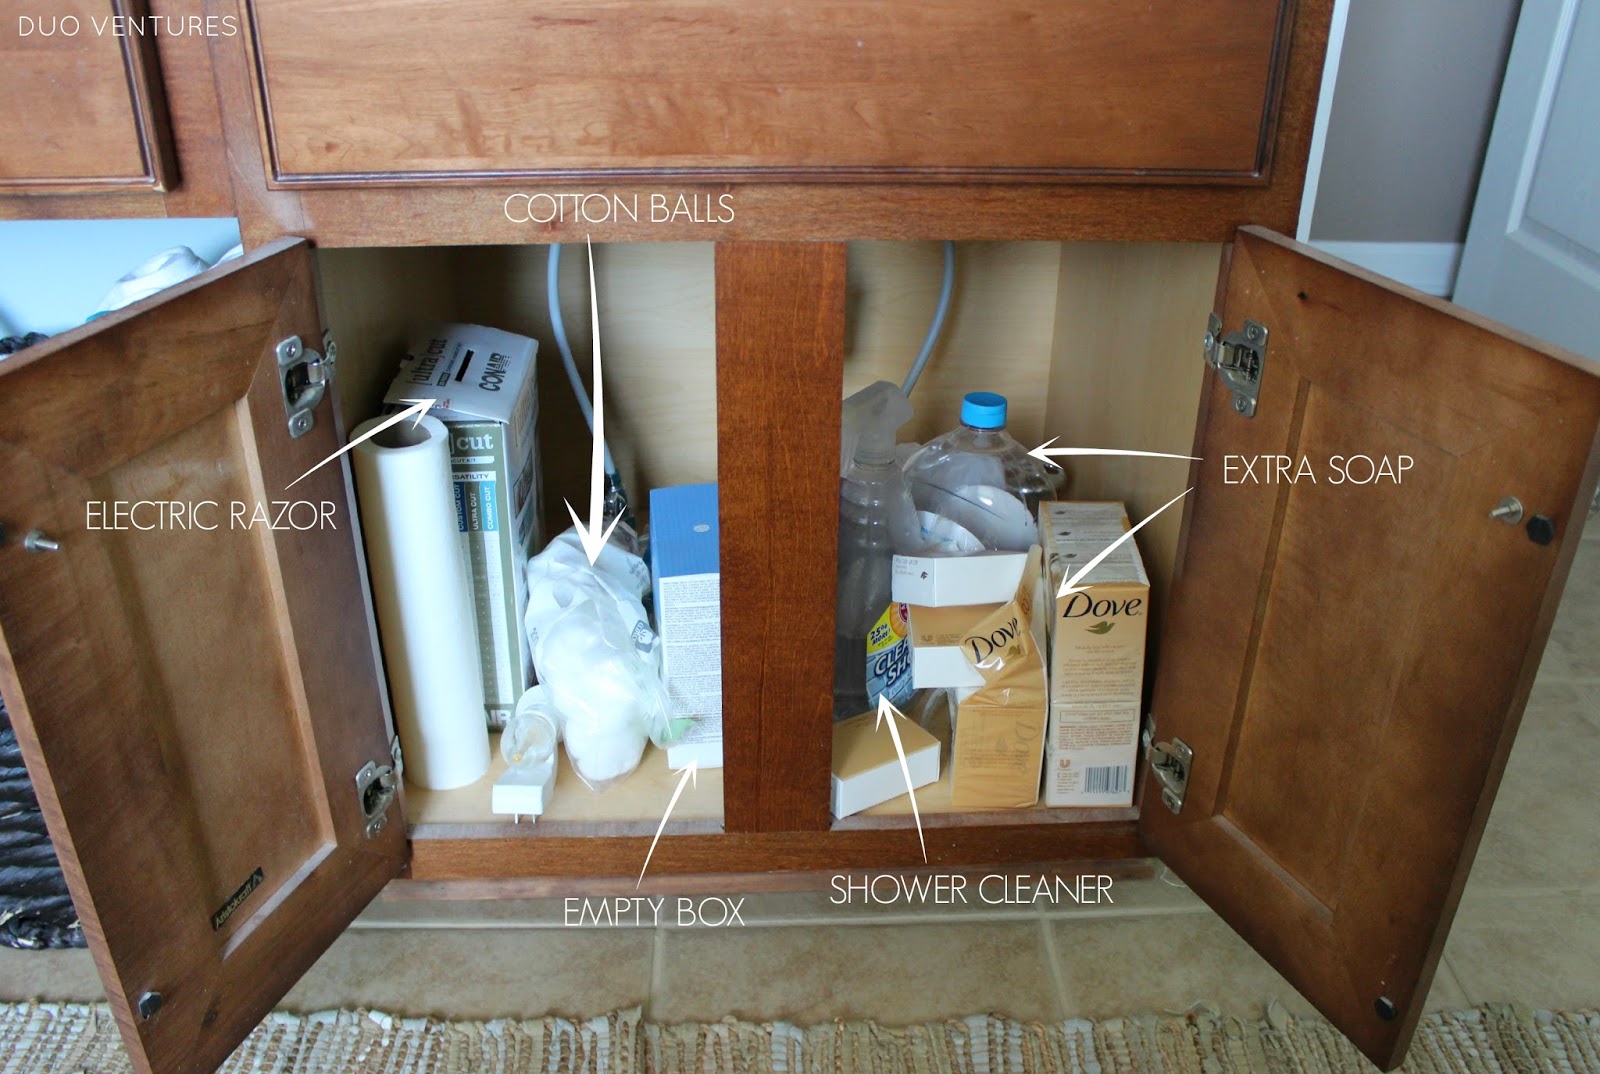
Moving on, here's the before of the second storage unit:

The second storage unit just needed a little purging & reorganizing. Since I relocated all of my hair care products, I put my scented lotions & extra body sprays there instead. Extra razors, waxing kit, & sunless tanner went on the bottom shelf:
If you're looking for some more organization inspiration, check out my previous projects.
Mel
:)
Thursday, May 1, 2014
Organizing: My Brother's Closet
His room is pretty tiny - so it's no wonder he spends most of his time in the basement. As a result, his bedroom had essentially become a storage facility for all his "stuff". Aside from his clothes, his bedroom & closet had been housing nearly every toy from his childhood. I would have liked to help him purge, sort, & organize through it all, but I focused on the closet & clothes situation during this trip.
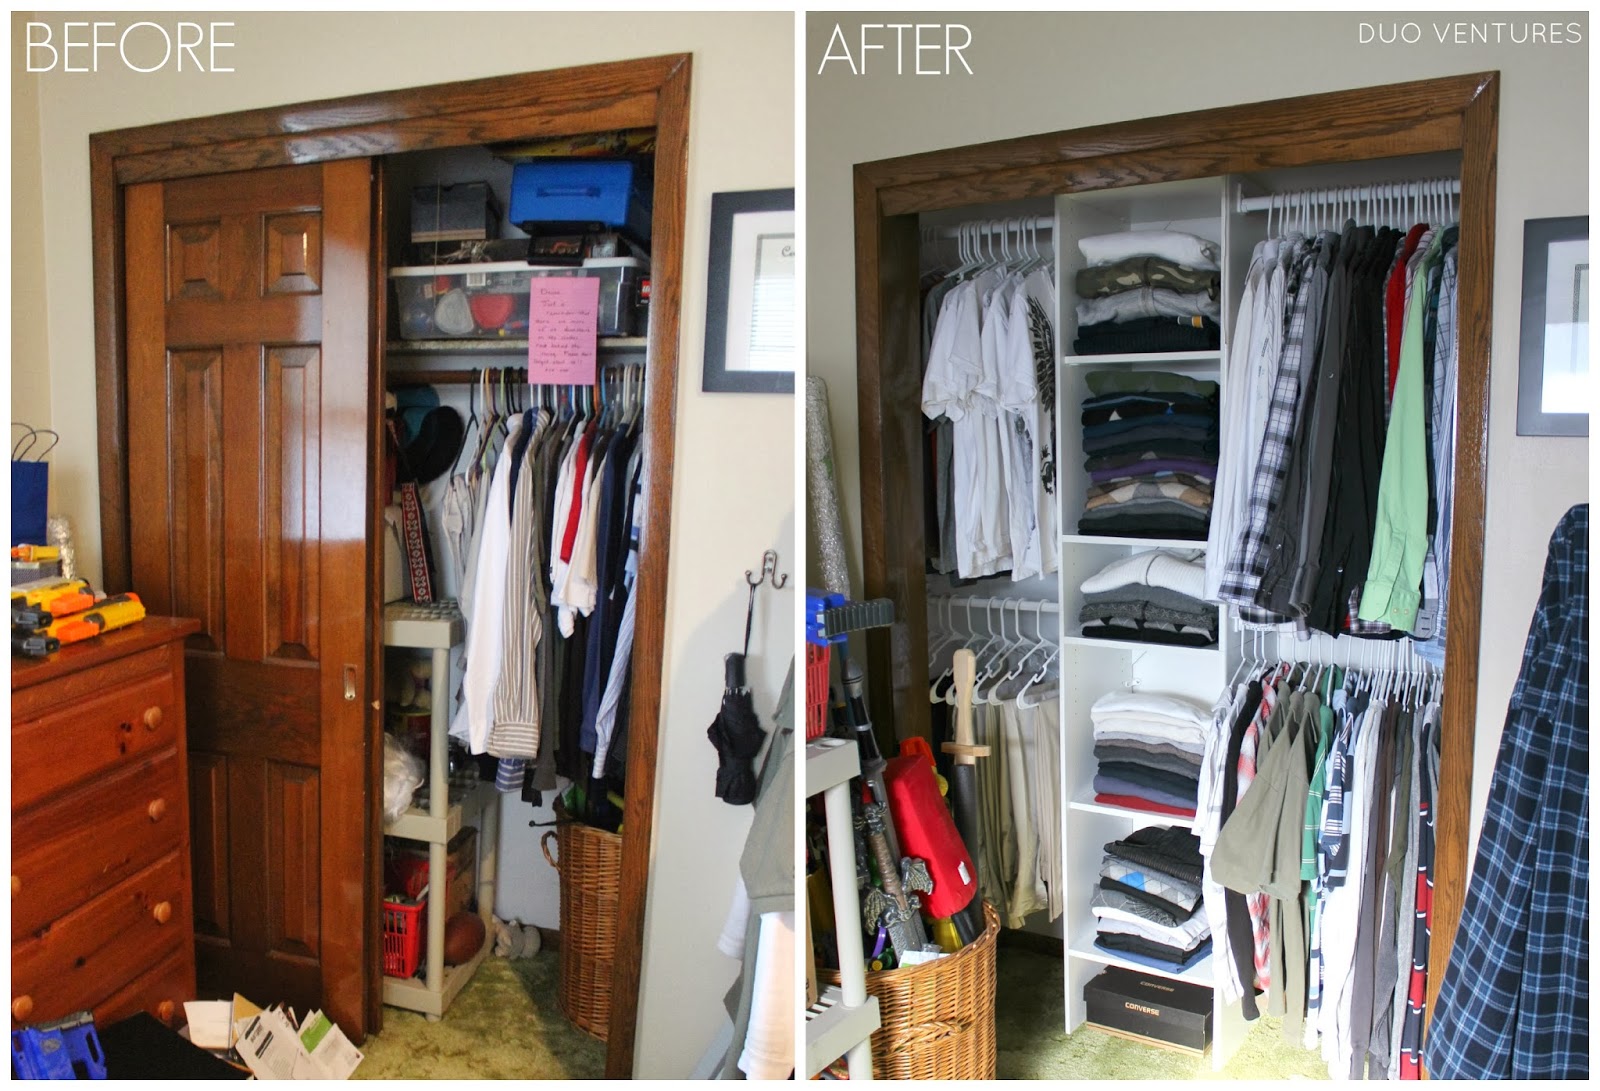
Here's what the closet looked like - as you can see, there was almost no room to hang his clothes:
Here's what the closet looked like - as you can see, there was almost no room to hang his clothes:

First, I emptied out the entire closet, organizing his clothing into piles as I went. Doing an inventory of all his clothing first is an important step because it allowed me to get a rough estimate of how much hanging storage & shelf space we would need to accommodate everything. Don't forget to take into account clothes that may be in the laundry room (in this case, half of his wardrobe was in the laundry!):

Next, we removed the closet doors to make installation easier. After I emptied out the closet, I was left with a single shelf & hanging bar - which was not the most functional setup. With the existing layout, there was simply too much wasted space. I felt a closet organizer kit would maximize the storage space - so I removed the shelf & the bar to make room for a new system:
Next, we removed the closet doors to make installation easier. After I emptied out the closet, I was left with a single shelf & hanging bar - which was not the most functional setup. With the existing layout, there was simply too much wasted space. I felt a closet organizer kit would maximize the storage space - so I removed the shelf & the bar to make room for a new system:

Next, I patched up all the holes:
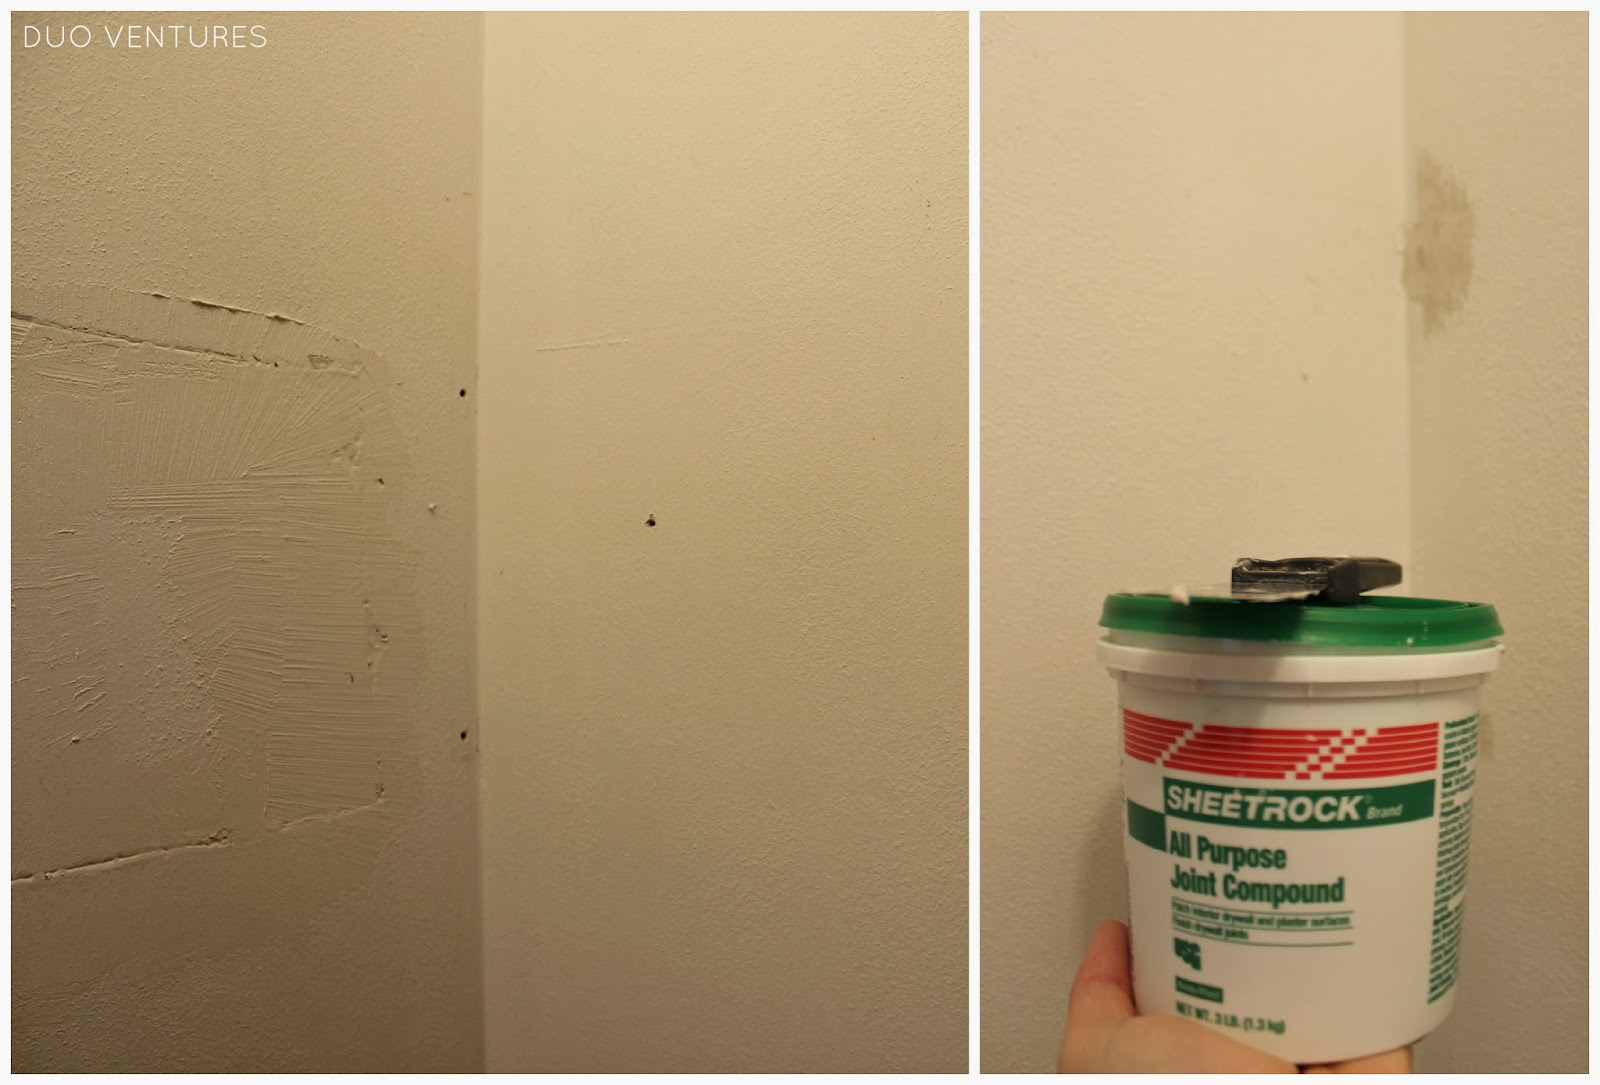
While the joint compound dried, Nader & I ran to Home Depot to look for a closet organizer.
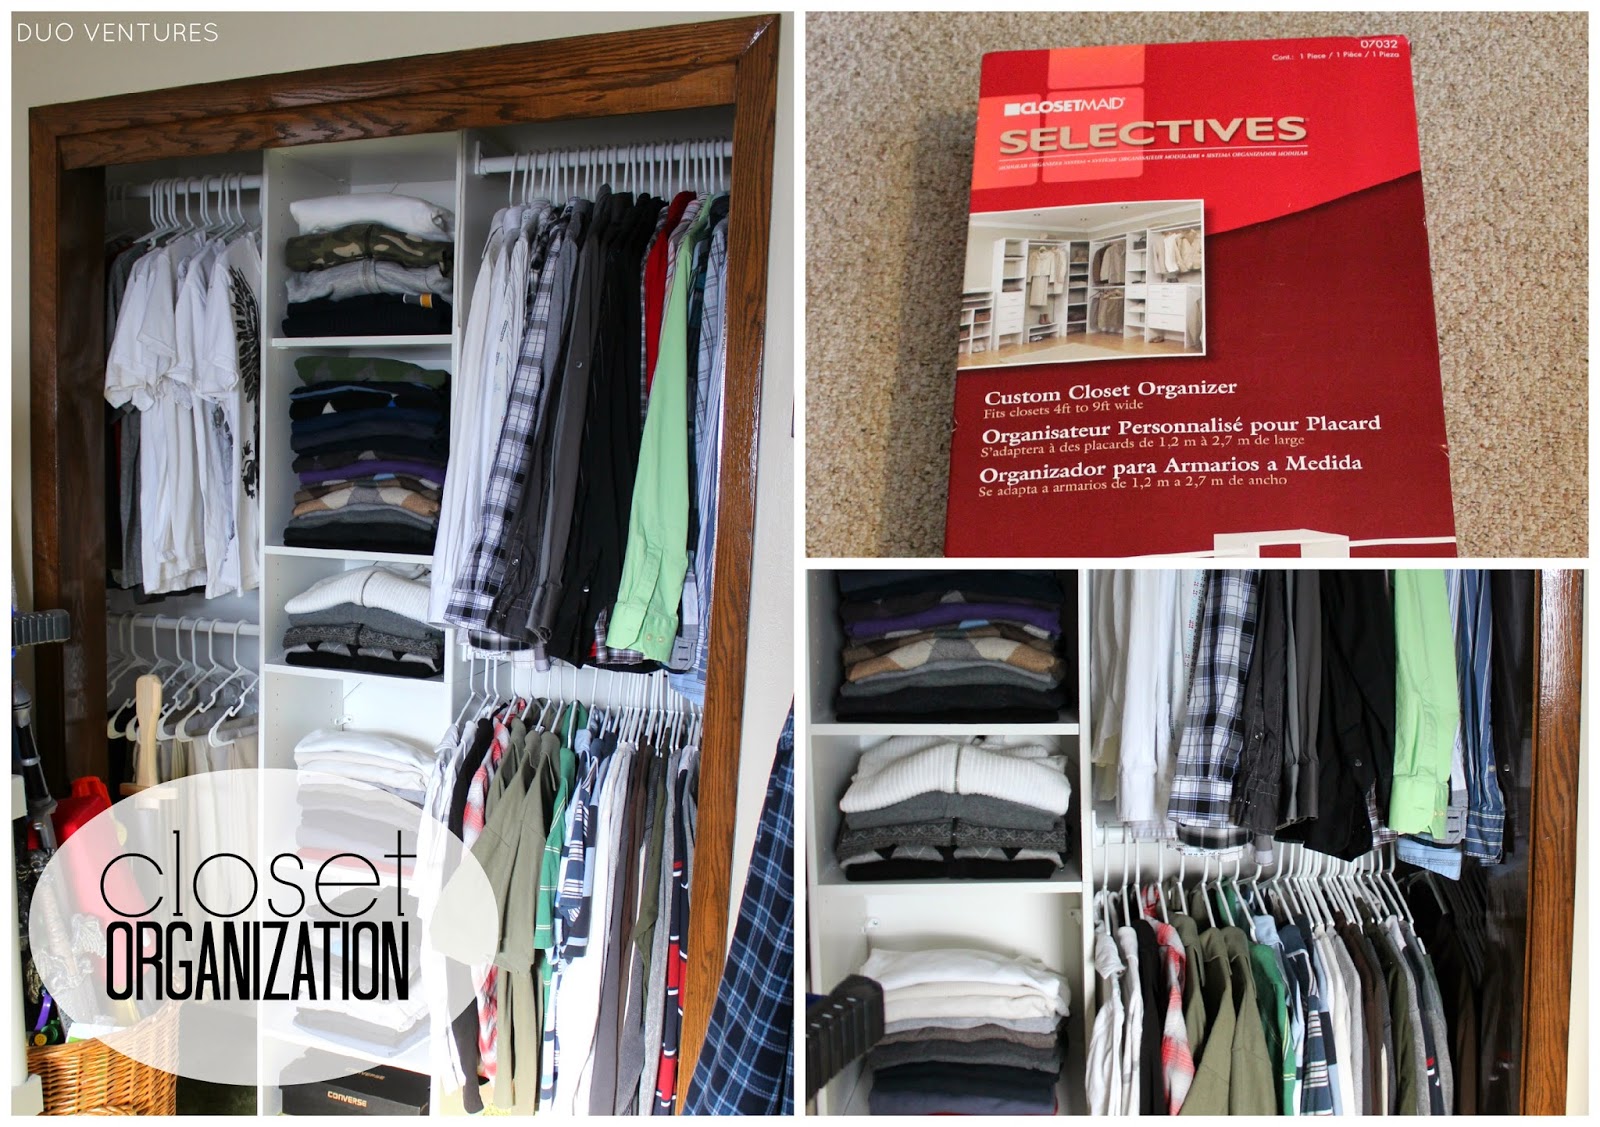
The kit we ended up getting was the Closetmaid Selectives 16" White Custom Closet Organizer (the shelf width is 16"). We went with this specific organizer because of the shallow shelf depth & adjustable width options. Devon's closet is not very deep & this kit is only about 14" deep.
This organizer also fits closets anywhere from 4'-9' wide, allowing you to customize it to your closet. It only came with 3 hanging rods, so we did purchase one extra rod as well.
It took us about 30-40 minutes to assemble the shelf portion:

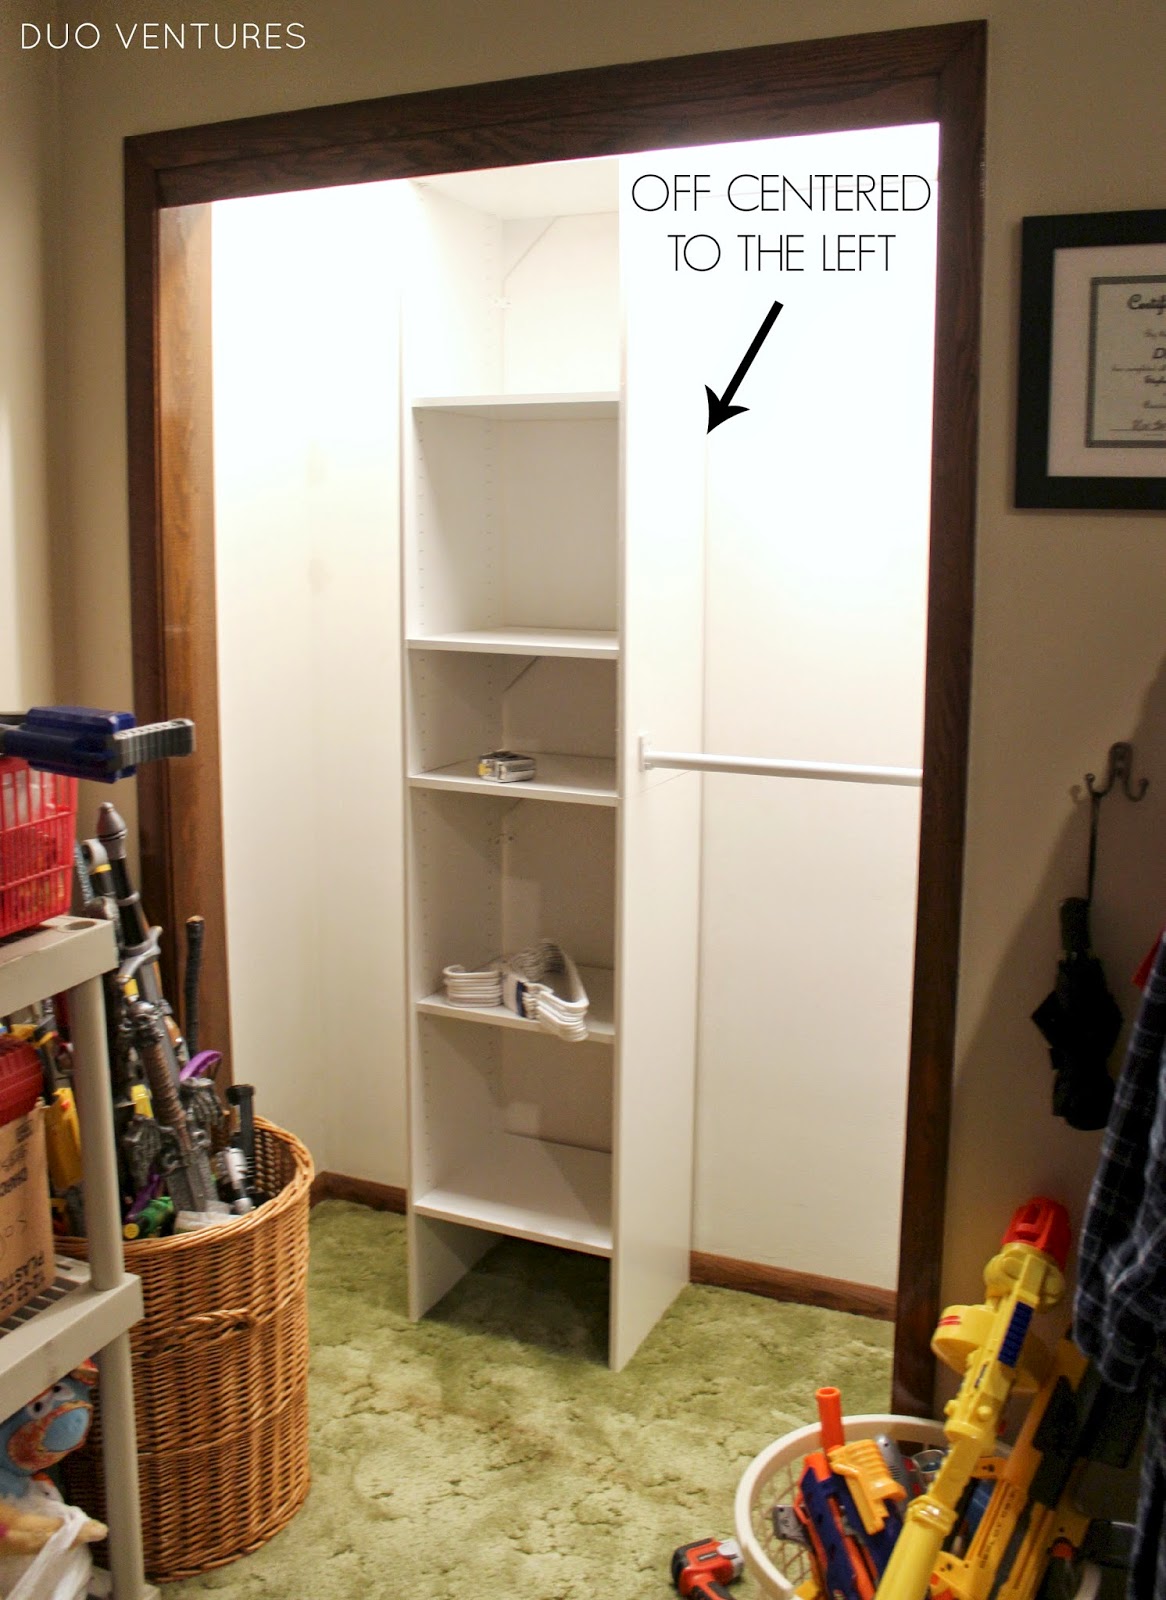
Next, we began installing the shelf unit. Before we attached it to the wall, we had to decide where we wanted to place it. If it was my closet, I would have left the doors off & centered the shelves - but Devon said he preferred to keep the doors on so that their cat stayed out.
This was actually an important detail when it came to installing the shelf unit - if the shelves were positioned directly in the middle of the closet, the doors would have been blocking them.
You can see what I mean from the old closet layout:
This was actually an important detail when it came to installing the shelf unit - if the shelves were positioned directly in the middle of the closet, the doors would have been blocking them.
You can see what I mean from the old closet layout:

Since we planned on putting the doors back up, I off-centered the shelf unit to the left so that he could access the shelves more easily. Once the shelving portion was done, we started on the rods,
using wall anchors to attach the rods to the walls:
using wall anchors to attach the rods to the walls:
The following day I began adding back all of his clothing, organizing by color & type. I also bought all new white hangers - they're relatively inexpensive & create so much more visual organization.
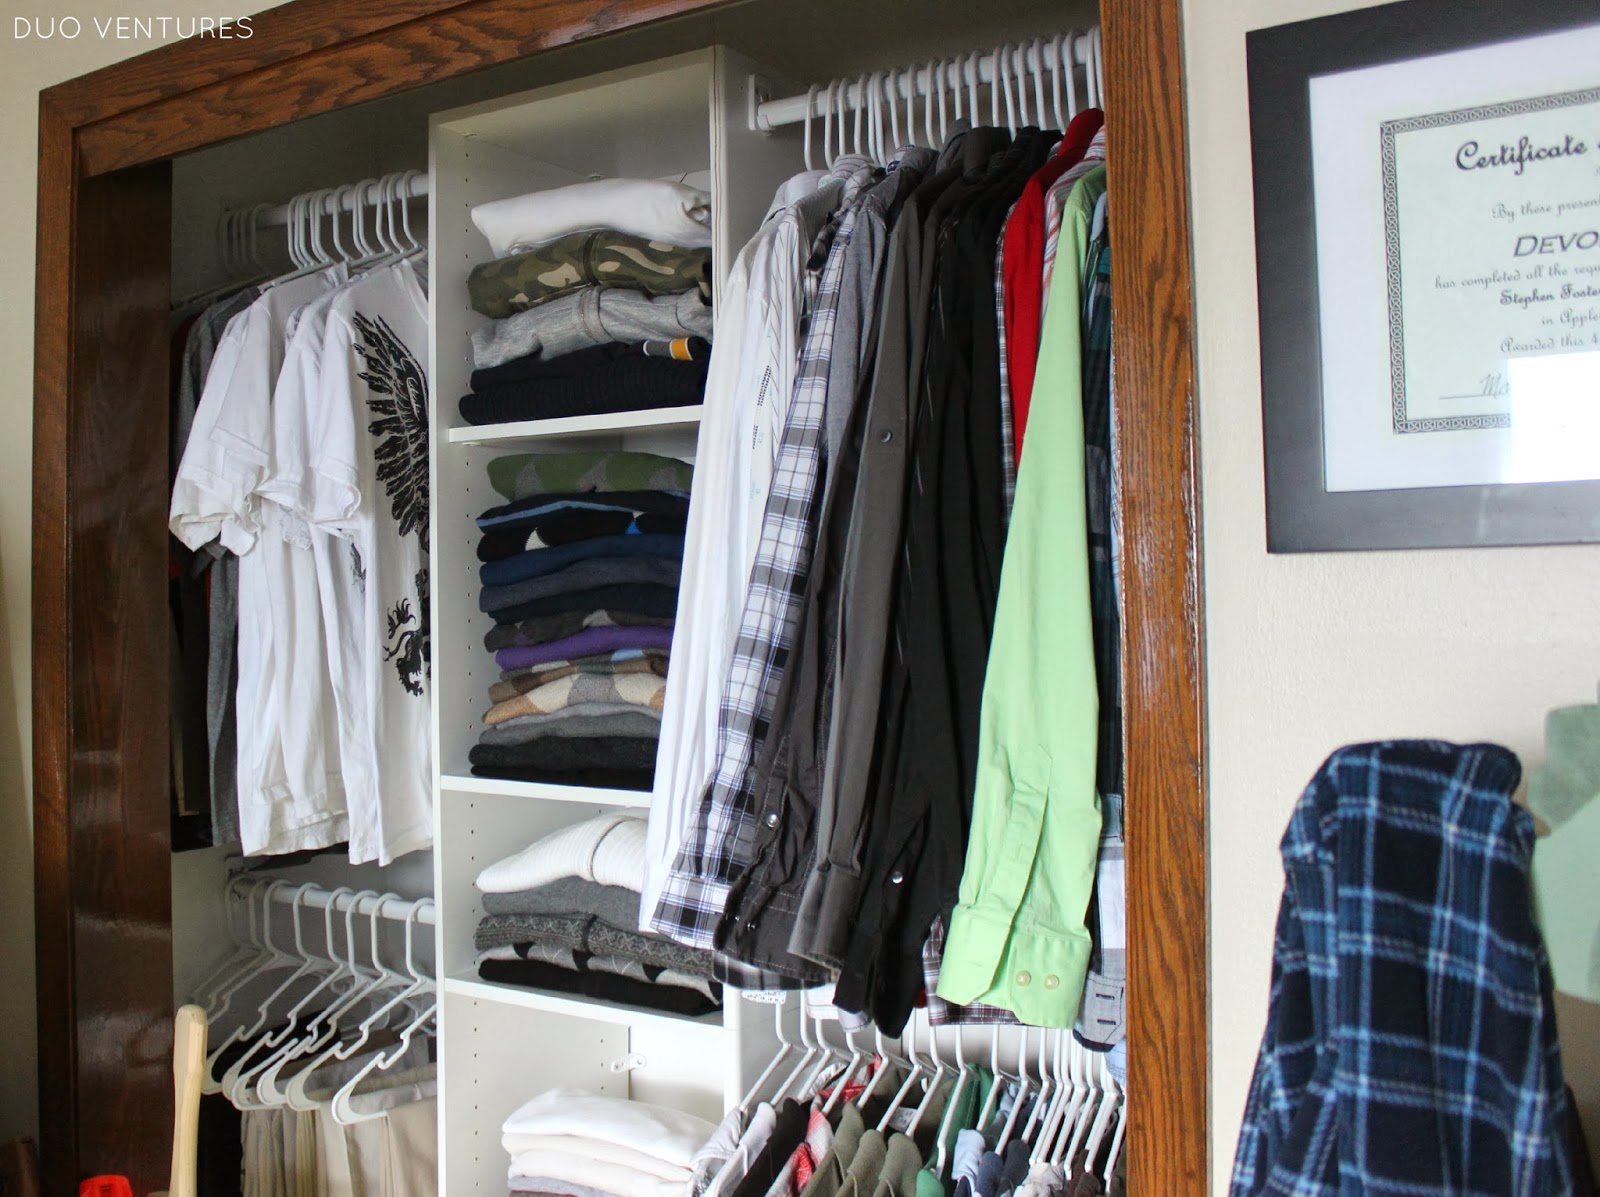
Since he had a smaller amount of t-shirts & dress pants, I hung those items on the shorter rods on the left side of the closet. His button down shirts, polos, & long sleeve shirts went on the longer rods on the right. I used the shelves to organize all his sweaters, hoodies, & flannels:
Since he had a smaller amount of t-shirts & dress pants, I hung those items on the shorter rods on the left side of the closet. His button down shirts, polos, & long sleeve shirts went on the longer rods on the right. I used the shelves to organize all his sweaters, hoodies, & flannels:
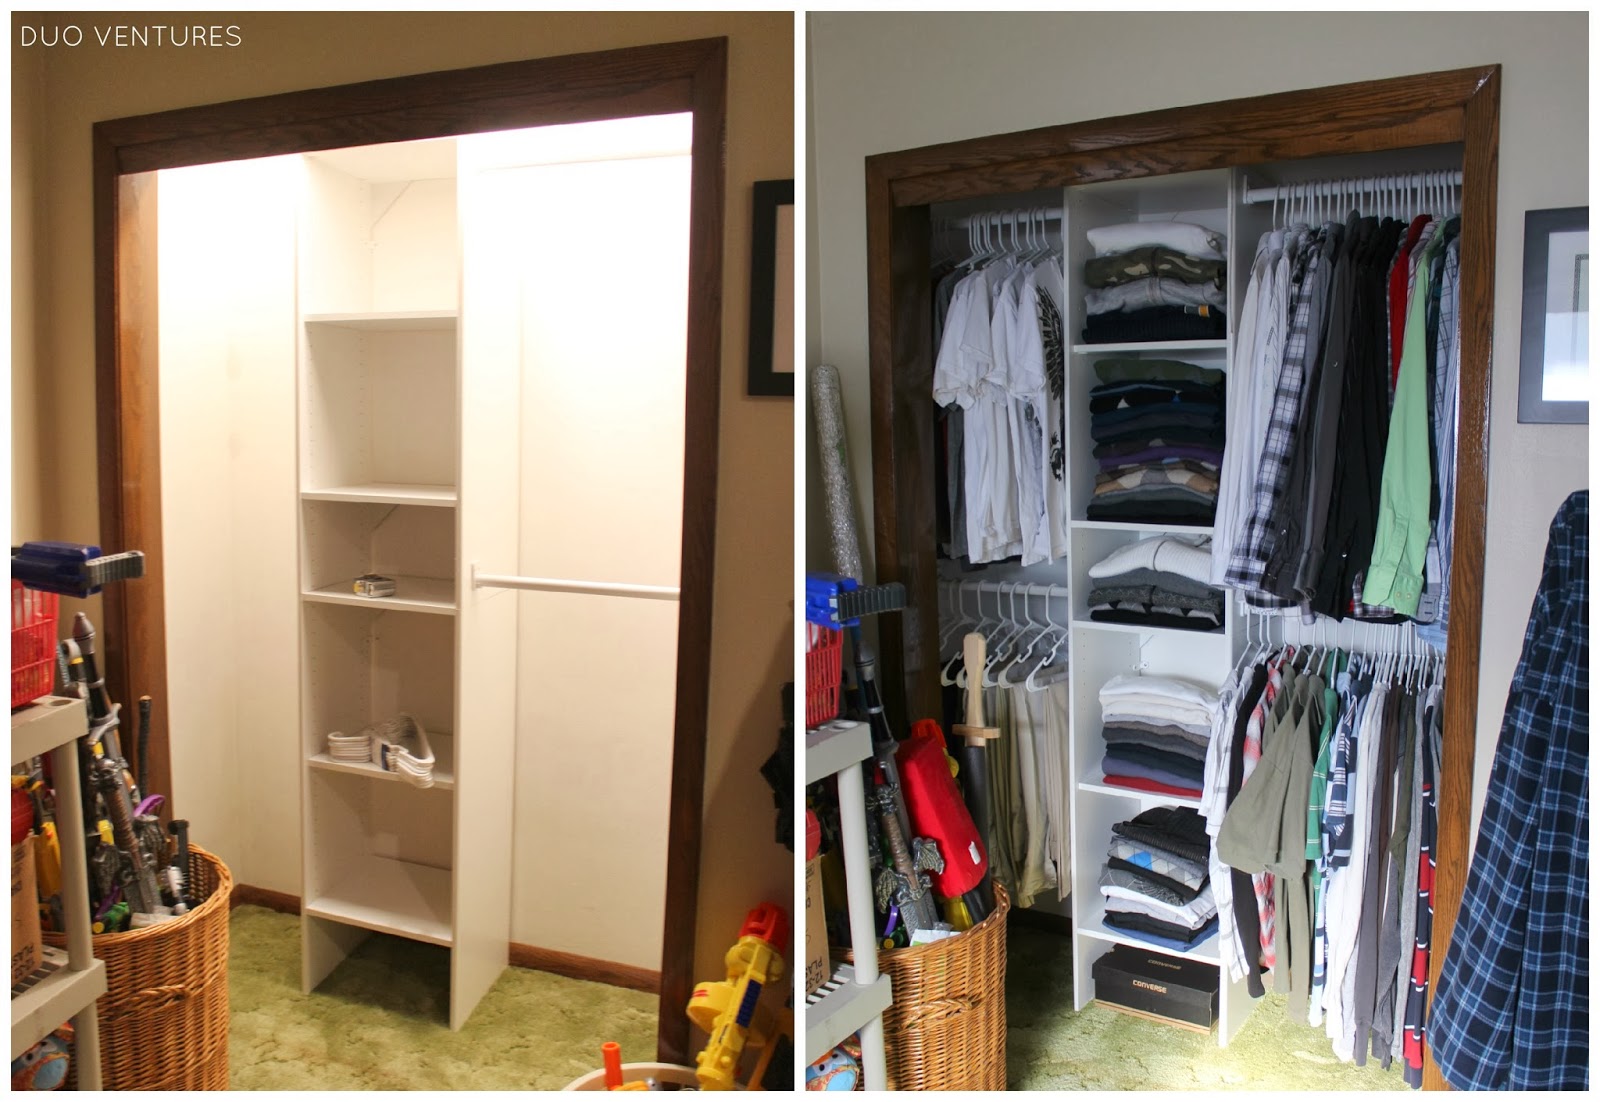
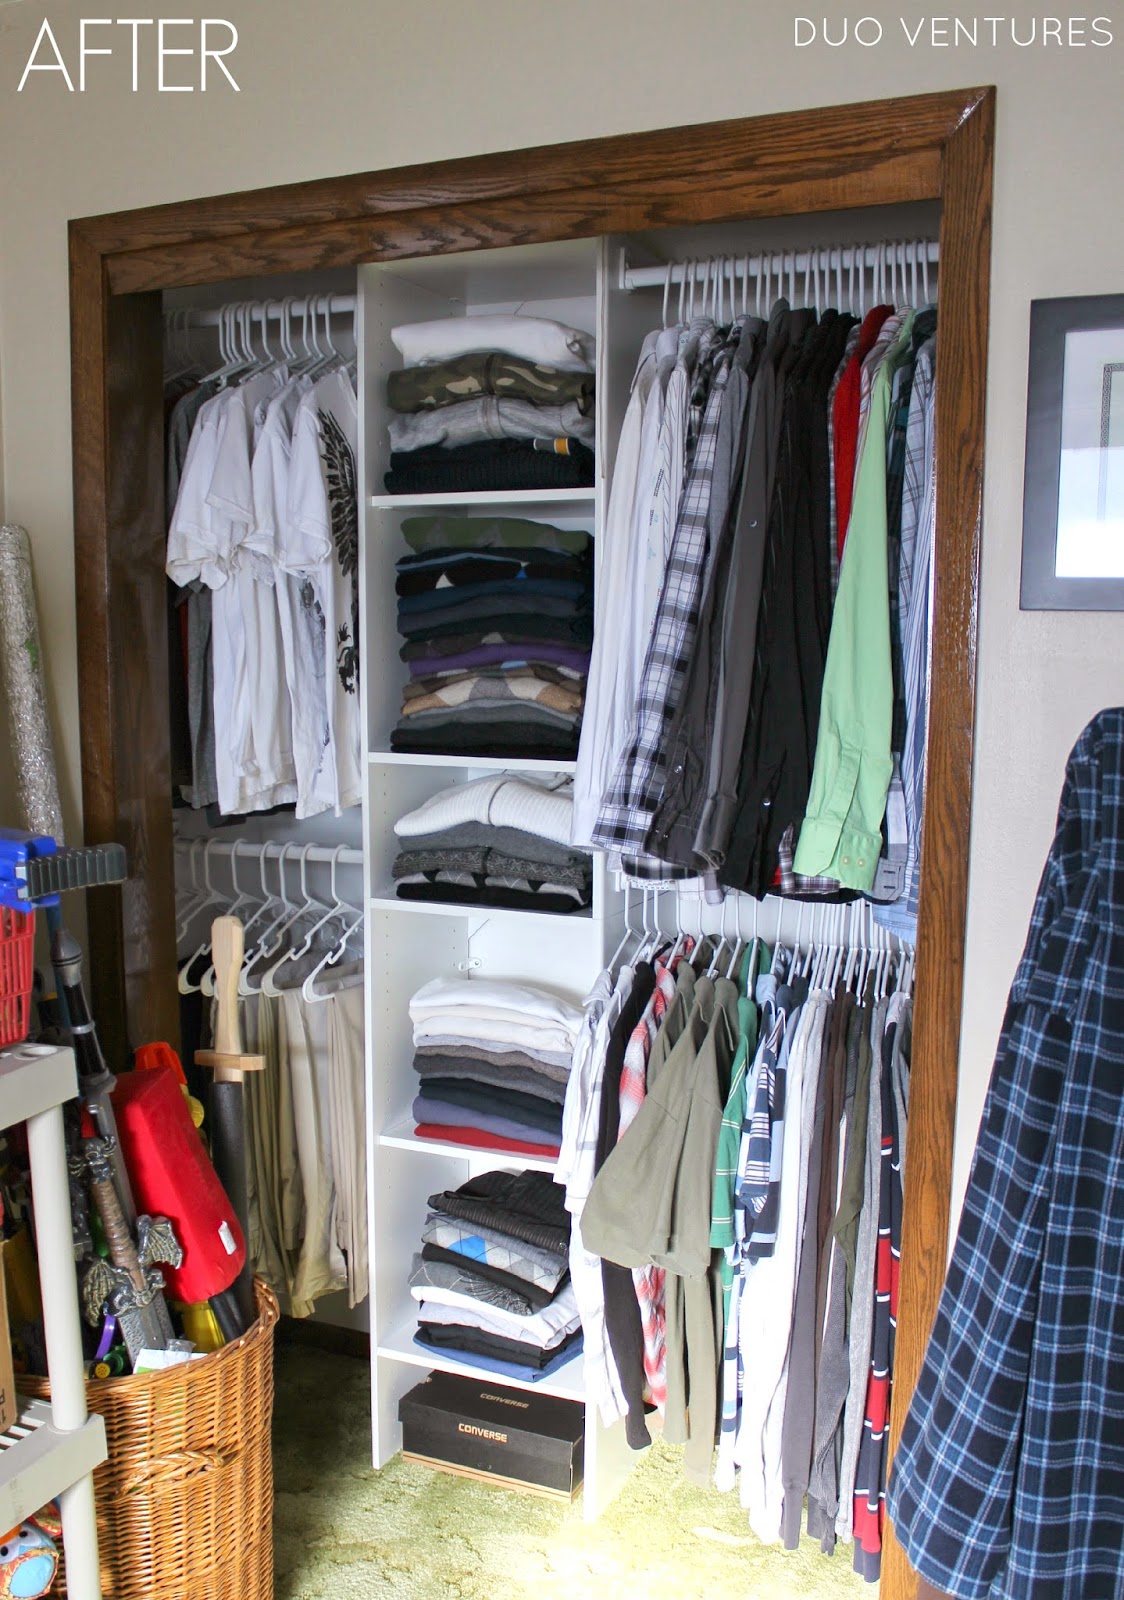

So for under $100, I was able to create a much more functional & usable closet space:
Now his closet is storing items that he actually uses on a daily basis. I wish I could have organized the rest of the room as well...but that's a project for another time.
Mel
:)
Subscribe to:
Comments (Atom)