
Let's move on to the third part of this tutorial series. In this case, we'll look at a concept that comes from Remix and can now also be found in React Router: loaders.
If you're coming from the previous tutorial, you can leave the project as is, but if you want to make sure everything is clean or start from the same point, you can run the following commands:
# Repository link https://github.com/kevinccbsg/react-router-tutorial-devto
git reset --hard
git clean -d -f
git checkout 02-loaders-detail-page
What are loaders?
Loaders are a mechanism that React Router provides to send information to our components. They are functions that we add in our route definitions.
Here's an example:
createBrowserRouter([
  {
    path: "/",
    loader: async () => {
      // return data from here
      return { records: await getSomeRecords() };
    },
    Component: MyRoute,
  },
]);
In loaders, we add everything we consider necessary to load for that page. When working with React Router, we need to start thinking in terms of pages, since all data loading and mutation is organized at that level.
In our contacts page, we're currently using a hardcoded array of data, which isn't realistic. So, we'll replace it with a call to an API we've created using json-server.
We won't go into detail about what json-server is (it's basically a quick way to simulate a REST API with a JSON file), just note that from now on we'll test the app with the command:
npm run serve:dev
This command starts both the API with json-server and the frontend.
In the src/api folder are all the methods that call the API using Axios. Since this series is about React Router, we won't go into detail about that part.
Now that we've covered the workflow, let's start the refactor. Normally in React, to load data in a component, we use something like:
const [contacts, setContacts] = useState<Contact[]>([]);

useEffect(() => {
  fetchContacts()
    .then((data) => setContacts(data))
}, []);
With React Router, this changes, as we'll use a loader defined in AppRoutes.tsx:
import { createBrowserRouter } from "react-router";
import ContactsPage from "./pages/Contacts";
import ContactForm from "./pages/ContactForm";
import { fetchContacts } from "@/api/contacts";

const AppRoutes = createBrowserRouter([
  {
    path: "/",
    // this property
    loader: async () => {
      const contacts = await fetchContacts();
      return { contacts };
    },
    Component: ContactsPage,
    children: [
      {
        path: "contacts/new",
        Component: ContactForm,
      },
    ],
  },
  {
    path: "/about",
    element: <div>About</div>,
  },
  {
    path: "*",
    element: <div>Not Found</div>,
  },
]);

export default AppRoutes;
Although this works, and we could then access the data using a React Router hook, I don't recommend doing it this way. The routes file can grow a lot, and later we'll need to solve a typing issue with TypeScript, for which this approach isn't ideal.
It's better to create a separate file, for example: src/pages/loader.tsx:
import { fetchContacts } from "@/api/contacts";

export const loadContacts = async () => {
  const contacts = await fetchContacts();
  return { contacts };
};
This way, the AppRoutes.tsx file is much cleaner:
import { createBrowserRouter } from "react-router";
import ContactsPage from "./pages/Contacts";
import ContactForm from "./pages/ContactForm";
import { loadContacts } from "./pages/loader";

const AppRoutes = createBrowserRouter([
  {
    path: "/",
    loader: loadContacts,
    Component: ContactsPage,
    children: [
      {
        path: "contacts/new",
        Component: ContactForm,
      },
    ],
  },
  {
    path: "/about",
    element: <div>About</div>,
  },
  {
    path: "*",
    element: <div>Not Found</div>,
  },
]);

export default AppRoutes;
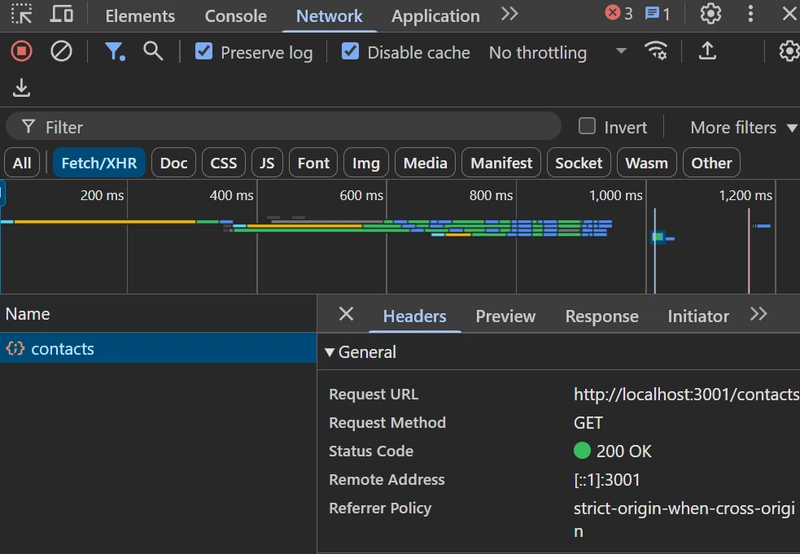
If we navigate to the web app, we'll see in the "Network" tab that the API call is made.
But the data is still hardcoded in the UI. How do we retrieve the info?
We use the useLoaderData hook from React Router:
const { contacts } = useLoaderData();
This hook always returns what the loader defined in the route for the component returns. In this case, an object with contacts.
However, if we use this in a TypeScript project, we'll get a typing error. To fix it, we write it like this:
const { contacts } = useLoaderData<typeof loadContacts>();
So the Contacts component ends up like this:
import { Link, Outlet, useLoaderData } from "react-router";
import { ScrollArea } from "@/components/ui/scroll-area";
import { Button } from "@/components/ui/button";
import { loadContacts } from "./loader";

const ContactsPage = () => {
  const { contacts } = useLoaderData<typeof loadContacts>();
  return (
    <div className="h-screen grid grid-cols-[300px_1fr]">
      {/* Sidebar */}
      <div className="border-r p-4 flex flex-col gap-4">
        <Button className="w-full" variant="secondary" asChild>
          <Link to="/contacts/new" viewTransition>
            New
          </Link>
        </Button>
        <ScrollArea className="flex-1">
        <div className="flex flex-col gap-1 mt-4">
          {contacts.map(contact => (
            <Button
              key={contact.id}
              className="justify-start"
              asChild
            >
              <Link to={`/contacts/${contact.id}`} viewTransition>
                {contact.firstName} {contact.lastName}
              </Link>
            </Button>
          ))}
        </div>
      </ScrollArea>
      </div>
      {/* Detail View */}
      <div className="p-8">
        <Outlet />
      </div>
    </div>
  );
};

export default ContactsPage;
That's why it's more convenient to have a loader file per page, as it improves type management and keeps everything more separated.
With this, we're doing the same as we did with useEffect, but in the recommended way for React Router.
Finally, you may have noticed a warning in the terminal:

This is because we don't have a loading screen yet. We can simulate a delay in the API to see the problem. In src/api/contacts.ts, uncomment the delay function and modify fetchContacts:
export const fetchContacts = async () => {
  const response = await api.get<Contact[]>('/contacts');
  await delay(2000); // Simulate network latency
  return response.data;
};
When we reload, we'll see the page stays blank for a few seconds until the data loads. This is because there's no loading state. React Router allows us to handle this in several ways, but in this post we'll use the HydrateFallback property.
In this project, we already have the ContactsSkeletonPage component, so we add it like this:
import { createBrowserRouter } from "react-router";
import ContactsPage from "./pages/Contacts";
import ContactForm from "./pages/ContactForm";
import { loadContacts } from "./pages/loader";
import ContactsSkeletonPage from "./Layouts/HomeSkeleton";

const AppRoutes = createBrowserRouter([
  {
    path: "/",
    loader: loadContacts,
    HydrateFallback: ContactsSkeletonPage,
    Component: ContactsPage,
    children: [
      {
        path: "contacts/new",
        Component: ContactForm,
      },
    ],
  },
  {
    path: "/about",
    element: <div>About</div>,
  },
  {
    path: "*",
    element: <div>Not Found</div>,
  },
]);

export default AppRoutes;
And with this, we now have a loading screen. The best part is that this can be applied per page, and each one loads independently without blocking the others.
We'll see this in more detail in the next post about loaders.
Without a doubt, this is one of the most important and powerful parts of React Router, and it will be even more so when we combine it with actions.
See you in part 4!

Top comments (0)