How to Take Screenshots in Ubuntu?
Last Updated :
21 Aug, 2024
Taking screenshots is an essential task for many users, whether you're documenting a process, saving important information, or sharing your screen with others. If you're using Ubuntu, there are several ways to take screenshots in Ubuntu efficiently. This article will walk you through different methods to capture screenshots in Ubuntu, from using built-in tools to more advanced commands. Whether you're a beginner or an experienced user, knowing how to take a screenshot in Ubuntu can greatly enhance your productivity.
However, if you are a newcomer to the Linux OS, then you might not be aware of the trick of Ubuntu screenshot shortcut.
How to Take Screenshots in Ubuntu?
In this article, we'll explore the simple steps you need to follow to take screenshots on Ubuntu system. By the end, you'll be equipped with the knowledge to capture and share screenshots efficiently
To Get ubuntu screenshot tool, the following methods can be used. Let us start with some Keyboard Shortcuts.
Method 1: Take Screenshots in Ubuntu Using Keyboard Shortcuts
There are few methods present to capture the screenshots without using any application even the inbuilt functions as well. There are three categories are present and for each of them, selective keys are allocated.
- To take the Full-Screen Capture, only Press the Prt SC Key. The screenshot will saved.
- To take a Screenshot of Any Application, Press the Alt + Prt SC Keys simultaneously while the app is opened.
- To take a screenshot of any Selective Region, Press the Shift + Prt Sc Keys simultaneously and drag on the screen.
To access all the saved images, open the File Application and click on the Pictures option.

Congratulation! You have successfully taken the Ubuntu Screenshot With Printscreen button without using any application.
Step 1: Open App Preferences and type for the Screen. You will get the option Take A Screenshot. Open it.
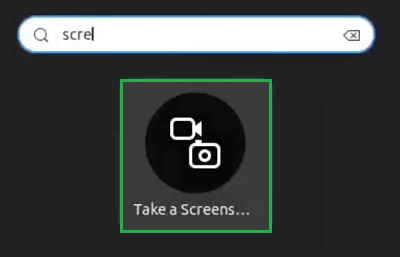
Step 2: You will get a few options to take screenshots. The application can also record the screen. When you are good to go, click on the Capture Button.

Hooray! The ubuntu screenshot selected area is now saved on the Pictures file after successfully taking it using the Screenshot Tool.
Method 3: Take Screenshots in Ubuntu Using Terminal
Note: The Ubuntu Terminal doesn't have to feature to take ubuntu screenshot selected area. However, some third-party applications come with the ability to take screenshots from the Terminal as well. In this case, the ImageMagick App is used. The command to take screenshots is different in different applications.
Open the Linux Terminal & execute the following code. It will take the screenshot without any output and save it to the Picture file location.
import -window root <screenshot name>

So, these are the simple methods you can check out to take Out Ubuntu Screenshots within a second. It is advisable to use the inbuilt applications to Take Screencapture on Ubuntu. However, there are many third-party applications are present that can be used for taking Ubuntu screenshots. You can pick up and install any one of them.
Conclusion
Knowing how to take screenshots in Ubuntu is a valuable skill, whether you need to capture your entire screen, a specific window, or a selected area. With the various tools and commands available, you can choose the method that best suits your needs. By following the steps outlined in this guide, you'll be able to capture screenshots in Ubuntu quickly and efficiently, making it easier to document and share your work.
Similar Reads
How to Take Screenshots in Windows 11 Did you know over 70% of Windows users are worldwide, and if we go more specifically with Windows 11, then according to Wikipidia, over 35% of users in the world are using Windows 11 as there PC operating system? This is a huge number, showing how popular Microsoft's latest OS is. If you're among th
5 min read
How to Take Screenshot on Windows Different ways to take Screenshot on Windows using KeyboardUse Print screen key to take a minimized or full-screen capture screenshotUse the game bar to take a screenshot on WindowsAlt + Prt Sc (print screen button) screen captureWindows + Print Screen screen captureUse the Snipping Tool to take a s
9 min read
How to Take a Screenshot on Apple Watch? Capturing a screenshot on the Apple Watch can be incredibly useful for saving important information or sharing your watch face with others. Whether you're using an Apple Watch Series 8 or any other model, knowing how to take screenshots on the Apple Watch is a handy skill. This article will provide
3 min read
How to take a Screenshot in Kali Linux Kali Linux is a Debian-based distribution with a strong focus on penetration testing, ethical hacking, digital forensics, and more. The project is maintained by Offensive Security. Unlike Debian which focuses on servers and desktop usage, Kali has a strong focus on Cyber security. With lots of prein
5 min read
How to Take Screenshots on Firefox? [ 3 Ways ] While working on Web Browsers, often we come across different important information that should be kept for the future. Now all the items on the Browsers like Firefox are not downloadable. In such cases, Screenshots on Firefox will be the best way to keep that item with you for a lifetime. In most c
4 min read
How to Take Screenshot in Apple Safari Need to capture a webpage, save important information, or share content from Safari? Taking a screenshot is quick and easy, whether you're using a Mac, iPhone, or iPad. This guide covers the simple steps to snap full-page screenshots, grab visible portions, or record scrolling content—perfect for wo
5 min read