Looking to enhance your Android phone's performance or customize its features? One of the best ways to do that is by installing a custom ROM on Android. A custom ROM allows you to replace your device's original firmware with one that provides additional features, better performance, or a different look.
In this guide, we will walk you through how to flash a custom ROM on your Android device, covering everything from backups to the actual installation process. Whether you're new to Android custom ROM installation or have some experience, this guide will ensure you're ready to dive in.
Pre-Requisites
For installing the Custom ROM on the device, users should need to do some prerequisites. These are the essential things that need to be executed beforehand. Before moving for the installation, these things should be done by the users. So, there will not be any big issues. Without these prerequisites, they can't install Custom ROM on Android.
- Custom Recovery: This is a kind of software present on the internet. Users need to download & install this software on their devices themselves. This is the software that is needed when they will start installing the Custom ROM. This is the platform where all the operations are going to be executed. There are several Custom Recovery software available on the internet and Google Play Store. Users can use any of them.
- Note: There are many Custom Recoveries available on the internet. Users can choose anyone from that. There is no need to worry about security. But it is advisable when the users are going to download the Custom Recovery, they should search for it with their Android device name. So, the proper things will appear in front of them. The installation guidelines are different for each device. A smartphone from a specific brand will not be the same as another one. So, in that case, users need to take the help of the internet.
- Custom ROM: As the main goal is to install the Custom ROM on Android phones, it is obvious that users should have a custom ROM with them. There are a lot of ROMs present on the internet. They are stored in the.zip format. Users need to download that file. There is no need to make any changes there. Or they should not open the file. When they go for the installation, that should be needed.
- Note: There are thousands of Custom ROMs present. Users need to search for a particular ROM with their device model name. They need to search for the ROM on the internet with the device name. A ROM that is downloaded & running on one device, might not work for any other device. Also, the configuration might get changed for that case So, it is advisable to only go for the particular ROM.
- Backed Up Data: While installing Custom ROM on Android, all the data stored there will be removed. All the applications, documents, and images will be removed. OS, for that purpose, it is advisable to back up all the stored data from the device. So, after completion of the installation process, users can load back them.
Installation Of A Custom ROM On Android
Installation of a Custom ROM on Android is a not good practice. Though, there are a lot of users who follow this path to renew their devices. But all the devices are made of some policies. They are implemented in different ways. Modifying the device as per your own wish can lead to harm in the sooner or later future. It is advisable to follow the below-mentioned steps carefully. Making one small mistake can cause damage to the device that might not be recovered.
Using Clockworkmod (CWM)
Step 1: At first, users need to shut down or switched off the device. Then they should press the Power + Volume Up bottom simultaneously. Then the device will start in the boot menu.
Note: For different devices, the way to open the boot menu is different. For one brand, users need to press the Power + Home + Volume Up bottom simultaneously. Then the boot menu will open. It is advisable to check how to open the boot menu on the internet before going for it.
Step 2: Now, as per the Custom Recovery which is used in the device, the look might be changed. But the operations will go similarly. Here, first, users need to browse the Backup & Restore option. Then they need to select the option.
Note: Using the Volume Up & Down button, users need to change the option. And for selecting the options, users need to press the Power button.

Step 3: Now, there will be some more options present on the next screen. There, users need to select the option to back up To SD Card. They need to select the option. After selecting the option, the screen turns black for a while. There is no need to worry about that. It will soon start again to the boot menu.
Note: Backup is very needed. Earlier, users have done the backup of their data. But this is not a similar backup. By any chance, if users find the new custom ROM is not a good one, then they can easily return to the old one. Just in the boot menu, users need to restore the things back.

Step 4: Now, users need to move to the Wipe Data/Factory Reset option. This option needs to be selected.

Step 5: Now, inside that option, users need to select the Yes option to move ahead. It will take typically a few seconds to complete the process.

Step 6: Now again users need to move to the Wipe Cache Partition option. This option needs to be selected.

Step 7: In the next screen, users need to select the Yes option. This option will help to reduce all the cache files stored in the device.
Note: These steps are necessary for a smooth installation of the Custom ROM. Without doing these steps, if users perform the next step, then there will be an error while completing the installation.

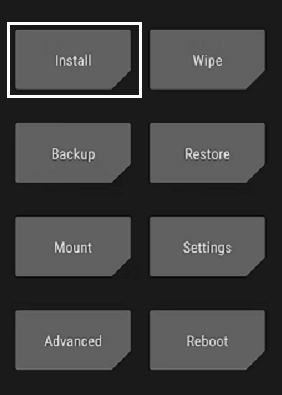
Step 8: Now, users need to select the option Install Zip. Here, we will install the downloaded Custom ROM zip file.

Step 9: There, users need to choose the option to select the zip files from the SD Card.

Step 10: Now, users need to move to a certain location where they have saved their zip file. Moving to that folder, users need to select the zip folder.

Step 11: As soon as they select the zip file, the installation will be started. Users need to wait till the process is completed.

Step 12: Now, after waiting for 20 minutes or more time, the installation will get completed.

Step 13: Now, it will again come back to the boot menu. There, at last, users need to select the option Reboot System Now. This will finalize all the changes. This will configure the Custom ROM.

Step 14: Now, it will ask for permission. Users need to select the Yes option & move forward.

Step 15: It will take a lot of time to finish the thing. When it is going to complete, it will show the message Finishing Boot. This means the process is going to be completed. After that, the device will boot in the new ROM.

Hence, we have successfully installed a Custom ROM on Android using Clockworkmod (CWM).
Using Team Win Recovery Project (TWRP):
This is another way to install Custom ROM on Android. But here, the ROM is different. This is known as the Team Win Recovery Project. This ROM is also used along with the above one. But the number of users is less here. Also, the process is more difficult & sometimes the mobile screen goes completely blank. This might seem that the process is completed. But the process is going on there. For all that reasons, it is advisable to go for the above method. That will be better to install a custom ROM.
Step 1: At first, users need to shut down the device. Then, using the same process, they need to reboot the system in the Boot Menu. As the users will use the TWRP. They will find out the different interfaces there. Users first need to click on the Backup option.

Step 2: Now, there will be many options provided. Users need to click all the checkboxes provided there. This will help to back up the data before going for the installation. This is the same process, users have performed for the above method also. After that, users need to swipe there for backup.

Step 3: It will take some time to perform the backup operation. During this period, the screen of the device might get blank for a long. But the process is not completed there. After the process is completed, the screen will again light up.
Step 4: Now, again, the main screen will come back. There, users need to click on the Wipe option. This will help to remove all the unnecessary data from the device for easy installation.

Step 5: Now, inside the Wipe option, users need to swipe the area to start the operation. This will take a long time to complete. Time consumption depends upon the system configuration.

Step 6: After completion of the Wipe operation, the main screen will again come back. There, users need to click on the Installation option.
Step 7: Now, as usual, users need to click on the .zip file of the Custom ROM. Users just need to click on the zip file. It will start the installation. It will take a long time to complete the installation process. Users need to wait till the process is completed.

Step 8: At last, after successful installation, the main screen will again come up. There, users need to click on the Reboot option to complete the process. It will take a long time to complete the booting. After booting, users will find the new ROM there.

Hence, we have successfully installed a Custom ROM on Android using Team Win Recovery Project (TWRP).
Conclusion
By following the steps to install a custom ROM on Android, you can unlock new features and get more control over your device. Always make sure to backup Android before installing a custom ROM, as flashing your device could result in data loss. With the right preparation and understanding of custom ROM installation steps, you can enjoy a whole new Android experience. Be cautious during the Android ROM flashing process, and consult guides to find the right ROM for your device to avoid compatibility issues.
Similar Reads
How to Install Termux on Android? Termux is a Free and Open-source Terminal Emulator which allows you to work under a Linux environment on Android or IOS Phones. It contains a built-in package manager that enables you to download and set up numerous testing and development apps across your phones. Using its package manager, it autom
2 min read
How to Install PHP on Android Device? Php is an open-source programming language that is typically used for Web development but may also be used for other purposes (backend developing). To put it succinctly, PHP is a server-side scripting language that may be installed on any device (e.g. bits of code to add forms to your site).It opera
2 min read
How to Install Flutter App on Android? The hottest and trending cross-platform framework, Flutter is Google's SDK for crafting beautiful, fast user experiences for mobile, web, and desktop with just a single codebase, meaning you write for one, build for three. Flutter works with existing code, is used by developers and organizations aro
4 min read
How To Install android-tools-fastboot on Ubuntu ADB and Fastboot are utilities that allow you to gain access to the Android system while your phone is linked to a desktop computer via USB. The computer and cable are required—there is no app version, and while ADB can be used wirelessly, it is significantly more difficult to set up. When Android i
3 min read
How to Install APK on Android: 3 Easy Methods Installing APK (Android Package Kit) files on your Android device is the best way to get apps that aren't available on the Google Play Store or are in beta. However, before you proceed, keep in mind that APK installation requires allowing installation from unknown sources. Follow these simple steps
7 min read
How to Install an APK on the Emulator in Android Studio? In this article, we will know, how we can install APK in our Android Studio Emulator. There are several methods to do that but most of them are quite unreliable and confusing but in this article, we are going to do that with some very easy methods with some very easy steps. Method 1 Step 1: Opening
2 min read