Arduino reference
3 likes1,403 views

The document provides an overview of the Arduino programming language and hardware. It describes the basic structure of an Arduino program with setup() and loop() functions. It lists the main data types and functions for digital and analog input/output, time, math, random numbers, serial communication and more. It also provides information on libraries, the Arduino board pins and components, and compares Arduino to the Processing language.


![Arduino
search
Buy | Download | Getting Started | Learning | Reference | Hardware | FAQ
Reference
Blog » | Forum » | Playground »
Language ( extended) | Libraries | Comparison | Board
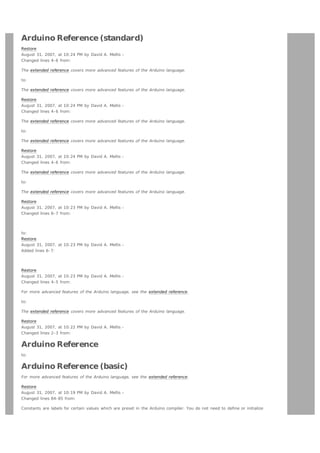
Arduino/ Processing Language Comparison
The Arduino language (based on Wiring) is implemented in C/ C++, and therefore has some differences from the Processing
language, which is based on J ava.
Arrays
Arduino
Processing
int bar[8];
bar[0] = 1;
int[] bar = new int[8];
bar[0] = 1;
int foo[] = { 0, 1, 2 };
int foo[] = { 0, 1, 2 };
or
int[] foo = { 0, 1, 2 };
Loops
Arduino
Processing
int i;
for (i = 0; i < 5; i++) { ... }
for (int i = 0; i < 5; i++) { ... }
Printing
Arduino
Processing
Serial.println("hello world");
println("hello world");
int i = 5;
Serial.println(i);
int i = 5;
println(i);
int i = 5;
Serial.print("i = ");
Serial.print(i);
int i = 5;
println("i = " + i);
Serial.println();
Reference Home
Corrections, suggestions, and new documentation should be posted to the Forum.
The text of the Arduino reference is licensed under a Creative Commons Attribution- ShareAlike 3.0 License. Code samples in
the reference are released into the public domain.
Edit Page | Page History | Printable View | All Recent Site Changes](https://image.slidesharecdn.com/arduinoreference-131030123929-phpapp02/85/Arduino-reference-8-320.jpg)


![Arduino
search
Buy | Download | Getting Started | Learning | Reference | Hardware | FAQ
Reference
Blog » | Forum » | Playground »
Language ( extended) | Libraries | Comparison | Board
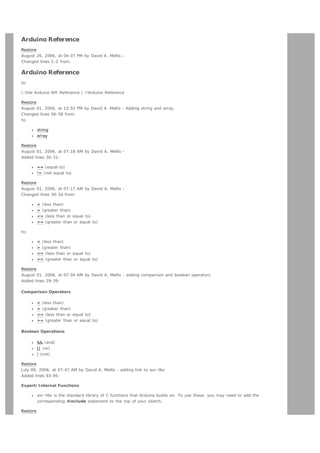
if
if tests whether a certain condition has been reached, such as an input being above a certain number. The format for an if
test is:
if (someVariable > 50)
{
// do something here
}
The program tests to see if someVariable is greater than 50. I f it is, the program takes a particular action. Put another way,
if the statement in parentheses is true, the statements inside the brackets are run. I f not, the program skips over the code.
The brackets may be omitted after an if statement. I f this is done, the next line (defined by the semicolon) becomes the only
conditional statement.
if (x > 120)
digitalWrite(LEDpin, HIGH);
if (x > 120)
digitalWrite(LEDpin, HIGH);
if (x > 120) {digitalWrite(LEDpin, HIGH);}
// all are correct
The statements being evaluated inside the parentheses require the use of one or more operators:
Operators:
x
x
x
x
x
==
!=
<
>
<=
y
y
y
y
y
(x
(x
(x
(x
(x
is
is
is
is
is
equal to y)
not equal to y)
less than y)
greater than y)
less than or equal to y)
x > = y (x is greater than or equal to y)
Warning:
Beware of accidentally using the single equal sign (e.g. if (x = 10) ). The single equal sign is the assignment operator,
and sets x to 10. I nstead use the double equal sign (e.g. if (x == 10) ), which is the comparison operator, and tests
whether x is equal to 10 or not. The latter statement is only true if x equals 10, but the former statement will always be
true.
This is because C evaluates the statement if (x=10) as follows: 10 is assigned to x, so x now contains 10. Then the 'if'
conditional evaluates 10, which always evaluates to TRUE, since any non- zero number evaluates to TRUE. Consequently, if
(x = 10) will always evaluate to TRUE, which is not the desired result when using an 'if' statement. Additionally, the variable
x will be set to 10, which is also not a desired action.
if can also be part of a branching control structure using the if...else] construction.
Reference Home
Corrections, suggestions, and new documentation should be posted to the Forum.
The text of the Arduino reference is licensed under a Creative Commons Attribution- ShareAlike 3.0 License. Code samples in
the reference are released into the public domain.](https://image.slidesharecdn.com/arduinoreference-131030123929-phpapp02/85/Arduino-reference-21-320.jpg)


![Arduino
search
Buy | Download | Getting Started | Learning | Reference | Hardware | FAQ
Reference
Blog » | Forum » | Playground »
Language ( extended) | Libraries | Comparison | Board
% (modulo)
Description
Returns the remainder from an integer division
Syntax
result = value1 % value2
Parameters
value1: a byte, char, int, or long
value2: a byte, char, int, or long
Returns
The remainder from an integer division.
Examples
x = 7 % 5;
// x now contains 2
x = 9 % 5;
x = 5 % 5;
// x now contains 4
// x now contains 0
x = 4 % 5;
// x now contains 4
The modulo operator is useful for tasks such as making an event occur at regular periods or making a memory array roll over
Example Code
// check a sensor every 10 times through a loop
void loop(){
i++;
if ((i % 10) == 0){
x = analogRead(sensPin);
}
// read sensor every ten times through loop
/ ...
}
// setup a buffer that averages the last five samples of a sensor
int senVal[5];
int i, j;
long average;
// create an array for sensor data
// counter variables
// variable to store average
...
void loop(){
// input sensor data into oldest memory slot
sensVal[(i++) % 5] = analogRead(sensPin);
average = 0;
for (j=0; j<5; j++){
average += sensVal[j];
}
// add up the samples](https://image.slidesharecdn.com/arduinoreference-131030123929-phpapp02/85/Arduino-reference-38-320.jpg)


![Arduino
Buy | Download | Getting Started | Learning | Reference | Hardware | FAQ
Reference
search
Blog » | Forum » | Playground »
Language ( extended) | Libraries | Comparison | Board
string
Description
Strings are represented as arrays of type char and are null- terminated.
Examples
All of the following are valid declarations for strings.
char Str1[15];
char Str2[8] = {'a', 'r', 'd', 'u', 'i', 'n', 'o'};
char
char
char
char
Str3[8] = {'a', 'r', 'd', 'u', 'i', 'n', 'o', '0'};
Str4[ ] = "arduino";
Str5[8] = "arduino";
Str6[15] = "arduino";
Possibilities for declaring strings
Declare an array of chars without initializing it as in Str1
Declare an array of chars (with one extra char) and the compiler will add the required null character, as in Str2
Explicitly add the null character, Str3
I nitialize with a string constant in quotation marks; the compiler will size the array to fit the string constant and a
terminating null character, Str4
I nitialize the array with an explicit size and string constant, Str5
I nitialize the array, leaving extra space for a larger string, Str6
Null termination
Generally, strings are terminated with a null character (ASCI I code 0). This allows functions (like Serial.print()) to tell where
the end of a string is. Otherwise, they would continue reading subsequent bytes of memory that aren't actually part of the
string.
This means that your string needs to have space for one more character than the text you want it to contain. That is why
Str2 and Str5 need to be eight characters, even though "arduino" is only seven - the last position is automatically filled with
a null character. Str4 will be automatically sized to eight characters, one for the extra null. I n Str3, we've explicitly included
the null character (written ' 0') ourselves.
Note that it's possible to have a string without a final null character (e.g. if you had specified the length of Str2 as seven
instead of eight). This will break most functions that use strings, so you shouldn't do it intentionally. I f you notice something
behaving strangely (operating on characters not in the string), however, this could be the problem.
Single quotes or double quotes?
Strings are always defined inside double quotes ("Abc") and characters are always defined inside single quotes('A').
Wrapping long strings
You can wrap long strings like this:
char myString[] = "This is the first line"
" this is the second line"
" etcetera";
Arrays of strings](https://image.slidesharecdn.com/arduinoreference-131030123929-phpapp02/85/Arduino-reference-89-320.jpg)
![I t is often convenient, when working with large amounts of text, such as a project with an LCD display, to setup an array of
strings. Because strings themselves are arrays, this is in actually an example of a two- dimensional array.
I n the code below, the asterisk after the datatype char "char* " indicates that this is an array of "pointers". All array names
are actually pointers, so this is required to make an array of arrays. Pointers are one of the more esoteric parts of C for
beginners to understand, but it isn't necessary to understand pointers in detail to use them effectively here.
Example
char* myStrings[]={"This is string 1", "This is string 2", "This is string 3",
"This is string 4", "This is string 5","This is string 6"};
void setup(){
Serial.begin(9600);
}
void loop(){
for (int i = 0; i < 6; i++){
Serial.println(myStrings[i]);
delay(500);
}
}
See Also
array
PROGMEM
Reference Home
Corrections, suggestions, and new documentation should be posted to the Forum.
The text of the Arduino reference is licensed under a Creative Commons Attribution- ShareAlike 3.0 License. Code samples in
the reference are released into the public domain.
Edit Page | Page History | Printable View | All Recent Site Changes](https://image.slidesharecdn.com/arduinoreference-131030123929-phpapp02/85/Arduino-reference-90-320.jpg)
![Arduino
Buy | Download | Getting Started | Learning | Reference | Hardware | FAQ
Reference
search
Blog » | Forum » | Playground »
Language ( extended) | Libraries | Comparison | Board
Arrays
An array is a collection of variables that are accessed with an index number. Arrays in the C programming language, on
which Arduino is based, can be complicated, but using simple arrays is relatively straightforward.
Creating (Declaring) an Array
All of the methods below are valid ways to create (declare) an array.
int myInts[6];
int myPins[] = {2, 4, 8, 3, 6};
int mySensVals[6] = {2, 4, -8, 3, 2};
char message[6] = "hello";
You can declare an array without initializing it as in myI nts.
I n myPins we declare an array without explicitly choosing a size. The compiler counts the elements and creates an array of
the appropriate size.
Finally you can both initialize and size your array, as in mySensVals. Note that when declaring an array of type char, one
more element than your initialization is required, to hold the required null character.
Accessing an Array
Arrays are zero indexed, that is, referring to the array initialization above, the first element of the array is at index 0, hence
mySensVals[0] == 2, mySensVals[1] == 4, and so forth.
I t also means that in an array with ten elements, index nine is the last element. Hence:
int myArray[10]={9,3,2,4,3,2,7,8,9,11};
// myArray[9]
// myArray[10]
contains 11
is invalid and contains random information (other memory address)
For this reason you should be careful in accessing arrays. Accessing past the end of an array (using an index number greater
than your declared array size - 1) is reading from memory that is in use for other purposes. Reading from these locations is
probably not going to do much except yield invalid data. Writing to random memory locations is definitely a bad idea and can
often lead to unhappy results such as crashes or program malfunction. This can also be a difficult bug to track down.
Unlike in some versions of BASI C, the C compiler does no checking to see if array access is within legal bounds of the array
size that you have declared.
To assign a value to an array:
mySensVals[0] = 10;
To retrieve a value from an array:
x = mySensVals[4];
Arrays and FOR Loops
Arrays are often manipulated inside for loops, where the loop counter is used as the index for each array element. For
example, to print the elements of an array over the serial port, you could do something like this:](https://image.slidesharecdn.com/arduinoreference-131030123929-phpapp02/85/Arduino-reference-91-320.jpg)
![int i;
f o r ( i = 0; i < 5; i = i + 1) {
Serial.println(myPins[i]);
}
Example
For a complete program that demonstrates the use of arrays, see the Knight Rider example from the Tutorials.
Reference Home
Corrections, suggestions, and new documentation should be posted to the Forum.
The text of the Arduino reference is licensed under a Creative Commons Attribution- ShareAlike 3.0 License. Code samples in
the reference are released into the public domain.
Edit Page | Page History | Printable View | All Recent Site Changes](https://image.slidesharecdn.com/arduinoreference-131030123929-phpapp02/85/Arduino-reference-92-320.jpg)
![Arduino
search
Buy | Download | Getting Started | Learning | Reference | Hardware | FAQ
Reference
Blog » | Forum » | Playground »
Language ( extended) | Libraries | Comparison | Board
ASCII chart
The ASCI I (American Standard Code for I nformation I nterchange) encoding dates to the 1960's. I t is the standard way that
text is encoded numerically.
Note that the first 32 characters (0- 31) are non- printing characters, often called control characters. The more useful
characters have been labeled.
DEC
Character
Value
0
1
2
3
4
5
6
7
8
9
10
11
DEC
Character
Value
Character
Value
DEC
Character
Value
32
33
34
35
36
37
38
39
40
41
42
43
space
!
"
#
$
%
&
'
(
)
*
+
64
65
66
67
68
69
70
71
72
73
74
75
@
A
B
C
D
E
F
G
H
I
J
K
96
97
98
99
100
101
102
103
104
105
106
107
`
a
b
c
d
e
f
g
h
i
j
k
44
45
,
-
76
77
L
M
108
109
l
m
return
14
15
16
17
46
47
48
49
50
.
/
0
1
2
78
79
80
81
82
N
O
P
Q
R
110
111
112
113
114
n
o
p
q
r
18
19
20
21
51
52
53
54
3
4
5
6
83
84
85
86
S
T
U
V
115
116
117
118
s
t
u
v
22
23
24
25
55
56
57
58
7
8
9
:
87
88
89
90
W
X
Y
Z
119
120
121
122
w
x
y
z
26
27
28
29
59
60
61
62
;
<
=
>
91
92
93
94
[
]
^
123
124
125
126
{
|
}
~
30
31
63
?
95
_
127
12
13
null
DEC
tab
line feed
carriage
Reference Home
Corrections, suggestions, and new documentation should be posted to the Forum.](https://image.slidesharecdn.com/arduinoreference-131030123929-phpapp02/85/Arduino-reference-93-320.jpg)


![Arduino
search
Buy | Download | Getting Started | Learning | Reference | Hardware | FAQ
Reference
Blog » | Forum » | Playground »
Language ( extended) | Libraries | Comparison | Board
#include
#include is used to include outside libraries in your sketch. This gives the programmer access to a large group of standard C
libraries (groups of pre- made functions), and also libraries written especially for Arduino.
The main reference page for AVR C libraries (AVR is a reference to the Atmel chips on which the Arduino is based) is here.
Note that #include, similar to #define, has no semicolon terminator, and the compiler will yield cryptic error messages if
you add one.
Example
This example includes a library that is used to put data into the program space flash instead of ram. This saves the ram
space for dynamic memory needs and makes large lookup tables more practical.
#include <avr/pgmspace.h>
prog_uint16_t myConstants[] PROGMEM = {0, 21140, 702
0,0,0,0,0,0,0,0,29810,8968,29762,29762,4500};
, 9128,
0, 25764, 8456,
Reference Home
Corrections, suggestions, and new documentation should be posted to the Forum.
The text of the Arduino reference is licensed under a Creative Commons Attribution- ShareAlike 3.0 License. Code samples in
the reference are released into the public domain.
Edit Page | Page History | Printable View | All Recent Site Changes](https://image.slidesharecdn.com/arduinoreference-131030123929-phpapp02/85/Arduino-reference-136-320.jpg)


![Arduino
search
Buy | Download | Getting Started | Learning | Reference | Hardware | FAQ
Reference
Blog » | Forum » | Playground »
Language ( extended) | Libraries | Comparison | Board
PROGMEM
Store data in flash (program) memory instead of SRAM. There's a description of the various types of memory available on an
Arduino board.
The PROGMEM keyword is a variable modifier, it should be used only with the datatypes defined in pgmspace.h. I t tells the
compiler "put this information into flash memory", instead of into SRAM, where it would normally go.
PROGMEM is part of the pgmspace.h library. So you first need to include the library at the top your sketch, like this:
#include <avr/pgmspace.h>
Syntax
dataType variableName[] PROGMEM = {dataInt0, dataInt1, dataInt3...};
program memory dataType - any program memory variable type (see below)
variableName - the name for your array of data
Note that because PROGMEM is a variable modifier, there is no hard and fast rule about where it should go, so the Arduino
compiler accepts all of the definitions below, which are also synonymous.
dataType variableName[] PROGMEM = {};
dataType PROGMEM variableName[] = {};
PROGMEM dataType variableName[] = {};
Common programming styles favor one of the first two however.
While PROGMEM could be used on a single variable, it is really only worth the fuss if you have a larger block of data that
needs to be stored, which is usually easiest in an array, (or another C data structure beyond our present discussion).
Using PROGMEM is also a two- step procedure. After getting the data into Flash memory, it requires special methods
(functions), also defined in the pgmspace.h library, to read the data from program memory back into SRAM, so we can do
something useful with it.
As mentioned above, it is important to use the datatypes outlined in pgmspace.h. Some cryptic bugs are generated by using
ordinary datatypes for program memory calls. Below is a list of variable types to use. Floating point numbers in program
memory do not appear to be supported.
prog_char
prog_uchar
- a signed char (1 byte) -127 to 128
- an unsigned char (1 byte) 0 to 255
prog_int16_t
prog_uint16_t
prog_int32_t
prog_uint32_t
-
a signed int (2 bytes) -32,767 to 32,768
an unsigned int (2 bytes) 0 to 65,535
a signed long (4 bytes) -2,147,483,648 to * 2,147,483,647.
an unsigned long (4 bytes) 0 to 4,294,967,295
Example
The following code fragments illustrate how to read and write unsigned chars (bytes) and ints (2 bytes) to PROGMEM.
#include <avr/pgmspace.h>
// save some unsigned ints
PROGMEM
prog_uint16_t charSet[]
= { 65000, 32796, 16843, 10, 11234};](https://image.slidesharecdn.com/arduinoreference-131030123929-phpapp02/85/Arduino-reference-160-320.jpg)
![// save some chars
prog_uchar signMessage[] PROGMEM
= {"I AM PREDATOR,
UNSEEN COMBATANT. CREATED BY THE UNITED STATES
DEPART"};
unsigned int displayInt;
int k;
// counter variable
char myChar;
// read back a 2-byte int
displayInt = pgm_read_word_near(charSet + k)
// read back a char
myChar = pgm_read_byte_near(signMessage + k);
Arrays of strings
I t is often convenient when working with large amounts of text, such as a project with an LCD display, to setup an array of
strings. Because strings themselves are arrays, this is in actually an example of a two- dimensional array.
These tend to be large structures so putting them into program memory is often desirable. The code below illustrates the
idea.
/*
PROGMEM string demo
How to store a table of strings in program memory (flash),
and retrieve them.
Information summarized from:
http://www.nongnu.org/avr-libc/user-manual/pgmspace.html
Setting up a table (array) of strings in program memory is slightly complicated, but
here is a good template to follow.
Setting up the strings is a two-step process. First define the strings.
*/
#include <avr/pgmspace.h>
prog_char string_0[] PROGMEM = "String 0";
prog_char string_1[] PROGMEM = "String 1";
prog_char
prog_char
prog_char
prog_char
string_2[]
string_3[]
string_4[]
string_5[]
PROGMEM
PROGMEM
PROGMEM
PROGMEM
=
=
=
=
"String
"String
"String
"String
// "String 0" etc are strings to store - change to suit.
2";
3";
4";
5";
// Then set up a table to refer to your strings.
PGM_P PROGMEM string_table[] =
{
string_0,
// change "string_table" name to suit
string_1,
string_2,
string_3,
string_4,
string_5 };
char buffer[30];
// make sure this is large enough for the largest string it must hold
void setup()
{
Serial.begin(9600);
}](https://image.slidesharecdn.com/arduinoreference-131030123929-phpapp02/85/Arduino-reference-161-320.jpg)
![void loop()
{
/* Using the string table in program memory requires the use of special functions to retrieve the data.
The strcpy_P function copies a string from program space to a string in RAM ("buffer").
Make sure your receiving string in RAM
is large enough to hold whatever
you are retrieving from program space. */
for (int i = 0; i < 6; i++)
{
strcpy_P(buffer, (char*)pgm_read_word(&(string_table[i]))); // Necessary casts and dereferencing, just
copy.
Serial.println( buffer );
delay( 500 );
}
}
See also
Types of memory available on an Arduino board
array
string
Reference Home
Corrections, suggestions, and new documentation should be posted to the Forum.
The text of the Arduino reference is licensed under a Creative Commons Attribution- ShareAlike 3.0 License. Code samples in
the reference are released into the public domain.
Edit Page | Page History | Printable View | All Recent Site Changes](https://image.slidesharecdn.com/arduinoreference-131030123929-phpapp02/85/Arduino-reference-162-320.jpg)


![Arduino
Buy | Download | Getting Started | Learning | Reference | Hardware | FAQ
Reference
search
Blog » | Forum » | Playground »
Language ( extended) | Libraries | Comparison | Board
sizeof
Description
The sizeof operator returns the number of bytes in a variable type, or the number of bytes occupied by an array.
Syntax
sizeof(variable)
Parameters
variable: any variable type or array (e.g. int, float, byte)
Example code
The sizeof operator is useful for dealing with arrays (such as strings) where it is convenient to be able to change the size of
the array without breaking other parts of the program.
This program prints out a text string one character at a time. Try changing the text phrase.
char myStr[] = "this is a test";
int i;
void setup(){
Serial.begin(9600);
}
void loop() {
for (i = 0; i < sizeof(myStr) - 1; i++){
Serial.print(i, DEC);
Serial.print(" = ");
Serial.println(myStr[i], BYTE);
}
}
Note that sizeof returns the total number of bytes. So for larger variable types such as ints, the for loop would look
something like this.
for (i = 0; i < (sizeof(myInts)/sizeof(int)) - 1; i++) {
// do something with myInts[i]
}
Reference Home
Corrections, suggestions, and new documentation should be posted to the Forum.
The text of the Arduino reference is licensed under a Creative Commons Attribution- ShareAlike 3.0 License. Code samples in
the reference are released into the public domain.
Edit Page | Page History | Printable View | All Recent Site Changes](https://image.slidesharecdn.com/arduinoreference-131030123929-phpapp02/85/Arduino-reference-166-320.jpg)

![Arduino
search
Buy | Download | Getting Started | Learning | Reference | Hardware | FAQ
Reference
Blog » | Forum » | Playground »
Language ( extended) | Libraries | Comparison | Board
Keywords
Keywords are constants, variables and function names that are defined as part of the Arduino language. Avoid using keywords
for variable names.
# Constants
HIGH
LOW
INPUT
OUTPUT
SERIAL
DISPLAY
PI
HALF_PI
TWO_PI
LSBFIRST
MSBFIRST
CHANGE
FALLING
RISING
false
true
null
# Port Variables & Constants
DDRB
PINB
PORTB
PB0
PB1
PB2
PB3
PB4
PB5
PB6
PB7
DDRC
PINC
PORTC
PC0
PC1
PC2
PC3
PC4
PC5
PC6
PC7
DDRD
private
protected
public
loop
max
return
short
millis
min
signed
static
%
switch
throw
/*
*
try
unsigned
new
null
void
()
PI
# Other
return
>>
abs
acos
;
Serial
+=
+
Setup
sin
[]
asin
=
atan
atan2
&
|
boolean
sq
sqrt
-=
switch
tan
this
true
TWO_PI
byte
case
ceil
char
void
while
Serial
begin
char
class
,
//
read
print
write
println
?:
constrain
cos
{}
available
digitalWrite
digitalRead
pinMode
-default
delay
delayMicroseconds
analogRead
analogWrite
attachInterrupts
detachInterrupts
/
/**
.
else
beginSerial
serialWrite
serialRead
serialAvailable](https://image.slidesharecdn.com/arduinoreference-131030123929-phpapp02/85/Arduino-reference-168-320.jpg)


![Arduino
Buy | Download | Getting Started | Learning | Reference | Hardware | FAQ
search
Blog » | Forum » | Playground »
Reference.Libraries History
Hide minor edits - Show changes to markup
J uly 09, 2008, at 04: 10 PM by David A. Mellis Changed line 40 from:
[[http: / / code.google.com/ p/ sserial2mobile/ | SSerial2Mobile] - send text messages or emails using a cell phone (via
AT commands over software serial)
to:
SSerial2Mobile - send text messages or emails using a cell phone (via AT commands over software serial)
Restore
J uly 09, 2008, at 04: 10 PM by David A. Mellis - adding sserial2mobile
Added line 40:
[[http: / / code.google.com/ p/ sserial2mobile/ | SSerial2Mobile] - send text messages or emails using a cell phone (via
AT commands over software serial)
Restore
J uly 03, 2008, at 11: 10 PM by David A. Mellis Added line 25:
DateTime - a library for keeping track of the current date and time in software.
Restore
J uly 02, 2008, at 10: 58 AM by David A. Mellis - pointing Wire link to local documentation
Added line 11:
EEPROM - reading and writing to "permanent" storage
Changed lines 14- 15 from:
EEPROM - reading and writing to "permanent" storage
to:
Wire - Two Wire I nterface ( TWI / I 2C) for sending and receiving data over a net of devices or sensors.
Changed lines 20- 21 from:
Wire - Two Wire I nterface ( TWI / I 2C) for sending and receiving data over a net of devices or sensors. On the Arduino,
SDA is on analog input pin 4, and SCL on analog input pin 5.
to:
Restore
May 16, 2008, at 10: 49 PM by David A. Mellis Added line 35:
PS2Keyboard - read characters from a PS2 keyboard.
Restore
May 10, 2008, at 12: 46 PM by David A. Mellis Added line 33:
MsTimer2 - uses the timer 2 interrupt to trigger an action every N milliseconds.
Restore
May 10, 2008, at 12: 40 PM by David A. Mellis - adding link to the glcd library.](https://image.slidesharecdn.com/arduinoreference-131030123929-phpapp02/85/Arduino-reference-190-320.jpg)

![To install, unzip the library to a sub- directory of the hardware/ libraries sub- directory of the Arduino application directory.
Then launch the Arduino environment; you should see the library in the I mport Library menu.
For a guide to writing your own libraries, see this tutorial .
Restore
November 02, 2007, at 02: 16 PM by David A. Mellis Changed line 35 from:
To install, unzip the library to a sub- directory of the hardware/ libraries of the Arduino application directory. Then launch
the Arduino environment; you should see the library in the I mport Library menu.
to:
To install, unzip the library to a sub- directory of the hardware/ libraries sub- directory of the Arduino application directory.
Then launch the Arduino environment; you should see the library in the I mport Library menu.
Restore
November 02, 2007, at 02: 16 PM by David A. Mellis - cleaning up the instructions
Changed lines 3- 6 from:
To use an existing library in a sketch simply go to the Sketch menu, choose "I mport Library", and pick from the libraries
available. This will insert an #include statement at the top of the sketch for each header (.h) file in the library's folder and
make the library's functions and constants available to your sketch.
Because libraries are uploaded to the board with your sketch, they increase the amount of space used by the ATmega8 on
the board. I f a sketch no longer needs a library, simply delete its #include statements from the top of your code.
to:
To use an existing library in a sketch, go to the Sketch menu, choose "I mport Library", and pick from the libraries available.
This will insert one or more #include statements at the top of the sketch and allow it to use the library.
Because libraries are uploaded to the board with your sketch, they increase the amount of space it takes up. I f a sketch no
longer needs a library, simply delete its #include statements from the top of your code.
Changed lines 33- 35 from:
LedControl - an alternative to the Matrix library for driving multiple LEDs with Maxim chips.
to:
LedControl - an alternative to the Matrix library for driving multiple LEDs with Maxim chips.
To install, unzip the library to a sub- directory of the hardware/ libraries of the Arduino application directory. Then launch
the Arduino environment; you should see the library in the I mport Library menu.
Restore
J une 20, 2007, at 05: 11 PM by David A. Mellis Changed line 33 from:
[[http: / / www.wayoda.org/ arduino/ ledcontrol/ index.html | LedControl] - an alternative to the Matrix library for driving
multiple LEDs with Maxim chips.
to:
LedControl - an alternative to the Matrix library for driving multiple LEDs with Maxim chips.
Restore
J une 20, 2007, at 05: 11 PM by David A. Mellis Changed lines 32- 33 from:
X10 - Sending X10 signals over AC power lines
to:
X10 - Sending X10 signals over AC power lines
[[http: / / www.wayoda.org/ arduino/ ledcontrol/ index.html | LedControl] - an alternative to the Matrix library for driving
multiple LEDs with Maxim chips.
Restore
J une 20, 2007, at 10: 30 AM by Tom I goe Changed line 32 from:](https://image.slidesharecdn.com/arduinoreference-131030123929-phpapp02/85/Arduino-reference-192-320.jpg)


![Arrays
(: table width=75% cellspacing=0 cellpadding=5: ) (: cellnr width=50% bgcolor=#999999: ) Arduino (: cell width=50%
bgcolor=#CCCCCC: ) Processing (: cellnr: ) int bar[8];
bar[0] = 1; (: cell: ) int[] bar = new int[8];
bar[0] = 1; (: cellnr bgcolor=#999999: ) int foo[] = { 0, 1, 2 }; (: cell bgcolor=#CCCCCC: ) int foo[] = { 0, 1, 2 };
or
int[] foo = { 0, 1, 2 }; (: tableend: )
Loops
(: table width=75% cellspacing=0 cellpadding=5: ) (: cellnr width=50% bgcolor=#999999: ) Arduino (: cell width=50%
bgcolor=#CCCCCC: ) Processing (: cellnr: ) int i;
for (i = 0; i < 5; i++) { ... } (: cell: ) for (int i = 0; i < 5; i++) { ... } (: tableend: )
Printing
(: table width=75% cellspacing=0 cellpadding=5: ) (: cellnr width=50% bgcolor=#999999: ) Arduino (: cell width=50%
bgcolor=#CCCCCC: ) Processing (: cellnr: ) printString("hello world");
printNewline(); (: cell: ) println("hello world"); (: cellnr bgcolor=#999999: ) int i = 5;
printI nteger(i);
printNewline(); (: cell bgcolor=#CCCCCC: ) int i = 5;
println(i); (: cellnr: ) int i = 5;
printString("i = ");
printI nteger(i);
printNewline(); (: cell: ) int i = 5;
println("i = " + i); (: tableend: )
Restore
Edit Page | Page History | Printable View | All Recent Site Changes](https://image.slidesharecdn.com/arduinoreference-131030123929-phpapp02/85/Arduino-reference-201-320.jpg)
![Arduino : Reference / Comparison
Reference
Language (extended) | Libraries | Comparison | Board
Arduino/ Processing Language Comparison
The Arduino language (based on Wiring) is implemented in C/ C++, and therefore has some differences from the
Processing language, which is based on J ava.
Arrays
Arduino
Processing
int bar[8];
bar[0] = 1;
int[] bar = new int[8];
bar[0] = 1;
int foo[] = { 0, 1, 2 };
int foo[] = { 0, 1, 2 };
or
int[] foo = { 0, 1, 2 };
Loops
Arduino
Processing
int i;
for (i = 0; i < 5; i++) { ... }
for (int i = 0; i < 5; i++) { ... }
Printing
Arduino
Processing
Serial.println("hello world");
println("hello world");
int i = 5;
Serial.println(i);
int i = 5;
println(i);
int i = 5;
Serial.print("i = ");
Serial.print(i);
Serial.println();
int i = 5;
println("i = " + i);
Reference Home
Corrections, suggestions, and new documentation should be posted to the Forum.
The text of the Arduino reference is licensed under a Creative Commons Attribution-ShareAlike 3.0 License . Code
samples in the reference are released into the public domain.
(Printable View of http://www.arduino.cc/en/Reference/Comparison)](https://image.slidesharecdn.com/arduinoreference-131030123929-phpapp02/85/Arduino-reference-202-320.jpg)


![Added line 11:
[@
Changed lines 13- 14 from:
to:
@]
Restore
December 10, 2005, at 10: 30 AM by 62.255.32.10 Added lines 11- 12:
pinMode(ledPin, OUTPUT); / / sets the digital pin as output
Restore
December 10, 2005, at 10: 28 AM by 62.255.32.10 Changed lines 9- 11 from:
you need to specify the number of the pin y ou want to configure followed by the word I NPUT or OUTPUT.
to:
you need to specify the number of the pin you want to configure followed by the word I NPUT or OUTPUT.
Restore
December 10, 2005, at 10: 26 AM by 62.255.32.10 Changed lines 5- 7 from:
Configures the specified pin to behave like an input or an output.
to:
Configures the specified pin to behave either as an input or an output.
Restore
December 03, 2005, at 01: 13 PM by 213.140.6.103 Changed lines 10- 11 from:
ou want to configure followed by the word I NPUT or OUTPUT.
to:
ou want to configure followed by the word I NPUT or OUTPUT.
Restore
December 03, 2005, at 01: 13 PM by 213.140.6.103 Changed lines 16- 17 from:
[@int ledPin = 13;
// LED connected to digital pin 13
to:
[@
int ledPin = 13; / / LED connected to digital pin 13
Restore
December 03, 2005, at 01: 12 PM by 213.140.6.103 Changed lines 16- 17 from:
int ledPin = 13; // LED connected to digital pin 13
to:
[@int ledPin = 13;
Changed lines 29- 30 from:
}
to:
} @]
// LED connected to digital pin 13](https://image.slidesharecdn.com/arduinoreference-131030123929-phpapp02/85/Arduino-reference-227-320.jpg)
![Restore
December 03, 2005, at 01: 12 PM by 213.140.6.103 Changed line 36 from:
digitalRead
to:
delay
Restore
November 27, 2005, at 10: 41 AM by 81.154.199.248 Changed lines 16- 17 from:
@@int ledPin = 13; / / LED connected to digital pin 13
to:
int ledPin = 13; // LED connected to digital pin 13
Restore
November 27, 2005, at 10: 41 AM by 81.154.199.248 Changed lines 29- 30 from:
}@@
to:
}
Restore
November 27, 2005, at 10: 40 AM by 81.154.199.248 Deleted line 17:
Deleted line 18:
Deleted line 19:
Deleted line 20:
Deleted line 23:
Restore
November 27, 2005, at 10: 40 AM by 81.154.199.248 Changed lines 16- 18 from:
[@int ledPin = 13; / / LED connected to digital pin 13
to:
@@int ledPin = 13; / / LED connected to digital pin 13
Changed lines 34- 35 from:
}@]
to:
}@@
Restore
November 27, 2005, at 10: 26 AM by 81.154.199.248 Added line 18:
Added
Added
Added
Added
line
line
line
line
20:
22:
24:
28:
Restore
November 27, 2005, at 10: 26 AM by 81.154.199.248 Changed lines 16- 19 from:
[@
int ledPin = 13; / / LED connected to digital pin 13
to:
[@int ledPin = 13; / / LED connected to digital pin 13](https://image.slidesharecdn.com/arduinoreference-131030123929-phpapp02/85/Arduino-reference-228-320.jpg)
![Changed lines 29- 31 from:
} @]
to:
}@]
Restore
November 27, 2005, at 10: 17 AM by 81.154.199.248 Changed lines 5- 7 from:
Configures the speficied pin to behave like an input or an output.
to:
Configures the specified pin to behave like an input or an output.
Restore
November 27, 2005, at 10: 17 AM by 81.154.199.248 Changed lines 16- 17 from:
[=
to:
[@
Changed lines 32- 33 from:
=]
to:
@]
Restore
November 27, 2005, at 10: 13 AM by 81.154.199.248 Changed lines 16- 17 from:
@@int ledPin = 13; / / LED connected to digital pin 13
to:
[= int ledPin = 13; / / LED connected to digital pin 13
Changed lines 30- 31 from:
}@@
to:
} =]
Restore
November 27, 2005, at 10: 10 AM by 81.154.199.248 Changed lines 16- 17 from:
[@int ledPin = 13; / / LED connected to digital pin 13
to:
@@int ledPin = 13; / / LED connected to digital pin 13
Changed lines 29- 30 from:
}@]
to:
}@@
Restore
November 27, 2005, at 10: 05 AM by 81.154.199.248 -](https://image.slidesharecdn.com/arduinoreference-131030123929-phpapp02/85/Arduino-reference-229-320.jpg)
![Changed lines 16- 18 from:
[@ int ledPin = 13; / / LED connected to digital pin 13
to:
[@int ledPin = 13; / / LED connected to digital pin 13
Changed lines 29- 32 from:
}
@]
to:
}@]
Restore
November 27, 2005, at 10: 03 AM by 81.154.199.248 Changed lines 16- 17 from:
pinMode(13,OUTPUT)
to:
int ledPin = 13;
void setup()
{
pinMode(ledPin, OUTPUT);
}
void loop()
{
digitalWrite(ledPin, HIGH);
delay(1000);
digitalWrite(ledPin, LOW);
delay(1000);
}
// LED connected to digital pin 13
// sets the digital pin as output
//
//
//
//
sets the LED on
waits for a second
sets the LED off
waits for a second
Restore
November 27, 2005, at 09: 55 AM by 81.154.199.248 Changed line 22 from:
[[digitalWrite]
to:
digitalWrite
Restore
November 27, 2005, at 09: 55 AM by 81.154.199.248 Changed line 4 from:
What it does
to:
What it does
Changed line 8 from:
What parametres does it take
to:
What parametres does it take
Changed line 12 from:](https://image.slidesharecdn.com/arduinoreference-131030123929-phpapp02/85/Arduino-reference-230-320.jpg)
![This function returns
to:
This function returns
Changed line 15 from:
Example
to:
Example
Changed lines 21- 23 from:
See also
{{digitalWrite}}
{{digitalRead}}
to:
See also
[[digitalWrite]
digitalRead
Restore
November 27, 2005, at 09: 54 AM by 81.154.199.248 Added lines 1- 23:
pinMode
What it does
Configures the speficied pin to behave like an input or an output.
What parametres does it take
you need to specify the number of the pin y ou want to configure followed by the word I NPUT or OUTPUT.
This function returns
nothing
Example
pinMode(13,OUTPUT)
configures pin number 13 to work as an output pin.
See also
{{digitalWrite}}
{{digitalRead}}
Restore
Edit Page | Page History | Printable View | All Recent Site Changes](https://image.slidesharecdn.com/arduinoreference-131030123929-phpapp02/85/Arduino-reference-231-320.jpg)


![Arduino
Buy | Download | Getting Started | Learning | Reference | Hardware | FAQ
search
Blog » | Forum » | Playground »
Reference.VariableDeclaration History
Hide minor edits - Show changes to markup
J uly 16, 2007, at 11: 44 PM by Paul Badger Changed lines 27- 28 from:
You can name a variable any word that is not already one of the keywords in Arduino.
to:
You can name a variable any word that is not already one of the keywords in Arduino. Avoid beginning variable names with
numeral characters.
Added line 42:
byte
Restore
J uly 16, 2007, at 11: 42 PM by Paul Badger Changed lines 31- 32 from:
All variables have to be declared before they are used. Declaring a variable means defining its type, and setting an initial
value. I n the above example, the statement
to:
All variables have to be declared before they are used. Declaring a variable means defining its type, and optionally, setting
an initial value (initializing the variable). I n the above example, the statement
Restore
J une 22, 2007, at 07: 20 AM by Paul Badger Changed line 18 from:
inputVariable = 100
to:
inputVariable = 100;
Changed lines 21- 22 from:
delay(inputVariable)@]
to:
delay(inputVariable); @]
Restore
May 26, 2007, at 07: 38 PM by Paul Badger Changed line 43 from:
unsigned int ?
to:
unsigned int
Changed line 45 from:
unsigned long](https://image.slidesharecdn.com/arduinoreference-131030123929-phpapp02/85/Arduino-reference-234-320.jpg)
![to:
unsigned long
Restore
May 26, 2007, at 07: 37 PM by Paul Badger Added line 43:
unsigned int ?
Added lines 45- 47:
unsigned long
float
double
Restore
May 26, 2007, at 07: 35 PM by Paul Badger Changed lines 8- 10 from:
int inputVariable = 0; # Declares the variable; this only needs to be done once inputVariable = analogRead(2); # Set the
variable to the input of analog pin #2@]
to:
int inputVariable = 0; / / declares the variable; this only needs to be done once inputVariable = analogRead(2); / / set the
variable to the input of analog pin #2@]
Restore
April 16, 2007, at 09: 22 AM by Paul Badger Changed lines 1- 2 from:
Variables
to:
Variables
Deleted lines 43- 44:
Reference Home
Restore
March 30, 2006, at 08: 00 PM by Tom I goe Changed lines 13- 14 from:
Once a variable has been set (or re- set), you can test it's value to see if it meets certain conditions, or you can use it's value
directly. For instance, the following code tests whether the inputVariable (from analog pin #2) is less than 100, then sets a
delay based on inputVariable which is a minimum of 100:
to:
Once a variable has been set (or re- set), you can test its value to see if it meets certain conditions, or you can use it's value
directly. For instance, the following code tests whether the inputVariable is less than 100, then sets a delay based on
inputVariable which is a minimum of 100:
Restore
March 30, 2006, at 08: 00 PM by Tom I goe Changed lines 9- 10 from:
inputVariable = analogRead(2); # Set the variable@]
to:
inputVariable = analogRead(2); # Set the variable to the input of analog pin #2@]
Restore
March 30, 2006, at 07: 59 PM by Tom I goe Changed lines 3- 4 from:
A variable is a way of naming and storing a value for later use by the program. An example of , like data from a analog pin
set to input. (See pinMode for more on setting pins to input or output.)](https://image.slidesharecdn.com/arduinoreference-131030123929-phpapp02/85/Arduino-reference-235-320.jpg)
![to:
A variable is a way of naming and storing a value for later use by the program, such as data from a analog pin set to input.
(See pinMode for more on setting pins to input or output.)
Restore
March 30, 2006, at 07: 58 PM by Tom I goe Changed lines 11- 12 from:
inputVariable is the variable itself. The first line declares that it will contain an int (short for integer.) The second line sets
inputVariable to the value at analog pin #2. This makes the value of pin #2 accessible elsewhere in the code. For instance,
the following code tests whether the value at analog pin #2 is greater than 0:
to:
inputVariable is the variable itself. The first line declares that it will contain an int (short for integer.) The second line sets
inputVariable to the value at analog pin #2. This makes the value of pin #2 accessible elsewhere in the code.
Once a variable has been set (or re- set), you can test it's value to see if it meets certain conditions, or you can use it's value
directly. For instance, the following code tests whether the inputVariable (from analog pin #2) is less than 100, then sets a
delay based on inputVariable which is a minimum of 100:
Changed line 16 from:
if (inputVariable > 0)
to:
if (inputVariable < 100)
Changed lines 18- 22 from:
# do something here
}@]
You should give your variables descriptive names, so as to make your code more readable. Variable names like tiltSensor or
pushButton help you (and anyone else reading your code) understand what the variable represents. Variable names like var
or value, on the other hand, do little to make your code readable.
to:
inputVariable = 100
}
delay(inputVariable)@]
This example shows all three useful operations with variables. I t tests the variable ( if (inputVariable < 100) ), it sets
the variable if it passes the test ( inputVariable = 100 ), and it uses the value of the variable as an input to the delay()
function ( delay(inputVariable) )
Style Note: You should give your variables descriptive names, so as to make your code more readable. Variable names like
tiltSensor or pushButton help you (and anyone else reading your code) understand what the variable represents. Variable
names like var or value, on the other hand, do little to make your code readable.
Restore
March 30, 2006, at 07: 49 PM by Tom I goe Changed lines 8- 10 from:
int inputVariable = 0; # This declares the variable, declaration only needs to be done once inputVariable = analogRead(2); #
This sets the variable@]
to:
int inputVariable = 0; # Declares the variable; this only needs to be done once inputVariable = analogRead(2); # Set the
variable@]
Restore
March 30, 2006, at 07: 48 PM by Tom I goe Changed lines 5- 6 from:
You set a variable by making it equal to the value you want to store. The following code declares a](https://image.slidesharecdn.com/arduinoreference-131030123929-phpapp02/85/Arduino-reference-236-320.jpg)
![variable inputVariable, and then sets it equal to the value at analog pin #2:
to:
You set a variable by making it equal to the value you want to store. The following code declares a variable inputVariable,
and then sets it equal to the value at analog pin #2:
Restore
March 30, 2006, at 07: 48 PM by Tom I goe Changed lines 3- 6 from:
Variables are expressions that store values, like sensor reading and storing input from a analog pin set to input. (See
pinMode for more on setting pins to input or output.)
A variable is a way of giving a name to the stored value. You set a variable by making it equal to the value you want to
store. The following code declares a variable inputVariable, and then sets it equal to the value at analog pin #2:
to:
A variable is a way of naming and storing a value for later use by the program. An example of , like data from a analog pin
set to input. (See pinMode for more on setting pins to input or output.)
You set a variable by making it equal to the value you want to store. The following code declares a
variable inputVariable, and then sets it equal to the value at analog pin #2:
Changed lines 8- 10 from:
int inputVariable = 0; inputVariable = analogRead(2); @]
to:
int inputVariable = 0; # This declares the variable, declaration only needs to be done once inputVariable = analogRead(2); #
This sets the variable@]
Restore
March 30, 2006, at 06: 45 PM by Tom I goe Changed lines 11- 12 from:
inputVariable is the variable itself. The first line declares that it will contain an int , which is to say a whole number. The
second line sets inputVariable to the value at analog pin #2. This makes the value of pin #2 accessible elsewhere in the
code. For instance, the following code tests whether the value at analog pin #2 is greater than 0:
to:
inputVariable is the variable itself. The first line declares that it will contain an int (short for integer.) The second line sets
inputVariable to the value at analog pin #2. This makes the value of pin #2 accessible elsewhere in the code. For instance,
the following code tests whether the value at analog pin #2 is greater than 0:
Changed lines 25- 26 from:
All variables have to be declared before they are used. To declare a variable implies to define its type, and an initial value.
to:
All variables have to be declared before they are used. Declaring a variable means defining its type, and setting an initial
value. I n the above example, the statement
Changed line 28 from:
int val = 0;
to:
int inputVariable = 0;
Changed lines 31- 32 from:
The previous statement informs that the variable val is of the type int and that its initial value is zero.
to:
declares that inputVariable is an int , and that its initial value is zero.
Added line 35:](https://image.slidesharecdn.com/arduinoreference-131030123929-phpapp02/85/Arduino-reference-237-320.jpg)
![char
Deleted line 36:
char
Restore
March 30, 2006, at 02: 24 PM by Tom I goe Changed lines 19- 20 from:
You should give your variables descriptive names, so as to make your code more readable. Variable names like tiltSensor or
pushButton help you (and anyone else reading your code) understand what the variable represents. Variable names like var
or value do little to make your code readable.
to:
You should give your variables descriptive names, so as to make your code more readable. Variable names like tiltSensor or
pushButton help you (and anyone else reading your code) understand what the variable represents. Variable names like var
or value, on the other hand, do little to make your code readable.
Restore
March 30, 2006, at 02: 11 PM by Tom I goe Changed lines 37- 38 from:
to:
long
Restore
March 30, 2006, at 02: 11 PM by Tom I goe Restore
March 30, 2006, at 02: 11 PM by Tom I goe Changed lines 11- 12 from:
inputVariable is the variable itself. The first line declares that it will contain an int , which is to say a whole number. The
second line sets inputVariable to the value at analog pin #2. This makes the value of pin #2 accessible elsewhere in the
code. For instance, the following code tests whether the value of inputVariable is greater than 0:
to:
inputVariable is the variable itself. The first line declares that it will contain an int , which is to say a whole number. The
second line sets inputVariable to the value at analog pin #2. This makes the value of pin #2 accessible elsewhere in the
code. For instance, the following code tests whether the value at analog pin #2 is greater than 0:
Restore
March 30, 2006, at 02: 00 PM by Tom I goe Changed lines 9- 11 from:
inputVariable = analogRead(2); @]
to:
inputVariable = analogRead(2); @]
Changed lines 17- 18 from:
} @]
to:
}@]
Restore
March 30, 2006, at 01: 59 PM by Tom I goe Changed lines 20- 22 from:
You give your variables descriptive names, so as to make your code more readable. Variable names like tiltSensor or
pushButton help you (and anyone else reading your code) understand what the variable represents. Variable names like var
or value do little to make your code readable.
to:
You should give your variables descriptive names, so as to make your code more readable. Variable names like tiltSensor or
pushButton help you (and anyone else reading your code) understand what the variable represents. Variable names like var](https://image.slidesharecdn.com/arduinoreference-131030123929-phpapp02/85/Arduino-reference-238-320.jpg)
![or value do little to make your code readable.
Restore
March 30, 2006, at 01: 59 PM by Tom I goe Changed lines 5- 6 from:
A variable is a way of giving a name to the stored value. You set a variable by making it equal to the value you want to
store. The following code sets inputVariable equal to the value at analog pin #2:
to:
A variable is a way of giving a name to the stored value. You set a variable by making it equal to the value you want to
store. The following code declares a variable inputVariable, and then sets it equal to the value at analog pin #2:
Changed line 8 from:
int inputVariable;
to:
int inputVariable = 0;
Changed lines 12- 13 from:
input_ variable is the variable itself. The first line declares that it will contain an int , which is to say a whole number. The
second line sets inputVariable to the value at analog pin #2. This makes the value of pin #2 accessible elsewhere in the
code. For instance, the following code tests whether the value of inputVariable is greater than 0:
to:
inputVariable is the variable itself. The first line declares that it will contain an int , which is to say a whole number. The
second line sets inputVariable to the value at analog pin #2. This makes the value of pin #2 accessible elsewhere in the
code. For instance, the following code tests whether the value of inputVariable is greater than 0:
Changed lines 23- 26 from:
You can choose any word that is not already existing in the language. The pre- defined words in the language are also called
keywords. Examples of keywords are: digitalRead, pinMode, or setup.
Again it is possible to choose completely random names like tomato or I _ love_ Sushi but this will make much more
complicated for other people to read your code and it is not recommended. Use variable names that describe what you're
using them for, like sensorValue or switchState.
to:
You can name a variable any word that is not already one of the keywords in Arduino.
Changed lines 27- 28 from:
Variables have to be declared before they are used. To declare a variable implies to define its type, and an initial value.
to:
All variables have to be declared before they are used. To declare a variable implies to define its type, and an initial value.
Restore
March 30, 2006, at 01: 52 PM by Tom I goe Changed line 7 from:
[=
to:
[@
Changed lines 10- 11 from:
=]
to:
@]
Changed line 14 from:](https://image.slidesharecdn.com/arduinoreference-131030123929-phpapp02/85/Arduino-reference-239-320.jpg)
![[=
to:
[@
Changed lines 19- 20 from:
=]
to:
@]
Restore
March 30, 2006, at 01: 52 PM by Tom I goe Changed line 8 from:
int inputVariable;
to:
int inputVariable;
Changed lines 15- 17 from:
if (inputVariable > 0)
{
# do something here
to:
if (inputVariable > 0) {
# do something here
Restore
March 30, 2006, at 01: 52 PM by Tom I goe Changed line 8 from:
int inputVariable;
to:
int inputVariable;
Changed lines 15- 17 from:
if (inputVariable > 0) {
# do something here
to:
if (inputVariable > 0)
{
# do something here
Restore
March 30, 2006, at 01: 51 PM by Tom I goe Changed lines 5- 6 from:
A variable is a way of giving a name to the stored value. You set a variable by making it equal to the value you want to
store. The following code sets input_ variable equal to the value at analog pin #2:
to:
A variable is a way of giving a name to the stored value. You set a variable by making it equal to the value you want to
store. The following code sets inputVariable equal to the value at analog pin #2:
Changed lines 8- 9 from:
input_ variable = analogRead(2);
to:](https://image.slidesharecdn.com/arduinoreference-131030123929-phpapp02/85/Arduino-reference-240-320.jpg)


![to:
This function will read a sensor five time with analogRead() and calculate the average of five readings. I t then scales the
data to 8 bits (0- 255), and inverts it, returning the inverted result.
Restore
November 05, 2007, at 04: 58 PM by Paul Badger Changed lines 58- 59 from:
A more complex example
to:
Another example
Restore
November 05, 2007, at 04: 53 PM by Paul Badger Changed lines 64- 65 from:
to:
int sval;
Changed line 67 from:
i = i + analogRead(0);
// sensor on analog pin 0
to:
sval = sval + analogRead(0);
// sensor on analog pin 0
Changed lines 70- 73 from:
i = i / 5;
i = i / 4;
// average
// scale to 8 bits (0 - 255)
i = 255 - i;
return i;
// invert output
to:
sval =
sval =
sval =
return
sval / 5;
sval / 4;
255 - sval;
sval;
// average
// scale to 8 bits (0 - 255)
// invert output
Restore
November 05, 2007, at 04: 50 PM by Paul Badger Changed lines 69- 70 from:
i = i / 5;
i = i / 4;
// average
// scale to 8 bits (0 - 255)
to:
i = i / 5;
i = i / 4;
// average
// scale to 8 bits (0 - 255)
Restore
November 05, 2007, at 04: 49 PM by Paul Badger Changed line 66 from:
i = i +
analogRead(0);
to:
i = i + analogRead(0);
// sensor on analog pin 0
Deleted lines 82- 83:
@]
Restore
November 05, 2007, at 04: 48 PM by Paul Badger -](https://image.slidesharecdn.com/arduinoreference-131030123929-phpapp02/85/Arduino-reference-248-320.jpg)
![Changed lines 62- 78 from:
[@ int ReadSens_ and_ Condition(){ int i;
for (i = 0; i < 5; i++){
i = i +
analogRead(0);
}
i = i / 5;
// average
i = i / 4; // scale to 8 bits (0 - 255)
i = 255 - i; // invert output
return i;
}
to:
int ReadSens_and_Condition(){
int i;
for (i = 0; i < 5; i++){
i = i + analogRead(0);
}
i = i / 5; // average
i = i / 4; // scale to 8 bits (0 - 255)
i = 255 - i; // invert output
return i;
}
To call our function we just assign it to a variable.
[@int sens;
sens = ReadSens_ and_ Condition();
Added lines 81- 84:
@]
Restore
November 05, 2007, at 04: 45 PM by Paul Badger Changed lines 5- 6 from:
For programmers accustomed to using BASI C, functions in Arduino provide (and extend) the utility of using subroutines
(GOSUB).
to:
For programmers accustomed to using BASI C, functions in Arduino provide (and extend) the utility of using subroutines
(GOSUB in BASI C).
Changed lines 25- 26 from:
To "call" our simple multiply function we pass it the datatypes it is expecting:
to:
To "call" our simple multiply function, we pass it parameters of the datatype that it is expecting:
Changed lines 60- 68 from:
I n a program to keep track of school records, we move a student up a grade if they are old enough, or if they have passed
a test, but only if they have paid their tuition.
[@ if (student_ age > x) {
if (tuition == "paid") {
student_grade++;
}](https://image.slidesharecdn.com/arduinoreference-131030123929-phpapp02/85/Arduino-reference-249-320.jpg)

![Restore
November 05, 2007, at 04: 17 PM by Paul Badger Changed line 44 from:
Serial.begin(9600);
to:
Serial.begin(9600);
Changed lines 48- 54 from:
int i = 2; int j = 3; int k;
k = myMultiplyFunction(i, j); / / k now contains 6 Serial.println(k); delay(500);
to:
int i = 2;
int j = 3;
int k;
k = myMultiplyFunction(i, j); // k now contains 6
Serial.println(k);
delay(500);
Changed lines 58- 60 from:
int result; result = x * y; return result;
to:
int result;
result = x * y;
return result;
Restore
November 05, 2007, at 04: 16 PM by Paul Badger Deleted line 36:
Deleted lines 37- 38:
Changed line 40 from:
The entire sketch would look like this:
to:
The entire sketch would then look like this:
Changed lines 60- 69 from:
}
@]
to:
return result; }@]
Restore
November 05, 2007, at 04: 13 PM by Paul Badger Changed lines 7- 8 from:
Standardizing code fragments into functions has severaladvantages:
to:
Standardizing code fragments into functions has several advantages:
Changed lines 11- 12 from:
They codify one action in one place so that the function only has to be thought out and debugged once.
to:](https://image.slidesharecdn.com/arduinoreference-131030123929-phpapp02/85/Arduino-reference-251-320.jpg)


![to:
% width=50pxAttach: FunctionAnatom.gif
Restore
October 15, 2007, at 05: 48 AM by Paul Badger Changed lines 22- 25 from:
Anatomy of a function?
to:
Restore
October 15, 2007, at 05: 46 AM by Paul Badger Changed lines 23- 25 from:
[[ FunctionAnatom.gif | Anatomy of a function]
to:
Anatomy of a function?
Restore](https://image.slidesharecdn.com/arduinoreference-131030123929-phpapp02/85/Arduino-reference-258-320.jpg)
![October 15, 2007, at 05: 46 AM by Paul Badger Added line 22:
Added line 25:
Restore
October 15, 2007, at 05: 46 AM by Paul Badger Changed lines 22- 23 from:
Attach: image.jpeg Δ
to:
[[ FunctionAnatom.gif | Anatomy of a function]
Restore
October 15, 2007, at 05: 44 AM by Paul Badger Added lines 22- 23:
Attach: image.jpeg Δ
Restore
J uly 17, 2007, at 01: 28 PM by David A. Mellis - removing prototyping note... i hope no one is still using arduino 0003 or
earlier
Deleted lines 57- 67:
Prototyping, prior to 0004
I f you are using a version of Arduino prior to 0004, any function you create yourself the in the body of your code needs a
function prototype at the beginning of your code, before the setup() code block. This is similar to the declaration of a
variable, and essentially is just the first line of your function declaration, with a semicolon at the end.
void displayNumber(int incomingValue);
This tells Arduino what kind of function you are calling and what arguments it will pass.
Restore
J uly 17, 2007, at 01: 27 PM by David A. Mellis Changed lines 5- 6 from:
For programmers accustomed to using BASI C, functions in C provide (and extend) the utility of using subroutines (GOSUB).
to:
For programmers accustomed to using BASI C, functions in Arduino provide (and extend) the utility of using subroutines
(GOSUB).
Restore
J uly 17, 2007, at 06: 30 AM by Paul Badger Changed lines 3- 4 from:
Functions allow you to create modular pieces of code that perform a defined task and then return you to the area of code
from which the function was "called". The typical case for creating a function is when you need to perform the same action
multiple times in one program.
to:
Functions allow a programmer to create modular pieces of code that performs a defined task and then returns to the area of
code from which the function was "called". The typical case for creating a function is when one needs to perform the same
action multiple times in a program.
For programmers accustomed to using BASI C, functions in C provide (and extend) the utility of using subroutines (GOSUB).
Restore
J uly 17, 2007, at 06: 25 AM by Paul Badger Changed lines 11- 12 from:
This reduces chances for errors in debugging and modification, if the code needs to be changed.
to:
This also reduces chances for errors in modification, if the code needs to be changed.](https://image.slidesharecdn.com/arduinoreference-131030123929-phpapp02/85/Arduino-reference-259-320.jpg)

![to:
@]
Deleted line 32:
Restore
October 01, 2006, at 05: 53 AM by Clay Shirky - Updated example and prototyping note
Changed lines 3- 4 from:
Functions allow you to create modular pieces of code that perform certain tasks and then return you to the area of code it
was executed from. Below is an example of a function being called:
to:
Functions allow you to create modular pieces of code that perform certain tasks and then return you to the area of code it
was executed from. The typical case for creating a function is when you need to perform the same action.
For instance, we move a student up a grade if they are old enough, or if they have passed a test, but only if they have paid
their tuition.
Changed lines 8- 17 from:
displayNumber(value);
to:
if (student_ age > x) {
if (tuition == "paid") {
student_grade++;
}
} if (test_ score > y) {
if (tuition == "paid") {
student_grade++;
}
}
Changed lines 20- 21 from:
When Arduino executes this line, it looks for this function's declaration somewhere in the code, passes the "value" variable
put inside the () as an "argument" to the function. Below is an example of what the function declaration could look like:
to:
However, if we later want to change tuition to a numerical test showing that they owe us less than a hundred dollars - tuition < 100; - - we have to change the code in two places, greatly increasing the risk of bugs if we change it one place and
forget to change it in the other.
A function helps by giving a block of code a name, then letting you call the entire block with that name. As a result, when
you need to changed the named code, you only have to change it in one place.
Our function looks like this:
/ / tell us the type of data the function expects void tuitionTest(int tuition_ balance) {
if (tuition_balance < 100) {
student_grade++;
}
}
And our code looks like this:
Changed lines 36- 39 from:
void displayNumber(int incomingValue){
printInteger(incomingValue);
// other code in the function
}](https://image.slidesharecdn.com/arduinoreference-131030123929-phpapp02/85/Arduino-reference-261-320.jpg)

![displayNumber(int incomingValue);
Restore
March 24, 2006, at 05: 27 PM by J eff Gray Changed line 5 from:
[=
to:
[@
Changed lines 7- 8 from:
=]
to:
@]
Changed line 22 from:
[=
to:
[@
Changed lines 24- 25 from:
=]
to:
@]
Restore
March 24, 2006, at 05: 27 PM by J eff Gray Changed lines 16- 17 from:
to:
@]
Restore
March 24, 2006, at 05: 26 PM by J eff Gray Changed lines 1- 2 from:
Functions
to:
Functions
Restore
March 24, 2006, at 05: 26 PM by J eff Gray Added lines 1- 27:
Functions
Functions allow you to create modular pieces of code that perform certain tasks and then return you to the area of code it
was executed from. Below is an example of a function being called:
displayNumber(value);
When Arduino executes this line, it looks for this function's declaration somewhere in the code, passes the "value" variable
put inside the () as an "argument" to the function. Below is an example of what the function declaration could look like:
[@ displayNumber(int incomingValue){
printInteger(incomingValue);
// other code in the function
}](https://image.slidesharecdn.com/arduinoreference-131030123929-phpapp02/85/Arduino-reference-263-320.jpg)


![Arduino
Buy | Download | Getting Started | Learning | Reference | Hardware | FAQ
search
Blog » | Forum » | Playground »
Reference.Void History
Hide minor edits - Show changes to markup
J uly 17, 2007, at 01: 15 PM by David A. Mellis Changed lines 8- 18 from:
/ / actions are performed in the function "setup" but / / no information is reported to the larger program
void setup(){
serial.begin(9600);
}@]
to:
/ / actions are performed in the functions "setup" and "loop" / / but no information is reported to the larger program
void setup() {
// ...
}
void loop() {
// ...
} @]
Restore
J uly 17, 2007, at 11: 07 AM by Paul Badger Changed lines 3- 5 from:
The void keyword is used only in function declarations. I t indicates that the function is expected to return no information, to
the function from which it was called.
to:
The void keyword is used only in function declarations. I t indicates that the function is expected to return no information to
the function from which it was called.
Restore
J uly 17, 2007, at 06: 41 AM by Paul Badger Changed lines 17- 19 from:
} @]
to:
}@]
Restore
J uly 17, 2007, at 06: 41 AM by Paul Badger Added lines 23- 24:
Restore
J uly 17, 2007, at 06: 41 AM by Paul Badger Changed line 22 from:
to:
function declaration](https://image.slidesharecdn.com/arduinoreference-131030123929-phpapp02/85/Arduino-reference-268-320.jpg)


![The brackets may be omitted after an if statement. I f this is done the next line (defined by the semicolon) becomes the only
conditional statement.
Restore
J une 11, 2007, at 11: 49 PM by Paul Badger Changed lines 35- 38 from:
See also
I f ... Else
to:
Restore
J une 11, 2007, at 11: 48 PM by Paul Badger Changed lines 35- 38 from:
to:
See also
I f ... Else
Restore
J une 11, 2007, at 11: 44 PM by Paul Badger Changed lines 30- 31 from:
Coding Warning: Beware of accidently using = (e.g. if (x = 10) ), which sets a variable, instead of using == (e.g. if (x
== 10) ), which tests whether x is equal to 10 or not. The latter statement is only true if x equals 10, but the former
statement will always be true, because the value of x = 10 is true if the assignment is successful. Mistaking = for == will
result in a test that is always passed, and which resets your variable, as a (probably unwanted) side- effect.
to:
Coding Warning:
Beware of accidently using = (e.g. if (x = 10) ), which sets a variable, instead of using == (e.g. if (x == 10) ), which
tests whether x is equal to 10 or not. The latter statement is only true if x equals 10, but the former statement will always
be true, because the value of x = 10 is true if the assignment is successful. Mistaking = for == will result in a test that is
always passed, and which resets your variable, as a (probably unwanted) side- effect.
Restore
May 26, 2007, at 07: 36 AM by Paul Badger Added lines 11- 12:
The program tests to see if someVariable is greater than 50. I f it is, the program takes a particular action. Put another way,
if the statement in parentheses is true, the statements inside the brackets are run. I f not, the program skips over the code.
Changed line 16 from:
if (x > 120) digitalWrite(LEDpin, HI GH); / / both are correct
to:
if (x > 120) digitalWrite(LEDpin, HI GH);
Deleted lines 19- 20:
The program tests to see if someVariable is greater than 50. I f it is, the program takes a particular action. Put another way,
if the statement in parentheses is true, the statements inside the brackets are run. I f not, the program skips over the code.
Restore
May 26, 2007, at 07: 33 AM by Paul Badger Changed lines 16- 17 from:
to:
@]
Restore
May 26, 2007, at 07: 33 AM by Paul Badger Added lines 10- 16:
I t is often convenient to use a single line for a compact conditional test, and reaction to the test. I n this case, the brackets](https://image.slidesharecdn.com/arduinoreference-131030123929-phpapp02/85/Arduino-reference-274-320.jpg)

![that is always passed, and which resets your variable as a (probably unwanted) side- effect.
to:
Coding Warning: Beware of accidently using =, which sets a variable ( if (x = 10) ), instead of == ( if (x == 10) ),
which tests whether x is equal to 10 or not. The latter statement is only true if x equals 10, but the former statement will
always be true, because the value of x = 10 is true if the assignment is successful. Mistaking = for == will result in a test
that is always passed, and which resets your variable as a (probably unwanted) side- effect.
Restore
March 30, 2006, at 08: 38 PM by Tom I goe Changed line 18 from:
x > y (x is greater than y)
to:
x >
y (x is greater than y)
Restore
March 30, 2006, at 08: 38 PM by Tom I goe Changed lines 15- 21 from:
x == y (x is equal to y)
x != y (x is not equal to y)
x < y (x is less than y)
x > y (x is greater than y)
x <= y (x is less than or equal to y)
x >= y (x is greater than or equal to y)
to:
x
x
x
x
x
x
= = y (x is equal to y)
! = y (x is not equal to y)
< y (x is less than y)
> y (x is greater than y)
< = y (x is less than or equal to y)
> = y (x is greater than or equal to y)
Restore
March 30, 2006, at 08: 37 PM by Tom I goe Changed lines 22- 26 from:
Coding Warning: Beware of accidently using =, which sets a variable ( if (x = 10) ), instead of == ( if (x == 10) ),
which tests whether x is equal to 10 or not.
The latter statement is only true if x equals 10, but the former statement will always be true, because the value of x = 10 is
set if the assignment is successful. Mistaking = for == will result in a test that is always passed, and which resets your
variable as a (probably unwanted) side- effect.
to:
Coding Warning: Beware of accidently using =, which sets a variable ( if (x = 10) ), instead of == ( if (x == 10) ),
which tests whether x is equal to 10 or not. The latter statement is only true if x equals 10, but the former statement will
always be true, because the value of x = 10 is set if the assignment is successful. Mistaking = for == will result in a test
that is always passed, and which resets your variable as a (probably unwanted) side- effect.
if can also be part of a branching control structure using the if...else] construction.
Restore
March 30, 2006, at 08: 36 PM by Tom I goe Changed lines 15- 21 from:
x == y(x is equal to y)
x != y (x is not equal to y)
x
x
x
x
< y (x is less than y)
> y (x is greater than y)
<= y (x is less than or equal to y)
>= y (x is greater than or equal to y)](https://image.slidesharecdn.com/arduinoreference-131030123929-phpapp02/85/Arduino-reference-276-320.jpg)


![Arduino : Reference / I f
Reference
Language (extended) | Libraries | Comparison | Board
if
if tests whether a certain condition has been reached, such as an input being above a certain number. The format
for an if test is:
if (someVariable > 50)
{
// do something here
}
The program tests to see if someVariable is greater than 50. I f it is, the program takes a particular action. Put
another way, if the statement in parentheses is true, the statements inside the brackets are run. I f not, the
program skips over the code.
The brackets may be omitted after an if statement. I f this is done, the next line (defined by the semicolon)
becomes the only conditional statement.
if (x > 120)
digitalWrite(LEDpin, HIGH);
if (x > 120)
digitalWrite(LEDpin, HIGH);
if (x > 120) {digitalWrite(LEDpin, HIGH);}
// all are correct
The statements being evaluated inside the parentheses require the use of one or more operators:
Operators:
x
x
x
x
x
x
==
!=
<
>
<=
>=
y
y
y
y
y
y
(x
(x
(x
(x
(x
(x
is
is
is
is
is
is
equal to y)
not equal to
less than y)
greater than
less than or
greater than
y)
y)
equal to y)
or equal to y)
Warning:
Beware of accidentally using the single equal sign (e.g. if (x = 10) ). The single equal sign is the assignment
operator, and sets x to 10. I nstead use the double equal sign (e.g. if (x == 10) ), which is the comparison
operator, and tests whether x is equal to 10 or not. The latter statement is only true if x equals 10, but the former
statement will always be true.
This is because C evaluates the statement if (x=10) as follows: 10 is assigned to x, so x now contains 10. Then
the 'if' conditional evaluates 10, which always evaluates to TRUE, since any non-zero number evaluates to TRUE.
Consequently, if (x = 10) will always evaluate to TRUE, which is not the desired result when using an 'if'
statement. Additionally, the variable x will be set to 10, which is also not a desired action.
if can also be part of a branching control structure using the if...else] construction.
Reference Home
Corrections, suggestions, and new documentation should be posted to the Forum.
The text of the Arduino reference is licensed under a Creative Commons Attribution-ShareAlike 3.0 License . Code
samples in the reference are released into the public domain.
(Printable View of http://www.arduino.cc/en/Reference/If)](https://image.slidesharecdn.com/arduinoreference-131030123929-phpapp02/85/Arduino-reference-281-320.jpg)


![to:
// do Thing B
Changed line 26 from:
# do thing C
to:
// do Thing C
Restore
April 16, 2007, at 09: 34 AM by Paul Badger Changed lines 1- 2 from:
if/ else
to:
if/ else
Restore
March 31, 2006, at 02: 44 PM by J eff Gray Added lines 1- 2:
if/ else
Restore
March 30, 2006, at 08: 53 PM by Tom I goe Changed lines 1- 2 from:
if/ else gives you greater control over the flow of your code than the basic if statement, by allowing you to group multiple
together. For instance, if you wanted to test an analog input, and do one thing if the input was less than 500, and another
thing if the input was 500 or greater, you would write that this way:
to:
if/ else gives you greater control over the flow of your code than the basic if statement, by allowing you to group multiple
tests together. For instance, if you wanted to test an analog input, and do one thing if the input was less than 500, and
another thing if the input was 500 or greater, you would write that this way:
Changed lines 10- 30 from:
}@]
to:
}@]
else can proceed another if test, so that multiple, mutually exclusive tests can be run at the same time:
if (pinFiveInput < 500)
{
# do Thing A
}
else if (pinFiveInput >= 1000)
{
# do Thing B
}
else
{
# do thing C
}
You can have an unlimited nuber of such branches. (Another way to express branching, mutually exclusive tests is with the
switch case statement.
Coding Note: I f you are using if/ else, and you want to make sure that some default action is always taken, it is a good idea
to end your tests with an else statement set to your desired default behavior.](https://image.slidesharecdn.com/arduinoreference-131030123929-phpapp02/85/Arduino-reference-284-320.jpg)


![to:
Loops through multiple values, from the first to the last by the increment specified. Useful when used in combination with
arrays to operate on collections of data/ pins.
There are many parts to the for loop:
for ( initialization; condition; increment) {
body
}
The initialization happens first and exactly once. Then, the condition is tested; if it's true, the body and the increment
are executed, and the condition is tested again. When the condition is false, the loop ends.
Deleted lines 20- 27:
Restore
March 27, 2006, at 10: 59 AM by Tom I goe Changed lines 5- 6 from:
I mportant Note: I n C you don’t need to initialise the local variable i. This is different in other, java based languages.
to:
I mportant Note: I n C you don’t need to initialise the local variable i. You can do it directly in the for statement itself. This is
different in other, java based languages.
Changed line 10 from:
for (i=1; i <= 8; i++){
to:
for (int i=1; i <= 8; i++){
Restore
March 24, 2006, at 04: 37 PM by J eff Gray Changed lines 1- 2 from:
for()
to:
for statements
Restore
March 24, 2006, at 04: 28 PM by J eff Gray Changed lines 5- 6 from:
I mportant Note: I n C you don’t need to initialise the local variable i. This is different in other, java based languages.
to:
I mportant Note: I n C you don’t need to initialise the local variable i. This is different in other, java based languages.
Restore
March 24, 2006, at 04: 28 PM by J eff Gray Changed lines 5- 6 from:
[""I mportant Note: ""] I n C you don’t need to initialise the local variable i. This is different in other, java based languages.
to:
I mportant Note: I n C you don’t need to initialise the local variable i. This is different in other, java based languages.
Restore
March 24, 2006, at 04: 27 PM by J eff Gray Changed lines 5- 6 from:
"bold"I mportant Note: "bold" I n C you don’t need to initialise the local variable i. This is different in other, java based
languages.
to:](https://image.slidesharecdn.com/arduinoreference-131030123929-phpapp02/85/Arduino-reference-292-320.jpg)
![[""I mportant Note: ""] I n C you don’t need to initialise the local variable i. This is different in other, java based languages.
Restore
March 24, 2006, at 04: 25 PM by J eff Gray Changed lines 5- 6 from:
<b>I mportant Note: </ b> I n C you don’t need to initialise the local variable i. This is different in other, java based languages.
to:
"bold"I mportant Note: "bold" I n C you don’t need to initialise the local variable i. This is different in other, java based
languages.
Restore
March 24, 2006, at 04: 25 PM by J eff Gray Added lines 1- 2:
for()
Changed lines 5- 10 from:
for (i=1; i <= 8; i++) {
statement using the value i;
}
N.B. I n C you don’t need to initialise the local variable i. This is different in other, java based languages.
to:
<b>I mportant Note: </ b> I n C you don’t need to initialise the local variable i. This is different in other, java based languages.
Example
for (i=1; i <= 8; i++){
statement using the value i;
}
Reference Home
Restore
February 14, 2006, at 09: 50 AM by Erica Calogero Added lines 1- 8:
Loops through the values of i, from the first to the last by the increment specified. Useful when used in combination with
arrays to operate on collections of data/ pins.
for (i=1; i <= 8; i++) {
statement using the value i;
}
N.B. I n C you don’t need to initialise the local variable i. This is different in other, java based languages.
Restore
Edit Page | Page History | Printable View | All Recent Site Changes](https://image.slidesharecdn.com/arduinoreference-131030123929-phpapp02/85/Arduino-reference-293-320.jpg)


![Added line 22:
// default is optional
Restore
April 16, 2007, at 10: 31 AM by Paul Badger Changed lines 1- 2 from:
Switch Case statements
to:
Switch Case statements
Changed lines 25- 27 from:
Reference Home
to:
Restore
March 26, 2006, at 02: 30 PM by J eff Gray Changed lines 8- 9 from:
break - important, without break, the switch statement will continue checking through the statement for any other
possibilities. I f one is found, it will run that as well, which may not be your intent.
to:
break - important, without break, the switch statement will continue checking through the statement for any other
possibilities. I f one is found, it will run that as well, which may not be your intent. Break tells the switch statement to
stop looking for matches, and end its function.
Restore
March 26, 2006, at 02: 28 PM by J eff Gray Added lines 1- 11:
Switch Case statements
J ust like I f statements, switch case statements help the control and flow of the programs. Switch case's allow you to make a
list of "cases" inside a switch bracket in which arduino will find the most suitable and run it.
Parameters
var - variable you wish to match with case statements
default - if no other conditions are met, default will run
break - important, without break, the switch statement will continue checking through the statement for any other
possibilities. I f one is found, it will run that as well, which may not be your intent.
Example
[@
Changed lines 21- 27 from:
}
to:
}
@]
Reference Home
Restore
March 26, 2006, at 02: 22 PM by J eff Gray Added lines 1- 10:
switch (var) {
case 1:
//do something when var == 1
break;
case 2:](https://image.slidesharecdn.com/arduinoreference-131030123929-phpapp02/85/Arduino-reference-297-320.jpg)


![Arduino
Buy | Download | Getting Started | Learning | Reference | Hardware | FAQ
search
Blog » | Forum » | Playground »
Reference.DoWhile History
Hide minor edits - Show changes to markup
May 26, 2007, at 07: 25 AM by Paul Badger Changed line 18 from:
delay(50);
// wait for sensors to stabilize
to:
delay(50);
// wait for sensors to stabilize
Restore
May 26, 2007, at 07: 25 AM by Paul Badger Added line 5:
[@
Changed lines 10- 12 from:
Example
to:
@]
Example
Restore
May 26, 2007, at 07: 24 AM by Paul Badger Changed lines 3- 4 from:
The do loop works in the same manner as the while loop, with the exception that the condition is tested only after the loop
has run, so the do loop will always run at least once.
to:
The do loop works in the same manner as the while loop, with the exception that the condition is tested at the end of the
loop, so the do loop will always run at least once.
Restore
May 26, 2007, at 07: 23 AM by Paul Badger Added lines 1- 19:
do - while
The do loop works in the same manner as the while loop, with the exception that the condition is tested only after the loop
has run, so the do loop will always run at least once.
do {
// statement block
} while (test condition);
Example
do
{
delay(50);
// wait for sensors to stabilize](https://image.slidesharecdn.com/arduinoreference-131030123929-phpapp02/85/Arduino-reference-306-320.jpg)


![if (sens > threshold){
// bail out on sensor detect
x = 0;
break;
}
Restore
May 26, 2007, at 06: 44 AM by Paul Badger Added lines 5- 7:
Example
[@
Changed lines 14- 16 from:
}
to:
}
@]
Restore
May 26, 2007, at 06: 43 AM by Paul Badger Added lines 1- 11:
break
break is used to exit from a do, for, or while loop, bypassing the normal loop condition. I t is also used to exit from a switch
statement. An example of break in a loop is shown here:
for (x = 0; x < 255; x ++) {
digitalWrite(PWMpin, x);
sens = analogRead(sensorPin);
if (sens > threshold) break; // bail out on sensor detect
delay(50);
}
Restore
Edit Page | Page History | Printable View | All Recent Site Changes](https://image.slidesharecdn.com/arduinoreference-131030123929-phpapp02/85/Arduino-reference-311-320.jpg)


![Changed lines 37- 39 from:
}
to:
}@]
Restore
J uly 16, 2007, at 11: 23 PM by Paul Badger Changed lines 42- 43 from:
comment?
to:
comments
Restore
J uly 16, 2007, at 11: 22 PM by Paul Badger Changed lines 3- 4 from:
Terminate a function and return a value to the calling function if desired.
to:
Terminate a function and return a value from a function to the calling function, if desired.
Changed lines 26- 43 from:
}@]
to:
}@]
The return keyword is handy to test a section of code without having to "comment out" large sections of possibly buggy code.
[@void loop(){ / / brilliant code idea to test here
return;
/ / the rest of a dysfunctional sketch here / / this code will never be executed }
See also
comment?
Restore
J uly 16, 2007, at 11: 14 PM by Paul Badger Added lines 1- 26:
return
Terminate a function and return a value to the calling function if desired.
Syntax:
return;
return value;
Parameters
value: any variable or constant type
Examples:
A function to compare a sensor input to a threshold
int checkSensor(){
if (analogRead(0) > 400) {
return 1;](https://image.slidesharecdn.com/arduinoreference-131030123929-phpapp02/85/Arduino-reference-319-320.jpg)


![Arduino
Buy | Download | Getting Started | Learning | Reference | Hardware | FAQ
search
Blog » | Forum » | Playground »
Reference.SemiColon History
Hide minor edits - Show changes to markup
April 29, 2007, at 05: 10 AM by David A. Mellis Changed lines 3- 4 from:
Used at the end of a statement to tell the computer when to execute an instruction.
to:
Used to end a statement.
Restore
April 25, 2007, at 11: 03 PM by Paul Badger Changed lines 1- 2 from:
; semicolon
to:
; semicolon
Changed lines 12- 15 from:
Forgetting to end a line in a semicolon will result in a compiler error. The error text may be obvious, and refer to a missing
semicolon, or it may not. I f an impenetrable or seemingly illogical compiler error comes up, one of the first things to check is
a missing semicolon in the immediate vicinity preceding the line at which the compiler complained.
Reference Home
to:
Forgetting to end a line in a semicolon will result in a compiler error. The error text may be obvious, and refer to a missing
semicolon, or it may not. I f an impenetrable or seemingly illogical compiler error comes up, one of the first things to check is
a missing semicolon, in the immediate vicinity, preceding the line at which the compiler complained.
Restore
April 14, 2007, at 09: 46 AM by Paul Badger Restore
April 14, 2007, at 09: 46 AM by Paul Badger Changed lines 10- 11 from:
to:
Tip
Forgetting to end a line in a semicolon will result in a compiler error. The error text may be obvious, and refer to a missing
semicolon, or it may not. I f an impenetrable or seemingly illogical compiler error comes up, one of the first things to check is
a missing semicolon in the immediate vicinity preceding the line at which the compiler complained.
Restore
March 24, 2006, at 04: 39 PM by J eff Gray Changed lines 9- 12 from:
@]
to:
@]](https://image.slidesharecdn.com/arduinoreference-131030123929-phpapp02/85/Arduino-reference-323-320.jpg)
![Reference Home
Restore
March 24, 2006, at 04: 39 PM by J eff Gray Changed lines 9- 25 from:
@]
to:
@]
Restore
March 24, 2006, at 04: 38 PM by J eff Gray Changed lines 1- 3 from:
int a = 13;
Used at the end of a statement to tell the computer when to execute an instruction.
to:
; semicolon
Used at the end of a statement to tell the computer when to execute an instruction.
Example
int a = 13;
Restore
February 14, 2006, at 10: 00 AM by Erica Calogero Added lines 1- 3:
int a = 13;
Used at the end of a statement to tell the computer when to execute an instruction.
Restore
Edit Page | Page History | Printable View | All Recent Site Changes](https://image.slidesharecdn.com/arduinoreference-131030123929-phpapp02/85/Arduino-reference-324-320.jpg)


![to:
The main uses of curly braces
Restore
April 14, 2007, at 09: 31 AM by Paul Badger Added lines 15- 16:
The main uses of curly braces
Changed lines 21- 22 from:
}
to:
}@]
Restore
April 14, 2007, at 09: 28 AM by Paul Badger Changed lines 3- 4 from:
Curly braces (also referred to as just "braces" or as "curly brackets) are a major part of the C programming language. They
are used in several different constructs, outlined below, and this can sometimes be confusing for beginners.
to:
Curly braces (also referred to as just "braces" or as "curly brackets") are a major part of the C programming language. They
are used in several different constructs, outlined below, and this can sometimes be confusing for beginners.
Restore
April 14, 2007, at 09: 27 AM by Paul Badger Changed lines 13- 14 from:
Unbalanced braces can often lead to cryptic, impenetrable compiler errors that can sometimes be hard to track down in a
large program. Because of their varied usages braces are also incredibly important to the syntax of a
to:
Unbalanced braces can often lead to cryptic, impenetrable compiler errors that can sometimes be hard to track down in a
large program. Because of their varied usages braces are also incredibly important to the syntax of a program and moving a
brace one or two lines will often dramatically affect the meaning of a program.
Restore
April 14, 2007, at 09: 26 AM by Paul Badger Changed lines 1- 2 from:
{ Curly Braces
}
to:
{ Curly Braces
}
Curly braces (also referred to as just "braces" or as "curly brackets) are a major part of the C programming language. They
are used in several different constructs, outlined below, and this can sometimes be confusing for beginners.
An opening curly brace "{" must always be followed by a closing curly brace "}". This is a condition that is often referred to
as the braces being balanced. The Arduino I DE (integrated development environment) includes a convenient feature to check
the balance of curly braces. J ust select a brace, or even click the insertion point immediately following a brace, and its logical
companion will be highlighted.
At present this feature is slightly buggy as the I DE will often find (incorrectly) a brace in text that has been "commented out."
Beginning programmers and programmers coming to C from the BASI C language often find using braces confusing or
daunting. After all, the same curly braces replace the RETURN statement in a subroutine (function), the ENDI F statement in a
conditional and the NEXT statement in a FOR loop.
For this reason it is good programming practice to type the closing brace immediately after typing the opening brace when
inserting a construct which requires curly braces. Then type some carriage returns between the braces and begin inserting
statements, and your braces, and your attitude, will never become unbalanced.
Unbalanced braces can often lead to cryptic, impenetrable compiler errors that can sometimes be hard to track down in a](https://image.slidesharecdn.com/arduinoreference-131030123929-phpapp02/85/Arduino-reference-328-320.jpg)

![to:
if (boolean expression)
{
statement(s)
}
else if (boolean expression)
{
statement(s)
}
else
{
statement(s)
}
Restore
April 14, 2007, at 08: 10 AM by Paul Badger Changed line 11 from:
int ledPin = 13; while (boolean expression)
to:
[@while (boolean expression)
Changed lines 24- 25 from:
}=]
to:
} @]
Restore
April 14, 2007, at 08: 08 AM by Paul Badger Added lines 1- 41:
{ Curly Braces
}
Loops
int ledPin = 13; while (boolean expression) {
statement(s)
}
do {
statement(s)
} while (boolean expression);
for (initialisation; termination condition; incrementing expr) {
statement(s)
}=]
Conditional statements
if (boolean expression) {
statement(s)
}
if (boolean expression) {
statement(s)
} else {](https://image.slidesharecdn.com/arduinoreference-131030123929-phpapp02/85/Arduino-reference-330-320.jpg)


![Restore
J une 03, 2007, at 09: 20 PM by Paul Badger Changed lines 11- 13 from:
/ * you could use a combination of slash- asterisk - - > asterisk- slash encapsulating your comments:
x = 7;
to:
/ * this is multiline comment - use it to comment out whole blocks of code
Changed lines 17- 23 from:
8/
*/'''
to:
/
Restore
J une 03, 2007, at 09: 17 PM by Paul Badger Changed lines 9- 11 from:
[@ x = 5; / / This is a single line comment - anything after the slashes is a comment
you could use a combination of slash- asterisk - - > asterisk- slash encapsulating your comments: / * blabla * /
to:
[@ x = 5; / / This is a single line comment. Anything after the slashes is a comment
/ * you could use a combination of slash- asterisk - - > asterisk- slash encapsulating your comments:
x = 7; if (gwb > 0){ / / single line comment is OK inside of multiline comment x = 3; / * but not another multiline comment this is invalid * / }
8/
*/'''
Restore
J une 03, 2007, at 09: 14 PM by Paul Badger Changed lines 12- 14 from:
to:
@]
Restore
J une 03, 2007, at 09: 13 PM by Paul Badger Changed lines 8- 9 from:
you may use a double- slash in the beginning of a line: / /
to:
Example
[@ x = 5; / / This is a single line comment - anything after the slashes is a comment
Restore
J une 03, 2007, at 09: 12 PM by Paul Badger Changed lines 3- 5 from:
Comments are parts in the program that are used to inform about the way the program works. They are not going to be
compiled, nor will be exported to the processor. They are useful for you to understand what a certain program you
downloaded is doing or to inform to your colleagues about what one of its lines is.
to:
Comments are parts in the program that are used to inform oneself or others about the way the program works. Comments
are not compiled or exported to the processor, so they don't take up any space on the Atmega chip.](https://image.slidesharecdn.com/arduinoreference-131030123929-phpapp02/85/Arduino-reference-337-320.jpg)


![to:
Programming Tips:
Changed lines 41- 47 from:
Use the cast operator e.g. (int)myfloat to convert one variable type to another on the fly.
to:
Use the cast operator e.g. (int)myFloat to convert one variable type to another on the fly.
Restore
April 16, 2007, at 10: 49 AM by Paul Badger Changed lines 42- 45 from:
Reference Home
to:
Restore
April 15, 2007, at 10: 18 PM by Paul Badger Changed lines 38- 41 from:
Use the cast operator eg (int)myfloat to convert one variable type to another on the fly.
to:
Use the cast operator e.g. (int)myfloat to convert one variable type to another on the fly.
Restore
April 15, 2007, at 10: 11 PM by David A. Mellis Changed lines 5- 6 from:
The arithmetic operators work exactly as one expects with the result returned being the result of the two values and the
operator
to:
These operators return the sum, difference, product, or quotient (respectively) of the two operands. The operation is
conducted using the data type of the operands, so, for example, 9 / 4 gives 2 since 9 and 4 are ints. This also means that
the operation can overflow if the result is larger than that which can be stored in the data type. I f the operands are of
different types, the "larger" type is used for the calculation.
Changed lines 17- 18 from:
result = value1 [+- * / ] value2
to:
result = value1 + value2;
result = value1 - value2;
result = value1 * value2;
result = value1 / value2;
Changed lines 26- 28 from:
value1: any variable type
value2: any variable type
to:
value1: any variable or constant
value2: any variable or constant
Restore
April 15, 2007, at 04: 13 PM by Paul Badger Added lines 35- 39:
Reference Home](https://image.slidesharecdn.com/arduinoreference-131030123929-phpapp02/85/Arduino-reference-342-320.jpg)
![Restore
April 15, 2007, at 04: 11 PM by Paul Badger Changed lines 26- 29 from:
A longer tutorial on computer math can eventually go in this space but for now, to benefit beginning programmers some
general guidelines will be presented. These will hopefully get you started toward getting the same answer out of your Arduino
that you do on your calculator.
Choose variable sizes that you are sure are large enough to hold the largest results from your calculations
to:
Choose variable sizes that are large enough to hold the largest results from your calculations
Changed lines 32- 34 from:
to:
Use the cast operator eg (int)myfloat to convert one variable type to another on the fly.
Restore
April 15, 2007, at 04: 08 PM by Paul Badger Changed lines 28- 30 from:
to:
Choose variable sizes that you are sure are large enough to hold the largest results from your calculations
Know at what point your variable will "roll over" and also what happens in the other direction e.g. (0 - 1) OR (0 - 32768)
For math that requires fractions, use float variables, but be aware of their drawbacks: large size, slow computation
speeds
Restore
April 15, 2007, at 04: 03 PM by Paul Badger Changed line 21 from:
value1: any variable type
to:
value1: any variable type
Changed lines 26- 32 from:
For beginning programmers there are several details of doing math on the computer to which one must pay attention. One is
that math on computers, as opposed to algebra class, must exist in physical space. This means that the variable (which
occupies a physical space on your Atmega chip) must be large enough to hold the results of your calculations.
Hence if you try something like this
byte x;
x = 255;
x = x + 1;
to:
A longer tutorial on computer math can eventually go in this space but for now, to benefit beginning programmers some
general guidelines will be presented. These will hopefully get you started toward getting the same answer out of your Arduino
that you do on your calculator.
Restore
April 15, 2007, at 03: 59 PM by Paul Badger Added lines 14- 18:
Syntax
result = value1 [+- * / ] value2
Restore
April 15, 2007, at 03: 27 PM by Paul Badger Changed line 8 from:](https://image.slidesharecdn.com/arduinoreference-131030123929-phpapp02/85/Arduino-reference-343-320.jpg)
![to:
[@
Changed line 13 from:
to:
@]
Changed lines 26- 27 from:
x = x + 1;
to:
x = x + 1; @]
Restore
April 15, 2007, at 03: 23 PM by Paul Badger Added lines 1- 27:
Addition, Subtraction, Multiplication, & Division
Description
The arithmetic operators work exactly as one expects with the result returned being the result of the two values and the
operator
Examples
y = y + 3; x = x - 7; i = j * 6; r = r / 5;
Parameters:
value1: any variable type value2: any variable type
Tips:
For beginning programmers there are several details of doing math on the computer to which one must pay attention. One is
that math on computers, as opposed to algebra class, must exist in physical space. This means that the variable (which
occupies a physical space on your Atmega chip) must be large enough to hold the results of your calculations.
Hence if you try something like this [@ byte x; x = 255; x = x + 1;
Restore
Edit Page | Page History | Printable View | All Recent Site Changes](https://image.slidesharecdn.com/arduinoreference-131030123929-phpapp02/85/Arduino-reference-344-320.jpg)


![Arduino
search
Buy | Download | Getting Started | Learning | Reference | Hardware | FAQ
Blog » | Forum » | Playground »
Reference.Modulo History
Hide minor edits - Show changes to markup
March 25, 2008, at 03: 13 PM by Paul Badger Restore
March 25, 2008, at 03: 11 PM by Paul Badger Changed line 60 from:
[[ / / send the analog input information (0 - 1023)
to:
[@ / / send the analog input information (0 - 1023)
Changed lines 62- 68 from:
Serial.print(value >> 7, BYTE);
// send highest three bits
]]
Serial.print(value >> 7, BYTE);
// send highest three bits
@]
to:
Restore
March 25, 2008, at 03: 11 PM by Paul Badger Changed lines 59- 60 from:
[[
// send the analog input information (0 - 1023)
to:
[[ / / send the analog input information (0 - 1023)
Changed lines 62- 68 from:
Serial.print(value >> 7, BYTE);
// send highest three bits
Serial.print(value >> 7, BYTE);
// send highest three bits
]]
to:
]]
Restore
March 25, 2008, at 03: 10 PM by Paul Badger Changed lines 57- 58 from:
The modulo operator can also be used to strip off the high bytes of a variable. The example below is from the Firmata
library.
to:
The modulo operator can also be used to strip off the high bits of a variable. The example below is from the Firmata library.
Changed lines 60- 61 from:
/ / send analog input information (0 - 1023)
Serial.print(value % 128, BYTE); //send lowest 7 bits
to:](https://image.slidesharecdn.com/arduinoreference-131030123929-phpapp02/85/Arduino-reference-348-320.jpg)
![// send the analog input information (0 - 1023)
Serial.print(value % 128, BYTE); // send lowest 7 bits
Restore
March 25, 2008, at 03: 09 PM by Paul Badger Changed lines 57- 58 from:
to:
The modulo operator can also be used to strip off the high bytes of a variable. The example below is from the Firmata
library.
[[ / / send analog input information (0 - 1023)
Serial.print(value % 128, BYTE); //send lowest 7 bits
Serial.print(value >> 7, BYTE);
// send highest three bits
]]
Restore
J uly 16, 2007, at 04: 55 AM by Paul Badger Changed line 34 from:
if ((i % 10) == 0){ / / read sensor every ten times through loop
to:
if ((i % 10) == 0){ / / read sensor every ten times through loop
Restore
J uly 16, 2007, at 04: 54 AM by Paul Badger Changed lines 34- 35 from:
if ((i % 10) == 0){
x = analogRead(sensPin);
// read sensor every ten times through loop
to:
if ((i % 10) == 0){ / / read sensor every ten times through loop
x = analogRead(sensPin);
Restore
May 28, 2007, at 08: 12 PM by Paul Badger Changed lines 65- 66 from:
division?
to:
division
Restore
May 28, 2007, at 08: 12 PM by Paul Badger Changed lines 65- 66 from:
division?
to:
division?
Restore
May 28, 2007, at 08: 11 PM by Paul Badger Changed lines 65- 66 from:
?
to:
division?
Restore](https://image.slidesharecdn.com/arduinoreference-131030123929-phpapp02/85/Arduino-reference-349-320.jpg)

![value1: a byte, char, int, or long
value2: a byte, char, int, or long
Restore
April 15, 2007, at 02: 07 PM by Paul Badger Deleted line 35:
Deleted lines 54- 55:
Restore
April 15, 2007, at 02: 06 PM by Paul Badger Changed line 58 from:
Common Programming Errors
to:
Tip
Restore
April 13, 2007, at 10: 45 PM by Paul Badger Changed lines 63- 65 from:
/ ?
to:
/ ?
Restore
April 13, 2007, at 10: 43 PM by Paul Badger Changed lines 27- 28 from:
The modulo operator is useful for making an event occur at regular periods, and tasks like making a memory array roll over
to:
The modulo operator is useful for making an event occur at regular periods and tasks like making a memory array roll over
Restore
April 13, 2007, at 10: 42 PM by Paul Badger Changed lines 6- 9 from:
to:
Syntax
x % y
Changed lines 12- 15 from:
x: the first number, a byte, char, int, or long
y: the second number, a byte, char, int, or long
to:
x: a byte, char, int, or long
y: a byte, char, int, or long
Changed line 21 from:
[@x = 7 % 5; / / x now contains 2
to:
[@x = 7 % 5; / / x now contains 2
Changed lines 46- 47 from:
sensVal[i++ % 5] = analogRead(sensPin);
to:](https://image.slidesharecdn.com/arduinoreference-131030123929-phpapp02/85/Arduino-reference-351-320.jpg)
![sensVal[(i++) % 5] = analogRead(sensPin); average = 0;
Changed line 49 from:
average = sensVal[j]; / / add up the samples
to:
average += sensVal[j]; / / add up the samples
Restore
April 13, 2007, at 10: 33 PM by Paul Badger Changed line 18 from:
[@x = 7 % 5; / / x now contains 2
to:
[@x = 7 % 5; / / x now contains 2
Changed line 26 from:
Example Programs
to:
Example Code
Restore
April 13, 2007, at 10: 33 PM by Paul Badger Changed line 18 from:
[@x = 7 % 5; / / x now contains 2
to:
[@x = 7 % 5; / / x now contains 2
Changed lines 24- 33 from:
The modulo operator is useful for generating repeating patterns or series of numbers, such as getting a memory array to roll
over
Example Program
[@/ / setup a buffer that averages the last five samples of a sensor
int senVal[5]; / / create an array for sensor data int i, j; / / counter variables long average; / / variable to store average ...
to:
The modulo operator is useful for making an event occur at regular periods, and tasks like making a memory array roll over
Example Programs
[@ / / check a sensor every 10 times through a loop
Added lines 30- 41:
i++; if ((i % 10) == 0){x = analogRead(sensPin); }
/ / setup a buffer that averages the last five samples of a sensor
int senVal[5]; / / create an array for sensor data int i, j; / / counter variables long average; / / variable to store average ...
void loop(){
Restore
April 13, 2007, at 10: 25 PM by Paul Badger Changed line 18 from:
x = 7 % 5; / / x now contains 2
to:](https://image.slidesharecdn.com/arduinoreference-131030123929-phpapp02/85/Arduino-reference-352-320.jpg)
![[@x = 7 % 5; / / x now contains 2
Changed lines 22- 23 from:
to:
@]
Changed lines 27- 28 from:
{@/ / setup a buffer that averages the last five samples of a sensor
to:
[@/ / setup a buffer that averages the last five samples of a sensor
Restore
April 13, 2007, at 10: 23 PM by Paul Badger Changed lines 26- 33 from:
/ / setup a buffer that averages the last five samples of a sensor
int senVal[5]; / / create an array for sensor data
to:
{@/ / setup a buffer that averages the last five samples of a sensor
int senVal[5]; / / create an array for sensor data int i, j; / / counter variables long average; / / variable to store average ...
void loop(){ / / input sensor data into oldest memory slot sensVal[i++ % 5] = analogRead(sensPin); for (j=0; j<5; j++){
average = sensVal[j]; / / add up the samples } average = average / 5; / / divide by total @]
Restore
April 13, 2007, at 10: 15 PM by Paul Badger Added lines 1- 42:
% (modulo)
Description
Returns the remainder from an integer division
Parameters
x: the first number, a byte, char, int, or long
y: the second number, a byte, char, int, or long
Returns
The remainder from an integer division.
Examples
x = 7 % 5; / / x now contains 2 x = 9 % 5; / / x now contains 4 x = 5 % 5; / / x now contains 0 x = 4 % 5; / / x now
contains 4
The modulo operator is useful for generating repeating patterns or series of numbers, such as getting a memory array to roll
over
Example Program
/ / setup a buffer that averages the last five samples of a sensor
int senVal[5]; / / create an array for sensor data
Common Programming Errors
the modulo operator will not work on floats
See also](https://image.slidesharecdn.com/arduinoreference-131030123929-phpapp02/85/Arduino-reference-353-320.jpg)

![Arduino : Reference / Modulo
Reference
Language (extended) | Libraries | Comparison | Board
% (modulo)
Description
Returns the remainder from an integer division
Syntax
result = value1 % value2
Parameters
value1: a byte, char, int, or long
value2: a byte, char, int, or long
Returns
The remainder from an integer division.
Examples
x
x
x
x
=
=
=
=
7
9
5
4
%
%
%
%
5;
5;
5;
5;
//
//
//
//
x
x
x
x
now
now
now
now
contains
contains
contains
contains
2
4
0
4
The modulo operator is useful for tasks such as making an event occur at regular periods or making a memory
array roll over
Example Code
// check a sensor every 10 times through a loop
void loop(){
i++;
if ((i % 10) == 0){
// read sensor every ten times through loop
x = analogRead(sensPin);
}
/ ...
}
// setup a buffer that averages the last five samples of a sensor
int senVal[5];
int i, j;
long average;
...
// create an array for sensor data
// counter variables
// variable to store average
void loop(){
// input sensor data into oldest memory slot
sensVal[(i++) % 5] = analogRead(sensPin);
average = 0;
for (j=0; j<5; j++){
average += sensVal[j];
// add up the samples
}
average = average / 5; // divide by total
The modulo operator can also be used to strip off the high bits of a variable. The example below is from the
Firmata library.](https://image.slidesharecdn.com/arduinoreference-131030123929-phpapp02/85/Arduino-reference-355-320.jpg)


![Changed lines 36- 37 from:
digitalWrite
to:
delay
pinMode
Restore
December 03, 2005, at 12: 42 PM by 213.140.6.103 Changed lines 16- 17 from:
[@
to:
[@
Deleted line 18:
Deleted line 19:
Deleted line 20:
Deleted line 21:
Deleted line 24:
Deleted line 25:
Deleted line 26:
Deleted line 27:
Deleted line 28:
Deleted line 29:
Restore
December 03, 2005, at 12: 40 PM by 213.140.6.103 Added line 20:
Added line 22:
Added line 24:
Added line 26:
Added line 30:
Added line 32:
Added line 34:
Added line 36:
Added line 38:
Added line 40:
Restore
December 03, 2005, at 12: 39 PM by 213.140.6.103 Changed lines 16- 17 from:
[=
to:
[@
Changed lines 32- 33 from:
=]
to:
@]
Restore
December 03, 2005, at 12: 39 PM by 213.140.6.103 Changed lines 16- 17 from:
[@
to:
[=
Changed lines 32- 33 from:](https://image.slidesharecdn.com/arduinoreference-131030123929-phpapp02/85/Arduino-reference-361-320.jpg)
![@]
to:
=]
Restore
November 27, 2005, at 10: 20 AM by 81.154.199.248 Added lines 1- 39:
DigitalWrite
What it does
Outputs a series of digital pulses that act like an analogue voltage.
What parametres does it take
you need to specify the number of the pin y ou want to configure followed by the word I NPUT or OUTPUT.
This function returns
nothing
Example
int ledPin = 13;
void setup()
{
pinMode(ledPin, OUTPUT);
}
void loop()
{
digitalWrite(ledPin, HIGH);
delay(1000);
digitalWrite(ledPin, LOW);
delay(1000);
}
// LED connected to digital pin 13
// sets the digital pin as output
//
//
//
//
sets the LED on
waits for a second
sets the LED off
waits for a second
configures pin number 13 to work as an output pin.
See also
digitalWrite
digitalRead
Restore
Edit Page | Page History | Printable View | All Recent Site Changes](https://image.slidesharecdn.com/arduinoreference-131030123929-phpapp02/85/Arduino-reference-362-320.jpg)


![Changed lines 57- 58 from:
/ / shift out lowbyte
to:
/ / shift out highbyte
Changed lines 60- 62 from:
/ / shift out highbyte @]
to:
@]
Restore
J uly 14, 2007, at 06: 09 PM by Paul Badger Changed lines 45- 46 from:
shiftOut(data, clock, MSBFI RST, (data >> 8)); / / >> is bitshift operator - moves highbyte into lowbyte
to:
/ / " >> " is bitshift operator - moves top 8 bit (high byte) into low byte shiftOut(data, clock, MSBFI RST, (data >> 8));
Restore
J uly 14, 2007, at 06: 08 PM by Paul Badger Deleted line 43:
shiftOut(data, clock, MSBFI RST, (data >> 8));
Added lines 45- 46:
shiftOut(data, clock, MSBFI RST, (data >> 8)); / / >> is bitshift operator - moves highbyte into lowbyte / / shift out lowbyte
Added lines 48- 53:
/ / And do this for LSBFI RST serial data = 500; shiftOut(data, clock, MSBFI RST, data);
Deleted lines 54- 59:
/ / And do this for LSBFI RST serial data = 500; shiftOut(data, clock, MSBFI RST, data); / / shift out lowbyte
Restore
April 13, 2007, at 11: 30 PM by Paul Badger Changed lines 6- 7 from:
This is known as synchronous serial protocol and is a common way that microcontrollers communicate with sensors, and with
other microcontrollers. The two devices always stay synchronized, and communicate at close to maximum speeds, since they
both share the same clock line. Often referred to in hardware documentation as SPI .
to:
This is known as synchronous serial protocol and is a common way that microcontrollers communicate with sensors, and with
other microcontrollers. The two devices always stay synchronized, and communicate at close to maximum speeds, since they
both share the same clock line. Often referred to as SPI (synchronous protocol interface) in hardware documentation.
Restore
April 13, 2007, at 09: 44 PM by Paul Badger Restore
April 13, 2007, at 09: 43 PM by Paul Badger Changed line 25 from:
Common Errors
to:
Common Programming Errors
Restore
April 13, 2007, at 09: 42 PM by Paul Badger -](https://image.slidesharecdn.com/arduinoreference-131030123929-phpapp02/85/Arduino-reference-390-320.jpg)

![// this will actually only output 244 because
// 500 % 256 = 244
// since only the low 8 bits are output
// Instead do this for MSBFIRST serial
data = 500;
shiftOut(data, clock, MSBFIRST, (data >> 8));
// shift out highbyte
shiftOut(data, clock, MSBFIRST, data);
// shift out lowbyte
// And do this for LSBFIRST serial
data = 500;
shiftOut(data, clock, MSBFIRST, data);
// shift out lowbyte
shiftOut(data, clock, MSBFIRST, (data >> 8));
// shift out highbyte
Restore
December 02, 2006, at 09: 42 AM by David A. Mellis Changed lines 25- 26 from:
[@//**************************************************************//
to:
[@/ / * * * * * * * * * * * * * * * * * * * * * * * * * * * * * * * * * * * * * * * * * * * * * * * * * * * * * * * * * * * * * * / /
Restore
December 02, 2006, at 09: 42 AM by David A. Mellis Changed line 25 from:
[@ //**************************************************************//
to:
[@//**************************************************************//
Restore
December 02, 2006, at 09: 42 AM by David A. Mellis Changed lines 25- 27 from:
[@
//**************************************************************//
to:
[@ //**************************************************************//
Deleted lines 40- 41:
Restore
December 02, 2006, at 09: 41 AM by David A. Mellis Added lines 23- 25:
For accompanying circuit, see the tutorial on controlling a 74HC595 shift register .
Changed lines 65- 66 from:
For accompanying circuit, see the tutorial on controlling a 74HC595 shift register .
to:
Restore
December 02, 2006, at 09: 41 AM by David A. Mellis Changed lines 60- 62 from:
} @]
to:
} @]](https://image.slidesharecdn.com/arduinoreference-131030123929-phpapp02/85/Arduino-reference-392-320.jpg)


![Arduino
Buy | Download | Getting Started | Learning | Reference | Hardware | FAQ
search
Blog » | Forum » | Playground »
Reference.Millis History
Hide minor edits - Show changes to markup
April 22, 2008, at 11: 39 PM by Paul Badger Changed lines 10- 11 from:
The number of milliseconds since the current program started running, as an unsigned long. This number will overflow (go
back to zero), after approximately 9 hours.
to:
The number of milliseconds since the current program started running, as an unsigned long. This number will overflow (go
back to zero), after approximately 9 hours and 32 minutes.
Restore
December 05, 2007, at 12: 42 PM by Paul Badger Changed lines 71- 72 from:
[@int startTime; / / should be "unsigned long startTime;
to:
[@int startTime; / / should be "unsigned long startTime; "
Restore
December 05, 2007, at 12: 41 PM by Paul Badger Changed lines 71- 72 from:
int startTime; / / should be "unsigned long startTime;
to:
[@int startTime; / / should be "unsigned long startTime;
Changed lines 75- 79 from:
startTime = millis(); / / datatype not large enough to hold data, will generate errors
to:
startTime = millis(); / / datatype not large enough to hold data, will generate errors@]
Restore
December 05, 2007, at 12: 41 PM by Paul Badger Changed line 65 from:
Note:
to:
Warning:
Restore
December 05, 2007, at 12: 40 PM by Paul Badger Changed lines 65- 67 from:
Note: Note that the parameter for millis is an unsigned long, errors may be generated if a programmer, tries to do
math with other datatypes such as ints.
to:](https://image.slidesharecdn.com/arduinoreference-131030123929-phpapp02/85/Arduino-reference-403-320.jpg)

![to:
hz = (1 /((float)time / 100000000.0));
// divide by 100,000 cycles and 1000 milliseconds per second
Deleted line 61:
Restore
April 19, 2007, at 09: 47 PM by Paul Badger Changed lines 64- 65 from:
} @]
to:
}@]
Restore
April 19, 2007, at 09: 47 PM by Paul Badger Deleted line 28:
Deleted lines 64- 65:
Deleted line 65:
Restore
April 19, 2007, at 09: 46 PM by Paul Badger Changed lines 12- 13 from:
Example
to:
Examples
Added lines 28- 67:
/ * Frequency Test
Paul Badger 2007
Program to empirically determine the time delay to generate the
proper frequency for a an I nfrared (I R) Remote Control Receiver module
These modules typically require 36 - 52 khz communication frequency
depending on specific part number.
/
int tdelay; unsigned long i, hz; unsigned long time; int outPin = 11;
void setup(){
pinMode(outPin, OUTPUT);
Serial.begin(9600);
}
void loop() {
for (tdelay = 1; tdelay < 12; tdelay++){
// scan across a range of time delays to find the right
frequency
time = millis();
// get start time of inner loop
for (i = 0; i < 100000; i++){
digitalWrite(outPin, HIGH);
delayMicroseconds(tdelay);
digitalWrite(outPin, LOW);
// time 100,000 cycles through the loop
delayMicroseconds(tdelay);
}
time = millis() - time;
// compute time through inner loop in milliseconds
hz = (1 /((float)time / 100000000.0));
// divide by 100,000 cycles and 10000 milliseconds per second
// to determine period, then take inverse to convert to hz
Serial.print(tdelay, DEC);
Serial.print("
");
Serial.println(hz, DEC);
}](https://image.slidesharecdn.com/arduinoreference-131030123929-phpapp02/85/Arduino-reference-405-320.jpg)


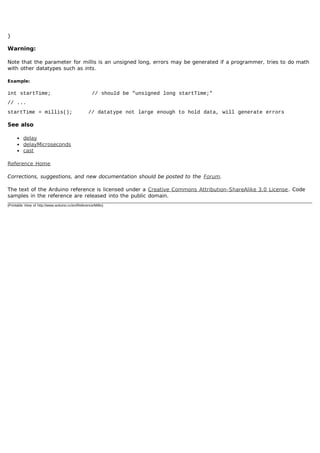


![Arduino
search
Buy | Download | Getting Started | Learning | Reference | Hardware | FAQ
Blog » | Forum » | Playground »
Reference.Min History
Hide minor edits - Show changes to markup
November 03, 2007, at 11: 32 PM by Paul Badger Changed lines 19- 20 from:
// ensuring that it never gets above 100.
@]
to:
// ensuring that it never gets above 100.@]
Restore
November 03, 2007, at 11: 32 PM by Paul Badger Deleted line 20:
Restore
November 03, 2007, at 11: 32 PM by Paul Badger Changed lines 18- 19 from:
[@sensVal = min(sensVal, 100); / / assigns sensVal to the smaller of sensVal or 100, ensuring that it never gets above 100.
to:
[@sensVal = min(sensVal, 100); / / assigns sensVal to the smaller of sensVal or 100
// ensuring that it never gets above 100.
Added lines 22- 24:
Note
Perhaps counter - intuitively, max() is often used to constrain the lower end of a variable's range, while min() is used to
constrain the upper end of the range.
Restore
April 16, 2007, at 11: 06 AM by Paul Badger Changed line 26 from:
Reference Home
to:
Restore
April 16, 2007, at 02: 13 AM by David A. Mellis Changed line 18 from:
[@sensVal = min(senVal, 100); / / limits sensor's top reading to 100 maximum
to:
[@sensVal = min(sensVal, 100); / / assigns sensVal to the smaller of sensVal or 100, ensuring that it never gets above 100.
Deleted lines 20- 24:
Tip
min is useful for limiting the range a variable (say reading a sensor) can move. Even though the name min would seem to
suggest it should be used to limit the sensor's minimum value, its real effect is to limit the variable's highest value. This can
be slightly counterintuitive.](https://image.slidesharecdn.com/arduinoreference-131030123929-phpapp02/85/Arduino-reference-425-320.jpg)


![Arduino
search
Buy | Download | Getting Started | Learning | Reference | Hardware | FAQ
Blog » | Forum » | Playground »
Reference.Max History
Hide minor edits - Show changes to markup
November 03, 2007, at 11: 30 PM by Paul Badger Changed lines 19- 21 from:
// (effectively ensuring that it is at least 20)
@]
to:
// (effectively ensuring that it is at least 20)@]
Restore
November 03, 2007, at 11: 30 PM by Paul Badger Added lines 22- 25:
Note
Perhaps counter - intuitively, max() is often used to constrain the lower end of a variable's range, while min() is used to
constrain the upper end of the range.
Restore
November 03, 2007, at 11: 24 PM by Paul Badger Changed lines 15- 16 from:
The larger of the two numbers.
to:
The larger of the two parameter values.
Restore
November 03, 2007, at 11: 24 PM by Paul Badger Changed line 18 from:
[@sensVal = max(senVal, 20); / / assigns sensVal to the bigger of sensVal or 20
to:
[@sensVal = max(senVal, 20); / / assigns sensVal to the larger of sensVal or 20
Restore
November 03, 2007, at 11: 23 PM by Paul Badger Changed line 19 from:
// (effectively ensuring that it is at least 20)
to:
// (effectively ensuring that it is at least 20)
Restore
November 03, 2007, at 11: 23 PM by Paul Badger Changed lines 18- 19 from:
[@sensVal = max(senVal, 20); / / assigns sensVal to the bigger of sensVal or 20 (effectively ensuring that it is at least 20)
to:](https://image.slidesharecdn.com/arduinoreference-131030123929-phpapp02/85/Arduino-reference-430-320.jpg)


![Arduino
Buy | Download | Getting Started | Learning | Reference | Hardware | FAQ
Reference.Constrain History
Hide minor edits - Show changes to markup
April 16, 2007, at 09: 37 AM by Paul Badger Changed line 32 from:
Reference Home
to:
Restore
April 16, 2007, at 09: 36 AM by Paul Badger Restore
April 15, 2007, at 10: 15 PM by Paul Badger Changed lines 1- 2 from:
constrain(x, a, b)
to:
constrain(x, a, b)
Restore
April 15, 2007, at 10: 15 PM by Paul Badger Changed lines 1- 2 from:
constrain(x, a, b)
to:
constrain(x, a, b)
Restore
April 15, 2007, at 10: 14 PM by Paul Badger Changed lines 1- 2 from:
constain(x, a, b)
to:
constrain(x, a, b)
Restore
April 14, 2007, at 08: 54 PM by Paul Badger Changed lines 25- 26 from:
/ / limits range of sensor from 10 to 150 @]
to:
/ / limits range of sensor values to between 10 and 150 @]
Restore
April 14, 2007, at 08: 52 PM by Paul Badger Changed lines 9- 14 from:
x: the number to constrain
a: the lower end of the range
search
Blog » | Forum » | Playground »](https://image.slidesharecdn.com/arduinoreference-131030123929-phpapp02/85/Arduino-reference-438-320.jpg)


![to:
randomSeed(analogRead(0));
Restore
September 15, 2006, at 11: 21 AM by David A. Mellis Changed lines 1- 3 from:
long random(max)
long random(min, max)
to:
long random(max)
long random(min, max)
Restore
September 15, 2006, at 11: 21 AM by David A. Mellis Changed lines 1- 2 from:
long random([min,] max)
to:
long random(max)
long random(min, max)
Restore
September 11, 2006, at 10: 15 AM by J eff Gray Changed lines 1- 2 from:
long random([start,] range)
to:
long random([min,] max)
Changed lines 7- 10 from:
start - optional starting range (ie: from "50" - 300).
range - the overall range of random numbers you'd like returned.
to:
min - optional starting range (ie: from "50" - 300).
max - the overall range of random numbers you'd like returned.
Restore
September 11, 2006, at 10: 05 AM by J eff Gray Added lines 29- 32:
// example with only a range, which would return
// a number between 0 - 300
// randNumber = random(300);
Restore
September 11, 2006, at 10: 04 AM by J eff Gray Added lines 1- 38:
long random([start,] range)
Description
The random function allows you to return pseudo- random numbers for use in your applications. NOTE: Use this after using
the randomSeed() function.
Parameters](https://image.slidesharecdn.com/arduinoreference-131030123929-phpapp02/85/Arduino-reference-480-320.jpg)


![April 15, 2007, at 10: 28 AM by David A. Mellis Changed lines 38- 39 from:
[@ if (a >= 10 && a <= 20){} / / true if a is between 10 and 20
to:
[@
Restore
April 15, 2007, at 10: 28 AM by David A. Mellis - matching formatting tags and removing incorrect example.
Changed lines 41- 43 from:
digitalWrite(ledPin, !a); / / this will turn on the LED every other time through the loop
to:
@]
Restore
April 14, 2007, at 09: 15 PM by Paul Badger Changed lines 29- 30 from:
Example
to:
Warning
Make sure you don't mistake the boolean AND operator, && (double ampersand) for the bitwise AND operator & (single
ampersand). They are entirely different beasts.
Similarly, do not confuse the boolean | | (double pipe) operator with the bitwise OR operator | (single pipe).
The bitwise not ~ (tilde) looks much different than the boolean not ! (exclamation point or "bang" as the programmers say)
but you still have to be sure which one you want where.
Examples
[@ if (a >= 10 && a <= 20){} / / true if a is between 10 and 20
if (a >= 10 && a <= 20){} / / true if a is between 10 and 20
digitalWrite(ledPin, !a); / / this will turn on the LED every other time through the loop
Restore
August 01, 2006, at 07: 16 AM by David A. Mellis Changed lines 5- 6 from:
&& (logical and): true only if both operands are true, e.g.
to:
&& (logical and)
True only if both operands are true, e.g.
Changed lines 13- 14 from:
| | (logical or): true if either operand is true, e.g.
to:
|| (logical or)
True if either operand is true, e.g.
Changed lines 21- 22 from:
! (not): true if the operand is true, e.g.
to:
! (not)](https://image.slidesharecdn.com/arduinoreference-131030123929-phpapp02/85/Arduino-reference-486-320.jpg)


![Arduino
Buy | Download | Getting Started | Learning | Reference | Hardware | FAQ
search
Blog » | Forum » | Playground »
Reference.Increment History
Hide minor edits - Show changes to markup
J uly 16, 2007, at 09: 35 AM by David A. Mellis Added line 34:
Restore
J uly 16, 2007, at 09: 35 AM by David A. Mellis Changed line 13 from:
x- - ; / / decrement x by one and returns the old value of x @]
to:
x- - ; / / decrement x by one and returns the old value of x
Restore
J uly 16, 2007, at 09: 35 AM by David A. Mellis - clarifying x++ and ++x, etc.
Changed lines 10- 12 from:
x++ ; / / equivalent to the expression x = x + 1; x- - ; / / equivalent to the expression x = x - 1; @]
to:
x++; / / increment x by one and returns the old value of x ++x; / / increment x by one and returns the new value of x
x- - ; / / decrement x by one and returns the old value of x @] - - x ; / / decrement x by one and returns the new value of x
@]
Changed lines 18- 19 from:
x: any variable type
to:
x: an integer or long (possibly unsigned)
Changed lines 22- 23 from:
I ncremented or decremented variable
to:
The original or newly incremented / decremented value of the variable.
Changed lines 27- 30 from:
x++; / / x now contains 3 x- - ; / / x contains 2 again@]
to:
y = ++x; / / x now contains 3, y contains 3 y = x- - ; / / x contains 2 again, y still contains 3 @]
Deleted lines 31- 32:
Deleted line 33:
Restore
J uly 16, 2007, at 05: 18 AM by Paul Badger Restore
J uly 16, 2007, at 05: 17 AM by Paul Badger Changed line 23 from:
[@x = 2; / / x now contains 2](https://image.slidesharecdn.com/arduinoreference-131030123929-phpapp02/85/Arduino-reference-491-320.jpg)
![to:
[@x = 2;
Restore
J uly 16, 2007, at 05: 17 AM by Paul Badger Changed lines 24- 27 from:
x++; / / x now contains 3 x- - ; / / x contains 2 again@]
to:
x++; / / x now contains 3 x- - ; / / x contains 2 again@]
Restore
J uly 16, 2007, at 05: 16 AM by Paul Badger Restore
J uly 16, 2007, at 05: 16 AM by Paul Badger Deleted lines 4- 7:
The ++ operator is
The - - operator is equivalent to the expression x = x - 1;
Restore
J uly 16, 2007, at 05: 14 AM by Paul Badger Changed lines 3- 4 from:
Description
to:
Description
Restore
J uly 16, 2007, at 05: 14 AM by Paul Badger Changed line 35 from:
+=
to:
+=
Restore
J uly 16, 2007, at 05: 13 AM by Paul Badger Changed lines 35- 36 from:
division
to:
+= - =
Restore
J uly 16, 2007, at 05: 08 AM by Paul Badger Deleted lines 26- 28:
Deleted lines 31- 63:
Example Code
// check a sensor every 10 times through a loop
void loop(){
i++;
if ((i % 10) == 0){
x = analogRead(sensPin);
}
/ ...
}
// read sensor every ten times through loop](https://image.slidesharecdn.com/arduinoreference-131030123929-phpapp02/85/Arduino-reference-492-320.jpg)
![// setup a buffer that averages the last five samples of a sensor
int senVal[5];
int i, j;
// create an array for sensor data
// counter variables
long average;
// variable to store average
...
void loop(){
// input sensor data into oldest memory slot
sensVal[(i++) % 5] = analogRead(sensPin);
average = 0;
for (j=0; j<5; j++){
average += sensVal[j];
}
average = average / 5;
// add up the samples
// divide by total
Tip
the modulo operator will not work on floats
Restore
J uly 16, 2007, at 05: 07 AM by Paul Badger Added line 13:
[@
Changed lines 15- 17 from:
x- - ; / / equivalent to the expression x = x - 1;
to:
x- - ; / / equivalent to the expression x = x - 1; @]
Restore
J uly 16, 2007, at 05: 06 AM by Paul Badger Added line 14:
Restore
J uly 16, 2007, at 05: 06 AM by Paul Badger Changed lines 1- 8 from:
++ (increment)
I ncrement a variable
Syntax
x++;
to:
++ (increment) / -- (decrement)
Description
The ++ operator is
The - - operator is equivalent to the expression x = x - 1;
I ncrement or decrement a variable
Syntax
x++ ; / / equivalent to the expression x = x + 1; x- - ; / / equivalent to the expression x = x - 1;
Parameters
x: any variable type](https://image.slidesharecdn.com/arduinoreference-131030123929-phpapp02/85/Arduino-reference-493-320.jpg)
![Returns
I ncremented or decremented variable
Examples
x = 2;
x++;
x--;
// x now contains 2
// x now contains 3
// x contains 2 again
Example Code
// check a sensor every 10 times through a loop
void loop(){
i++;
if ((i % 10) == 0){
// read sensor every ten times through loop
x = analogRead(sensPin);
}
/ ...
}
// setup a buffer that averages the last five samples of a sensor
int senVal[5];
int i, j;
long average;
...
// create an array for sensor data
// counter variables
// variable to store average
void loop(){
// input sensor data into oldest memory slot
sensVal[(i++) % 5] = analogRead(sensPin);
average = 0;
for (j=0; j<5; j++){
average += sensVal[j];
// add up the samples
}
average = average / 5; // divide by total
Tip
the modulo operator will not work on floats
See also
division
Restore
J uly 16, 2007, at 04: 51 AM by Paul Badger Added lines 1- 8:
++ (increment)
I ncrement a variable
Syntax
x++;
Restore
Edit Page | Page History | Printable View | All Recent Site Changes](https://image.slidesharecdn.com/arduinoreference-131030123929-phpapp02/85/Arduino-reference-494-320.jpg)


![x += y; / / equivalent to the expression x = x + y; x - = y; / / equivalent to the expression x = x - y; x * = y; / / equivalent
to the expression x = x * y; x / = y; / / equivalent to the expression x = x / y;
Changed lines 18- 19 from:
x: any variable type
to:
x: any variable type y: any variable type or constant
Changed lines 24- 27 from:
x++; / / x now contains 3 x- - ; / / x contains 2 again@]
to:
x += 4; / / x now contains 6 x - = 3; / / x now contains 3 x * = 10; / / x now contains 30 x / = 2; / / x now contains 15 @]
Restore
J uly 16, 2007, at 05: 27 AM by Paul Badger Added lines 1- 31:
+= , -= , *= , / =
Description
Perform a mathematical operation on a variable with another constant or variable. The += (et al) operators are just a
convenient shorthand for the expanded syntax below.
Syntax
x+=2;
x - =2;
x*=2;
x/=2;
//
//
//
//
equivalent
equivalent
equivalent
equivalent
to
to
to
to
the
the
the
the
expression
expression
expression
expression
x
x
x
x
=
=
=
=
x
x
x
x
+
*
/
2;
1;
2;
2;
Parameters
x: any variable type
Examples
x = 2;
x++;
x--;
// x now contains 3
// x contains 2 again
See also
+=
-=
Restore
Edit Page | Page History | Printable View | All Recent Site Changes](https://image.slidesharecdn.com/arduinoreference-131030123929-phpapp02/85/Arduino-reference-499-320.jpg)


![Changed lines 15- 16 from:
@]
to:
@]
Restore
April 24, 2007, at 06: 19 PM by Paul Badger Changed lines 13- 14 from:
Notice that in hexadecimal, valid characters are 0 through 9 and A through F; A has the value 10, B is 11, up to F, which is
15.
to:
Notice that in hexadecimal, valid characters are 0 through 9 and A through F; A has the value 10, B is 11, up to F, which is
15. To decode a two- digit hex value into decimal multiply the most significant (left- most) digit by 16 and add the right digit.
Deleted lines 18- 20:
Deleted line 25:
Reference Home
Restore
April 24, 2007, at 06: 17 PM by Paul Badger Changed lines 17- 21 from:
@@myI nt = (B11001100 * 256) + B10101010; / / first constant is the high byte
to:
myInt = (B11001100 * 256) + B10101010; // B11001100 is the high byte
Restore
April 24, 2007, at 06: 16 PM by Paul Badger Changed lines 13- 16 from:
Notice that in hexadecimal, some digits can be letters; A has the value 10, B is 11, up to F, which is 15.
The binary constants only work between 0 (B0) and 255 (B11111111). The others can be negative and bigger.
to:
Notice that in hexadecimal, valid characters are 0 through 9 and A through F; A has the value 10, B is 11, up to F, which is
15.
The binary formatter only works on bytes (8 bits) between 0 (B0) and 255 (B11111111). I f it's convenient to input an int (16
bits) in binary form you can do it a two- step procedure such as this:
@@myI nt = (B11001100 * 256) + B10101010; / / first constant is the high byte
Restore
December 02, 2006, at 09: 30 AM by David A. Mellis Added lines 15- 16:
The binary constants only work between 0 (B0) and 255 (B11111111). The others can be negative and bigger.
Restore
December 02, 2006, at 09: 28 AM by David A. Mellis Changed lines 6- 10 from:
Name Base Prefix Example Value Decimal 10 none 123 123 Binary 2 B B1111011 123 Octal 8 0 0173 123 Hexadecimal 16 0x
0x7B 123
to:
Base Example 10 (decimal) 123 2 (binary) B1111011 8 (octal) 0173 16 (hexadecimal) 0x7B
Restore
December 02, 2006, at 09: 26 AM by David A. Mellis Added lines 1- 22:](https://image.slidesharecdn.com/arduinoreference-131030123929-phpapp02/85/Arduino-reference-527-320.jpg)


![Restore
May 28, 2007, at 01: 47 PM by Paul Badger Changed lines 3- 6 from:
boolean variables are one- bit variables that can only hold two values, 1 and 0. Note that the constants HI GH and LOW are
also defined as 1 and 0, as are the variables TRUE and FALSE.
Example
to:
boolean variables are one- bit variables that can only hold two values, 1 and 0. Note that the constants HI GH and LOW are
also defined as 1 and 0, as are the variables TRUE and FALSE.
All of the following will set the variable running to a TRUE condition:
Deleted lines 6- 8:
1. define LEDpin 5 / / LED on pin 5
2. define switchPin 13 / / momentary switch on 13
[@
Changed lines 8- 20 from:
boolean LEDon;
to:
running = 35; / / any non- zero number is TRUE running = - 7; / / negative numbers are non- zero running = HI GH; / / HI GH is
defined as 1 running = .125 / / non- zero float defined as TRUE
Example
[@
1. define LEDpin 5 / / LED on pin 5
2. define switchPin 13 / / momentary switch on 13
[@ boolean running;
Changed line 31 from:
delay(50); / / delay to debounce switch
to:
delay(100); / / delay to debounce switch
Changed line 34 from:
to:
/ / more statements
Changed lines 36- 40 from:
@]
to:
@]
See also
Constants
boolean operators ?
Restore
May 28, 2007, at 01: 37 PM by Paul Badger Changed line 28 from:
]](https://image.slidesharecdn.com/arduinoreference-131030123929-phpapp02/85/Arduino-reference-535-320.jpg)
![to:
@]
Restore
May 28, 2007, at 01: 37 PM by Paul Badger Changed line 7 from:
to:
[@
Added line 28:
]
Restore
May 28, 2007, at 01: 36 PM by Paul Badger Added lines 1- 27:
boolean variables
boolean variables are one- bit variables that can only hold two values, 1 and 0. Note that the constants HI GH and LOW are
also defined as 1 and 0, as are the variables TRUE and FALSE.
Example
1. define LEDpin 5 / / LED on pin 5
2. define switchPin 13 / / momentary switch on 13
[@ boolean running; boolean LEDon; int x;
void setup(){ pinMode( LEDpin, OUTPUT); pinMode(switchPin, I NPUT); digitalWrite(switchPin, HI GH); / / turn on pullup resistors
}
void loop(){ if (digitalRead(switchPin) == 0){ / / switch is pressed delay(50); / / delay to debounce switch running = !running;
/ / toggle running variable digitalWrite(LEDpin, running) / / indicate via LED
}
Restore
Edit Page | Page History | Printable View | All Recent Site Changes](https://image.slidesharecdn.com/arduinoreference-131030123929-phpapp02/85/Arduino-reference-536-320.jpg)


![Changed lines 13- 14 from:
int var = val;
to:
int var = val;
Restore
March 24, 2006, at 01: 55 PM by J eff Gray Changed lines 13- 14 from:
[int var = val; ]
to:
int var = val;
Restore
March 24, 2006, at 01: 55 PM by J eff Gray Changed lines 13- 14 from:
int var = val;
to:
[int var = val; ]
Restore
March 24, 2006, at 01: 54 PM by J eff Gray Added lines 1- 8:
int
Description
I ntegers are your primary form of number storage, and store a 4 byte value. This gives you a range of - 2147483647 to
2147483647 (minimum value of - 2^31 and a maximum value of 2^31 - 1).
Example
Changed lines 11- 23 from:
A data type that is 4 bytes long with a minimum value of - 2^31 and a maximum value of 2^31 - 1. Needed before
declaring a new variable in your code.
to:
Parameters
int var = val;
var - your int variable name
val - the value you assign to that variable
Reference Home
Restore
February 14, 2006, at 09: 58 AM by Erica Calogero Added lines 1- 3:
int ledPin = 13;
A data type that is 4 bytes long with a minimum value of - 2^31 and a maximum value of 2^31 - 1. Needed before
declaring a new variable in your code.
Restore
Edit Page | Page History | Printable View | All Recent Site Changes](https://image.slidesharecdn.com/arduinoreference-131030123929-phpapp02/85/Arduino-reference-554-320.jpg)


![to:
The difference lies in the way the highest bit, sometimes refered to as the "sign" bit is interpreted. I n the Arduino int type,
which is signed, if the high bit is a "1", the number is interpreted as a negative number and the other 15 bits are interpreted
with 2's complement math.
Restore
April 24, 2007, at 05: 52 PM by Paul Badger Restore
April 16, 2007, at 05: 09 PM by David A. Mellis - not sure that unsigned int x = 65536; does what you expect (constant are
signed ints, I believe)
Deleted lines 28- 29:
x = 65535;
Restore
April 16, 2007, at 05: 08 PM by David A. Mellis Changed lines 14- 15 from:
Parameters
to:
Syntax
Changed lines 34- 36 from:
to:
See Also
byte
int
long
unsigned long
Restore
April 16, 2007, at 02: 23 PM by Paul Badger Added lines 24- 25:
When variables are made to exceed their maximum capacity they "roll over" back to their minimum capacitiy, note that this
happens in both directions
Restore
April 16, 2007, at 11: 35 AM by Paul Badger Changed lines 24- 28 from:
[@unsigned int x x = 0; x = x - 1; / / x now contains 65535 - rolls over x = 65535; x = x + 1; / / x now contains 0
to:
[@ unsigned int x
x = 0;
x = x - 1;
// x now contains 65535 - rolls over in neg direction
x = 65535;
x = x + 1;
// x now contains 0 - rolls over
Restore
April 16, 2007, at 11: 33 AM by Paul Badger Changed lines 29- 33 from:
to:
@]
Restore
April 16, 2007, at 11: 32 AM by Paul Badger Added lines 1- 33:](https://image.slidesharecdn.com/arduinoreference-131030123929-phpapp02/85/Arduino-reference-558-320.jpg)


![Arduino
Buy | Download | Getting Started | Learning | Reference | Hardware | FAQ
search
Blog » | Forum » | Playground »
Reference.Long History
Hide minor edits - Show changes to markup
April 16, 2007, at 05: 06 PM by David A. Mellis Changed lines 24- 25 from:
Parameters
to:
Syntax
Changed lines 36- 37 from:
to:
unsigned int
unsigned long
Restore
April 16, 2007, at 04: 17 PM by Paul Badger Deleted lines 37- 38:
Reference Home
Restore
April 16, 2007, at 01: 53 AM by David A. Mellis Changed line 34 from:
[[byte]
to:
byte
Restore
April 16, 2007, at 01: 53 AM by David A. Mellis Changed lines 32- 35 from:
to:
See Also
[[byte]
int
Restore
April 16, 2007, at 01: 07 AM by Paul Badger Changed lines 5- 6 from:
Long variables are extended size varialbes for number storage, and store 32 bits, from - 2,147,483,648 to 2,147,483,647.
to:
Long variables are extended size variables for number storage, and store 32 bits (4 bytes), from - 2,147,483,648 to
2,147,483,647.
Restore
March 31, 2006, at 02: 58 PM by J eff Gray Changed line 28 from:](https://image.slidesharecdn.com/arduinoreference-131030123929-phpapp02/85/Arduino-reference-562-320.jpg)


![Arduino
Buy | Download | Getting Started | Learning | Reference | Hardware | FAQ
search
Blog » | Forum » | Playground »
Reference.Float History
Hide minor edits - Show changes to markup
May 28, 2007, at 10: 24 PM by David A. Mellis Changed lines 7- 8 from:
Floating point math is much slower than integer math in performing calculations, so should be avoided if, for example, a loop
has to run at top speed for a critical timing function. Programmers often go to some lengths to convert floating point
calculations to integer math to increase speed.
to:
Floating point numbers are not exact, and may yield strange results when compared. For example 6.0 / 3.0 may not equal
2.0 . You should instead check that the absolute value of the difference between the numbers is less than some small
number.
Floating point math is also much slower than integer math in performing calculations, so should be avoided if, for example, a
loop has to run at top speed for a critical timing function. Programmers often go to some lengths to convert floating point
calculations to integer math to increase speed.
Restore
May 28, 2007, at 08: 08 PM by Paul Badger Changed line 31 from:
y = x / 2;
// y now contains 0, integers can't hold fractions
to:
y = x / 2;
// y now contains 0, ints can't hold fractions
Restore
April 16, 2007, at 05: 05 PM by David A. Mellis Changed lines 17- 18 from:
Parameters
to:
Syntax
Restore
April 16, 2007, at 11: 38 AM by Paul Badger Changed lines 26- 33 from:
int x; int y; float z;
x = 1; y = x / 2; / / y now contains 0, integers can't hold fractions z = (float)x / 2.0; / / z now contains .5 (you have to use
2.0, not 2)@]
to:
int x;
int y;
float z;
x = 1;
y = x / 2;
// y now contains 0, integers can't hold fractions
z = (float)x / 2.0;
// z now contains .5 (you have to use 2.0, not 2)@]](https://image.slidesharecdn.com/arduinoreference-131030123929-phpapp02/85/Arduino-reference-571-320.jpg)
![Restore
April 16, 2007, at 11: 36 AM by Paul Badger Deleted line 37:
Reference Home
Restore
April 14, 2007, at 03: 14 PM by Paul Badger Changed lines 32- 33 from:
z = x / 2.0; / / z now contains .5 (you have to use 2.0, not 2)@]
to:
z = (float)x / 2.0; / / z now contains .5 (you have to use 2.0, not 2)@]
Restore
April 14, 2007, at 11: 01 AM by David A. Mellis - correcting float = int / int; to float = int / float;
Changed lines 32- 33 from:
z = x / 2; / / z now contains .5@]
to:
z = x / 2.0; / / z now contains .5 (you have to use 2.0, not 2)@]
Restore
April 14, 2007, at 12: 06 AM by Paul Badger Changed line 9 from:
That being said, floating point math is one of the things missing from many beginning microcontroller systems.
to:
That being said, floating point math is useful for a wide range of physical computing tasks, and is one of the things missing
from many beginning microcontroller systems.
Changed lines 22- 24 from:
val - the value you assign to that variable
to:
val - the value you assign to that variable
Example Code
int x;
int y;
float z;
x = 1;
y = x / 2;
z = x / 2;
// y now contains 0, integers can't hold fractions
// z now contains .5
Programming Tip
Serial.println() truncates floats (throws away the fractions) into integers when sending serial. Multiply by power of ten to
preserve resolution.
Restore
April 13, 2007, at 11: 54 PM by Paul Badger Changed lines 14- 15 from:
float myfloat;
float sensorCalbrate = 1.117;
to:
float myfloat;
float sensorCalbrate = 1.117;](https://image.slidesharecdn.com/arduinoreference-131030123929-phpapp02/85/Arduino-reference-572-320.jpg)


![Restore
October 27, 2007, at 09: 58 PM by Paul Badger Changed lines 72- 79 from:
array PROGMEM
to:
array
PROGMEM
Restore
October 27, 2007, at 09: 58 PM by Paul Badger Changed lines 70- 76 from:
to:
See Also
array PROGMEM
Restore
October 27, 2007, at 09: 50 PM by Paul Badger Changed line 65 from:
Serial.print(myStrings[i]);
to:
Serial.println(myStrings[i]);
Restore
October 27, 2007, at 09: 36 PM by Paul Badger Restore
October 27, 2007, at 09: 29 PM by Paul Badger Changed lines 50- 53 from:
I t is often convenient when working with large amounts of text, such as a project with an LCD display, to setup an array of
strings. Because strings themselves are arrays, this is in actually a two- dimensional array.
I t isn't necessary to understand this contruction in detail to use it effectively. The code fragments below illustrate the idea.
to:
I t is often convenient when working with large amounts of text, such as a project with an LCD display, to setup an array of
strings. Because strings themselves are arrays, this is in actually an expample of a two- dimensional array.
I t isn't necessary to understand this construction in detail to use it effectively. The code fragments below illustrate the idea.
Restore
October 27, 2007, at 09: 26 PM by Paul Badger Deleted line 63:
Restore
October 27, 2007, at 09: 26 PM by Paul Badger Changed line 56 from:
char* myStrings[]={"This is string 1", "This is string 2", "This is string 3",/ /
to:
char* myStrings[]={"This is string 1", "This is string 2", "This is string 3",
Restore
October 27, 2007, at 09: 25 PM by Paul Badger Changed lines 56- 59 from:
char* myStrings[]={"This is string 1", "This is string 2", "This is string 3",
"This is string 4", "This is string 5","This is string 6", };
to:](https://image.slidesharecdn.com/arduinoreference-131030123929-phpapp02/85/Arduino-reference-580-320.jpg)
![char* myStrings[]={"This is string 1", "This is string 2", "This is string 3",/ / "This is string 4", "This is string 5","This is string
6"};
Restore
October 27, 2007, at 09: 24 PM by Paul Badger Changed lines 50- 51 from:
I t is often useful when working with several strings, such as a project with an LCD display, to setup an array of strings.
Because strings themselves are arrays, this is in actually a two- dimensional array. The code fragments below illustrate the
idea.
to:
I t is often convenient when working with large amounts of text, such as a project with an LCD display, to setup an array of
strings. Because strings themselves are arrays, this is in actually a two- dimensional array.
I t isn't necessary to understand this contruction in detail to use it effectively. The code fragments below illustrate the idea.
Changed lines 56- 57 from:
char* myStrings[]={"This is string 1", "This is string 2"};
to:
char* myStrings[]={"This is string 1", "This is string 2", "This is string 3",
"This is string 4", "This is string 5","This is string 6", };
Changed lines 65- 68 from:
Serial.print(myStrings[0]); delay(100); Serial.print(myStrings[1]); delay(100);
to:
for (int i = 0; i < 6; i++){
Serial.print(myStrings[i]);
delay(500);
}
Restore
October 27, 2007, at 09: 16 PM by Paul Badger Changed lines 18- 19 from:
Possibilities for declaring strings
to:
Possibilities for declaring strings
Changed lines 35- 36 from:
Single quotes or double quotes?
to:
Single quotes or double quotes?
Changed lines 39- 40 from:
Wrapping long strings
to:
Wrapping long strings
Changed lines 48- 53 from:
to:
Arrays of strings
I t is often useful when working with several strings, such as a project with an LCD display, to setup an array of strings.
Because strings themselves are arrays, this is in actually a two- dimensional array. The code fragments below illustrate the
idea.](https://image.slidesharecdn.com/arduinoreference-131030123929-phpapp02/85/Arduino-reference-581-320.jpg)
![char* myStrings[]={"This is string 1", "This is string 2"};
void setup(){
Serial.begin(9600);
}
void loop(){
Serial.print(myStrings[0]);
delay(100);
Serial.print(myStrings[1]);
delay(100);
}
Restore
October 27, 2007, at 09: 09 PM by Paul Badger Changed lines 27- 28 from:
Null termination
to:
Null termination
Restore
September 27, 2007, at 12: 34 PM by David A. Mellis Changed lines 5- 6 from:
Strings in the C programming language are represented as arrays of type char.
to:
Strings are represented as arrays of type char and are null- terminated.
Restore
September 27, 2007, at 10: 50 AM by Paul Badger Changed lines 5- 6 from:
Strings in the C programming language are represented as arrays of chars.
to:
Strings in the C programming language are represented as arrays of type char.
Restore
September 27, 2007, at 10: 47 AM by Paul Badger Changed lines 31- 32 from:
This means that your string needs to have space for more character than the text you want it to contain. That is why Str2
and Str5 need to be eight characters, even though "arduino" is only seven - the last position is automatically filled by a null
character. Str4 will be automatically sized to eight characters, one for the extra null. I n Str3, we've explicitly included the
null character (written ' 0') ourselves.
to:
This means that your string needs to have space for one more character than the text you want it to contain. That is why
Str2 and Str5 need to be eight characters, even though "arduino" is only seven - the last position is automatically filled by a
null character. Str4 will be automatically sized to eight characters, one for the extra null. I n Str3, we've explicitly included
the null character (written ' 0') ourselves.
Restore
May 31, 2007, at 09: 30 AM by David A. Mellis Changed line 7 from:
String declarations
to:
Examples
Restore](https://image.slidesharecdn.com/arduinoreference-131030123929-phpapp02/85/Arduino-reference-582-320.jpg)
![May 31, 2007, at 09: 29 AM by David A. Mellis - Clarifying the language.
Changed lines 5- 6 from:
Strings in the C programming language are defined as arrays of type char.
to:
Strings in the C programming language are represented as arrays of chars.
Changed line 12 from:
char Str3[8] = {'a', 'r', 'd', 'u', 'i', 'n', 'o','0'};
to:
char Str3[8] = {'a', 'r', 'd', 'u', 'i', 'n', 'o', '0'};
Changed lines 23- 24 from:
I nitialization is in the form of a string constant in quotation marks, the compiler will size the array to fit the constant
and add the extra null, Str4
I nitialize the array with an explicit size, Str5
to:
I nitialize with a string constant in quotation marks; the compiler will size the array to fit the string constant and a
terminating null character, Str4
I nitialize the array with an explicit size and string constant, Str5
Deleted line 26:
Changed lines 29- 32 from:
Note the differences between Str2 & Str3, in theory it seems the array of Str1 should be able to be contained with a
declaration of 7 elements in the array, since there are only 7 letters in "Arduino". However the Arduino language enforces
"null termination" meaning that the last character of an array must be a null (denoted by 0), as in Str2.
When declaring a string, you must declare an extra character for this null or the compiler will complain with an error about
the initialization string being too long. For the same reasons, Str3 can hold only 14 characters, not 15, as one might assume.
to:
Generally, strings are terminated with a null character (ASCI I code 0). This allows function (like Serial.print()) to tell where
the end of a string is. Otherwise, they would continue reading subsequent bytes of memory that aren't actually part of the
string.
This means that your string needs to have space for more character than the text you want it to contain. That is why Str2
and Str5 need to be eight characters, even though "arduino" is only seven - the last position is automatically filled by a null
character. Str4 will be automatically sized to eight characters, one for the extra null. I n Str3, we've explicitly included the
null character (written ' 0') ourselves.
Note that it's possible to have a string without a final null character (e.g. if you had specified the length of Str2 as seven
instead of eight). This will break most functions that use strings, so you shouldn't do it intentionally. I f you notice something
behaving strangely (operating on characters not in the string), however, this could be the problem.
Restore
May 31, 2007, at 09: 16 AM by David A. Mellis - don't want {} around a multi- line string - it makes it into an array of
strings.
Changed line 42 from:
char myString[] = {"This is the first line"
to:
char myString[] = "This is the first line"
Changed line 44 from:
" etcetera"};
to:
" etcetera";
Restore](https://image.slidesharecdn.com/arduinoreference-131030123929-phpapp02/85/Arduino-reference-583-320.jpg)
![May 29, 2007, at 02: 16 PM by Paul Badger Changed lines 38- 39 from:
to:
Wrapping long strings
You can wrap long strings like this:
char myString[] = {"This is the first line"
" this is the second line"
" etcetera"};
Restore
April 16, 2007, at 11: 03 AM by Paul Badger Changed line 39 from:
Reference Home
to:
Restore
April 15, 2007, at 03: 00 PM by Paul Badger Changed lines 21- 27 from:
Declare an array of chars (with one extra char)and the compiler will add the required null character
Explicitly add the null character
I nitialization is in the form of a string constant in quotation marks, the compiler will size the array to fit the constant
and add the extra null
I nitialize the array with an explicit size
I nitialize the array, leaving extra space for a larger string
to:
Declare an array of chars (with one extra char) and the compiler will add the required null character, as in Str2
Explicitly add the null character, Str3
I nitialization is in the form of a string constant in quotation marks, the compiler will size the array to fit the constant
and add the extra null, Str4
I nitialize the array with an explicit size, Str5
I nitialize the array, leaving extra space for a larger string, Str6
Restore
April 15, 2007, at 12: 54 PM by Paul Badger Changed line 8 from:
All of the following are valid declarations of valid strings.
to:
All of the following are valid declarations for strings.
Changed lines 17- 18 from:
Facts about strings
to:
Restore
April 15, 2007, at 12: 53 PM by Paul Badger Changed line 8 from:
Strings can be declared in any of the following manners
to:
All of the following are valid declarations of valid strings.
Changed lines 10- 12 from:
char Str1[8] = {'a', 'r', 'd', 'u', 'i', 'n', 'o'};
char Str2[8] = {'a', 'r', 'd', 'u', 'i', 'n', 'o','0'};
char Str3[4];
to:](https://image.slidesharecdn.com/arduinoreference-131030123929-phpapp02/85/Arduino-reference-584-320.jpg)
![char Str1[15];
char Str2[8] = {'a', 'r', 'd', 'u', 'i', 'n', 'o'};
char Str3[8] = {'a', 'r', 'd', 'u', 'i', 'n', 'o','0'};
Changed lines 17- 56 from:
Null termination
Note the differences between Str1 & Str2, in theory it seems the array of Str1 should be able to be contained with a
declaration of 7 elements in the array, since there are only 7 letters in "Arduino". However the Arduino language enforces
"null termination" meaning that the last character of an array must be a null (denoted by 0), as in Str2. I f you haven't
declared an extra character for this null, the compiler will complain with an error about the initialization string being too long.
I n the first example the array is initialized with constants of type char, 'a', 'r'. 'd', etc. These constants (letters in this case,
but any ASCI I symbols really) are declared by enclosing them in single quotes. I n example four, the initialization of the string
is shown with the whole word in quotation marks as in "arduino"
Note that in example 4 above, the
Example
long time;
void setup(){
Serial.begin(9600);
}
void loop(){
Serial.print("Time: ");
time = millis();
//prints time since program started
Serial.println(time);
// wait a second so as not to send massive amounts of data
delay(1000);
}
Parameters
long var = val;
var - your long variable name
val - the value you assign to that variable
to:
Facts about strings
Possibilities for declaring strings
Declare an array of chars without initializing it as in Str1
Declare an array of chars (with one extra char)and the compiler will add the required null character
Explicitly add the null character
I nitialization is in the form of a string constant in quotation marks, the compiler will size the array to fit the constant
and add the extra null
I nitialize the array with an explicit size
I nitialize the array, leaving extra space for a larger string
Null termination
Note the differences between Str2 & Str3, in theory it seems the array of Str1 should be able to be contained with a
declaration of 7 elements in the array, since there are only 7 letters in "Arduino". However the Arduino language enforces
"null termination" meaning that the last character of an array must be a null (denoted by 0), as in Str2.
When declaring a string, you must declare an extra character for this null or the compiler will complain with an error about
the initialization string being too long. For the same reasons, Str3 can hold only 14 characters, not 15, as one might assume.
Single quotes or double quotes?
Strings are always defined inside double quotes ("Abc") and characters are always defined inside single quotes('A').](https://image.slidesharecdn.com/arduinoreference-131030123929-phpapp02/85/Arduino-reference-585-320.jpg)
![Restore
April 14, 2007, at 11: 24 PM by Paul Badger Restore
April 14, 2007, at 11: 24 PM by Paul Badger Changed lines 10- 15 from:
char myStr1[8] = {'a', 'r', 'd', 'u', 'i', 'n', 'o'};
char myStr2[8] = {'a', 'r', 'd', 'u', 'i', 'n', 'o','0'};
char myStr3[4];
char myStr4[ ] = "arduino";
char myStr5[8] = "arduino";
char myStr6[15] = "arduino";
to:
char Str1[8] = {'a', 'r', 'd', 'u', 'i', 'n', 'o'};
char Str2[8] = {'a', 'r', 'd', 'u', 'i', 'n', 'o','0'};
char Str3[4];
char Str4[ ] = "arduino";
char Str5[8] = "arduino";
char Str6[15] = "arduino";
Changed lines 17- 18 from:
A couple of things to note.
to:
Null termination
Note the differences between Str1 & Str2, in theory it seems the array of Str1 should be able to be contained with a
declaration of 7 elements in the array, since there are only 7 letters in "Arduino". However the Arduino language enforces
"null termination" meaning that the last character of an array must be a null (denoted by 0), as in Str2. I f you haven't
declared an extra character for this null, the compiler will complain with an error about the initialization string being too long.
Restore
April 14, 2007, at 11: 12 PM by Paul Badger Changed lines 10- 15 from:
char
char
char
char
char
char
myStr[7] = {'a', 'r', 'd', 'u', 'i' 'n' 'o'};
myStr[8] = {'a', 'r', 'd', 'u', 'i', 'n', 'o','0'};
myStr[4];
myStr[ ] = "arduino";
myStr[7] = "arduino";
myStr[15] = "arduino";
to:
char myStr1[8] = {'a', 'r', 'd', 'u', 'i', 'n', 'o'};
char myStr2[8] = {'a', 'r', 'd', 'u', 'i', 'n', 'o','0'};
char myStr3[4];
char myStr4[ ] = "arduino";
char myStr5[8] = "arduino";
char myStr6[15] = "arduino";
Changed lines 19- 22 from:
I n the first example the array is initialized with constants of type char 'a', 'r'. 'd', etc. These constants (letters in this case,
but any ASCI I symbols really) are declared by enclosing in single quotes. I n example four, the initialization of the string is
shown with the whole word in quotation marks
to:
I n the first example the array is initialized with constants of type char, 'a', 'r'. 'd', etc. These constants (letters in this case,
but any ASCI I symbols really) are declared by enclosing them in single quotes. I n example four, the initialization of the string
is shown with the whole word in quotation marks as in "arduino"
Restore
April 14, 2007, at 11: 07 PM by Paul Badger Changed lines 10- 15 from:](https://image.slidesharecdn.com/arduinoreference-131030123929-phpapp02/85/Arduino-reference-586-320.jpg)
![char str[5] = {'a', 'r', 'd', 'u', 'i' 'n' 'o'};
char str[6] = {'a', 'r', 'd', 'u', 'i', 'n', 'o','0'};
char str[3];
char str[ ] = "arduino";
char str[7] = "arduino";
char str[15] = "arduino";
to:
char myStr[7] = {'a', 'r', 'd', 'u', 'i' 'n' 'o'};
char myStr[8] = {'a', 'r', 'd', 'u', 'i', 'n', 'o','0'};
char myStr[4];
char myStr[ ] = "arduino";
char myStr[7] = "arduino";
char myStr[15] = "arduino";
Changed lines 19- 21 from:
I n the first example the array is initialized with constants of type char.
to:
I n the first example the array is initialized with constants of type char 'a', 'r'. 'd', etc. These constants (letters in this case,
but any ASCI I symbols really) are declared by enclosing in single quotes. I n example four, the initialization of the string is
shown with the whole word in quotation marks
Restore
April 14, 2007, at 11: 02 PM by Paul Badger Added lines 1- 53:
string
Description
Strings in the C programming language are defined as arrays of type char.
String declarations
Strings can be declared in any of the following manners
char
char
char
char
char
char
str[5] = {'a', 'r', 'd', 'u', 'i' 'n' 'o'};
str[6] = {'a', 'r', 'd', 'u', 'i', 'n', 'o','0'};
str[3];
str[ ] = "arduino";
str[7] = "arduino";
str[15] = "arduino";
A couple of things to note. I n the first example the array is initialized with constants of type char.
Note that in example 4 above, the
Example
long time;
void setup(){
Serial.begin(9600);
}
void loop(){
Serial.print("Time: ");
time = millis();
//prints time since program started
Serial.println(time);
// wait a second so as not to send massive amounts of data
delay(1000);
}](https://image.slidesharecdn.com/arduinoreference-131030123929-phpapp02/85/Arduino-reference-587-320.jpg)

![Arduino : Reference / String
Reference
Language (extended) | Libraries | Comparison | Board
string
Description
Strings are represented as arrays of type char and are null-terminated.
Examples
All of the following are valid declarations for strings.
char Str1[15];
char Str2[8] = {'a', 'r', 'd', 'u', 'i', 'n', 'o'};
char Str3[8] = {'a', 'r', 'd', 'u', 'i', 'n', 'o', '0'};
char Str4[ ] = "arduino";
char Str5[8] = "arduino";
char Str6[15] = "arduino";
Possibilities for declaring strings
Declare an array of chars without initializing it as in Str1
Declare an array of chars (with one extra char) and the compiler will add the required null character, as in
Str2
Explicitly add the null character, Str3
I nitialize with a string constant in quotation marks; the compiler will size the array to fit the string constant
and a terminating null character, Str4
I nitialize the array with an explicit size and string constant, Str5
I nitialize the array, leaving extra space for a larger string, Str6
Null termination
Generally, strings are terminated with a null character (ASCI I code 0). This allows functions (like Serial.print()) to
tell where the end of a string is. Otherwise, they would continue reading subsequent bytes of memory that aren't
actually part of the string.
This means that your string needs to have space for one more character than the text you want it to contain. That
is why Str2 and Str5 need to be eight characters, even though "arduino" is only seven - the last position is
automatically filled with a null character. Str4 will be automatically sized to eight characters, one for the extra null.
I n Str3, we've explicitly included the null character (written ' 0') ourselves.
Note that it's possible to have a string without a final null character (e.g. if you had specified the length of Str2 as
seven instead of eight). This will break most functions that use strings, so you shouldn't do it intentionally. I f you
notice something behaving strangely (operating on characters not in the string), however, this could be the
problem.
Single quotes or double quotes?
Strings are always defined inside double quotes ("Abc") and characters are always defined inside single quotes('A').
Wrapping long strings
You can wrap long strings like this:
char myString[] = "This is the first line"
" this is the second line"
" etcetera";
Arrays of strings](https://image.slidesharecdn.com/arduinoreference-131030123929-phpapp02/85/Arduino-reference-589-320.jpg)
![I t is often convenient, when working with large amounts of text, such as a project with an LCD display, to setup an
array of strings. Because strings themselves are arrays, this is in actually an example of a two-dimensional array.
I n the code below, the asterisk after the datatype char "char* " indicates that this is an array of "pointers". All
array names are actually pointers, so this is required to make an array of arrays. Pointers are one of the more
esoteric parts of C for beginners to understand, but it isn't necessary to understand pointers in detail to use them
effectively here.
Example
char* myStrings[]={"This is string 1", "This is string 2", "This is string 3",
"This is string 4", "This is string 5","This is string 6"};
void setup(){
Serial.begin(9600);
}
void loop(){
for (int i = 0; i < 6; i++){
Serial.println(myStrings[i]);
delay(500);
}
}
See Also
array
PROGMEM
Reference Home
Corrections, suggestions, and new documentation should be posted to the Forum.
The text of the Arduino reference is licensed under a Creative Commons Attribution-ShareAlike 3.0 License . Code
samples in the reference are released into the public domain.
(Printable View of http://www.arduino.cc/en/Reference/String)](https://image.slidesharecdn.com/arduinoreference-131030123929-phpapp02/85/Arduino-reference-590-320.jpg)

![Arduino
search
Buy | Download | Getting Started | Learning | Reference | Hardware | FAQ
Blog » | Forum » | Playground »
Reference.Array History
Hide minor edits - Show changes to markup
J anuary 10, 2008, at 10: 49 PM by Paul Badger Changed lines 35- 36 from:
Unlike in some version of BASI C, the C compiler does no checking to see if array access is within legal bounds of the array
size that you have declared.
to:
Unlike in some versions of BASI C, the C compiler does no checking to see if array access is within legal bounds of the array
size that you have declared.
Restore
May 26, 2007, at 08: 07 PM by Paul Badger Added lines 35- 36:
Unlike in some version of BASI C, the C compiler does no checking to see if array access is within legal bounds of the array
size that you have declared.
Restore
May 26, 2007, at 08: 05 PM by Paul Badger Added lines 32- 34:
For this reason you should be careful in accessing arrays. Accessing past the end of an array (using an index number greater
than your declared array size - 1) is reading from memory that is in use for other purposes. Reading from these locations is
probably not going to do much except yield invalid data. Writing to random memory locations is definitely a bad idea and can
often lead to unhappy results such as crashes or program malfunction. This can also be a difficult bug to track down.
Deleted lines 55- 58:
Coding Tip
Be careful in accessing arrays. Accessing past the end of an array (using an index number greater than your declared array
size - 1) is reading from memory that is in use for other purposes. Reading from these locations is probably not going to do
much except yield invalid data. Writing to random memory locations is definitely a bad idea and can often lead to unhappy
results such as crashes or program malfunction. This can also be a difficult bug to track down.
Restore
May 26, 2007, at 08: 01 PM by Paul Badger Changed line 26 from:
I t also means that in an array with ten elements, that index nine is the last element. Hence:
to:
I t also means that in an array with ten elements, index nine is the last element. Hence:
Restore
May 26, 2007, at 08: 01 PM by Paul Badger Changed line 30 from:
// myArray[10]
is invalid and contains random
information (other memory address)
// myArray[10]
is invalid and contains random information (other memory address)
to:](https://image.slidesharecdn.com/arduinoreference-131030123929-phpapp02/85/Arduino-reference-592-320.jpg)
![Restore
May 26, 2007, at 08: 00 PM by Paul Badger Changed lines 31- 32 from:
to:
@]
Restore
May 26, 2007, at 08: 00 PM by Paul Badger Changed line 26 from:
To assign a value to an array:
to:
I t also means that in an array with ten elements, that index nine is the last element. Hence:
Added lines 28- 34:
int myArray[10]={9,3,2,4,3,2,7,8,9,11};
// myArray[9]
// myArray[10]
contains 11
is invalid and contains random
information (other memory address)
To assign a value to an array:
[@
Changed lines 56- 57 from:
Be careful in accessing arrays. Accessing past the end of an array is reading from memory that is in use for other purposes.
Reading from these locations is probably not going to do much except yield invalid data. Writing to random memory locations
is definitely a bad idea and can often lead to unhappy results such as crashes or program malfunction. This can also be a
difficult bug to track down.
to:
Be careful in accessing arrays. Accessing past the end of an array (using an index number greater than your declared array
size - 1) is reading from memory that is in use for other purposes. Reading from these locations is probably not going to do
much except yield invalid data. Writing to random memory locations is definitely a bad idea and can often lead to unhappy
results such as crashes or program malfunction. This can also be a difficult bug to track down.
Restore
May 26, 2007, at 07: 52 PM by Paul Badger Deleted line 42:
Restore
May 26, 2007, at 07: 51 PM by Paul Badger Changed line 23 from:
Arrays are zero indexed, that is, refering to the assignment above, the first element of the array is at index 0, hence
to:
Arrays are zero indexed, that is, referring to the array initialization above, the first element of the array is at index 0,
hence
Restore
May 26, 2007, at 07: 49 PM by Paul Badger Changed line 23 from:
Arrays are zero indexed, that is, the first element of the array is at index 0, hence
to:
Arrays are zero indexed, that is, refering to the assignment above, the first element of the array is at index 0, hence
Restore
April 18, 2007, at 02: 00 AM by David A. Mellis Changed line 11 from:
int myPins[] = {1, 5, 17, -2, 3};](https://image.slidesharecdn.com/arduinoreference-131030123929-phpapp02/85/Arduino-reference-593-320.jpg)
![to:
int myPins[] = {2, 4, 8, 3, 6};
Added line 13:
char message[6] = "hello";
Changed lines 17- 18 from:
I n myPins we declare an array without explicitly choosing a size. The compiler counts the elements and adds one more
element for a required null character terminator.
to:
I n myPins we declare an array without explicitly choosing a size. The compiler counts the elements and creates an array of
the appropriate size.
Changed line 40 from:
Serial.println(pins[i]);
to:
Serial.println(myPins[i]);
Restore
April 17, 2007, at 08: 29 PM by Paul Badger Changed line 25 from:
To assign a value to an array:
to:
To assign a value to an array:
Changed lines 27- 28 from:
mySensVals[0] = 10; @] To retrieve a value from an array:
to:
mySensVals[0] = 10; @]
To retrieve a value from an array:
Changed lines 34- 35 from:
Arrays are often manipulated inside for loops, where the loop counter is used as the index for each array element. To print
the elements of an array over the serial port, you could do something like this:
to:
Arrays are often manipulated inside for loops, where the loop counter is used as the index for each array element. For
example, to print the elements of an array over the serial port, you could do something like this:
Restore
April 17, 2007, at 08: 27 PM by Paul Badger Changed lines 28- 29 from:
@] To retrieve a value from an array:
to:
@] To retrieve a value from an array:
Added lines 31- 32:
Arrays and FOR Loops
Restore
April 17, 2007, at 08: 26 PM by Paul Badger Changed lines 18- 19 from:](https://image.slidesharecdn.com/arduinoreference-131030123929-phpapp02/85/Arduino-reference-594-320.jpg)
![Finally you can both initialize and size your array, as in mySensVals. Note however that one more element than your
initialization is required, to hold the required null character.
to:
Finally you can both initialize and size your array, as in mySensVals. Note that when declaring an array of type char, one
more element than your initialization is required, to hold the required null character.
Changed lines 22- 24 from:
Arrays are zero indexed, that is, the first element of the array is at index 0, hence mySensVals[0] == 2, mySensVals[1]
== 4, and so forth.
To assign a value to an array, do something like this
to:
Arrays are zero indexed, that is, the first element of the array is at index 0, hence
mySensVals[0] == 2, mySensVals[1] == 4, and so forth.
To assign a value to an array:
Changed line 29 from:
To retrieve a value from an array, something like
to:
To retrieve a value from an array:
Restore
April 16, 2007, at 11: 49 PM by Paul Badger Changed lines 22- 23 from:
Arrays are zero indexed, that is, the first element of the array is at index 0, hence @@mySensVals[0] == 2, mySensVals[1]
== 4, and so forth.
to:
Arrays are zero indexed, that is, the first element of the array is at index 0, hence mySensVals[0] == 2, mySensVals[1]
== 4, and so forth.
Restore
April 16, 2007, at 11: 47 PM by Paul Badger Changed lines 22- 23 from:
Arrays are zero indexed, that is, the first element of the array is at index 0 so @@mySensVals[0] == 2, mySensVals[1]
== 4, and so forth.
to:
Arrays are zero indexed, that is, the first element of the array is at index 0, hence @@mySensVals[0] == 2, mySensVals[1]
== 4, and so forth.
Restore
April 16, 2007, at 11: 46 PM by Paul Badger Changed lines 16- 19 from:
I n myPins we declare an array without explicitly choosing a size. The compiler counts the elements and adds one more
element for a required null character.
Finally you can both initialize and size your array. Note however that one more element than your initialization is required, to
hold the required null character.
to:
I n myPins we declare an array without explicitly choosing a size. The compiler counts the elements and adds one more
element for a required null character terminator.
Finally you can both initialize and size your array, as in mySensVals. Note however that one more element than your
initialization is required, to hold the required null character.](https://image.slidesharecdn.com/arduinoreference-131030123929-phpapp02/85/Arduino-reference-595-320.jpg)
![Changed lines 31- 32 from:
To print the elements of an array over the serial port, you could do something like this:
to:
Arrays are often manipulated inside for loops, where the loop counter is used as the index for each array element. To print
the elements of an array over the serial port, you could do something like this:
Restore
April 16, 2007, at 11: 42 PM by Paul Badger Changed lines 3- 4 from:
An array is a collection of variables that are accessed with an index number. Arrays in the C programming language, on
which Arduino is based, can be complicated, but using simple arrays is relatively easy.
to:
An array is a collection of variables that are accessed with an index number. Arrays in the C programming language, on
which Arduino is based, can be complicated, but using simple arrays is relatively straightforward.
Restore
April 16, 2007, at 11: 41 PM by Paul Badger Changed lines 7- 8 from:
To create an array, of, say, 5 integers, place a statement like this at the top of your sketch or the start of a function:
to:
All of the methods below are valid ways to create (declare) an array.
Changed lines 10- 12 from:
int pins[5];
to:
int myInts[6];
int myPins[] = {1, 5, 17, -2, 3};
int mySensVals[6] = {2, 4, -8, 3, 2};
Changed lines 15- 16 from:
I f you want to give the elements of the array initial values, use a statement like this instead:
to:
You can declare an array without initializing it as in myI nts.
I n myPins we declare an array without explicitly choosing a size. The compiler counts the elements and adds one more
element for a required null character.
Finally you can both initialize and size your array. Note however that one more element than your initialization is required, to
hold the required null character.
Accessing an Array
Arrays are zero indexed, that is, the first element of the array is at index 0 so @@mySensVals[0] == 2, mySensVals[1]
== 4, and so forth.
To assign a value to an array, do something like this
Changed line 26 from:
int pins[5] = { 11, 3, 5, 4, 2 };
to:
mySensVals[0] = 10;
Changed lines 28- 34 from:
This will assign the value 11 to the first elements in the array, the value 3 to the second, etc.](https://image.slidesharecdn.com/arduinoreference-131030123929-phpapp02/85/Arduino-reference-596-320.jpg)
![Accessing an Array
The first thing you need to know is that arrays are zero indexed, that is, the first element of the array is at index 0 and is
accessed with a statement like:
to:
To retrieve a value from an array, something like x = mySensVals[4];
To print the elements of an array over the serial port, you could do something like this:
Changed lines 34- 37 from:
pins[0] = 10;
to:
int i; for (i = 0; i < 5; i = i + 1) {
Serial.println(pins[i]);
}
Deleted lines 39- 47:
To print the elements of an array over the serial port, you could do something like this:
int i;
f o r ( i = 0; i < 5; i = i + 1) {
Serial.println(pins[i]);
}
Restore
April 16, 2007, at 11: 19 PM by Paul Badger Changed lines 3- 4 from:
An array is a group of variables that is accessed with an index number. Arrays in the C programming language, on which
Arduino is based, can be complicated, but simple things should be relatively easy. The basics operations are:
to:
An array is a collection of variables that are accessed with an index number. Arrays in the C programming language, on
which Arduino is based, can be complicated, but using simple arrays is relatively easy.
Restore
April 16, 2007, at 11: 50 AM by Paul Badger Changed lines 5- 6 from:
Creating (declaring) an array
to:
Creating (Declaring) an Array
Changed lines 21- 22 from:
Accessing an Array
to:
Accessing an Array
Changed lines 38- 39 from:
Example
to:
Example
Restore](https://image.slidesharecdn.com/arduinoreference-131030123929-phpapp02/85/Arduino-reference-597-320.jpg)

![Restore
April 15, 2007, at 10: 11 PM by Paul Badger Deleted lines 37- 40:
Tip
Be careful in accessing arrays. Accessing past the end of an array is reading from memory that is in use for other purposes.
Reading from these locations is probably not going to do much except yield invalid data. Writing to random memory locations
is definitely a bad idea and can often lead to unhappy results such as crashes or program malfunction. This can also be a
difficult bug to track down.
Changed lines 40- 44 from:
For a complete program that demonstrates the use of arrays, see the Knight Rider example from the Tutorials.
to:
For a complete program that demonstrates the use of arrays, see the Knight Rider example from the Tutorials.
Tip
Be careful in accessing arrays. Accessing past the end of an array is reading from memory that is in use for other purposes.
Reading from these locations is probably not going to do much except yield invalid data. Writing to random memory locations
is definitely a bad idea and can often lead to unhappy results such as crashes or program malfunction. This can also be a
difficult bug to track down.
Restore
April 15, 2007, at 10: 10 PM by Paul Badger Added lines 38- 41:
Tip
Be careful in accessing arrays. Accessing past the end of an array is reading from memory that is in use for other purposes.
Reading from these locations is probably not going to do much except yield invalid data. Writing to random memory locations
is definitely a bad idea and can often lead to unhappy results such as crashes or program malfunction. This can also be a
difficult bug to track down.
Restore
August 12, 2006, at 12: 00 PM by David A. Mellis - adding link to Knight Rider example
Changed lines 36- 40 from:
@]
to:
@]
Example
For a complete program that demonstrates the use of arrays, see the Knight Rider example from the Tutorials.
Restore
August 01, 2006, at 02: 01 PM by David A. Mellis Changed lines 5- 6 from:
Creating an Array
to:
Creating an Array
Changed lines 21- 22 from:
Accessing an Array
to:
Accessing an Array
Restore
August 01, 2006, at 01: 57 PM by David A. Mellis -](https://image.slidesharecdn.com/arduinoreference-131030123929-phpapp02/85/Arduino-reference-599-320.jpg)
![Changed lines 23- 36 from:
The first thing you need to know is that arrays are zero indexed, that is, the first element of the array is at index 0.
to:
The first thing you need to know is that arrays are zero indexed, that is, the first element of the array is at index 0 and is
accessed with a statement like:
pins[0] = 10;
To print the elements of an array over the serial port, you could do something like this:
int i;
f o r ( i = 0; i < 5; i = i + 1) {
Serial.println(pins[i]);
}
Restore
August 01, 2006, at 01: 39 PM by David A. Mellis Added lines 1- 23:
Arrays
Arrays in the C programming language, on which Arduino is based, can be complicated, but simple things should be relatively
easy. The basics operations are:
Creating an Array
To create an array, of, say, 5 integers, place a statement like this at the top of your sketch or the start of a function:
int pins[5];
I f you want to give the elements of the array initial values, use a statement like this instead:
int pins[5] = { 11, 3, 5, 4, 2 };
This will assign the value 11 to the first elements in the array, the value 3 to the second, etc.
Accessing an Array
The first thing you need to know is that arrays are zero indexed, that is, the first element of the array is at index 0.
Restore
Edit Page | Page History | Printable View | All Recent Site Changes](https://image.slidesharecdn.com/arduinoreference-131030123929-phpapp02/85/Arduino-reference-600-320.jpg)
![Arduino : Reference / Array
Reference
Language (extended) | Libraries | Comparison | Board
Arrays
An array is a collection of variables that are accessed with an index number. Arrays in the C programming
language, on which Arduino is based, can be complicated, but using simple arrays is relatively straightforward.
Creating (Declaring) an Array
All of the methods below are valid ways to create (declare) an array.
int myInts[6];
int myPins[] = {2, 4, 8, 3, 6};
int mySensVals[6] = {2, 4, -8, 3, 2};
char message[6] = "hello";
You can declare an array without initializing it as in myI nts.
I n myPins we declare an array without explicitly choosing a size. The compiler counts the elements and creates an
array of the appropriate size.
Finally you can both initialize and size your array, as in mySensVals. Note that when declaring an array of type
char, one more element than your initialization is required, to hold the required null character.
Accessing an Array
Arrays are zero indexed, that is, referring to the array initialization above, the first element of the array is at
index 0, hence
mySensVals[0] == 2, mySensVals[1] == 4, and so forth.
I t also means that in an array with ten elements, index nine is the last element. Hence:
int myArray[10]={9,3,2,4,3,2,7,8,9,11};
// myArray[9]
contains 11
// myArray[10]
is invalid and contains random information (other memory address)
For this reason you should be careful in accessing arrays. Accessing past the end of an array (using an index
number greater than your declared array size - 1) is reading from memory that is in use for other purposes.
Reading from these locations is probably not going to do much except yield invalid data. Writing to random
memory locations is definitely a bad idea and can often lead to unhappy results such as crashes or program
malfunction. This can also be a difficult bug to track down.
Unlike in some versions of BASI C, the C compiler does no checking to see if array access is within legal bounds of
the array size that you have declared.
To assign a value to an array:
mySensVals[0] = 10;
To retrieve a value from an array:
x = mySensVals[4];
Arrays and FOR Loops
Arrays are often manipulated inside for loops, where the loop counter is used as the index for each array element.](https://image.slidesharecdn.com/arduinoreference-131030123929-phpapp02/85/Arduino-reference-601-320.jpg)
![For example, to print the elements of an array over the serial port, you could do something like this:
int i;
for (i = 0; i < 5; i = i + 1) {
Serial.println(myPins[i]);
}
Example
For a complete program that demonstrates the use of arrays, see the Knight Rider example from the Tutorials.
Reference Home
Corrections, suggestions, and new documentation should be posted to the Forum.
The text of the Arduino reference is licensed under a Creative Commons Attribution-ShareAlike 3.0 License . Code
samples in the reference are released into the public domain.
(Printable View of http://www.arduino.cc/en/Reference/Array)](https://image.slidesharecdn.com/arduinoreference-131030123929-phpapp02/85/Arduino-reference-602-320.jpg)


![64 @
Deleted line 84:
64 @
Restore
May 30, 2007, at 11: 11 AM by Paul Badger Deleted line 117:
Deleted line 121:
Restore
May 30, 2007, at 11: 11 AM by Paul Badger Changed line 155 from:
to:
@]
Restore
May 30, 2007, at 11: 10 AM by Paul Badger Changed line 45 from:
(: cell width=33% : )
to:
(: cell width=20% : )
Changed line 81 from:
(: cell width=33% : )
to:
(: cell width=20% : )
Changed line 120 from:
(: cell width=33% : )
to:
(: cell width=20% : )
Restore
May 30, 2007, at 11: 09 AM by Paul Badger Added lines 79- 83:
@] (: cell width=33% : ) [@
Added lines 117- 123:
@] (: cell width=33% : ) [@
Changed lines 154- 156 from:
127
to:
127
(: tableend: )
Restore
May 30, 2007, at 11: 08 AM by Paul Badger Changed lines 35- 36 from:
25
to:](https://image.slidesharecdn.com/arduinoreference-131030123929-phpapp02/85/Arduino-reference-606-320.jpg)
![25
Added lines 43- 47:
@] (: cell width=33% : ) [@
Restore
May 30, 2007, at 11: 07 AM by Paul Badger Changed lines 10- 138 from:
0 NULL
to:
0 NULL 1 2 3 4 5 6 7 8 9 tab 10 line feed 11 12 13 carriage return 14 15 16 17 18 19 20 21 22 23 24 25
26 27 28 29 30 31 32 space 33 ! 34 " 35 # 36 $ 37 % 38 & 39 ' 40 ( 41 ) 42 * 43 + 44 ,
3 52 4 53 5 54 6 55 7 56 8 57 9 58 : 59 ; 60 < 61 = 62 > 63 ? 64 @ 65 A 66 B 67 C 68
75 K 76 L 77 M 78 N 79 O 80 P 81 Q 82 R 83 S 84 T 85 U 86 V 87 W 88 X 89 Y 90 Z 91 [
b 99 c 100 d 101 e 102 f 103 g 104 h 105 i 106 j 107 k 108 l 109 m 110 n 111 o 112 p
118 v 119 w 120 x 121 y 122 z 123 { 124 | 125 } 126 ~ 127
Restore
May 30, 2007, at 11: 00 AM by Paul Badger Changed lines 1- 10 from:
45 - 46 . 47 / 48 0 49 1 50 2 51
D 69 E 70 F 71 G 72 H 73 I 74 J
92 93 ] 94 ^ 95 _ 96 ` 97 a 98
113 q 114 r 115 s 116 t 117 u](https://image.slidesharecdn.com/arduinoreference-131030123929-phpapp02/85/Arduino-reference-607-320.jpg)


![Arduino : Reference / ASCI I chart
Reference
Language (extended) | Libraries | Comparison | Board
ASCI I chart
The ASCI I (American Standard Code for I nformation I nterchange) encoding dates to the 1960's. I t is the standard
way that text is encoded numerically.
Note that the first 32 characters (0- 31) are non- printing characters, often called control characters. The more
useful characters have been labeled.
DEC
Value
Character
DEC
Value
Character
DEC
Value
Character
DEC
Value
Character
0
1
2
3
4
5
6
7
8
9
10
11
12
13
return
14
15
16
17
18
19
20
21
22
23
24
25
26
27
28
29
30
31
null
32
33
34
35
36
37
38
39
40
41
42
43
44
45
46
47
48
49
50
51
52
53
54
55
56
57
58
59
60
61
62
63
space
!
"
#
$
%
&
'
(
)
*
+
,
.
/
0
1
2
3
4
5
6
7
8
9
:
;
<
=
>
?
64
65
66
67
68
69
70
71
72
73
74
75
76
77
78
79
80
81
82
83
84
85
86
87
88
89
90
91
92
93
94
95
@
A
B
C
D
E
F
G
H
I
J
K
L
M
N
O
P
Q
R
S
T
U
V
W
X
Y
Z
[
]
^
_
96
97
98
99
100
101
102
103
104
105
106
107
108
109
110
111
112
113
114
115
116
117
118
119
120
121
122
123
124
125
126
127
`
a
b
c
d
e
f
g
h
i
j
k
l
m
n
o
p
q
r
s
t
u
v
w
x
y
z
{
|
}
~
tab
line feed
carriage
Reference Home
Corrections, suggestions, and new documentation should be posted to the Forum.
The text of the Arduino reference is licensed under a Creative Commons Attribution-ShareAlike 3.0 License . Code
samples in the reference are released into the public domain.
(Printable View of http://www.arduino.cc/en/Reference/ASCIIchart)](https://image.slidesharecdn.com/arduinoreference-131030123929-phpapp02/85/Arduino-reference-611-320.jpg)


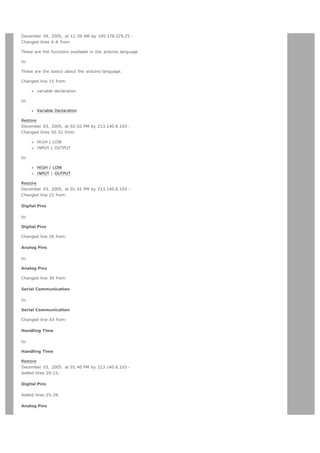


![Arduino
Buy | Download | Getting Started | Learning | Reference | Hardware | FAQ
search
Blog » | Forum » | Playground »
Reference.HomePage History
Hide minor edits - Show changes to output
J uly 02, 2008, at 03: 11 PM by David A. Mellis Changed lines 2- 3 from:
!Arduino Reference
to:
!Language Reference
Restore
May 07, 2008, at 02: 40 PM by David A. Mellis Changed line 41 from:
* [[Arithmetic | plus ]] (addition)
to:
* [[Arithmetic | + (addition)]]
Restore
April 29, 2008, at 10: 33 AM by David A. Mellis Changed lines 4- 5 from:
''See the '''[[Extended | extended reference]]''' for more advanced features of the Arduino languages and the '''[[Libraries |
libraries page]]''' for interfacing with particular types of hardware.
to:
''See the '''[[Extended | extended reference]]''' for more advanced features of the Arduino languages and the '''[[Libraries |
libraries page]]''' for interfacing with particular types of hardware.''
Restore
April 29, 2008, at 10: 33 AM by David A. Mellis Changed lines 4- 5 from:
''See the '''[[Extended | extended reference]]''' for more advanced features of the Arduino languages and the '''[[Libraries |
libraries page]]''' for interfacing with particular types of hardware. The '''[[Tutorial/ Foundations| foundations page]]''' has
extended descriptions of some hardware and software features.''
to:
''See the '''[[Extended | extended reference]]''' for more advanced features of the Arduino languages and the '''[[Libraries |
libraries page]]''' for interfacing with particular types of hardware.
Restore
April 23, 2008, at 10: 30 PM by David A. Mellis Changed line 8 from:
(: table width=90% border=0 cellpadding=5 cellspacing=0: )
to:
(: table width=100% border=0 cellpadding=5 cellspacing=0: )
Restore
March 31, 2008, at 06: 24 AM by Paul Badger Restore
March 29, 2008, at 11: 39 AM by David A. Mellis Changed lines 128- 135 from:
to:
* [[pow]](base, exponent)
* [[sqrt]](x)
'''Trigonometry'''
* [[sin]](rad)
* [[cos]](rad)
* [[tan]](rad)
Restore
March 29, 2008, at 09: 18 AM by David A. Mellis Changed lines 127- 128 from:](https://image.slidesharecdn.com/arduinoreference-131030123929-phpapp02/85/Arduino-reference-647-320.jpg)
![to:
* [[map]](value, fromLow, fromHigh, toLow, toHigh)
Restore
March 07, 2008, at 10: 05 PM by Paul Badger Changed lines 4- 5 from:
''See the '''[[Extended | extended reference]]''' for more advanced features of the Arduino languages and the '''[[Libraries |
libraries page]]''' for interfacing with particular types of hardware. The '''[[Tutorial/ Foundations| Foundations page]]''' has
extended descriptions of some hardware and software features.''
to:
''See the '''[[Extended | extended reference]]''' for more advanced features of the Arduino languages and the '''[[Libraries |
libraries page]]''' for interfacing with particular types of hardware. The '''[[Tutorial/ Foundations| foundations page]]''' has
extended descriptions of some hardware and software features.''
Restore
March 07, 2008, at 10: 04 PM by Paul Badger Changed lines 4- 5 from:
''See the '''[[Extended | extended reference]]''' for more advanced features of the Arduino languages and the '''[[Libraries |
libraries page]]''' for interfacing with particular types of hardware. The [[Tutorial/ Foundations| Foundations page]] has
extended descriptions of hardware and software features.''
to:
''See the '''[[Extended | extended reference]]''' for more advanced features of the Arduino languages and the '''[[Libraries |
libraries page]]''' for interfacing with particular types of hardware. The '''[[Tutorial/ Foundations| Foundations page]]''' has
extended descriptions of some hardware and software features.''
Restore
March 07, 2008, at 10: 03 PM by Paul Badger Changed lines 4- 5 from:
''See the '''[[Extended | extended reference]]''' for more advanced features of the Arduino languages and
libraries page]]''' for interfacing with particular types of hardware. The [[Tutorial/ Foundations| Foundations
descriptions of hardware and software features.''
to:
''See the '''[[Extended | extended reference]]''' for more advanced features of the Arduino languages and
libraries page]]''' for interfacing with particular types of hardware. The [[Tutorial/ Foundations| Foundations
extended descriptions of hardware and software features.''
Restore
the '''[[Libraries |
page has extended
the '''[[Libraries |
page]] has
March 07, 2008, at 10: 03 PM by Paul Badger Changed lines 4- 5 from:
''See the '''[[Extended | extended reference]]''' for more advanced features of the Arduino languages and the '''[[Libraries |
libraries page]]''' for interfacing with particular types of hardware.''
to:
''See the '''[[Extended | extended reference]]''' for more advanced features of the Arduino languages and the '''[[Libraries |
libraries page]]''' for interfacing with particular types of hardware. The [[Tutorial/ Foundations| Foundations page has extended
descriptions of hardware and software features.''
Restore
March 06, 2008, at 09: 01 AM by David A. Mellis Changed lines 4- 5 from:
''See the '''[[Extended | extended reference]]''' for more advanced features of the Arduino languages.''
to:
''See the '''[[Extended | extended reference]]''' for more advanced features of the Arduino languages and the '''[[Libraries |
libraries page]]''' for interfacing with particular types of hardware.''
Changed lines 147- 148 from:
'''Didn't find something?''' Check the [[Extended | extended reference]].
to:
'''Didn't find something?''' Check the [[Extended | extended reference]] or the [[Libraries | libraries]].
Restore
February 28, 2008, at 09: 49 AM by David A. Mellis Changed lines 77- 78 from:
to:
* [[Constants| true]] | [[Constants| false]]
Restore
November 24, 2007, at 12: 42 AM by Paul Badger Changed line 14 from:
* void [[setup]]().
to:
* void [[setup]]()
Restore
November 24, 2007, at 12: 39 AM by Paul Badger - test the summary feature](https://image.slidesharecdn.com/arduinoreference-131030123929-phpapp02/85/Arduino-reference-648-320.jpg)
![Changed line 14 from:
* void [[setup]]()
to:
* void [[setup]]().
Restore
November 05, 2007, at 03: 44 AM by David A. Mellis Deleted line 108:
* [[analogPins | analog pins]]
Restore
November 03, 2007, at 10: 53 PM by Paul Badger Added line 109:
* [[analogPins | analog pins]]
Deleted line 110:
* [[analogPins | analog pins]]
Restore
November 03, 2007, at 10: 01 PM by Paul Badger Changed line 110 from:
* [[analogPins | configuring analog pins]]
to:
* [[analogPins | analog pins]]
Restore
November 03, 2007, at 09: 58 PM by Paul Badger Restore
November 03, 2007, at 09: 58 PM by Paul Badger Changed lines 109- 110 from:
* int [[analogRead]](pin)
to:
* int [[analogRead]](pin)
* [[analogPins | configuring analog pins]]
Restore
August 31, 2007, at 11: 05 PM by David A. Mellis Changed lines 2- 3 from:
!Arduino Reference (standard)
to:
!Arduino Reference
Restore
August 31, 2007, at 10: 46 PM by David A. Mellis Changed lines 6- 7 from:
Arduino programs can be divided in three main parts: '''structure''', '''values''' (variables and constants), and '''functions'''. The
Arduino language is based on C/ C++.
to:
Arduino programs can be divided in three main parts: ''structure'', ''values'' (variables and constants), and ''functions''. The
Arduino language is based on C/ C++.
Restore
August 31, 2007, at 10: 46 PM by David A. Mellis Changed lines 4- 5 from:
''See the'' '''[[Extended | extended reference]]''' ''for more advanced features of the Arduino languages.''
to:
''See the '''[[Extended | extended reference]]''' for more advanced features of the Arduino languages.''
Restore
August 31, 2007, at 10: 45 PM by David A. Mellis Changed lines 4- 5 from:
See the '''[[Extended | extended reference]]''' for more advanced features of the Arduino languages.
to:
''See the'' '''[[Extended | extended reference]]''' ''for more advanced features of the Arduino languages.''
Restore
August 31, 2007, at 10: 45 PM by David A. Mellis Changed lines 4- 5 from:
''The [[Extended | extended reference]] covers more advanced features of the Arduino language.''
to:
See the '''[[Extended | extended reference]]''' for more advanced features of the Arduino languages.
Restore
August 31, 2007, at 10: 44 PM by David A. Mellis Changed lines 39- 41 from:](https://image.slidesharecdn.com/arduinoreference-131030123929-phpapp02/85/Arduino-reference-649-320.jpg)
![* [[Define | #define]]
* [[I nclude | #include]]
to:
Restore
August 31, 2007, at 10: 43 PM by David A. Mellis Added lines 146- 147:
[[<<]]
Restore
August 31, 2007, at 10: 43 PM by David A. Mellis Added lines 146- 147:
'''Didn't find something?''' Check the [[Extended | extended reference]].
Restore
August 31, 2007, at 10: 40 PM by David A. Mellis - removing things that only belong in the extended reference.
Deleted lines 61- 68:
!!!!Bitwise Operators
* [[BitwiseAnd | &]] (bitwise and)
* [[BitwiseAnd | | ]] (bitwise or)
* [[BitwiseAnd | ^]] (bitwise xor)
* [[BitwiseXorNot | ~]] (bitwise not)
* [[Bitshift | <<]] (bitshift left)
* [[Bitshift | >>]] (bitshift right)
Deleted lines 69- 71:
* [[bitwiseCompound | &= ]] (compound bitwise and)
* [[bitwiseCompound | | = ]] (compound bitwise or)
Deleted lines 97- 109:
!!!!Variable Scope & Qualifiers
*
*
*
*
[[scope | variable scope]]
[[static]]
[[volatile]]
[[const]]
!!!!Utilities
* [[cast]] (cast operator)
Deleted line 99:
* [[keywords]]
Deleted lines 134- 140:
'''External I nterrupts'''
These functions allow you to trigger a function when the input to a pin changes value.
* [[attachI nterrupt]](interrupt, function, mode)
* [[detachI nterrupt]](interrupt)
Restore
August 31, 2007, at 10: 26 PM by David A. Mellis Changed lines 121- 122 from:
* [[sizeof]]() (sizeof operator)
to:
Changed lines 177- 178 from:
[[Extended]]
to:
Restore
August 31, 2007, at 10: 25 PM by David A. Mellis Changed lines 2- 3 from:
!Arduino Reference (basic)
to:
!Arduino Reference (standard)
Restore
August 31, 2007, at 10: 24 PM by David A. Mellis Changed lines 4- 6 from:
''The [[Extended | extended reference]] covers more advanced features of the Arduino language.'' [[<<]]](https://image.slidesharecdn.com/arduinoreference-131030123929-phpapp02/85/Arduino-reference-650-320.jpg)
![to:
''The [[Extended | extended reference]] covers more advanced features of the Arduino language.''
Restore
August 31, 2007, at 10: 24 PM by David A. Mellis Changed lines 4- 6 from:
''The [[Extended | extended reference]] covers more advanced features of the Arduino language.''
to:
''The [[Extended | extended reference]] covers more advanced features of the Arduino language.'' [[<<]]
Restore
August 31, 2007, at 10: 24 PM by David A. Mellis Changed lines 4- 6 from:
''The [[Extended | extended reference]] covers more advanced features of the Arduino language.''
to:
''The [[Extended | extended reference]] covers more advanced features of the Arduino language.''
Restore
August 31, 2007, at 10: 23 PM by David A. Mellis Changed lines 6- 7 from:
[[<<]]
to:
Restore
August 31, 2007, at 10: 23 PM by David A. Mellis Added lines 6- 7:
[[<<]]
Restore
August 31, 2007, at 10: 23 PM by David A. Mellis Changed lines 4- 5 from:
''For more advanced features of the Arduino language, see the [[Extended | extended reference]].''
to:
''The [[Extended | extended reference]] covers more advanced features of the Arduino language.''
Restore
August 31, 2007, at 10: 22 PM by David A. Mellis Changed lines 2- 3 from:
!Arduino Reference
to:
!Arduino Reference (basic)
''For more advanced features of the Arduino language, see the [[Extended | extended reference]].''
Restore
August 31, 2007, at 10: 19 PM by David A. Mellis Changed lines 84- 85 from:
Constants are labels for certain values which are preset in the Arduino compiler. You do not need to define or initialize
constants. Arduino includes the following pre- defined constants.
to:
Constants are particular values with specific meanings.
Restore
August 31, 2007, at 10: 18 PM by David A. Mellis Changed lines 81- 82 from:
Variables are expressions that you can use in programs to store values, such as a sensor reading from an analog pin. They
can have various types, which are described below.
to:
Variables are expressions that you can use in programs to store values, such as a sensor reading from an analog pin.
!!!!Constants
Constants are labels for certain values which are preset in the Arduino compiler. You do not need to define or initialize
constants. Arduino includes the following pre- defined constants.
* [[Constants| HI GH]] | [[Constants| LOW]]
* [[Constants| I NPUT]] | [[Constants| OUTPUT]]
* [[I nteger Constants]]](https://image.slidesharecdn.com/arduinoreference-131030123929-phpapp02/85/Arduino-reference-651-320.jpg)
![Added lines 93- 94:
Variables can have various types, which are described below.
Changed lines 115- 122 from:
!!!!Constants
Constants are labels for certain values which are preset in the Arduino compiler. You do not need to define or initialize
constants. Arduino includes the following pre- defined constants.
* [[Constants| HI GH]] | [[Constants| LOW]]
* [[Constants| I NPUT]] | [[Constants| OUTPUT]]
* [[I ntegerConstants]]
to:
Restore
August 31, 2007, at 09: 46 PM by David A. Mellis - removing PROGMEM (doesn't belong in the basic reference)
Changed lines 104- 105 from:
* [[PROGMEM]]
to:
Restore
August 31, 2007, at 09: 45 PM by David A. Mellis Changed lines 10- 11 from:
I n Arduino, the standard program entry point (main) is defined in the core and calls into two functions in a sketch. '''setup()'''
is called once, then '''loop()''' is called repeatedly (until you reset your board).
to:
An Arduino program run in two parts:
Added lines 15- 16:
setup() is preparation, and loop() is execution. I n the setup section, always at the top of your program, you would set
[[pinMode| pinModes]], initialize serial communication, etc. The loop section is the code to be executed - - reading inputs,
triggering outputs, etc.
Restore
August 31, 2007, at 09: 44 PM by David A. Mellis Changed lines 10- 11 from:
An Arduino program run in two parts:
to:
I n Arduino, the standard program entry point (main) is defined in the core and calls into two functions in a sketch. '''setup()'''
is called once, then '''loop()''' is called repeatedly (until you reset your board).
Deleted lines 14- 15:
setup() is preparation, and loop() is execution. I n the setup section, always at the top of your program, you would set
[[pinMode| pinModes]], initialize serial communication, etc. The loop section is the code to be executed - - reading inputs,
triggering outputs, etc.
Restore
August 23, 2007, at 02: 24 PM by Paul Badger Changed lines 15- 16 from:
setup() is preparation, and loop() is execution. I n the setup section, always at the top of your program, you would set
[[pinMode]], initialize serial communication, etc. The loop section is the code to be executed - - reading inputs, triggering
outputs, etc.
to:
setup() is preparation, and loop() is execution. I n the setup section, always at the top of your program, you would set
[[pinMode| pinModes]], initialize serial communication, etc. The loop section is the code to be executed - - reading inputs,
triggering outputs, etc.
Restore
August 23, 2007, at 02: 19 PM by Paul Badger Changed lines 81- 82 from:
Variables are expressions that you can use in programs to store values, like e.g. sensor reading from an analog pin. They
can have various types, which are described below.
to:
Variables are expressions that you can use in programs to store values, such as a sensor reading from an analog pin. They
can have various types, which are described below.
Restore
J uly 17, 2007, at 11: 10 AM by Paul Badger Changed lines 19- 20 from:
* * [[void | void keyword]]
to:
* * [[void | void]]
Restore
J uly 17, 2007, at 10: 27 AM by Paul Badger -](https://image.slidesharecdn.com/arduinoreference-131030123929-phpapp02/85/Arduino-reference-652-320.jpg)
![Restore
J uly 17, 2007, at 10: 27 AM by Paul Badger Changed lines 174- 175 from:
to:
[[Extended]]
Restore
J uly 17, 2007, at 06: 36 AM by Paul Badger Restore
J uly 17, 2007, at 06: 35 AM by Paul Badger Changed lines 19- 20 from:
to:
* * [[void | void keyword]]
Restore
J uly 16, 2007, at 11: 47 PM by Paul Badger Added lines 31- 38:
!!!!Further Syntax
* [[SemiColon| ; ]] (semicolon)
* [[Braces| {}]] (curly braces)
* [[Comments| / / ]] (single line comment)
* [[Comments| / * * / ]] (multi- line comment)
* [[Define | #define]]
* [[I nclude | #include]]
Deleted lines 77- 85:
!!!!Further Syntax
* [[SemiColon| ; ]] (semicolon)
* [[Braces| {}]] (curly braces)
* [[Comments| / / ]] (single line comment)
* [[Comments| / * * / ]] (multi- line comment)
* [[Define | #define]]
* [[I nclude | #include]]
Restore
J uly 16, 2007, at 11: 05 PM by Paul Badger Changed lines 29- 30 from:
to:
* [[return]]
Restore
J uly 16, 2007, at 09: 42 PM by Paul Badger Changed lines 173- 174 from:
[[Alpha]]
to:
Restore
J uly 16, 2007, at 09: 41 PM by Paul Badger Restore
J uly 16, 2007, at 09: 41 PM by Paul Badger Restore
J uly 16, 2007, at 09: 40 PM by Paul Badger Changed lines 173- 174 from:
to:
[[Alpha]]
Restore
J uly 16, 2007, at 05: 56 AM by Paul Badger Changed lines
* [[Arithmetic
* [[Arithmetic
* [[Arithmetic
31- 36 from:
| plus ]](addition)
| - ]](subtraction)
| * ]](multiplication)
* [[Arithmetic | / ]](division)
* [[modulo | % ]](modulo)
to:
* [[Arithmetic | plus ]] (addition)
* [[Arithmetic | - ]] (subtraction)
* [[Arithmetic | * ]] (multiplication)](https://image.slidesharecdn.com/arduinoreference-131030123929-phpapp02/85/Arduino-reference-653-320.jpg)
![* [[Arithmetic | / ]] (division)
* [[modulo | % ]] (modulo)
Restore
J uly 16, 2007, at 05: 55 AM by Paul Badger Changed lines 63- 69 from:
* [[incrementCompound | += ]] (compound multiplication)
* [[incrementCompound | - = ]] (compound division)
* [[bitwiseCompound | &= ]] (bitwise and)
* [[bitwiseCompound | | = ]] (bitwise or)
to:
* [[incrementCompound | * = ]] (compound multiplication)
* [[incrementCompound | / = ]] (compound division)
* [[bitwiseCompound | &= ]] (compound bitwise and)
* [[bitwiseCompound | | = ]] (compound bitwise or)
Restore
J uly 16, 2007, at 05: 54 AM by Paul Badger Changed lines 61- 62 from:
* [[incrementCompound | += ]] (compound increment)
* [[incrementCompound
to:
* [[incrementCompound
* [[incrementCompound
* [[incrementCompound
* [[incrementCompound
Restore
| - = ]] (compound decrement)
|
|
|
|
+= ]] (compound addition)
- = ]] (compound subtraction)
+= ]] (compound multiplication)
- = ]] (compound division)
J uly 16, 2007, at 05: 12 AM by Paul Badger Changed lines 60- 62 from:
* [[decrement | - - ]] (decrement)
to:
* [[increment | - - ]] (decrement)
* [[incrementCompound | += ]] (compound increment)
* [[incrementCompound | - = ]] (compound decrement)
Restore
J uly 16, 2007, at 04: 48 AM by Paul Badger Changed lines 60- 64 from:
* [[decrement | | ]] (decrement)
* [[ | &= ]] (bitwise and)
* [[ | | = ]] (bitwise or)
to:
* [[decrement | - - ]] (decrement)
* [[bitwiseCompound | &= ]] (bitwise and)
* [[bitwiseCompound | | = ]] (bitwise or)
Restore
J uly 16, 2007, at 04: 46 AM by Paul Badger Added lines 58- 64:
!!!!Compound Operators
* [[increment | ++]] (increment)
* [[decrement | | ]] (decrement)
* [[ | &= ]] (bitwise and)
* [[ | | = ]] (bitwise or)
Restore
J une 11, 2007, at 06: 57 PM by Paul Badger Changed lines 91- 92 from:
to:
* [[PROGMEM]]
Restore
May 29, 2007, at 02: 34 PM by Paul Badger Changed lines 85- 86 from:](https://image.slidesharecdn.com/arduinoreference-131030123929-phpapp02/85/Arduino-reference-654-320.jpg)
![!!!!Variable Scope
to:
!!!!Variable Scope & Qualifiers
Changed lines 90- 91 from:
to:
* [[const]]
Restore
May 28, 2007, at 01: 50 PM by Paul Badger Added line 72:
* [[BooleanVariables| boolean]]
Restore
May 26, 2007, at 07: 41 PM by Paul Badger Changed lines 106- 107 from:
* [[ASCI I chart]]
to:
* [[ASCI I chart| ASCI I chart]]
Restore
May 26, 2007, at 07: 41 PM by Paul Badger Changed lines 106- 107 from:
to:
* [[ASCI I chart]]
Restore
May 26, 2007, at 07: 08 AM by Paul Badger Changed line 26 from:
* [[do... while]]
to:
* [[doWhile | do... while]]
Restore
May 26, 2007, at 07: 07 AM by Paul Badger Added line 26:
* [[do... while]]
Restore
May 26, 2007, at 06: 36 AM by Paul Badger Changed lines 26- 28 from:
to:
* [[break]]
* [[continue]]
Restore
May 17, 2007, at 10: 36 PM by Paul Badger Changed lines 85- 86 from:
to:
* [[volatile]]
Restore
May 17, 2007, at 11: 51 AM by David A. Mellis Changed lines 4- 5 from:
Arduino programs can be divided in three main parts: '''structure''', '''values''' (variables and constants), and '''functions'''.
to:
Arduino programs can be divided in three main parts: '''structure''', '''values''' (variables and constants), and '''functions'''. The
Arduino language is based on C/ C++.
Restore
May 17, 2007, at 11: 09 AM by Paul Badger Changed lines 110- 111 from:
* [[pullups | pullup resistors]]
to:
Restore
May 17, 2007, at 11: 08 AM by Paul Badger Changed lines 110- 111 from:
* pullup resistors
to:
* [[pullups | pullup resistors]]
Restore
May 17, 2007, at 11: 08 AM by Paul Badger Changed lines 110- 111 from:
to:](https://image.slidesharecdn.com/arduinoreference-131030123929-phpapp02/85/Arduino-reference-655-320.jpg)
![* pullup resistors
Restore
May 04, 2007, at 06: 01 AM by Paul Badger Changed lines 83- 85 from:
* Variable scope
* Static
to:
* [[scope | variable scope]]
* [[static]]
Restore
May 04, 2007, at 06: 00 AM by Paul Badger Added lines 80- 85:
!!!!Variable Scope
* Variable scope
* Static
Restore
April 29, 2007, at 05: 06 AM by David A. Mellis - math.h isn't supported, so don't document it here.
Changed lines 123- 124 from:
* [[mathHeader| math.h]](trig,sqrt,pow etc.)
to:
Restore
April 29, 2007, at 05: 03 AM by David A. Mellis - API changes (including exposing internal registers) should be discussed on
the developers list
Changed lines 54- 55 from:
* [[port manipulation]]
to:
Changed lines 96- 98 from:
* [[Atmega8 hardware]]
* [[Atmega168 hardware]]
to:
Restore
April 27, 2007, at 10: 18 PM by Paul Badger Changed lines 126- 127 from:
* [[mathHeader| math.h]](math.h - trig,sqrt,pow etc.)
to:
* [[mathHeader| math.h]](trig,sqrt,pow etc.)
Restore
April 27, 2007, at 10: 18 PM by Paul Badger Changed lines 126- 127 from:
* [[math]](math.h - trig,sqrt,pow etc.)
to:
* [[mathHeader| math.h]](math.h - trig,sqrt,pow etc.)
Restore
April 27, 2007, at 10: 17 PM by Paul Badger Changed lines 126- 127 from:
* [[mathHeader]](trig,sqrt,pow etc.)
to:
* [[math]](math.h - trig,sqrt,pow etc.)
Restore
April 27, 2007, at 10: 08 PM by Paul Badger Added line 77:
* [[double]]
Restore
April 27, 2007, at 10: 06 PM by Paul Badger Changed lines 125- 126 from:
* [[math.h]](trig,sqrt,pow etc.)
to:
* [[mathHeader]](trig,sqrt,pow etc.)
Restore
April 27, 2007, at 09: 25 PM by Paul Badger Changed lines 125- 126 from:
to:
* [[math.h]](trig,sqrt,pow etc.)](https://image.slidesharecdn.com/arduinoreference-131030123929-phpapp02/85/Arduino-reference-656-320.jpg)
![Restore
April 25, 2007, at 09: 34 PM by Paul Badger Changed lines 86- 87 from:
* [[Constants]]
to:
* [[I ntegerConstants]]
Restore
April 25, 2007, at 09: 31 PM by Paul Badger Changed lines 86- 87 from:
* [[I nteger Constants]]
to:
* [[Constants]]
Changed line 90 from:
* [[cast]](cast operator)
to:
* [[cast]] (cast operator)
Restore
April 25, 2007, at 09: 24 PM by Paul Badger Changed lines 62- 63 from:
* [[Define | #include]]
to:
* [[I nclude | #include]]
Restore
April 25, 2007, at 08: 58 PM by Paul Badger Changed lines 62- 63 from:
to:
* [[Define | #include]]
Restore
April 24, 2007, at 10: 32 AM by Paul Badger Changed lines 54- 55 from:
to:
* [[port manipulation]]
Changed lines 97- 98 from:
* [[port manipulation]]
to:
Restore
April 24, 2007, at 12: 58 AM by Paul Badger Changed lines 96- 97 from:
* [[Port Manipulation]]
to:
* [[port manipulation]]
Restore
April 24, 2007, at 12: 57 AM by Paul Badger Changed lines 91- 92 from:
!!!!Reference
to:
!!Reference
Restore
April 24, 2007, at 12: 29 AM by Paul Badger Changed lines 96- 97 from:
to:
* [[Port Manipulation]]
Restore
April 23, 2007, at 10: 29 PM by Paul Badger Changed lines 94- 96 from:
to:
* [[Atmega8 hardware]]
* [[Atmega168 hardware]]
Restore
April 18, 2007, at 08: 49 AM by Paul Badger Changed line 50 from:
* [[BitwiseXorNot | ^]] (bitwise xor)
to:
* [[BitwiseAnd | ^]] (bitwise xor)](https://image.slidesharecdn.com/arduinoreference-131030123929-phpapp02/85/Arduino-reference-657-320.jpg)
![Restore
April 17, 2007, at 11: 22 PM by Paul Badger Changed lines 93- 94 from:
* [[keywords]])
to:
* [[keywords]]
Restore
April 17, 2007, at 11: 21 PM by Paul Badger Changed lines 93- 94 from:
* [[keywords]](keywords)
to:
* [[keywords]])
Restore
April 17, 2007, at 11: 11 PM by Paul Badger Changed lines 91- 94 from:
to:
!!!!Reference
* [[keywords]](keywords)
Restore
April 17, 2007, at 09: 08 PM by Paul Badger Changed line 50 from:
* [[Bitwise | ^]] (bitwise xor)
to:
* [[BitwiseXorNot | ^]] (bitwise xor)
Restore
April 17, 2007, at 08: 49 PM by Paul Badger Changed line 51 from:
* [[Bitwise | ~]] (bitwise not)
to:
* [[BitwiseXorNot | ~]] (bitwise not)
Restore
April 17, 2007, at 08: 31 PM by Paul Badger Changed lines 48- 49 from:
* [[Bitwise | &]] (bitwise and)
* [[Bitwise | | ]] (bitwise or)
to:
* [[BitwiseAnd | &]] (bitwise and)
* [[BitwiseAnd | | ]] (bitwise or)
Restore
April 16, 2007, at 11: 15 AM by Paul Badger Added line 71:
* [[unsigned int]]
Added line 73:
* [[unsigned long]]
Restore
April 16, 2007, at 11: 02 AM by Paul Badger Changed lines 2- 3 from:
!!Arduino Reference
to:
!Arduino Reference
Restore
April 16, 2007, at 02: 02 AM by David A. Mellis Added lines 66- 67:
!!!!Data Types
Changed lines 75- 77 from:
* [[cast]](cast operator)
* [[sizeof]]() (sizeof operator)
to:
Changed lines 84- 85 from:
to:
!!!!Utilities
* [[cast]](cast operator)](https://image.slidesharecdn.com/arduinoreference-131030123929-phpapp02/85/Arduino-reference-658-320.jpg)
![* [[sizeof]]() (sizeof operator)
Restore
April 16, 2007, at 01: 56 AM by Paul Badger Changed line 28 from:
* [[Arithmetic | + ]](addition)
to:
* [[Arithmetic | plus ]](addition)
Restore
April 16, 2007, at 01: 55 AM by David A. Mellis Changed line 28 from:
* [[Arithmetic | plus ]](addition)
to:
* [[Arithmetic | + ]](addition)
Changed lines 48- 51 from:
* [[Bitwise | &]] (and)
* [[Bitwise | | ]] (or)
* [[Bitwise | ^]] (xor)
* [[Bitwise | ~]] (not)
to:
* [[Bitwise | &]] (bitwise and)
* [[Bitwise | | ]] (bitwise or)
* [[Bitwise | ^]] (bitwise xor)
* [[Bitwise | ~]] (bitwise not)
Restore
April 16, 2007, at 12: 22 AM by Paul Badger Changed lines 52- 54 from:
to:
* [[Bitshift | <<]] (bitshift left)
* [[Bitshift | >>]] (bitshift right)
Restore
April 16, 2007, at 12: 19 AM by Paul Badger Restore
April 15, 2007, at 11: 47 PM by Paul Badger Changed lines 51- 52 from:
* [[Bitwise | !]] (not)
to:
* [[Bitwise | ~]] (not)
Restore
April 15, 2007, at 11: 35 PM by Paul Badger Changed line 42 from:
!!!!Boolean Operations
to:
!!!!Boolean Operators
Changed line 47 from:
!!!!Bitwise Operations
to:
!!!!Bitwise Operators
Restore
April 15, 2007, at 11: 34 PM by Paul Badger Added lines 47- 52:
!!!!Bitwise Operations
* [[Bitwise | &]] (and)
* [[Bitwise | | ]] (or)
* [[Bitwise | ^]] (xor)
* [[Bitwise | !]] (not)
Restore
April 15, 2007, at 11: 31 PM by Paul Badger Changed lines 66- 67 from:
* [[sizeof]](sizeof operator)
to:
* [[sizeof]]() (sizeof operator)
Restore
April 15, 2007, at 04: 40 PM by Paul Badger -](https://image.slidesharecdn.com/arduinoreference-131030123929-phpapp02/85/Arduino-reference-659-320.jpg)
![Changed lines 66- 67 from:
to:
* [[sizeof]](sizeof operator)
Restore
April 15, 2007, at 04: 17 PM by Paul Badger Changed lines 65- 66 from:
to:
* [[cast]](cast operator)
Restore
April 15, 2007, at 03: 05 PM by Paul Badger Changed lines 28- 31 from:
* [[addition | + ]](addition)
* [[subtraction | - ]](subtraction)
* [[multiplication | * ]](multiplication)
* [[division | / ]](division)
to:
* [[Arithmetic | plus ]](addition)
* [[Arithmetic | - ]](subtraction)
* [[Arithmetic | * ]](multiplication)
* [[Arithmetic | / ]](division)
Restore
April 15, 2007, at 02: 58 PM by Paul Badger Restore
April 15, 2007, at 02: 55 PM by Paul Badger
Restore
April 15, 2007, at 02: 49 PM by Paul Badger
Changed lines 28- 31 from:
* [[addition | +]](modulo)
* [[subtraction | - ]](modulo)
* [[multiplication | * ]](modulo)
* [[dvivision | / ]](modulo)
to:
* [[addition | + ]](addition)
* [[subtraction | - ]](subtraction)
* [[multiplication | * ]](multiplication)
* [[division | / ]](division)
Restore
April 15, 2007, at 02: 47 PM by Paul Badger
Restore
April 15, 2007, at 02: 47 PM by Paul Badger
Added lines 28- 31:
* [[addition | +]](modulo)
* [[subtraction | - ]](modulo)
-
-
* [[multiplication | * ]](modulo)
* [[dvivision | / ]](modulo)
Restore
April 13, 2007, at 11: 27 PM by David A. Mellis Changed lines 28- 29 from:
* [[% ]](modulo)
to:
* [[modulo | % ]](modulo)
Restore
April 13, 2007, at 11: 20 PM by Paul Badger Restore
April 13, 2007, at 11: 18 PM by Paul Badger Restore
April 13, 2007, at 11: 17 PM by Paul Badger Restore
April 13, 2007, at 10: 53 PM by David A. Mellis - moving % (modulo) the left column under "arithmetic operators"; keeping
the right col. for functions
Changed lines 15- 16 from:
setup() is preparation, and loop() is execution. I n the setup section, always at the top of your program, you woiuld set
[[pinMode]], initialize serial communication, etc. The loop section is the code to be executed - - reading inputs, triggering
outputs, etc.
to:](https://image.slidesharecdn.com/arduinoreference-131030123929-phpapp02/85/Arduino-reference-660-320.jpg)
![setup() is preparation, and loop() is execution. I n the setup section, always at the top of your program, you would set
[[pinMode]], initialize serial communication, etc. The loop section is the code to be executed - - reading inputs, triggering
outputs, etc.
Added lines 27- 29:
!!!!Arithmetic Operators
* [[% ]](modulo)
Deleted line 93:
* [[% ]](modulo)
Restore
April 13, 2007, at 10: 50 PM by Paul Badger Changed line 91 from:
* [[% (modulo)]]
to:
* [[% ]](modulo)
Restore
April 13, 2007, at 10: 00 PM by Paul Badger Changed line 91 from:
* [[% ]] (modulo)
to:
* [[% (modulo)]]
Restore
April 13, 2007, at 09: 49 PM by Paul Badger Changed line 91 from:
to:
* [[% ]] (modulo)
Restore
December 25, 2006, at 06: 25 PM by David A. Mellis Changed lines 4- 6 from:
Arduino provides a library of functions on top of the standard AVR C/ C++ routines. The main file of your sketch is compiled
as C++, but you can add straight C files as well.
Arduino programs can be divided in three main parts: '''program structure''', '''values''' (variables and constants), and
'''functions'''.
to:
Arduino programs can be divided in three main parts: '''structure''', '''values''' (variables and constants), and '''functions'''.
Changed lines 8- 11 from:
!! Program Structure
!!!!Getting Started
to:
!! Structure
Added line 52:
* [[byte]]
Changed lines 65- 66 from:
to:
* [[I nteger Constants]]
Changed lines 75- 77 from:
* int [[digitalRead]](pin)
* unsigned long [[pulseI n]](pin, value)
to:
* int [[digitalRead]](pin)
Changed lines 81- 85 from:
'''Handling Time'''
to:
'''Advanced I / O'''
* [[shiftOut]](dataPin, clockPin, bitOrder, value)
* unsigned long [[pulseI n]](pin, value)
'''Time'''
Changed lines 90- 93 from:
'''Random number generation'''](https://image.slidesharecdn.com/arduinoreference-131030123929-phpapp02/85/Arduino-reference-661-320.jpg)
![New in Arduino 0005.
to:
'''Math'''
* [[min]](x, y)
* [[max]](x, y)
* [[abs]](x)
* [[constrain]](x, a, b)
'''Random Numbers'''
Added lines 103- 109:
'''External I nterrupts'''
These functions allow you to trigger a function when the input to a pin changes value.
* [[attachI nterrupt]](interrupt, function, mode)
* [[detachI nterrupt]](interrupt)
Changed lines 115- 116 from:
* [[Serial.available]]()
* [[Serial.read]]()
to:
* int [[Serial.available]]()
* int [[Serial.read]]()
* [[Serial.flush]]()
Deleted lines 120- 137:
''Old serial library (deprecated).''
* [[beginSerial]](speed)
* [[serialWrite]](c)
* int [[serialAvailable]]()
* int [[serialRead]]()
* [[printMode]](mode)
* [[printByte]](c)
* [[printString]](str)
* [[printI nteger]](num)
* [[printHex]](num)
* [[printOctal]](num)
* [[printBinary]](num)
* [[printNewline]]()
'''Expert/ I nternal Functions'''
* [[http: / / www.nongnu.org/ avr- libc/ user- manual/ modules.html | avr- libc]] is the standard library of C functions that Arduino
builds on. To use these, you may need to add the corresponding '''#include''' statement to the top of your sketch.
Restore
November 12, 2006, at 11: 51 AM by David A. Mellis - removing bit about floats not being supported
Changed lines 52- 53 from:
Variables are expressions that you can use in programs to store values, like e.g. sensor reading from an analog pin. They
can have various types, which are described below. ''Floating point variables and operations are not currently supported.''
to:
Variables are expressions that you can use in programs to store values, like e.g. sensor reading from an analog pin. They
can have various types, which are described below.
Added line 57:
* [[float]]
Restore
November 04, 2006, at 01: 19 PM by David A. Mellis Deleted lines 5- 6:
I f you're used to Processing or J ava, please check out the [[http: / / arduino.berlios.de/ index.php/ Main/ ComparisonProcessing |
Arduino/ Processing language comparison]].
Restore
November 04, 2006, at 01: 18 PM by David A. Mellis Deleted lines 123- 137:
!!Libraries
''These are the "official" libraries that are included in the Arduino distribution. They are compatible with the Wiring versions,](https://image.slidesharecdn.com/arduinoreference-131030123929-phpapp02/85/Arduino-reference-662-320.jpg)
![and the links below point to the (excellent) Wiring documentation.''
* [[http: / / wiring.org.co/ reference/ libraries/ Matrix/ index.html | Matrix]] - Basic LED Matrix display manipulation library
* [[http: / / wiring.org.co/ reference/ libraries/ Sprite/ index.html | Sprite]] - Basic image sprite manipulation library for use in
animations with an LED matrix
* [[http: / / wiring.org.co/ reference/ libraries/ Wire/ index.html | Wire]] - Two Wire I nterface for sending and receiving data over a
net of devices or sensors.
''These are not (yet) included with the Arduino distribution and may change.''
* [[http: / / www.arduino.cc/ playground/ Code/ SimpleMessageSystem | Simple Message System]]
* [[http: / / www.arduino.cc/ en/ Tutorial/ LCDLibrary | LCD Library]]
* [[Tutorial/ TextString| TextString Library]]
* [[http: / / www.arduino.cc/ playground/ Code/ Metro | Metro]]
Restore
October 21, 2006, at 03: 32 PM by David A. Mellis - adding link to metro library
Added lines 137- 138:
* [[http: / / www.arduino.cc/ playground/ Code/ Metro | Metro]]
Restore
October 21, 2006, at 03: 07 PM by David A. Mellis - adding libraries included in the distribution
Added lines 126- 131:
''These are the "official" libraries that are included in the Arduino distribution. They are compatible with the Wiring versions,
and the links below point to the (excellent) Wiring documentation.''
* [[http: / / wiring.org.co/ reference/ libraries/ Matrix/ index.html | Matrix]] - Basic LED Matrix display manipulation library
* [[http: / / wiring.org.co/ reference/ libraries/ Sprite/ index.html | Sprite]] - Basic image sprite manipulation library for use in
animations with an LED matrix
* [[http: / / wiring.org.co/ reference/ libraries/ Wire/ index.html | Wire]] - Two Wire I nterface for sending and receiving data over a
net of devices or sensors.
Restore
October 20, 2006, at 11: 57 AM by Tom I goe Added line 130:
* [[Tutorial/ TextString| TextString Library]]
Restore
October 01, 2006, at 03: 55 PM by David A. Mellis - adding libraries
Added lines 123- 129:
!!Libraries
''These are not (yet) included with the Arduino distribution and may change.''
* [[http: / / www.arduino.cc/ playground/ Code/ SimpleMessageSystem | Simple Message System]]
* [[http: / / www.arduino.cc/ en/ Tutorial/ LCDLibrary | LCD Library]]
Restore
September 05, 2006, at 08: 58 AM by David A. Mellis Changed lines 4- 5 from:
These are the basics about the Arduino language, which implemented in C. I f you're used to Processing or J ava, please check
out the [[http: / / arduino.berlios.de/ index.php/ Main/ ComparisonProcessing | Arduino/ Processing language comparison]].
to:
Arduino provides a library of functions on top of the standard AVR C/ C++ routines. The main file of your sketch is compiled
as C++, but you can add straight C files as well.
I f you're used to Processing or J ava, please check out the [[http: / / arduino.berlios.de/ index.php/ Main/ ComparisonProcessing |
Arduino/ Processing language comparison]].
Restore
August 27, 2006, at 10: 58 AM by David A. Mellis Added lines 81- 93:
'''Handling Time'''
* unsigned long [[millis]]()
* [[delay]](ms)
* [[delayMicroseconds]](us)
'''Random number generation'''](https://image.slidesharecdn.com/arduinoreference-131030123929-phpapp02/85/Arduino-reference-663-320.jpg)
![New in Arduino 0005.
* [[randomSeed]](seed)
* long [[random]](max)
* long [[random]](min, max)
Changed lines 118- 122 from:
'''Handling Time'''
* unsigned long [[millis]]()
* [[delay]](ms)
* [[delayMicroseconds]](us)
to:
Restore
August 26, 2006, at 04: 07 PM by David A. Mellis Changed line 1 from:
(: title API Reference: )
to:
(: title Reference: )
Restore
August 26, 2006, at 04: 07 PM by David A. Mellis Changed lines 1- 2 from:
(: title Arduino API Reference: ) !!Arduino Reference
to:
(: title API Reference: )
!!Arduino Reference
Restore
August 26, 2006, at 04: 07 PM
Changed lines 1- 2 from:
!!Arduino Reference
to:
(: title Arduino API Reference: )
Restore
August 01, 2006, at 12: 55 PM
Changed lines 56- 58 from:
to:
* [[string]]
* [[array]]
Restore
August 01, 2006, at 07: 18 AM
Added lines 30- 31:
* [[if| ==]] (equal to)
* [[if| !=]] (not equal to)
Restore
by David A. Mellis -
!!Arduino Reference
by David A. Mellis - Adding string and array.
by David A. Mellis -
August 01, 2006, at 07: 17 AM by David A. Mellis Changed lines 30- 34 from:
* [[Comparison| <]] (less than)
* [[Comparison| >]] (greater than)
* [[Comparison| <=]] (less than or equal to)
* [[Comparison| >=]] (greater than or equal to)
to:
* [[if| <]] (less than)
* [[if| >]] (greater than)
* [[if| <=]] (less than or equal to)
* [[if| >=]] (greater than or equal to)
Restore
August 01, 2006, at 07: 04 AM by David A. Mellis - adding comparison and boolean operators
Added lines 29- 39:
!!!!Comparison Operators
* [[Comparison| <]] (less than)
* [[Comparison| >]] (greater than)
* [[Comparison| <=]] (less than or equal to)
* [[Comparison| >=]] (greater than or equal to)
!!!!Boolean Operations
* [[Boolean | &&]] (and)
* [[Boolean | | | ]] (or)](https://image.slidesharecdn.com/arduinoreference-131030123929-phpapp02/85/Arduino-reference-664-320.jpg)
![* [[Boolean | !]] (not)
Restore
J uly 09, 2006, at 07: 47 AM by David A. Mellis - adding link to avr- libc
Added lines 93- 95:
'''Expert/ I nternal Functions'''
* [[http: / / www.nongnu.org/ avr- libc/ user- manual/ modules.html | avr- libc]] is the standard library of C functions that Arduino
builds on. To use these, you may need to add the corresponding '''#include''' statement to the top of your sketch.
Restore
May 28, 2006, at 05: 03 PM by David A. Mellis Changed lines 38- 39 from:
Variables are expressions that you can use in programs to store values, like e.g. sensor reading from an analog pin. They
can have various types, which are described below. '''Warning''': floating point variables and operations are not currently
supported.
to:
Variables are expressions that you can use in programs to store values, like e.g. sensor reading from an analog pin. They
can have various types, which are described below. ''Floating point variables and operations are not currently supported.''
Changed lines 67- 68 from:
Used for communication between the Arduino board and a computer or other devices. This communication happens via the
Arduino board's serial or USB connection and on digital pins 0 (RX) and 1 (TX). Thus, if you use these functions, you cannot
also use pins 0 and 1 for digital i/ o.
to:
Used for communication between the Arduino board and a computer or other devices. This communication happens via the
Arduino board's serial or USB connection and on digital pins 0 (RX) and 1 (TX). Thus, if you use these functions, ''you cannot
also use pins 0 and 1 for digital i/ o.''
Restore
May 28, 2006, at 05: 01 PM by David A. Mellis - clarifying serial communication
Changed lines 67- 68 from:
Used for communication between the Arduino board and the computer, via the USB or serial connection. This communication
happens on digital pins 0 (RX) and 1 (TX). This means that these functions can be used to communicate with a serial device
on those pins, but also that any digital i/ o on pins 0 and 1 will interfere with this communication.
to:
Used for communication between the Arduino board and a computer or other devices. This communication happens via the
Arduino board's serial or USB connection and on digital pins 0 (RX) and 1 (TX). Thus, if you use these functions, you cannot
also use pins 0 and 1 for digital i/ o.
Restore
May 28, 2006, at 04: 55 PM by David A. Mellis Changed lines 67- 68 from:
Used for communication between the Arduino board and the computer, via the USB or serial connection. Or used for serial
communication on digital pins 0 (RX) and 1 (TX). ''Note: if you are using these functions, you cannot also use pins 0 and 1
for digital i/ o.''
to:
Used for communication between the Arduino board and the computer, via the USB or serial connection. This communication
happens on digital pins 0 (RX) and 1 (TX). This means that these functions can be used to communicate with a serial device
on those pins, but also that any digital i/ o on pins 0 and 1 will interfere with this communication.
Restore
May 28, 2006, at 04: 52 PM by David A. Mellis - serial notes
Changed lines 67- 68 from:
''Used for communication between the Arduino board and the computer, via the USB or serial connection (both appear as
serial ports to software on the computer). Or used for serial communication on digital pins 0 (RX) and 1 (TX).''
to:
Used for communication between the Arduino board and the computer, via the USB or serial connection. Or used for serial
communication on digital pins 0 (RX) and 1 (TX). ''Note: if you are using these functions, you cannot also use pins 0 and 1
for digital i/ o.''
* [[Serial.begin]](speed)
* [[Serial.available]]()
* [[Serial.read]]()
* [[Serial.print]](data)
* [[Serial.println]](data)
''Old serial library (deprecated).''
Deleted lines 88- 96:
'' Serial Library as of version 0004''](https://image.slidesharecdn.com/arduinoreference-131030123929-phpapp02/85/Arduino-reference-665-320.jpg)
![* [[Serial.begin]](speed)
* [[Serial.available]]()
* [[Serial.read]]()
* [[Serial.print]](data)
* [[Serial.println]](data)
Restore
April 19, 2006, at 06: 45 AM by David A. Mellis - Clarifying serial communication (USB or serial)
Added lines 66- 68:
''Used for communication between the Arduino board and the computer, via the USB or serial connection (both appear as
serial ports to software on the computer). Or used for serial communication on digital pins 0 (RX) and 1 (TX).''
Restore
April 17, 2006, at 06: 47 AM by Massimo Banzi Restore
April 14, 2006, at 07: 49 AM by David A. Mellis - Adding pulseI n()
Changed lines 59- 60 from:
to:
* unsigned long [[pulseI n]](pin, value)
Restore
March 31, 2006, at 06: 19 AM by Clay Shirky Changed line 5 from:
Arduino programs can be divided in three main parts: program structure, values (variables and constants), and functions.
to:
Arduino programs can be divided in three main parts: '''program structure''', '''values''' (variables and constants), and
'''functions'''.
Changed lines 17- 18 from:
setup() is preparation, and loop() is execution. I n the setup section, always at the top of your program, you initialize
[[variables]], set [[pinMode]], etc. The loop section is the code to be executed - - reading inputs, triggering outputs, etc.
to:
setup() is preparation, and loop() is execution. I n the setup section, always at the top of your program, you woiuld set
[[pinMode]], initialize serial communication, etc. The loop section is the code to be executed - - reading inputs, triggering
outputs, etc.
Restore
March 31, 2006, at 05: 02 AM by Clay Shirky Added lines 11- 13:
An Arduino program run in two parts:
Added lines 16- 18:
setup() is preparation, and loop() is execution. I n the setup section, always at the top of your program, you initialize
[[variables]], set [[pinMode]], etc. The loop section is the code to be executed - - reading inputs, triggering outputs, etc.
Changed lines 21- 22 from:
!!!!Further Syntax
to:
!!!!Control Structures
Added lines 28- 29:
!!!!Further Syntax
Restore
March 31, 2006, at 04: 48 AM by Clay Shirky Changed line 5 from:
Arduino programs can be divided in three main parts:
to:
Arduino programs can be divided in three main parts: program structure, values (variables and constants), and functions.
Restore
March 31, 2006, at 03: 39 AM by David A. Mellis - Clarifying analogWrite == pwm
Changed line 46 from:
'''Digital Pins'''
to:
'''Digital I / O'''
Changed line 51 from:
'''Analog Pins'''](https://image.slidesharecdn.com/arduinoreference-131030123929-phpapp02/85/Arduino-reference-666-320.jpg)
![to:
'''Analog I / O'''
Changed lines 53- 54 from:
* [[analogWrite]](pin, value)
to:
* [[analogWrite]](pin, value) - ''PWM''
Restore
March 30, 2006, at 08: 02 PM by Tom I goe Changed line 17 from:
* [[if/ else]]
to:
* [[if...else]]
Restore
March 30, 2006, at 08: 01 PM by Tom I goe Added line 17:
* [[if/ else]]
Restore
March 28, 2006, at 03: 19 AM by David A. Mellis - Changed "Define" to "#define"
Changed lines 24- 25 from:
* [[Define]]
to:
* [[Define | #define]]
Restore
March 27, 2006, at 01: 10 PM by Tom I goe Changed lines 24- 25 from:
to:
* [[Define]]
Changed lines 35- 36 from:
Another form of variables are constants, which are preset variables that you do not need to define or initialize.
to:
Constants are labels for certain values which are preset in the Arduino compiler. You do not need to define or initialize
constants. Arduino includes the following pre- defined constants.
Changed lines 40- 53 from:
Finally, defines are a useful C component that allow you to specify something before it is compiled.
!!!!Defines
You can define numbers in arduino that don't take up any program memory space on the chip. Arduino defines have the
same syntax as C defines:
@@#define constantName value@@
Note that the # is necessary. For example:
@@#define ledPin 3@@
The compiler will replace any mentions of ledPin with the value 3 at compile time.
to:
Restore
March 27, 2006, at 12: 56 PM by Tom I goe Restore
March 27, 2006, at 12: 28 PM by Tom I goe Changed lines 83- 87 from:
to:
* [[Serial.print]](data)
* [[Serial.println]](data)
Restore
March 27, 2006, at 12: 23 PM by Tom I goe Changed lines 82- 83 from:
to:
* [[Serial.read]]()](https://image.slidesharecdn.com/arduinoreference-131030123929-phpapp02/85/Arduino-reference-667-320.jpg)
![Restore
March 27, 2006, at 12: 19 PM by Tom I goe Changed lines 81- 82 from:
to:
* [[Serial.available]]()
Restore
March 27, 2006, at 12: 14 PM by Tom I goe Added lines 79- 81:
'' Serial Library as of version 0004''
* [[Serial.begin]](speed)
Restore
March 26, 2006, at 02: 21 PM by J eff Gray Changed line 18 from:
* [[select case]]
to:
* [[switch case]]
Restore
March 26, 2006, at 02: 21 PM by J eff Gray Added line 18:
* [[select case]]
Restore
March 26, 2006, at 11: 29 AM by J eff Gray Deleted line 5:
Restore
March 25, 2006, at 02: 21 PM by J eff Gray Changed lines 9- 10 from:
!!! Program Structure
to:
!! Program Structure
Changed lines 25- 26 from:
!!! Variables
to:
!! Variables
Changed lines 54- 55 from:
!!! Functions
to:
!! Functions
Restore
March 25, 2006, at 02: 20 PM by J eff Gray Changed lines 7- 8 from:
(: table border=0 cellpadding=5 cellspacing=0: )
(: cell: )
to:
(: table width=90% border=0 cellpadding=5 cellspacing=0: )
(: cell width=50% : )
Changed line 53 from:
(: cell: )
to:
(: cell width=50% : )
Restore
March 25, 2006, at 02: 19 PM by J eff Gray Changed lines 7- 8 from:
| | border = 0
||
to:
(: table border=0 cellpadding=5 cellspacing=0: )
(: cell: )
Changed line 53 from:
||
to:
(: cell: )
Changed line 83 from:
||
to:
(: tableend: )](https://image.slidesharecdn.com/arduinoreference-131030123929-phpapp02/85/Arduino-reference-668-320.jpg)

![* [[Constants| HI GH]] | [[Constants| LOW]]
* [[Constants| I NPUT]] | [[Constants| OUTPUT]]
Deleted lines 65- 69:
!!! Constants
* [[Constants| HI GH]] | [[Constants| LOW]]
* [[Constants| I NPUT]] | [[Constants| OUTPUT]]
Restore
March 24, 2006, at 04: 46 PM by J eff Gray Added lines 5- 6:
Arduino programs can be divided in three main parts:
Changed lines 9- 11 from:
Arduino programs can be divided in three main parts:
* [[Variable Declaration]]
to:
!!!!Getting Started
Added lines 12- 14:
* [[Variable Declaration]]
* [[Function Declaration]]
!!!!Further Syntax
Restore
February 09, 2006, at 08: 25 AM by 85.18.81.162 Changed lines 22- 23 from:
Variables are expressions that you can use in programs to store values, like e.g. sensor reading from an analog pin. They
can have various types, which are described below.
to:
Variables are expressions that you can use in programs to store values, like e.g. sensor reading from an analog pin. They
can have various types, which are described below. '''Warning''': floating point variables and operations are not currently
supported.
Restore
J anuary 20, 2006, at 10: 44 AM by 85.18.81.162 Changed lines 3- 6 from:
These are the basics about the arduino language.
to:
These are the basics about the Arduino language, which implemented in C. I f you're used to Processing or J ava, please check
out the [[http: / / arduino.berlios.de/ index.php/ Main/ ComparisonProcessing | Arduino/ Processing language comparison]].
Restore
J anuary 08, 2006, at 12: 46 PM by 82.186.237.10 Changed lines 53- 54 from:
to:
* [[printNewline]]()
Restore
J anuary 03, 2006, at 03: 35 AM by 82.186.237.10 Deleted lines 65- 79:
!!! Writing Comments
Comments are parts in the program that are used to inform about the way the program works. They are not going to be
compiled, nor will be exported to the processor. They are useful for you to understand what a certain program you
downloaded is doing or to inform to your colleagues about what one of its lines is.
There are two different ways of marking a line as a comment:
* you could use a double- slash in the beginning of a line: '''/ / '''
* you could use a combination of slash- asterisk - - > asterisk- slash encapsulating your comments: '''/ * blabla * / '''
'''Tip'''
When experimenting with code the ability of commenting parts of your program becomes very useful for you to "park" part of
the code for a while.](https://image.slidesharecdn.com/arduinoreference-131030123929-phpapp02/85/Arduino-reference-670-320.jpg)
![Restore
December 30, 2005, at 05: 41 AM by 82.186.237.10 Deleted lines 6- 9:
!!! Variables
Variables are expressions that you can use in programs to store values, like e.g. sensor reading from an analog pin.
Added lines 22- 29:
!!! Variables
Variables are expressions that you can use in programs to store values, like e.g. sensor reading from an analog pin. They
can have various types, which are described below.
* [[char]]
* [[int]]
* [[long]]
Restore
December 29, 2005, at 08: 08 AM by 82.186.237.10 Changed lines 18- 25 from:
to:
* [[if]]
* [[for]]
* [[while]]
* [[SemiColon| ; ]] (semicolon)
* [[Braces| {}]] (curly braces)
* [[Comments| / / ]] (single line comment)
* [[Comments| / * * / ]] (multi- line comment)
Restore
December 28, 2005, at 03: 59 PM by 82.186.237.10 Changed lines 22- 25 from:
* void [[pinMode]](int pin, int mode)
* void [[digitalWrite]](int pin, int val)
* int [[digitalRead]](int pin)
to:
* [[pinMode]](pin, mode)
* [[digitalWrite]](pin, value)
* int [[digitalRead]](pin)
Changed lines 27- 29 from:
* int [[analogRead]](int pin)
* void [[analogWrite]](int pin, int val)
to:
* int [[analogRead]](pin)
* [[analogWrite]](pin, value)
Changed lines 31- 32 from:
* void [[beginSerial]](int baud)
* void [[serialWrite]](unsigned char c)
to:
* [[beginSerial]](speed)
* [[serialWrite]](c)
Changed lines 35- 42 from:
* void [[printMode]](int mode)
*
*
*
*
void
void
void
void
[[printByte]](unsigned char c)
[[printString]](unsigned char * s)
[[printI nteger]](int n)
[[printHex]](unsigned int n)
* void [[printOctal]](unsigned int n)
* void [[printBinary]](unsigned int n)
to:
* [[printMode]](mode)
*
*
*
*
[[printByte]](c)
[[printString]](str)
[[printI nteger]](num)
[[printHex]](num)
* [[printOctal]](num)
* [[printBinary]](num)](https://image.slidesharecdn.com/arduinoreference-131030123929-phpapp02/85/Arduino-reference-671-320.jpg)
![Changed lines 44- 47 from:
* unsigned [[long millis]]()
* void [[delay]](unsigned long ms)
* void [[delayMicroseconds]](unsigned long us)
to:
* unsigned long [[millis]]()
* [[delay]](ms)
* [[delayMicroseconds]](us)
Restore
December 16, 2005, at 02: 58 PM by 85.18.81.162 Added lines 67- 80:
!!!Defines
You can define constants in arduino, that don't take up any program memory space on the chip. Arduino defines have the
same syntax as C defines:
@@#define constantName value@@
Note that the # is necessary. For example:
@@#define ledPin 3@@
The compiler will replace any mentions of ledPin with the value 3 at compile time.
Restore
December 09, 2005, at 11: 39 AM by 195.178.229.25 Changed lines 4- 6 from:
These are the functions available in the arduino language
to:
These are the basics about the arduino language.
Changed line 15 from:
* variable declaration
to:
* [[Variable Declaration]]
Restore
December 03, 2005, at 02: 02 PM by 213.140.6.103 Changed lines 50- 52 from:
* HI GH | LOW
* I NPUT | OUTPUT
to:
* [[Constants| HI GH]] | [[Constants| LOW]]
* [[Constants| I NPUT]] | [[Constants| OUTPUT]]
Restore
December 03, 2005, at 01: 41 PM by 213.140.6.103 Changed line 21 from:
!!!! Digital Pins
to:
'''Digital Pins'''
Changed line 26 from:
!!!! Analog Pins
to:
'''Analog Pins'''
Changed line 30 from:
!!!! Serial Communication
to:
'''Serial Communication'''
Changed line 43 from:
!!!! Handling Time
to:
'''Handling Time'''
Restore](https://image.slidesharecdn.com/arduinoreference-131030123929-phpapp02/85/Arduino-reference-672-320.jpg)
![December 03, 2005, at 01: 40 PM by 213.140.6.103 Added lines 20- 21:
!!!! Digital Pins
Added lines 25- 26:
!!!! Analog Pins
Added lines 29- 30:
!!!! Serial Communication
Added lines 42- 43:
!!!! Handling Time
Restore
December 03, 2005, at 12: 48 PM by 213.140.6.103 Added lines 40- 44:
!!! Constants
* HI GH | LOW
* I NPUT | OUTPUT
Restore
December 03, 2005, at 12: 37 PM by 213.140.6.103 Added lines 40- 43:
!!! Creating New Functions
Restore
December 03, 2005, at 10: 53 AM by 213.140.6.103 Changed lines 9- 10 from:
to:
Variables are expressions that you can use in programs to store values, like e.g. sensor reading from an analog pin.
Added lines 12- 15:
Arduino programs can be divided in three main parts:
* variable declaration
Changed lines 38- 49 from:
* void [[delayMicroseconds]](unsigned long us)
to:
* void [[delayMicroseconds]](unsigned long us)
!!! Writing Comments
Comments are parts in the program that are used to inform about the way the program works. They are not going to be
compiled, nor will be exported to the processor. They are useful for you to understand what a certain program you
downloaded is doing or to inform to your colleagues about what one of its lines is.
There are two different ways of marking a line as a comment:
* you could use a double- slash in the beginning of a line: '''/ / '''
* you could use a combination of slash- asterisk - - > asterisk- slash encapsulating your comments: '''/ * blabla * / '''
'''Tip'''
When experimenting with code the ability of commenting parts of your program becomes very useful for you to "park" part of
the code for a while.
Restore
November 27, 2005, at 10: 42 AM by 81.154.199.248 Changed lines 12- 13 from:
* voide [[loop]]()
to:
* void [[loop]]()
Restore
November 27, 2005, at 10: 17 AM by 81.154.199.248 Changed lines 24- 33 from:
* void printMode(int mode)](https://image.slidesharecdn.com/arduinoreference-131030123929-phpapp02/85/Arduino-reference-673-320.jpg)
![* void printByte(unsigned char c)
* void printString(unsigned char * s)
* void printI nteger(int n)
* void printHex(unsigned int n)
* void printOctal(unsigned int n)
* void printBinary(unsigned int n)
* unsigned long millis()
* void delay(unsigned long ms)
* void delayMicroseconds(unsigned long us)
to:
* void [[printMode]](int mode)
* void [[printByte]](unsigned char c)
* void [[printString]](unsigned char * s)
* void [[printI nteger]](int n)
* void [[printHex]](unsigned int n)
* void [[printOctal]](unsigned int n)
* void [[printBinary]](unsigned int n)
* unsigned [[long millis]]()
* void [[delay]](unsigned long ms)
* void [[delayMicroseconds]](unsigned long us)
Restore
November 27, 2005, at 10: 15 AM by 81.154.199.248 Changed lines 16- 23 from:
* void digitalWrite(int pin, int val)
* int digitalRead(int pin)
* int analogRead(int pin)
* void analogWrite(int pin, int val)
* void beginSerial(int baud)
* void serialWrite(unsigned char c)
* int serialAvailable()
* int serialRead()
to:
* void [[digitalWrite]](int pin, int val)
* int [[digitalRead]](int pin)
* int [[analogRead]](int pin)
* void [[analogWrite]](int pin, int val)
* void [[beginSerial]](int baud)
* void [[serialWrite]](unsigned char c)
* int [[serialAvailable]]()
* int [[serialRead]]()
Restore
November 27, 2005, at 09: 58 AM by 81.154.199.248 Changed lines 11- 13 from:
* void [[setup()]]
* voide [[loop()]]
to:
* void [[setup]]()
* voide [[loop]]()
Restore
November 27, 2005, at 09: 58 AM by 81.154.199.248 Added lines 9- 13:
!!! Program Structure
* void [[setup()]]
* voide [[loop()]]
Restore
November 27, 2005, at 09: 56 AM by 81.154.199.248 Added lines 6- 9:
!!! Variables
!!! Functions
Restore
November 27, 2005, at 09: 49 AM by 81.154.199.248 Added lines 1- 24:](https://image.slidesharecdn.com/arduinoreference-131030123929-phpapp02/85/Arduino-reference-674-320.jpg)
![!!Arduino Reference
These are the functions available in the arduino language
* void [[pinMode]](int pin, int mode)
* void digitalWrite(int pin, int val)
* int digitalRead(int pin)
* int analogRead(int pin)
* void analogWrite(int pin, int val)
* void beginSerial(int baud)
* void serialWrite(unsigned char c)
* int serialAvailable()
* int serialRead()
* void printMode(int mode)
* void printByte(unsigned char c)
* void printString(unsigned char * s)
* void printI nteger(int n)
* void printHex(unsigned int n)
* void printOctal(unsigned int n)
* void printBinary(unsigned int n)
* unsigned long millis()
* void delay(unsigned long ms)
* void delayMicroseconds(unsigned long us)
Restore
Edit Page | Page History | Printable View | All Recent Site Changes](https://image.slidesharecdn.com/arduinoreference-131030123929-phpapp02/85/Arduino-reference-675-320.jpg)
Arduino reference
- 1. Arduino search Buy | Download | Getting Started | Learning | Reference | Hardware | FAQ Reference Blog » | Forum » | Playground » Language ( extended) | Libraries | Comparison | Board Language Reference See the extended reference for more advanced features of the Arduino languages and the libraries page for interfacing with particular types of hardware. Arduino programs can be divided in three main parts: structure, values (variables and constants), and functions. The Arduino language is based on C/ C++. Structure Functions An Arduino program run in two parts: Digital I / O void setup() void loop() setup() is preparation, and loop() is execution. I n the setup section, always at the top of your program, you would set pinMode(pin, mode) digitalWrite(pin, value) int digitalRead(pin) Analog I / O pinModes, initialize serial communication, etc. The loop section is the code to be executed - - reading inputs, triggering outputs, etc. Variable Declaration Function Declaration void Control Structures if if...else for switch case while do... while break continue return Further Syntax ; (semicolon) {} (curly braces) / / (single line comment) / * * / (multi- line comment) Arithmetic Operators + (addition) - (subtraction) * (multiplication) / (division) % (modulo) Comparison Operators int analogRead(pin) analogWrite(pin, value) - PWM Advanced I / O shiftOut(dataPin, clockPin, bitOrder, value) unsigned long pulseI n (pin, value) Time unsigned long millis() delay(ms) delayMicroseconds(us) Math min(x, y) max(x, y) abs(x) constrain(x, a, b) map(value, fromLow, fromHigh, toLow, toHigh) pow(base, exponent) sqrt(x) Trigonometry sin(rad) cos(rad) tan(rad) Random Numbers randomSeed(seed) long random(max) long random(min, max) Serial Communication Used for communication between the Arduino board and a
- 2. == (equal to) != (not equal to) < (less than) computer or other devices. This communication happens via the Arduino board's serial or USB connection and on digital > (greater than) <= (less than or equal to) you cannot also use pins 0 and 1 for digital i/ o. pins 0 (RX) and 1 (TX). Thus, if you use these functions, Serial.begin(speed) >= (greater than or equal to) int Serial.available() int Serial.read() Serial.flush() Boolean Operators && (and) | | (or) ! (not) Compound Operators ++ (increment) Serial.print(data) Serial.println(data) Didn't find something? Check the extended reference or the libraries. - - (decrement) += (compound addition) - = (compound subtraction) * = (compound multiplication) / = (compound division) Variables Variables are expressions that you can use in programs to store values, such as a sensor reading from an analog pin. Constants Constants are particular values with specific meanings. HI GH | LOW I NPUT | OUTPUT true | false I nteger Constants Data Types Variables can have various types, which are described below. boolean char byte int unsigned int long unsigned long float double string array Reference ASCI I chart Reference Home Corrections, suggestions, and new documentation should be posted to the Forum. The text of the Arduino reference is licensed under a Creative Commons Attribution- ShareAlike 3.0 License. Code samples in the reference are released into the public domain. Edit Page | Page History | Printable View | All Recent Site Changes
- 3. Arduino search Buy | Download | Getting Started | Learning | Reference | Hardware | FAQ Reference Blog » | Forum » | Playground » Language ( extended) | Libraries | Comparison | Board Arduino Reference (extended) The Arduino language is based on C/ C++ and supports all standard C constructs and some C++ features. I t links against AVR Libc and allows the use of any of its functions; see its user manual for details. Structure Functions I n Arduino, the standard program entry point (main) is defined in the core and calls into two functions in a sketch. Digital I / O pinMode(pin, mode) digitalWrite(pin, value) setup() is called once, then loop() is called repeatedly (until you reset your board). void setup() void loop() int digitalRead(pin) Analog I / O analogReference(type) int analogRead(pin) Control Structures if if...else for switch case while do... while break continue return analogWrite(pin, value) - PWM Advanced I / O shiftOut(dataPin, clockPin, bitOrder, value) unsigned long pulseI n (pin, value) Time unsigned long millis() delay(ms) delayMicroseconds(us) Further Syntax Math ; (semicolon) {} (curly braces) / / (single line comment) / * * / (multi- line comment) #define #include Arithmetic Operators + (addition) - (subtraction) * (multiplication) / (division) % (modulo) Comparison Operators min(x, y) max(x, y) abs(x) constrain(x, a, b) map(value, fromLow, fromHigh, toLow, toHigh) pow(base, exponent) sqrt(x) Trigonometry sin(rad) cos(rad) tan(rad) Random Numbers randomSeed(seed) == (equal to) != (not equal to) < (less than) > (greater than) <= (less than or equal to) >= (greater than or equal to) long random(max) long random(min, max) External I nterrupts attachI nterrupt(interrupt, function, mode) detachI nterrupt (interrupt)
- 4. Boolean Operators I nterrupts && (and) interrupts() | | (or) ! (not) noI nterrupts () Pointer Access Operators * dereference operator & reference operator Bitwise Operators & (bitwise and) | (bitwise or) ^ (bitwise xor) ~ (bitwise not) << (bitshift left) >> (bitshift right) Port Manipulation Compound Operators ++ (increment) - - (decrement) += (compound addition) - = (compound subtraction) * = (compound multiplication) / = (compound division) &= (compound bitwise and) | = (compound bitwise or) Variables Constants HI GH | LOW I NPUT | OUTPUT true | false integer constants floating point constants Data Types void keyword boolean char unsigned char byte int unsigned int long unsigned long float double string array Variable Scope & Qualifiers static volatile const PROGMEM Serial Communication Serial.begin(speed) int Serial.available() int Serial.read() Serial.flush() Serial.print(data) Serial.println(data)
- 5. Utilities cast (cast operator) sizeof() (sizeof operator) Reference keywords ASCI I chart Atmega168 pin mapping Reference Home Corrections, suggestions, and new documentation should be posted to the Forum. The text of the Arduino reference is licensed under a Creative Commons Attribution- ShareAlike 3.0 License. Code samples in the reference are released into the public domain. Edit Page | Page History | Printable View | All Recent Site Changes
- 6. Arduino Buy | Download | Getting Started | Learning | Reference | Hardware | FAQ Reference search Blog » | Forum » | Playground » Language ( extended) | Libraries | Comparison | Board Libraries To use an existing library in a sketch, go to the Sketch menu, choose "I mport Library", and pick from the libraries available. This will insert one or more #include statements at the top of the sketch and allow it to use the library. Because libraries are uploaded to the board with your sketch, they increase the amount of space it takes up. I f a sketch no longer needs a library, simply delete its #include statements from the top of your code. Official Libraries These are the "official" libraries that are included in the Arduino distribution. EEPROM - reading and writing to "permanent" storage SoftwareSerial - for serial communication on any digital pins Stepper - for controlling stepper motors Wire - Two Wire I nterface ( TWI / I 2C) for sending and receiving data over a net of devices or sensors. These libraries are compatible Wiring versions, and the links below point to the (excellent) Wiring documentation. Matrix - Basic LED Matrix display manipulation library Sprite - Basic image sprite manipulation library for use in animations with an LED matrix Contributed Libraries Libraries written by members of the Arduino community. DateTime - a library for keeping track of the current date and time in software. Firmata - for communicating with applications on the computer using a standard serial protocol. GLCD - graphics routines for LCD based on the KS0108 or equivalent chipset. LCD - control LCDs (using 8 data lines) LCD 4 Bit - control LCDs (using 4 data lines) LedControl - for controlling LED matrices or seven- segment displays with a MAX7221 or MAX7219. LedControl - an alternative to the Matrix library for driving multiple LEDs with Maxim chips. TextString - handle strings Metro - help you time actions at regular intervals MsTimer2 - uses the timer 2 interrupt to trigger an action every N milliseconds. OneWire - control devices (from Dallas Semiconductor) that use the One Wire protocol. PS2Keyboard - read characters from a PS2 keyboard. Servo - provides software support for Servo motors on any pins. Servotimer1 - provides hardware support for Servo motors on pins 9 and 10 Simple Message System - send messages between Arduino and the computer SSerial2Mobile - send text messages or emails using a cell phone (via AT commands over software serial) X10 - Sending X10 signals over AC power lines To install, unzip the library to a sub- directory of the hardware/ libraries sub- directory of the Arduino application directory. Then launch the Arduino environment; you should see the library in the I mport Library menu. For a guide to writing your own libraries, see this tutorial . Reference Home Corrections, suggestions, and new documentation should be posted to the Forum. The text of the Arduino reference is licensed under a Creative Commons Attribution- ShareAlike 3.0 License. Code samples in the reference are released into the public domain.
- 7. Edit Page | Page History | Printable View | All Recent Site Changes
- 8. Arduino search Buy | Download | Getting Started | Learning | Reference | Hardware | FAQ Reference Blog » | Forum » | Playground » Language ( extended) | Libraries | Comparison | Board Arduino/ Processing Language Comparison The Arduino language (based on Wiring) is implemented in C/ C++, and therefore has some differences from the Processing language, which is based on J ava. Arrays Arduino Processing int bar[8]; bar[0] = 1; int[] bar = new int[8]; bar[0] = 1; int foo[] = { 0, 1, 2 }; int foo[] = { 0, 1, 2 }; or int[] foo = { 0, 1, 2 }; Loops Arduino Processing int i; for (i = 0; i < 5; i++) { ... } for (int i = 0; i < 5; i++) { ... } Printing Arduino Processing Serial.println("hello world"); println("hello world"); int i = 5; Serial.println(i); int i = 5; println(i); int i = 5; Serial.print("i = "); Serial.print(i); int i = 5; println("i = " + i); Serial.println(); Reference Home Corrections, suggestions, and new documentation should be posted to the Forum. The text of the Arduino reference is licensed under a Creative Commons Attribution- ShareAlike 3.0 License. Code samples in the reference are released into the public domain. Edit Page | Page History | Printable View | All Recent Site Changes
- 9. Arduino search Buy | Download | Getting Started | Learning | Reference | Hardware | FAQ Reference Blog » | Forum » | Playground » Language ( extended) | Libraries | Comparison | Board Introduction to the Arduino Board Looking at the board from the top down, this is an outline of what you will see (parts of the board you might interact with in the course of normal use are highlighted): Starting clockwise from the top center: Analog Reference pin (orange) Digital Ground (light green) Digital Pins 2- 13 (green) Digital Pins 0- 1/ Serial I n/ Out - TX/ RX (dark green) - These pins cannot be used for digital i/ o ( digitalRead and digitalWrite) if you are also using serial communication (e.g. Serial.begin) . Reset Button - S1 (dark blue) I n- circuit Serial Programmer (blue- green) Analog I n Pins 0- 5 (light blue) Power and Ground Pins (power: orange, grounds: light orange) External Power Supply I n (9- 12VDC) - X1 (pink) Toggles External Power and USB Power (place jumper on two pins closest to desired supply) - SV1 (purple) USB (used for uploading sketches to the board and for serial communication between the board and the computer; can be used to power the board) (yellow) Microcontrollers ATmega168 (used on most Arduino boards) ATmega8 (used on some older board) Digital I / O Pins 14 (of which 6 provide PWM output) Digital I / O Pins 14 (of which 3 provide PWM output) Analog I nput Pins 6 (DI P) or 8 (SMD) Analog I nput Pins 6 DC Current per I / O Pin 40 mA DC Current per I / O Pin 40 mA
- 10. Flash Memory 16 KB Flash Memory 8 KB SRAM 1 KB SRAM 1 KB EEPROM 512 bytes EEPROM 512 bytes ( datasheet) ( datasheet) Digital Pins I n addition to the specific functions listed below, the digital pins on an Arduino board can be used for general purpose input and output via the pinMode() , digitalRead(), and digitalWrite() commands. Each pin has an internal pull- up resistor which can be turned on and off using digitalWrite() (w/ a value of HI GH or LOW, respectively) when the pin is configured as an input. The maximum current per pin is 40 mA. Serial: 0 (RX) and 1 (TX). Used to receive (RX) and transmit (TX) TTL serial data. On the Arduino Diecimila, these pins are connected to the corresponding pins of the FTDI USB- to- TTL Serial chip. On the Arduino BT, they are connected to the corresponding pins of the WT11 Bluetooth module. On the Arduino Mini and LilyPad Arduino, they are intended for use with an external TTL serial module (e.g. the Mini- USB Adapter). External I nterrupts: 2 and 3. These pins can be configured to trigger an interrupt on a low value, a rising or falling edge, or a change in value. See the attachI nterrupt() function for details. PWM: 3, 5, 6, 9, 10, and 11. Provide 8- bit PWM output with the analogWrite() function. On boards with an ATmega8, PWM output is available only on pins 9, 10, and 11. BT Reset: 7. (Arduino BT - only) Connected to the reset line of the bluetooth module. SPI : 10 (SS), 11 (MOSI ), 12 (MI SO), 13 (SCK). These pins support SPI communication, which, although provided by the underlying hardware, is not currently included in the Arduino language. LED: 13. On the Diecimila and LilyPad, there is a built- in LED connected to digital pin 13. When the pin is HI GH value, the LED is on, when the pin is LOW, it's off. Analog Pins I n addition to the specific functions listed below, the analog input pins support 10- bit analog- to- digital conversion (ADC) using the analogRead() function. Most of the analog inputs can also be used as digital pins: analog input 0 as digital pin 14 through analog input 5 as digital pin 19. Analog inputs 6 and 7 (present on the Mini and BT) cannot be used as digital pins. I 2 C: 4 (SDA) and 5 (SCL). Support I 2 C (TWI ) communication using the Wire library (documentation on the Wiring website). Power Pins VI N (sometimes labelled "9V"). The input voltage to the Arduino board when it's using an external power source (as opposed to 5 volts from the USB connection or other regulated power source). You can supply voltage through this pin, or, if supplying voltage via the power jack, access it through this pin. Note that different boards accept different input voltages ranges, please see the documentation for your board. Also note that the LilyPad has no VI N pin and accepts only a regulated input. 5V. The regulated power supply used to power the microcontroller and other components on the board. This can come either from VI N via an on- board regulator, or be supplied by USB or another regulated 5V supply. 3V3. (Diecimila- only) A 3.3 volt supply generated by the on- board FTDI chip. GND. Ground pins. Other Pins AREF. Reference voltage for the analog inputs. Used with analogReference(). Reset. (Diecimila- only) Bring this line LOW to reset the microcontroller. Typically used to add a reset button to shields which block the one on the board. Reference Home Corrections, suggestions, and new documentation should be posted to the Forum. The text of the Arduino reference is licensed under a Creative Commons Attribution- ShareAlike 3.0 License. Code samples in the reference are released into the public domain.
- 11. Edit Page | Page History | Printable View | All Recent Site Changes
- 12. Arduino Buy | Download | Getting Started | Learning | Reference | Hardware | FAQ Reference search Blog » | Forum » | Playground » Language ( extended) | Libraries | Comparison | Board setup() The setup() function is called when your program starts. Use it to initialize your variables, pin modes, start using libraries, etc. The setup function will only run once, after each powerup or reset of the Arduino board. Example int buttonPin = 3; void setup() { beginSerial(9600); pinMode(buttonPin, INPUT); } void loop() { // ... } Reference Home Corrections, suggestions, and new documentation should be posted to the Forum. The text of the Arduino reference is licensed under a Creative Commons Attribution- ShareAlike 3.0 License. Code samples in the reference are released into the public domain. Edit Page | Page History | Printable View | All Recent Site Changes
- 13. Arduino Buy | Download | Getting Started | Learning | Reference | Hardware | FAQ Reference search Blog » | Forum » | Playground » Language ( extended) | Libraries | Comparison | Board loop() After creating a setup() function, which initializes and sets the initial values, the loop() function does precisely what its name suggests, and loops consecutively, allowing your program to change and respond. Use it to actively control the Arduino board. Example int buttonPin = 3; // setup initializes serial and the button pin void setup() { beginSerial(9600); pinMode(buttonPin, INPUT); } // loop checks the button pin each time, // and will send serial if it is pressed void loop() { if (digitalRead(buttonPin) == HIGH) serialWrite('H'); else serialWrite('L'); delay(1000); } Reference Home Corrections, suggestions, and new documentation should be posted to the Forum. The text of the Arduino reference is licensed under a Creative Commons Attribution- ShareAlike 3.0 License. Code samples in the reference are released into the public domain. Edit Page | Page History | Printable View | All Recent Site Changes
- 14. Arduino search Buy | Download | Getting Started | Learning | Reference | Hardware | FAQ Reference Blog » | Forum » | Playground » Language ( extended) | Libraries | Comparison | Board pinMode(pin, mode) Description Configures the specified pin to behave either as an input or an output. See the reference page below. Parameters pin: the number of the pin whose mode you wish to set. ( int) mode: either I NPUT or OUTPUT. Returns None Example int ledPin = 13; void setup() { pinMode(ledPin, OUTPUT); } // LED connected to digital pin 13 // sets the digital pin as output void loop() { digitalWrite(ledPin, HIGH); delay(1000); // sets the LED on // waits for a second digitalWrite(ledPin, LOW); delay(1000); // sets the LED off // waits for a second } Note The analog input pins can be used as digital pins, referred to as numbers 14 (analog input 0) to 19 (analog input 5). See also Description of the pins on an Arduino board constants digitalWrite digitalRead Reference Home Corrections, suggestions, and new documentation should be posted to the Forum. The text of the Arduino reference is licensed under a Creative Commons Attribution- ShareAlike 3.0 License. Code samples in the reference are released into the public domain. Edit Page | Page History | Printable View | All Recent Site Changes
- 16. Arduino search Buy | Download | Getting Started | Learning | Reference | Hardware | FAQ Reference Blog » | Forum » | Playground » Language ( extended) | Libraries | Comparison | Board Variables A variable is a way of naming and storing a value for later use by the program, such as data from a analog pin set to input. (See pinMode for more on setting pins to input or output.) You set a variable by making it equal to the value you want to store. The following code declares a variable inputVariable, and then sets it equal to the value at analog pin #2: int inputVariable = 0; // declares the variable; this only needs to be done once inputVariable = analogRead(2); // set the variable to the input of analog pin #2 inputVariable is the variable itself. The first line declares that it will contain an int (short for integer.) The second line sets inputVariable to the value at analog pin #2. This makes the value of pin #2 accessible elsewhere in the code. Once a variable has been set (or re- set), you can test its value to see if it meets certain conditions, or you can use it's value directly. For instance, the following code tests whether the inputVariable is less than 100, then sets a delay based on inputVariable which is a minimum of 100: if (inputVariable < 100) { inputVariable = 100; } delay(inputVariable); This example shows all three useful operations with variables. I t tests the variable ( if (inputVariable < 100) ), it sets the variable if it passes the test ( inputVariable = 100 ), and it uses the value of the variable as an input to the delay() function ( delay(inputVariable) ) Style Note: You should give your variables descriptive names, so as to make your code more readable. Variable names like tiltSensor or pushButton help you (and anyone else reading your code) understand what the variable represents. Variable names like var or value, on the other hand, do little to make your code readable. You can name a variable any word that is not already one of the keywords in Arduino. Avoid beginning variable names with numeral characters. Variable Declaration All variables have to be declared before they are used. Declaring a variable means defining its type, and optionally, setting an initial value (initializing the variable). I n the above example, the statement int inputVariable = 0; declares that inputVariable is an int , and that its initial value is zero. Possible types for variables are: char byte int unsigned int long unsigned long float double Reference Home
- 17. Corrections, suggestions, and new documentation should be posted to the Forum. The text of the Arduino reference is licensed under a Creative Commons Attribution- ShareAlike 3.0 License. Code samples in the reference are released into the public domain. Edit Page | Page History | Printable View | All Recent Site Changes
- 18. Arduino Buy | Download | Getting Started | Learning | Reference | Hardware | FAQ Reference search Blog » | Forum » | Playground » Language ( extended) | Libraries | Comparison | Board Functions Segmenting code into functions allows a programmer to create modular pieces of code that perform a defined task and then return to the area of code from which the function was "called". The typical case for creating a function is when one needs to perform the same action multiple times in a program. For programmers accustomed to using BASI C, functions in Arduino provide (and extend) the utility of using subroutines (GOSUB in BASI C). Standardizing code fragments into functions has several advantages: Functions help the programmer stay organized. Often this helps to conceptualize the program. Functions codify one action in one place so that the function only has to be thought out and debugged once. This also reduces chances for errors in modification, if the code needs to be changed. Functions make the whole sketch smaller and more compact because sections of code are reused many times. They make it easier to reuse code in other programs by making it more modular, and as a nice side effect, using functions also often makes the code more readable. There are two required functions in an Arduino sketch, setup() and loop(). Other functions must be created outside the brackets of those two functions. As an example, we will create a simple function to multiply two numbers. Example To "call" our simple multiply function, we pass it parameters of the datatype that it is expecting: void loop{ int i = 2; int j = 3; int k; k = myMultiplyFunction(i, j); // k now contains 6 }
- 19. Our function needs to be declared outside any other function, so "myMultiplyFunction()" can go either above or below the "loop()" function. The entire sketch would then look like this: void setup(){ Serial.begin(9600); } void loop{ int i = 2; int j = 3; int k; k = myMultiplyFunction(i, j); // k now contains 6 Serial.println(k); delay(500); } int myMultiplyFunction(int x, int y){ int result; result = x * y; return result; } Another example This function will read a sensor five times with analogRead() and calculate the average of five readings. I t then scales the data to 8 bits (0- 255), and inverts it, returning the inverted result. int ReadSens_and_Condition(){ int i; int sval; for (i = 0; i < 5; i++){ sval = sval + analogRead(0); } sval = sval = sval = return sval / 5; sval / 4; 255 - sval; sval; // sensor on analog pin 0 // average // scale to 8 bits (0 - 255) // invert output } To call our function we just assign it to a variable. int sens; sens = ReadSens_and_Condition(); Reference Home Corrections, suggestions, and new documentation should be posted to the Forum. The text of the Arduino reference is licensed under a Creative Commons Attribution- ShareAlike 3.0 License. Code samples in the reference are released into the public domain. Edit Page | Page History | Printable View | All Recent Site Changes
- 20. Arduino Buy | Download | Getting Started | Learning | Reference | Hardware | FAQ Reference search Blog » | Forum » | Playground » Language ( extended) | Libraries | Comparison | Board void The void keyword is used only in function declarations. I t indicates that the function is expected to return no information to the function from which it was called. Example: // actions are performed in the functions "setup" and "loop" // but no information is reported to the larger program void setup() { // ... } void loop() { // ... } See also function declaration Reference Home Corrections, suggestions, and new documentation should be posted to the Forum. The text of the Arduino reference is licensed under a Creative Commons Attribution- ShareAlike 3.0 License. Code samples in the reference are released into the public domain. Edit Page | Page History | Printable View | All Recent Site Changes
- 21. Arduino search Buy | Download | Getting Started | Learning | Reference | Hardware | FAQ Reference Blog » | Forum » | Playground » Language ( extended) | Libraries | Comparison | Board if if tests whether a certain condition has been reached, such as an input being above a certain number. The format for an if test is: if (someVariable > 50) { // do something here } The program tests to see if someVariable is greater than 50. I f it is, the program takes a particular action. Put another way, if the statement in parentheses is true, the statements inside the brackets are run. I f not, the program skips over the code. The brackets may be omitted after an if statement. I f this is done, the next line (defined by the semicolon) becomes the only conditional statement. if (x > 120) digitalWrite(LEDpin, HIGH); if (x > 120) digitalWrite(LEDpin, HIGH); if (x > 120) {digitalWrite(LEDpin, HIGH);} // all are correct The statements being evaluated inside the parentheses require the use of one or more operators: Operators: x x x x x == != < > <= y y y y y (x (x (x (x (x is is is is is equal to y) not equal to y) less than y) greater than y) less than or equal to y) x > = y (x is greater than or equal to y) Warning: Beware of accidentally using the single equal sign (e.g. if (x = 10) ). The single equal sign is the assignment operator, and sets x to 10. I nstead use the double equal sign (e.g. if (x == 10) ), which is the comparison operator, and tests whether x is equal to 10 or not. The latter statement is only true if x equals 10, but the former statement will always be true. This is because C evaluates the statement if (x=10) as follows: 10 is assigned to x, so x now contains 10. Then the 'if' conditional evaluates 10, which always evaluates to TRUE, since any non- zero number evaluates to TRUE. Consequently, if (x = 10) will always evaluate to TRUE, which is not the desired result when using an 'if' statement. Additionally, the variable x will be set to 10, which is also not a desired action. if can also be part of a branching control structure using the if...else] construction. Reference Home Corrections, suggestions, and new documentation should be posted to the Forum. The text of the Arduino reference is licensed under a Creative Commons Attribution- ShareAlike 3.0 License. Code samples in the reference are released into the public domain.
- 22. Edit Page | Page History | Printable View | All Recent Site Changes
- 23. Arduino Buy | Download | Getting Started | Learning | Reference | Hardware | FAQ Reference search Blog » | Forum » | Playground » Language ( extended) | Libraries | Comparison | Board if/ else if/ else allows greater control over the flow of code than the basic if statement, by allowing multiple tests to be grouped together. For example, an analog input could be tested and one action taken if the input was less than 500, and another action taken if the input was 500 or greater. The code would look like this: if (pinFiveInput < 500) { // action A } else { // action B } else can proceed another if test, so that multiple, mutually exclusive tests can be run at the same time: if (pinFiveInput < 500) { // do Thing A } else if (pinFiveInput >= 1000) { // do Thing B } else { // do Thing C } You can have an unlimited nuber of such branches. (Another way to express branching, mutually exclusive tests is with the switch case statement. Coding Note: I f you are using if/ else, and you want to make sure that some default action is always taken, it is a good idea to end your tests with an else statement set to your desired default behavior. Reference Home Corrections, suggestions, and new documentation should be posted to the Forum. The text of the Arduino reference is licensed under a Creative Commons Attribution- ShareAlike 3.0 License. Code samples in the reference are released into the public domain. Edit Page | Page History | Printable View | All Recent Site Changes
- 24. Arduino Buy | Download | Getting Started | Learning | Reference | Hardware | FAQ Reference search Blog » | Forum » | Playground » Language ( extended) | Libraries | Comparison | Board for statements Desciption The for statement is used to repeat a block of statements enclosed in curly braces. An increment counter is usually used to increment and terminate the loop. The for statement is useful for any repetitive operation, and is often used in combination with arrays to operate on collections of data/ pins. There are three parts to the for loop header: for ( initialization; condition; increment) { //statement(s); } The initialization happens first and exactly once. Each time through the loop, the condition is tested; if it's true, the statement block, and the increment is executed, then the condition is tested again. When the condition becomes false, the loop ends. Example // Dim an LED using a PWM pin int PWMpin = 10; // LED in series with 1k resistor on pin 10 void setup() { // no setup needed } void loop() { for (int i=0; i <= 255; i++){ analogWrite(PWMpin, i); delay(10); } } Coding Tip The C for loop is much more flexible than for loops found in some other computer languages, including BASI C. Any or all of the three header elements may be omitted, although the semicolons are required. Also the statements for initialization, condition, and increment can be any valid C statements with unrelated variables. These types of unusual for statements may provide solutions to some rare programming problems. See also while Reference Home Corrections, suggestions, and new documentation should be posted to the Forum. The text of the Arduino reference is licensed under a Creative Commons Attribution- ShareAlike 3.0 License. Code samples in the reference are released into the public domain.
- 25. Edit Page | Page History | Printable View | All Recent Site Changes
- 26. Arduino Buy | Download | Getting Started | Learning | Reference | Hardware | FAQ Reference search Blog » | Forum » | Playground » Language ( extended) | Libraries | Comparison | Board switch / case statements J ust like I f statements, switch case statements help the control and flow of the programs. Switch/ case allows you to make a list of "cases" inside a switch curly bracket. The program checks each case for a match with the test variable, and runs the code if if a match is found. Parameters var - variable you wish to match with case statements default - if no other conditions are met, default will run break - important, without break, the switch statement will continue checking through the statement for any other possibile matches. I f one is found, it will run that as well, which may not be your intent. Break tells the switch statement to stop looking for matches, and exit the switch statement. Example switch (var) { case 1: //do something when var == 1 break; // break is optional case 2: //do something when var == 2 break; default: // if nothing else matches, do the default // default is optional } Reference Home Corrections, suggestions, and new documentation should be posted to the Forum. The text of the Arduino reference is licensed under a Creative Commons Attribution- ShareAlike 3.0 License. Code samples in the reference are released into the public domain. Edit Page | Page History | Printable View | All Recent Site Changes
- 27. Arduino Buy | Download | Getting Started | Learning | Reference | Hardware | FAQ Reference search Blog » | Forum » | Playground » Language ( extended) | Libraries | Comparison | Board while loops Description while loops will loop continuously, and infinitely, until the expression inside the parenthesis, () becomes false. Something must change the tested variable, or the while loop will never exit. This could be in your code, such as an incremented variable, or an external condition, such as testing a sensor. Syntax while(expression){ // statement(s) } Parameters expression - a (boolean) C statement that evaluates to true or false Example var = 0; while(var < 200){ // do something repetitive 200 times var++; } Reference Home Corrections, suggestions, and new documentation should be posted to the Forum. The text of the Arduino reference is licensed under a Creative Commons Attribution- ShareAlike 3.0 License. Code samples in the reference are released into the public domain. Edit Page | Page History | Printable View | All Recent Site Changes
- 28. Arduino Buy | Download | Getting Started | Learning | Reference | Hardware | FAQ Reference search Blog » | Forum » | Playground » Language ( extended) | Libraries | Comparison | Board do - while The do loop works in the same manner as the while loop, with the exception that the condition is tested at the end of the loop, so the do loop will always run at least once. do { // statement block } while (test condition); Example do { delay(50); // wait for sensors to stabilize x = readSensors(); // check the sensors } while (x < 100); Reference Home Corrections, suggestions, and new documentation should be posted to the Forum. The text of the Arduino reference is licensed under a Creative Commons Attribution- ShareAlike 3.0 License. Code samples in the reference are released into the public domain. Edit Page | Page History | Printable View | All Recent Site Changes
- 29. Arduino Buy | Download | Getting Started | Learning | Reference | Hardware | FAQ Reference search Blog » | Forum » | Playground » Language ( extended) | Libraries | Comparison | Board break break is used to exit from a do, for, or while loop, bypassing the normal loop condition. I t is also used to exit from a switch statement. Example for (x = 0; x < 255; x ++) { digitalWrite(PWMpin, x); sens = analogRead(sensorPin); if (sens > threshold){ // bail out on sensor detect x = 0; break; } delay(50); } Reference Home Corrections, suggestions, and new documentation should be posted to the Forum. The text of the Arduino reference is licensed under a Creative Commons Attribution- ShareAlike 3.0 License. Code samples in the reference are released into the public domain. Edit Page | Page History | Printable View | All Recent Site Changes
- 30. Arduino search Buy | Download | Getting Started | Learning | Reference | Hardware | FAQ Reference Blog » | Forum » | Playground » Language ( extended) | Libraries | Comparison | Board continue continue is used to bypass portions of code in a do, for, or while loop. I t forces the conditional expression to be evaluated, without terminating the loop. Example for (x = 0; x < 255; x ++) { if (x > 40 && x < 120){ continue; // create jump in values } digitalWrite(PWMpin, x); delay(50); } Reference Home Corrections, suggestions, and new documentation should be posted to the Forum. The text of the Arduino reference is licensed under a Creative Commons Attribution- ShareAlike 3.0 License. Code samples in the reference are released into the public domain. Edit Page | Page History | Printable View | All Recent Site Changes
- 31. Arduino Buy | Download | Getting Started | Learning | Reference | Hardware | FAQ Reference search Blog » | Forum » | Playground » Language ( extended) | Libraries | Comparison | Board return Terminate a function and return a value from a function to the calling function, if desired. Syntax: return; return value; / / both forms are valid Parameters value: any variable or constant type Examples: A function to compare a sensor input to a threshold int checkSensor(){ if (analogRead(0) > 400) { return 1; else{ return 0; } } The return keyword is handy to test a section of code without having to "comment out" large sections of possibly buggy code. void loop(){ // brilliant code idea to test here return; // the rest of a dysfunctional sketch here // this code will never be executed } See also comments Reference Home Corrections, suggestions, and new documentation should be posted to the Forum. The text of the Arduino reference is licensed under a Creative Commons Attribution- ShareAlike 3.0 License. Code samples in the reference are released into the public domain. Edit Page | Page History | Printable View | All Recent Site Changes
- 32. Arduino Buy | Download | Getting Started | Learning | Reference | Hardware | FAQ Reference search Blog » | Forum » | Playground » Language ( extended) | Libraries | Comparison | Board ; semicolon Used to end a statement. Example int a = 13; Tip Forgetting to end a line in a semicolon will result in a compiler error. The error text may be obvious, and refer to a missing semicolon, or it may not. I f an impenetrable or seemingly illogical compiler error comes up, one of the first things to check is a missing semicolon, in the immediate vicinity, preceding the line at which the compiler complained. Reference Home Corrections, suggestions, and new documentation should be posted to the Forum. The text of the Arduino reference is licensed under a Creative Commons Attribution- ShareAlike 3.0 License. Code samples in the reference are released into the public domain. Edit Page | Page History | Printable View | All Recent Site Changes
- 33. Arduino Buy | Download | Getting Started | Learning | Reference | Hardware | FAQ Reference search Blog » | Forum » | Playground » Language ( extended) | Libraries | Comparison | Board { Curly Braces } Curly braces (also referred to as just "braces" or as "curly brackets") are a major part of the C programming language. They are used in several different constructs, outlined below, and this can sometimes be confusing for beginners. An opening curly brace "{" must always be followed by a closing curly brace "}". This is a condition that is often referred to as the braces being balanced. The Arduino I DE (integrated development environment) includes a convenient feature to check the balance of curly braces. J ust select a brace, or even click the insertion point immediately following a brace, and its logical companion will be highlighted. At present this feature is slightly buggy as the I DE will often find (incorrectly) a brace in text that has been "commented out." Beginning programmers, and programmers coming to C from the BASI C language often find using braces confusing or daunting. After all, the same curly braces replace the RETURN statement in a subroutine (function), the ENDI F statement in a conditional and the NEXT statement in a FOR loop. Because the use of the curly brace is so varied, it is good programming practice to type the closing brace immediately after typing the opening brace when inserting a construct which requires curly braces. Then insert some carriage returns between your braces and begin inserting statements. Your braces, and your attitude, will never become unbalanced. Unbalanced braces can often lead to cryptic, impenetrable compiler errors that can sometimes be hard to track down in a large program. Because of their varied usages, braces are also incredibly important to the syntax of a program and moving a brace one or two lines will often dramatically affect the meaning of a program. The main uses of curly braces Functions void myfunction(datatype argument){ statements(s) } Loops while (boolean expression) { statement(s) } do { statement(s) } while (boolean expression); for (initialisation; termination condition; incrementing expr) { statement(s) } Conditional statements if (boolean expression) { statement(s) }
- 34. else if (boolean expression) { statement(s) } else { statement(s) } Reference Home Reference Home Corrections, suggestions, and new documentation should be posted to the Forum. The text of the Arduino reference is licensed under a Creative Commons Attribution- ShareAlike 3.0 License. Code samples in the reference are released into the public domain. Edit Page | Page History | Printable View | All Recent Site Changes
- 35. Arduino Buy | Download | Getting Started | Learning | Reference | Hardware | FAQ Reference search Blog » | Forum » | Playground » Language ( extended) | Libraries | Comparison | Board Comments Comments are lines in the program that are used to inform yourself or others about the way the program works. They are ignored by the compiler, and not exported to the processor, so they don't take up any space on the Atmega chip. Comments only purpose are to help you understand (or remember) how your program works or to inform others how your program works. There are two different ways of marking a line as a comment: Example x = 5; // This is a single line comment. Anything after the slashes is a comment // to the end of the line /* this is multiline comment - use it to comment out whole blocks of code if (gwb == 0){ // single line comment is OK inside of multiline comment x = 3; } /* but not another multiline comment - this is invalid */ // don't forget the "closing" comment - they have to be balanced! */ Tip When experimenting with code, "commenting out" parts of your program is a convenient way to remove lines that may be buggy. This leaves the lines in the code, but turns them into comments, so the compiler just ignores them. This can be especially useful when trying to locate a problem, or when a program refuses to compile and the compiler error is cryptic or unhelpful. Reference Home Corrections, suggestions, and new documentation should be posted to the Forum. The text of the Arduino reference is licensed under a Creative Commons Attribution- ShareAlike 3.0 License. Code samples in the reference are released into the public domain. Edit Page | Page History | Printable View | All Recent Site Changes
- 36. Arduino Buy | Download | Getting Started | Learning | Reference | Hardware | FAQ Reference search Blog » | Forum » | Playground » Language ( extended) | Libraries | Comparison | Board Addition, Subtraction, Multiplication, & Division Description These operators return the sum, difference, product, or quotient (respectively) of the two operands. The operation is conducted using the data type of the operands, so, for example, 9 / 4 gives 2 since 9 and 4 are ints. This also means that the operation can overflow if the result is larger than that which can be stored in the data type (e.g. adding 1 to an int with the value 32,767 gives - 32,768). I f the operands are of different types, the "larger" type is used for the calculation. I f one of the numbers (operands) are of the type float or of type double, floating point math will be used for the calculation. Examples y = y + 3; x = x - 7; i = j * 6; r = r / 5; Syntax result result result result = = = = value1 value1 value1 value1 + * / value2; value2; value2; value2; Parameters: value1: any variable or constant value2: any variable or constant Programming Tips: Know that integer constants default to int , so some constant calculations may overflow (e.g. 60 * 1000 will yield a negative result). Choose variable sizes that are large enough to hold the largest results from your calculations Know at what point your variable will "roll over" and also what happens in the other direction e.g. (0 - 1) OR (0 - 32768) For math that requires fractions, use float variables, but be aware of their drawbacks: large size, slow computation speeds Use the cast operator e.g. (int)myFloat to convert one variable type to another on the fly. Reference Home Corrections, suggestions, and new documentation should be posted to the Forum. The text of the Arduino reference is licensed under a Creative Commons Attribution- ShareAlike 3.0 License. Code samples in the reference are released into the public domain.
- 37. Edit Page | Page History | Printable View | All Recent Site Changes
- 38. Arduino search Buy | Download | Getting Started | Learning | Reference | Hardware | FAQ Reference Blog » | Forum » | Playground » Language ( extended) | Libraries | Comparison | Board % (modulo) Description Returns the remainder from an integer division Syntax result = value1 % value2 Parameters value1: a byte, char, int, or long value2: a byte, char, int, or long Returns The remainder from an integer division. Examples x = 7 % 5; // x now contains 2 x = 9 % 5; x = 5 % 5; // x now contains 4 // x now contains 0 x = 4 % 5; // x now contains 4 The modulo operator is useful for tasks such as making an event occur at regular periods or making a memory array roll over Example Code // check a sensor every 10 times through a loop void loop(){ i++; if ((i % 10) == 0){ x = analogRead(sensPin); } // read sensor every ten times through loop / ... } // setup a buffer that averages the last five samples of a sensor int senVal[5]; int i, j; long average; // create an array for sensor data // counter variables // variable to store average ... void loop(){ // input sensor data into oldest memory slot sensVal[(i++) % 5] = analogRead(sensPin); average = 0; for (j=0; j<5; j++){ average += sensVal[j]; } // add up the samples
- 39. average = average / 5; // divide by total The modulo operator can also be used to strip off the high bits of a variable. The example below is from the Firmata library. // send the analog input information (0 - 1023) Serial.print(value % 128, BYTE); // send lowest 7 bits Serial.print(value >> 7, BYTE); // send highest three bits Tip the modulo operator will not work on floats See also division Reference Home Corrections, suggestions, and new documentation should be posted to the Forum. The text of the Arduino reference is licensed under a Creative Commons Attribution- ShareAlike 3.0 License. Code samples in the reference are released into the public domain. Edit Page | Page History | Printable View | All Recent Site Changes
- 40. Arduino search Buy | Download | Getting Started | Learning | Reference | Hardware | FAQ Reference Blog » | Forum » | Playground » Language ( extended) | Libraries | Comparison | Board digitalWrite(pin, value) Description Sets a pin configured as OUTPUT to either a HI GH or a LOW state at the specified pin. The digitalWrite() function is also used to set pullup resistors when a pin is configured as an I NPUT. Parameters pin: the pin number value: HI GH or LOW Returns none Example int ledPin = 13; void setup() { pinMode(ledPin, OUTPUT); } // LED connected to digital pin 13 // sets the digital pin as output void loop() { digitalWrite(ledPin, HIGH); delay(1000); // sets the LED on // waits for a second digitalWrite(ledPin, LOW); delay(1000); // waits for a second // sets the LED off } Sets pin 13 to HI GH, makes a one- second- long delay, and sets the pin back to LOW. Note The analog input pins can also be used as digital pins, referred to as numbers 14 (analog input 0) to 19 (analog input 5). See also Description of the pins on an Arduino board pinMode digitalRead Reference Home Corrections, suggestions, and new documentation should be posted to the Forum. The text of the Arduino reference is licensed under a Creative Commons Attribution- ShareAlike 3.0 License. Code samples in the reference are released into the public domain.
- 41. Edit Page | Page History | Printable View | All Recent Site Changes
- 42. Arduino search Buy | Download | Getting Started | Learning | Reference | Hardware | FAQ Reference Blog » | Forum » | Playground » Language ( extended) | Libraries | Comparison | Board digitalRead(pin) What it does Reads the value from a specified pin, it will be either HI GH or LOW. Parameters pin: the number of the digital pin you want to read. Returns Either HI GH or LOW Example int ledPin = 13; // LED connected to digital pin 13 int inPin = 7; // pushbutton connected to digital pin 7 int val = 0; // variable to store the read value void setup() { pinMode(ledPin, OUTPUT); pinMode(inPin, INPUT); } void loop() { val = digitalRead(inPin); digitalWrite(ledPin, val); } // sets the digital pin 13 as output // sets the digital pin 7 as input // read the input pin // sets the LED to the button's value Sets pin 13 to the same value as the pin 7, which is an input. Note I f the pin isn't connected to anything, digitalRead() can return either HI GH or LOW (and this can change randomly). The analog input pins can be used as digital pins w/ numbers 14 (analog input 0) to 19 (analog input 5). See also Description of the pins on an Arduino board pinMode digitalWrite Reference Home Corrections, suggestions, and new documentation should be posted to the Forum. The text of the Arduino reference is licensed under a Creative Commons Attribution- ShareAlike 3.0 License. Code samples in the reference are released into the public domain.
- 43. Edit Page | Page History | Printable View | All Recent Site Changes
- 44. Arduino search Buy | Download | Getting Started | Learning | Reference | Hardware | FAQ Reference Blog » | Forum » | Playground » Language ( extended) | Libraries | Comparison | Board int analogRead(pin) Description Reads the value from the specified analog pin. The Arduino board contains a 6 channel (8 channels on the Mini and Nano), 10- bit analog to digital converter. This means that it will map input voltages between 0 and 5 volts into integer values between 0 and 1023. This yields a resolution between readings of: 5 volts / 1024 units or, .0049 volts (4.9 mV) per unit. I t takes about 100 us (0.0001 s) to read an analog input, so the maximum reading rate is about 10,000 times a second. Parameters pin: the number of the analog input pin to read from (0 to 5 on most boards, 0 to 7 on the Mini and Nano) Returns An integer value in the range of 0 to 1023. Note I f the analog input pin is not connected to anything, the value returned by analogRead() will fluctuate based on a number of factors (e.g. the values of the other analog inputs, how close your hand is to the board, etc.). Example int analogPin = 3; int val = 0; // potentiometer wiper (middle terminal) connected to analog pin 3 // outside leads to ground and +5V // variable to store the value read void setup() { Serial.begin(9600); // setup serial } void loop() { val = analogRead(analogPin); Serial.println(val); // read the input pin // debug value } See also Description of the analog input pins analogWrite Reference Home Corrections, suggestions, and new documentation should be posted to the Forum. The text of the Arduino reference is licensed under a Creative Commons Attribution- ShareAlike 3.0 License. Code samples in the reference are released into the public domain.
- 45. Edit Page | Page History | Printable View | All Recent Site Changes
- 46. Arduino search Buy | Download | Getting Started | Learning | Reference | Hardware | FAQ Reference Blog » | Forum » | Playground » Language ( extended) | Libraries | Comparison | Board analogWrite(pin, value) Description Writes an analog value (PWM wave) to a pin. Can be used to light a LED at varying brightnesses or drive a motor at various speeds. After a call to analogWrite, the pin will generate a steady wave until the next call to analogWrite (or a call to digitalRead or digitalWrite on the same pin). The frequency of the PWM signal is approximately 490 Hz. On newer Arduino boards (including the Mini and BT) with the ATmega168 chip, this function works on pins 3, 5, 6, 9, 10, and 11. Older USB and serial Arduino boards with an ATmega8 only support analogWrite() on pins 9, 10, and 11. Parameters pin: the pin to write to. value: the duty cycle: between 0 (always off) and 255 (always on). Returns nothing Notes and Known I ssues You do not need to call pinMode() to set the pin as an output before calling analogWrite(). The PWM outputs generated on pins 5 and 6 will have higher- than- expected duty cycles. This is because of interactions with the millis() and delay() functions, which share the same internal timer used to generate those PWM outputs. Example Sets the output to the LED proportional to the value read from the potentiometer. int ledPin = 9; int analogPin = 3; int val = 0; // LED connected to digital pin 9 // potentiometer connected to analog pin 3 // variable to store the read value void setup() { pinMode(ledPin, OUTPUT); // sets the pin as output } void loop() { val = analogRead(analogPin); analogWrite(ledPin, val / 4); } See also Explanation of PWM pinMode digitalWrite analogRead // read the input pin // analogRead values go from 0 to 1023, analogWrite values from 0 to 255
- 47. Reference Home Corrections, suggestions, and new documentation should be posted to the Forum. The text of the Arduino reference is licensed under a Creative Commons Attribution- ShareAlike 3.0 License. Code samples in the reference are released into the public domain. Edit Page | Page History | Printable View | All Recent Site Changes
- 48. Arduino Buy | Download | Getting Started | Learning | Reference | Hardware | FAQ Reference search Blog » | Forum » | Playground » Language ( extended) | Libraries | Comparison | Board shiftOut(dataPin, clockPin, bitOrder, value) Description Shifts out a byte of data one bit at a time. Starts from either the most (i.e. the leftmost) or least (rightmost) significant bit. Each bit is written in turn to the dataPin, after which the clockPin is toggled to indicate that the bit is available. This is known as synchronous serial protocol and is a common way that microcontrollers communicate with sensors, and with other microcontrollers. The two devices always stay synchronized, and communicate at close to maximum speeds, since they both share the same clock line. Often referred to as SPI (synchronous protocol interface) in hardware documentation. Parameters dataPin: the pin on which to output each bit ( int ) clockPin: the pin to toggle once the dataPin has been set to the correct value ( int) bitOrder: which order to shift out the bits; either MSBFI RST or LSBFI RST. (Most Significant Bit First, or, Least Significant Bit First) value: the data to shift out. ( byte) Returns None Note The dataPin and clockPin must already be configured as outputs by a call to pinMode. Common Programming Errors Note also that this function, as it is currently written, is hard- wired to output 8 bits at a time. An int holds two bytes (16 bits), so outputting an int with shiftout requires a two- step operation: Example: int data; int clock; int cs; ... digitalWrite(cs, LOW); data = 500; shiftOut(data, clock, MSBFIRST, data) digitalWrite(cs, HIGH); // this will actually only output 244 because // 500 % 256 = 244 // since only the low 8 bits are output // Instead do this for MSBFIRST serial data = 500; // shift out highbyte // " >> " is bitshift operator - moves top 8 bits (high byte) into low byte
- 49. shiftOut(data, clock, MSBFIRST, (data >> 8)); // shift out lowbyte shiftOut(data, clock, MSBFIRST, data); // And do this for LSBFIRST serial data = 500; // shift out lowbyte shiftOut(data, clock, LSBFIRST, data); // shift out highbyte shiftOut(data, clock, LSBFIRST, (data >> 8)); Example For accompanying circuit, see the tutorial on controlling a 74HC595 shift register . //**************************************************************// // Name : shiftOutCode, Hello World // // // Author Date : Carlyn Maw,Tom Igoe : 25 Oct, 2006 // // // Version : 1.0 // // Notes : Code for using a 74HC595 Shift Register // // : to count from 0 to 255 // //**************************************************************** //Pin connected to ST_CP of 74HC595 int latchPin = 8; //Pin connected to SH_CP of 74HC595 int clockPin = 12; ////Pin connected to DS of 74HC595 int dataPin = 11; void setup() { //set pins to output because they are addressed in the main loop pinMode(latchPin, OUTPUT); pinMode(clockPin, OUTPUT); pinMode(dataPin, OUTPUT); } void loop() { //count up routine for (int j = 0; j < 256; j++) { //ground latchPin and hold low for as long as you are transmitting digitalWrite(latchPin, LOW); shiftOut(dataPin, clockPin, LSBFIRST, j); //return the latch pin high to signal chip that it //no longer needs to listen for information digitalWrite(latchPin, HIGH); delay(1000); } } Reference Home Reference Home Corrections, suggestions, and new documentation should be posted to the Forum. The text of the Arduino reference is licensed under a Creative Commons Attribution- ShareAlike 3.0 License. Code samples in the reference are released into the public domain. Edit Page | Page History | Printable View | All Recent Site Changes
- 50. Arduino Buy | Download | Getting Started | Learning | Reference | Hardware | FAQ Reference search Blog » | Forum » | Playground » Language ( extended) | Libraries | Comparison | Board unsigned long pulseIn(pin, value) unsigned long pulseIn(pin, value, timeout) Description Reads a pulse (either HI GH or LOW) on a pin. For example, if value is HI GH, pulseI n() waits for the pin to go HI GH, starts timing, then waits for the pin to go LOW and stops timing. Returns the length of the pulse in microseconds. Gives up and returns 0 if no pulse starts within a specified time out. The timing of this function has been determined empirically and will probably show errors in longer pulses. Works on pulses from 10 microseconds to 3 minutes in length. Parameters pin: the number of the pin on which you want to read the pulse. ( int) value: type type of pulse to read: either HI GH or LOW. ( int) timeout (optional): the number of microseconds to wait for the pulse to start; default is one second ( unsigned long) Returns the length of the pulse (in microseconds) or 0 if no pulse started before the timeout Example int pin = 7; unsigned long duration; void setup() { pinMode(pin, INPUT); } void loop() { duration = pulseIn(pin, HIGH); } See also pinMode Reference Home Corrections, suggestions, and new documentation should be posted to the Forum. The text of the Arduino reference is licensed under a Creative Commons Attribution- ShareAlike 3.0 License. Code samples in the reference are released into the public domain.
- 51. Edit Page | Page History | Printable View | All Recent Site Changes
- 52. Arduino search Buy | Download | Getting Started | Learning | Reference | Hardware | FAQ Reference Blog » | Forum » | Playground » Language ( extended) | Libraries | Comparison | Board unsigned long millis() Description Returns the number of milliseconds since the Arduino board began running the current program. Parameters None Returns The number of milliseconds since the current program started running, as an unsigned long. This number will overflow (go back to zero), after approximately 9 hours and 32 minutes. Examples long time; void setup(){ Serial.begin(9600); } void loop(){ Serial.print("Time: "); time = millis(); //prints time since program started Serial.println(time); // wait a second so as not to send massive amounts of data delay(1000); } /* Frequency Test * Paul Badger 2007 * * * * Program to empirically determine the time delay to generate the proper frequency for a an Infrared (IR) Remote Control Receiver module These modules typically require 36 - 52 khz communication frequency depending on specific device. */ int tdelay; unsigned long i, hz; unsigned long time; int outPin = 11; void setup(){ pinMode(outPin, OUTPUT); Serial.begin(9600); } void loop() { for (tdelay = 1; tdelay < 12; tdelay++){ frequency time = millis(); // scan across a range of time delays to find the right // get start time of inner loop
- 53. for (i = 0; i < 100000; i++){ digitalWrite(outPin, HIGH); // time 100,000 cycles through the loop delayMicroseconds(tdelay); digitalWrite(outPin, LOW); delayMicroseconds(tdelay); } time = millis() - time; // compute time through inner loop in milliseconds hz = (1 /((float)time / 100000000.0)); // divide by 100,000 cycles and 1000 milliseconds per second // to determine period, then take inverse to convert to hertz Serial.print(tdelay, DEC); Serial.print(" "); Serial.println(hz, DEC); } } Warning: Note that the parameter for millis is an unsigned long, errors may be generated if a programmer, tries to do math with other datatypes such as ints. Example: int startTime; // should be "unsigned long startTime;" // ... startTime = millis(); // datatype not large enough to hold data, will generate errors See also delay delayMicroseconds cast Reference Home Corrections, suggestions, and new documentation should be posted to the Forum. The text of the Arduino reference is licensed under a Creative Commons Attribution- ShareAlike 3.0 License. Code samples in the reference are released into the public domain. Edit Page | Page History | Printable View | All Recent Site Changes
- 54. Arduino search Buy | Download | Getting Started | Learning | Reference | Hardware | FAQ Reference Blog » | Forum » | Playground » Language ( extended) | Libraries | Comparison | Board delay(ms) Description Pauses your program for the amount of time (in miliseconds) specified as parameter. Parameters unsigned long ms - the number of milliseconds to pause (there are 1000 milliseconds in a second) Returns nothing Warning: The parameter for delay is an unsigned long. When using an integer constant larger than about 32767 as a parameter for delay, append an "UL" suffix to the end. e.g. delay(60000UL); Similarly, casting variables to unsigned longs will insure that they are handled correctly by the compiler. e.g. delay((unsigned long)tdelay * 100UL); Example int ledPin = 13; // LED connected to digital pin 13 void setup() { pinMode(ledPin, OUTPUT); // sets the digital pin as output } void loop() { digitalWrite(ledPin, HIGH); delay(1000); digitalWrite(ledPin, LOW); delay(1000); // // // // sets the LED on waits for a second sets the LED off waits for a second } configures pin number 13 to work as an output pin. I t sets the pin to HI GH, waits for 1000 miliseconds (1 second), sets it back to LOW and waits for 1000 miliseconds. See also millis delayMicroseconds integer constants Reference Home Corrections, suggestions, and new documentation should be posted to the Forum. The text of the Arduino reference is licensed under a Creative Commons Attribution- ShareAlike 3.0 License. Code samples in the reference are released into the public domain.
- 55. Edit Page | Page History | Printable View | All Recent Site Changes
- 56. Arduino search Buy | Download | Getting Started | Learning | Reference | Hardware | FAQ Reference Blog » | Forum » | Playground » Language ( extended) | Libraries | Comparison | Board delayMicroseconds(us) Description Pauses the program for the amount of time (in microseconds) specified as parameter. For delays longer than a few thousand microseconds, you should use delay() instead. Currently, the largest value that will produce an accurate delay is 16383. This could change in future Arduino releases. Parameters us: the number of microseconds to pause. (There are a thousand microseconds in a millisecond, and a million microseconds in a second.) Returns None Example int outPin = 8; void setup() { pinMode(outPin, OUTPUT); } void loop() { digitalWrite(outPin, HIGH); delayMicroseconds(50); digitalWrite(outPin, LOW); delayMicroseconds(50); // digital pin 8 // sets the digital pin as output // sets the pin on // pauses for 50 microseconds // sets the pin off // pauses for 50 microseconds } configures pin number 8 to work as an output pin. I t sends a train of pulses with 100 microseconds period. Caveats and Known I ssues This function works very accurately in the range 3 microseconds and up. We cannot assure that delayMicroseconds will perform precisely for smaller delay- times. To ensure more accurate delays, this functions disables interrupts during its operation, meaning that some things (like receiving serial data, or incrementing the value returned by millis()) will not happen during the delay. Thus, you should only use this function for short delays, and use delay() for longer ones. delayMicroseconds(0) will generate a much longer delay than expected (~1020 us) as will negative numbers. See also millis delay
- 57. Reference Home Corrections, suggestions, and new documentation should be posted to the Forum. The text of the Arduino reference is licensed under a Creative Commons Attribution- ShareAlike 3.0 License. Code samples in the reference are released into the public domain. Edit Page | Page History | Printable View | All Recent Site Changes
- 58. Arduino Buy | Download | Getting Started | Learning | Reference | Hardware | FAQ Reference search Blog » | Forum » | Playground » Language ( extended) | Libraries | Comparison | Board min(x, y) Description Calculates the minimum of two numbers. Parameters x: the first number, any data type y: the second number, any data type Returns The smaller of the two numbers. Examples sensVal = min(sensVal, 100); // assigns sensVal to the smaller of sensVal or 100 // ensuring that it never gets above 100. Note Perhaps counter - intuitively, max() is often used to constrain the lower end of a variable's range, while min() is used to constrain the upper end of the range. See also max() constrain() Reference Home Corrections, suggestions, and new documentation should be posted to the Forum. The text of the Arduino reference is licensed under a Creative Commons Attribution- ShareAlike 3.0 License. Code samples in the reference are released into the public domain. Edit Page | Page History | Printable View | All Recent Site Changes
- 59. Arduino Buy | Download | Getting Started | Learning | Reference | Hardware | FAQ Reference search Blog » | Forum » | Playground » Language ( extended) | Libraries | Comparison | Board max(x, y) Description Calculates the maximum of two numbers. Parameters x: the first number, any data type y: the second number, any data type Returns The larger of the two parameter values. Example sensVal = max(senVal, 20); // assigns sensVal to the larger of sensVal or 20 // (effectively ensuring that it is at least 20) Note Perhaps counter - intuitively, max() is often used to constrain the lower end of a variable's range, while min() is used to constrain the upper end of the range. See also min() constrain() Reference Home Corrections, suggestions, and new documentation should be posted to the Forum. The text of the Arduino reference is licensed under a Creative Commons Attribution- ShareAlike 3.0 License. Code samples in the reference are released into the public domain. Edit Page | Page History | Printable View | All Recent Site Changes
- 60. Arduino Buy | Download | Getting Started | Learning | Reference | Hardware | FAQ Reference search Blog » | Forum » | Playground » Language ( extended) | Libraries | Comparison | Board abs(x) Description Computes the absolute value of a number. Parameters x: the number Returns x: if x is greater than or equal to 0. -x: if x is less than 0. Reference Home Corrections, suggestions, and new documentation should be posted to the Forum. The text of the Arduino reference is licensed under a Creative Commons Attribution- ShareAlike 3.0 License. Code samples in the reference are released into the public domain. Edit Page | Page History | Printable View | All Recent Site Changes
- 61. Arduino Buy | Download | Getting Started | Learning | Reference | Hardware | FAQ Reference search Blog » | Forum » | Playground » Language ( extended) | Libraries | Comparison | Board constrain(x, a, b) Description Constrains a number to be within a range. Parameters x: the number to constrain, all data types a: the lower end of the range, all data types b: the upper end of the range, all data types Returns x: if x is between a and b a: if x is less than a b: if x is greater than b Example sensVal = constrain(sensVal, 10, 150); // limits range of sensor values to between 10 and 150 See also min() max() Reference Home Corrections, suggestions, and new documentation should be posted to the Forum. The text of the Arduino reference is licensed under a Creative Commons Attribution- ShareAlike 3.0 License. Code samples in the reference are released into the public domain. Edit Page | Page History | Printable View | All Recent Site Changes
- 62. Arduino Buy | Download | Getting Started | Learning | Reference | Hardware | FAQ Reference search Blog » | Forum » | Playground » Language ( extended) | Libraries | Comparison | Board map(value, fromLow, fromHigh, toLow, toHigh) Description Re- maps a number from one range to another. That is, a value of fromLow would get mapped to toLow , a value of fromHigh to toHigh, values in- between to values in- between, etc. Does not constrain values to within the range, because out- of- range values are sometimes intended and useful. Parameters value: the number to map fromLow: the lower bound of the value's current range fromHigh: the upper bound of the value's current range toLow: the lower bound of the value's target range toHigh: the upper bound of the value's target range Returns The mapped value. Example void setup() {} void loop() { int val = analogRead(0); val = map(val, 0, 1023, 0, 255); analogWrite(9, val); } See Also constrain() Reference Home Corrections, suggestions, and new documentation should be posted to the Forum. The text of the Arduino reference is licensed under a Creative Commons Attribution- ShareAlike 3.0 License. Code samples in the reference are released into the public domain. Edit Page | Page History | Printable View | All Recent Site Changes
- 63. Arduino Buy | Download | Getting Started | Learning | Reference | Hardware | FAQ Reference search Blog » | Forum » | Playground » Language ( extended) | Libraries | Comparison | Board pow(base, exponent) Description Calculates the value of a number raised to a power. Pow() can be used to raise a number to a fractional power. This is useful for generating exponential mapping of values or curves. Parameters base: the number ( float) exponent: the power to which the base is raised ( float) Returns The result of the exponentiation ( double) Example See the fscale function in the code library. See also sqrt() float double Reference Home Corrections, suggestions, and new documentation should be posted to the Forum. The text of the Arduino reference is licensed under a Creative Commons Attribution- ShareAlike 3.0 License. Code samples in the reference are released into the public domain. Edit Page | Page History | Printable View | All Recent Site Changes
- 64. Arduino Buy | Download | Getting Started | Learning | Reference | Hardware | FAQ Reference search Blog » | Forum » | Playground » Language ( extended) | Libraries | Comparison | Board sqrt(x) Description Calculates the square root of a number. Parameters x: the number, any data type Returns double, the number's square root. See also pow() float double Reference Home Corrections, suggestions, and new documentation should be posted to the Forum. The text of the Arduino reference is licensed under a Creative Commons Attribution- ShareAlike 3.0 License. Code samples in the reference are released into the public domain. Edit Page | Page History | Printable View | All Recent Site Changes
- 65. Arduino Buy | Download | Getting Started | Learning | Reference | Hardware | FAQ Reference search Blog » | Forum » | Playground » Language ( extended) | Libraries | Comparison | Board sin(rad) Description Calculates the sine of an angle (in radians). The result will be between - 1 and 1. Parameters rad: the angle in radians ( float) Returns the sine of the angle ( double) Note Serial.print() and Serial.println() do not currently support printing floats. See also cos() tan() float double Reference Home Corrections, suggestions, and new documentation should be posted to the Forum. The text of the Arduino reference is licensed under a Creative Commons Attribution- ShareAlike 3.0 License. Code samples in the reference are released into the public domain. Edit Page | Page History | Printable View | All Recent Site Changes
- 66. Arduino Buy | Download | Getting Started | Learning | Reference | Hardware | FAQ Reference search Blog » | Forum » | Playground » Language ( extended) | Libraries | Comparison | Board cos(rad) Description Calculates the cos of an angle (in radians). The result will be between - 1 and 1. Parameters rad: the angle in radians ( float) Returns The cos of the angle ("double") Note Serial.print() and Serial.println() do not currently support printing floats. See also sin() tan() float double Reference Home Corrections, suggestions, and new documentation should be posted to the Forum. The text of the Arduino reference is licensed under a Creative Commons Attribution- ShareAlike 3.0 License. Code samples in the reference are released into the public domain. Edit Page | Page History | Printable View | All Recent Site Changes
- 67. Arduino Buy | Download | Getting Started | Learning | Reference | Hardware | FAQ Reference search Blog » | Forum » | Playground » Language ( extended) | Libraries | Comparison | Board tan(rad) Description Calculates the tangent of an angle (in radians). The result will be between negative infinity and infinity. Parameters rad: the angle in radians ( float) Returns The tangent of the angle ( double) Note Serial.print() and Serial.println() do not currently support printing floats. See also sin() cos() float double Reference Home Corrections, suggestions, and new documentation should be posted to the Forum. The text of the Arduino reference is licensed under a Creative Commons Attribution- ShareAlike 3.0 License. Code samples in the reference are released into the public domain. Edit Page | Page History | Printable View | All Recent Site Changes
- 68. Arduino Buy | Download | Getting Started | Learning | Reference | Hardware | FAQ Reference search Blog » | Forum » | Playground » Language ( extended) | Libraries | Comparison | Board randomSeed(seed) Description randomSeed() initializes the pseudo- random number generator, causing it to start at an arbitrary point in its random sequence. This sequence, while very long, and random, is always the same. I f it is important for a sequence of values generated by random() to differ, on subsequent executions of a sketch, use randomSeed() to initialize the random number generator with a fairly random input, such as analogRead() on an unconnected pin. Conversely, it can occasionally be useful to use pseudo- random sequences that repeat exactly. This can be accomplished by calling randomSeed() with a fixed number, before starting the random sequence. Parameters long, int - pass a number to generate the seed. Returns no returns Example long randNumber; void setup(){ Serial.begin(9600); randomSeed(analogRead(0)); } void loop(){ randNumber = random(300); Serial.println(randNumber); delay(50); } See also random Reference Home Corrections, suggestions, and new documentation should be posted to the Forum. The text of the Arduino reference is licensed under a Creative Commons Attribution- ShareAlike 3.0 License. Code samples in the reference are released into the public domain. Edit Page | Page History | Printable View | All Recent Site Changes
- 69. Arduino Buy | Download | Getting Started | Learning | Reference | Hardware | FAQ Reference search Blog » | Forum » | Playground » Language ( extended) | Libraries | Comparison | Board long random(max) long random(min, max) Description The random function generates pseudo- random numbers. Parameters min - lower bound of the random value, inclusive (optional parameter) max - upper bound of the random value, exclusive Returns long - a random number between min and max - 1 Note: I f it is important for a sequence of values generated by random() to differ, on subsequent executions of a sketch, use randomSeed() to initialize the random number generator with a fairly random input, such as analogRead() on an unconnected pin. Conversely, it can occasionally be useful to use pseudo- random sequences that repeat exactly. This can be accomplished by calling randomSeed() with a fixed number, before starting the random sequence. Example long randNumber; void setup(){ Serial.begin(9600); // if analog input pin 0 is unconnected, random analog // noise will cause the call to randomSeed() to generate // different seed numbers each time the sketch runs. // randomSeed() will then shuffle the random function. randomSeed(analogRead(0)); } void loop() { // print a random number from 0 to 299 randNumber = random(300); Serial.println(randNumber); // print a random number from 10 to 19 randNumber = random(10, 20); Serial.println(randNumber); delay(50); } See also
- 70. randomSeed Reference Home Corrections, suggestions, and new documentation should be posted to the Forum. The text of the Arduino reference is licensed under a Creative Commons Attribution- ShareAlike 3.0 License. Code samples in the reference are released into the public domain. Edit Page | Page History | Printable View | All Recent Site Changes
- 71. Arduino search Buy | Download | Getting Started | Learning | Reference | Hardware | FAQ Reference Blog » | Forum » | Playground » Language ( extended) | Libraries | Comparison | Board Boolean Operators These can be used inside the condition of an if statement. && (logical and) True only if both operands are true, e.g. if (digitalRead(2) == 1 && digitalRead(3) == 1) { // read two switches // ... } is true only if x is 1, 2, 3, or 4. || (logical or) True if either operand is true, e.g. i f ( x > 0 || y > 0) { // ... } is true if either x or y is greater than 0. ! (not) True if the operand is false, e.g. if (!x) { // ... } is true if x is false (i.e. if x equals 0). Warning Make sure you don't mistake the boolean AND operator, && (double ampersand) for the bitwise AND operator & (single ampersand). They are entirely different beasts. Similarly, do not confuse the boolean | | (double pipe) operator with the bitwise OR operator | (single pipe). The bitwise not ~ (tilde) looks much different than the boolean not ! (exclamation point or "bang" as the programmers say) but you still have to be sure which one you want where. Examples if (a >= 10 && a <= 20){} See also & (bitwise AND) | (bitwise OR) ~ (bitwise NOT if Reference Home // true if a is between 10 and 20
- 72. Corrections, suggestions, and new documentation should be posted to the Forum. The text of the Arduino reference is licensed under a Creative Commons Attribution- ShareAlike 3.0 License. Code samples in the reference are released into the public domain. Edit Page | Page History | Printable View | All Recent Site Changes
- 73. Arduino Buy | Download | Getting Started | Learning | Reference | Hardware | FAQ Reference search Blog » | Forum » | Playground » Language ( extended) | Libraries | Comparison | Board ++ (increment) / -- (decrement) Description I ncrement or decrement a variable Syntax x++; ++x; // increment x by one and returns the old value of x // increment x by one and returns the new value of x x-- ; // decrement x by one and returns the old value of x --x ; // decrement x by one and returns the new value of x Parameters x: an integer or long (possibly unsigned) Returns The original or newly incremented / decremented value of the variable. Examples x = 2; y = ++x; y = x --; // x now contains 3, y contains 3 // x contains 2 again, y still contains 3 See also += -= Reference Home Corrections, suggestions, and new documentation should be posted to the Forum. The text of the Arduino reference is licensed under a Creative Commons Attribution- ShareAlike 3.0 License. Code samples in the reference are released into the public domain. Edit Page | Page History | Printable View | All Recent Site Changes
- 74. Arduino search Buy | Download | Getting Started | Learning | Reference | Hardware | FAQ Reference Blog » | Forum » | Playground » Language ( extended) | Libraries | Comparison | Board += , -= , *= , / = Description Perform a mathematical operation on a variable with another constant or variable. The += (et al) operators are just a convenient shorthand for the expanded syntax, listed below. Syntax x += y; // equivalent to the expression x = x + y; x - = y; x *= y; // equivalent to the expression x = x - y; // equivalent to the expression x = x * y; x /= y; // equivalent to the expression x = x / y; Parameters x: any variable type y: any variable type or constant Examples x = 2; x x x x += -= *= /= 4; 3; 10; 2; // // // // x x x x now now now now contains contains contains contains 6 3 30 15 Reference Home Corrections, suggestions, and new documentation should be posted to the Forum. The text of the Arduino reference is licensed under a Creative Commons Attribution- ShareAlike 3.0 License. Code samples in the reference are released into the public domain. Edit Page | Page History | Printable View | All Recent Site Changes
- 75. Arduino Buy | Download | Getting Started | Learning | Reference | Hardware | FAQ Reference search Blog » | Forum » | Playground » Language ( extended) | Libraries | Comparison | Board constants Constants are predefined variables in the Arduino language. They are used to make the programs easier to read. We classify constants in groups. Defining Logical Levels, true and false (Boolean Constants) There are two constants used to represent truth and falsity in the Arduino language: true, and false. false false is the easier of the two to define. false is defined as 0 (zero). true true is often said to be defined as 1, which is correct, but true has a wider definition. Any integer which is non- zero is TRUE, in a Boolean sense. So - 1, 2 and - 200 are all defined as true, too, in a Boolean sense. Note that the true and false constants are typed in lowercase unlike HI GH, LOW, I NPUT, & OUTPUT. Defining Pin Levels, HIGH and LOW When reading or writing to a digital pin there are only two possible values a pin can take/ be- set- to: HI GH and LOW . HI GH The meaning of HI GH (in reference to a pin) is somewhat different depending on whether a pin is set to an I NPUT or OUTPUT. When a pin is configured as an I NPUT with pinMode, and read with digitalRead, the microcontroller will report HI GH if a voltage of 3 volts or more is present at the pin. When a pin is configured to OUTPUT with pinMode, and set to HI GH with digitalWrite, the pin is at 5 volts. I n this state it can source current, e.g. light an LED that is connected through a series resistor to ground, or to another pin configured as an output, and set to LOW. LOW The meaning of LOW also has a different meaning depending on whether a pin is set to I NPUT or OUTPUT. When a pin is configured as an I NPUT with pinMode, and read with digitalRead, the microcontroller will report LOW if a voltage of 2 volts or less is present at the pin. When a pin is configured to OUTPUT with pinMode, and set to LOW with digitalWrite, the pin is at 0 volts. I n this state it can sink current, i.e. light an LED that is connected through a series resistor to, +5 volts, or to another pin configured as an output, and set to HI GH. Defining Digital Pins, INPUT and OUTPUT Digital pins can be used either as I NPUT or OUTPUT. Changing a pin from I NPUT TO OUTPUT with pinMode() drastically changes the electrical behavior of the pin. Pins Configured as I nputs Arduino (Atmega) pins configured as I NPUT with pinMode() are said to be in a high- impedance state. One way of explaining this is that pins configured as I NPUT make extremely small demands on the circuit that they are sampling, say equivalent to a series resistor of 100 Megohms in front of the pin. This makes them useful for reading a sensor, but not powering an LED. Pins Configured as Outputs
- 76. Pins configured as OUTPUT with pinMode() are said to be in a low- impedance state. This means that they can provide a substantial amount of current to other circuits. Atmega pins can source (provide positive current) or sink (provide negative current) up to 40 mA (milliamps) of current to other devices/ circuits. This makes them useful for powering LED's but useless for reading sensors. Pins configured as outputs can also be damaged or destroyed if short circuited to either ground or 5 volt power rails. The amount of current provided by an Atmega pin is also not enough to power most relays or motors, and some interface circuitry will be required. See also pinMode() I nteger Constants boolean variables Reference Home Corrections, suggestions, and new documentation should be posted to the Forum. The text of the Arduino reference is licensed under a Creative Commons Attribution- ShareAlike 3.0 License. Code samples in the reference are released into the public domain. Edit Page | Page History | Printable View | All Recent Site Changes
- 77. Arduino search Buy | Download | Getting Started | Learning | Reference | Hardware | FAQ Reference Blog » | Forum » | Playground » Language ( extended) | Libraries | Comparison | Board Integer Constants I nteger constants are numbers used directly in a sketch, like 123. By default, these numbers are treated as int 's but you can change this with the U and L modifiers (see below). Normally, integer constants are treated as base 10 (decimal) integers, but special notation (formatters) may be used to enter numbers in other bases. Base Example 10 (decimal) 2 (binary) 123 B1111011 Formatter Comment none capital 'B' only works with 8 bit values characters 0-1 valid 8 (octal) 0173 leading zero characters 0-7 valid 16 (hexadecimal) 0x7B leading 0x characters 0-9, A-F, a-f valid Decimal is base 10, this is the common- sense math with which you are aquainted. Example: 101 == 101 decimal ((1 * 10^2) + (0 * 10^1) + 1) Binary is base two. Only characters 0 and 1 are valid. Example: B101 == 5 decimal ((1 * 2^2) + (0 * 2^1) + 1) The binary formatter only works on bytes (8 bits) between 0 (B0) and 255 (B11111111). I f it's convenient to input an int (16 bits) in binary form you can do it a two- step procedure such as this: myInt = (B11001100 * 256) + B10101010; // B11001100 is the high byte Octal is base eight. Only characters 0 through 7 are valid. Example: 0101 == 65 decimal ((1 * 8^2) + (0 * 8^1) + 1) Warning You can generate a hard- to- find bug by (unintentionally) including a leading zero before a constant and having the compiler unintentionally interpret your constant as octal Hexadecimal (or hex) is base sixteen. Valid characters are 0 through 9 and letters A through F; A has the value 10, B is 11, up to F, which is 15. Example: 0x101 == 257 decimal ((1 * 16^2) + (0 * 16^1) + 1) U & L formatters By default, an integer constant is treated as an int with the attendant limitations in values. To specify an integer constant with another data type, follow it with: a 'u' or 'U' to force the constant into an unsigned data format. Example: 33u
- 78. a 'l' or 'L' to force the constant into a long data format. Example: 100000L a 'ul' or 'UL' to force the constant into an unsigned long constant. Example: 32767ul See also constants #define byte int unsigned int long unsigned long Reference Home Corrections, suggestions, and new documentation should be posted to the Forum. The text of the Arduino reference is licensed under a Creative Commons Attribution- ShareAlike 3.0 License. Code samples in the reference are released into the public domain. Edit Page | Page History | Printable View | All Recent Site Changes
- 79. Arduino search Buy | Download | Getting Started | Learning | Reference | Hardware | FAQ Reference Blog » | Forum » | Playground » Language ( extended) | Libraries | Comparison | Board boolean variables boolean variables are hold one of two values, true and false. Example int LEDpin = 5; int switchPin = 13; // LED on pin 5 // momentary switch on 13, other side connected to ground boolean running = false; void setup() { pinMode(LEDpin, OUTPUT); pinMode(switchPin, INPUT); digitalWrite(switchPin, HIGH); // turn on pullup resistor } void loop() { if (digitalRead(switchPin) == LOW) { // switch is pressed - pullup keeps delay(100); // running = !running; // digitalWrite(LEDpin, running) // } } pin high normally delay to debounce switch toggle running variable indicate via LED See also constants boolean operators Reference Home Corrections, suggestions, and new documentation should be posted to the Forum. The text of the Arduino reference is licensed under a Creative Commons Attribution- ShareAlike 3.0 License. Code samples in the reference are released into the public domain. Edit Page | Page History | Printable View | All Recent Site Changes
- 80. Arduino Buy | Download | Getting Started | Learning | Reference | Hardware | FAQ Reference search Blog » | Forum » | Playground » Language ( extended) | Libraries | Comparison | Board char Description A data type that takes up 1 byte of memory that stores a character value. Character literals are written in single quotes, like this: 'A' (for multiple characters - strings - use double quotes: "ABC"). Characters are stored as numbers however. You can see the specific encoding in the ASCI I chart. This means that it is possible to do arithmetic on characters, in which the ASCI I value of the character is used (e.g. 'A' + 1 has the value 66, since the ASCI I value of the capital letter A is 65). See Serial.println reference for more on how characters are translated to numbers. The char datatype is a signed type, meaning that it encodes numbers from - 128 to 127. For an unsigned, one- byte (8 bit) data type, use the byte data type. Example char myChar = 'A'; See also byte int array Serial.println Reference Home Corrections, suggestions, and new documentation should be posted to the Forum. The text of the Arduino reference is licensed under a Creative Commons Attribution- ShareAlike 3.0 License. Code samples in the reference are released into the public domain. Edit Page | Page History | Printable View | All Recent Site Changes
- 81. Arduino Buy | Download | Getting Started | Learning | Reference | Hardware | FAQ Reference search Blog » | Forum » | Playground » Language ( extended) | Libraries | Comparison | Board byte Description Bytes store an 8- bit number, from 0 to 255. byte is an unsigned data type, meaning that it does not store negative numbers. Example byte b = B10010; // "B" is the binary formatter (18 decimal) See also int unsigned int long unsigned long integer constants Reference Home Corrections, suggestions, and new documentation should be posted to the Forum. The text of the Arduino reference is licensed under a Creative Commons Attribution- ShareAlike 3.0 License. Code samples in the reference are released into the public domain. Edit Page | Page History | Printable View | All Recent Site Changes
- 82. Arduino Buy | Download | Getting Started | Learning | Reference | Hardware | FAQ Reference search Blog » | Forum » | Playground » Language ( extended) | Libraries | Comparison | Board int Description I ntegers are your primary datatype for number storage, and store a 2 byte value. This yields a range of - 32,768 to 32,767 (minimum value of - 2^15 and a maximum value of (2^15) - 1). I nt's store negative numbers with a technique called 2's complement math. The highest bit, sometimes refered to as the "sign" bit, flags the number as a negative number. The rest of the bits are inverted and 1 is added. The Arduino takes care of dealing with negative numbers for you, so that arithmetic operations work transparently in the expected manner. There can be an unexpected complication in dealing with the bitshift right operator (>>) however. Example int ledPin = 13; Syntax int var = val; var - your int variable name val - the value you assign to that variable Coding Tip When variables are made to exceed their maximum capacity they "roll over" back to their minimum capacitiy, note that this happens in both directions. int x x = -32,768; x = x - 1; // x now contains 32,767 - rolls over in neg. direction x = 32,767; x = x + 1; // x now contains -32,768 - rolls over See Also byte unsigned int long unsigned long Reference Home Corrections, suggestions, and new documentation should be posted to the Forum. The text of the Arduino reference is licensed under a Creative Commons Attribution- ShareAlike 3.0 License. Code samples in the reference are released into the public domain. Edit Page | Page History | Printable View | All Recent Site Changes
- 83. Arduino Buy | Download | Getting Started | Learning | Reference | Hardware | FAQ Reference search Blog » | Forum » | Playground » Language ( extended) | Libraries | Comparison | Board unsigned int Description Unsigned ints (unsigned integers) are the same as ints in that they store a 2 byte value. I nstead of storing negative numbers however they only store positive values, yielding a useful range of 0 to 65,535 (2^16) - 1). The difference between unsigned ints and (signed) ints, lies in the way the highest bit, sometimes refered to as the "sign" bit, is interpreted. I n the Arduino int type (which is signed), if the high bit is a "1", the number is interpreted as a negative number, and the other 15 bits are interpreted with 2's complement math. Example unsigned int ledPin = 13; Syntax unsigned int var = val; var - your unsigned int variable name val - the value you assign to that variable Coding Tip When variables are made to exceed their maximum capacity they "roll over" back to their minimum capacitiy, note that this happens in both directions unsigned int x x = 0; x = x - 1; // x now contains 65535 - rolls over in neg direction x = x + 1; // x now contains 0 - rolls over See Also byte int long unsigned long Reference Home Corrections, suggestions, and new documentation should be posted to the Forum. The text of the Arduino reference is licensed under a Creative Commons Attribution- ShareAlike 3.0 License. Code samples in the reference are released into the public domain. Edit Page | Page History | Printable View | All Recent Site Changes
- 84. Arduino Buy | Download | Getting Started | Learning | Reference | Hardware | FAQ Reference search Blog » | Forum » | Playground » Language ( extended) | Libraries | Comparison | Board long Description Long variables are extended size variables for number storage, and store 32 bits (4 bytes), from - 2,147,483,648 to 2,147,483,647. Example long time; void setup(){ Serial.begin(9600); } void loop(){ Serial.print("Time: "); time = millis(); //prints time since program started Serial.println(time); // wait a second so as not to send massive amounts of data delay(1000); } Syntax long var = val; var - your long variable name val - the value you assign to that variable See Also byte int unsigned int unsigned long Reference Home Corrections, suggestions, and new documentation should be posted to the Forum. The text of the Arduino reference is licensed under a Creative Commons Attribution- ShareAlike 3.0 License. Code samples in the reference are released into the public domain. Edit Page | Page History | Printable View | All Recent Site Changes
- 85. Arduino Buy | Download | Getting Started | Learning | Reference | Hardware | FAQ Reference search Blog » | Forum » | Playground » Language ( extended) | Libraries | Comparison | Board unsigned long Description Unsigned long variables are extended size variables for number storage, and store 32 bits (4 bytes). Unlike standard longs unsigned longs won't store negative numbers, making their range from 0 to 4,294,967,295 (2^32 - 1). Example unsigned long time; void setup() { Serial.begin(9600); } void loop() { Serial.print("Time: "); time = millis(); //prints time since program started Serial.println(time); // wait a second so as not to send massive amounts of data delay(1000); } Syntax unsigned long var = val; var - your long variable name val - the value you assign to that variable See Also byte int unsigned int long Reference Home Corrections, suggestions, and new documentation should be posted to the Forum. The text of the Arduino reference is licensed under a Creative Commons Attribution- ShareAlike 3.0 License. Code samples in the reference are released into the public domain. Edit Page | Page History | Printable View | All Recent Site Changes
- 86. Arduino Buy | Download | Getting Started | Learning | Reference | Hardware | FAQ Reference search Blog » | Forum » | Playground » Language ( extended) | Libraries | Comparison | Board float Description Datatype for floating- point numbers, a number that has a decimal point. Floating- point numbers are often used to approximate analog and continuous values because they have greater resolution than integers. Floating- point numbers can be as large as 3.4028235E+38 and as low as - 3.4028235E+38. They are stored as 32 bits (4 bytes) of information. Floating point numbers are not exact, and may yield strange results when compared. For example 6.0 / 3.0 may not equal 2.0 . You should instead check that the absolute value of the difference between the numbers is less than some small number. Floating point math is also much slower than integer math in performing calculations, so should be avoided if, for example, a loop has to run at top speed for a critical timing function. Programmers often go to some lengths to convert floating point calculations to integer math to increase speed. That being said, floating point math is useful for a wide range of physical computing tasks, and is one of the things missing from many beginning microcontroller systems. Examples float myfloat; float sensorCalbrate = 1.117; Syntax float var = val; var - your float variable name val - the value you assign to that variable Example Code int x; int y; float z; x = 1; y = x / 2; z = (float)x / 2.0; // y now contains 0, ints can't hold fractions // z now contains .5 (you have to use 2.0, not 2) Programming Tip Serial.println() truncates floats (throws away the fractions) into integers when sending serial. Multiply by power of ten to preserve resolution. Reference Home Corrections, suggestions, and new documentation should be posted to the Forum. The text of the Arduino reference is licensed under a Creative Commons Attribution- ShareAlike 3.0 License. Code samples in the reference are released into the public domain. Edit Page | Page History | Printable View | All Recent Site Changes
- 88. Arduino Buy | Download | Getting Started | Learning | Reference | Hardware | FAQ Reference search Blog » | Forum » | Playground » Language ( extended) | Libraries | Comparison | Board double Desciption Double precision floating point number. Occupies 4 bytes. See: Float Reference Home Corrections, suggestions, and new documentation should be posted to the Forum. The text of the Arduino reference is licensed under a Creative Commons Attribution- ShareAlike 3.0 License. Code samples in the reference are released into the public domain. Edit Page | Page History | Printable View | All Recent Site Changes
- 89. Arduino Buy | Download | Getting Started | Learning | Reference | Hardware | FAQ Reference search Blog » | Forum » | Playground » Language ( extended) | Libraries | Comparison | Board string Description Strings are represented as arrays of type char and are null- terminated. Examples All of the following are valid declarations for strings. char Str1[15]; char Str2[8] = {'a', 'r', 'd', 'u', 'i', 'n', 'o'}; char char char char Str3[8] = {'a', 'r', 'd', 'u', 'i', 'n', 'o', '0'}; Str4[ ] = "arduino"; Str5[8] = "arduino"; Str6[15] = "arduino"; Possibilities for declaring strings Declare an array of chars without initializing it as in Str1 Declare an array of chars (with one extra char) and the compiler will add the required null character, as in Str2 Explicitly add the null character, Str3 I nitialize with a string constant in quotation marks; the compiler will size the array to fit the string constant and a terminating null character, Str4 I nitialize the array with an explicit size and string constant, Str5 I nitialize the array, leaving extra space for a larger string, Str6 Null termination Generally, strings are terminated with a null character (ASCI I code 0). This allows functions (like Serial.print()) to tell where the end of a string is. Otherwise, they would continue reading subsequent bytes of memory that aren't actually part of the string. This means that your string needs to have space for one more character than the text you want it to contain. That is why Str2 and Str5 need to be eight characters, even though "arduino" is only seven - the last position is automatically filled with a null character. Str4 will be automatically sized to eight characters, one for the extra null. I n Str3, we've explicitly included the null character (written ' 0') ourselves. Note that it's possible to have a string without a final null character (e.g. if you had specified the length of Str2 as seven instead of eight). This will break most functions that use strings, so you shouldn't do it intentionally. I f you notice something behaving strangely (operating on characters not in the string), however, this could be the problem. Single quotes or double quotes? Strings are always defined inside double quotes ("Abc") and characters are always defined inside single quotes('A'). Wrapping long strings You can wrap long strings like this: char myString[] = "This is the first line" " this is the second line" " etcetera"; Arrays of strings
- 90. I t is often convenient, when working with large amounts of text, such as a project with an LCD display, to setup an array of strings. Because strings themselves are arrays, this is in actually an example of a two- dimensional array. I n the code below, the asterisk after the datatype char "char* " indicates that this is an array of "pointers". All array names are actually pointers, so this is required to make an array of arrays. Pointers are one of the more esoteric parts of C for beginners to understand, but it isn't necessary to understand pointers in detail to use them effectively here. Example char* myStrings[]={"This is string 1", "This is string 2", "This is string 3", "This is string 4", "This is string 5","This is string 6"}; void setup(){ Serial.begin(9600); } void loop(){ for (int i = 0; i < 6; i++){ Serial.println(myStrings[i]); delay(500); } } See Also array PROGMEM Reference Home Corrections, suggestions, and new documentation should be posted to the Forum. The text of the Arduino reference is licensed under a Creative Commons Attribution- ShareAlike 3.0 License. Code samples in the reference are released into the public domain. Edit Page | Page History | Printable View | All Recent Site Changes
- 91. Arduino Buy | Download | Getting Started | Learning | Reference | Hardware | FAQ Reference search Blog » | Forum » | Playground » Language ( extended) | Libraries | Comparison | Board Arrays An array is a collection of variables that are accessed with an index number. Arrays in the C programming language, on which Arduino is based, can be complicated, but using simple arrays is relatively straightforward. Creating (Declaring) an Array All of the methods below are valid ways to create (declare) an array. int myInts[6]; int myPins[] = {2, 4, 8, 3, 6}; int mySensVals[6] = {2, 4, -8, 3, 2}; char message[6] = "hello"; You can declare an array without initializing it as in myI nts. I n myPins we declare an array without explicitly choosing a size. The compiler counts the elements and creates an array of the appropriate size. Finally you can both initialize and size your array, as in mySensVals. Note that when declaring an array of type char, one more element than your initialization is required, to hold the required null character. Accessing an Array Arrays are zero indexed, that is, referring to the array initialization above, the first element of the array is at index 0, hence mySensVals[0] == 2, mySensVals[1] == 4, and so forth. I t also means that in an array with ten elements, index nine is the last element. Hence: int myArray[10]={9,3,2,4,3,2,7,8,9,11}; // myArray[9] // myArray[10] contains 11 is invalid and contains random information (other memory address) For this reason you should be careful in accessing arrays. Accessing past the end of an array (using an index number greater than your declared array size - 1) is reading from memory that is in use for other purposes. Reading from these locations is probably not going to do much except yield invalid data. Writing to random memory locations is definitely a bad idea and can often lead to unhappy results such as crashes or program malfunction. This can also be a difficult bug to track down. Unlike in some versions of BASI C, the C compiler does no checking to see if array access is within legal bounds of the array size that you have declared. To assign a value to an array: mySensVals[0] = 10; To retrieve a value from an array: x = mySensVals[4]; Arrays and FOR Loops Arrays are often manipulated inside for loops, where the loop counter is used as the index for each array element. For example, to print the elements of an array over the serial port, you could do something like this:
- 92. int i; f o r ( i = 0; i < 5; i = i + 1) { Serial.println(myPins[i]); } Example For a complete program that demonstrates the use of arrays, see the Knight Rider example from the Tutorials. Reference Home Corrections, suggestions, and new documentation should be posted to the Forum. The text of the Arduino reference is licensed under a Creative Commons Attribution- ShareAlike 3.0 License. Code samples in the reference are released into the public domain. Edit Page | Page History | Printable View | All Recent Site Changes
- 93. Arduino search Buy | Download | Getting Started | Learning | Reference | Hardware | FAQ Reference Blog » | Forum » | Playground » Language ( extended) | Libraries | Comparison | Board ASCII chart The ASCI I (American Standard Code for I nformation I nterchange) encoding dates to the 1960's. I t is the standard way that text is encoded numerically. Note that the first 32 characters (0- 31) are non- printing characters, often called control characters. The more useful characters have been labeled. DEC Character Value 0 1 2 3 4 5 6 7 8 9 10 11 DEC Character Value Character Value DEC Character Value 32 33 34 35 36 37 38 39 40 41 42 43 space ! " # $ % & ' ( ) * + 64 65 66 67 68 69 70 71 72 73 74 75 @ A B C D E F G H I J K 96 97 98 99 100 101 102 103 104 105 106 107 ` a b c d e f g h i j k 44 45 , - 76 77 L M 108 109 l m return 14 15 16 17 46 47 48 49 50 . / 0 1 2 78 79 80 81 82 N O P Q R 110 111 112 113 114 n o p q r 18 19 20 21 51 52 53 54 3 4 5 6 83 84 85 86 S T U V 115 116 117 118 s t u v 22 23 24 25 55 56 57 58 7 8 9 : 87 88 89 90 W X Y Z 119 120 121 122 w x y z 26 27 28 29 59 60 61 62 ; < = > 91 92 93 94 [ ] ^ 123 124 125 126 { | } ~ 30 31 63 ? 95 _ 127 12 13 null DEC tab line feed carriage Reference Home Corrections, suggestions, and new documentation should be posted to the Forum.
- 94. The text of the Arduino reference is licensed under a Creative Commons Attribution- ShareAlike 3.0 License. Code samples in the reference are released into the public domain. Edit Page | Page History | Printable View | All Recent Site Changes
- 95. Arduino Buy | Download | Getting Started | Learning | Reference | Hardware | FAQ Login to Arduino Username: Password: Keep me logged in: ✔ Login Edit Page | Page History | Printable View | All Recent Site Changes search Blog » | Forum » | Playground »
- 96. Arduino Buy | Download | Getting Started | Learning | Reference | Hardware | FAQ search Blog » | Forum » | Playground » Reference.HomePage History Hide minor edits - Show changes to markup J uly 02, 2008, at 03: 11 PM by David A. Mellis Changed lines 2- 3 from: Arduino Reference to: Language Reference Restore May 07, 2008, at 02: 40 PM by David A. Mellis Changed line 41 from: plus (addition) to: + (addition) Restore April 29, 2008, at 10: 33 AM by David A. Mellis Changed lines 4- 5 from: ''See the extended reference for more advanced features of the Arduino languages and the libraries page for interfacing with particular types of hardware. to: See the extended reference for more advanced features of the Arduino languages and the libraries page for interfacing with particular types of hardware. Restore April 29, 2008, at 10: 33 AM by David A. Mellis Changed lines 4- 5 from: See the extended reference for more advanced features of the Arduino languages and the libraries page for interfacing with particular types of hardware. The foundations page has extended descriptions of some hardware and software features. to: ''See the extended reference for more advanced features of the Arduino languages and the libraries page for interfacing with particular types of hardware. Restore April 23, 2008, at 10: 30 PM by David A. Mellis Changed line 8 from: (: table width=90% border=0 cellpadding=5 cellspacing=0: ) to: (: table width=100% border=0 cellpadding=5 cellspacing=0: ) Restore March 31, 2008, at 06: 24 AM by Paul Badger Restore
- 97. March 29, 2008, at 11: 39 AM by David A. Mellis Changed lines 128- 135 from: to: pow(base, exponent) sqrt(x) Trigonometry sin(rad) cos(rad) tan(rad) Restore March 29, 2008, at 09: 18 AM by David A. Mellis Changed lines 127- 128 from: to: map(value, fromLow, fromHigh, toLow, toHigh) Restore March 07, 2008, at 10: 05 PM by Paul Badger Changed lines 4- 5 from: See the extended reference for more advanced features of the Arduino languages and the libraries page for interfacing with particular types of hardware. The Foundations page has extended descriptions of some hardware and software features. to: See the extended reference for more advanced features of the Arduino languages and the libraries page for interfacing with particular types of hardware. The foundations page has extended descriptions of some hardware and software features. Restore March 07, 2008, at 10: 04 PM by Paul Badger Changed lines 4- 5 from: See the extended reference for more advanced features of the Arduino languages and the libraries page for interfacing with particular types of hardware. The Foundations page has extended descriptions of hardware and software features. to: See the extended reference for more advanced features of the Arduino languages and the libraries page for interfacing with particular types of hardware. The Foundations page has extended descriptions of some hardware and software features. Restore March 07, 2008, at 10: 03 PM by Paul Badger Changed lines 4- 5 from: See the extended reference for more advanced features of the Arduino languages and the libraries page for interfacing with particular types of hardware. The [[Tutorial/ Foundations| Foundations page has extended descriptions of hardware and software features. to: See the extended reference for more advanced features of the Arduino languages and the libraries page for interfacing with particular types of hardware. The Foundations page has extended descriptions of hardware and software features. Restore March 07, 2008, at 10: 03 PM by Paul Badger Changed lines 4- 5 from: See the extended reference for more advanced features of the Arduino languages and the libraries page for interfacing with particular types of hardware. to: See the extended reference for more advanced features of the Arduino languages and the libraries page for interfacing with particular types of hardware. The [[Tutorial/ Foundations| Foundations page has extended descriptions of hardware and software features. Restore March 06, 2008, at 09: 01 AM by David A. Mellis -
- 98. Changed lines 4- 5 from: See the extended reference for more advanced features of the Arduino languages. to: See the extended reference for more advanced features of the Arduino languages and the libraries page for interfacing with particular types of hardware. Changed lines 147- 148 from: Didn't find something? Check the extended reference. to: Didn't find something? Check the extended reference or the libraries. Restore February 28, 2008, at 09: 49 AM by David A. Mellis Changed lines 77- 78 from: to: true | false Restore November 24, 2007, at 12: 42 AM by Paul Badger Changed line 14 from: void setup(). to: void setup() Restore November 24, 2007, at 12: 39 AM by Paul Badger - test the summary feature Changed line 14 from: void setup() to: void setup(). Restore November 05, 2007, at 03: 44 AM by David A. Mellis Deleted line 108: analog pins Restore November 03, 2007, at 10: 53 PM by Paul Badger Added line 109: analog pins Deleted line 110: analog pins Restore November 03, 2007, at 10: 01 PM by Paul Badger Changed line 110 from: configuring analog pins to: analog pins Restore November 03, 2007, at 09: 58 PM by Paul Badger Restore November 03, 2007, at 09: 58 PM by Paul Badger -
- 99. Changed lines 109- 110 from: int analogRead(pin) to: int analogRead(pin) configuring analog pins Restore August 31, 2007, at 11: 05 PM by David A. Mellis Changed lines 2- 3 from: Arduino Reference (standard) to: Arduino Reference Restore August 31, 2007, at 10: 46 PM by David A. Mellis Changed lines 6- 7 from: Arduino programs can be divided in three main parts: structure, values (variables and constants), and functions. The Arduino language is based on C/ C++. to: Arduino programs can be divided in three main parts: structure, values (variables and constants), and functions. The Arduino language is based on C/ C++. Restore August 31, 2007, at 10: 46 PM by David A. Mellis Changed lines 4- 5 from: See the extended reference for more advanced features of the Arduino languages. to: See the extended reference for more advanced features of the Arduino languages. Restore August 31, 2007, at 10: 45 PM by David A. Mellis Changed lines 4- 5 from: See the extended reference for more advanced features of the Arduino languages. to: See the extended reference for more advanced features of the Arduino languages. Restore August 31, 2007, at 10: 45 PM by David A. Mellis Changed lines 4- 5 from: The extended reference covers more advanced features of the Arduino language. to: See the extended reference for more advanced features of the Arduino languages. Restore August 31, 2007, at 10: 44 PM by David A. Mellis Changed lines 39- 41 from: #define #include to: Restore August 31, 2007, at 10: 43 PM by David A. Mellis Added lines 146- 147:
- 100. Restore August 31, 2007, at 10: 43 PM by David A. Mellis Added lines 146- 147: Didn't find something? Check the extended reference. Restore August 31, 2007, at 10: 40 PM by David A. Mellis - removing things that only belong in the extended reference. Deleted lines 61- 68: Bitwise Operators & (bitwise and) | (bitwise or) ^ (bitwise xor) ~ (bitwise not) << (bitshift left) >> (bitshift right) Deleted lines 69- 71: &= (compound bitwise and) | = (compound bitwise or) Deleted lines 97- 109: Variable Scope & Qualifiers variable scope static volatile const Utilities cast (cast operator) Deleted line 99: keywords Deleted lines 134- 140: External I nterrupts These functions allow you to trigger a function when the input to a pin changes value. attachI nterrupt(interrupt, function, mode) detachI nterrupt(interrupt) Restore August 31, 2007, at 10: 26 PM by David A. Mellis Changed lines 121- 122 from: sizeof() (sizeof operator) to: Changed lines 177- 178 from: Extended to: Restore August 31, 2007, at 10: 25 PM by David A. Mellis Changed lines 2- 3 from: Arduino Reference (basic) to:
- 101. Arduino Reference (standard) Restore August 31, 2007, at 10: 24 PM by David A. Mellis Changed lines 4- 6 from: The extended reference covers more advanced features of the Arduino language. to: The extended reference covers more advanced features of the Arduino language. Restore August 31, 2007, at 10: 24 PM by David A. Mellis Changed lines 4- 6 from: The extended reference covers more advanced features of the Arduino language. to: The extended reference covers more advanced features of the Arduino language. Restore August 31, 2007, at 10: 24 PM by David A. Mellis Changed lines 4- 6 from: The extended reference covers more advanced features of the Arduino language. to: The extended reference covers more advanced features of the Arduino language. Restore August 31, 2007, at 10: 23 PM by David A. Mellis Changed lines 6- 7 from: to: Restore August 31, 2007, at 10: 23 PM by David A. Mellis Added lines 6- 7: Restore August 31, 2007, at 10: 23 PM by David A. Mellis Changed lines 4- 5 from: For more advanced features of the Arduino language, see the extended reference. to: The extended reference covers more advanced features of the Arduino language. Restore August 31, 2007, at 10: 22 PM by David A. Mellis Changed lines 2- 3 from: Arduino Reference to: Arduino Reference (basic) For more advanced features of the Arduino language, see the extended reference. Restore August 31, 2007, at 10: 19 PM by David A. Mellis Changed lines 84- 85 from: Constants are labels for certain values which are preset in the Arduino compiler. You do not need to define or initialize
- 102. constants. Arduino includes the following pre- defined constants. to: Constants are particular values with specific meanings. Restore August 31, 2007, at 10: 18 PM by David A. Mellis Changed lines 81- 82 from: Variables are expressions that you can use in programs to store values, such as a sensor reading from an analog pin. They can have various types, which are described below. to: Variables are expressions that you can use in programs to store values, such as a sensor reading from an analog pin. Constants Constants are labels for certain values which are preset in the Arduino compiler. You do not need to define or initialize constants. Arduino includes the following pre- defined constants. HI GH | LOW I NPUT | OUTPUT I nteger Constants Added lines 93- 94: Variables can have various types, which are described below. Changed lines 115- 122 from: Constants Constants are labels for certain values which are preset in the Arduino compiler. You do not need to define or initialize constants. Arduino includes the following pre- defined constants. HI GH | LOW I NPUT | OUTPUT I ntegerConstants to: Restore August 31, 2007, at 09: 46 PM by David A. Mellis - removing PROGMEM (doesn't belong in the basic reference) Changed lines 104- 105 from: PROGMEM to: Restore August 31, 2007, at 09: 45 PM by David A. Mellis Changed lines 10- 11 from: I n Arduino, the standard program entry point (main) is defined in the core and calls into two functions in a sketch. setup() is called once, then loop() is called repeatedly (until you reset your board). to: An Arduino program run in two parts: Added lines 15- 16: setup() is preparation, and loop() is execution. I n the setup section, always at the top of your program, you would set pinModes, initialize serial communication, etc. The loop section is the code to be executed - - reading inputs, triggering outputs, etc. Restore August 31, 2007, at 09: 44 PM by David A. Mellis Changed lines 10- 11 from: An Arduino program run in two parts:
- 103. to: I n Arduino, the standard program entry point (main) is defined in the core and calls into two functions in a sketch. setup() is called once, then loop() is called repeatedly (until you reset your board). Deleted lines 14- 15: setup() is preparation, and loop() is execution. I n the setup section, always at the top of your program, you would set pinModes, initialize serial communication, etc. The loop section is the code to be executed - - reading inputs, triggering outputs, etc. Restore August 23, 2007, at 02: 24 PM by Paul Badger Changed lines 15- 16 from: setup() is preparation, and loop() is execution. I n the setup section, always at the top of your program, you would set pinMode, initialize serial communication, etc. The loop section is the code to be executed - - reading inputs, triggering outputs, etc. to: setup() is preparation, and loop() is execution. I n the setup section, always at the top of your program, you would set pinModes, initialize serial communication, etc. The loop section is the code to be executed - - reading inputs, triggering outputs, etc. Restore August 23, 2007, at 02: 19 PM by Paul Badger Changed lines 81- 82 from: Variables are expressions that you can use in programs to store values, like e.g. sensor reading from an analog pin. They can have various types, which are described below. to: Variables are expressions that you can use in programs to store values, such as a sensor reading from an analog pin. They can have various types, which are described below. Restore J uly 17, 2007, at 11: 10 AM by Paul Badger Changed lines 19- 20 from: void keyword to: void Restore J uly 17, 2007, at 10: 27 AM by Paul Badger Restore J uly 17, 2007, at 10: 27 AM by Paul Badger Changed lines 174- 175 from: to: Extended Restore J uly 17, 2007, at 06: 36 AM by Paul Badger Restore J uly 17, 2007, at 06: 35 AM by Paul Badger Changed lines 19- 20 from: to: void keyword Restore J uly 16, 2007, at 11: 47 PM by Paul Badger Added lines 31- 38: Further Syntax
- 104. ; (semicolon) {} (curly braces) / / (single line comment) / * * / (multi- line comment) #define #include Deleted lines 77- 85: Further Syntax ; (semicolon) {} (curly braces) / / (single line comment) / * * / (multi- line comment) #define #include Restore J uly 16, 2007, at 11: 05 PM by Paul Badger Changed lines 29- 30 from: to: return Restore J uly 16, 2007, at 09: 42 PM by Paul Badger Changed lines 173- 174 from: Alpha to: Restore J uly 16, 2007, at 09: 41 PM by Paul Badger Restore J uly 16, 2007, at 09: 41 PM by Paul Badger Restore J uly 16, 2007, at 09: 40 PM by Paul Badger Changed lines 173- 174 from: to: Alpha Restore J uly 16, 2007, at 05: 56 AM by Paul Badger Changed lines 31- 36 from: plus(addition) - (subtraction) * (multiplication) / (division) % (modulo) to: plus (addition) - (subtraction) * (multiplication) / (division) % (modulo) Restore J uly 16, 2007, at 05: 55 AM by Paul Badger Changed lines 63- 69 from: += (compound multiplication) - = (compound division) &= (bitwise and)
- 105. | = (bitwise or) to: * = (compound multiplication) / = (compound division) &= (compound bitwise and) | = (compound bitwise or) Restore J uly 16, 2007, at 05: 54 AM by Paul Badger Changed lines 61- 62 from: += (compound increment) - = (compound decrement) to: += (compound addition) - = (compound subtraction) += (compound multiplication) - = (compound division) Restore J uly 16, 2007, at 05: 12 AM by Paul Badger Changed lines 60- 62 from: - - ? (decrement) to: - - (decrement) += (compound increment) - = (compound decrement) Restore J uly 16, 2007, at 04: 48 AM by Paul Badger Changed lines 60- 64 from: | ? (decrement) (bitwise and) (bitwise or) to: - - ? (decrement) &= (bitwise and) | = (bitwise or) Restore J uly 16, 2007, at 04: 46 AM by Paul Badger Added lines 58- 64: Compound Operators ++ (increment) | ? (decrement) (bitwise and) (bitwise or) Restore J une 11, 2007, at 06: 57 PM by Paul Badger Changed lines 91- 92 from: to: PROGMEM Restore May 29, 2007, at 02: 34 PM by Paul Badger Changed lines 85- 86 from:
- 106. Variable Scope to: Variable Scope & Qualifiers Changed lines 90- 91 from: to: const Restore May 28, 2007, at 01: 50 PM by Paul Badger Added line 72: boolean Restore May 26, 2007, at 07: 41 PM by Paul Badger Changed lines 106- 107 from: ASCI I chart? to: ASCI I chart Restore May 26, 2007, at 07: 41 PM by Paul Badger Changed lines 106- 107 from: to: ASCI I chart? Restore May 26, 2007, at 07: 08 AM by Paul Badger Changed line 26 from: do... while to: do... while Restore May 26, 2007, at 07: 07 AM by Paul Badger Added line 26: do... while Restore May 26, 2007, at 06: 36 AM by Paul Badger Changed lines 26- 28 from: to: break continue Restore May 17, 2007, at 10: 36 PM by Paul Badger Changed lines 85- 86 from: to: volatile Restore May 17, 2007, at 11: 51 AM by David A. Mellis Changed lines 4- 5 from: Arduino programs can be divided in three main parts: structure, values (variables and constants), and functions. to:
- 107. Arduino programs can be divided in three main parts: structure, values (variables and constants), and functions. The Arduino language is based on C/ C++. Restore May 17, 2007, at 11: 09 AM by Paul Badger Changed lines 110- 111 from: pullup resistors? to: Restore May 17, 2007, at 11: 08 AM by Paul Badger Changed lines 110- 111 from: pullup resistors to: pullup resistors? Restore May 17, 2007, at 11: 08 AM by Paul Badger Changed lines 110- 111 from: to: pullup resistors Restore May 04, 2007, at 06: 01 AM by Paul Badger Changed lines 83- 85 from: Variable scope Static to: variable scope static Restore May 04, 2007, at 06: 00 AM by Paul Badger Added lines 80- 85: Variable Scope Variable scope Static Restore April 29, 2007, at 05: 06 AM by David A. Mellis - math.h isn't supported, so don't document it here. Changed lines 123- 124 from: math.h(trig,sqrt,pow etc.) to: Restore April 29, 2007, at 05: 03 AM by David A. Mellis - API changes (including exposing internal registers) should be discussed on the developers list Changed lines 54- 55 from: port manipulation to: Changed lines 96- 98 from: Atmega8 hardware Atmega168 hardware to: Restore April 27, 2007, at 10: 18 PM by Paul Badger -
- 108. Changed lines 126- 127 from: math.h(math.h - trig,sqrt,pow etc.) to: math.h(trig,sqrt,pow etc.) Restore April 27, 2007, at 10: 18 PM by Paul Badger Changed lines 126- 127 from: math ?(math.h - trig,sqrt,pow etc.) to: math.h(math.h - trig,sqrt,pow etc.) Restore April 27, 2007, at 10: 17 PM by Paul Badger Changed lines 126- 127 from: mathHeader(trig,sqrt,pow etc.) to: math ?(math.h - trig,sqrt,pow etc.) Restore April 27, 2007, at 10: 08 PM by Paul Badger Added line 77: double Restore April 27, 2007, at 10: 06 PM by Paul Badger Changed lines 125- 126 from: math.h(trig,sqrt,pow etc.) to: mathHeader(trig,sqrt,pow etc.) Restore April 27, 2007, at 09: 25 PM by Paul Badger Changed lines 125- 126 from: to: math.h(trig,sqrt,pow etc.) Restore April 25, 2007, at 09: 34 PM by Paul Badger Changed lines 86- 87 from: Constants to: I ntegerConstants Restore April 25, 2007, at 09: 31 PM by Paul Badger Changed lines 86- 87 from: I nteger Constants to: Constants Changed line 90 from: cast(cast operator)
- 109. to: cast (cast operator) Restore April 25, 2007, at 09: 24 PM by Paul Badger Changed lines 62- 63 from: #include to: #include Restore April 25, 2007, at 08: 58 PM by Paul Badger Changed lines 62- 63 from: to: #include Restore April 24, 2007, at 10: 32 AM by Paul Badger Changed lines 54- 55 from: to: port manipulation Changed lines 97- 98 from: port manipulation to: Restore April 24, 2007, at 12: 58 AM by Paul Badger Changed lines 96- 97 from: Port Manipulation to: port manipulation Restore April 24, 2007, at 12: 57 AM by Paul Badger Changed lines 91- 92 from: Reference to: Reference Restore April 24, 2007, at 12: 29 AM by Paul Badger Changed lines 96- 97 from: to: Port Manipulation Restore April 23, 2007, at 10: 29 PM by Paul Badger Changed lines 94- 96 from: to: Atmega8 hardware Atmega168 hardware Restore April 18, 2007, at 08: 49 AM by Paul Badger Changed line 50 from:
- 110. ^ (bitwise xor) to: ^ (bitwise xor) Restore April 17, 2007, at 11: 22 PM by Paul Badger Changed lines 93- 94 from: keywords) to: keywords Restore April 17, 2007, at 11: 21 PM by Paul Badger Changed lines 93- 94 from: keywords(keywords) to: keywords) Restore April 17, 2007, at 11: 11 PM by Paul Badger Changed lines 91- 94 from: to: Reference keywords(keywords) Restore April 17, 2007, at 09: 08 PM by Paul Badger Changed line 50 from: ^ (bitwise xor) to: ^ (bitwise xor) Restore April 17, 2007, at 08: 49 PM by Paul Badger Changed line 51 from: ~ (bitwise not) to: ~ (bitwise not) Restore April 17, 2007, at 08: 31 PM by Paul Badger Changed lines 48- 49 from: & (bitwise and) | (bitwise or) to: & (bitwise and) | (bitwise or) Restore April 16, 2007, at 11: 15 AM by Paul Badger Added line 71: unsigned int
- 111. Added line 73: unsigned long Restore April 16, 2007, at 11: 02 AM by Paul Badger Changed lines 2- 3 from: Arduino Reference to: Arduino Reference Restore April 16, 2007, at 02: 02 AM by David A. Mellis Added lines 66- 67: Data Types Changed lines 75- 77 from: cast(cast operator) sizeof() (sizeof operator) to: Changed lines 84- 85 from: to: Utilities cast(cast operator) sizeof() (sizeof operator) Restore April 16, 2007, at 01: 56 AM by Paul Badger Changed line 28 from: Arithmetic(addition) to: plus(addition) Restore April 16, 2007, at 01: 55 AM by David A. Mellis Changed line 28 from: plus(addition) to: Arithmetic(addition) Changed lines 48- 51 from: & (and) | (or) ^ (xor) ~ (not) to: & (bitwise and) | (bitwise or) ^ (bitwise xor) ~ (bitwise not) Restore April 16, 2007, at 12: 22 AM by Paul Badger Changed lines 52- 54 from:
- 112. to: << (bitshift left) >> (bitshift right) Restore April 16, 2007, at 12: 19 AM by Paul Badger Restore April 15, 2007, at 11: 47 PM by Paul Badger Changed lines 51- 52 from: ! (not) to: ~ (not) Restore April 15, 2007, at 11: 35 PM by Paul Badger Changed line 42 from: Boolean Operations to: Boolean Operators Changed line 47 from: Bitwise Operations to: Bitwise Operators Restore April 15, 2007, at 11: 34 PM by Paul Badger Added lines 47- 52: Bitwise Operations & (and) | (or) ^ (xor) ! (not) Restore April 15, 2007, at 11: 31 PM by Paul Badger Changed lines 66- 67 from: sizeof(sizeof operator) to: sizeof() (sizeof operator) Restore April 15, 2007, at 04: 40 PM by Paul Badger Changed lines 66- 67 from: to: sizeof(sizeof operator) Restore April 15, 2007, at 04: 17 PM by Paul Badger Changed lines 65- 66 from: to: cast(cast operator) Restore
- 113. April 15, 2007, at 03: 05 PM by Paul Badger Changed lines 28- 31 from: Addition?(addition) - ?(subtraction) * ?(multiplication) / ?(division) to: plus(addition) - (subtraction) * (multiplication) / (division) Restore April 15, 2007, at 02: 58 PM by Paul Badger Restore April 15, 2007, at 02: 55 PM by Paul Badger Restore April 15, 2007, at 02: 49 PM by Paul Badger Changed lines 28- 31 from: Addition?(modulo) - ?(modulo) * ?(modulo) / ?(modulo) to: Addition?(addition) - ?(subtraction) * ?(multiplication) / ?(division) Restore April 15, 2007, at 02: 47 PM by Paul Badger Restore April 15, 2007, at 02: 47 PM by Paul Badger Added lines 28- 31: Addition?(modulo) - ?(modulo) * ?(modulo) / ?(modulo) Restore April 13, 2007, at 11: 27 PM by David A. Mellis Changed lines 28- 29 from: % (modulo) to: % (modulo) Restore April 13, 2007, at 11: 20 PM by Paul Badger Restore April 13, 2007, at 11: 18 PM by Paul Badger Restore April 13, 2007, at 11: 17 PM by Paul Badger Restore April 13, 2007, at 10: 53 PM by David A. Mellis - moving % (modulo) the left column under "arithmetic operators"; keeping the right col. for functions Changed lines 15- 16 from: setup() is preparation, and loop() is execution. I n the setup section, always at the top of your program, you woiuld set pinMode, initialize serial communication, etc. The loop section is the code to be executed - - reading inputs, triggering outputs, etc.
- 114. to: setup() is preparation, and loop() is execution. I n the setup section, always at the top of your program, you would set pinMode, initialize serial communication, etc. The loop section is the code to be executed - - reading inputs, triggering outputs, etc. Added lines 27- 29: Arithmetic Operators % (modulo) Deleted line 93: % (modulo) Restore April 13, 2007, at 10: 50 PM by Paul Badger Changed line 91 from: % to: % (modulo) Restore April 13, 2007, at 10: 00 PM by Paul Badger Changed line 91 from: % (modulo) to: % Restore April 13, 2007, at 09: 49 PM by Paul Badger Changed line 91 from: to: % (modulo) Restore December 25, 2006, at 06: 25 PM by David A. Mellis Changed lines 4- 6 from: Arduino provides a library of functions on top of the standard AVR C/ C++ routines. The main file of your sketch is compiled as C++, but you can add straight C files as well. Arduino programs can be divided in three main parts: program structure, values (variables and constants), and functions. to: Arduino programs can be divided in three main parts: structure, values (variables and constants), and functions. Changed lines 8- 11 from: Program Structure Getting Started to: Structure Added line 52: byte Changed lines 65- 66 from: to:
- 115. I nteger Constants Changed lines 75- 77 from: int digitalRead(pin) unsigned long pulseI n (pin, value) to: int digitalRead(pin) Changed lines 81- 85 from: Handling Time to: Advanced I / O shiftOut(dataPin, clockPin, bitOrder, value) unsigned long pulseI n (pin, value) Time Changed lines 90- 93 from: Random number generation New in Arduino 0005. to: Math min(x, y) max(x, y) abs(x) constrain(x, a, b) Random Numbers Added lines 103- 109: External I nterrupts These functions allow you to trigger a function when the input to a pin changes value. attachI nterrupt(interrupt, function, mode) detachI nterrupt(interrupt) Changed lines 115- 116 from: Serial.available() Serial.read() to: int Serial.available() int Serial.read() Serial.flush() Deleted lines 120- 137: Old serial library (deprecated). beginSerial (speed) serialWrite(c) int serialAvailable() int serialRead() printMode(mode) printByte(c) printString(str) printI nteger(num) printHex(num)
- 116. printOctal(num) printBinary(num) printNewline() Expert/ I nternal Functions avr- libc is the standard library of C functions that Arduino builds on. To use these, you may need to add the corresponding #include statement to the top of your sketch. Restore November 12, 2006, at 11: 51 AM by David A. Mellis - removing bit about floats not being supported Changed lines 52- 53 from: Variables are expressions that you can use in programs to store values, like e.g. sensor reading from an analog pin. They can have various types, which are described below. Floating point variables and operations are not currently supported. to: Variables are expressions that you can use in programs to store values, like e.g. sensor reading from an analog pin. They can have various types, which are described below. Added line 57: float Restore November 04, 2006, at 01: 19 PM by David A. Mellis Deleted lines 5- 6: I f you're used to Processing or J ava, please check out the Arduino/ Processing language comparison. Restore November 04, 2006, at 01: 18 PM by David A. Mellis Deleted lines 123- 137: Libraries These are the "official" libraries that are included in the Arduino distribution. They are compatible with the Wiring versions, and the links below point to the (excellent) Wiring documentation. Matrix - Basic LED Matrix display manipulation library Sprite - Basic image sprite manipulation library for use in animations with an LED matrix Wire - Two Wire I nterface for sending and receiving data over a net of devices or sensors. These are not (yet) included with the Arduino distribution and may change. Simple Message System LCD Library TextString Library Metro Restore October 21, 2006, at 03: 32 PM by David A. Mellis - adding link to metro library Added lines 137- 138: Metro Restore October 21, 2006, at 03: 07 PM by David A. Mellis - adding libraries included in the distribution Added lines 126- 131: These are the "official" libraries that are included in the Arduino distribution. They are compatible with the Wiring versions, and the links below point to the (excellent) Wiring documentation. Matrix - Basic LED Matrix display manipulation library Sprite - Basic image sprite manipulation library for use in animations with an LED matrix Wire - Two Wire I nterface for sending and receiving data over a net of devices or sensors. Restore October 20, 2006, at 11: 57 AM by Tom I goe Added line 130:
- 117. TextString Library Restore October 01, 2006, at 03: 55 PM by David A. Mellis - adding libraries Added lines 123- 129: Libraries These are not (yet) included with the Arduino distribution and may change. Simple Message System LCD Library Restore September 05, 2006, at 08: 58 AM by David A. Mellis Changed lines 4- 5 from: These are the basics about the Arduino language, which implemented in C. I f you're used to Processing or J ava, please check out the Arduino/ Processing language comparison. to: Arduino provides a library of functions on top of the standard AVR C/ C++ routines. The main file of your sketch is compiled as C++, but you can add straight C files as well. I f you're used to Processing or J ava, please check out the Arduino/ Processing language comparison. Restore August 27, 2006, at 10: 58 AM by David A. Mellis Added lines 81- 93: Handling Time unsigned long millis() delay(ms) delayMicroseconds(us) Random number generation New in Arduino 0005. randomSeed(seed) long random(max) long random(min, max) Changed lines 118- 122 from: Handling Time unsigned long millis() delay(ms) delayMicroseconds(us) to: Restore August 26, 2006, at 04: 07 PM by David A. Mellis Changed line 1 from: (: title API Reference: ) to: (: title Reference: ) Restore August 26, 2006, at 04: 07 PM by David A. Mellis Changed lines 1- 2 from: (: title Arduino API Reference: ) !!Arduino Reference to: (: title API Reference: )
- 118. Arduino Reference Restore August 26, 2006, at 04: 07 PM by David A. Mellis Changed lines 1- 2 from: Arduino Reference to: (: title Arduino API Reference: ) !!Arduino Reference Restore August 01, 2006, at 12: 55 PM by David A. Mellis - Adding string and array. Changed lines 56- 58 from: to: string array Restore August 01, 2006, at 07: 18 AM by David A. Mellis Added lines 30- 31: == (equal to) != (not equal to) Restore August 01, 2006, at 07: 17 AM by David A. Mellis Changed lines 30- 34 from: < (less than) > (greater than) <= (less than or equal to) >= (greater than or equal to) to: < (less than) > (greater than) <= (less than or equal to) >= (greater than or equal to) Restore August 01, 2006, at 07: 04 AM by David A. Mellis - adding comparison and boolean operators Added lines 29- 39: Comparison Operators < (less than) > (greater than) <= (less than or equal to) >= (greater than or equal to) Boolean Operations && (and) | | (or) ! (not) Restore J uly 09, 2006, at 07: 47 AM by David A. Mellis - adding link to avr- libc Added lines 93- 95: Expert/ I nternal Functions avr- libc is the standard library of C functions that Arduino builds on. To use these, you may need to add the corresponding #include statement to the top of your sketch. Restore
- 119. May 28, 2006, at 05: 03 PM by David A. Mellis Changed lines 38- 39 from: Variables are expressions that you can use in programs to store values, like e.g. sensor reading from an analog pin. They can have various types, which are described below. Warning: floating point variables and operations are not currently supported. to: Variables are expressions that you can use in programs to store values, like e.g. sensor reading from an analog pin. They can have various types, which are described below. Floating point variables and operations are not currently supported. Changed lines 67- 68 from: Used for communication between the Arduino board and a computer or other devices. This communication happens via the Arduino board's serial or USB connection and on digital pins 0 (RX) and 1 (TX). Thus, if you use these functions, you cannot also use pins 0 and 1 for digital i/ o. to: Used for communication between the Arduino board and a computer or other devices. This communication happens via the Arduino board's serial or USB connection and on digital pins 0 (RX) and 1 (TX). Thus, if you use these functions, you cannot also use pins 0 and 1 for digital i/ o. Restore May 28, 2006, at 05: 01 PM by David A. Mellis - clarifying serial communication Changed lines 67- 68 from: Used for communication between the Arduino board and the computer, via the USB or serial connection. This communication happens on digital pins 0 (RX) and 1 (TX). This means that these functions can be used to communicate with a serial device on those pins, but also that any digital i/ o on pins 0 and 1 will interfere with this communication. to: Used for communication between the Arduino board and a computer or other devices. This communication happens via the Arduino board's serial or USB connection and on digital pins 0 (RX) and 1 (TX). Thus, if you use these functions, you cannot also use pins 0 and 1 for digital i/ o. Restore May 28, 2006, at 04: 55 PM by David A. Mellis Changed lines 67- 68 from: Used for communication between the Arduino board and the computer, via the USB or serial connection. Or used for serial communication on digital pins 0 (RX) and 1 (TX). Note: if you are using these functions, you cannot also use pins 0 and 1 for digital i/ o. to: Used for communication between the Arduino board and the computer, via the USB or serial connection. This communication happens on digital pins 0 (RX) and 1 (TX). This means that these functions can be used to communicate with a serial device on those pins, but also that any digital i/ o on pins 0 and 1 will interfere with this communication. Restore May 28, 2006, at 04: 52 PM by David A. Mellis - serial notes Changed lines 67- 68 from: Used for communication between the Arduino board and the computer, via the USB or serial connection (both appear as serial ports to software on the computer). Or used for serial communication on digital pins 0 (RX) and 1 (TX). to: Used for communication between the Arduino board and the computer, via the USB or serial connection. Or used for serial communication on digital pins 0 (RX) and 1 (TX). Note: if you are using these functions, you cannot also use pins 0 and 1 for digital i/ o. Serial.begin(speed) Serial.available() Serial.read() Serial.print(data) Serial.println(data) Old serial library (deprecated).
- 120. Deleted lines 88- 96: Serial Library as of version 0004 Serial.begin(speed) Serial.available() Serial.read() Serial.print(data) Serial.println(data) Restore April 19, 2006, at 06: 45 AM by David A. Mellis - Clarifying serial communication (USB or serial) Added lines 66- 68: Used for communication between the Arduino board and the computer, via the USB or serial connection (both appear as serial ports to software on the computer). Or used for serial communication on digital pins 0 (RX) and 1 (TX). Restore April 17, 2006, at 06: 47 AM by Massimo Banzi Restore April 14, 2006, at 07: 49 AM by David A. Mellis - Adding pulseI n() Changed lines 59- 60 from: to: unsigned long pulseI n (pin, value) Restore March 31, 2006, at 06: 19 AM by Clay Shirky Changed line 5 from: Arduino programs can be divided in three main parts: program structure, values (variables and constants), and functions. to: Arduino programs can be divided in three main parts: program structure, values (variables and constants), and functions. Changed lines 17- 18 from: setup() is preparation, and loop() is execution. I n the setup section, always at the top of your program, you initialize variables ?, set pinMode, etc. The loop section is the code to be executed - - reading inputs, triggering outputs, etc. to: setup() is preparation, and loop() is execution. I n the setup section, always at the top of your program, you woiuld set pinMode, initialize serial communication, etc. The loop section is the code to be executed - - reading inputs, triggering outputs, etc. Restore March 31, 2006, at 05: 02 AM by Clay Shirky Added lines 11- 13: An Arduino program run in two parts: Added lines 16- 18: setup() is preparation, and loop() is execution. I n the setup section, always at the top of your program, you initialize variables ?, set pinMode, etc. The loop section is the code to be executed - - reading inputs, triggering outputs, etc. Changed lines 21- 22 from: Further Syntax to: Control Structures Added lines 28- 29: Further Syntax Restore
- 121. March 31, 2006, at 04: 48 AM by Clay Shirky Changed line 5 from: Arduino programs can be divided in three main parts: to: Arduino programs can be divided in three main parts: program structure, values (variables and constants), and functions. Restore March 31, 2006, at 03: 39 AM by David A. Mellis - Clarifying analogWrite == pwm Changed line 46 from: Digital Pins to: Digital I / O Changed line 51 from: Analog Pins to: Analog I / O Changed lines 53- 54 from: analogWrite(pin, value) to: analogWrite(pin, value) - PWM Restore March 30, 2006, at 08: 02 PM by Tom I goe Changed line 17 from: else? to: if...else Restore March 30, 2006, at 08: 01 PM by Tom I goe Added line 17: else? Restore March 28, 2006, at 03: 19 AM by David A. Mellis - Changed "Define" to "#define" Changed lines 24- 25 from: Define to: #define Restore March 27, 2006, at 01: 10 PM by Tom I goe Changed lines 24- 25 from: to: Define Changed lines 35- 36 from: Another form of variables are constants, which are preset variables that you do not need to define or initialize. to: Constants are labels for certain values which are preset in the Arduino compiler. You do not need to define or initialize
- 122. constants. Arduino includes the following pre- defined constants. Changed lines 40- 53 from: Finally, defines are a useful C component that allow you to specify something before it is compiled. Defines You can define numbers in arduino that don't take up any program memory space on the chip. Arduino defines have the same syntax as C defines: #define constantName value Note that the # is necessary. For example: #define ledPin 3 The compiler will replace any mentions of ledPin with the value 3 at compile time. to: Restore March 27, 2006, at 12: 56 PM by Tom I goe Restore March 27, 2006, at 12: 28 PM by Tom I goe Changed lines 83- 87 from: to: Serial.print(data) Serial.println(data) Restore March 27, 2006, at 12: 23 PM by Tom I goe Changed lines 82- 83 from: to: Serial.read() Restore March 27, 2006, at 12: 19 PM by Tom I goe Changed lines 81- 82 from: to: Serial.available() Restore March 27, 2006, at 12: 14 PM by Tom I goe Added lines 79- 81: Serial Library as of version 0004 Serial.begin(speed) Restore March 26, 2006, at 02: 21 PM by J eff Gray Changed line 18 from: select case? to: switch case Restore March 26, 2006, at 02: 21 PM by J eff Gray Added line 18: select case? Restore March 26, 2006, at 11: 29 AM by J eff Gray Deleted line 5: Restore
- 123. March 25, 2006, at 02: 21 PM by J eff Gray Changed lines 9- 10 from: Program Structure to: Program Structure Changed lines 25- 26 from: Variables to: Variables Changed lines 54- 55 from: Functions to: Functions Restore March 25, 2006, at 02: 20 PM by J eff Gray Changed lines 7- 8 from: (: table border=0 cellpadding=5 cellspacing=0: ) (: cell: ) to: (: table width=90% border=0 cellpadding=5 cellspacing=0: ) (: cell width=50% : ) Changed line 53 from: (: cell: ) to: (: cell width=50% : ) Restore March 25, 2006, at 02: 19 PM by J eff Gray Changed lines 7- 8 from: to: (: table border=0 cellpadding=5 cellspacing=0: ) (: cell: ) Changed line 53 from: to: (: cell: ) Changed line 83 from: to: (: tableend: ) Restore March Added Added Added 25, 2006, at 02: 17 PM by J eff Gray lines 7- 8: line 53: line 83: Restore March 25, 2006, at 12: 20 AM by J eff Gray Restore March 24, 2006, at 05: 46 PM by J eff Gray Changed lines 41- 42 from: You can define constants in arduino, that don't take up any program memory space on the chip. Arduino defines have the
- 124. same syntax as C defines: to: You can define numbers in arduino that don't take up any program memory space on the chip. Arduino defines have the same syntax as C defines: Restore March 24, 2006, at 05: 45 PM by J eff Gray Added line 31: Constants Changed lines 39- 40 from: Defines to: Defines Restore March 24, 2006, at 05: 44 PM by J eff Gray Added lines 36- 49: Finally, defines are a useful C component that allow you to specify something before it is compiled. Defines You can define constants in arduino, that don't take up any program memory space on the chip. Arduino defines have the same syntax as C defines: #define constantName value Note that the # is necessary. For example: #define ledPin 3 The compiler will replace any mentions of ledPin with the value 3 at compile time. Deleted lines 78- 91: Creating New Functions Defines You can define constants in arduino, that don't take up any program memory space on the chip. Arduino defines have the same syntax as C defines: #define constantName value Note that the # is necessary. For example: #define ledPin 3 The compiler will replace any mentions of ledPin with the value 3 at compile time. Restore March 24, 2006, at 05: 42 PM by J eff Gray Added lines 31- 35: Another form of variables are constants, which are preset variables that you do not need to define or initialize. HI GH | LOW I NPUT | OUTPUT Deleted lines 65- 69: Constants HI GH | LOW I NPUT | OUTPUT
- 125. Restore March 24, 2006, at 04: 46 PM by J eff Gray Added lines 5- 6: Arduino programs can be divided in three main parts: Changed lines 9- 11 from: Arduino programs can be divided in three main parts: Variable Declaration to: Getting Started Added lines 12- 14: Variable Declaration Function Declaration Further Syntax Restore February 09, 2006, at 08: 25 AM by 85.18.81.162 Changed lines 22- 23 from: Variables are expressions that you can use in programs to store values, like e.g. sensor reading from an analog pin. They can have various types, which are described below. to: Variables are expressions that you can use in programs to store values, like e.g. sensor reading from an analog pin. They can have various types, which are described below. Warning: floating point variables and operations are not currently supported. Restore J anuary 20, 2006, at 10: 44 AM by 85.18.81.162 Changed lines 3- 6 from: These are the basics about the arduino language. to: These are the basics about the Arduino language, which implemented in C. I f you're used to Processing or J ava, please check out the Arduino/ Processing language comparison. Restore J anuary 08, 2006, at 12: 46 PM by 82.186.237.10 Changed lines 53- 54 from: to: printNewline() Restore J anuary 03, 2006, at 03: 35 AM by 82.186.237.10 Deleted lines 65- 79: Writing Comments Comments are parts in the program that are used to inform about the way the program works. They are not going to be compiled, nor will be exported to the processor. They are useful for you to understand what a certain program you downloaded is doing or to inform to your colleagues about what one of its lines is. There are two different ways of marking a line as a comment: you could use a double- slash in the beginning of a line: / / you could use a combination of slash- asterisk - - > asterisk- slash encapsulating your comments: / * blabla * / Tip When experimenting with code the ability of commenting parts of your program becomes very useful for you to "park" part of the code for a while. Restore
- 126. December 30, 2005, at 05: 41 AM by 82.186.237.10 Deleted lines 6- 9: Variables Variables are expressions that you can use in programs to store values, like e.g. sensor reading from an analog pin. Added lines 22- 29: Variables Variables are expressions that you can use in programs to store values, like e.g. sensor reading from an analog pin. They can have various types, which are described below. char int long Restore December 29, 2005, at 08: 08 AM by 82.186.237.10 Changed lines 18- 25 from: to: if for while ; (semicolon) {} (curly braces) / / (single line comment) / * * / (multi- line comment) Restore December 28, 2005, at 03: 59 PM by 82.186.237.10 Changed lines 22- 25 from: void pinMode(int pin, int mode) void digitalWrite(int pin, int val) int digitalRead(int pin) to: pinMode(pin, mode) digitalWrite(pin, value) int digitalRead(pin) Changed lines 27- 29 from: int analogRead(int pin) void analogWrite(int pin, int val) to: int analogRead(pin) analogWrite(pin, value) Changed lines 31- 32 from: void beginSerial (int baud) void serialWrite(unsigned char c) to: beginSerial (speed) serialWrite(c) Changed lines 35- 42 from: void void void void printMode(int mode) printByte(unsigned char c) printString(unsigned char * s) printI nteger(int n) void printHex(unsigned int n)
- 127. void printOctal(unsigned int n) void printBinary(unsigned int n) to: printMode(mode) printByte(c) printString(str) printI nteger(num) printHex(num) printOctal(num) printBinary(num) Changed lines 44- 47 from: unsigned long millis?() void delay(unsigned long ms) void delayMicroseconds(unsigned long us) to: unsigned long millis() delay(ms) delayMicroseconds(us) Restore December 16, 2005, at 02: 58 PM by 85.18.81.162 Added lines 67- 80: Defines You can define constants in arduino, that don't take up any program memory space on the chip. Arduino defines have the same syntax as C defines: #define constantName value Note that the # is necessary. For example: #define ledPin 3 The compiler will replace any mentions of ledPin with the value 3 at compile time. Restore December 09, 2005, at 11: 39 AM by 195.178.229.25 Changed lines 4- 6 from: These are the functions available in the arduino language to: These are the basics about the arduino language. Changed line 15 from: variable declaration to: Variable Declaration Restore December 03, 2005, at 02: 02 PM by 213.140.6.103 Changed lines 50- 52 from: HI GH | LOW I NPUT | OUTPUT to: HI GH | LOW I NPUT | OUTPUT Restore
- 128. December 03, 2005, at 01: 41 PM by 213.140.6.103 Changed line 21 from: Digital Pins to: Digital Pins Changed line 26 from: Analog Pins to: Analog Pins Changed line 30 from: Serial Communication to: Serial Communication Changed line 43 from: Handling Time to: Handling Time Restore December 03, 2005, at 01: 40 PM by 213.140.6.103 Added lines 20- 21: Digital Pins Added lines 25- 26: Analog Pins Added lines 29- 30: Serial Communication Added lines 42- 43: Handling Time Restore December 03, 2005, at 12: 48 PM by 213.140.6.103 Added lines 40- 44: Constants HI GH | LOW I NPUT | OUTPUT Restore December 03, 2005, at 12: 37 PM by 213.140.6.103 Added lines 40- 43: Creating New Functions Restore December 03, 2005, at 10: 53 AM by 213.140.6.103 Changed lines 9- 10 from: to:
- 129. Variables are expressions that you can use in programs to store values, like e.g. sensor reading from an analog pin. Added lines 12- 15: Arduino programs can be divided in three main parts: variable declaration Changed lines 38- 49 from: void delayMicroseconds(unsigned long us) to: void delayMicroseconds(unsigned long us) Writing Comments Comments are parts in the program that are used to inform about the way the program works. They are not going to be compiled, nor will be exported to the processor. They are useful for you to understand what a certain program you downloaded is doing or to inform to your colleagues about what one of its lines is. There are two different ways of marking a line as a comment: you could use a double- slash in the beginning of a line: / / you could use a combination of slash- asterisk - - > asterisk- slash encapsulating your comments: / * blabla * / Tip When experimenting with code the ability of commenting parts of your program becomes very useful for you to "park" part of the code for a while. Restore November 27, 2005, at 10: 42 AM by 81.154.199.248 Changed lines 12- 13 from: voide loop() to: void loop() Restore November 27, 2005, at 10: 17 AM by 81.154.199.248 Changed lines 24- 33 from: void printMode(int mode) void printByte(unsigned char c) void printString(unsigned char * s) void printI nteger(int n) void printHex(unsigned int n) void printOctal(unsigned int n) void printBinary(unsigned int n) unsigned long millis() void delay(unsigned long ms) void delayMicroseconds(unsigned long us) to: void void void void printMode(int mode) printByte(unsigned char c) printString(unsigned char * s) printI nteger(int n) void printHex(unsigned int n) void printOctal(unsigned int n) void printBinary(unsigned int n) unsigned long millis?() void delay(unsigned long ms) void delayMicroseconds(unsigned long us) Restore November 27, 2005, at 10: 15 AM by 81.154.199.248 Changed lines 16- 23 from:
- 130. void digitalWrite(int pin, int val) int digitalRead(int pin) int analogRead(int pin) void analogWrite(int pin, int val) void beginSerial(int baud) void serialWrite(unsigned char c) int serialAvailable() int serialRead() to: void digitalWrite(int pin, int val) int digitalRead(int pin) int analogRead(int pin) void analogWrite(int pin, int val) void beginSerial (int baud) void serialWrite(unsigned char c) int serialAvailable() int serialRead() Restore November 27, 2005, at 09: 58 AM by 81.154.199.248 Changed lines 11- 13 from: void setup voide loop to: void setup() voide loop() Restore November 27, 2005, at 09: 58 AM by 81.154.199.248 Added lines 9- 13: Program Structure void setup voide loop Restore November 27, 2005, at 09: 56 AM by 81.154.199.248 Added lines 6- 9: Variables Functions Restore November 27, 2005, at 09: 49 AM by 81.154.199.248 Added lines 1- 24: Arduino Reference These are the functions available in the arduino language void pinMode(int pin, int mode) void digitalWrite(int pin, int val) int digitalRead(int pin) int analogRead(int pin) void analogWrite(int pin, int val) void beginSerial(int baud) void serialWrite(unsigned char c) int serialAvailable() int serialRead() void printMode(int mode) void printByte(unsigned char c) void printString(unsigned char * s)
- 131. void printI nteger(int n) void printHex(unsigned int n) void printOctal(unsigned int n) void printBinary(unsigned int n) unsigned long millis() void delay(unsigned long ms) void delayMicroseconds(unsigned long us) Restore Edit Page | Page History | Printable View | All Recent Site Changes
- 132. Arduino : Reference / Reference Reference Language (extended) | Libraries | Comparison | Board Language Reference See the extended reference for more advanced features of the Arduino languages and the libraries page for interfacing with particular types of hardware. Arduino programs can be divided in three main parts: structure, values (variables and constants), and functions. The Arduino language is based on C/ C++. Structure Functions An Arduino program run in two parts: Digital I / O pinMode(pin, mode) digitalWrite(pin, value) int digitalRead(pin) void setup() void loop() setup() is preparation, and loop() is execution. I n the setup section, always at the top of your program, you would set pinModes, initialize serial communication, etc. The loop section is the code to be executed - - reading inputs, triggering outputs, etc. Variable Declaration Function Declaration void Analog I / O int analogRead(pin) analogWrite(pin, value) - PWM Advanced I / O shiftOut(dataPin, clockPin, bitOrder, value) unsigned long pulseI n(pin, value) Time unsigned long millis() delay(ms) delayMicroseconds(us) Control Structures if if...else for switch case while do... while break continue return Further Syntax ; (semicolon) {} (curly braces) / / (single line comment) / * * / (multi-line comment) Arithmetic Operators + (addition) - (subtraction) * (multiplication) / (division) % (modulo) Math min(x, y) max(x, y) abs(x) constrain(x, a, b) map(value, fromLow, fromHigh, toLow, toHigh) pow(base, exponent) sqrt(x) Trigonometry sin(rad) cos(rad) tan(rad) Random Numbers randomSeed(seed) long random(max) long random(min, max) Serial Communication Used for communication between the Arduino board and a computer or other devices. This communication happens via the Arduino board's serial or USB
- 133. Comparison Operators == (equal to) != (not equal to) < (less than) > (greater than) <= (less than or equal to) >= (greater than or equal to) Boolean Operators && (and) | | (or) ! (not) Compound Operators ++ (increment) -- (decrement) += (compound addition) -= (compound subtraction) * = (compound multiplication) / = (compound division) Variables Variables are expressions that you can use in programs to store values, such as a sensor reading from an analog pin. Constants Constants are particular values with specific meanings. HI GH | LOW I NPUT | OUTPUT true | false I nteger Constants Data Types Variables can have various types, which are described below. boolean char byte int unsigned int long unsigned long float double string array Reference connection and on digital pins 0 (RX) and 1 (TX). Thus, if you use these functions, you cannot also use pins 0 and 1 for digital i/ o. Serial.begin(speed) int Serial.available() int Serial.read() Serial.flush() Serial.print(data) Serial.println(data) Didn't find something? Check the extended reference or the libraries.
- 134. ASCI I chart Reference Home Corrections, suggestions, and new documentation should be posted to the Forum. The text of the Arduino reference is licensed under a Creative Commons Attribution-ShareAlike 3.0 License . Code samples in the reference are released into the public domain. (Printable View of http://www.arduino.cc/en/Reference/HomePage)
- 135. Arduino Buy | Download | Getting Started | Learning | Reference | Hardware | FAQ Reference search Blog » | Forum » | Playground » Language ( extended) | Libraries | Comparison | Board Define #define is a useful C component that allows you to give a name to a constant value before the program is compiled. Defined constants in arduino don't take up any program memory space on the chip. The compiler will replace references to these constants with the defined value at compile time. Arduino defines have the same syntax as C defines: Syntax #define constantName value Note that the # is necessary. Example #define ledPin 3 //The compiler will replace any mention of ledPin with the value 3 at compile time. Tip There is no semicolon after the #define statement. I f you include one, the compiler will throw cryptic errors further down the page. See Constants Reference Home Corrections, suggestions, and new documentation should be posted to the Forum. The text of the Arduino reference is licensed under a Creative Commons Attribution- ShareAlike 3.0 License. Code samples in the reference are released into the public domain. Edit Page | Page History | Printable View | All Recent Site Changes
- 136. Arduino search Buy | Download | Getting Started | Learning | Reference | Hardware | FAQ Reference Blog » | Forum » | Playground » Language ( extended) | Libraries | Comparison | Board #include #include is used to include outside libraries in your sketch. This gives the programmer access to a large group of standard C libraries (groups of pre- made functions), and also libraries written especially for Arduino. The main reference page for AVR C libraries (AVR is a reference to the Atmel chips on which the Arduino is based) is here. Note that #include, similar to #define, has no semicolon terminator, and the compiler will yield cryptic error messages if you add one. Example This example includes a library that is used to put data into the program space flash instead of ram. This saves the ram space for dynamic memory needs and makes large lookup tables more practical. #include <avr/pgmspace.h> prog_uint16_t myConstants[] PROGMEM = {0, 21140, 702 0,0,0,0,0,0,0,0,29810,8968,29762,29762,4500}; , 9128, 0, 25764, 8456, Reference Home Corrections, suggestions, and new documentation should be posted to the Forum. The text of the Arduino reference is licensed under a Creative Commons Attribution- ShareAlike 3.0 License. Code samples in the reference are released into the public domain. Edit Page | Page History | Printable View | All Recent Site Changes
- 137. Arduino Buy | Download | Getting Started | Learning | Reference | Hardware | FAQ Reference search Blog » | Forum » | Playground » Language ( extended) | Libraries | Comparison | Board analogReference(type) Description Configures the reference voltage used for analog input. The analogRead() function will return 1023 for an input equal to the reference voltage. The options are: DEFAULT: the default analog reference of 5 volts. I NTERNAL: an built- in reference, equal to 1.1 volts on the ATmega168 and 2.56 volts on the ATmega8. EXTERNAL: the voltage applied to the AREF pin is used as the reference. Parameters type: which type of reference to use (DEFAULT, I NTERNAL, or EXTERNAL). Returns None. Warning I t is a good idea to connect external voltages to the AREF pin through a 5K resistor. This will prevent possible internal damage to the Atmega chip if analogReference() software settings are incompatible with the current hardware setup. Connecting external voltages through a resistor also make it possible to switch the AREF voltage on the fly, say from the 5 volt DEFAULT setting, to a 3.3 volt EXTERNAL setting (and applied voltage), without the hardware setup affecting either ADC configuration. Use of the AREF pin The voltage applied to the AREF pin directly governs the ADC and sets the voltage at which the ADC will report its highest reading, 1023. Lower voltages applied to ADC (analog) pins will be scaled proportionally, so at the DEFAULT setting (5 volt internal connection), 2.5 volts on an analog pin will report approximately 512. The default configuration on all Arduino implementations is to have nothing connected externally to the AREF pin (Atmega pin 21). I n this case the DEFAULT analogReference software setting connects the AVCC voltage, internally, to the AREF pin. This appears to be a low impedance connection (high current) and voltages, other than AVCC, applied (erroneously) to the AREF pin in the DEFAULT setting could damage the ATMEGA chip. For this reason, connecting external voltages to the AREF pin through a 5K resistor is a good idea. The AREF pin may also be connected internally to an (internal) 1.1 volt source with analogReference(I NTERNAL). With this setting voltages applied to the ADC (analog) pins that are 1.1 volts (or higher) will report 1023, when read with analogRead. Lower voltages will report proportional values, so .55 volts will report about 512. The connection between the 1.1 volt source and the AREF pin is a very high impedance (low current) connection, so that reading the 1.1 (internally supplied) voltage at the AREF pin may only be done with a more expensive, high- impedance multimeter. An external voltage applied (erroneously) to AREF pin while using the I NTERNAL setting will not damage the chip, but will totally override the 1.1 volt source, and ADC readings will be governed by the external voltage. I t is still desirable to connect any external voltage to the AREF pin however, through a 5K resistor to avoid the problem cited above. The correct software setting for using the AREF pin with an external voltage is analogReference(EXTERNAL). This disconnects both of the internal references and the voltage applied externally to the AREF pin sets the reference voltage for the ADC. See also Description of the analog input pins
- 138. analogRead Reference Home Corrections, suggestions, and new documentation should be posted to the Forum. The text of the Arduino reference is licensed under a Creative Commons Attribution- ShareAlike 3.0 License. Code samples in the reference are released into the public domain. Edit Page | Page History | Printable View | All Recent Site Changes
- 139. Arduino Buy | Download | Getting Started | Learning | Reference | Hardware | FAQ Reference search Blog » | Forum » | Playground » Language ( extended) | Libraries | Comparison | Board attachInterrupt(interrupt, function, mode) Description Specifies a function to call when external interrupt 0 or 1 occurs, on digital pin 2 or 3, respectively. Note: I nside the attached function, delay() won't work and the value returned by millis() will not increment. Serial data received while in the function may be lost. You should declare as volatile any variables that you modify within the attached function. Parameters interrupt:: the number of the interrupt ( int): 0 or 1. function:: the function to call when the interrupt occurs; this function must take no parameters and return nothing. This function is sometimes referred to as an interrupt service routine. mode: defines when the interrupt should be triggered. Four contstants are predefined as valid values: LOW to trigger the interrupt whenever the pin is low, CHANGE to trigger the interrupt whenever the pin changes value RI SI NG to trigger when the pin goes from low to high, FALLI NG for when the pin goes from high to low. Returns none Using I nterrupts I nterrupts are useful for making things happen automatically in microcontroller programs, and can help solve timing problems. A good task for using an interrupt might be reading a rotary encoder, monitoring user input. I f you wanted to insure that a program always caught the pulses from a rotary encoder, never missing a pulse, it would make it very tricky to write a program to do anything else, because the program would need to constantly poll the sensor lines for the encoder, in order to catch pulses when they occurred. Other sensors have a similar interface dynamic too, such as trying to read a sound sensor that is trying to catch a click, or an infrared slot sensor (photo- interrupter) trying to catch a coin drop. I n all of these situations, using an interrupt can free the microcontroller to get some other work done while not missing the doorbell. Example int pin = 13; volatile int state = LOW; void setup() { pinMode(pin, OUTPUT); attachInterrupt(0, blink, CHANGE); } void loop() { digitalWrite(pin, state); }
- 140. void blink() { state = !state; } See also detachI nterrupt Reference Home Corrections, suggestions, and new documentation should be posted to the Forum. The text of the Arduino reference is licensed under a Creative Commons Attribution- ShareAlike 3.0 License. Code samples in the reference are released into the public domain. Edit Page | Page History | Printable View | All Recent Site Changes
- 141. Arduino Buy | Download | Getting Started | Learning | Reference | Hardware | FAQ Reference search Blog » | Forum » | Playground » Language ( extended) | Libraries | Comparison | Board detachInterrupt(interrupt) Description Turns off the given interrupt. Parameters interrupt: the number of interrupt to disable (0 or 1). See also attachI nterrupt() Reference Home Corrections, suggestions, and new documentation should be posted to the Forum. The text of the Arduino reference is licensed under a Creative Commons Attribution- ShareAlike 3.0 License. Code samples in the reference are released into the public domain. Edit Page | Page History | Printable View | All Recent Site Changes
- 142. Arduino Buy | Download | Getting Started | Learning | Reference | Hardware | FAQ Reference search Blog » | Forum » | Playground » Language ( extended) | Libraries | Comparison | Board The pointer operators & (reference) and * (dereference) Pointers are one of the more complicated subjects for beginners in learning C, and it is possible to write the vast majority of Arduino sketches without ever encountering pointers. However for manipulating certain data structures, the use of pointers can simplify the code, and and knowledge of manipulating pointers is handy to have in one's toolkit. Reference Home Corrections, suggestions, and new documentation should be posted to the Forum. The text of the Arduino reference is licensed under a Creative Commons Attribution- ShareAlike 3.0 License. Code samples in the reference are released into the public domain. Edit Page | Page History | Printable View | All Recent Site Changes
- 143. Arduino Buy | Download | Getting Started | Learning | Reference | Hardware | FAQ Reference search Blog » | Forum » | Playground » Language ( extended) | Libraries | Comparison | Board Bitwise AND (&), Bitwise OR (|), Bitwise XOR (^) Bitwise AND (&) The bitwise operators perform their calculations at the bit level of variables. They help solve a wide range of common programming problems. Much of the material below is from an excellent tutorial on bitwise math wihch may be found here. Description and Syntax Below are descriptions and syntax for all of the operators. Further details may be found in the referenced tutorial. Bitwise AND (&) The bitwise AND operator in C++ is a single ampersand, &, used between two other integer expressions. Bitwise AND operates on each bit position of the surrounding expressions independently, according to this rule: if both input bits are 1, the resulting output is 1, otherwise the output is 0. Another way of expressing this is: 0 0 1 1 0 1 0 1 - --------0 0 0 1 operand1 operand2 (operand1 & operand2) - returned result I n Arduino, the type int is a 16- bit value, so using & between two int expressions causes 16 simultaneous AND operations to occur. I n a code fragment like: int a = 92; // in binary: 0000000001011100 int b = 101; int c = a & b; // in binary: 0000000001100101 // result: 0000000001000100, or 68 in decimal. Each of the 16 bits in a and b are processed by using the bitwise AND, and all 16 resulting bits are stored in c, resulting in the value 01000100 in binary, which is 68 in decimal. One of the most common uses of bitwise AND is to select a particular bit (or bits) from an integer value, often called masking. See below for an example Bitwise OR (| ) The bitwise OR operator in C++ is the vertical bar symbol, | . Like the & operator, | operates independently each bit in its two surrounding integer expressions, but what it does is different (of course). The bitwise OR of two bits is 1 if either or both of the input bits is 1, otherwise it is 0. I n other words: 0 0 1 1 0 1 0 1 - --------0 1 1 1 operand1 operand2 (operand1 | operand2) - returned result Here is an example of the bitwise OR used in a snippet of C++ code: int a = 92; int b = 101; int c = a | b; // in binary: 0000000001011100 // in binary: 0000000001100101 // result: 0000000001111101, or 125 in decimal. Example Program A common job for the bitwise AND and OR operators is what programmers call Read- Modify- Write on a port. On microcontrollers, a port is an 8 bit number that represents something about the condition of the pins. Writing to a port
- 144. controls all of the pins at once. PORTD is a built- in constant that refers to the output states of digital pins 0,1,2,3,4,5,6,7. I f there is 1 in an bit position, then that pin is HI GH. (The pins already need to be set to outputs with the pinMode() command.) So if we write PORTD = B00110001; we have made pins 2,3 & 7 HI GH. One slight hitch here is that we may also have changeed the state of Pins 0 & 1, which are used by the Arduino for serial communications so we may have interfered with serial communication. Our algorithm for the program is: Get PORTD and clear out only the bits corresponding to the pins we wish to control (with bitwise AND). Combine the modified PORTD value with the new value for the pins under control (with biwise OR). int i; int j; // counter variable void setup(){ DDRD = DDRD | B11111100; // set direction bits for pins 2 to 7, leave 0 and 1 untouched (xx | 00 == xx) // same as pinMode(pin, OUTPUT) for pins 2 to 7 Serial.begin(9600); } void loop(){ for (i=0; i<64; i++){ PORTD = PORTD & B00000011; j = (i << 2); // clear out bits 2 - 7, leave pins 0 and 1 untouched (xx & 11 == xx) // shift variable up to pins 2 - 7 - to avoid pins 0 and 1 PORTD = PORTD | j; // combine the port information with the new information for LED pins Serial.println(PORTD, BIN); // debug to show masking delay(100); } } Bitwise XOR (^) There is a somewhat unusual operator in C++ called bitwise EXCLUSI VE OR, also known as bitwise XOR. (I n English this is usually pronounced "eks- or".) The bitwise XOR operator is written using the caret symbol ^. This operator is very similar to the bitwise OR operator | , only it evaluates to 0 for a given bit position when both of the input bits for that position are 1: 0 0 1 1 0 1 0 1 - --------0 1 1 0 operand1 operand2 (operand1 ^ operand2) - returned result Another way to look at bitwise XOR is that each bit in the result is a 1 if the input bits are different, or 0 if they are the same. Here is a simple code example: int x = 12; int y = 10; int z = x ^ y; // binary: 1100 // binary: 1010 // binary: 0110, or decimal 6 The ^ operator is often used to toggle (i.e. change from 0 to 1, or 1 to 0) some of the bits in an integer expression. I n a bitwise OR operation if there is a 1 in the mask bit, that bit is inverted; if there is a 0, the bit is not inverted and stays the same. Below is a program to blink digital pin 5. // Blink_Pin_5 // demo for Exclusive OR void setup(){ DDRD = DDRD | B00100000; // set digital pin five as OUTPUT Serial.begin(9600); } void loop(){ PORTD = PORTD ^ B00100000; delay(100); } // invert bit 5 (digital pin 5), leave others untouched
- 145. See Also &&(Boolean AND) | | (Boolean OR) Reference Home Corrections, suggestions, and new documentation should be posted to the Forum. The text of the Arduino reference is licensed under a Creative Commons Attribution- ShareAlike 3.0 License. Code samples in the reference are released into the public domain. Edit Page | Page History | Printable View | All Recent Site Changes
- 146. Arduino search Buy | Download | Getting Started | Learning | Reference | Hardware | FAQ Reference Blog » | Forum » | Playground » Language ( extended) | Libraries | Comparison | Board Bitwise NOT (~) The bitwise NOT operator in C++ is the tilde character ~. Unlike & and | , the bitwise NOT operator is applied to a single operand to its right. Bitwise NOT changes each bit to its opposite: 0 becomes 1, and 1 becomes 0. For example: 0 1 operand1 - - -------1 0 ~ operand1 int a = 103; // binary: 0000000001100111 int b = ~a; // binary: 1111111110011000 = -104 You might be surprised to see a negative number like - 104 as the result of this operation. This is because the highest bit in an int variable is the so- called sign bit. I f the highest bit is 1, the number is interpreted as negative. This encoding of positive and negative numbers is referred to as two's complement. For more information, see the Wikipedia article on two's complement. As an aside, it is interesting to note that for any integer x, ~x is the same as - x- 1. At times, the sign bit in a signed integer expression can cause some unwanted surprises. Reference Home Corrections, suggestions, and new documentation should be posted to the Forum. The text of the Arduino reference is licensed under a Creative Commons Attribution- ShareAlike 3.0 License. Code samples in the reference are released into the public domain. Edit Page | Page History | Printable View | All Recent Site Changes
- 147. Arduino Buy | Download | Getting Started | Learning | Reference | Hardware | FAQ Reference search Blog » | Forum » | Playground » Language ( extended) | Libraries | Comparison | Board bitshift left (<<), bitshift right (>>) Description From The Bitmath Tutorial in The Playground There are two bit shift operators in C++: the left shift operator << and the right shift operator >>. These operators cause the bits in the left operand to be shifted left or right by the number of positions specified by the right operand. More on bitwise math may be found here. Syntax variable << number_ of_ bits variable >> number_ of_ bits Parameters variable - (byte, int, long) number_ of_ bits integer <= 32 Example: int a = 5; int b = a << 3; int c = b >> 3; // binary: 0000000000000101 // binary: 0000000000101000, or 40 in decimal // binary: 0000000000000101, or back to 5 like we started with When you shift a value x by y bits (x << y), the leftmost y bits in x are lost, literally shifted out of existence: int a = 5; int b = a << 14; // binary: 0000000000000101 // binary: 0100000000000000 - the first 1 in 101 was discarded I f you are certain that none of the ones in a value are being shifted into oblivion, a simple way to think of the left- shift operator is that it multiplies the left operand by 2 raised to the right operand power. For example, to generate powers of 2, the following expressions can be employed: 1 << 1 << 1 << 0 1 2 == == == 1 2 4 1 << ... 1 << 1 << 3 == 8 8 9 == == 256 512 1 << 10 ... == 1024 When you shift x right by y bits (x >> y), and the highest bit in x is a 1, the behavior depends on the exact data type of x. I f x is of type int, the highest bit is the sign bit, determining whether x is negative or not, as we have discussed above. I n that case, the sign bit is copied into lower bits, for esoteric historical reasons: int x = -16; int y = x >> 3; // binary: 1111111111110000 // binary: 1111111111111110 This behavior, called sign extension, is often not the behavior you want. I nstead, you may wish zeros to be shifted in from the left. I t turns out that the right shift rules are different for unsigned int expressions, so you can use a typecast to suppress ones being copied from the left:
- 148. int x = -16; int y = (unsigned int)x >> 3; // binary: 1111111111110000 // binary: 0001111111111110 I f you are careful to avoid sign extension, you can use the right- shift operator >> as a way to divide by powers of 2. For example: int x = 1000; int y = x >> 3; // integer division of 1000 by 8, causing y = 125. Reference Home Corrections, suggestions, and new documentation should be posted to the Forum. The text of the Arduino reference is licensed under a Creative Commons Attribution- ShareAlike 3.0 License. Code samples in the reference are released into the public domain. Edit Page | Page History | Printable View | All Recent Site Changes
- 149. Arduino Buy | Download | Getting Started | Learning | Reference | Hardware | FAQ Reference search Blog » | Forum » | Playground » Language ( extended) | Libraries | Comparison | Board Port Registers Port registers allow for lower- level and faster manipulation of the i/ o pins of the microcontroller on an Arduino board. The chips used on the Arduino board (the ATmega8 and ATmega168) have three ports: B (digital pin 8 to 13) C (analog input pins) D (digital pins 0 to 7) Each port is controlled by three registers, which are also defined variables in the arduino language. The DDR register, determines whether the pin is an I NPUT or OUTPUT. The PORT register controls whether the pin is HI GH or LOW, and the PI N register reads the state of I NPUT pins set to input with pinMode(). The maps of the ATmega8 and ATmega168 chips show the ports. DDR and PORT registers may be both written to, and read. PI N registers correspond to the state of inputs and may only be read. PORTD maps to Arduino digital pins 0 to 7 DDRD – The Port D Data Direction Register PORTD – The Port D Data Register PI ND – The Port D I nput Pins Register - read only PORTB maps to Arduino digital pins 8 to 13 The two high bits (6 & 7) map to the crystal pins and are not usable DDRB – The Port B Data Direction Register PORTB – The Port B Data Register PI NB – The Port B I nput Pins Register - read only PORTC maps to Arduino analog pins 0 to 5. Pins 6 & 7 are only accessible on the Arduino Mini DDRC – The Port C Data Direction Register PORTC – The Port C Data Register PI NC – The Port C I nput Pins Register Each bit of these registers corresponds to a single pin; e.g. the low bit of DDRB, PORTB, and PI NB refers to pin PB0 (digital pin 8). For a complete mapping of Arduino pin numbers to ports and bits, see the diagram for your chip: ATmega8, ATmega168. (Note that some bits of a port may be used for things other than i/ o; be careful not to change the values of the register bits corresponding to them.) Examples Referring to the pin map above, the PortD registers control Arduino digital pins 0 – 7. You should note, however, that pins 0 & 1 are used for serial communications for programming and debugging the Arduino, so changing these pins should usually be avoided unless needed for serial input or output functions. Be aware that this can interfere with program download or debugging. DDRD is the direction register for Port D (Arduino digital pins 0- 7). The bits in this register control whether the pins in PORTD are configured as inputs or outputs so, for example: DDRD = B11111110; // sets Arduino pins 1 – 7 as outputs, pin 0 as input DDRD = DDRD | B11111100; // this is safer – it sets pins 2 to 7 as outputs // without changing the value of pins 0 & 1, which are RX & TX //See the bitwise operators reference pages and The Bitmath Tutorial in the Playground PORTB is the register for the state of the outputs. For example;
- 150. PORTD = B10101000; // sets digital pins 7,5,3 HIGH You will only see 5 volts on these pins however if the pins have been set as outputs using the DDRD register or with pinMode(). PI NB is the input register variable – it will read all of the digital input pins at the same time. Why use port manipulation? From The Bitmath Tutorial Generally speaking, doing this sort of thing is not a good idea. Why not? Here are a few reasons: The code is much more difficult for you to debug and maintain, and is a lot harder for other people to understand. I t only takes a few microseconds for the processor to execute code, but it might take hours for you to figure out why it isn't working right and fix it! Your time is valuable, right? But the computer's time is very cheap, measured in the cost of the electricity you feed it. Usually it is much better to write code the most obvious way. The code is less portable. I f you use digitalRead() and digitalWrite(), it is much easier to write code that will run on all of the Atmel microcontrollers, whereas the control and port registers can be different on each kind of microcontroller. I t is a lot easier to cause unintentional malfunctions with direct port access. Notice how the line DDRD = B11111110; above mentions that it must leave pin 0 as an input pin. Pin 0 is the receive line (RX) on the serial port. I t would be very easy to accidentally cause your serial port to stop working by changing pin 0 into an output pin! Now that would be very confusing when you suddenly are unable to receive serial data, wouldn't it? So you might be saying to yourself, great, why would I ever want to use this stuff then? Here are some of the positive aspects of direct port access: I f you are running low on program memory, you can use these tricks to make your code smaller. I t requires a lot fewer bytes of compiled code to simultaneously write a bunch of hardware pins simultaneously via the port registers than it would using a for loop to set each pin separately. I n some cases, this might make the difference between your program fitting in flash memory or not! Sometimes you might need to set multiple output pins at exactly the same time. Calling digitalWrite(10,HI GH); followed by digitalWrite(11,HI GH); will cause pin 10 to go HI GH several microseconds before pin 11, which may confuse certain time- sensitive external digital circuits you have hooked up. Alternatively, you could set both pins high at exactly the same moment in time using PORTB | = B1100; You may need to be able to turn pins on and off very quickly, meaning within fractions of a microsecond. I f you look at the source code in lib/ targets/ arduino/ wiring.c, you will see that digitalRead() and digitalWrite() are each about a dozen or so lines of code, which get compiled into quite a few machine instructions. Each machine instruction requires one clock cycle at 16MHz, which can add up in time- sensitive applications. Direct port access can do the same job in a lot fewer clock cycles. Reference Home Corrections, suggestions, and new documentation should be posted to the Forum. The text of the Arduino reference is licensed under a Creative Commons Attribution- ShareAlike 3.0 License. Code samples in the reference are released into the public domain. Edit Page | Page History | Printable View | All Recent Site Changes
- 151. Arduino search Buy | Download | Getting Started | Learning | Reference | Hardware | FAQ Reference Blog » | Forum » | Playground » Language ( extended) | Libraries | Comparison | Board compound bitwise AND (&=), compound bitwise OR (|=) The compound bitwise operators perform their calculations at the bit level of variables. They are often used to clear and set specific bits of a variable. See the bitwise AND (&) and bitwise OR (| ) operators for the details of their operation, and also the Bitmath Tutorial for more information on bitwise operators. compound bitwise AND (&=) Description The compound bitwise AND operator (&=) is often used with a variable and a constant to force particular bits in a variable to the LOW state (to 0). This is often referred to in programming guides as "clearing" or "resetting" bits. Syntax: x &= y; // equivalent to x = x & y; Parameters x: a char, int or long variable y: an integer constant or char, int, or long Example: First, a review of the Bitwise AND (&) operator 0 0 1 1 0 1 0 1 - - -------0 0 0 1 operand1 operand2 (operand1 & operand2) - returned result Bits that are "bitwise ANDed" with 0 are cleared to 0 so, if myByte is a byte variable, myByte & B00000000 = 0; Bits that are "bitwise ANDed" with 1 are unchanged so, myByte & B11111111 = myByte; Note: because we are dealing with bits in a bitwise operator - it is convenient to use the binary formatter with constants. The numbers are still the same value in other representations, they are just not as easy to understand. Also, B00000000 is shown for clarity, but zero in any number format is zero (hmmm something philosophical there?) Consequently - to clear (set to zero) bits 0 & 1 of a variable, while leaving the rest of the variable unchanged, use the compound bitwise AND operator (&=) with the constant B11111100 1 1 0 1 1 1 0 1 1 1 0 1 1 0 0 0 variable mask - - -------------------1 0 1 0 1 0 0 0 variable unchanged bits cleared
- 152. Here is the same representation with the variable's bits replaced with the symbol x x 1 x 1 x 1 x 1 x 1 x 1 x 0 x 0 variable mask - - -------------------x x x x x x 0 0 variable unchanged bits cleared So if: myByte = 10101010; myByte &= B1111100 == B10101000; compound bitwise OR (|=) Description The compound bitwise OR operator (| =) is often used with a variable and a constant to "set" (set to 1) particular bits in a variable. Syntax: x |= y; // equivalent to x = x | y; Parameters x: a char, int or long variable y: an integer constant or char, int, or long Example: First, a review of the Bitwise OR (| ) operator 0 0 1 1 0 1 0 1 - - -------0 1 1 1 operand1 operand2 (operand1 | operand2) - returned result Bits that are "bitwise ORed" with 0 are unchanged, so if myByte is a byte variable, myByte | B00000000 = myByte; Bits that are "bitwise ORed" with 1 are set to 1 so: myByte & B11111111 = B11111111; Consequently - to set bits 0 & 1 of a variable, while leaving the rest of the variable unchanged, use the compound bitwise AND operator (&=) with the constant B00000011 1 0 1 0 1 0 1 0 0 0 0 0 0 0 1 1 - - -------------------1 0 1 0 1 0 1 variable mask 1 variable unchanged bits set Here is the same representation with the variables bits replaced with the symbol x x x x x x x x x 0 0 0 0 0 0 1 1 - - -------------------x x x x x x 1 1 variable mask
- 153. variable unchanged bits set So if: myByte = B10101010; myByte |= B00000011 == B10101011; See Also & (bitwise AND) | (bitwise OR) && (Boolean AND) | | (Boolean OR) Reference Home Corrections, suggestions, and new documentation should be posted to the Forum. The text of the Arduino reference is licensed under a Creative Commons Attribution- ShareAlike 3.0 License. Code samples in the reference are released into the public domain. Edit Page | Page History | Printable View | All Recent Site Changes
- 154. Arduino search Buy | Download | Getting Started | Learning | Reference | Hardware | FAQ Reference Blog » | Forum » | Playground » Language ( extended) | Libraries | Comparison | Board floating point constants Similar to integer constants, floating point constants are used to make code more readable. Floating point constants are swapped at compile time for the value to which the expression evaluates. Examples: n = .005; Floating point constants can also be expressed in a variety of scientific notation. 'E' and 'e' are both accepted as valid exponent indicators. floating-point constant 10.0 2.34E5 67e -12 evaluates to: also evaluates to: 10 2.34 x 10⁵ 67.0 x 10⁻¹² 234000 .000000000067 Reference Home Corrections, suggestions, and new documentation should be posted to the Forum. The text of the Arduino reference is licensed under a Creative Commons Attribution- ShareAlike 3.0 License. Code samples in the reference are released into the public domain. Edit Page | Page History | Printable View | All Recent Site Changes
- 155. Arduino Buy | Download | Getting Started | Learning | Reference | Hardware | FAQ Reference search Blog » | Forum » | Playground » Language ( extended) | Libraries | Comparison | Board unsigned char Description An unsigned data type that occupies 1 byte of memory. Same as the byte datatype. The unsigned char datatype encodes numbers from 0 to 255. For consistency of Arduino programming style, the byte data type is to be preferred. Example unsigned char myChar = 240; See also byte int array Serial.println Reference Home Corrections, suggestions, and new documentation should be posted to the Forum. The text of the Arduino reference is licensed under a Creative Commons Attribution- ShareAlike 3.0 License. Code samples in the reference are released into the public domain. Edit Page | Page History | Printable View | All Recent Site Changes
- 156. Arduino search Buy | Download | Getting Started | Learning | Reference | Hardware | FAQ Reference Blog » | Forum » | Playground » Language ( extended) | Libraries | Comparison | Board Static The static keyword is used to create variables that are visible to only one function. However unlike local variables that get created and destroyed every time a function is called, static variables persist beyond the function call, preserving their data between function calls. Variables declared as static will only be created and initialized the first time a function is called. Example /* RandomWalk Paul Badger 2007 RandomWalk wanders up and down randomly between two endpoints. The maximum move in one loop is governed by the parameter "stepsize". A static variable is moved up and down a random amount. This technique is also known as "pink noise" and "drunken walk". */ #define randomWalkLowRange -20 #define randomWalkHighRange 20 int stepsize; int thisTime; int total; void setup() { Serial.begin(9600); } void loop() { // tetst randomWalk function stepsize = 5; thisTime = randomWalk(stepsize); Serial.println(thisTime); delay(10); } int randomWalk(int moveSize){ static int place; // variable to store value in random walk - declared static so that it stores // values in between function calls, but no other functions can change its value place = place + (random(-moveSize, moveSize + 1)); if (place < randomWalkLowRange){ place = place + (randomWalkLowRange - place); } else if(place > randomWalkHighRange){ place = place - (place - randomWalkHighRange); } // check lower and upper limits // reflect number back in positive direction // reflect number back in negative direction
- 157. return place; } Reference Home Corrections, suggestions, and new documentation should be posted to the Forum. The text of the Arduino reference is licensed under a Creative Commons Attribution- ShareAlike 3.0 License. Code samples in the reference are released into the public domain. Edit Page | Page History | Printable View | All Recent Site Changes
- 158. Arduino Buy | Download | Getting Started | Learning | Reference | Hardware | FAQ Reference search Blog » | Forum » | Playground » Language ( extended) | Libraries | Comparison | Board volatile keyword volatile is a keyword known as a variable qualifier, it is usually used before the datatype of a variable, to modify the way in which the compiler and subsequent program treats the variable. Declaring a variable volatile is a directive to the compiler. The compiler is software which translates your C/ C++ code into the machine code, which are the real instructions for the Atmega chip in the Arduino. Specifically, it directs the compiler to load the variable from RAM and not from a storage register, which is a temporary memory location where program variables are stored and manipulated. Under certain conditions, the value for a variable stored in registers can be inaccurate. A variable should be declared volatile whenever its value can be changed by something beyond the control of the code section in which it appears, such as a concurrently executing thread. I n the Arduino, the only place that this is likely to occur is in sections of code associated with interrupts, called an interrupt service routine. Example // toggles LED when interrupt pin changes state int pin = 13; volatile int state = LOW; void setup() { pinMode(pin, OUTPUT); attachInterrupt(0, blink, CHANGE); } void loop() { digitalWrite(pin, state); } void blink() { state = !state; } See also AttachI nterrupt Reference Home Corrections, suggestions, and new documentation should be posted to the Forum. The text of the Arduino reference is licensed under a Creative Commons Attribution- ShareAlike 3.0 License. Code samples in the reference are released into the public domain. Edit Page | Page History | Printable View | All Recent Site Changes
- 159. Arduino Buy | Download | Getting Started | Learning | Reference | Hardware | FAQ Reference search Blog » | Forum » | Playground » Language ( extended) | Libraries | Comparison | Board const keyword The const keyword stands for constant. I t is a variable qualifier that modifies the behavior of the variable. const makes a variable "read- only". This means that the variable can be used just as any other variable of its type, but its value cannot be changed. You will get a compiler error if you try to assign a value to a const variable. Example const float pi = 3.14; float x; // .... x = pi * 2; // it's fine to use const's in math pi = 7; // illegal - you can't write to (modify) a constant #define or const You can use either const or #define for creating numeric or string constants. For arrays, you will need to use const. See also: #define volatile Reference Home Corrections, suggestions, and new documentation should be posted to the Forum. The text of the Arduino reference is licensed under a Creative Commons Attribution- ShareAlike 3.0 License. Code samples in the reference are released into the public domain. Edit Page | Page History | Printable View | All Recent Site Changes
- 160. Arduino search Buy | Download | Getting Started | Learning | Reference | Hardware | FAQ Reference Blog » | Forum » | Playground » Language ( extended) | Libraries | Comparison | Board PROGMEM Store data in flash (program) memory instead of SRAM. There's a description of the various types of memory available on an Arduino board. The PROGMEM keyword is a variable modifier, it should be used only with the datatypes defined in pgmspace.h. I t tells the compiler "put this information into flash memory", instead of into SRAM, where it would normally go. PROGMEM is part of the pgmspace.h library. So you first need to include the library at the top your sketch, like this: #include <avr/pgmspace.h> Syntax dataType variableName[] PROGMEM = {dataInt0, dataInt1, dataInt3...}; program memory dataType - any program memory variable type (see below) variableName - the name for your array of data Note that because PROGMEM is a variable modifier, there is no hard and fast rule about where it should go, so the Arduino compiler accepts all of the definitions below, which are also synonymous. dataType variableName[] PROGMEM = {}; dataType PROGMEM variableName[] = {}; PROGMEM dataType variableName[] = {}; Common programming styles favor one of the first two however. While PROGMEM could be used on a single variable, it is really only worth the fuss if you have a larger block of data that needs to be stored, which is usually easiest in an array, (or another C data structure beyond our present discussion). Using PROGMEM is also a two- step procedure. After getting the data into Flash memory, it requires special methods (functions), also defined in the pgmspace.h library, to read the data from program memory back into SRAM, so we can do something useful with it. As mentioned above, it is important to use the datatypes outlined in pgmspace.h. Some cryptic bugs are generated by using ordinary datatypes for program memory calls. Below is a list of variable types to use. Floating point numbers in program memory do not appear to be supported. prog_char prog_uchar - a signed char (1 byte) -127 to 128 - an unsigned char (1 byte) 0 to 255 prog_int16_t prog_uint16_t prog_int32_t prog_uint32_t - a signed int (2 bytes) -32,767 to 32,768 an unsigned int (2 bytes) 0 to 65,535 a signed long (4 bytes) -2,147,483,648 to * 2,147,483,647. an unsigned long (4 bytes) 0 to 4,294,967,295 Example The following code fragments illustrate how to read and write unsigned chars (bytes) and ints (2 bytes) to PROGMEM. #include <avr/pgmspace.h> // save some unsigned ints PROGMEM prog_uint16_t charSet[] = { 65000, 32796, 16843, 10, 11234};
- 161. // save some chars prog_uchar signMessage[] PROGMEM = {"I AM PREDATOR, UNSEEN COMBATANT. CREATED BY THE UNITED STATES DEPART"}; unsigned int displayInt; int k; // counter variable char myChar; // read back a 2-byte int displayInt = pgm_read_word_near(charSet + k) // read back a char myChar = pgm_read_byte_near(signMessage + k); Arrays of strings I t is often convenient when working with large amounts of text, such as a project with an LCD display, to setup an array of strings. Because strings themselves are arrays, this is in actually an example of a two- dimensional array. These tend to be large structures so putting them into program memory is often desirable. The code below illustrates the idea. /* PROGMEM string demo How to store a table of strings in program memory (flash), and retrieve them. Information summarized from: http://www.nongnu.org/avr-libc/user-manual/pgmspace.html Setting up a table (array) of strings in program memory is slightly complicated, but here is a good template to follow. Setting up the strings is a two-step process. First define the strings. */ #include <avr/pgmspace.h> prog_char string_0[] PROGMEM = "String 0"; prog_char string_1[] PROGMEM = "String 1"; prog_char prog_char prog_char prog_char string_2[] string_3[] string_4[] string_5[] PROGMEM PROGMEM PROGMEM PROGMEM = = = = "String "String "String "String // "String 0" etc are strings to store - change to suit. 2"; 3"; 4"; 5"; // Then set up a table to refer to your strings. PGM_P PROGMEM string_table[] = { string_0, // change "string_table" name to suit string_1, string_2, string_3, string_4, string_5 }; char buffer[30]; // make sure this is large enough for the largest string it must hold void setup() { Serial.begin(9600); }
- 162. void loop() { /* Using the string table in program memory requires the use of special functions to retrieve the data. The strcpy_P function copies a string from program space to a string in RAM ("buffer"). Make sure your receiving string in RAM is large enough to hold whatever you are retrieving from program space. */ for (int i = 0; i < 6; i++) { strcpy_P(buffer, (char*)pgm_read_word(&(string_table[i]))); // Necessary casts and dereferencing, just copy. Serial.println( buffer ); delay( 500 ); } } See also Types of memory available on an Arduino board array string Reference Home Corrections, suggestions, and new documentation should be posted to the Forum. The text of the Arduino reference is licensed under a Creative Commons Attribution- ShareAlike 3.0 License. Code samples in the reference are released into the public domain. Edit Page | Page History | Printable View | All Recent Site Changes
- 163. Arduino Buy | Download | Getting Started | Learning | Reference | Hardware | FAQ Reference search Blog » | Forum » | Playground » Language ( extended) | Libraries | Comparison | Board interrupts() Description Re- enables interrupts (after they've been disabled by noI nterrupts()). I nterrupts allow certain important tasks to happen in the background and are enabled by default. Some functions will not work while interrupts are disabled, and incoming communication may be ignored. I nterrupts can slightly disrupt the timing of code, however, and may be disabled for particularly critical sections of code. Parameters None. Returns None. Example void setup() {} void loop() { noInterrupts(); // critical, time-sensitive code here interrupts(); // other code here } See Also noI nterrupts () Reference Home Corrections, suggestions, and new documentation should be posted to the Forum. The text of the Arduino reference is licensed under a Creative Commons Attribution- ShareAlike 3.0 License. Code samples in the reference are released into the public domain. Edit Page | Page History | Printable View | All Recent Site Changes
- 164. Arduino Buy | Download | Getting Started | Learning | Reference | Hardware | FAQ Reference search Blog » | Forum » | Playground » Language ( extended) | Libraries | Comparison | Board noInterrupts() Description Disables interrupts (you can re- enable them with interrupts()). I nterrupts allow certain important tasks to happen in the background and are enabled by default. Some functions will not work while interrupts are disabled, and incoming communication may be ignored. I nterrupts can slightly disrupt the timing of code, however, and may be disabled for particularly critical sections of code. Parameters None. Returns None. Example void setup() {} void loop() { noInterrupts(); // critical, time-sensitive code here interrupts(); // other code here } See Also interrupts() Reference Home Corrections, suggestions, and new documentation should be posted to the Forum. The text of the Arduino reference is licensed under a Creative Commons Attribution- ShareAlike 3.0 License. Code samples in the reference are released into the public domain. Edit Page | Page History | Printable View | All Recent Site Changes
- 165. Arduino Buy | Download | Getting Started | Learning | Reference | Hardware | FAQ Reference search Blog » | Forum » | Playground » Language ( extended) | Libraries | Comparison | Board Cast Description The cast operator translates one variable type into another and forces calculations to be performed in the cast type. Syntax (type)variable Parameters: type: any variable type (e.g. int, float, byte) variable: any variable or constant Example int i; float f; f = 3.6; i = (int) f; // now i is 3 Note When casting from a float to an int, the value is truncated not rounded. So both (int) 3.2 and (int) 3.7 are 3. Reference Home Corrections, suggestions, and new documentation should be posted to the Forum. The text of the Arduino reference is licensed under a Creative Commons Attribution- ShareAlike 3.0 License. Code samples in the reference are released into the public domain. Edit Page | Page History | Printable View | All Recent Site Changes
- 166. Arduino Buy | Download | Getting Started | Learning | Reference | Hardware | FAQ Reference search Blog » | Forum » | Playground » Language ( extended) | Libraries | Comparison | Board sizeof Description The sizeof operator returns the number of bytes in a variable type, or the number of bytes occupied by an array. Syntax sizeof(variable) Parameters variable: any variable type or array (e.g. int, float, byte) Example code The sizeof operator is useful for dealing with arrays (such as strings) where it is convenient to be able to change the size of the array without breaking other parts of the program. This program prints out a text string one character at a time. Try changing the text phrase. char myStr[] = "this is a test"; int i; void setup(){ Serial.begin(9600); } void loop() { for (i = 0; i < sizeof(myStr) - 1; i++){ Serial.print(i, DEC); Serial.print(" = "); Serial.println(myStr[i], BYTE); } } Note that sizeof returns the total number of bytes. So for larger variable types such as ints, the for loop would look something like this. for (i = 0; i < (sizeof(myInts)/sizeof(int)) - 1; i++) { // do something with myInts[i] } Reference Home Corrections, suggestions, and new documentation should be posted to the Forum. The text of the Arduino reference is licensed under a Creative Commons Attribution- ShareAlike 3.0 License. Code samples in the reference are released into the public domain. Edit Page | Page History | Printable View | All Recent Site Changes
- 168. Arduino search Buy | Download | Getting Started | Learning | Reference | Hardware | FAQ Reference Blog » | Forum » | Playground » Language ( extended) | Libraries | Comparison | Board Keywords Keywords are constants, variables and function names that are defined as part of the Arduino language. Avoid using keywords for variable names. # Constants HIGH LOW INPUT OUTPUT SERIAL DISPLAY PI HALF_PI TWO_PI LSBFIRST MSBFIRST CHANGE FALLING RISING false true null # Port Variables & Constants DDRB PINB PORTB PB0 PB1 PB2 PB3 PB4 PB5 PB6 PB7 DDRC PINC PORTC PC0 PC1 PC2 PC3 PC4 PC5 PC6 PC7 DDRD private protected public loop max return short millis min signed static % switch throw /* * try unsigned new null void () PI # Other return >> abs acos ; Serial += + Setup sin [] asin = atan atan2 & | boolean sq sqrt -= switch tan this true TWO_PI byte case ceil char void while Serial begin char class , // read print write println ?: constrain cos {} available digitalWrite digitalRead pinMode -default delay delayMicroseconds analogRead analogWrite attachInterrupts detachInterrupts / /** . else beginSerial serialWrite serialRead serialAvailable
- 169. PIND == printString PORTD PD0 PD1 exp false float printInteger printByte printHex PD2 float printOctal PD3 PD4 PD5 floor for < printBinary printNewline pulseIn PD6 <= shiftOut PD7 HALF_PI if ++ # Datatypes != boolean byte char int << < class <= default do double log && ! int || long Reference Home Corrections, suggestions, and new documentation should be posted to the Forum. The text of the Arduino reference is licensed under a Creative Commons Attribution- ShareAlike 3.0 License. Code samples in the reference are released into the public domain. Edit Page | Page History | Printable View | All Recent Site Changes
- 170. Arduino Buy | Download | Getting Started | Learning | Reference | Hardware | FAQ Login to Arduino Username: Password: Keep me logged in: ✔ Login Edit Page | Page History | Printable View | All Recent Site Changes search Blog » | Forum » | Playground »
- 171. Arduino Buy | Download | Getting Started | Learning | Reference | Hardware | FAQ Reference.Extended History Hide minor edits - Show changes to markup May 07, 2008, at 02: 44 PM by David A. Mellis Changed line 35 from: plus (addition) to: + (addition) Restore April 30, 2008, at 08: 49 AM by David A. Mellis Deleted lines 3- 4: The foundations page has extended descriptions of some hardware and software features. Restore April 23, 2008, at 10: 30 PM by David A. Mellis Changed line 8 from: (: table width=90% border=0 cellpadding=5 cellspacing=0: ) to: (: table width=100% border=0 cellpadding=5 cellspacing=0: ) Restore March 31, 2008, at 06: 26 AM by Paul Badger Changed lines 4- 5 from: foundations page has extended descriptions of some hardware and software features.'' to: The foundations page has extended descriptions of some hardware and software features. Restore March 31, 2008, at 06: 26 AM by Paul Badger Added lines 4- 5: foundations page has extended descriptions of some hardware and software features.'' Restore March 29, 2008, at 11: 30 AM by David A. Mellis Added lines 173- 177: I nterrupts interrupts() noI nterrupts () Restore March 29, 2008, at 09: 19 AM by David A. Mellis Added line 153: map(value, fromLow, fromHigh, toLow, toHigh) Restore search Blog » | Forum » | Playground »
- 172. March 28, 2008, at 06: 14 PM by David A. Mellis Added line 135: analogReference(type) Restore February 28, 2008, at 09: 49 AM by David A. Mellis Added line 85: true | false Restore J anuary 17, 2008, at 10: 02 AM by David A. Mellis - because hardware information doesn't belong in the programming language / api reference Deleted line 133: analog pins Restore J anuary 16, 2008, at 10: 40 AM by Paul Badger - people want to know where to find this info - why not here? Added line 134: analog pins Restore J anuary 11, 2008, at 12: 05 PM by David A. Mellis - moving the analog pin description to the hardware tutorials on the playground. Deleted line 133: analog pins Restore J anuary 11, 2008, at 11: 29 AM by David A. Mellis - moving variable scope to the code tutorials section (in the playground) Deleted line 107: variable scope Restore November 23, 2007, at 06: 13 PM by David A. Mellis - we're documenting the Arduino language here, not AVR LI BC. Changed lines 155- 156 from: math.h to: Restore November 23, 2007, at 05: 02 PM by Paul Badger Changed lines 86- 88 from: floating point contstants to: floating point constants Restore November 23, 2007, at 05: 02 PM by Paul Badger Changed line 85 from: I nteger Constants to: integer constants Restore November 23, 2007, at 05: 01 PM by Paul Badger Added line 85: I nteger Constants Changed lines 88- 89 from: I nteger Constants
- 173. to: Restore November 23, 2007, at 04: 46 PM by Paul Badger Restore November 23, 2007, at 04: 45 PM by Paul Badger Changed lines 85- 86 from: to: floating point contstants Restore November 23, 2007, at 04: 11 PM by Paul Badger Changed lines 154- 155 from: to: math.h Restore November 21, 2007, at 02: 11 PM by Paul Badger Deleted lines 118- 119: (: cell width=50% : ) Changed lines 124- 125 from: to: (: cell width=50% : ) Restore November 21, 2007, at 02: 10 PM by Paul Badger Added lines 119- 120: (: cell width=50% : ) Changed lines 126- 127 from: (: cell width=50% : ) to: Restore November 21, 2007, at 09: 33 AM by David A. Mellis - adding sqrt Changed lines 153- 154 from: to: sqrt(x) Restore November 21, 2007, at 09: 27 AM by David A. Mellis Changed lines 152- 153 from: pow(x, n) to: pow(base, exponent) Restore November 21, 2007, at 09: 24 AM by David A. Mellis Changed lines 152- 153 from: to: pow(x, n) Restore November 21, 2007, at 09: 22 AM by David A. Mellis Deleted lines 147- 149: sin(rad) cos(rad) tan(rad)
- 174. Added lines 153- 157: Trigonometry sin(rad) cos(rad) tan(rad) Restore November 21, 2007, at 09: 17 AM by David A. Mellis - adding trig functions (instead of general math.h page) Changed lines 148- 150 from: AVR math.h library to: sin(rad) cos(rad) tan(rad) Restore November 17, 2007, at 10: 56 PM by Paul Badger Changed lines 55- 57 from: * dereference operator? & reference operator? to: * dereference operator & reference operator Restore November 17, 2007, at 10: 55 PM by Paul Badger Changed lines 55- 57 from: * dereference operator? & indirection operator? to: * dereference operator? & reference operator? Restore November 17, 2007, at 10: 46 PM by Paul Badger Changed lines 55- 57 from: * dereference operator? &indirection operator? to: * dereference operator? & indirection operator? Restore November 17, 2007, at 10: 45 PM by Paul Badger Added lines 54- 57: Pointer Access Operators * dereference operator? &indirection operator? Restore November 13, 2007, at 08: 49 PM by Paul Badger Changed line 119 from: Atmega168 pin mapping chart to:
- 175. Atmega168 pin mapping Restore November 13, 2007, at 08: 48 PM by Paul Badger Changed line 119 from: to: Atmega168 pin mapping chart Restore November 06, 2007, at 03: 34 PM by Paul Badger Changed line 130 from: int analog pins to: analog pins Restore November 06, 2007, at 03: 33 PM by Paul Badger Added line 130: int analog pins Restore October 15, 2007, at 04: 55 AM by Paul Badger Changed lines 61- 62 from: port manipulation to: Port Manipulation Restore September 08, 2007, at 09: 23 AM by Paul Badger Added line 88: unsigned char Restore August 31, 2007, at 10: 17 PM by David A. Mellis Added lines 76- 82: Constants HI GH | LOW I NPUT | OUTPUT I nteger Constants Changed lines 107- 113 from: Constants HI GH | LOW I NPUT | OUTPUT I ntegerConstants to: Restore August 31, 2007, at 10: 16 PM by David A. Mellis - moved discussion of AVR libraries to the introduction of this page. Changed lines 166- 172 from: AVR Libraries Using AVR libraries Main Library page to:
- 176. Restore August 31, 2007, at 10: 14 PM by David A. Mellis Deleted lines 14- 15: void keyword Added lines 76- 78: Data Types void keyword Restore August 31, 2007, at 10: 14 PM by David A. Mellis - don't need a tutorial on functions and variables here. Changed lines 14- 15 from: Variable Declaration Function Declaration to: Restore August 31, 2007, at 10: 13 PM by David A. Mellis - moving reference to bottom of first column Deleted lines 111- 112: (: cell width=50% : ) Added lines 117- 118: (: cell width=50% : ) Restore August 31, 2007, at 10: 13 PM by David A. Mellis - AREF pin doesn't belong here; instead we should have a function to put it in use. Deleted lines 118- 121: Hardware Analog Reference Pin (AREF) Restore August 31, 2007, at 10: 11 PM by David A. Mellis - removing the pin mappings; there are links from the port manipulation reference instead. Deleted line 120: Atmega168 pin mapping Restore August 31, 2007, at 09: 45 PM by David A. Mellis Changed line 1 from: (: title Reference: ) to: (: title Extended Reference: ) Restore August 31, 2007, at 09: 45 PM by David A. Mellis Changed lines 10- 11 from: An Arduino program run in two parts: to: I n Arduino, the standard program entry point (main) is defined in the core and calls into two functions in a sketch. setup() is called once, then loop() is called repeatedly (until you reset your board). Restore August 31, 2007, at 09: 37 PM by David A. Mellis Changed lines 2- 7 from:
- 177. Arduino Reference Extended Version The Arduino language is based on C/ C++. to: Arduino Reference (extended) The Arduino language is based on C/ C++ and supports all standard C constructs and some C++ features. I t links against AVR Libc and allows the use of any of its functions; see its user manual for details. Restore August 11, 2007, at 08: 46 AM by Paul Badger Added lines 114- 115: (: cell width=50% : ) Added lines 120- 122: Hardware Changed lines 124- 125 from: (: cell width=50% : ) to: Analog Reference Pin (AREF) Restore J uly 17, 2007, at 11: 03 AM by Paul Badger Changed lines 66- 67 from: to: port manipulation Restore J uly 17, 2007, at 10: 58 AM by Paul Badger Changed lines 117- 118 from: to: Atmega168 pin mapping Restore J uly 17, 2007, at 10: 55 AM by Paul Badger Restore J uly 17, 2007, at 10: 47 AM by Paul Badger Changed lines 168- 169 from: Arduino 0008 contains headers for the following libraries: to: Using AVR libraries Restore J uly 17, 2007, at 10: 45 AM by Paul Badger Changed lines 166- 173 from: to: AVR Libraries Arduino 0008 contains headers for the following libraries: Main Library page Restore J uly 17, 2007, at 10: 36 AM by Paul Badger Deleted lines 79- 82:
- 178. Variables are expressions that you can use in programs to store values, like e.g. sensor reading from an analog pin. They can have various types, which are described below. Data Types Restore J uly 17, 2007, at 10: 35 AM by Paul Badger Changed lines 106- 107 from: Constants are labels for certain values which are preset in the Arduino compiler. You do not need to define or initialize constants. Arduino includes the following pre- defined constants. to: Deleted lines 157- 158: These functions allow you to trigger a function when the input to a pin changes value. Deleted lines 162- 163: Used for communication between the Arduino board and a computer or other devices. This communication happens via the Arduino board's serial or USB connection and on digital pins 0 (RX) and 1 (TX). Thus, if you use these functions, you cannot also use pins 0 and 1 for digital i/ o. Restore J uly 17, 2007, at 10: 33 AM by Paul Badger Added line 145: AVR math.h library Restore J uly 17, 2007, at 10: 30 AM by Paul Badger Deleted lines 15- 17: setup() is preparation, and loop() is execution. I n the setup section, always at the top of your program, you would set pinMode, initialize serial communication, etc. The loop section is the code to be executed - - reading inputs, triggering outputs, etc. Restore J uly 17, 2007, at 10: 29 AM by Paul Badger Added lines 1- 178: (: title Reference: ) Arduino Reference Extended Version The Arduino language is based on C/ C++. (: table width=90% border=0 cellpadding=5 cellspacing=0: ) (: cell width=50% : ) Structure An Arduino program run in two parts: void setup() void loop() setup() is preparation, and loop() is execution. I n the setup section, always at the top of your program, you would set pinMode, initialize serial communication, etc. The loop section is the code to be executed - - reading inputs, triggering outputs, etc. Variable Declaration Function Declaration void keyword Control Structures if if...else for
- 179. switch case while do... while break continue return Further Syntax ; (semicolon) {} (curly braces) / / (single line comment) / * * / (multi- line comment) #define #include Arithmetic Operators plus (addition) - (subtraction) * (multiplication) / (division) % (modulo) Comparison Operators == (equal to) != (not equal to) < (less than) > (greater than) <= (less than or equal to) >= (greater than or equal to) Boolean Operators && (and) | | (or) ! (not) Bitwise Operators & (bitwise and) | (bitwise or) ^ (bitwise xor) ~ (bitwise not) << (bitshift left) >> (bitshift right) Compound Operators ++ (increment) - - (decrement) += (compound addition) - = (compound subtraction) * = (compound multiplication) / = (compound division) &= (compound bitwise and) | = (compound bitwise or) Variables Variables are expressions that you can use in programs to store values, like e.g. sensor reading from an analog pin. They can have various types, which are described below. Data Types
- 180. boolean char byte int unsigned int long unsigned long float double string array Variable Scope & Qualifiers variable scope static volatile const PROGMEM Constants Constants are labels for certain values which are preset in the Arduino compiler. You do not need to define or initialize constants. Arduino includes the following pre- defined constants. HI GH | LOW I NPUT | OUTPUT I ntegerConstants Utilities cast (cast operator) sizeof() (sizeof operator) Reference keywords ASCI I chart (: cell width=50% : ) Functions Digital I / O pinMode(pin, mode) digitalWrite(pin, value) int digitalRead(pin) Analog I / O int analogRead(pin) analogWrite(pin, value) - PWM Advanced I / O shiftOut(dataPin, clockPin, bitOrder, value) unsigned long pulseI n (pin, value) Time unsigned long millis() delay(ms) delayMicroseconds(us) Math min(x, y) max(x, y)
- 181. abs(x) constrain(x, a, b) Random Numbers randomSeed(seed) long random(max) long random(min, max) External I nterrupts These functions allow you to trigger a function when the input to a pin changes value. attachI nterrupt(interrupt, function, mode) detachI nterrupt(interrupt) Serial Communication Used for communication between the Arduino board and a computer or other devices. This communication happens via the Arduino board's serial or USB connection and on digital pins 0 (RX) and 1 (TX). Thus, if you use these functions, you cannot also use pins 0 and 1 for digital i/ o. Serial.begin(speed) int Serial.available() int Serial.read() Serial.flush() Serial.print(data) Serial.println(data) (: tableend: ) Restore Edit Page | Page History | Printable View | All Recent Site Changes
- 182. Arduino : Reference / Extended Reference Reference Language (extended) | Libraries | Comparison | Board Arduino Reference (extended) The Arduino language is based on C/ C++ and supports all standard C constructs and some C++ features. I t links against AVR Libc and allows the use of any of its functions; see its user manual for details. Structure Functions I n Arduino, the standard program entry point (main) is defined in the core and calls into two functions in a sketch. setup() is called once, then loop() is called repeatedly (until you reset your board). Digital I / O pinMode(pin, mode) digitalWrite(pin, value) int digitalRead(pin) void setup() void loop() Control Structures if if...else for switch case while do... while break continue return Further Syntax ; (semicolon) {} (curly braces) / / (single line comment) / * * / (multi-line comment) #define #include Arithmetic Operators + (addition) - (subtraction) * (multiplication) / (division) % (modulo) Comparison Operators == (equal to) != (not equal to) < (less than) > (greater than) <= (less than or equal to) >= (greater than or equal to) Analog I / O analogReference(type) int analogRead(pin) analogWrite(pin, value) - PWM Advanced I / O shiftOut(dataPin, clockPin, bitOrder, value) unsigned long pulseI n(pin, value) Time unsigned long millis() delay(ms) delayMicroseconds(us) Math min(x, y) max(x, y) abs(x) constrain(x, a, b) map(value, fromLow, fromHigh, toLow, toHigh) pow(base, exponent) sqrt(x) Trigonometry sin(rad) cos(rad) tan(rad) Random Numbers randomSeed(seed) long random(max) long random(min, max) External I nterrupts attachI nterrupt(interrupt, function, mode) detachI nterrupt(interrupt) I nterrupts
- 183. Boolean Operators && (and) | | (or) ! (not) Pointer Access Operators * dereference operator & reference operator Bitwise Operators & (bitwise and) | (bitwise or) ^ (bitwise xor) ~ (bitwise not) << (bitshift left) >> (bitshift right) Port Manipulation Compound Operators ++ (increment) -- (decrement) += (compound addition) -= (compound subtraction) * = (compound multiplication) / = (compound division) &= (compound bitwise and) | = (compound bitwise or) Variables Constants HI GH | LOW I NPUT | OUTPUT true | false integer constants floating point constants Data Types void keyword boolean char unsigned char byte int unsigned int long unsigned long float double interrupts() noI nterrupts() Serial Communication Serial.begin(speed) int Serial.available() int Serial.read() Serial.flush() Serial.print(data) Serial.println(data)
- 184. string array Variable Scope & Qualifiers static volatile const PROGMEM Utilities cast (cast operator) sizeof() (sizeof operator) Reference keywords ASCI I chart Atmega168 pin mapping Reference Home Corrections, suggestions, and new documentation should be posted to the Forum. The text of the Arduino reference is licensed under a Creative Commons Attribution-ShareAlike 3.0 License . Code samples in the reference are released into the public domain. (Printable View of http://www.arduino.cc/en/Reference/Extended)
- 185. Arduino Buy | Download | Getting Started | Learning | Reference | Hardware | FAQ Reference search Blog » | Forum » | Playground » Language ( extended) | Libraries | Comparison | Board EEPROM Library The microcontroller on the Arduino board has 512 bytes of EEPROM: memory whose values are kept when the board is turned off (like a tiny hard drive). This library enables you to read and write those bytes. Functions byte EEPROM.read(address) EEPROM.write(address, value) Reference Home Corrections, suggestions, and new documentation should be posted to the Forum. The text of the Arduino reference is licensed under a Creative Commons Attribution- ShareAlike 3.0 License. Code samples in the reference are released into the public domain. Edit Page | Page History | Printable View | All Recent Site Changes
- 186. Arduino Buy | Download | Getting Started | Learning | Reference | Hardware | FAQ Reference search Blog » | Forum » | Playground » Language ( extended) | Libraries | Comparison | Board SoftwareSerial Library The Arduino hardware has built- in support for serial communication on pins 0 and 1 (which also goes to the computer via the USB connection). The native serial support happens via a piece of hardware (built into the chip) called a UART. This hardware allows the Atmega chip to receive serial communication even while working on other tasks, as long as there room in the 64 byte serial buffer. The SoftwareSerial library has been developed to allow serial communication on other digital pins of the Arduino, using software to replicate the functionality (hence the name "SoftwareSerial"). Limitations Because it's not supported by hardware, the library has a few limitations: Only speeds up to 9600 baud work Serial.available() doesn't work Serial.read() will wait until data arrives Only data received while Serial.read() is being called will be received. Data received at other times will be lost, since the chip is not "listening". SoftwareSerial appears to have some timing issues and/ or software issues. Check this forum thread for discussion. Software Serial Discussion. I n particular, if you are having problems using SoftwareSerial with an Atmega168 chip delete SoftwareSerial.o in your Arduino directory. Example SoftwareSerialExample Functions SoftwareSerial() begin() read() print() println() Reference Home Corrections, suggestions, and new documentation should be posted to the Forum. The text of the Arduino reference is licensed under a Creative Commons Attribution- ShareAlike 3.0 License. Code samples in the reference are released into the public domain. Edit Page | Page History | Printable View | All Recent Site Changes
- 187. Arduino Buy | Download | Getting Started | Learning | Reference | Hardware | FAQ Reference search Blog » | Forum » | Playground » Language ( extended) | Libraries | Comparison | Board Stepper Library This library allows you to control unipolar or bipolar stepper motors. To use it you will need a stepper motor, and the appropriate hardware to control it. For more on that, see Tom I goe's notes on steppers . Circuits Unipolar Steppers Bipolar Steppers Functions Stepper(steps, pin1, pin2) Stepper(steps, pin1, pin2, pin3, pin4) setSpeed(rpm) step(steps) Example Motor Knob Reference Home Corrections, suggestions, and new documentation should be posted to the Forum. The text of the Arduino reference is licensed under a Creative Commons Attribution- ShareAlike 3.0 License. Code samples in the reference are released into the public domain. Edit Page | Page History | Printable View | All Recent Site Changes
- 188. Arduino Buy | Download | Getting Started | Learning | Reference | Hardware | FAQ Reference search Blog » | Forum » | Playground » Language ( extended) | Libraries | Comparison | Board Wire Library This library allows you to communicate with I 2C / TWI devices. On the Arduino, SDA (data line) is on analog input pin 4, and SCL (clock line) is on analog input pin 5. Functions begin() begin(address) requestFrom(address, count) beginTransmission(address) endTransmission() send() byte available() byte receive() onReceive(handler) onRequest(handler) Note There are both 7- and 8- bit versions of I 2C addresses. 7 bits identify the device, and the eighth bit determines if it's being written to or read from. The Wire library uses 7 bit addresses throughout. I f you have a datasheet or sample code that uses 8 bit address, you'll want to drop the low bit, yielding an address between 0 and 127. Reference Home Corrections, suggestions, and new documentation should be posted to the Forum. The text of the Arduino reference is licensed under a Creative Commons Attribution- ShareAlike 3.0 License. Code samples in the reference are released into the public domain. Edit Page | Page History | Printable View | All Recent Site Changes
- 189. Arduino Buy | Download | Getting Started | Learning | Reference | Hardware | FAQ Login to Arduino Username: Password: Keep me logged in: ✔ Login Edit Page | Page History | Printable View | All Recent Site Changes search Blog » | Forum » | Playground »
- 190. Arduino Buy | Download | Getting Started | Learning | Reference | Hardware | FAQ search Blog » | Forum » | Playground » Reference.Libraries History Hide minor edits - Show changes to markup J uly 09, 2008, at 04: 10 PM by David A. Mellis Changed line 40 from: [[http: / / code.google.com/ p/ sserial2mobile/ | SSerial2Mobile] - send text messages or emails using a cell phone (via AT commands over software serial) to: SSerial2Mobile - send text messages or emails using a cell phone (via AT commands over software serial) Restore J uly 09, 2008, at 04: 10 PM by David A. Mellis - adding sserial2mobile Added line 40: [[http: / / code.google.com/ p/ sserial2mobile/ | SSerial2Mobile] - send text messages or emails using a cell phone (via AT commands over software serial) Restore J uly 03, 2008, at 11: 10 PM by David A. Mellis Added line 25: DateTime - a library for keeping track of the current date and time in software. Restore J uly 02, 2008, at 10: 58 AM by David A. Mellis - pointing Wire link to local documentation Added line 11: EEPROM - reading and writing to "permanent" storage Changed lines 14- 15 from: EEPROM - reading and writing to "permanent" storage to: Wire - Two Wire I nterface ( TWI / I 2C) for sending and receiving data over a net of devices or sensors. Changed lines 20- 21 from: Wire - Two Wire I nterface ( TWI / I 2C) for sending and receiving data over a net of devices or sensors. On the Arduino, SDA is on analog input pin 4, and SCL on analog input pin 5. to: Restore May 16, 2008, at 10: 49 PM by David A. Mellis Added line 35: PS2Keyboard - read characters from a PS2 keyboard. Restore May 10, 2008, at 12: 46 PM by David A. Mellis Added line 33: MsTimer2 - uses the timer 2 interrupt to trigger an action every N milliseconds. Restore May 10, 2008, at 12: 40 PM by David A. Mellis - adding link to the glcd library.
- 191. Changed lines 21- 24 from: Unofficial Libraries These are not (yet) included with the Arduino distribution and may change. to: Contributed Libraries Libraries written by members of the Arduino community. Added line 26: GLCD - graphics routines for LCD based on the KS0108 or equivalent chipset. Restore April 09, 2008, at 06: 39 PM by David A. Mellis Changed lines 25- 26 from: Simple Message System - send messages between Arduino and the computer OneWire - control devices (from Dallas Semiconductor) that use the One Wire protocol. to: Firmata - for communicating with applications on the computer using a standard serial protocol. Added line 29: LedControl - an alternative to the Matrix library for driving multiple LEDs with Maxim chips. Added line 32: OneWire - control devices (from Dallas Semiconductor) that use the One Wire protocol. Added line 35: Simple Message System - send messages between Arduino and the computer Changed lines 37- 38 from: LedControl - an alternative to the Matrix library for driving multiple LEDs with Maxim chips. to: Restore J anuary 20, 2008, at 11: 14 AM by David A. Mellis - adding link to the one wire library Added line 26: OneWire - control devices (from Dallas Semiconductor) that use the One Wire protocol. Restore December 05, 2007, at 08: 42 AM by David A. Mellis - adding LedControl library link. Added line 28: LedControl - for controlling LED matrices or seven- segment displays with a MAX7221 or MAX7219. Restore November 02, 2007, at 04: 20 PM by David A. Mellis Changed lines 37- 39 from: For a guide to writing your own libraries, see this tutorial . to: For a guide to writing your own libraries, see this tutorial . Restore November 02, 2007, at 04: 19 PM by David A. Mellis Changed lines 35- 37 from: To install, unzip the library to a sub- directory of the hardware/ libraries sub- directory of the Arduino application directory. Then launch the Arduino environment; you should see the library in the I mport Library menu. to:
- 192. To install, unzip the library to a sub- directory of the hardware/ libraries sub- directory of the Arduino application directory. Then launch the Arduino environment; you should see the library in the I mport Library menu. For a guide to writing your own libraries, see this tutorial . Restore November 02, 2007, at 02: 16 PM by David A. Mellis Changed line 35 from: To install, unzip the library to a sub- directory of the hardware/ libraries of the Arduino application directory. Then launch the Arduino environment; you should see the library in the I mport Library menu. to: To install, unzip the library to a sub- directory of the hardware/ libraries sub- directory of the Arduino application directory. Then launch the Arduino environment; you should see the library in the I mport Library menu. Restore November 02, 2007, at 02: 16 PM by David A. Mellis - cleaning up the instructions Changed lines 3- 6 from: To use an existing library in a sketch simply go to the Sketch menu, choose "I mport Library", and pick from the libraries available. This will insert an #include statement at the top of the sketch for each header (.h) file in the library's folder and make the library's functions and constants available to your sketch. Because libraries are uploaded to the board with your sketch, they increase the amount of space used by the ATmega8 on the board. I f a sketch no longer needs a library, simply delete its #include statements from the top of your code. to: To use an existing library in a sketch, go to the Sketch menu, choose "I mport Library", and pick from the libraries available. This will insert one or more #include statements at the top of the sketch and allow it to use the library. Because libraries are uploaded to the board with your sketch, they increase the amount of space it takes up. I f a sketch no longer needs a library, simply delete its #include statements from the top of your code. Changed lines 33- 35 from: LedControl - an alternative to the Matrix library for driving multiple LEDs with Maxim chips. to: LedControl - an alternative to the Matrix library for driving multiple LEDs with Maxim chips. To install, unzip the library to a sub- directory of the hardware/ libraries of the Arduino application directory. Then launch the Arduino environment; you should see the library in the I mport Library menu. Restore J une 20, 2007, at 05: 11 PM by David A. Mellis Changed line 33 from: [[http: / / www.wayoda.org/ arduino/ ledcontrol/ index.html | LedControl] - an alternative to the Matrix library for driving multiple LEDs with Maxim chips. to: LedControl - an alternative to the Matrix library for driving multiple LEDs with Maxim chips. Restore J une 20, 2007, at 05: 11 PM by David A. Mellis Changed lines 32- 33 from: X10 - Sending X10 signals over AC power lines to: X10 - Sending X10 signals over AC power lines [[http: / / www.wayoda.org/ arduino/ ledcontrol/ index.html | LedControl] - an alternative to the Matrix library for driving multiple LEDs with Maxim chips. Restore J une 20, 2007, at 10: 30 AM by Tom I goe Changed line 32 from:
- 193. * X10 - Sending X10 signals over AC power lines to: X10 - Sending X10 signals over AC power lines Restore J une 20, 2007, at 10: 29 AM by Tom I goe Changed line 32 from: * X10? - Sending X10 signals over AC power lines to: * X10 - Sending X10 signals over AC power lines Restore J une 20, 2007, at 10: 29 AM by Tom I goe Changed lines 31- 32 from: Servotimer1 - provides hardware support for Servo motors on pins 9 and 10 to: Servotimer1 - provides hardware support for Servo motors on pins 9 and 10 * X10? - Sending X10 signals over AC power lines Restore J une 13, 2007, at 01: 25 PM by David A. Mellis - adding LCD 4 bit link Changed lines 26- 27 from: LCD Library - control LCD displays TextString Library - handle strings to: LCD - control LCDs (using 8 data lines) LCD 4 Bit - control LCDs (using 4 data lines) TextString - handle strings Restore J une 13, 2007, at 01: 20 PM by David A. Mellis - adding links to the servo libraries Changed lines 29- 30 from: Stepper - Allows you to control a unipolar or bipolar stepper motor to: Servo - provides software support for Servo motors on any pins. Servotimer1 - provides hardware support for Servo motors on pins 9 and 10 Restore J une 09, 2007, at 06: 53 PM by David A. Mellis Changed lines 11- 12 from: SoftwareSerial Software Serial - a few examples for 0007 to: SoftwareSerial - for serial communication on any digital pins Stepper - for controlling stepper motors EEPROM - reading and writing to "permanent" storage Restore March 11, 2007, at 05: 18 PM by Tom I goe Added line 27: Stepper - Allows you to control a unipolar or bipolar stepper motor Restore J anuary 13, 2007, at 03: 17 AM by David A. Mellis - describing the unofficial libraries. Changed lines 23- 26 from:
- 194. Simple Message System LCD Library TextString Library Metro to: Simple Message System - send messages between Arduino and the computer LCD Library - control LCD displays TextString Library - handle strings Metro - help you time actions at regular intervals Restore J anuary 08, 2007, at 07: 36 AM by David A. Mellis Changed lines 9- 10 from: These are the "official" libraries that are included in the Arduino distribution. They are compatible with the Wiring versions, and the links below point to the (excellent) Wiring documentation. to: These are the "official" libraries that are included in the Arduino distribution. SoftwareSerial Software Serial - a few examples for 0007 These libraries are compatible Wiring versions, and the links below point to the (excellent) Wiring documentation. Changed lines 18- 21 from: (: if loggedin true: ) SoftwareSerial Software Serial - a few examples for 0007 (: if: ) to: Restore J anuary 06, 2007, at 11: 05 AM by Tom I goe Changed line 15 from: hi there to: SoftwareSerial Software Serial - a few examples for 0007 Restore J anuary 06, 2007, at 11: 04 AM by Tom I goe Changed line 14 from: (: if auth admin: ) to: (: if loggedin true: ) Restore J anuary 06, 2007, at 11: 04 AM by Tom I goe Changed line 14 from: (: if auth=admin: ) to: (: if auth admin: ) Restore J anuary 06, 2007, at 11: 03 AM by Tom I goe Changed line 14 from: (: if auth edit: ) to: (: if auth=admin: ) Restore J anuary 06, 2007, at 11: 02 AM by Tom I goe -
- 195. Changed line 14 from: (: if auth=edit: ) to: (: if auth edit: ) Restore J anuary 06, 2007, at 11: 02 AM by Tom I goe Changed line 14 from: (: if auth edit: ) to: (: if auth=edit: ) Restore J anuary 06, 2007, at 11: 01 AM by Tom I goe Changed lines 14- 17 from: to: (: if auth edit: ) hi there (: if: ) Restore November 07, 2006, at 09: 20 AM by David A. Mellis - adding twi/ i2c pins Changed lines 13- 14 from: Wire - Two Wire I nterface for sending and receiving data over a net of devices or sensors. to: Wire - Two Wire I nterface ( TWI / I 2C) for sending and receiving data over a net of devices or sensors. On the Arduino, SDA is on analog input pin 4, and SCL on analog input pin 5. Restore November 04, 2006, at 12: 48 PM by David A. Mellis Added lines 3- 8: To use an existing library in a sketch simply go to the Sketch menu, choose "I mport Library", and pick from the libraries available. This will insert an #include statement at the top of the sketch for each header (.h) file in the library's folder and make the library's functions and constants available to your sketch. Because libraries are uploaded to the board with your sketch, they increase the amount of space used by the ATmega8 on the board. I f a sketch no longer needs a library, simply delete its #include statements from the top of your code. Official Libraries Added lines 15- 16: Unofficial Libraries Restore November 04, 2006, at 12: 46 PM by David A. Mellis Added lines 1- 14: Libraries These are the "official" libraries that are included in the Arduino distribution. They are compatible with the Wiring versions, and the links below point to the (excellent) Wiring documentation. Matrix - Basic LED Matrix display manipulation library Sprite - Basic image sprite manipulation library for use in animations with an LED matrix Wire - Two Wire I nterface for sending and receiving data over a net of devices or sensors. These are not (yet) included with the Arduino distribution and may change. Simple Message System LCD Library TextString Library Metro
- 196. Restore Edit Page | Page History | Printable View | All Recent Site Changes
- 197. Arduino : Reference / Libraries Reference Language (extended) | Libraries | Comparison | Board Libraries To use an existing library in a sketch, go to the Sketch menu, choose "I mport Library", and pick from the libraries available. This will insert one or more #include statements at the top of the sketch and allow it to use the library. Because libraries are uploaded to the board with your sketch, they increase the amount of space it takes up. I f a sketch no longer needs a library, simply delete its #include statements from the top of your code. Official Libraries These are the "official" libraries that are included in the Arduino distribution. EEPROM - reading and writing to "permanent" storage SoftwareSerial - for serial communication on any digital pins Stepper - for controlling stepper motors Wire - Two Wire I nterface (TWI / I 2C) for sending and receiving data over a net of devices or sensors. These libraries are compatible Wiring versions, and the links below point to the (excellent) Wiring documentation. Matrix - Basic LED Matrix display manipulation library Sprite - Basic image sprite manipulation library for use in animations with an LED matrix Contributed Libraries Libraries written by members of the Arduino community. DateTime - a library for keeping track of the current date and time in software. Firmata - for communicating with applications on the computer using a standard serial protocol. GLCD - graphics routines for LCD based on the KS0108 or equivalent chipset. LCD - control LCDs (using 8 data lines) LCD 4 Bit - control LCDs (using 4 data lines) LedControl - for controlling LED matrices or seven-segment displays with a MAX7221 or MAX7219. LedControl - an alternative to the Matrix library for driving multiple LEDs with Maxim chips. TextString - handle strings Metro - help you time actions at regular intervals MsTimer2 - uses the timer 2 interrupt to trigger an action every N milliseconds. OneWire - control devices (from Dallas Semiconductor) that use the One Wire protocol. PS2Keyboard - read characters from a PS2 keyboard. Servo - provides software support for Servo motors on any pins. Servotimer1 - provides hardware support for Servo motors on pins 9 and 10 Simple Message System - send messages between Arduino and the computer SSerial2Mobile - send text messages or emails using a cell phone (via AT commands over software serial) X10 - Sending X10 signals over AC power lines To install, unzip the library to a sub- directory of the hardware/ libraries sub- directory of the Arduino application directory. Then launch the Arduino environment; you should see the library in the I mport Library menu. For a guide to writing your own libraries, see this tutorial. Reference Home Corrections, suggestions, and new documentation should be posted to the Forum. The text of the Arduino reference is licensed under a Creative Commons Attribution-ShareAlike 3.0 License . Code
- 198. samples in the reference are released into the public domain. (Printable View of http://www.arduino.cc/en/Reference/Libraries)
- 199. Arduino Buy | Download | Getting Started | Learning | Reference | Hardware | FAQ Login to Arduino Username: Password: Keep me logged in: ✔ Login Edit Page | Page History | Printable View | All Recent Site Changes search Blog » | Forum » | Playground »
- 200. Arduino Buy | Download | Getting Started | Learning | Reference | Hardware | FAQ search Blog » | Forum » | Playground » Reference.Comparison History Hide minor edits - Show changes to markup J une 15, 2007, at 05: 38 PM by David A. Mellis Changed lines 3- 4 from: The Arduino language (based on Wiring) is implemented in C, and therefore has some differences from the Processing language, which is based on J ava. to: The Arduino language (based on Wiring) is implemented in C/ C++, and therefore has some differences from the Processing language, which is based on J ava. Restore J une 15, 2007, at 05: 38 PM by David A. Mellis - updating serial examples to current api Changed line 30 from: (: cellnr: ) printString("hello world"); printNewline(); to: (: cellnr: ) Serial.println("hello world"); Changed line 32 from: (: cellnr bgcolor=#999999: ) int i = 5; printI nteger(i); printNewline(); to: (: cellnr bgcolor=#999999: ) int i = 5; Serial.println(i); Changed line 34 from: (: cellnr: ) int i = 5; printString("i = "); printI nteger(i); printNewline(); to: (: cellnr: ) int i = 5; Serial.print("i = "); Serial.print(i); Serial.println(); Restore November 04, 2006, at 12: 45 PM by David A. Mellis Added lines 1- 37: Arduino/ Processing Language Comparison The Arduino language (based on Wiring) is implemented in C, and therefore has some differences from the Processing language, which is based on J ava.
- 201. Arrays (: table width=75% cellspacing=0 cellpadding=5: ) (: cellnr width=50% bgcolor=#999999: ) Arduino (: cell width=50% bgcolor=#CCCCCC: ) Processing (: cellnr: ) int bar[8]; bar[0] = 1; (: cell: ) int[] bar = new int[8]; bar[0] = 1; (: cellnr bgcolor=#999999: ) int foo[] = { 0, 1, 2 }; (: cell bgcolor=#CCCCCC: ) int foo[] = { 0, 1, 2 }; or int[] foo = { 0, 1, 2 }; (: tableend: ) Loops (: table width=75% cellspacing=0 cellpadding=5: ) (: cellnr width=50% bgcolor=#999999: ) Arduino (: cell width=50% bgcolor=#CCCCCC: ) Processing (: cellnr: ) int i; for (i = 0; i < 5; i++) { ... } (: cell: ) for (int i = 0; i < 5; i++) { ... } (: tableend: ) Printing (: table width=75% cellspacing=0 cellpadding=5: ) (: cellnr width=50% bgcolor=#999999: ) Arduino (: cell width=50% bgcolor=#CCCCCC: ) Processing (: cellnr: ) printString("hello world"); printNewline(); (: cell: ) println("hello world"); (: cellnr bgcolor=#999999: ) int i = 5; printI nteger(i); printNewline(); (: cell bgcolor=#CCCCCC: ) int i = 5; println(i); (: cellnr: ) int i = 5; printString("i = "); printI nteger(i); printNewline(); (: cell: ) int i = 5; println("i = " + i); (: tableend: ) Restore Edit Page | Page History | Printable View | All Recent Site Changes
- 202. Arduino : Reference / Comparison Reference Language (extended) | Libraries | Comparison | Board Arduino/ Processing Language Comparison The Arduino language (based on Wiring) is implemented in C/ C++, and therefore has some differences from the Processing language, which is based on J ava. Arrays Arduino Processing int bar[8]; bar[0] = 1; int[] bar = new int[8]; bar[0] = 1; int foo[] = { 0, 1, 2 }; int foo[] = { 0, 1, 2 }; or int[] foo = { 0, 1, 2 }; Loops Arduino Processing int i; for (i = 0; i < 5; i++) { ... } for (int i = 0; i < 5; i++) { ... } Printing Arduino Processing Serial.println("hello world"); println("hello world"); int i = 5; Serial.println(i); int i = 5; println(i); int i = 5; Serial.print("i = "); Serial.print(i); Serial.println(); int i = 5; println("i = " + i); Reference Home Corrections, suggestions, and new documentation should be posted to the Forum. The text of the Arduino reference is licensed under a Creative Commons Attribution-ShareAlike 3.0 License . Code samples in the reference are released into the public domain. (Printable View of http://www.arduino.cc/en/Reference/Comparison)
- 203. Arduino Buy | Download | Getting Started | Learning | Reference | Hardware | FAQ Login to Arduino Username: Password: Keep me logged in: ✔ Login Edit Page | Page History | Printable View | All Recent Site Changes search Blog » | Forum » | Playground »
- 204. Arduino search Buy | Download | Getting Started | Learning | Reference | Hardware | FAQ Blog » | Forum » | Playground » Reference.Board History Hide minor edits - Show changes to markup April 23, 2008, at 10: 30 PM by David A. Mellis Changed line 23 from: (: table width=95% border=0 cellpadding=5 cellspacing=0: ) to: (: table width=100% border=0 cellpadding=5 cellspacing=0: ) Restore April 18, 2008, at 08: 54 PM by David A. Mellis Changed lines 88- 89 from: AREF. Reference voltage for the analog inputs. Not currently supported by the Arduino software. to: AREF. Reference voltage for the analog inputs. Used with analogReference(). Restore March 09, 2008, at 08: 32 PM by David A. Mellis Changed line 32 from: Flash Memory 16 KB (of which 2 KB used by bootloader) to: Flash Memory 16 KB Changed line 46 from: Flash Memory 8 KB (of which 1 KB used by bootloader) to: Flash Memory 8 KB Restore March 09, 2008, at 08: 31 PM by David A. Mellis Added lines 21- 53: Microcontrollers (: table width=95% border=0 cellpadding=5 cellspacing=0: ) (: cell width=50% : ) ATmega168 (used on most Arduino boards) Digital I / O Pins 14 (of which 6 provide PWM output) Analog I nput Pins 6 (DI P) or 8 (SMD) DC Current per I / O Pin 40 mA Flash Memory 16 KB (of which 2 KB used by bootloader) SRAM 1 KB EEPROM 512 bytes (datasheet) (: cell width=50% : ) ATmega8 (used on some older board)
- 205. Digital I / O Pins 14 (of which 3 provide PWM output) Analog I nput Pins 6 DC Current per I / O Pin 40 mA Flash Memory 8 KB (of which 1 KB used by bootloader) SRAM 1 KB EEPROM 512 bytes (datasheet) (: tableend: ) Restore February 13, 2008, at 09: 16 PM by David A. Mellis - moving the board page here from the guide, since it's not really about "getting started" Added lines 1- 57: Introduction to the Arduino Board Looking at the board from the top down, this is an outline of what you will see (parts of the board you might interact with in the course of normal use are highlighted): Starting clockwise from the top center: Analog Reference pin (orange) Digital Ground (light green) Digital Pins 2- 13 (green) Digital Pins 0- 1/ Serial I n/ Out - TX/ RX (dark green) - These pins cannot be used for digital i/ o ( digitalRead and digitalWrite) if you are also using serial communication (e.g. Serial.begin) . Reset Button - S1 (dark blue) I n- circuit Serial Programmer (blue- green) Analog I n Pins 0- 5 (light blue) Power and Ground Pins (power: orange, grounds: light orange) External Power Supply I n (9- 12VDC) - X1 (pink) Toggles External Power and USB Power (place jumper on two pins closest to desired supply) - SV1 (purple) USB (used for uploading sketches to the board and for serial communication between the board and the computer; can be used to power the board) (yellow) Digital Pins I n addition to the specific functions listed below, the digital pins on an Arduino board can be used for general purpose input and output via the pinMode() , digitalRead(), and digitalWrite() commands. Each pin has an internal pull- up resistor which can be turned on and off using digitalWrite() (w/ a value of HI GH or LOW, respectively) when the pin is configured as an input.
- 206. The maximum current per pin is 40 mA. Serial: 0 (RX) and 1 (TX). Used to receive (RX) and transmit (TX) TTL serial data. On the Arduino Diecimila, these pins are connected to the corresponding pins of the FTDI USB- to- TTL Serial chip. On the Arduino BT, they are connected to the corresponding pins of the WT11 Bluetooth module. On the Arduino Mini and LilyPad Arduino, they are intended for use with an external TTL serial module (e.g. the Mini- USB Adapter). External I nterrupts: 2 and 3. These pins can be configured to trigger an interrupt on a low value, a rising or falling edge, or a change in value. See the attachI nterrupt() function for details. PWM: 3, 5, 6, 9, 10, and 11. Provide 8- bit PWM output with the analogWrite() function. On boards with an ATmega8, PWM output is available only on pins 9, 10, and 11. BT Reset: 7. (Arduino BT - only) Connected to the reset line of the bluetooth module. SPI : 10 (SS), 11 (MOSI ), 12 (MI SO), 13 (SCK). These pins support SPI communication, which, although provided by the underlying hardware, is not currently included in the Arduino language. LED: 13. On the Diecimila and LilyPad, there is a built- in LED connected to digital pin 13. When the pin is HI GH value, the LED is on, when the pin is LOW, it's off. Analog Pins I n addition to the specific functions listed below, the analog input pins support 10- bit analog- to- digital conversion (ADC) using the analogRead() function. Most of the analog inputs can also be used as digital pins: analog input 0 as digital pin 14 through analog input 5 as digital pin 19. Analog inputs 6 and 7 (present on the Mini and BT) cannot be used as digital pins. I 2 C: 4 (SDA) and 5 (SCL). Support I 2 C (TWI ) communication using the Wire library (documentation on the Wiring website). Power Pins VI N (sometimes labelled "9V"). The input voltage to the Arduino board when it's using an external power source (as opposed to 5 volts from the USB connection or other regulated power source). You can supply voltage through this pin, or, if supplying voltage via the power jack, access it through this pin. Note that different boards accept different input voltages ranges, please see the documentation for your board. Also note that the LilyPad has no VI N pin and accepts only a regulated input. 5V. The regulated power supply used to power the microcontroller and other components on the board. This can come either from VI N via an on- board regulator, or be supplied by USB or another regulated 5V supply. 3V3. (Diecimila- only) A 3.3 volt supply generated by the on- board FTDI chip. GND. Ground pins. Other Pins AREF. Reference voltage for the analog inputs. Not currently supported by the Arduino software. Reset. (Diecimila- only) Bring this line LOW to reset the microcontroller. Typically used to add a reset button to shields which block the one on the board. Restore Edit Page | Page History | Printable View | All Recent Site Changes
- 207. Arduino : Reference / Board Reference Language (extended) | Libraries | Comparison | Board I ntroduction to the Arduino Board Looking at the board from the top down, this is an outline of what you will see (parts of the board you might interact with in the course of normal use are highlighted): Starting clockwise from the top center: Analog Reference pin (orange) Digital Ground (light green) Digital Pins 2-13 (green) Digital Pins 0-1/ Serial I n/ Out - TX/ RX (dark green) - These pins cannot be used for digital i/ o (digitalRead and digitalWrite) if you are also using serial communication (e.g. Serial.begin). Reset Button - S1 (dark blue) I n- circuit Serial Programmer (blue-green) Analog I n Pins 0-5 (light blue) Power and Ground Pins (power: orange, grounds: light orange) External Power Supply I n (9- 12VDC) - X1 (pink) Toggles External Power and USB Power (place jumper on two pins closest to desired supply) - SV1 (purple) USB (used for uploading sketches to the board and for serial communication between the board and the computer; can be used to power the board) (yellow) Microcontrollers ATmega168 (used on most Arduino boards) ATmega8 (used on some older board) Digital I / O Pins 14 (of which 6 provide PWM output) Digital I / O Pins 14 (of which 3 provide PWM output) Analog I nput Pins 6 (DI P) or 8 (SMD) Analog I nput Pins 6 40 mA DC Current per I / O Pin 40 mA DC Current per I / O Pin
- 208. Flash Memory 16 KB Flash Memory SRAM 1 KB SRAM 1 KB EEPROM 512 bytes EEPROM 512 bytes (datasheet) 8 KB (datasheet) Digital Pins I n addition to the specific functions listed below, the digital pins on an Arduino board can be used for general purpose input and output via the pinMode() , digitalRead() , and digitalWrite() commands. Each pin has an internal pull- up resistor which can be turned on and off using digitalWrite() (w/ a value of HI GH or LOW, respectively) when the pin is configured as an input. The maximum current per pin is 40 mA. Serial: 0 (RX) and 1 (TX). Used to receive (RX) and transmit (TX) TTL serial data. On the Arduino Diecimila, these pins are connected to the corresponding pins of the FTDI USB- to-TTL Serial chip. On the Arduino BT, they are connected to the corresponding pins of the WT11 Bluetooth module. On the Arduino Mini and LilyPad Arduino, they are intended for use with an external TTL serial module (e.g. the Mini-USB Adapter). External I nterrupts: 2 and 3. These pins can be configured to trigger an interrupt on a low value, a rising or falling edge, or a change in value. See the attachI nterrupt() function for details. PWM: 3, 5, 6, 9, 10, and 11. Provide 8-bit PWM output with the analogWrite() function. On boards with an ATmega8, PWM output is available only on pins 9, 10, and 11. BT Reset: 7. (Arduino BT- only) Connected to the reset line of the bluetooth module. SPI : 10 (SS), 11 (MOSI ), 12 (MI SO), 13 (SCK). These pins support SPI communication, which, although provided by the underlying hardware, is not currently included in the Arduino language. LED: 13. On the Diecimila and LilyPad, there is a built-in LED connected to digital pin 13. When the pin is HI GH value, the LED is on, when the pin is LOW, it's off. Analog Pins I n addition to the specific functions listed below, the analog input pins support 10- bit analog-to-digital conversion (ADC) using the analogRead() function. Most of the analog inputs can also be used as digital pins: analog input 0 as digital pin 14 through analog input 5 as digital pin 19. Analog inputs 6 and 7 (present on the Mini and BT) cannot be used as digital pins. I 2C: 4 (SDA) and 5 (SCL). Support I 2C (TWI ) communication using the Wire library (documentation on the Wiring website). Power Pins VI N (sometimes labelled "9V"). The input voltage to the Arduino board when it's using an external power source (as opposed to 5 volts from the USB connection or other regulated power source). You can supply voltage through this pin, or, if supplying voltage via the power jack, access it through this pin. Note that different boards accept different input voltages ranges, please see the documentation for your board. Also note that the LilyPad has no VI N pin and accepts only a regulated input. 5V. The regulated power supply used to power the microcontroller and other components on the board. This can come either from VI N via an on- board regulator, or be supplied by USB or another regulated 5V supply. 3V3. (Diecimila-only) A 3.3 volt supply generated by the on-board FTDI chip.
- 209. GND. Ground pins. Other Pins AREF. Reference voltage for the analog inputs. Used with analogReference(). Reset. (Diecimila- only) Bring this line LOW to reset the microcontroller. Typically used to add a reset button to shields which block the one on the board. Reference Home Corrections, suggestions, and new documentation should be posted to the Forum. The text of the Arduino reference is licensed under a Creative Commons Attribution-ShareAlike 3.0 License . Code samples in the reference are released into the public domain. (Printable View of http://www.arduino.cc/en/Reference/Board)
- 210. Arduino Buy | Download | Getting Started | Learning | Reference | Hardware | FAQ Login to Arduino Username: Password: Keep me logged in: ✔ Login Edit Page | Page History | Printable View | All Recent Site Changes search Blog » | Forum » | Playground »
- 211. Arduino Buy | Download | Getting Started | Learning | Reference | Hardware | FAQ search Blog » | Forum » | Playground » Reference.Setup History Hide minor edits - Show changes to markup J anuary 02, 2008, at 10: 24 PM by Paul Badger Changed lines 3- 4 from: The setup() function is called when your program starts. Use it to initialize your variables, pin modes, start using libraries, etc. to: The setup() function is called when your program starts. Use it to initialize your variables, pin modes, start using libraries, etc. The setup function will only run once, after each powerup or reset of the Arduino board. Restore August 31, 2007, at 10: 15 PM by David A. Mellis Changed lines 17- 22 from: if (digitalRead(buttonPin) == HIGH) serialWrite('H'); else serialWrite('L'); delay(1000); to: // ... Restore April 16, 2007, at 09: 18 AM by Paul Badger Changed lines 1- 2 from: setup() to: setup() Restore April 16, 2007, at 09: 17 AM by Paul Badger Deleted lines 25- 26: Reference Home Restore March 24, 2006, at 04: 36 PM by J eff Gray Changed lines 1- 2 from: Setup to: setup() Restore March 24, 2006, at 04: 35 PM by J eff Gray Changed lines 1- 2 from:
- 212. setup to: Setup Restore March 24, 2006, at 04: 30 PM by J eff Gray Deleted line 5: Deleted line 6: Restore March 24, 2006, at 01: 37 PM by J eff Gray Restore J anuary 12, 2006, at 05: 34 PM by 82.186.237.10 Added lines 28- 29: Reference Home Restore December 16, 2005, at 03: 13 PM by 85.18.81.162 Changed lines 1- 3 from: Setup to: setup The setup() function is called when your program starts. Use it to initialize your variables, pin modes, start using libraries, etc. Example int buttonPin = 3; void setup() { beginSerial(9600); pinMode(buttonPin, INPUT); } void loop() { if (digitalRead(buttonPin) == HIGH) serialWrite('H'); else serialWrite('L'); delay(1000); } Restore November 27, 2005, at 09: 58 AM by 81.154.199.248 Added lines 1- 3: Setup Restore Edit Page | Page History | Printable View | All Recent Site Changes
- 213. Arduino : Reference / Setup Reference Language (extended) | Libraries | Comparison | Board setup() The setup() function is called when your program starts. Use it to initialize your variables, pin modes, start using libraries, etc. The setup function will only run once, after each powerup or reset of the Arduino board. Example int buttonPin = 3; void setup() { beginSerial(9600); pinMode(buttonPin, INPUT); } void loop() { // ... } Reference Home Corrections, suggestions, and new documentation should be posted to the Forum. The text of the Arduino reference is licensed under a Creative Commons Attribution-ShareAlike 3.0 License . Code samples in the reference are released into the public domain. (Printable View of http://www.arduino.cc/en/Reference/Setup)
- 214. Arduino Buy | Download | Getting Started | Learning | Reference | Hardware | FAQ Login to Arduino Username: Password: Keep me logged in: ✔ Login Edit Page | Page History | Printable View | All Recent Site Changes search Blog » | Forum » | Playground »
- 215. Arduino Buy | Download | Getting Started | Learning | Reference | Hardware | FAQ search Blog » | Forum » | Playground » Reference.Loop History Hide minor edits - Show changes to markup April 16, 2007, at 09: 19 AM by Paul Badger Deleted lines 29- 30: Reference Home Restore March 24, 2006, at 04: 35 PM by J eff Gray Changed lines 1- 2 from: loop() to: loop() Restore March 24, 2006, at 01: 42 PM by J eff Gray Deleted line 7: Restore March 24, 2006, at 01: 42 PM by J eff Gray Added lines 1- 32: loop() After creating a setup() function, which initializes and sets the initial values, the loop() function does precisely what its name suggests, and loops consecutively, allowing your program to change and respond. Use it to actively control the Arduino board. Example int buttonPin = 3; // setup initializes serial and the button pin void setup() { beginSerial(9600); pinMode(buttonPin, INPUT); } // loop checks the button pin each time, // and will send serial if it is pressed void loop() { if (digitalRead(buttonPin) == HIGH) serialWrite('H'); else serialWrite('L'); delay(1000); }
- 216. Reference Home Restore Edit Page | Page History | Printable View | All Recent Site Changes
- 217. Arduino : Reference / Loop Reference Language (extended) | Libraries | Comparison | Board loop() After creating a setup() function, which initializes and sets the initial values, the loop() function does precisely what its name suggests, and loops consecutively, allowing your program to change and respond. Use it to actively control the Arduino board. Example int buttonPin = 3; // setup initializes serial and the button pin void setup() { beginSerial(9600); pinMode(buttonPin, INPUT); } // loop checks the button pin each time, // and will send serial if it is pressed void loop() { if (digitalRead(buttonPin) == HIGH) serialWrite('H'); else serialWrite('L'); } delay(1000); Reference Home Corrections, suggestions, and new documentation should be posted to the Forum. The text of the Arduino reference is licensed under a Creative Commons Attribution-ShareAlike 3.0 License . Code samples in the reference are released into the public domain. (Printable View of http://www.arduino.cc/en/Reference/Loop)
- 218. Arduino Buy | Download | Getting Started | Learning | Reference | Hardware | FAQ Login to Arduino Username: Password: Keep me logged in: ✔ Login Edit Page | Page History | Printable View | All Recent Site Changes search Blog » | Forum » | Playground »
- 219. Arduino Buy | Download | Getting Started | Learning | Reference | Hardware | FAQ search Blog » | Forum » | Playground » Reference.PinMode History Hide minor edits - Show changes to markup February 13, 2008, at 09: 28 PM by David A. Mellis Changed line 38 from: Description of the pins on an Arduino board? to: Description of the pins on an Arduino board Restore February 13, 2008, at 09: 28 PM by David A. Mellis Changed lines 38- 39 from: Description of the pins on an Arduino board analog pins to: Description of the pins on an Arduino board? Restore J anuary 19, 2008, at 09: 39 AM by David A. Mellis - changing analog pins link to playground. Changed line 39 from: analog pins to: analog pins Restore J anuary 18, 2008, at 12: 32 PM by Paul Badger Changed lines 35- 36 from: The analog input pins can be used as digital pins w/ numbers 14 (analog input 0) to 19 (analog input 5). to: The analog input pins can be used as digital pins, referred to as numbers 14 (analog input 0) to 19 (analog input 5). Restore J anuary 18, 2008, at 09: 14 AM by David A. Mellis Deleted lines 8- 9: valid pin numbers on most boards are 0 to 19, valid pin numbers on the Mini are 0 to 21. Pins 0 to 13 refer to the digital pins and pins 14 to 19 refer to the analog pins, when using the digitalWrite and pinMode commands. Added lines 33- 36: Note The analog input pins can be used as digital pins w/ numbers 14 (analog input 0) to 19 (analog input 5). Restore J anuary 17, 2008, at 11: 23 PM by Paul Badger Changed lines 4- 5 from:
- 220. Configures the specified pin to behave either as an input or an output. to: Configures the specified pin to behave either as an input or an output. See the reference page below. Changed lines 7- 8 from: pin: the number of the pin whose mode you want to set. ( int) to: pin: the number of the pin whose mode you wish to set. ( int) valid pin numbers on most boards are 0 to 19, valid pin numbers on the Mini are 0 to 21. Pins 0 to 13 refer to the digital pins and pins 14 to 19 refer to the analog pins, when using the digitalWrite and pinMode commands. Added line 37: analog pins Restore J anuary 11, 2008, at 11: 40 AM by David A. Mellis Deleted line 5: Changed lines 9- 10 from: mode: either I NPUT or OUTPUT. ( int) to: mode: either I NPUT or OUTPUT. Deleted lines 32- 53: Pins Configured as I NPUT Arduino (Atmega) pins default to inputs, so they don't need to be explicitly declared as inputs with pinMode(). Pins configured as inputs are said to be in a high- impedance state. One way of explaining this is that input pins make extremely small demands on the circuit that they are sampling, say equivalent to a series resistor of 100 Megohms in front of the pin. This means that it takes very little current to move the input pin from one state to another, and can make the pins useful for such tasks as implementing a capacitive touch sensor. Often it is useful however, to steer an input pin to a known state if no input is present. This can be done by adding a pullup (resistor to VCC), or pulldown resistor (resistor to ground) on the input, with 10K being a common value. There are also convenient 20K pullup resistors built into the Atmega chip that can be accessed from software. These built- in pullup resistors are accessed in the following manner. pinMode(pin, INPUT); digitalWrite(pin, HIGH); // set pin to input // turn on pullup resistors Note that the pullup resistors provide enough current to dimmly light an LED connected to a pin that has been configured as an input. I f LED's in a project seem to be working, but very dimmly, this is likely what is going on, and you have forgotten to use pinMode to change the pins to outputs. Pins Configured as OUTPUT Pins configured as OUTPUT with pinMode() are said to be in a low- impedance state. This means that they can provide a substantial amount of current to other circuits. Atmega pins can source (provide positive current) or sink (provide negative current) up to 40 mA (milliamps) of current to other devices/ circuits. This is enough current to brightly light up an LED (don't forget the series resistor), or run many sensors, for example, but not enough current to run most relays, solenoids, or motors. Short circuits on Arduino pins, or attempting to run high current devices from them, can damage or destroy the output transistors in the pin, or damage the entire Atmega chip. Often this will result in a "dead" pin in the microcontroller but the remaining chip will still function adequately. For this reason it is a good idea to connect OUTPUT pins to other devices with 470O or 1k resistors. Added line 34: Description of the pins on an Arduino board
- 221. Deleted line 37: delay Restore December 02, 2007, at 09: 52 PM by Paul Badger Restore December 02, 2007, at 09: 50 PM by Paul Badger Restore December 02, 2007, at 09: 49 PM by Paul Badger Changed lines 47- 49 from: to: Note that the pullup resistors provide enough current to dimmly light an LED connected to a pin that has been configured as an input. I f LED's in a project seem to be working, but very dimmly, this is likely what is going on, and you have forgotten to use pinMode to change the pins to outputs. Restore November 18, 2007, at 01: 01 PM by Paul Badger Changed lines 38- 39 from: Often it is useful however, to steer an input pin to a known state if no input is present. This can be done by adding a pullup (resistor to VCC), or pulldown resistor(resistor to ground) to the input, with 10K being a common value. to: Often it is useful however, to steer an input pin to a known state if no input is present. This can be done by adding a pullup (resistor to VCC), or pulldown resistor (resistor to ground) on the input, with 10K being a common value. Changed lines 50- 51 from: Pins configured as OUTPUT with pinMode() are said to be in a low- impedance state. This means that they can provide a substantial amount of current to other circuits. Atmega pins can sorce (provide positive current) or sink (provide negative current) up to 40 mA (milliamps) of current to other devices/ circuits. This is enough current to brightly light up an LED (don't forget the series resistor), or run many sensors, for example, but not enough current to run most relays, solenoids, or motors. to: Pins configured as OUTPUT with pinMode() are said to be in a low- impedance state. This means that they can provide a substantial amount of current to other circuits. Atmega pins can source (provide positive current) or sink (provide negative current) up to 40 mA (milliamps) of current to other devices/ circuits. This is enough current to brightly light up an LED (don't forget the series resistor), or run many sensors, for example, but not enough current to run most relays, solenoids, or motors. Restore November 03, 2007, at 09: 55 PM by Paul Badger Changed lines 38- 39 from: Often it is useful however, to steer an input pin to a known state if no input is present. This can be done by adding a pullup (resistor to VCC), or pulldown (resistor to ground) resistor to the input, with 10K being a common value. to: Often it is useful however, to steer an input pin to a known state if no input is present. This can be done by adding a pullup (resistor to VCC), or pulldown resistor(resistor to ground) to the input, with 10K being a common value. Restore J une 09, 2007, at 08: 39 PM by Paul Badger Changed line 55 from: Constants to: constants Restore J une 09, 2007, at 08: 39 PM by Paul Badger Changed line 55 from:
- 222. Constants to: Constants Restore J une 09, 2007, at 08: 39 PM by Paul Badger Added line 55: Constants Restore J une 09, 2007, at 08: 37 PM by Paul Badger Changed lines 34- 35 from: Pins Configured as I nputs to: Pins Configured as I NPUT Changed lines 48- 53 from: Pins Configured as Outputs Pins configured as outputs with pinMode() are said to be in a low- impedance state. This means that they can provide a substantial amount of current to other circuits. Atmega pins can sorce (provide positive current) or sink (provide negative current) up to 40 mA (milliamps) of current to other devices/ circuits. This is enough current to brightly light up an LED (don't forget the series resistor), or run many sensors, for example, but not enough current to run most relays, solenoids, or motors. Short circuits on Arduino pins, or attempting to run high current devices from them, can damage or destroy the output transistors in the pin, or damage the entire Atmega chip. Often this will result in a "dead" pin in the microcontroller but the remaining chip will still function adequately. For this reason it is a good idea to connect output pins with 470O or 1k resistors. to: Pins Configured as OUTPUT Pins configured as OUTPUT with pinMode() are said to be in a low- impedance state. This means that they can provide a substantial amount of current to other circuits. Atmega pins can sorce (provide positive current) or sink (provide negative current) up to 40 mA (milliamps) of current to other devices/ circuits. This is enough current to brightly light up an LED (don't forget the series resistor), or run many sensors, for example, but not enough current to run most relays, solenoids, or motors. Short circuits on Arduino pins, or attempting to run high current devices from them, can damage or destroy the output transistors in the pin, or damage the entire Atmega chip. Often this will result in a "dead" pin in the microcontroller but the remaining chip will still function adequately. For this reason it is a good idea to connect OUTPUT pins to other devices with 470O or 1k resistors. Restore J une 09, 2007, at 08: 34 PM by Paul Badger Changed lines 52- 53 from: Short circuits on Arduino pins, or attempting to run high current devices from them, can damage or destroy the output transistors in the pin, or damage the entire Atmega chip. Often this will result in a "dead" pin in the microcontroller but the remaining chip will still function adequately. to: Short circuits on Arduino pins, or attempting to run high current devices from them, can damage or destroy the output transistors in the pin, or damage the entire Atmega chip. Often this will result in a "dead" pin in the microcontroller but the remaining chip will still function adequately. For this reason it is a good idea to connect output pins with 470O or 1k resistors. Restore May 21, 2007, at 09: 04 PM by Paul Badger Changed lines 36- 37 from: Arduino (Atmega) pins default to inputs, so don't need to be explicitly declared as inputs with pinMode(). Pins configured as
- 223. inputs are said to be in a high- impedance state. One way of explaining this is that input pins make extremely small demands on the circuit that they are sampling, say equivalent to a series resistor of 100 Megohms in front of the pin. This means that it takes very little current to move the input pin from one state to another, and can make the pins useful for such tasks as implementing a capacitive touch sensor. to: Arduino (Atmega) pins default to inputs, so they don't need to be explicitly declared as inputs with pinMode(). Pins configured as inputs are said to be in a high- impedance state. One way of explaining this is that input pins make extremely small demands on the circuit that they are sampling, say equivalent to a series resistor of 100 Megohms in front of the pin. This means that it takes very little current to move the input pin from one state to another, and can make the pins useful for such tasks as implementing a capacitive touch sensor. Restore May 17, 2007, at 12: 36 PM by Paul Badger Added line 56: digitalRead Restore May 17, 2007, at 12: 34 PM by Paul Badger Deleted lines 56- 58: Reference Home Restore May 17, 2007, at 12: 33 PM by Paul Badger Changed lines 50- 51 from: Pins configured as outputs with pinMode() are said to be in a low- impedance state. This means that they can provide a substantial amount of current to other circuits. Atmega pins can sorce (provide positive current) or sink (provide negative current) up to 40 mA (milliamps) of current to other devices/ circuits. This is enough current to brightly light up an LED (don't forget the series resistor), or run many sensors, for example, but not enough current to run most relays, solenoids or motors. to: Pins configured as outputs with pinMode() are said to be in a low- impedance state. This means that they can provide a substantial amount of current to other circuits. Atmega pins can sorce (provide positive current) or sink (provide negative current) up to 40 mA (milliamps) of current to other devices/ circuits. This is enough current to brightly light up an LED (don't forget the series resistor), or run many sensors, for example, but not enough current to run most relays, solenoids, or motors. Restore May 17, 2007, at 12: 30 PM by Paul Badger Changed lines 50- 51 from: Pins configured as outputs with pinMode() are said to be in a low- impedance state. This means that they can provide a substantial amount of current to other circuits. Atmega pins can provide up to 40 mA (milliamps) to other devices. This is enough current to brightly light up an LED (don't forget the series resistor), or run many sensors, for example, but not enough current to run most relays, solenoids or motors. to: Pins configured as outputs with pinMode() are said to be in a low- impedance state. This means that they can provide a substantial amount of current to other circuits. Atmega pins can sorce (provide positive current) or sink (provide negative current) up to 40 mA (milliamps) of current to other devices/ circuits. This is enough current to brightly light up an LED (don't forget the series resistor), or run many sensors, for example, but not enough current to run most relays, solenoids or motors. Restore May 17, 2007, at 12: 28 PM by Paul Badger Changed lines 38- 39 from: Often it is useful however to steer an input pin to a known state if no input is present. This can be done by adding a pullup (resistor to VCC) or pulldown (resistor to ground) resistor to the input, with 10K being a common value. to: Often it is useful however, to steer an input pin to a known state if no input is present. This can be done by adding a pullup (resistor to VCC), or pulldown (resistor to ground) resistor to the input, with 10K being a common value. Restore
- 224. May 17, 2007, at 12: 27 PM by Paul Badger Changed lines 36- 37 from: Arduino (Atmega) pins default to inputs, so don't need to be explicitly declared as inputs with pinMode(). Pins configured as inputs are said to be in a high- impedance state. One way of explaining this is that input pins make extremely small demands on the circuit that they are sampling, say equivalent to a series resistor of 100 Megohms in front of the pin. This means that it takes very little current to move the input pin from one state to another, and can make the pins useful for such tasks as implementing a touch sensor. to: Arduino (Atmega) pins default to inputs, so don't need to be explicitly declared as inputs with pinMode(). Pins configured as inputs are said to be in a high- impedance state. One way of explaining this is that input pins make extremely small demands on the circuit that they are sampling, say equivalent to a series resistor of 100 Megohms in front of the pin. This means that it takes very little current to move the input pin from one state to another, and can make the pins useful for such tasks as implementing a capacitive touch sensor. Restore May 17, 2007, at 12: 26 PM by Paul Badger Changed lines 36- 40 from: Arduino (Atmega) pins default to inputs, so don't need to be explicitly declared as inputs with pinMode(). Pins configured as inputs have an extremely high input impedance (~100 Megohm). This means that it takes very little current to move the input pin from one state to another, and can make the pins useful for such tasks as implementing a touch sensor. Often it is useful however to steer an input pin to a known state, if no input is present. This can be done by adding a pullup (resistor to VCC) or pulldown (resistor to ground) resistor to the input, with 10K being a common value. to: Arduino (Atmega) pins default to inputs, so don't need to be explicitly declared as inputs with pinMode(). Pins configured as inputs are said to be in a high- impedance state. One way of explaining this is that input pins make extremely small demands on the circuit that they are sampling, say equivalent to a series resistor of 100 Megohms in front of the pin. This means that it takes very little current to move the input pin from one state to another, and can make the pins useful for such tasks as implementing a touch sensor. Often it is useful however to steer an input pin to a known state if no input is present. This can be done by adding a pullup (resistor to VCC) or pulldown (resistor to ground) resistor to the input, with 10K being a common value. Restore May 17, 2007, at 11: 50 AM by Paul Badger Changed lines 53- 54 from: Short circuits on Arduino pins, or attempting to run high current devices from them, can damage or destroy the output transistors in the pin, either/ or damage the entire Atmega chip. Often this will result in a "dead" pin in the microcontroller but the remaining chip will still function adequately. to: Short circuits on Arduino pins, or attempting to run high current devices from them, can damage or destroy the output transistors in the pin, or damage the entire Atmega chip. Often this will result in a "dead" pin in the microcontroller but the remaining chip will still function adequately. Restore May 17, 2007, at 11: 49 AM by Paul Badger Changed lines 44- 45 from: pinMode (pin, I NPUT); / / set pin to input digitalWrite (pin, HI GH); / / turn on pullup resistors to: pinMode(pin, I NPUT); / / set pin to input digitalWrite(pin, HI GH); / / turn on pullup resistors Added lines 49- 54: Pins Configured as Outputs Pins configured as outputs with pinMode() are said to be in a low- impedance state. This means that they can provide a substantial amount of current to other circuits. Atmega pins can provide up to 40 mA (milliamps) to other devices. This is enough current to brightly light up an LED (don't forget the series resistor), or run many sensors, for example, but not enough current to run most relays, solenoids or motors.
- 225. Short circuits on Arduino pins, or attempting to run high current devices from them, can damage or destroy the output transistors in the pin, either/ or damage the entire Atmega chip. Often this will result in a "dead" pin in the microcontroller but the remaining chip will still function adequately. Restore May 17, 2007, at 11: 39 AM by Paul Badger Changed lines 36- 37 from: Arduino (Atmega) pins default to inputs, so don't need to be explicitly declared as inputs with pinMode(). Pins configured as inputs have an extremely high input impedance (~100 Megohm). This means that it takes very little current to move the input pin from one state to another and can make the pins useful for such tasks as capacitive sensing. to: Arduino (Atmega) pins default to inputs, so don't need to be explicitly declared as inputs with pinMode(). Pins configured as inputs have an extremely high input impedance (~100 Megohm). This means that it takes very little current to move the input pin from one state to another, and can make the pins useful for such tasks as implementing a touch sensor. Restore May 17, 2007, at 11: 38 AM by Paul Badger Changed lines 16- 17 from: [@ to: [@ Changed lines 34- 36 from: configures pin number 13 to work as an output pin. to: Pins Configured as I nputs Arduino (Atmega) pins default to inputs, so don't need to be explicitly declared as inputs with pinMode(). Pins configured as inputs have an extremely high input impedance (~100 Megohm). This means that it takes very little current to move the input pin from one state to another and can make the pins useful for such tasks as capacitive sensing. Often it is useful however to steer an input pin to a known state, if no input is present. This can be done by adding a pullup (resistor to VCC) or pulldown (resistor to ground) resistor to the input, with 10K being a common value. There are also convenient 20K pullup resistors built into the Atmega chip that can be accessed from software. These built- in pullup resistors are accessed in the following manner. pinMode (pin, INPUT); digitalWrite (pin, HIGH); // set pin to input // turn on pullup resistors Restore J anuary 12, 2006, at 05: 36 PM by 82.186.237.10 Added lines 40- 42: Reference Home Restore December 28, 2005, at 03: 45 PM by 82.186.237.10 Changed lines 8- 11 from: pin ( int): the number of the pin whose mode you want to set. mode ( int): either I NPUT or OUTPUT to: pin: the number of the pin whose mode you want to set. ( int) mode: either I NPUT or OUTPUT. ( int) Restore December 28, 2005, at 03: 44 PM by 82.186.237.10 -
- 226. Changed lines 1- 6 from: pinMode pinMode(int pin, int mode) to: pinMode(pin, mode) Changed lines 8- 11 from: pin: the number of the pin whose mode you want to set mode: either I NPUT or OUTPUT to: pin ( int): the number of the pin whose mode you want to set. mode ( int): either I NPUT or OUTPUT Restore December 28, 2005, at 03: 42 PM by 82.186.237.10 Added line 21: Restore December 28, 2005, at 03: 42 PM by 82.186.237.10 Changed line 7 from: What it does to: Description Changed lines 11- 17 from: What parametres does it take you need to specify the number of the pin you want to configure followed by the word I NPUT or OUTPUT. This function returns nothing to: Parameters pin: the number of the pin whose mode you want to set mode: either I NPUT or OUTPUT Returns None Restore December 10, 2005, at 10: 33 AM by 62.255.32.10 Changed lines 3- 6 from: to: pinMode(int pin, int mode) Changed lines 14- 17 from: pinMode(ledPin, OUTPUT); // sets the digital pin as output to: Restore December 10, 2005, at 10: 31 AM by 62.255.32.10 -
- 227. Added line 11: [@ Changed lines 13- 14 from: to: @] Restore December 10, 2005, at 10: 30 AM by 62.255.32.10 Added lines 11- 12: pinMode(ledPin, OUTPUT); / / sets the digital pin as output Restore December 10, 2005, at 10: 28 AM by 62.255.32.10 Changed lines 9- 11 from: you need to specify the number of the pin y ou want to configure followed by the word I NPUT or OUTPUT. to: you need to specify the number of the pin you want to configure followed by the word I NPUT or OUTPUT. Restore December 10, 2005, at 10: 26 AM by 62.255.32.10 Changed lines 5- 7 from: Configures the specified pin to behave like an input or an output. to: Configures the specified pin to behave either as an input or an output. Restore December 03, 2005, at 01: 13 PM by 213.140.6.103 Changed lines 10- 11 from: ou want to configure followed by the word I NPUT or OUTPUT. to: ou want to configure followed by the word I NPUT or OUTPUT. Restore December 03, 2005, at 01: 13 PM by 213.140.6.103 Changed lines 16- 17 from: [@int ledPin = 13; // LED connected to digital pin 13 to: [@ int ledPin = 13; / / LED connected to digital pin 13 Restore December 03, 2005, at 01: 12 PM by 213.140.6.103 Changed lines 16- 17 from: int ledPin = 13; // LED connected to digital pin 13 to: [@int ledPin = 13; Changed lines 29- 30 from: } to: } @] // LED connected to digital pin 13
- 228. Restore December 03, 2005, at 01: 12 PM by 213.140.6.103 Changed line 36 from: digitalRead to: delay Restore November 27, 2005, at 10: 41 AM by 81.154.199.248 Changed lines 16- 17 from: @@int ledPin = 13; / / LED connected to digital pin 13 to: int ledPin = 13; // LED connected to digital pin 13 Restore November 27, 2005, at 10: 41 AM by 81.154.199.248 Changed lines 29- 30 from: }@@ to: } Restore November 27, 2005, at 10: 40 AM by 81.154.199.248 Deleted line 17: Deleted line 18: Deleted line 19: Deleted line 20: Deleted line 23: Restore November 27, 2005, at 10: 40 AM by 81.154.199.248 Changed lines 16- 18 from: [@int ledPin = 13; / / LED connected to digital pin 13 to: @@int ledPin = 13; / / LED connected to digital pin 13 Changed lines 34- 35 from: }@] to: }@@ Restore November 27, 2005, at 10: 26 AM by 81.154.199.248 Added line 18: Added Added Added Added line line line line 20: 22: 24: 28: Restore November 27, 2005, at 10: 26 AM by 81.154.199.248 Changed lines 16- 19 from: [@ int ledPin = 13; / / LED connected to digital pin 13 to: [@int ledPin = 13; / / LED connected to digital pin 13
- 229. Changed lines 29- 31 from: } @] to: }@] Restore November 27, 2005, at 10: 17 AM by 81.154.199.248 Changed lines 5- 7 from: Configures the speficied pin to behave like an input or an output. to: Configures the specified pin to behave like an input or an output. Restore November 27, 2005, at 10: 17 AM by 81.154.199.248 Changed lines 16- 17 from: [= to: [@ Changed lines 32- 33 from: =] to: @] Restore November 27, 2005, at 10: 13 AM by 81.154.199.248 Changed lines 16- 17 from: @@int ledPin = 13; / / LED connected to digital pin 13 to: [= int ledPin = 13; / / LED connected to digital pin 13 Changed lines 30- 31 from: }@@ to: } =] Restore November 27, 2005, at 10: 10 AM by 81.154.199.248 Changed lines 16- 17 from: [@int ledPin = 13; / / LED connected to digital pin 13 to: @@int ledPin = 13; / / LED connected to digital pin 13 Changed lines 29- 30 from: }@] to: }@@ Restore November 27, 2005, at 10: 05 AM by 81.154.199.248 -
- 230. Changed lines 16- 18 from: [@ int ledPin = 13; / / LED connected to digital pin 13 to: [@int ledPin = 13; / / LED connected to digital pin 13 Changed lines 29- 32 from: } @] to: }@] Restore November 27, 2005, at 10: 03 AM by 81.154.199.248 Changed lines 16- 17 from: pinMode(13,OUTPUT) to: int ledPin = 13; void setup() { pinMode(ledPin, OUTPUT); } void loop() { digitalWrite(ledPin, HIGH); delay(1000); digitalWrite(ledPin, LOW); delay(1000); } // LED connected to digital pin 13 // sets the digital pin as output // // // // sets the LED on waits for a second sets the LED off waits for a second Restore November 27, 2005, at 09: 55 AM by 81.154.199.248 Changed line 22 from: [[digitalWrite] to: digitalWrite Restore November 27, 2005, at 09: 55 AM by 81.154.199.248 Changed line 4 from: What it does to: What it does Changed line 8 from: What parametres does it take to: What parametres does it take Changed line 12 from:
- 231. This function returns to: This function returns Changed line 15 from: Example to: Example Changed lines 21- 23 from: See also {{digitalWrite}} {{digitalRead}} to: See also [[digitalWrite] digitalRead Restore November 27, 2005, at 09: 54 AM by 81.154.199.248 Added lines 1- 23: pinMode What it does Configures the speficied pin to behave like an input or an output. What parametres does it take you need to specify the number of the pin y ou want to configure followed by the word I NPUT or OUTPUT. This function returns nothing Example pinMode(13,OUTPUT) configures pin number 13 to work as an output pin. See also {{digitalWrite}} {{digitalRead}} Restore Edit Page | Page History | Printable View | All Recent Site Changes
- 232. Arduino : Reference / Pin Mode Reference Language (extended) | Libraries | Comparison | Board pinMode(pin, mode) Description Configures the specified pin to behave either as an input or an output. See the reference page below. Parameters pin: the number of the pin whose mode you wish to set. (int) mode: either I NPUT or OUTPUT. Returns None Example int ledPin = 13; // LED connected to digital pin 13 void setup() { pinMode(ledPin, OUTPUT); } // sets the digital pin as output void loop() { digitalWrite(ledPin, HIGH); delay(1000); digitalWrite(ledPin, LOW); delay(1000); } // // // // sets the LED on waits for a second sets the LED off waits for a second Note The analog input pins can be used as digital pins, referred to as numbers 14 (analog input 0) to 19 (analog input 5). See also Description of the pins on an Arduino board constants digitalWrite digitalRead Reference Home Corrections, suggestions, and new documentation should be posted to the Forum. The text of the Arduino reference is licensed under a Creative Commons Attribution-ShareAlike 3.0 License . Code samples in the reference are released into the public domain. (Printable View of http://www.arduino.cc/en/Reference/PinMode)
- 233. Arduino Buy | Download | Getting Started | Learning | Reference | Hardware | FAQ Login to Arduino Username: Password: Keep me logged in: ✔ Login Edit Page | Page History | Printable View | All Recent Site Changes search Blog » | Forum » | Playground »
- 234. Arduino Buy | Download | Getting Started | Learning | Reference | Hardware | FAQ search Blog » | Forum » | Playground » Reference.VariableDeclaration History Hide minor edits - Show changes to markup J uly 16, 2007, at 11: 44 PM by Paul Badger Changed lines 27- 28 from: You can name a variable any word that is not already one of the keywords in Arduino. to: You can name a variable any word that is not already one of the keywords in Arduino. Avoid beginning variable names with numeral characters. Added line 42: byte Restore J uly 16, 2007, at 11: 42 PM by Paul Badger Changed lines 31- 32 from: All variables have to be declared before they are used. Declaring a variable means defining its type, and setting an initial value. I n the above example, the statement to: All variables have to be declared before they are used. Declaring a variable means defining its type, and optionally, setting an initial value (initializing the variable). I n the above example, the statement Restore J une 22, 2007, at 07: 20 AM by Paul Badger Changed line 18 from: inputVariable = 100 to: inputVariable = 100; Changed lines 21- 22 from: delay(inputVariable)@] to: delay(inputVariable); @] Restore May 26, 2007, at 07: 38 PM by Paul Badger Changed line 43 from: unsigned int ? to: unsigned int Changed line 45 from: unsigned long
- 235. to: unsigned long Restore May 26, 2007, at 07: 37 PM by Paul Badger Added line 43: unsigned int ? Added lines 45- 47: unsigned long float double Restore May 26, 2007, at 07: 35 PM by Paul Badger Changed lines 8- 10 from: int inputVariable = 0; # Declares the variable; this only needs to be done once inputVariable = analogRead(2); # Set the variable to the input of analog pin #2@] to: int inputVariable = 0; / / declares the variable; this only needs to be done once inputVariable = analogRead(2); / / set the variable to the input of analog pin #2@] Restore April 16, 2007, at 09: 22 AM by Paul Badger Changed lines 1- 2 from: Variables to: Variables Deleted lines 43- 44: Reference Home Restore March 30, 2006, at 08: 00 PM by Tom I goe Changed lines 13- 14 from: Once a variable has been set (or re- set), you can test it's value to see if it meets certain conditions, or you can use it's value directly. For instance, the following code tests whether the inputVariable (from analog pin #2) is less than 100, then sets a delay based on inputVariable which is a minimum of 100: to: Once a variable has been set (or re- set), you can test its value to see if it meets certain conditions, or you can use it's value directly. For instance, the following code tests whether the inputVariable is less than 100, then sets a delay based on inputVariable which is a minimum of 100: Restore March 30, 2006, at 08: 00 PM by Tom I goe Changed lines 9- 10 from: inputVariable = analogRead(2); # Set the variable@] to: inputVariable = analogRead(2); # Set the variable to the input of analog pin #2@] Restore March 30, 2006, at 07: 59 PM by Tom I goe Changed lines 3- 4 from: A variable is a way of naming and storing a value for later use by the program. An example of , like data from a analog pin set to input. (See pinMode for more on setting pins to input or output.)
- 236. to: A variable is a way of naming and storing a value for later use by the program, such as data from a analog pin set to input. (See pinMode for more on setting pins to input or output.) Restore March 30, 2006, at 07: 58 PM by Tom I goe Changed lines 11- 12 from: inputVariable is the variable itself. The first line declares that it will contain an int (short for integer.) The second line sets inputVariable to the value at analog pin #2. This makes the value of pin #2 accessible elsewhere in the code. For instance, the following code tests whether the value at analog pin #2 is greater than 0: to: inputVariable is the variable itself. The first line declares that it will contain an int (short for integer.) The second line sets inputVariable to the value at analog pin #2. This makes the value of pin #2 accessible elsewhere in the code. Once a variable has been set (or re- set), you can test it's value to see if it meets certain conditions, or you can use it's value directly. For instance, the following code tests whether the inputVariable (from analog pin #2) is less than 100, then sets a delay based on inputVariable which is a minimum of 100: Changed line 16 from: if (inputVariable > 0) to: if (inputVariable < 100) Changed lines 18- 22 from: # do something here }@] You should give your variables descriptive names, so as to make your code more readable. Variable names like tiltSensor or pushButton help you (and anyone else reading your code) understand what the variable represents. Variable names like var or value, on the other hand, do little to make your code readable. to: inputVariable = 100 } delay(inputVariable)@] This example shows all three useful operations with variables. I t tests the variable ( if (inputVariable < 100) ), it sets the variable if it passes the test ( inputVariable = 100 ), and it uses the value of the variable as an input to the delay() function ( delay(inputVariable) ) Style Note: You should give your variables descriptive names, so as to make your code more readable. Variable names like tiltSensor or pushButton help you (and anyone else reading your code) understand what the variable represents. Variable names like var or value, on the other hand, do little to make your code readable. Restore March 30, 2006, at 07: 49 PM by Tom I goe Changed lines 8- 10 from: int inputVariable = 0; # This declares the variable, declaration only needs to be done once inputVariable = analogRead(2); # This sets the variable@] to: int inputVariable = 0; # Declares the variable; this only needs to be done once inputVariable = analogRead(2); # Set the variable@] Restore March 30, 2006, at 07: 48 PM by Tom I goe Changed lines 5- 6 from: You set a variable by making it equal to the value you want to store. The following code declares a
- 237. variable inputVariable, and then sets it equal to the value at analog pin #2: to: You set a variable by making it equal to the value you want to store. The following code declares a variable inputVariable, and then sets it equal to the value at analog pin #2: Restore March 30, 2006, at 07: 48 PM by Tom I goe Changed lines 3- 6 from: Variables are expressions that store values, like sensor reading and storing input from a analog pin set to input. (See pinMode for more on setting pins to input or output.) A variable is a way of giving a name to the stored value. You set a variable by making it equal to the value you want to store. The following code declares a variable inputVariable, and then sets it equal to the value at analog pin #2: to: A variable is a way of naming and storing a value for later use by the program. An example of , like data from a analog pin set to input. (See pinMode for more on setting pins to input or output.) You set a variable by making it equal to the value you want to store. The following code declares a variable inputVariable, and then sets it equal to the value at analog pin #2: Changed lines 8- 10 from: int inputVariable = 0; inputVariable = analogRead(2); @] to: int inputVariable = 0; # This declares the variable, declaration only needs to be done once inputVariable = analogRead(2); # This sets the variable@] Restore March 30, 2006, at 06: 45 PM by Tom I goe Changed lines 11- 12 from: inputVariable is the variable itself. The first line declares that it will contain an int , which is to say a whole number. The second line sets inputVariable to the value at analog pin #2. This makes the value of pin #2 accessible elsewhere in the code. For instance, the following code tests whether the value at analog pin #2 is greater than 0: to: inputVariable is the variable itself. The first line declares that it will contain an int (short for integer.) The second line sets inputVariable to the value at analog pin #2. This makes the value of pin #2 accessible elsewhere in the code. For instance, the following code tests whether the value at analog pin #2 is greater than 0: Changed lines 25- 26 from: All variables have to be declared before they are used. To declare a variable implies to define its type, and an initial value. to: All variables have to be declared before they are used. Declaring a variable means defining its type, and setting an initial value. I n the above example, the statement Changed line 28 from: int val = 0; to: int inputVariable = 0; Changed lines 31- 32 from: The previous statement informs that the variable val is of the type int and that its initial value is zero. to: declares that inputVariable is an int , and that its initial value is zero. Added line 35:
- 238. char Deleted line 36: char Restore March 30, 2006, at 02: 24 PM by Tom I goe Changed lines 19- 20 from: You should give your variables descriptive names, so as to make your code more readable. Variable names like tiltSensor or pushButton help you (and anyone else reading your code) understand what the variable represents. Variable names like var or value do little to make your code readable. to: You should give your variables descriptive names, so as to make your code more readable. Variable names like tiltSensor or pushButton help you (and anyone else reading your code) understand what the variable represents. Variable names like var or value, on the other hand, do little to make your code readable. Restore March 30, 2006, at 02: 11 PM by Tom I goe Changed lines 37- 38 from: to: long Restore March 30, 2006, at 02: 11 PM by Tom I goe Restore March 30, 2006, at 02: 11 PM by Tom I goe Changed lines 11- 12 from: inputVariable is the variable itself. The first line declares that it will contain an int , which is to say a whole number. The second line sets inputVariable to the value at analog pin #2. This makes the value of pin #2 accessible elsewhere in the code. For instance, the following code tests whether the value of inputVariable is greater than 0: to: inputVariable is the variable itself. The first line declares that it will contain an int , which is to say a whole number. The second line sets inputVariable to the value at analog pin #2. This makes the value of pin #2 accessible elsewhere in the code. For instance, the following code tests whether the value at analog pin #2 is greater than 0: Restore March 30, 2006, at 02: 00 PM by Tom I goe Changed lines 9- 11 from: inputVariable = analogRead(2); @] to: inputVariable = analogRead(2); @] Changed lines 17- 18 from: } @] to: }@] Restore March 30, 2006, at 01: 59 PM by Tom I goe Changed lines 20- 22 from: You give your variables descriptive names, so as to make your code more readable. Variable names like tiltSensor or pushButton help you (and anyone else reading your code) understand what the variable represents. Variable names like var or value do little to make your code readable. to: You should give your variables descriptive names, so as to make your code more readable. Variable names like tiltSensor or pushButton help you (and anyone else reading your code) understand what the variable represents. Variable names like var
- 239. or value do little to make your code readable. Restore March 30, 2006, at 01: 59 PM by Tom I goe Changed lines 5- 6 from: A variable is a way of giving a name to the stored value. You set a variable by making it equal to the value you want to store. The following code sets inputVariable equal to the value at analog pin #2: to: A variable is a way of giving a name to the stored value. You set a variable by making it equal to the value you want to store. The following code declares a variable inputVariable, and then sets it equal to the value at analog pin #2: Changed line 8 from: int inputVariable; to: int inputVariable = 0; Changed lines 12- 13 from: input_ variable is the variable itself. The first line declares that it will contain an int , which is to say a whole number. The second line sets inputVariable to the value at analog pin #2. This makes the value of pin #2 accessible elsewhere in the code. For instance, the following code tests whether the value of inputVariable is greater than 0: to: inputVariable is the variable itself. The first line declares that it will contain an int , which is to say a whole number. The second line sets inputVariable to the value at analog pin #2. This makes the value of pin #2 accessible elsewhere in the code. For instance, the following code tests whether the value of inputVariable is greater than 0: Changed lines 23- 26 from: You can choose any word that is not already existing in the language. The pre- defined words in the language are also called keywords. Examples of keywords are: digitalRead, pinMode, or setup. Again it is possible to choose completely random names like tomato or I _ love_ Sushi but this will make much more complicated for other people to read your code and it is not recommended. Use variable names that describe what you're using them for, like sensorValue or switchState. to: You can name a variable any word that is not already one of the keywords in Arduino. Changed lines 27- 28 from: Variables have to be declared before they are used. To declare a variable implies to define its type, and an initial value. to: All variables have to be declared before they are used. To declare a variable implies to define its type, and an initial value. Restore March 30, 2006, at 01: 52 PM by Tom I goe Changed line 7 from: [= to: [@ Changed lines 10- 11 from: =] to: @] Changed line 14 from:
- 240. [= to: [@ Changed lines 19- 20 from: =] to: @] Restore March 30, 2006, at 01: 52 PM by Tom I goe Changed line 8 from: int inputVariable; to: int inputVariable; Changed lines 15- 17 from: if (inputVariable > 0) { # do something here to: if (inputVariable > 0) { # do something here Restore March 30, 2006, at 01: 52 PM by Tom I goe Changed line 8 from: int inputVariable; to: int inputVariable; Changed lines 15- 17 from: if (inputVariable > 0) { # do something here to: if (inputVariable > 0) { # do something here Restore March 30, 2006, at 01: 51 PM by Tom I goe Changed lines 5- 6 from: A variable is a way of giving a name to the stored value. You set a variable by making it equal to the value you want to store. The following code sets input_ variable equal to the value at analog pin #2: to: A variable is a way of giving a name to the stored value. You set a variable by making it equal to the value you want to store. The following code sets inputVariable equal to the value at analog pin #2: Changed lines 8- 9 from: input_ variable = analogRead(2); to:
- 241. int inputVariable; inputVariable = analogRead(2); Changed lines 12- 21 from: input_ variable is the variable itself; it makes the value at analog pin #2 accessible elsewhere in the code. For instance, the following code tests whether the value of input_ variable is The name of the variable is val in this case, but we could have chosen anything else like e.g. inputPin or sensorA. You can choose any word that is not already existing in the language. The pre- defined words in the language are also called keywords. Examples of keywords are: digitalRead, pinMode, or setup. Again it is possible to choose completely random names like tomato or I _ love_ Sushi but this will make much more complicated for other people to read your code and it is not recommended. Use variable names that describe what you're using them for, like sensorValue or switchState. Variable Declaration Variables have to be declared before they are used. To declare a variable implies to define its type, and an initial value. to: input_ variable is the variable itself. The first line declares that it will contain an int , which is to say a whole number. The second line sets inputVariable to the value at analog pin #2. This makes the value of pin #2 accessible elsewhere in the code. For instance, the following code tests whether the value of inputVariable is greater than 0: Changed lines 15- 18 from: int val = 0; to: if (inputVariable > 0) { # do something here } Added lines 21- 34: You give your variables descriptive names, so as to make your code more readable. Variable names like tiltSensor or pushButton help you (and anyone else reading your code) understand what the variable represents. Variable names like var or value do little to make your code readable. You can choose any word that is not already existing in the language. The pre- defined words in the language are also called keywords. Examples of keywords are: digitalRead, pinMode, or setup. Again it is possible to choose completely random names like tomato or I _ love_ Sushi but this will make much more complicated for other people to read your code and it is not recommended. Use variable names that describe what you're using them for, like sensorValue or switchState. Variable Declaration Variables have to be declared before they are used. To declare a variable implies to define its type, and an initial value. int val = 0; Restore March 30, 2006, at 01: 37 PM by Tom I goe Changed lines 5- 6 from: A variable is a way of giving a name to the stored value. You set a variable by making it equal to the value you want to store. The following code sets input_ variable equal to the value at analog pin #2.: to: A variable is a way of giving a name to the stored value. You set a variable by making it equal to the value you want to store. The following code sets input_ variable equal to the value at analog pin #2: Changed lines 11- 12 from: input_ variable is what's called a variable. I t is a container for data inside the memory of Arduino. The name of the variable is val in this case, but we could have chosen anything else like e.g. inputPin or sensorA.
- 242. to: input_ variable is the variable itself; it makes the value at analog pin #2 accessible elsewhere in the code. For instance, the following code tests whether the value of input_ variable is The name of the variable is val in this case, but we could have chosen anything else like e.g. inputPin or sensorA. Restore March 30, 2006, at 01: 35 PM by Tom I goe Added lines 5- 6: A variable is a way of giving a name to the stored value. You set a variable by making it equal to the value you want to store. The following code sets input_ variable equal to the value at analog pin #2.: Changed line 8 from: val = analogRead(2); to: input_ variable = analogRead(2); Changed lines 11- 12 from: val is what's called a variable. I t is a container for data inside the memory of Arduino. The name of the variable is val in this case, but we could have chosen anything else like e.g. inputPin or sensorA. to: input_ variable is what's called a variable. I t is a container for data inside the memory of Arduino. The name of the variable is val in this case, but we could have chosen anything else like e.g. inputPin or sensorA. Restore March 30, 2006, at 01: 32 PM by Tom I goe Changed lines 3- 4 from: Variables are expressions that can be used in programs to store values, like e.g. sensor reading from an analog pin. to: Variables are expressions that store values, like sensor reading and storing input from a analog pin set to input. (See pinMode for more on setting pins to input or output.) Restore March 25, 2006, at 12: 18 AM by J eff Gray Changed lines 1- 2 from: Variables to: Variables Restore March 24, 2006, at 11: 32 PM by Tom I goe Changed lines 9- 10 from: val is what we call a variable. I t is a container for data inside the memory of Arduino. The name of the variable is val in this case, but we could have chosen anything else like e.g. inputPin or sensorA. to: val is what's called a variable. I t is a container for data inside the memory of Arduino. The name of the variable is val in this case, but we could have chosen anything else like e.g. inputPin or sensorA. Changed lines 13- 14 from: Again it is possible to choose completely random names like tomato or I _ love_ Sushi but this will make much more complicated for other people to read your code and it is not recommended. to: Again it is possible to choose completely random names like tomato or I _ love_ Sushi but this will make much more complicated for other people to read your code and it is not recommended. Use variable names that describe what you're
- 243. using them for, like sensorValue or switchState. Restore J anuary 12, 2006, at 05: 34 PM by 82.186.237.10 Changed lines 23- 24 from: The previous statement informs that the variable val is of the type I nteger and that its initial value is zero. to: The previous statement informs that the variable val is of the type int and that its initial value is zero. Changed lines 27- 29 from: I nteger? Char? to: int char Reference Home Restore December 09, 2005, at 11: 58 AM by 195.178.229.25 Added lines 1- 29: Variables Variables are expressions that can be used in programs to store values, like e.g. sensor reading from an analog pin. val = analogRead(2); val is what we call a variable. I t is a container for data inside the memory of Arduino. The name of the variable is val in this case, but we could have chosen anything else like e.g. inputPin or sensorA. You can choose any word that is not already existing in the language. The pre- defined words in the language are also called keywords. Examples of keywords are: digitalRead, pinMode, or setup. Again it is possible to choose completely random names like tomato or I _ love_ Sushi but this will make much more complicated for other people to read your code and it is not recommended. Variable Declaration Variables have to be declared before they are used. To declare a variable implies to define its type, and an initial value. int val = 0; The previous statement informs that the variable val is of the type I nteger and that its initial value is zero. Possible types for variables are: I nteger? Char? Restore Edit Page | Page History | Printable View | All Recent Site Changes
- 244. Arduino : Reference / Variable Declaration Reference Language (extended) | Libraries | Comparison | Board Variables A variable is a way of naming and storing a value for later use by the program, such as data from a analog pin set to input. (See pinMode for more on setting pins to input or output.) You set a variable by making it equal to the value you want to store. The following code declares a variable inputVariable, and then sets it equal to the value at analog pin #2: int inputVariable = 0; // declares the variable; this only needs to be done once inputVariable = analogRead(2); // set the variable to the input of analog pin #2 inputVariable is the variable itself. The first line declares that it will contain an int (short for integer.) The second line sets inputVariable to the value at analog pin #2. This makes the value of pin #2 accessible elsewhere in the code. Once a variable has been set (or re- set), you can test its value to see if it meets certain conditions, or you can use it's value directly. For instance, the following code tests whether the inputVariable is less than 100, then sets a delay based on inputVariable which is a minimum of 100: if (inputVariable < 100) { inputVariable = 100; } delay(inputVariable); This example shows all three useful operations with variables. I t tests the variable ( if (inputVariable < 100) ), it sets the variable if it passes the test ( inputVariable = 100 ), and it uses the value of the variable as an input to the delay() function ( delay(inputVariable) ) Style Note: You should give your variables descriptive names, so as to make your code more readable. Variable names like tiltSensor or pushButton help you (and anyone else reading your code) understand what the variable represents. Variable names like var or value, on the other hand, do little to make your code readable. You can name a variable any word that is not already one of the keywords in Arduino. Avoid beginning variable names with numeral characters. Variable Declaration All variables have to be declared before they are used. Declaring a variable means defining its type, and optionally, setting an initial value (initializing the variable). I n the above example, the statement int inputVariable = 0; declares that inputVariable is an int, and that its initial value is zero. Possible types for variables are: char byte int unsigned int long unsigned long float double
- 245. Reference Home Corrections, suggestions, and new documentation should be posted to the Forum. The text of the Arduino reference is licensed under a Creative Commons Attribution-ShareAlike 3.0 License . Code samples in the reference are released into the public domain. (Printable View of http://www.arduino.cc/en/Reference/VariableDeclaration)
- 246. Arduino Buy | Download | Getting Started | Learning | Reference | Hardware | FAQ Login to Arduino Username: Password: Keep me logged in: ✔ Login Edit Page | Page History | Printable View | All Recent Site Changes search Blog » | Forum » | Playground »
- 247. Arduino Buy | Download | Getting Started | Learning | Reference | Hardware | FAQ search Blog » | Forum » | Playground » Reference.FunctionDeclaration History Hide minor edits - Show changes to markup February 14, 2008, at 12: 08 AM by Paul Badger Changed lines 3- 6 from: Functions allow a programmer to create modular pieces of code that performs a defined task and then returns to the area of code from which the function was "called". The typical case for creating a function is when one needs to perform the same action multiple times in a program. For programmers accustomed to using BASI C, functions in Arduino provide (and extend) the utility of using subroutines (GOSUB in BASI C). to: Segmenting code into functions allows a programmer to create modular pieces of code that perform a defined task and then return to the area of code from which the function was "called". The typical case for creating a function is when one needs to perform the same action multiple times in a program. For programmers accustomed to using BASI C, functions in Arduino provide (and extend) the utility of using subroutines (GOSUB in BASI C). Restore December 02, 2007, at 09: 59 PM by Paul Badger Added line 34: } Changed lines 36- 37 from: Our function needs to be declared outside any other function, so "myMultiplyFunction()" can go above or below the "loop()" function. to: Our function needs to be declared outside any other function, so "myMultiplyFunction()" can go either above or below the "loop()" function. Restore November 28, 2007, at 11: 11 PM by Paul Badger Restore November 28, 2007, at 11: 07 PM by Paul Badger Changed lines 60- 61 from: This function will read a sensor five time with analogRead() and calculate the average of five readings. I t then scales the data to 8 bits (0- 255), and inverts it, returning the inverted result. to: This function will read a sensor five times with analogRead() and calculate the average of five readings. I t then scales the data to 8 bits (0- 255), and inverts it, returning the inverted result. Restore November 05, 2007, at 05: 00 PM by Paul Badger Changed lines 60- 61 from: The function will read a sensor five time with analogRead() then calculate the average of five readings. I t then scales the data to 8 bits (0- 255) and inverts it.
- 248. to: This function will read a sensor five time with analogRead() and calculate the average of five readings. I t then scales the data to 8 bits (0- 255), and inverts it, returning the inverted result. Restore November 05, 2007, at 04: 58 PM by Paul Badger Changed lines 58- 59 from: A more complex example to: Another example Restore November 05, 2007, at 04: 53 PM by Paul Badger Changed lines 64- 65 from: to: int sval; Changed line 67 from: i = i + analogRead(0); // sensor on analog pin 0 to: sval = sval + analogRead(0); // sensor on analog pin 0 Changed lines 70- 73 from: i = i / 5; i = i / 4; // average // scale to 8 bits (0 - 255) i = 255 - i; return i; // invert output to: sval = sval = sval = return sval / 5; sval / 4; 255 - sval; sval; // average // scale to 8 bits (0 - 255) // invert output Restore November 05, 2007, at 04: 50 PM by Paul Badger Changed lines 69- 70 from: i = i / 5; i = i / 4; // average // scale to 8 bits (0 - 255) to: i = i / 5; i = i / 4; // average // scale to 8 bits (0 - 255) Restore November 05, 2007, at 04: 49 PM by Paul Badger Changed line 66 from: i = i + analogRead(0); to: i = i + analogRead(0); // sensor on analog pin 0 Deleted lines 82- 83: @] Restore November 05, 2007, at 04: 48 PM by Paul Badger -
- 249. Changed lines 62- 78 from: [@ int ReadSens_ and_ Condition(){ int i; for (i = 0; i < 5; i++){ i = i + analogRead(0); } i = i / 5; // average i = i / 4; // scale to 8 bits (0 - 255) i = 255 - i; // invert output return i; } to: int ReadSens_and_Condition(){ int i; for (i = 0; i < 5; i++){ i = i + analogRead(0); } i = i / 5; // average i = i / 4; // scale to 8 bits (0 - 255) i = 255 - i; // invert output return i; } To call our function we just assign it to a variable. [@int sens; sens = ReadSens_ and_ Condition(); Added lines 81- 84: @] Restore November 05, 2007, at 04: 45 PM by Paul Badger Changed lines 5- 6 from: For programmers accustomed to using BASI C, functions in Arduino provide (and extend) the utility of using subroutines (GOSUB). to: For programmers accustomed to using BASI C, functions in Arduino provide (and extend) the utility of using subroutines (GOSUB in BASI C). Changed lines 25- 26 from: To "call" our simple multiply function we pass it the datatypes it is expecting: to: To "call" our simple multiply function, we pass it parameters of the datatype that it is expecting: Changed lines 60- 68 from: I n a program to keep track of school records, we move a student up a grade if they are old enough, or if they have passed a test, but only if they have paid their tuition. [@ if (student_ age > x) { if (tuition == "paid") { student_grade++; }
- 250. to: The function will read a sensor five time with analogRead() then calculate the average of five readings. I t then scales the data to 8 bits (0- 255) and inverts it. [@ int ReadSens_ and_ Condition(){ int i; for (i = 0; i < 5; i++){ i = i + analogRead(0); Changed lines 68- 71 from: if (test_ score > y) { if (tuition == "paid") { student_grade++; } to: i = i / 5; // average i = i / 4; // scale to 8 bits (0 - 255) i = 255 - i; // invert output return i; Added lines 74- 78: Deleted lines 79- 100: However, if we later want to change tuition to a numerical test showing that they owe us less than a hundred dollars - tuition < 100; - - we have to change the code in two places, greatly increasing the risk of bugs if we change it one place and forget to change it in the other. A function helps by giving a block of code a name, then letting you call the entire block with that name. As a result, when you need to changed the named code, you only have to change it in one place. Our function looks like this: // tell us the type of data the function expects void tuitionTest(int tuition_balance) { if (tuition_balance < 100) { student_grade++; } } And our code looks like this: if (student_age > x) { tuitionTest(tuition_balance); } if (test_score > y) { tuitionTest(tuition_balance); } Restore November 05, 2007, at 04: 21 PM by Paul Badger Restore November 05, 2007, at 04: 20 PM by Paul Badger Deleted line 21: Deleted lines 24- 25: Changed lines 38- 40 from: [@ void setup(){ to: [@void setup(){
- 251. Restore November 05, 2007, at 04: 17 PM by Paul Badger Changed line 44 from: Serial.begin(9600); to: Serial.begin(9600); Changed lines 48- 54 from: int i = 2; int j = 3; int k; k = myMultiplyFunction(i, j); / / k now contains 6 Serial.println(k); delay(500); to: int i = 2; int j = 3; int k; k = myMultiplyFunction(i, j); // k now contains 6 Serial.println(k); delay(500); Changed lines 58- 60 from: int result; result = x * y; return result; to: int result; result = x * y; return result; Restore November 05, 2007, at 04: 16 PM by Paul Badger Deleted line 36: Deleted lines 37- 38: Changed line 40 from: The entire sketch would look like this: to: The entire sketch would then look like this: Changed lines 60- 69 from: } @] to: return result; }@] Restore November 05, 2007, at 04: 13 PM by Paul Badger Changed lines 7- 8 from: Standardizing code fragments into functions has severaladvantages: to: Standardizing code fragments into functions has several advantages: Changed lines 11- 12 from: They codify one action in one place so that the function only has to be thought out and debugged once. to:
- 252. Functions codify one action in one place so that the function only has to be thought out and debugged once. Added lines 20- 22: There are two required functions in an Arduino sketch, setup() and loop(). Other functions must be created outside the brackets of those two functions. As an example, we will create a simple function to multiply two numbers. Restore November 05, 2007, at 04: 07 PM by Paul Badger Changed line 57 from: int myMultiplyFunction(int i, int j){ to: int myMultiplyFunction(int x, int y){ Changed lines 59- 65 from: result = to: result = x * y; } Restore November 05, 2007, at 03: 58 PM by Paul Badger Changed lines 58- 64 from: to: int result; result = Restore November 05, 2007, at 03: 57 PM by Paul Badger Added lines 23- 24: Changed lines 29- 32 from: int: i = 2; int: j = 3; int: k; to: int i = 2; int j = 3; int k; Changed lines 38- 44 from: A more complex example I n a program to keep track of school records, we move a student up a grade if they are old enough, or if they have passed a test, but only if they have paid their tuition. to: Our function needs to be declared outside any other function, so "myMultiplyFunction()" can go above or below the "loop()" function. The entire sketch would look like this: Changed lines 42- 45 from: if (student_ age > x) { if (tuition == "paid") { student_grade++; } to: void setup(){ Serial.begin(9600); Changed lines 46- 49 from: if (test_ score > y) { if (tuition == "paid") {
- 253. student_grade++; } to: void loop{ int i = 2; int j = 3; int k; k = myMultiplyFunction(i, j); / / k now contains 6 Serial.println(k); delay(500); Added lines 56- 64: int myMultiplyFunction(int i, int j){ Changed lines 66- 70 from: However, if we later want to change tuition to a numerical test showing that they owe us less than a hundred dollars - tuition < 100; - - we have to change the code in two places, greatly increasing the risk of bugs if we change it one place and forget to change it in the other. A function helps by giving a block of code a name, then letting you call the entire block with that name. As a result, when you need to changed the named code, you only have to change it in one place. Our function looks like this: to: A more complex example I n a program to keep track of school records, we move a student up a grade if they are old enough, or if they have passed a test, but only if they have paid their tuition. Changed lines 75- 77 from: / / tell us the type of data the function expects void tuitionTest(int tuition_ balance) { if (tuition_balance < 100) { to: if (student_ age > x) { if (tuition == "paid") { Added lines 80- 84: if (test_ score > y) { if (tuition == "paid") { student_grade++; } } Changed lines 86- 90 from: And our code looks like this: to: However, if we later want to change tuition to a numerical test showing that they owe us less than a hundred dollars - tuition < 100; - - we have to change the code in two places, greatly increasing the risk of bugs if we change it one place and forget to change it in the other. A function helps by giving a block of code a name, then letting you call the entire block with that name. As a result, when you need to changed the named code, you only have to change it in one place. Our function looks like this: Changed lines 92- 93 from: if (student_ age > x) { tuitionTest(tuition_balance); to:
- 254. / / tell us the type of data the function expects void tuitionTest(int tuition_ balance) { if (tuition_balance < 100) { student_grade++; } Deleted lines 97- 99: if (test_ score > y) { tuitionTest(tuition_balance); } Added lines 99- 107: And our code looks like this: if (student_age > x) { tuitionTest(tuition_balance); } if (test_score > y) { tuitionTest(tuition_balance); } Restore October 15, 2007, at 07: 48 AM by Paul Badger Changed lines 23- 24 from: To "call" our simple multiply function we pass it the datatypes is it expecting: to: To "call" our simple multiply function we pass it the datatypes it is expecting: Restore October 15, 2007, at 07: 45 AM by Paul Badger Changed lines 21- 22 from: to:
- 255. Restore October 15, 2007, at 06: 04 AM by Paul Badger Changed lines 23- 25 from: I n a program to keep track of school records, we move a student up a grade if they are old enough, or if they have passed a test, but only if they have paid their tuition. to: To "call" our simple multiply function we pass it the datatypes is it expecting: Changed lines 26- 35 from: if (student_ age > x) { if (tuition == "paid") { student_grade++; } } if (test_ score > y) { if (tuition == "paid") { student_grade++; } } to: void loop{ int: i = 2; int: j = 3; int: k; k = myMultiplyFunction(i, j); / / k now contains 6 Changed lines 34- 38 from: However, if we later want to change tuition to a numerical test showing that they owe us less than a hundred dollars - tuition < 100; - - we have to change the code in two places, greatly increasing the risk of bugs if we change it one place and forget to change it in the other. A function helps by giving a block of code a name, then letting you call the entire block with that name. As a result, when you need to changed the named code, you only have to change it in one place. Our function looks like this: to: A more complex example I n a program to keep track of school records, we move a student up a grade if they are old enough, or if they have passed a test, but only if they have paid their tuition. Changed lines 44- 46 from:
- 256. / / tell us the type of data the function expects void tuitionTest(int tuition_ balance) { if (tuition_balance < 100) { to: if (student_ age > x) { if (tuition == "paid") { Added lines 49- 53: if (test_ score > y) { if (tuition == "paid") { student_grade++; } } Changed lines 55- 59 from: And our code looks like this: to: However, if we later want to change tuition to a numerical test showing that they owe us less than a hundred dollars - tuition < 100; - - we have to change the code in two places, greatly increasing the risk of bugs if we change it one place and forget to change it in the other. A function helps by giving a block of code a name, then letting you call the entire block with that name. As a result, when you need to changed the named code, you only have to change it in one place. Our function looks like this: Changed lines 61- 62 from: if (student_ age > x) { tuitionTest(tuition_balance); to: / / tell us the type of data the function expects void tuitionTest(int tuition_ balance) { if (tuition_balance < 100) { student_grade++; } Deleted lines 66- 68: if (test_ score > y) { tuitionTest(tuition_balance); } Added lines 68- 76: And our code looks like this: if (student_age > x) { tuitionTest(tuition_balance); } if (test_score > y) { tuitionTest(tuition_balance); } Restore October 15, 2007, at 05: 57 AM by Paul Badger Changed lines 21- 23 from:
- 257. to: Restore October 15, 2007, at 05: 57 AM by Paul Badger Changed lines 21- 23 from: to: Restore October 15, 2007, at 05: 57 AM by Paul Badger Changed lines 7- 10 from: Standardizing code fragments into functions has several advantages: Functions help the programmer stay organized. Often this helps to concpetualize the program. to: Standardizing code fragments into functions has severaladvantages: Functions help the programmer stay organized. Often this helps to conceptualize the program. Changed lines 21- 25 from: % width=50pxAttach: FunctionAnatom.gif to: Restore October 15, 2007, at 05: 51 AM by Paul Badger Changed lines 22- 25 from:
- 258. to: % width=50pxAttach: FunctionAnatom.gif Restore October 15, 2007, at 05: 48 AM by Paul Badger Changed lines 22- 25 from: Anatomy of a function? to: Restore October 15, 2007, at 05: 46 AM by Paul Badger Changed lines 23- 25 from: [[ FunctionAnatom.gif | Anatomy of a function] to: Anatomy of a function? Restore
- 259. October 15, 2007, at 05: 46 AM by Paul Badger Added line 22: Added line 25: Restore October 15, 2007, at 05: 46 AM by Paul Badger Changed lines 22- 23 from: Attach: image.jpeg Δ to: [[ FunctionAnatom.gif | Anatomy of a function] Restore October 15, 2007, at 05: 44 AM by Paul Badger Added lines 22- 23: Attach: image.jpeg Δ Restore J uly 17, 2007, at 01: 28 PM by David A. Mellis - removing prototyping note... i hope no one is still using arduino 0003 or earlier Deleted lines 57- 67: Prototyping, prior to 0004 I f you are using a version of Arduino prior to 0004, any function you create yourself the in the body of your code needs a function prototype at the beginning of your code, before the setup() code block. This is similar to the declaration of a variable, and essentially is just the first line of your function declaration, with a semicolon at the end. void displayNumber(int incomingValue); This tells Arduino what kind of function you are calling and what arguments it will pass. Restore J uly 17, 2007, at 01: 27 PM by David A. Mellis Changed lines 5- 6 from: For programmers accustomed to using BASI C, functions in C provide (and extend) the utility of using subroutines (GOSUB). to: For programmers accustomed to using BASI C, functions in Arduino provide (and extend) the utility of using subroutines (GOSUB). Restore J uly 17, 2007, at 06: 30 AM by Paul Badger Changed lines 3- 4 from: Functions allow you to create modular pieces of code that perform a defined task and then return you to the area of code from which the function was "called". The typical case for creating a function is when you need to perform the same action multiple times in one program. to: Functions allow a programmer to create modular pieces of code that performs a defined task and then returns to the area of code from which the function was "called". The typical case for creating a function is when one needs to perform the same action multiple times in a program. For programmers accustomed to using BASI C, functions in C provide (and extend) the utility of using subroutines (GOSUB). Restore J uly 17, 2007, at 06: 25 AM by Paul Badger Changed lines 11- 12 from: This reduces chances for errors in debugging and modification, if the code needs to be changed. to: This also reduces chances for errors in modification, if the code needs to be changed.
- 260. Restore J uly 16, 2007, at 11: 02 PM by Paul Badger Changed lines 15- 17 from: They make it easier to reuse code in other programs. Funcitons make programs more modular and flexible. to: They make it easier to reuse code in other programs by making it more modular, and as a nice side effect, using functions also often makes the code more readable. Restore J uly 16, 2007, at 10: 51 PM by Paul Badger Changed lines 3- 6 from: Functions allow you to create modular pieces of code that perform certain tasks and then return you to the area of code it was executed from. The typical case for creating a function is when you need to perform the same action. For instance, we move a student up a grade if they are old enough, or if they have passed a test, but only if they have paid their tuition. to: Functions allow you to create modular pieces of code that perform a defined task and then return you to the area of code from which the function was "called". The typical case for creating a function is when you need to perform the same action multiple times in one program. Standardizing code fragments into functions has several advantages: Functions help the programmer stay organized. Often this helps to concpetualize the program. They codify one action in one place so that the function only has to be thought out and debugged once. This reduces chances for errors in debugging and modification, if the code needs to be changed. Functions make the whole sketch smaller and more compact because sections of code are reused many times. They make it easier to reuse code in other programs. Funcitons make programs more modular and flexible. Example I n a program to keep track of school records, we move a student up a grade if they are old enough, or if they have passed a test, but only if they have paid their tuition. Restore April 16, 2007, at 09: 30 AM by Paul Badger Restore April 16, 2007, at 09: 25 AM by Paul Badger Added line 51: Restore April 16, 2007, at 09: 24 AM by Paul Badger Changed lines 1- 2 from: Functions to: Functions Deleted lines 50- 51: Reference Home Restore October 01, 2006, at 05: 54 AM by Clay Shirky Deleted line 18: Changed line 24 from: to: [@ Changed line 31 from:
- 261. to: @] Deleted line 32: Restore October 01, 2006, at 05: 53 AM by Clay Shirky - Updated example and prototyping note Changed lines 3- 4 from: Functions allow you to create modular pieces of code that perform certain tasks and then return you to the area of code it was executed from. Below is an example of a function being called: to: Functions allow you to create modular pieces of code that perform certain tasks and then return you to the area of code it was executed from. The typical case for creating a function is when you need to perform the same action. For instance, we move a student up a grade if they are old enough, or if they have passed a test, but only if they have paid their tuition. Changed lines 8- 17 from: displayNumber(value); to: if (student_ age > x) { if (tuition == "paid") { student_grade++; } } if (test_ score > y) { if (tuition == "paid") { student_grade++; } } Changed lines 20- 21 from: When Arduino executes this line, it looks for this function's declaration somewhere in the code, passes the "value" variable put inside the () as an "argument" to the function. Below is an example of what the function declaration could look like: to: However, if we later want to change tuition to a numerical test showing that they owe us less than a hundred dollars - tuition < 100; - - we have to change the code in two places, greatly increasing the risk of bugs if we change it one place and forget to change it in the other. A function helps by giving a block of code a name, then letting you call the entire block with that name. As a result, when you need to changed the named code, you only have to change it in one place. Our function looks like this: / / tell us the type of data the function expects void tuitionTest(int tuition_ balance) { if (tuition_balance < 100) { student_grade++; } } And our code looks like this: Changed lines 36- 39 from: void displayNumber(int incomingValue){ printInteger(incomingValue); // other code in the function }
- 262. to: if (student_ age > x) { tuitionTest(tuition_balance); } if (test_ score > y) { tuitionTest(tuition_balance); } Changed lines 43- 47 from: Important (Prototyping) I n C, any function you create yourself the in the body of your code needs a function prototype at the beginning of your code, before the setup() code block. This is similar to the declaration of a variable, and essentially is just the first line of your function declaration, with a semicolon at the end. to: Prototyping, prior to 0004 I f you are using a version of Arduino prior to 0004, any function you create yourself the in the body of your code needs a function prototype at the beginning of your code, before the setup() code block. This is similar to the declaration of a variable, and essentially is just the first line of your function declaration, with a semicolon at the end. Changed lines 52- 53 from: This prepares C to know what kind of function you are calling and what arguments it will pass. to: This tells Arduino what kind of function you are calling and what arguments it will pass. Restore March 26, 2006, at 10: 11 AM by David A. Mellis - Added "void" to function as C++ (in release 0004) will require it. Changed line 12 from: displayNumber(int incomingValue){ to: void displayNumber(int incomingValue){ Changed line 23 from: displayNumber(int incomingValue); to: void displayNumber(int incomingValue); Restore March 25, 2006, at 05: 41 AM by David A. Mellis - Prototypes end with semicolons. Changed lines 20- 21 from: I n C, any function you create yourself the in the body of your code needs a function prototype at the beginning of your code, before the setup() code block. This is similar to the declaration of a variable, and essentially is just the first line of your function declaration. to: I n C, any function you create yourself the in the body of your code needs a function prototype at the beginning of your code, before the setup() code block. This is similar to the declaration of a variable, and essentially is just the first line of your function declaration, with a semicolon at the end. Changed line 23 from: displayNumber(int incomingValue) to:
- 263. displayNumber(int incomingValue); Restore March 24, 2006, at 05: 27 PM by J eff Gray Changed line 5 from: [= to: [@ Changed lines 7- 8 from: =] to: @] Changed line 22 from: [= to: [@ Changed lines 24- 25 from: =] to: @] Restore March 24, 2006, at 05: 27 PM by J eff Gray Changed lines 16- 17 from: to: @] Restore March 24, 2006, at 05: 26 PM by J eff Gray Changed lines 1- 2 from: Functions to: Functions Restore March 24, 2006, at 05: 26 PM by J eff Gray Added lines 1- 27: Functions Functions allow you to create modular pieces of code that perform certain tasks and then return you to the area of code it was executed from. Below is an example of a function being called: displayNumber(value); When Arduino executes this line, it looks for this function's declaration somewhere in the code, passes the "value" variable put inside the () as an "argument" to the function. Below is an example of what the function declaration could look like: [@ displayNumber(int incomingValue){ printInteger(incomingValue); // other code in the function }
- 264. Important (Prototyping) I n C, any function you create yourself the in the body of your code needs a function prototype at the beginning of your code, before the setup() code block. This is similar to the declaration of a variable, and essentially is just the first line of your function declaration. displayNumber(int incomingValue) This prepares C to know what kind of function you are calling and what arguments it will pass. Reference Home Restore Edit Page | Page History | Printable View | All Recent Site Changes
- 265. Arduino : Reference / Function Declaration Reference Language (extended) | Libraries | Comparison | Board Functions Segmenting code into functions allows a programmer to create modular pieces of code that perform a defined task and then return to the area of code from which the function was "called". The typical case for creating a function is when one needs to perform the same action multiple times in a program. For programmers accustomed to using BASI C, functions in Arduino provide (and extend) the utility of using subroutines (GOSUB in BASI C). Standardizing code fragments into functions has several advantages: Functions help the programmer stay organized. Often this helps to conceptualize the program. Functions codify one action in one place so that the function only has to be thought out and debugged once. This also reduces chances for errors in modification, if the code needs to be changed. Functions make the whole sketch smaller and more compact because sections of code are reused many times. They make it easier to reuse code in other programs by making it more modular, and as a nice side effect, using functions also often makes the code more readable. There are two required functions in an Arduino sketch, setup() and loop(). Other functions must be created outside the brackets of those two functions. As an example, we will create a simple function to multiply two numbers. Example To "call" our simple multiply function, we pass it parameters of the datatype that it is expecting: void loop{ int i = 2; int j = 3; int k; k = myMultiplyFunction(i, j); // k now contains 6 }
- 266. Our function needs to be declared outside any other function, so "myMultiplyFunction()" can go either above or below the "loop()" function. The entire sketch would then look like this: void setup(){ Serial.begin(9600); } void loop{ int i = 2; int j = 3; int k; } k = myMultiplyFunction(i, j); // k now contains 6 Serial.println(k); delay(500); int myMultiplyFunction(int x, int y){ int result; result = x * y; return result; } Another example This function will read a sensor five times with analogRead() and calculate the average of five readings. I t then scales the data to 8 bits (0- 255), and inverts it, returning the inverted result. int ReadSens_and_Condition(){ int i; int sval; for (i = 0; i < 5; i++){ sval = sval + analogRead(0); } } sval = sval = sval = return sval / 5; sval / 4; 255 - sval; sval; // sensor on analog pin 0 // average // scale to 8 bits (0 - 255) // invert output To call our function we just assign it to a variable. int sens; sens = ReadSens_and_Condition(); Reference Home Corrections, suggestions, and new documentation should be posted to the Forum. The text of the Arduino reference is licensed under a Creative Commons Attribution-ShareAlike 3.0 License . Code samples in the reference are released into the public domain. (Printable View of http://www.arduino.cc/en/Reference/FunctionDeclaration)
- 267. Arduino Buy | Download | Getting Started | Learning | Reference | Hardware | FAQ Login to Arduino Username: Password: Keep me logged in: ✔ Login Edit Page | Page History | Printable View | All Recent Site Changes search Blog » | Forum » | Playground »
- 268. Arduino Buy | Download | Getting Started | Learning | Reference | Hardware | FAQ search Blog » | Forum » | Playground » Reference.Void History Hide minor edits - Show changes to markup J uly 17, 2007, at 01: 15 PM by David A. Mellis Changed lines 8- 18 from: / / actions are performed in the function "setup" but / / no information is reported to the larger program void setup(){ serial.begin(9600); }@] to: / / actions are performed in the functions "setup" and "loop" / / but no information is reported to the larger program void setup() { // ... } void loop() { // ... } @] Restore J uly 17, 2007, at 11: 07 AM by Paul Badger Changed lines 3- 5 from: The void keyword is used only in function declarations. I t indicates that the function is expected to return no information, to the function from which it was called. to: The void keyword is used only in function declarations. I t indicates that the function is expected to return no information to the function from which it was called. Restore J uly 17, 2007, at 06: 41 AM by Paul Badger Changed lines 17- 19 from: } @] to: }@] Restore J uly 17, 2007, at 06: 41 AM by Paul Badger Added lines 23- 24: Restore J uly 17, 2007, at 06: 41 AM by Paul Badger Changed line 22 from: to: function declaration
- 269. Restore J uly 17, 2007, at 06: 40 AM by Paul Badger Added lines 1- 22: void The void keyword is used only in function declarations. I t indicates that the function is expected to return no information, to the function from which it was called. Example: // actions are performed in the function "setup" but // no information is reported to the larger program void setup(){ serial.begin(9600); } See also Restore Edit Page | Page History | Printable View | All Recent Site Changes
- 270. Arduino : Reference / Void Reference Language (extended) | Libraries | Comparison | Board void The void keyword is used only in function declarations. I t indicates that the function is expected to return no information to the function from which it was called. Example: // actions are performed in the functions "setup" and "loop" // but no information is reported to the larger program void setup() { // ... } void loop() { // ... } See also function declaration Reference Home Corrections, suggestions, and new documentation should be posted to the Forum. The text of the Arduino reference is licensed under a Creative Commons Attribution-ShareAlike 3.0 License . Code samples in the reference are released into the public domain. (Printable View of http://www.arduino.cc/en/Reference/Void)
- 271. Arduino Buy | Download | Getting Started | Learning | Reference | Hardware | FAQ Login to Arduino Username: Password: Keep me logged in: ✔ Login Edit Page | Page History | Printable View | All Recent Site Changes search Blog » | Forum » | Playground »
- 272. Arduino Buy | Download | Getting Started | Learning | Reference | Hardware | FAQ search Blog » | Forum » | Playground » Reference.If History Hide minor edits - Show changes to markup April 08, 2008, at 06: 32 PM by Paul Badger Changed lines 37- 38 from: This is because C evaluates if (x=10) is as follows: 10 is assigned to x, so x now contains 10. Then the 'if' conditional evaluates 10, which always evaluates to TRUE, since any non- zero number evaluates to TRUE. Consequently, if (x = 10) will always evaluate to TRUE, which is not the desired result when using an 'if' statement. to: This is because C evaluates the statement if (x=10) as follows: 10 is assigned to x, so x now contains 10. Then the 'if' conditional evaluates 10, which always evaluates to TRUE, since any non- zero number evaluates to TRUE. Consequently, if (x = 10) will always evaluate to TRUE, which is not the desired result when using an 'if' statement. Additionally, the variable x will be set to 10, which is also not a desired action. Restore September 23, 2007, at 07: 57 AM by Paul Badger Changed lines 35- 36 from: Beware of accidentally using the single equal sign '='(e.g. if (x = 10) ), which is the assignment operator, and sets x to 10. I nstead use the double equal sign, == (e.g. if (x == 10) ), which is the comparison operator, and tests whether x is equal to 10 or not. The latter statement is only true if x equals 10, but the former statement will always be true. to: Beware of accidentally using the single equal sign (e.g. if (x = 10) ). The single equal sign is the assignment operator, and sets x to 10. I nstead use the double equal sign (e.g. if (x == 10) ), which is the comparison operator, and tests whether x is equal to 10 or not. The latter statement is only true if x equals 10, but the former statement will always be true. Restore September 23, 2007, at 07: 54 AM by Paul Badger Changed lines 35- 38 from: Beware of accidentally using the single equal sign '='(e.g. if (x = 10) ), which is the assignment operator, setting x to 10. I nstead use the double equal sign, == (e.g. if (x == 10) ), which tests whether x is equal to 10 or not. The latter statement is only true if x equals 10, but the former statement will always be true. This is because C evaluates if (x=10) is as follows: 10 is assigned to x, so x now contains 10. Then the 'if' conditional evaluates 10, which always evaluates to TRUE, since any non- zero number evaluates to TRUE. Consequently, if (x = 10) will always evaluate to TRUE, which is not the desired result when using an 'if' statement. to: Beware of accidentally using the single equal sign '='(e.g. if (x = 10) ), which is the assignment operator, and sets x to 10. I nstead use the double equal sign, == (e.g. if (x == 10) ), which is the comparison operator, and tests whether x is equal to 10 or not. The latter statement is only true if x equals 10, but the former statement will always be true. This is because C evaluates if (x=10) is as follows: 10 is assigned to x, so x now contains 10. Then the 'if' conditional evaluates 10, which always evaluates to TRUE, since any non- zero number evaluates to TRUE. Consequently, if (x = 10) will always evaluate to TRUE, which is not the desired result when using an 'if' statement. Restore September 23, 2007, at 07: 52 AM by Paul Badger Changed lines 34- 36 from:
- 273. Coding Warning: Beware of accidentally using the single equal sign '='(e.g. if (x = 10) ), which is the assignment operator, instead of using == (e.g. if (x == 10) ), which tests whether x is equal to 10 or not. The latter statement is only true if x equals 10, but the former statement will always be true, because the value of x = 10 is true if the assignment is successful. Mistaking = for == will result in a test that is always passed, and which resets your variable, as a (probably unwanted) side- effect. to: Warning: Beware of accidentally using the single equal sign '='(e.g. if (x = 10) ), which is the assignment operator, setting x to 10. I nstead use the double equal sign, == (e.g. if (x == 10) ), which tests whether x is equal to 10 or not. The latter statement is only true if x equals 10, but the former statement will always be true. This is because C evaluates if (x=10) is as follows: 10 is assigned to x, so x now contains 10. Then the 'if' conditional evaluates 10, which always evaluates to TRUE, since any non- zero number evaluates to TRUE. Consequently, if (x = 10) will always evaluate to TRUE, which is not the desired result when using an 'if' statement. Restore September 23, 2007, at 07: 47 AM by Paul Badger Changed lines 35- 36 from: Beware of accidently using = (e.g. if (x = 10) ), which sets a variable, instead of using == (e.g. if (x == 10) ), which tests whether x is equal to 10 or not. The latter statement is only true if x equals 10, but the former statement will always be true, because the value of x = 10 is true if the assignment is successful. Mistaking = for == will result in a test that is always passed, and which resets your variable, as a (probably unwanted) side- effect. to: Beware of accidentally using the single equal sign '='(e.g. if (x = 10) ), which is the assignment operator, instead of using == (e.g. if (x == 10) ), which tests whether x is equal to 10 or not. The latter statement is only true if x equals 10, but the former statement will always be true, because the value of x = 10 is true if the assignment is successful. Mistaking = for == will result in a test that is always passed, and which resets your variable, as a (probably unwanted) side- effect. Restore September 23, 2007, at 07: 44 AM by Paul Badger Changed line 13 from: The brackets may be omitted after an if statement. I f this is done the next line (defined by the semicolon) becomes the only conditional statement. to: The brackets may be omitted after an if statement. I f this is done, the next line (defined by the semicolon) becomes the only conditional statement. Restore September 23, 2007, at 07: 43 AM by Paul Badger Changed lines 16- 17 from: if (x > 120) digitalWrite(LEDpin, HI GH); if (x > 120) {digitalWrite( LEDpin, HI GH); } / / both are correct to: if (x > 120) digitalWrite(LEDpin, HI GH); if (x > 120) digitalWrite(LEDpin, HI GH); if (x > 120) {digitalWrite( LEDpin, HI GH); } / / all are correct Restore September 23, 2007, at 07: 41 AM by Paul Badger Changed line 13 from: I t is often convenient to use a single line for a compact conditional test, and reaction to the test. I n this case, the brackets may be ommited although they may add clarity for beginning programmers: to:
- 274. The brackets may be omitted after an if statement. I f this is done the next line (defined by the semicolon) becomes the only conditional statement. Restore J une 11, 2007, at 11: 49 PM by Paul Badger Changed lines 35- 38 from: See also I f ... Else to: Restore J une 11, 2007, at 11: 48 PM by Paul Badger Changed lines 35- 38 from: to: See also I f ... Else Restore J une 11, 2007, at 11: 44 PM by Paul Badger Changed lines 30- 31 from: Coding Warning: Beware of accidently using = (e.g. if (x = 10) ), which sets a variable, instead of using == (e.g. if (x == 10) ), which tests whether x is equal to 10 or not. The latter statement is only true if x equals 10, but the former statement will always be true, because the value of x = 10 is true if the assignment is successful. Mistaking = for == will result in a test that is always passed, and which resets your variable, as a (probably unwanted) side- effect. to: Coding Warning: Beware of accidently using = (e.g. if (x = 10) ), which sets a variable, instead of using == (e.g. if (x == 10) ), which tests whether x is equal to 10 or not. The latter statement is only true if x equals 10, but the former statement will always be true, because the value of x = 10 is true if the assignment is successful. Mistaking = for == will result in a test that is always passed, and which resets your variable, as a (probably unwanted) side- effect. Restore May 26, 2007, at 07: 36 AM by Paul Badger Added lines 11- 12: The program tests to see if someVariable is greater than 50. I f it is, the program takes a particular action. Put another way, if the statement in parentheses is true, the statements inside the brackets are run. I f not, the program skips over the code. Changed line 16 from: if (x > 120) digitalWrite(LEDpin, HI GH); / / both are correct to: if (x > 120) digitalWrite(LEDpin, HI GH); Deleted lines 19- 20: The program tests to see if someVariable is greater than 50. I f it is, the program takes a particular action. Put another way, if the statement in parentheses is true, the statements inside the brackets are run. I f not, the program skips over the code. Restore May 26, 2007, at 07: 33 AM by Paul Badger Changed lines 16- 17 from: to: @] Restore May 26, 2007, at 07: 33 AM by Paul Badger Added lines 10- 16: I t is often convenient to use a single line for a compact conditional test, and reaction to the test. I n this case, the brackets
- 275. may be ommited although they may add clarity for beginning programmers: [@ if (x > 120) digitalWrite(LEDpin, HI GH); / / both are correct if (x > 120) {digitalWrite( LEDpin, HI GH); } / / both are correct Restore April 16, 2007, at 05: 02 PM by David A. Mellis Changed line 7 from: # do something here to: // do something here Restore April 16, 2007, at 10: 52 AM by Paul Badger Changed lines 22- 23 from: Coding Warning: Beware of accidently using = (e.g. if (x = 10) ), which sets a variable, instead of using == (e.g. if (x == 10) ), which tests whether x is equal to 10 or not. The latter statement is only true if x equals 10, but the former statement will always be true, because the value of x = 10 is true if the assignment is successful. Mistaking = for == will result in a test that is always passed, and which resets your variable as a (probably unwanted) side- effect. to: Coding Warning: Beware of accidently using = (e.g. if (x = 10) ), which sets a variable, instead of using == (e.g. if (x == 10) ), which tests whether x is equal to 10 or not. The latter statement is only true if x equals 10, but the former statement will always be true, because the value of x = 10 is true if the assignment is successful. Mistaking = for == will result in a test that is always passed, and which resets your variable, as a (probably unwanted) side- effect. Restore April 16, 2007, at 10: 51 AM by Paul Badger Changed lines 1- 2 from: if to: if Restore April 16, 2007, at 09: 14 AM by Paul Badger Changed lines 26- 29 from: Reference Home to: Restore March 30, 2006, at 08: 58 PM by Tom I goe Changed lines 22- 23 from: Coding Warning: Beware of accidently using =, which sets a variable ( if (x = 10) ), instead of == ( if (x == 10) ), which tests whether x is equal to 10 or not. The latter statement is only true if x equals 10, but the former statement will always be true, because the value of x = 10 is true if the assignment is successful. Mistaking = for == will result in a test that is always passed, and which resets your variable as a (probably unwanted) side- effect. to: Coding Warning: Beware of accidently using = (e.g. if (x = 10) ), which sets a variable, instead of using == (e.g. if (x == 10) ), which tests whether x is equal to 10 or not. The latter statement is only true if x equals 10, but the former statement will always be true, because the value of x = 10 is true if the assignment is successful. Mistaking = for == will result in a test that is always passed, and which resets your variable as a (probably unwanted) side- effect. Restore March 30, 2006, at 08: 55 PM by Tom I goe Changed lines 22- 23 from: Coding Warning: Beware of accidently using =, which sets a variable ( if (x = 10) ), instead of == ( if (x == 10) ), which tests whether x is equal to 10 or not. The latter statement is only true if x equals 10, but the former statement will always be true, because the value of x = 10 is set if the assignment is successful. Mistaking = for == will result in a test
- 276. that is always passed, and which resets your variable as a (probably unwanted) side- effect. to: Coding Warning: Beware of accidently using =, which sets a variable ( if (x = 10) ), instead of == ( if (x == 10) ), which tests whether x is equal to 10 or not. The latter statement is only true if x equals 10, but the former statement will always be true, because the value of x = 10 is true if the assignment is successful. Mistaking = for == will result in a test that is always passed, and which resets your variable as a (probably unwanted) side- effect. Restore March 30, 2006, at 08: 38 PM by Tom I goe Changed line 18 from: x > y (x is greater than y) to: x > y (x is greater than y) Restore March 30, 2006, at 08: 38 PM by Tom I goe Changed lines 15- 21 from: x == y (x is equal to y) x != y (x is not equal to y) x < y (x is less than y) x > y (x is greater than y) x <= y (x is less than or equal to y) x >= y (x is greater than or equal to y) to: x x x x x x = = y (x is equal to y) ! = y (x is not equal to y) < y (x is less than y) > y (x is greater than y) < = y (x is less than or equal to y) > = y (x is greater than or equal to y) Restore March 30, 2006, at 08: 37 PM by Tom I goe Changed lines 22- 26 from: Coding Warning: Beware of accidently using =, which sets a variable ( if (x = 10) ), instead of == ( if (x == 10) ), which tests whether x is equal to 10 or not. The latter statement is only true if x equals 10, but the former statement will always be true, because the value of x = 10 is set if the assignment is successful. Mistaking = for == will result in a test that is always passed, and which resets your variable as a (probably unwanted) side- effect. to: Coding Warning: Beware of accidently using =, which sets a variable ( if (x = 10) ), instead of == ( if (x == 10) ), which tests whether x is equal to 10 or not. The latter statement is only true if x equals 10, but the former statement will always be true, because the value of x = 10 is set if the assignment is successful. Mistaking = for == will result in a test that is always passed, and which resets your variable as a (probably unwanted) side- effect. if can also be part of a branching control structure using the if...else] construction. Restore March 30, 2006, at 08: 36 PM by Tom I goe Changed lines 15- 21 from: x == y(x is equal to y) x != y (x is not equal to y) x x x x < y (x is less than y) > y (x is greater than y) <= y (x is less than or equal to y) >= y (x is greater than or equal to y)
- 277. to: x == y (x is equal to y) x != y (x is not equal to y) x < y (x is less than y) x > y (x is greater than y) x <= y (x is less than or equal to y) x >= y (x is greater than or equal to y) Restore March 30, 2006, at 08: 35 PM by Tom I goe Changed lines 15- 21 from: == (equals to) != (not equals) < (less than) > (grater than) <= (less than or equals) >= (greater than or equals) to: x == y(x is equal to y) x != y (x is not equal to y) x < y (x is less than y) x > y (x is greater than y) x <= y (x is less than or equal to y) x >= y (x is greater than or equal to y) Restore March 30, 2006, at 08: 33 PM by Tom I goe Changed lines 10- 11 from: The program tests to see if someVariable is greater than 50. I f it is, the program takes a particular action. Put another way, if the statement in brackets is true, the statements inside the brackets are run. I f not, the program skips over the code. to: The program tests to see if someVariable is greater than 50. I f it is, the program takes a particular action. Put another way, if the statement in parentheses is true, the statements inside the brackets are run. I f not, the program skips over the code. Restore March 30, 2006, at 08: 32 PM by Tom I goe Changed lines 3- 4 from: if tests whether a certain condition has been reached, such as an input being above a certain number. The format for an if test is: to: if tests whether a certain condition has been reached, such as an input being above a certain number. The format for an if test is: Restore March 30, 2006, at 08: 32 PM by Tom I goe Changed lines 1- 4 from: if statements if tests whether a certain condition has been reached, such as an input being above a certain number. The format for an if test is: to: if if tests whether a certain condition has been reached, such as an input being above a certain number. The format for an if test is: Restore
- 278. March 30, 2006, at 08: 31 PM by Tom I goe Changed lines 3- 12 from: This helps the control and flow of the programs, used to check if condition has been reached, the computer determines whether the expression (in the brackets) is true or false. I f true the statements (inside the curly brackets) are executed, if not, the program skips over the code. To test for equality is == A warning: Beware of using = instead of ==, such as writing accidentally i f ( i = j ) ..... This is a perfectly LEGAL C statement (syntactically speaking) which copies the value in "j" into "i", and delivers this value, which will then be interpreted as TRUE if j is non- zero. This is called assignment by value - - a key feature of C. to: if tests whether a certain condition has been reached, such as an input being above a certain number. The format for an if test is: if (someVariable > 50) { # do something here } The program tests to see if someVariable is greater than 50. I f it is, the program takes a particular action. Put another way, if the statement in brackets is true, the statements inside the brackets are run. I f not, the program skips over the code. The statements being evaluated inside the parentheses require the use of one or more operators: Changed lines 22- 31 from: Example if(expression) { statement; statement; } to: Coding Warning: Beware of accidently using =, which sets a variable ( if (x = 10) ), instead of == ( if (x == 10) ), which tests whether x is equal to 10 or not. The latter statement is only true if x equals 10, but the former statement will always be true, because the value of x = 10 is set if the assignment is successful. Mistaking = for == will result in a test that is always passed, and which resets your variable as a (probably unwanted) side- effect. Restore March 24, 2006, at 04: 36 PM by J eff Gray Changed lines 1- 2 from: if to: if statements Restore March 24, 2006, at 04: 36 PM by J eff Gray Changed lines 1- 2 from: setup to:
- 279. if Restore March 24, 2006, at 04: 35 PM by J eff Gray Changed lines 1- 2 from: setup to: setup Restore March 24, 2006, at 04: 34 PM by J eff Gray Changed lines 1- 6 from: if(expression) { statement; statement; } to: setup Changed lines 5- 7 from: To test for equality is == to: To test for equality is == Deleted line 8: Deleted line 10: Changed lines 13- 19 from: Other operators: != (not equals) < (less than) > (grater than) <= (less than or equals) >= (greater than or equals) to: Operators: == (equals to) != (not equals) < (less than) > (grater than) <= (less than or equals) >= (greater than or equals) Example if(expression) { statement; statement; } Reference Home
- 280. Restore February 14, 2006, at 09: 46 AM by Erica Calogero Changed lines 12- 14 from: A warning: Beware of using ` ` = instead of ` ` ==, such as writing accidentally to: A warning: Beware of using = instead of ==, such as writing accidentally Restore February 14, 2006, at 09: 45 AM by Erica Calogero Added lines 1- 26: if(expression) { statement; statement; } This helps the control and flow of the programs, used to check if condition has been reached, the computer determines whether the expression (in the brackets) is true or false. I f true the statements (inside the curly brackets) are executed, if not, the program skips over the code. To test for equality is == A warning: Beware of using ` ` = instead of ` ` ==, such as writing accidentally i f ( i = j ) ..... This is a perfectly LEGAL C statement (syntactically speaking) which copies the value in "j" into "i", and delivers this value, which will then be interpreted as TRUE if j is non- zero. This is called assignment by value - - a key feature of C. Other operators: != (not equals) < (less than) > (grater than) <= (less than or equals) >= (greater than or equals) Restore Edit Page | Page History | Printable View | All Recent Site Changes
- 281. Arduino : Reference / I f Reference Language (extended) | Libraries | Comparison | Board if if tests whether a certain condition has been reached, such as an input being above a certain number. The format for an if test is: if (someVariable > 50) { // do something here } The program tests to see if someVariable is greater than 50. I f it is, the program takes a particular action. Put another way, if the statement in parentheses is true, the statements inside the brackets are run. I f not, the program skips over the code. The brackets may be omitted after an if statement. I f this is done, the next line (defined by the semicolon) becomes the only conditional statement. if (x > 120) digitalWrite(LEDpin, HIGH); if (x > 120) digitalWrite(LEDpin, HIGH); if (x > 120) {digitalWrite(LEDpin, HIGH);} // all are correct The statements being evaluated inside the parentheses require the use of one or more operators: Operators: x x x x x x == != < > <= >= y y y y y y (x (x (x (x (x (x is is is is is is equal to y) not equal to less than y) greater than less than or greater than y) y) equal to y) or equal to y) Warning: Beware of accidentally using the single equal sign (e.g. if (x = 10) ). The single equal sign is the assignment operator, and sets x to 10. I nstead use the double equal sign (e.g. if (x == 10) ), which is the comparison operator, and tests whether x is equal to 10 or not. The latter statement is only true if x equals 10, but the former statement will always be true. This is because C evaluates the statement if (x=10) as follows: 10 is assigned to x, so x now contains 10. Then the 'if' conditional evaluates 10, which always evaluates to TRUE, since any non-zero number evaluates to TRUE. Consequently, if (x = 10) will always evaluate to TRUE, which is not the desired result when using an 'if' statement. Additionally, the variable x will be set to 10, which is also not a desired action. if can also be part of a branching control structure using the if...else] construction. Reference Home Corrections, suggestions, and new documentation should be posted to the Forum. The text of the Arduino reference is licensed under a Creative Commons Attribution-ShareAlike 3.0 License . Code samples in the reference are released into the public domain. (Printable View of http://www.arduino.cc/en/Reference/If)
- 282. Arduino Buy | Download | Getting Started | Learning | Reference | Hardware | FAQ Login to Arduino Username: Password: Keep me logged in: ✔ Login Edit Page | Page History | Printable View | All Recent Site Changes search Blog » | Forum » | Playground »
- 283. Arduino Buy | Download | Getting Started | Learning | Reference | Hardware | FAQ search Blog » | Forum » | Playground » Reference.Else History Hide minor edits - Show changes to markup September 23, 2007, at 08: 10 AM by Paul Badger Changed lines 3- 4 from: if/ else gives you greater control over the flow of your code than the basic if statement, by allowing you to group multiple tests together. For instance, if you wanted to test an analog input, and do one thing if the input was less than 500, and another thing if the input was 500 or greater, you would write that this way: to: if/ else allows greater control over the flow of code than the basic if statement, by allowing multiple tests to be grouped together. For example, an analog input could be tested and one action taken if the input was less than 500, and another action taken if the input was 500 or greater. The code would look like this: Changed line 7 from: // do Thing A to: // action A Changed line 11 from: // do Thing B to: // action B Restore April 16, 2007, at 05: 02 PM by David A. Mellis Changed line 7 from: # do Thing A to: // do Thing A Changed line 11 from: # do Thing B to: // do Thing B Changed line 18 from: # do Thing A to: // do Thing A Changed line 22 from: # do Thing B
- 284. to: // do Thing B Changed line 26 from: # do thing C to: // do Thing C Restore April 16, 2007, at 09: 34 AM by Paul Badger Changed lines 1- 2 from: if/ else to: if/ else Restore March 31, 2006, at 02: 44 PM by J eff Gray Added lines 1- 2: if/ else Restore March 30, 2006, at 08: 53 PM by Tom I goe Changed lines 1- 2 from: if/ else gives you greater control over the flow of your code than the basic if statement, by allowing you to group multiple together. For instance, if you wanted to test an analog input, and do one thing if the input was less than 500, and another thing if the input was 500 or greater, you would write that this way: to: if/ else gives you greater control over the flow of your code than the basic if statement, by allowing you to group multiple tests together. For instance, if you wanted to test an analog input, and do one thing if the input was less than 500, and another thing if the input was 500 or greater, you would write that this way: Changed lines 10- 30 from: }@] to: }@] else can proceed another if test, so that multiple, mutually exclusive tests can be run at the same time: if (pinFiveInput < 500) { # do Thing A } else if (pinFiveInput >= 1000) { # do Thing B } else { # do thing C } You can have an unlimited nuber of such branches. (Another way to express branching, mutually exclusive tests is with the switch case statement. Coding Note: I f you are using if/ else, and you want to make sure that some default action is always taken, it is a good idea to end your tests with an else statement set to your desired default behavior.
- 285. Restore March 30, 2006, at 08: 43 PM by Tom I goe Added lines 1- 10: if/ else gives you greater control over the flow of your code than the basic if statement, by allowing you to group multiple together. For instance, if you wanted to test an analog input, and do one thing if the input was less than 500, and another thing if the input was 500 or greater, you would write that this way: if (pinFiveInput < 500) { # do Thing A } else { # do Thing B } Restore Edit Page | Page History | Printable View | All Recent Site Changes
- 286. Arduino : Reference / Else Reference Language (extended) | Libraries | Comparison | Board if/ else if/ else allows greater control over the flow of code than the basic if statement, by allowing multiple tests to be grouped together. For example, an analog input could be tested and one action taken if the input was less than 500, and another action taken if the input was 500 or greater. The code would look like this: if (pinFiveInput < 500) { // action A } else { // action B } else can proceed another if test, so that multiple, mutually exclusive tests can be run at the same time: if (pinFiveInput < 500) { // do Thing A } else if (pinFiveInput >= 1000) { // do Thing B } else { // do Thing C } You can have an unlimited nuber of such branches. (Another way to express branching, mutually exclusive tests is with the switch case statement. Coding Note: I f you are using if/ else, and you want to make sure that some default action is always taken, it is a good idea to end your tests with an else statement set to your desired default behavior. Reference Home Corrections, suggestions, and new documentation should be posted to the Forum. The text of the Arduino reference is licensed under a Creative Commons Attribution-ShareAlike 3.0 License . Code samples in the reference are released into the public domain. (Printable View of http://www.arduino.cc/en/Reference/Else)
- 287. Arduino Buy | Download | Getting Started | Learning | Reference | Hardware | FAQ Login to Arduino Username: Password: Keep me logged in: ✔ Login Edit Page | Page History | Printable View | All Recent Site Changes search Blog » | Forum » | Playground »
- 288. Arduino Buy | Download | Getting Started | Learning | Reference | Hardware | FAQ Reference.For History Hide minor edits - Show changes to markup May 31, 2007, at 09: 42 AM by David A. Mellis Changed lines 21- 30 from: 1. define PWMpin 10 / / LED in series with 1k resistor on pin 10 void setup(){}; void loop(){}; for (int i=0; i <= 255; i++){ analogWrite(PWMpin, i); delay(10); } to: int PWMpin = 10; / / LED in series with 1k resistor on pin 10 void setup() { // no setup needed Added lines 27- 34: void loop() { for (int i=0; i <= 255; i++){ analogWrite(PWMpin, i); delay(10); } } Added line 36: Restore May 30, 2007, at 11: 34 AM by Paul Badger Changed lines 21- 22 from: 1. define PWMpin 10 to: 1. define PWMpin 10 / / LED in series with 1k resistor on pin 10 Restore May 30, 2007, at 11: 33 AM by Paul Badger Changed lines 20- 22 from: for (int i=1; i <= 8; i++){ // statement using the value i; } to: / / Dim an LED using a PWM pin search Blog » | Forum » | Playground »
- 289. 1. define PWMpin 10 void setup(){}; void loop(){}; for (int i=0; i <= 255; i++){ analogWrite(PWMpin, i); delay(10); } } Restore April 16, 2007, at 05: 00 PM by David A. Mellis Changed lines 11- 12 from: #statement(s) to: //statement(s); Changed line 21 from: statement using the value i; to: // statement using the value i; Restore April 16, 2007, at 10: 30 AM by Paul Badger Changed lines 9- 10 from: for ( initialization;;condition;; increment) { to: for ( initialization; condition; increment) { Changed lines 15- 16 from: The initialization happens first and exactly once. Each time through the loop, the condition is tested; if it's true, the statement block, and the increment is executed, then the condition is tested again. When the condition is false, the loop ends. to: The initialization happens first and exactly once. Each time through the loop, the condition is tested; if it's true, the statement block, and the increment is executed, then the condition is tested again. When the condition becomes false, the loop ends. Restore April 16, 2007, at 10: 27 AM by Paul Badger Changed lines 15- 16 from: The initialization happens first and exactly once. Each time through the loop the condition is tested; if it's true, the statement block, and the increment is executed, then the condition is tested again. When the condition is false, the loop ends. to: The initialization happens first and exactly once. Each time through the loop, the condition is tested; if it's true, the statement block, and the increment is executed, then the condition is tested again. When the condition is false, the loop ends. Restore April 16, 2007, at 10: 25 AM by Paul Badger Changed lines 15- 16 from: The initialization happens first and exactly once. Each time through the loop the condition is tested; if it's true, the statement block, the increment is executed, and the condition is tested again. When the condition is false, the loop ends.
- 290. to: The initialization happens first and exactly once. Each time through the loop the condition is tested; if it's true, the statement block, and the increment is executed, then the condition is tested again. When the condition is false, the loop ends. Restore April 16, 2007, at 10: 21 AM by Paul Badger Changed lines 24- 26 from: Coding Tip to: Coding Tip Restore April 16, 2007, at 10: 21 AM by Paul Badger Changed lines 9- 12 from: for ( initialization; condition;increment) { #statement(s) to: for ( initialization;;condition;; increment) { #statement(s) Changed lines 15- 16 from: The initialization happens first and exactly once. Then, the condition is tested; if it's true, the body and the increment are executed, and the condition is tested again. When the condition is false, the loop ends. to: The initialization happens first and exactly once. Each time through the loop the condition is tested; if it's true, the statement block, the increment is executed, and the condition is tested again. When the condition is false, the loop ends. Added lines 25- 28: Coding Tip The C for loop is much more flexible than for loops found in some other computer languages, including BASI C. Any or all of the three header elements may be omitted, although the semicolons are required. Also the statements for initialization, condition, and increment can be any valid C statements with unrelated variables. These types of unusual for statements may provide solutions to some rare programming problems. Restore April 16, 2007, at 10: 03 AM by Paul Badger Changed lines 9- 12 from: for ( initialization; condition;increment) { #statement(s) } to: for ( initialization; condition;increment) { #statement(s) } Restore April 16, 2007, at 09: 59 AM by Paul Badger Changed line 9 from: for ( initialization; condition; increment) { to: for ( initialization; condition;increment) {
- 291. Restore April 16, 2007, at 09: 52 AM by Paul Badger Changed lines 3- 10 from: Loops through multiple values, from the first to the last by the increment specified. Useful when used in combination with arrays to operate on collections of data/ pins. There are many parts to the for loop: for ( initialization; condition; increment) { body } to: Desciption The for statement is used to repeat a block of statements enclosed in curly braces. An increment counter is usually used to increment and terminate the loop. The for statement is useful for any repetitive operation, and is often used in combination with arrays to operate on collections of data/ pins. There are three parts to the for loop header: for ( initialization; condition; increment) { #statement(s) } Restore April 16, 2007, at 09: 36 AM by Paul Badger Restore April 16, 2007, at 09: 17 AM by Paul Badger Restore April 16, 2007, at 09: 16 AM by Paul Badger Changed lines 1- 2 from: for statements to: for statements Restore April 16, 2007, at 09: 16 AM by Paul Badger Deleted lines 23- 24: Reference Home Restore December 02, 2006, at 09: 53 AM by David A. Mellis Changed lines 13- 14 from: Example to: Example Added lines 21- 24: See also while Restore December 02, 2006, at 09: 52 AM by David A. Mellis Changed lines 3- 6 from: Loops through the values of i, from the first to the last by the increment specified. Useful when used in combination with arrays to operate on collections of data/ pins. I mportant Note: I n C you don’t need to initialise the local variable i. You can do it directly in the for statement itself. This is different in other, java based languages.
- 292. to: Loops through multiple values, from the first to the last by the increment specified. Useful when used in combination with arrays to operate on collections of data/ pins. There are many parts to the for loop: for ( initialization; condition; increment) { body } The initialization happens first and exactly once. Then, the condition is tested; if it's true, the body and the increment are executed, and the condition is tested again. When the condition is false, the loop ends. Deleted lines 20- 27: Restore March 27, 2006, at 10: 59 AM by Tom I goe Changed lines 5- 6 from: I mportant Note: I n C you don’t need to initialise the local variable i. This is different in other, java based languages. to: I mportant Note: I n C you don’t need to initialise the local variable i. You can do it directly in the for statement itself. This is different in other, java based languages. Changed line 10 from: for (i=1; i <= 8; i++){ to: for (int i=1; i <= 8; i++){ Restore March 24, 2006, at 04: 37 PM by J eff Gray Changed lines 1- 2 from: for() to: for statements Restore March 24, 2006, at 04: 28 PM by J eff Gray Changed lines 5- 6 from: I mportant Note: I n C you don’t need to initialise the local variable i. This is different in other, java based languages. to: I mportant Note: I n C you don’t need to initialise the local variable i. This is different in other, java based languages. Restore March 24, 2006, at 04: 28 PM by J eff Gray Changed lines 5- 6 from: [""I mportant Note: ""] I n C you don’t need to initialise the local variable i. This is different in other, java based languages. to: I mportant Note: I n C you don’t need to initialise the local variable i. This is different in other, java based languages. Restore March 24, 2006, at 04: 27 PM by J eff Gray Changed lines 5- 6 from: "bold"I mportant Note: "bold" I n C you don’t need to initialise the local variable i. This is different in other, java based languages. to:
- 293. [""I mportant Note: ""] I n C you don’t need to initialise the local variable i. This is different in other, java based languages. Restore March 24, 2006, at 04: 25 PM by J eff Gray Changed lines 5- 6 from: <b>I mportant Note: </ b> I n C you don’t need to initialise the local variable i. This is different in other, java based languages. to: "bold"I mportant Note: "bold" I n C you don’t need to initialise the local variable i. This is different in other, java based languages. Restore March 24, 2006, at 04: 25 PM by J eff Gray Added lines 1- 2: for() Changed lines 5- 10 from: for (i=1; i <= 8; i++) { statement using the value i; } N.B. I n C you don’t need to initialise the local variable i. This is different in other, java based languages. to: <b>I mportant Note: </ b> I n C you don’t need to initialise the local variable i. This is different in other, java based languages. Example for (i=1; i <= 8; i++){ statement using the value i; } Reference Home Restore February 14, 2006, at 09: 50 AM by Erica Calogero Added lines 1- 8: Loops through the values of i, from the first to the last by the increment specified. Useful when used in combination with arrays to operate on collections of data/ pins. for (i=1; i <= 8; i++) { statement using the value i; } N.B. I n C you don’t need to initialise the local variable i. This is different in other, java based languages. Restore Edit Page | Page History | Printable View | All Recent Site Changes
- 294. Arduino : Reference / For Reference Language (extended) | Libraries | Comparison | Board for statements Desciption The for statement is used to repeat a block of statements enclosed in curly braces. An increment counter is usually used to increment and terminate the loop. The for statement is useful for any repetitive operation, and is often used in combination with arrays to operate on collections of data/ pins. There are three parts to the for loop header: for (initialization; condition; increment) { //statement(s); } The initialization happens first and exactly once. Each time through the loop, the condition is tested; if it's true, the statement block, and the increment is executed, then the condition is tested again. When the condition becomes false, the loop ends. Example // Dim an LED using a PWM pin int PWMpin = 10; // LED in series with 1k resistor on pin 10 void setup() { // no setup needed } void loop() { for (int i=0; i <= 255; i++){ analogWrite(PWMpin, i); delay(10); } } Coding Tip The C for loop is much more flexible than for loops found in some other computer languages, including BASI C. Any or all of the three header elements may be omitted, although the semicolons are required. Also the statements for initialization, condition, and increment can be any valid C statements with unrelated variables. These types of unusual for statements may provide solutions to some rare programming problems. See also while Reference Home Corrections, suggestions, and new documentation should be posted to the Forum. The text of the Arduino reference is licensed under a Creative Commons Attribution-ShareAlike 3.0 License . Code samples in the reference are released into the public domain. (Printable View of http://www.arduino.cc/en/Reference/For)
- 295. Arduino Buy | Download | Getting Started | Learning | Reference | Hardware | FAQ Login to Arduino Username: Password: Keep me logged in: ✔ Login Edit Page | Page History | Printable View | All Recent Site Changes search Blog » | Forum » | Playground »
- 296. Arduino Buy | Download | Getting Started | Learning | Reference | Hardware | FAQ search Blog » | Forum » | Playground » Reference.SwitchCase History Hide minor edits - Show changes to markup J uly 17, 2007, at 11: 18 AM by Paul Badger Changed lines 1- 4 from: Switch / Case statements J ust like I f statements, switch case statements help the control and flow of the programs. Switch case's allow you to make a list of "cases" inside a switch bracket in which arduino will find the most suitable and run it. to: switch / case statements J ust like I f statements, switch case statements help the control and flow of the programs. Switch/ case allows you to make a list of "cases" inside a switch curly bracket. The program checks each case for a match with the test variable, and runs the code if if a match is found. Restore J uly 17, 2007, at 11: 15 AM by Paul Badger Changed lines 1- 2 from: Switch Case statements to: Switch / Case statements Restore J uly 17, 2007, at 11: 15 AM by Paul Badger Changed lines 8- 9 from: break - important, without break, the switch statement will continue checking through the statement for any other possibilities. I f one is found, it will run that as well, which may not be your intent. Break tells the switch statement to stop looking for matches, and end its function. to: break - important, without break, the switch statement will continue checking through the statement for any other possibile matches. I f one is found, it will run that as well, which may not be your intent. Break tells the switch statement to stop looking for matches, and exit the switch statement. Restore J uly 17, 2007, at 11: 14 AM by Paul Badger Changed line 16 from: // break is optional, without it, case statement goes on checking for matches to: // break is optional Restore J uly 17, 2007, at 11: 13 AM by Paul Badger Added line 16: // break is optional, without it, case statement goes on checking for matches
- 297. Added line 22: // default is optional Restore April 16, 2007, at 10: 31 AM by Paul Badger Changed lines 1- 2 from: Switch Case statements to: Switch Case statements Changed lines 25- 27 from: Reference Home to: Restore March 26, 2006, at 02: 30 PM by J eff Gray Changed lines 8- 9 from: break - important, without break, the switch statement will continue checking through the statement for any other possibilities. I f one is found, it will run that as well, which may not be your intent. to: break - important, without break, the switch statement will continue checking through the statement for any other possibilities. I f one is found, it will run that as well, which may not be your intent. Break tells the switch statement to stop looking for matches, and end its function. Restore March 26, 2006, at 02: 28 PM by J eff Gray Added lines 1- 11: Switch Case statements J ust like I f statements, switch case statements help the control and flow of the programs. Switch case's allow you to make a list of "cases" inside a switch bracket in which arduino will find the most suitable and run it. Parameters var - variable you wish to match with case statements default - if no other conditions are met, default will run break - important, without break, the switch statement will continue checking through the statement for any other possibilities. I f one is found, it will run that as well, which may not be your intent. Example [@ Changed lines 21- 27 from: } to: } @] Reference Home Restore March 26, 2006, at 02: 22 PM by J eff Gray Added lines 1- 10: switch (var) { case 1: //do something when var == 1 break; case 2:
- 298. //do something when var == 2 break; default: // if nothing else matches, do the default } Restore Edit Page | Page History | Printable View | All Recent Site Changes
- 299. Arduino : Reference / Switch Case Reference Language (extended) | Libraries | Comparison | Board switch / case statements J ust like I f statements, switch case statements help the control and flow of the programs. Switch/ case allows you to make a list of "cases" inside a switch curly bracket. The program checks each case for a match with the test variable, and runs the code if if a match is found. Parameters var - variable you wish to match with case statements default - if no other conditions are met, default will run break - important, without break, the switch statement will continue checking through the statement for any other possibile matches. I f one is found, it will run that as well, which may not be your intent. Break tells the switch statement to stop looking for matches, and exit the switch statement. Example switch (var) { case 1: //do something when var == 1 break; // break is optional case 2: //do something when var == 2 break; default: // if nothing else matches, do the default // default is optional } Reference Home Corrections, suggestions, and new documentation should be posted to the Forum. The text of the Arduino reference is licensed under a Creative Commons Attribution- ShareAlike 3.0 License. Code samples in the reference are released into the public domain. (Printable View of http://www.arduino.cc/en/Reference/SwitchCase)
- 300. Arduino Buy | Download | Getting Started | Learning | Reference | Hardware | FAQ Login to Arduino Username: Password: Keep me logged in: ✔ Login Edit Page | Page History | Printable View | All Recent Site Changes search Blog » | Forum » | Playground »
- 301. Arduino Buy | Download | Getting Started | Learning | Reference | Hardware | FAQ search Blog » | Forum » | Playground » Reference.While History Hide minor edits - Show changes to markup May 26, 2007, at 07: 05 AM by Paul Badger Changed lines 5- 6 from: While loops will loop continuously, and infinitely, until the expression inside the parenthesis, () becomes false. Something must change the tested variable, or the while loop will never exit. This could be in your code, such as an incremented variable, or an external condition, such as testing a sensor. to: while loops will loop continuously, and infinitely, until the expression inside the parenthesis, () becomes false. Something must change the tested variable, or the while loop will never exit. This could be in your code, such as an incremented variable, or an external condition, such as testing a sensor. Restore May 26, 2007, at 07: 05 AM by Paul Badger Changed lines 1- 2 from: While statements to: while loops Restore May 05, 2007, at 07: 37 AM by Paul Badger Changed lines 5- 6 from: While loops will loop continuously, and infinitely, until the expression inside the parenthesis, () becomes false. Something must change the tested variable, or the while loop will never exit. This could be in your code such as an incremented variable, or an external condition such as testing a sensor. to: While loops will loop continuously, and infinitely, until the expression inside the parenthesis, () becomes false. Something must change the tested variable, or the while loop will never exit. This could be in your code, such as an incremented variable, or an external condition, such as testing a sensor. Restore May 05, 2007, at 07: 36 AM by Paul Badger Changed lines 5- 6 from: While loops will loop continuously, and infinitely, until the expression inside the parenthesis, () becomes false. Something inside the loop must change the tested variable, or the while loop will never exit. to: While loops will loop continuously, and infinitely, until the expression inside the parenthesis, () becomes false. Something must change the tested variable, or the while loop will never exit. This could be in your code such as an incremented variable, or an external condition such as testing a sensor. Restore April 16, 2007, at 05: 01 PM by David A. Mellis Changed line 9 from: // statement(s);
- 302. to: // statement(s) Restore April 16, 2007, at 05: 01 PM by David A. Mellis Changed line 9 from: // #statement(s) to: // statement(s); Restore April 16, 2007, at 05: 01 PM by David A. Mellis Changed lines 9- 11 from: 1. statement(s) to: // #statement(s) Restore April 16, 2007, at 10: 48 AM by Paul Badger Changed lines 3- 6 from: Loops continuously until the expression inside () are not true. Useful for creating your own loops, but make sure to keep track of some variable you can use to stop the while loop if that is your intent. Example to: Description While loops will loop continuously, and infinitely, until the expression inside the parenthesis, () becomes false. Something inside the loop must change the tested variable, or the while loop will never exit. Syntax while(expression){ #statement(s) } Parameters expression - a (boolean) C statement that evaluates to true or false Example Changed line 23 from: //do something repetitive 200 times to: // do something repetitive 200 times Restore March 26, 2006, at 02: 34 PM by J eff Gray Added lines 1- 13: While statements Loops continuously until the expression inside () are not true. Useful for creating your own loops, but make sure to keep track of some variable you can use to stop the while loop if that is your intent. Example
- 303. var = 0; while(var < 200){ //do something repetitive 200 times var++; } Restore Edit Page | Page History | Printable View | All Recent Site Changes
- 304. Arduino : Reference / While Reference Language (extended) | Libraries | Comparison | Board while loops Description while loops will loop continuously, and infinitely, until the expression inside the parenthesis, () becomes false. Something must change the tested variable, or the while loop will never exit. This could be in your code, such as an incremented variable, or an external condition, such as testing a sensor. Syntax while(expression){ // statement(s) } Parameters expression - a (boolean) C statement that evaluates to true or false Example var = 0; while(var < 200){ // do something repetitive 200 times var++; } Reference Home Corrections, suggestions, and new documentation should be posted to the Forum. The text of the Arduino reference is licensed under a Creative Commons Attribution-ShareAlike 3.0 License . Code samples in the reference are released into the public domain. (Printable View of http://www.arduino.cc/en/Reference/While)
- 305. Arduino Buy | Download | Getting Started | Learning | Reference | Hardware | FAQ Login to Arduino Username: Password: Keep me logged in: ✔ Login Edit Page | Page History | Printable View | All Recent Site Changes search Blog » | Forum » | Playground »
- 306. Arduino Buy | Download | Getting Started | Learning | Reference | Hardware | FAQ search Blog » | Forum » | Playground » Reference.DoWhile History Hide minor edits - Show changes to markup May 26, 2007, at 07: 25 AM by Paul Badger Changed line 18 from: delay(50); // wait for sensors to stabilize to: delay(50); // wait for sensors to stabilize Restore May 26, 2007, at 07: 25 AM by Paul Badger Added line 5: [@ Changed lines 10- 12 from: Example to: @] Example Restore May 26, 2007, at 07: 24 AM by Paul Badger Changed lines 3- 4 from: The do loop works in the same manner as the while loop, with the exception that the condition is tested only after the loop has run, so the do loop will always run at least once. to: The do loop works in the same manner as the while loop, with the exception that the condition is tested at the end of the loop, so the do loop will always run at least once. Restore May 26, 2007, at 07: 23 AM by Paul Badger Added lines 1- 19: do - while The do loop works in the same manner as the while loop, with the exception that the condition is tested only after the loop has run, so the do loop will always run at least once. do { // statement block } while (test condition); Example do { delay(50); // wait for sensors to stabilize
- 307. x = readSensors(); // check the sensors } while (x < 100); Restore Edit Page | Page History | Printable View | All Recent Site Changes
- 308. Arduino : Reference / Do While Reference Language (extended) | Libraries | Comparison | Board do - while The do loop works in the same manner as the while loop, with the exception that the condition is tested at the end of the loop, so the do loop will always run at least once. do { // statement block } while (test condition); Example do { delay(50); x = readSensors(); // wait for sensors to stabilize // check the sensors } while (x < 100); Reference Home Corrections, suggestions, and new documentation should be posted to the Forum. The text of the Arduino reference is licensed under a Creative Commons Attribution-ShareAlike 3.0 License . Code samples in the reference are released into the public domain. (Printable View of http://www.arduino.cc/en/Reference/DoWhile)
- 309. Arduino Buy | Download | Getting Started | Learning | Reference | Hardware | FAQ Login to Arduino Username: Password: Keep me logged in: ✔ Login Edit Page | Page History | Printable View | All Recent Site Changes search Blog » | Forum » | Playground »
- 310. Arduino Buy | Download | Getting Started | Learning | Reference | Hardware | FAQ search Blog » | Forum » | Playground » Reference.Break History Hide minor edits - Show changes to markup August 08, 2007, at 05: 42 AM by Paul Badger Changed lines 3- 5 from: break is used to exit from a do, for, or while loop, bypassing the normal loop condition. I t is also used to exit from a switch statement. to: break is used to exit from a do, for, or while loop, bypassing the normal loop condition. I t is also used to exit from a switch statement. Restore May 30, 2007, at 11: 37 AM by Paul Badger Restore May 26, 2007, at 07: 04 AM by Paul Badger Changed lines 3- 5 from: break is used to exit from a do, for, or while loop, bypassing the normal loop condition. I t is also used to exit from a switch statement. to: break is used to exit from a do, for, or while loop, bypassing the normal loop condition. I t is also used to exit from a switch statement. Restore May 26, 2007, at 06: 48 AM by Paul Badger Changed lines 3- 5 from: break is used to exit from a do, for, or while loop, bypassing the normal loop condition. I t is also used to exit from a switch statement. An example of break in a loop is shown here: to: break is used to exit from a do, for, or while loop, bypassing the normal loop condition. I t is also used to exit from a switch statement. Restore May 26, 2007, at 06: 47 AM by Paul Badger Changed lines 3- 5 from: break is used to exit from a do, for, or while loop, bypassing the normal loop condition. I t is also used to exit from a switch statement. An example of break in a loop is shown here: to: break is used to exit from a do, for, or while loop, bypassing the normal loop condition. I t is also used to exit from a switch statement. An example of break in a loop is shown here: Changed lines 11- 12 from: sens = analogRead(sensorPin); if (sens > threshold) break; // bail out on sensor detect to: sens = analogRead(sensorPin);
- 311. if (sens > threshold){ // bail out on sensor detect x = 0; break; } Restore May 26, 2007, at 06: 44 AM by Paul Badger Added lines 5- 7: Example [@ Changed lines 14- 16 from: } to: } @] Restore May 26, 2007, at 06: 43 AM by Paul Badger Added lines 1- 11: break break is used to exit from a do, for, or while loop, bypassing the normal loop condition. I t is also used to exit from a switch statement. An example of break in a loop is shown here: for (x = 0; x < 255; x ++) { digitalWrite(PWMpin, x); sens = analogRead(sensorPin); if (sens > threshold) break; // bail out on sensor detect delay(50); } Restore Edit Page | Page History | Printable View | All Recent Site Changes
- 312. Arduino : Reference / Break Reference Language (extended) | Libraries | Comparison | Board break break is used to exit from a do, for, or while loop, bypassing the normal loop condition. I t is also used to exit from a switch statement. Example for (x = 0; x < 255; x ++) { digitalWrite(PWMpin, x); sens = analogRead(sensorPin); if (sens > threshold){ // bail out on sensor detect x = 0; break; } delay(50); } Reference Home Corrections, suggestions, and new documentation should be posted to the Forum. The text of the Arduino reference is licensed under a Creative Commons Attribution-ShareAlike 3.0 License . Code samples in the reference are released into the public domain. (Printable View of http://www.arduino.cc/en/Reference/Break)
- 313. Arduino Buy | Download | Getting Started | Learning | Reference | Hardware | FAQ Login to Arduino Username: Password: Keep me logged in: ✔ Login Edit Page | Page History | Printable View | All Recent Site Changes search Blog » | Forum » | Playground »
- 314. Arduino search Buy | Download | Getting Started | Learning | Reference | Hardware | FAQ Blog » | Forum » | Playground » Reference.Continue History Hide minor edits - Show changes to markup May 26, 2007, at 07: 01 AM by Paul Badger Deleted line 9: Changed line 11 from: continue; to: continue; Restore May 26, 2007, at 07: 01 AM by Paul Badger Added line 5: Example Changed lines 7- 8 from: Example to: Restore May 26, 2007, at 07: 00 AM by Paul Badger Changed lines 1- 19 from: continue to: continue continue is used to bypass portions of code in a do, for, or while loop. I t forces the conditional expression to be evaluated, without terminating the loop. !!!!Example for (x = 0; x < 255; x ++) { if (x > 40 && x < 120){ continue; } // create jump in values digitalWrite(PWMpin, x); delay(50); } Restore May 26, 2007, at 06: 51 AM by Paul Badger Added line 1: continue
- 315. Restore Edit Page | Page History | Printable View | All Recent Site Changes
- 316. Arduino : Reference / Continue Reference Language (extended) | Libraries | Comparison | Board continue continue is used to bypass portions of code in a do, for, or while loop. I t forces the conditional expression to be evaluated, without terminating the loop. Example for (x = 0; x < 255; x ++) { if (x > 40 && x < 120){ continue; } } // create jump in values digitalWrite(PWMpin, x); delay(50); Reference Home Corrections, suggestions, and new documentation should be posted to the Forum. The text of the Arduino reference is licensed under a Creative Commons Attribution-ShareAlike 3.0 License . Code samples in the reference are released into the public domain. (Printable View of http://www.arduino.cc/en/Reference/Continue)
- 317. Arduino Buy | Download | Getting Started | Learning | Reference | Hardware | FAQ Login to Arduino Username: Password: Keep me logged in: ✔ Login Edit Page | Page History | Printable View | All Recent Site Changes search Blog » | Forum » | Playground »
- 318. Arduino Buy | Download | Getting Started | Learning | Reference | Hardware | FAQ Reference.Return History Hide minor edits - Show changes to markup April 03, 2008, at 01: 15 PM by Paul Badger Changed lines 9- 10 from: return value; to: return value; / / both forms are valid Restore October 08, 2007, at 10: 32 PM by Paul Badger Changed lines 18- 19 from: [@ int checkSensor(){ to: [@ int checkSensor(){ Restore October 08, 2007, at 10: 32 PM by Paul Badger Deleted line 17: Restore J uly 16, 2007, at 11: 28 PM by Paul Badger Changed lines 5- 6 from: Syntax: to: Syntax: Changed lines 11- 12 from: Parameters to: Parameters Restore J uly 16, 2007, at 11: 28 PM by Paul Badger Changed lines 11- 12 from: Parameters to: Parameters Restore J uly 16, 2007, at 11: 26 PM by Paul Badger Added line 31: Restore J uly 16, 2007, at 11: 25 PM by Paul Badger - search Blog » | Forum » | Playground »
- 319. Changed lines 37- 39 from: } to: }@] Restore J uly 16, 2007, at 11: 23 PM by Paul Badger Changed lines 42- 43 from: comment? to: comments Restore J uly 16, 2007, at 11: 22 PM by Paul Badger Changed lines 3- 4 from: Terminate a function and return a value to the calling function if desired. to: Terminate a function and return a value from a function to the calling function, if desired. Changed lines 26- 43 from: }@] to: }@] The return keyword is handy to test a section of code without having to "comment out" large sections of possibly buggy code. [@void loop(){ / / brilliant code idea to test here return; / / the rest of a dysfunctional sketch here / / this code will never be executed } See also comment? Restore J uly 16, 2007, at 11: 14 PM by Paul Badger Added lines 1- 26: return Terminate a function and return a value to the calling function if desired. Syntax: return; return value; Parameters value: any variable or constant type Examples: A function to compare a sensor input to a threshold int checkSensor(){ if (analogRead(0) > 400) { return 1;
- 320. else{ return 0; } } Restore Edit Page | Page History | Printable View | All Recent Site Changes
- 321. Arduino : Reference / Return Reference Language (extended) | Libraries | Comparison | Board return Terminate a function and return a value from a function to the calling function, if desired. Syntax: return; return value; / / both forms are valid Parameters value: any variable or constant type Examples: A function to compare a sensor input to a threshold int checkSensor(){ if (analogRead(0) > 400) { return 1; else{ return 0; } } The return keyword is handy to test a section of code without having to "comment out" large sections of possibly buggy code. void loop(){ // brilliant code idea to test here return; // the rest of a dysfunctional sketch here // this code will never be executed } See also comments Reference Home Corrections, suggestions, and new documentation should be posted to the Forum. The text of the Arduino reference is licensed under a Creative Commons Attribution-ShareAlike 3.0 License . Code samples in the reference are released into the public domain. (Printable View of http://www.arduino.cc/en/Reference/Return)
- 322. Arduino Buy | Download | Getting Started | Learning | Reference | Hardware | FAQ Login to Arduino Username: Password: Keep me logged in: ✔ Login Edit Page | Page History | Printable View | All Recent Site Changes search Blog » | Forum » | Playground »
- 323. Arduino Buy | Download | Getting Started | Learning | Reference | Hardware | FAQ search Blog » | Forum » | Playground » Reference.SemiColon History Hide minor edits - Show changes to markup April 29, 2007, at 05: 10 AM by David A. Mellis Changed lines 3- 4 from: Used at the end of a statement to tell the computer when to execute an instruction. to: Used to end a statement. Restore April 25, 2007, at 11: 03 PM by Paul Badger Changed lines 1- 2 from: ; semicolon to: ; semicolon Changed lines 12- 15 from: Forgetting to end a line in a semicolon will result in a compiler error. The error text may be obvious, and refer to a missing semicolon, or it may not. I f an impenetrable or seemingly illogical compiler error comes up, one of the first things to check is a missing semicolon in the immediate vicinity preceding the line at which the compiler complained. Reference Home to: Forgetting to end a line in a semicolon will result in a compiler error. The error text may be obvious, and refer to a missing semicolon, or it may not. I f an impenetrable or seemingly illogical compiler error comes up, one of the first things to check is a missing semicolon, in the immediate vicinity, preceding the line at which the compiler complained. Restore April 14, 2007, at 09: 46 AM by Paul Badger Restore April 14, 2007, at 09: 46 AM by Paul Badger Changed lines 10- 11 from: to: Tip Forgetting to end a line in a semicolon will result in a compiler error. The error text may be obvious, and refer to a missing semicolon, or it may not. I f an impenetrable or seemingly illogical compiler error comes up, one of the first things to check is a missing semicolon in the immediate vicinity preceding the line at which the compiler complained. Restore March 24, 2006, at 04: 39 PM by J eff Gray Changed lines 9- 12 from: @] to: @]
- 324. Reference Home Restore March 24, 2006, at 04: 39 PM by J eff Gray Changed lines 9- 25 from: @] to: @] Restore March 24, 2006, at 04: 38 PM by J eff Gray Changed lines 1- 3 from: int a = 13; Used at the end of a statement to tell the computer when to execute an instruction. to: ; semicolon Used at the end of a statement to tell the computer when to execute an instruction. Example int a = 13; Restore February 14, 2006, at 10: 00 AM by Erica Calogero Added lines 1- 3: int a = 13; Used at the end of a statement to tell the computer when to execute an instruction. Restore Edit Page | Page History | Printable View | All Recent Site Changes
- 325. Arduino : Reference / Semi Colon Reference Language (extended) | Libraries | Comparison | Board ; semicolon Used to end a statement. Example int a = 13; Tip Forgetting to end a line in a semicolon will result in a compiler error. The error text may be obvious, and refer to a missing semicolon, or it may not. I f an impenetrable or seemingly illogical compiler error comes up, one of the first things to check is a missing semicolon, in the immediate vicinity, preceding the line at which the compiler complained. Reference Home Corrections, suggestions, and new documentation should be posted to the Forum. The text of the Arduino reference is licensed under a Creative Commons Attribution-ShareAlike 3.0 License . Code samples in the reference are released into the public domain. (Printable View of http://www.arduino.cc/en/Reference/SemiColon)
- 326. Arduino Buy | Download | Getting Started | Learning | Reference | Hardware | FAQ Login to Arduino Username: Password: Keep me logged in: ✔ Login Edit Page | Page History | Printable View | All Recent Site Changes search Blog » | Forum » | Playground »
- 327. Arduino Buy | Download | Getting Started | Learning | Reference | Hardware | FAQ search Blog » | Forum » | Playground » Reference.Braces History Hide minor edits - Show changes to markup May 28, 2007, at 02: 04 PM by Paul Badger Changed lines 13- 14 from: Unbalanced braces can often lead to cryptic, impenetrable compiler errors that can sometimes be hard to track down in a large program. Because of their varied usages braces are also incredibly important to the syntax of a program and moving a brace one or two lines will often dramatically affect the meaning of a program. to: Unbalanced braces can often lead to cryptic, impenetrable compiler errors that can sometimes be hard to track down in a large program. Because of their varied usages, braces are also incredibly important to the syntax of a program and moving a brace one or two lines will often dramatically affect the meaning of a program. Restore April 14, 2007, at 09: 47 AM by Paul Badger Added lines 56- 58: Reference Home Restore April 14, 2007, at 09: 37 AM by Paul Badger Changed lines 9- 14 from: Beginning programmers and programmers coming to C from the BASI C language often find using braces confusing or daunting. After all, the same curly braces replace the RETURN statement in a subroutine (function), the ENDI F statement in a conditional and the NEXT statement in a FOR loop. For this reason it is good programming practice to type the closing brace immediately after typing the opening brace when inserting a construct which requires curly braces. Then type some carriage returns between the braces and begin inserting statements, and your braces, and your attitude, will never become unbalanced. Unbalanced braces can often lead to cryptic, impenetrable compiler errors that can sometimes be hard to track down in a large program. Because of their varied usages braces are also incredibly important to the syntax of a program and moving a brace one or two lines will often dramatically affect the meaning of a program. to: Beginning programmers, and programmers coming to C from the BASI C language often find using braces confusing or daunting. After all, the same curly braces replace the RETURN statement in a subroutine (function), the ENDI F statement in a conditional and the NEXT statement in a FOR loop. Because the use of the curly brace is so varied, it is good programming practice to type the closing brace immediately after typing the opening brace when inserting a construct which requires curly braces. Then insert some carriage returns between your braces and begin inserting statements. Your braces, and your attitude, will never become unbalanced. Unbalanced braces can often lead to cryptic, impenetrable compiler errors that can sometimes be hard to track down in a large program. Because of their varied usages braces are also incredibly important to the syntax of a program and moving a brace one or two lines will often dramatically affect the meaning of a program. Restore April 14, 2007, at 09: 33 AM by Paul Badger Changed lines 15- 16 from: The main uses of curly braces
- 328. to: The main uses of curly braces Restore April 14, 2007, at 09: 31 AM by Paul Badger Added lines 15- 16: The main uses of curly braces Changed lines 21- 22 from: } to: }@] Restore April 14, 2007, at 09: 28 AM by Paul Badger Changed lines 3- 4 from: Curly braces (also referred to as just "braces" or as "curly brackets) are a major part of the C programming language. They are used in several different constructs, outlined below, and this can sometimes be confusing for beginners. to: Curly braces (also referred to as just "braces" or as "curly brackets") are a major part of the C programming language. They are used in several different constructs, outlined below, and this can sometimes be confusing for beginners. Restore April 14, 2007, at 09: 27 AM by Paul Badger Changed lines 13- 14 from: Unbalanced braces can often lead to cryptic, impenetrable compiler errors that can sometimes be hard to track down in a large program. Because of their varied usages braces are also incredibly important to the syntax of a to: Unbalanced braces can often lead to cryptic, impenetrable compiler errors that can sometimes be hard to track down in a large program. Because of their varied usages braces are also incredibly important to the syntax of a program and moving a brace one or two lines will often dramatically affect the meaning of a program. Restore April 14, 2007, at 09: 26 AM by Paul Badger Changed lines 1- 2 from: { Curly Braces } to: { Curly Braces } Curly braces (also referred to as just "braces" or as "curly brackets) are a major part of the C programming language. They are used in several different constructs, outlined below, and this can sometimes be confusing for beginners. An opening curly brace "{" must always be followed by a closing curly brace "}". This is a condition that is often referred to as the braces being balanced. The Arduino I DE (integrated development environment) includes a convenient feature to check the balance of curly braces. J ust select a brace, or even click the insertion point immediately following a brace, and its logical companion will be highlighted. At present this feature is slightly buggy as the I DE will often find (incorrectly) a brace in text that has been "commented out." Beginning programmers and programmers coming to C from the BASI C language often find using braces confusing or daunting. After all, the same curly braces replace the RETURN statement in a subroutine (function), the ENDI F statement in a conditional and the NEXT statement in a FOR loop. For this reason it is good programming practice to type the closing brace immediately after typing the opening brace when inserting a construct which requires curly braces. Then type some carriage returns between the braces and begin inserting statements, and your braces, and your attitude, will never become unbalanced. Unbalanced braces can often lead to cryptic, impenetrable compiler errors that can sometimes be hard to track down in a
- 329. large program. Because of their varied usages braces are also incredibly important to the syntax of a Restore April 14, 2007, at 08: 30 AM by Paul Badger Changed lines 1- 8 from: { Curly Braces } to: { Curly Braces } Functions [@ void myfunction(datatype argument){ statements(s) } Changed lines 11- 25 from: while (boolean expression) { statement(s) } do { statement(s) } while (boolean expression); for (initialisation; termination condition; incrementing expr) { statement(s) } to: while (boolean expression) { statement(s) } do { statement(s) } while (boolean expression); for (initialisation; termination condition; incrementing expr) { statement(s) } Changed lines 29- 41 from: if (boolean expression) { statement(s) } if (boolean expression) { statement(s) } else { statement(s) }
- 330. to: if (boolean expression) { statement(s) } else if (boolean expression) { statement(s) } else { statement(s) } Restore April 14, 2007, at 08: 10 AM by Paul Badger Changed line 11 from: int ledPin = 13; while (boolean expression) to: [@while (boolean expression) Changed lines 24- 25 from: }=] to: } @] Restore April 14, 2007, at 08: 08 AM by Paul Badger Added lines 1- 41: { Curly Braces } Loops int ledPin = 13; while (boolean expression) { statement(s) } do { statement(s) } while (boolean expression); for (initialisation; termination condition; incrementing expr) { statement(s) }=] Conditional statements if (boolean expression) { statement(s) } if (boolean expression) { statement(s) } else {
- 331. statement(s) } Restore Edit Page | Page History | Printable View | All Recent Site Changes
- 332. Arduino : Reference / Braces Reference Language (extended) | Libraries | Comparison | Board {} Curly Braces Curly braces (also referred to as just "braces" or as "curly brackets") are a major part of the C programming language. They are used in several different constructs, outlined below, and this can sometimes be confusing for beginners. An opening curly brace "{" must always be followed by a closing curly brace "}". This is a condition that is often referred to as the braces being balanced. The Arduino I DE (integrated development environment) includes a convenient feature to check the balance of curly braces. J ust select a brace, or even click the insertion point immediately following a brace, and its logical companion will be highlighted. At present this feature is slightly buggy as the I DE will often find (incorrectly) a brace in text that has been "commented out." Beginning programmers, and programmers coming to C from the BASI C language often find using braces confusing or daunting. After all, the same curly braces replace the RETURN statement in a subroutine (function), the ENDI F statement in a conditional and the NEXT statement in a FOR loop. Because the use of the curly brace is so varied, it is good programming practice to type the closing brace immediately after typing the opening brace when inserting a construct which requires curly braces. Then insert some carriage returns between your braces and begin inserting statements. Your braces, and your attitude, will never become unbalanced. Unbalanced braces can often lead to cryptic, impenetrable compiler errors that can sometimes be hard to track down in a large program. Because of their varied usages, braces are also incredibly important to the syntax of a program and moving a brace one or two lines will often dramatically affect the meaning of a program. The main uses of curly braces Functions void myfunction(datatype argument){ statements(s) } Loops while (boolean expression) { statement(s) } do { statement(s) } while (boolean expression); for (initialisation; termination condition; incrementing expr) { statement(s) } Conditional statements if (boolean expression) { statement(s) } else if (boolean expression)
- 333. { statement(s) } else { statement(s) } Reference Home Reference Home Corrections, suggestions, and new documentation should be posted to the Forum. The text of the Arduino reference is licensed under a Creative Commons Attribution-ShareAlike 3.0 License . Code samples in the reference are released into the public domain. (Printable View of http://www.arduino.cc/en/Reference/Braces)
- 334. Arduino Buy | Download | Getting Started | Learning | Reference | Hardware | FAQ Login to Arduino Username: Password: Keep me logged in: ✔ Login Edit Page | Page History | Printable View | All Recent Site Changes search Blog » | Forum » | Playground »
- 335. Arduino Buy | Download | Getting Started | Learning | Reference | Hardware | FAQ search Blog » | Forum » | Playground » Reference.Comments History Hide minor edits - Show changes to markup J uly 16, 2007, at 11: 24 PM by Paul Badger Changed line 21 from: Tip to: Tip Restore J une 03, 2007, at 09: 40 PM by Paul Badger Changed line 15 from: x = 3; / * but not another multiline comment - this is invalid * / to: x = 3; / * but not another multiline comment - this is invalid * / Restore J une 03, 2007, at 09: 40 PM by Paul Badger Changed line 14 from: if (gwb > 0){ / / single line comment is OK inside of multiline comment to: if (gwb == 0){ / / single line comment is OK inside of multiline comment Restore J une 03, 2007, at 09: 39 PM by Paul Badger Changed lines 10- 11 from: // to the end of the line to: // to the end of the line Restore J une 03, 2007, at 09: 39 PM by Paul Badger Changed lines 10- 11 from: / / to the end of the line to: // to the end of the line Restore J une 03, 2007, at 09: 38 PM by Paul Badger Changed lines 9- 10 from: [@ x = 5; / / This is a single line comment. Anything after the slashes is a comment to the end of the line to: [@ x = 5; / / This is a single line comment. Anything after the slashes is a comment / / to the end of the line
- 336. Restore J une 03, 2007, at 09: 38 PM by Paul Badger Deleted line 19: Changed lines 21- 22 from: When experimenting with code "commenting out" parts of your program is a convenient way to remove lines that may be buggy. This leaves the lines in the code but turns them into comments, so the compiler will ignore them. This can be especially useful when trying to locate a problem, or when a program refuses to compile and the compiler error is cryptic or unhelpful. to: When experimenting with code, "commenting out" parts of your program is a convenient way to remove lines that may be buggy. This leaves the lines in the code, but turns them into comments, so the compiler just ignores them. This can be especially useful when trying to locate a problem, or when a program refuses to compile and the compiler error is cryptic or unhelpful. Restore J une 03, 2007, at 09: 36 PM by Paul Badger Changed lines 3- 5 from: Comments are parts in the program that are used to inform yourself or others about the way the program works. Comments are ignored by the compiler, and not exported to the processor, so they don't take up any space on the Atmega chip. They are strictly useful to help you understand (or remember) how your program works or to inform others how your program works. to: Comments are lines in the program that are used to inform yourself or others about the way the program works. They are ignored by the compiler, and not exported to the processor, so they don't take up any space on the Atmega chip. Comments only purpose are to help you understand (or remember) how your program works or to inform others how your program works. Changed lines 9- 10 from: [@ x = 5; / / This is a single line comment. Anything after the slashes is a comment to: [@ x = 5; / / This is a single line comment. Anything after the slashes is a comment to the end of the line Changed line 16 from: to: / / don't forget the "closing" comment - they have to be balanced! Restore J une 03, 2007, at 09: 24 PM by Paul Badger Changed lines 3- 5 from: Comments are parts in the program that are used to inform oneself or others about the way the program works. Comments are not compiled or exported to the processor, so they don't take up any space on the Atmega chip. They are strictly useful for you to understand what your program is doing or to inform others how your program works. to: Comments are parts in the program that are used to inform yourself or others about the way the program works. Comments are ignored by the compiler, and not exported to the processor, so they don't take up any space on the Atmega chip. They are strictly useful to help you understand (or remember) how your program works or to inform others how your program works. Changed line 14 from: x = 3; / * but not another multiline comment - this is invalid * / to: x = 3; / * but not another multiline comment - this is invalid * /
- 337. Restore J une 03, 2007, at 09: 20 PM by Paul Badger Changed lines 11- 13 from: / * you could use a combination of slash- asterisk - - > asterisk- slash encapsulating your comments: x = 7; to: / * this is multiline comment - use it to comment out whole blocks of code Changed lines 17- 23 from: 8/ */''' to: / Restore J une 03, 2007, at 09: 17 PM by Paul Badger Changed lines 9- 11 from: [@ x = 5; / / This is a single line comment - anything after the slashes is a comment you could use a combination of slash- asterisk - - > asterisk- slash encapsulating your comments: / * blabla * / to: [@ x = 5; / / This is a single line comment. Anything after the slashes is a comment / * you could use a combination of slash- asterisk - - > asterisk- slash encapsulating your comments: x = 7; if (gwb > 0){ / / single line comment is OK inside of multiline comment x = 3; / * but not another multiline comment this is invalid * / } 8/ */''' Restore J une 03, 2007, at 09: 14 PM by Paul Badger Changed lines 12- 14 from: to: @] Restore J une 03, 2007, at 09: 13 PM by Paul Badger Changed lines 8- 9 from: you may use a double- slash in the beginning of a line: / / to: Example [@ x = 5; / / This is a single line comment - anything after the slashes is a comment Restore J une 03, 2007, at 09: 12 PM by Paul Badger Changed lines 3- 5 from: Comments are parts in the program that are used to inform about the way the program works. They are not going to be compiled, nor will be exported to the processor. They are useful for you to understand what a certain program you downloaded is doing or to inform to your colleagues about what one of its lines is. to: Comments are parts in the program that are used to inform oneself or others about the way the program works. Comments are not compiled or exported to the processor, so they don't take up any space on the Atmega chip.
- 338. They are strictly useful for you to understand what your program is doing or to inform others how your program works. Changed line 8 from: you could use a double- slash in the beginning of a line: / / to: you may use a double- slash in the beginning of a line: / / Added line 11: Changed lines 13- 14 from: When experimenting with code the ability of commenting parts of your program becomes very useful for you to "park" part of the code for a while. to: When experimenting with code "commenting out" parts of your program is a convenient way to remove lines that may be buggy. This leaves the lines in the code but turns them into comments, so the compiler will ignore them. This can be especially useful when trying to locate a problem, or when a program refuses to compile and the compiler error is cryptic or unhelpful. Restore April 18, 2007, at 02: 09 AM by David A. Mellis Deleted lines 11- 12: Reference Home Restore J anuary 12, 2006, at 05: 35 PM by 82.186.237.10 Changed lines 10- 13 from: When experimenting with code the ability of commenting parts of your program becomes very useful for you to "park" part of the code for a while. to: When experimenting with code the ability of commenting parts of your program becomes very useful for you to "park" part of the code for a while. Reference Home Restore J anuary 03, 2006, at 03: 35 AM by 82.186.237.10 Added lines 1- 10: Comments Comments are parts in the program that are used to inform about the way the program works. They are not going to be compiled, nor will be exported to the processor. They are useful for you to understand what a certain program you downloaded is doing or to inform to your colleagues about what one of its lines is. There are two different ways of marking a line as a comment: you could use a double- slash in the beginning of a line: / / you could use a combination of slash- asterisk - - > asterisk- slash encapsulating your comments: / * blabla * / Tip When experimenting with code the ability of commenting parts of your program becomes very useful for you to "park" part of the code for a while. Restore Edit Page | Page History | Printable View | All Recent Site Changes
- 339. Arduino : Reference / Comments Reference Language (extended) | Libraries | Comparison | Board Comments Comments are lines in the program that are used to inform yourself or others about the way the program works. They are ignored by the compiler, and not exported to the processor, so they don't take up any space on the Atmega chip. Comments only purpose are to help you understand (or remember) how your program works or to inform others how your program works. There are two different ways of marking a line as a comment: Example x = 5; // This is a single line comment. Anything after the slashes is a comment // to the end of the line /* this is multiline comment - use it to comment out whole blocks of code if (gwb == 0){ // single line comment is OK inside of multiline comment x = 3; /* but not another multiline comment - this is invalid */ } // don't forget the "closing" comment - they have to be balanced! */ Tip When experimenting with code, "commenting out" parts of your program is a convenient way to remove lines that may be buggy. This leaves the lines in the code, but turns them into comments, so the compiler just ignores them. This can be especially useful when trying to locate a problem, or when a program refuses to compile and the compiler error is cryptic or unhelpful. Reference Home Corrections, suggestions, and new documentation should be posted to the Forum. The text of the Arduino reference is licensed under a Creative Commons Attribution-ShareAlike 3.0 License . Code samples in the reference are released into the public domain. (Printable View of http://www.arduino.cc/en/Reference/Comments)
- 340. Arduino Buy | Download | Getting Started | Learning | Reference | Hardware | FAQ Login to Arduino Username: Password: Keep me logged in: ✔ Login Edit Page | Page History | Printable View | All Recent Site Changes search Blog » | Forum » | Playground »
- 341. Arduino Buy | Download | Getting Started | Learning | Reference | Hardware | FAQ search Blog » | Forum » | Playground » Reference.Arithmetic History Hide minor edits - Show changes to markup February 13, 2008, at 10: 43 AM by David A. Mellis Changed lines 5- 6 from: These operators return the sum, difference, product, or quotient (respectively) of the two operands. The operation is conducted using the data type of the operands, so, for example, 9 / 4 gives 2 since 9 and 4 are ints. This also means that the operation can overflow if the result is larger than that which can be stored in the data type. I f the operands are of different types, the "larger" type is used for the calculation. to: These operators return the sum, difference, product, or quotient (respectively) of the two operands. The operation is conducted using the data type of the operands, so, for example, 9 / 4 gives 2 since 9 and 4 are ints. This also means that the operation can overflow if the result is larger than that which can be stored in the data type (e.g. adding 1 to an int with the value 32,767 gives - 32,768). I f the operands are of different types, the "larger" type is used for the calculation. Added lines 35- 36: Know that integer constants default to int , so some constant calculations may overflow (e.g. 60 * 1000 will yield a negative result). Restore May 28, 2007, at 08: 24 PM by Paul Badger Restore May 28, 2007, at 08: 23 PM by Paul Badger Changed line 7 from: I f one of the numbers (operands) are of the type float or of type double, floating point math will be used for the operation. to: I f one of the numbers (operands) are of the type float or of type double, floating point math will be used for the calculation. Restore May 28, 2007, at 08: 21 PM by Paul Badger Changed lines 5- 6 from: These operators return the sum, difference, product, or quotient (respectively) of the two operands. The operation is conducted using the data type of the operands, so, for example, 9 / 4 gives 2 since 9 and 4 are ints. This also means that the operation can overflow if the result is larger than that which can be stored in the data type. I f the operands are of different types, the "larger" type is used for the calculation. to: These operators return the sum, difference, product, or quotient (respectively) of the two operands. The operation is conducted using the data type of the operands, so, for example, 9 / 4 gives 2 since 9 and 4 are ints. This also means that the operation can overflow if the result is larger than that which can be stored in the data type. I f the operands are of different types, the "larger" type is used for the calculation. I f one of the numbers (operands) are of the type float or of type double, floating point math will be used for the operation. Changed lines 33- 34 from: Tips:
- 342. to: Programming Tips: Changed lines 41- 47 from: Use the cast operator e.g. (int)myfloat to convert one variable type to another on the fly. to: Use the cast operator e.g. (int)myFloat to convert one variable type to another on the fly. Restore April 16, 2007, at 10: 49 AM by Paul Badger Changed lines 42- 45 from: Reference Home to: Restore April 15, 2007, at 10: 18 PM by Paul Badger Changed lines 38- 41 from: Use the cast operator eg (int)myfloat to convert one variable type to another on the fly. to: Use the cast operator e.g. (int)myfloat to convert one variable type to another on the fly. Restore April 15, 2007, at 10: 11 PM by David A. Mellis Changed lines 5- 6 from: The arithmetic operators work exactly as one expects with the result returned being the result of the two values and the operator to: These operators return the sum, difference, product, or quotient (respectively) of the two operands. The operation is conducted using the data type of the operands, so, for example, 9 / 4 gives 2 since 9 and 4 are ints. This also means that the operation can overflow if the result is larger than that which can be stored in the data type. I f the operands are of different types, the "larger" type is used for the calculation. Changed lines 17- 18 from: result = value1 [+- * / ] value2 to: result = value1 + value2; result = value1 - value2; result = value1 * value2; result = value1 / value2; Changed lines 26- 28 from: value1: any variable type value2: any variable type to: value1: any variable or constant value2: any variable or constant Restore April 15, 2007, at 04: 13 PM by Paul Badger Added lines 35- 39: Reference Home
- 343. Restore April 15, 2007, at 04: 11 PM by Paul Badger Changed lines 26- 29 from: A longer tutorial on computer math can eventually go in this space but for now, to benefit beginning programmers some general guidelines will be presented. These will hopefully get you started toward getting the same answer out of your Arduino that you do on your calculator. Choose variable sizes that you are sure are large enough to hold the largest results from your calculations to: Choose variable sizes that are large enough to hold the largest results from your calculations Changed lines 32- 34 from: to: Use the cast operator eg (int)myfloat to convert one variable type to another on the fly. Restore April 15, 2007, at 04: 08 PM by Paul Badger Changed lines 28- 30 from: to: Choose variable sizes that you are sure are large enough to hold the largest results from your calculations Know at what point your variable will "roll over" and also what happens in the other direction e.g. (0 - 1) OR (0 - 32768) For math that requires fractions, use float variables, but be aware of their drawbacks: large size, slow computation speeds Restore April 15, 2007, at 04: 03 PM by Paul Badger Changed line 21 from: value1: any variable type to: value1: any variable type Changed lines 26- 32 from: For beginning programmers there are several details of doing math on the computer to which one must pay attention. One is that math on computers, as opposed to algebra class, must exist in physical space. This means that the variable (which occupies a physical space on your Atmega chip) must be large enough to hold the results of your calculations. Hence if you try something like this byte x; x = 255; x = x + 1; to: A longer tutorial on computer math can eventually go in this space but for now, to benefit beginning programmers some general guidelines will be presented. These will hopefully get you started toward getting the same answer out of your Arduino that you do on your calculator. Restore April 15, 2007, at 03: 59 PM by Paul Badger Added lines 14- 18: Syntax result = value1 [+- * / ] value2 Restore April 15, 2007, at 03: 27 PM by Paul Badger Changed line 8 from:
- 344. to: [@ Changed line 13 from: to: @] Changed lines 26- 27 from: x = x + 1; to: x = x + 1; @] Restore April 15, 2007, at 03: 23 PM by Paul Badger Added lines 1- 27: Addition, Subtraction, Multiplication, & Division Description The arithmetic operators work exactly as one expects with the result returned being the result of the two values and the operator Examples y = y + 3; x = x - 7; i = j * 6; r = r / 5; Parameters: value1: any variable type value2: any variable type Tips: For beginning programmers there are several details of doing math on the computer to which one must pay attention. One is that math on computers, as opposed to algebra class, must exist in physical space. This means that the variable (which occupies a physical space on your Atmega chip) must be large enough to hold the results of your calculations. Hence if you try something like this [@ byte x; x = 255; x = x + 1; Restore Edit Page | Page History | Printable View | All Recent Site Changes
- 345. Arduino : Reference / Arithmetic Reference Language (extended) | Libraries | Comparison | Board Addition, Subtraction, Multiplication, & Division Description These operators return the sum, difference, product, or quotient (respectively) of the two operands. The operation is conducted using the data type of the operands, so, for example, 9 / 4 gives 2 since 9 and 4 are ints. This also means that the operation can overflow if the result is larger than that which can be stored in the data type (e.g. adding 1 to an int with the value 32,767 gives - 32,768). I f the operands are of different types, the "larger" type is used for the calculation. I f one of the numbers (operands) are of the type float or of type double, floating point math will be used for the calculation. Examples y x i r = = = = y x j r + * / 3; 7; 6; 5; Syntax result result result result = = = = value1 value1 value1 value1 + * / value2; value2; value2; value2; Parameters: value1: any variable or constant value2: any variable or constant Programming Tips: Know that integer constants default to int, so some constant calculations may overflow (e.g. 60 * 1000 will yield a negative result). Choose variable sizes that are large enough to hold the largest results from your calculations Know at what point your variable will "roll over" and also what happens in the other direction e.g. (0 - 1) OR (0 - - 32768) For math that requires fractions, use float variables, but be aware of their drawbacks: large size, slow computation speeds Use the cast operator e.g. (int)myFloat to convert one variable type to another on the fly. Reference Home Corrections, suggestions, and new documentation should be posted to the Forum. The text of the Arduino reference is licensed under a Creative Commons Attribution-ShareAlike 3.0 License . Code samples in the reference are released into the public domain.
- 346. (Printable View of http://www.arduino.cc/en/Reference/Arithmetic)
- 347. Arduino Buy | Download | Getting Started | Learning | Reference | Hardware | FAQ Login to Arduino Username: Password: Keep me logged in: ✔ Login Edit Page | Page History | Printable View | All Recent Site Changes search Blog » | Forum » | Playground »
- 348. Arduino search Buy | Download | Getting Started | Learning | Reference | Hardware | FAQ Blog » | Forum » | Playground » Reference.Modulo History Hide minor edits - Show changes to markup March 25, 2008, at 03: 13 PM by Paul Badger Restore March 25, 2008, at 03: 11 PM by Paul Badger Changed line 60 from: [[ / / send the analog input information (0 - 1023) to: [@ / / send the analog input information (0 - 1023) Changed lines 62- 68 from: Serial.print(value >> 7, BYTE); // send highest three bits ]] Serial.print(value >> 7, BYTE); // send highest three bits @] to: Restore March 25, 2008, at 03: 11 PM by Paul Badger Changed lines 59- 60 from: [[ // send the analog input information (0 - 1023) to: [[ / / send the analog input information (0 - 1023) Changed lines 62- 68 from: Serial.print(value >> 7, BYTE); // send highest three bits Serial.print(value >> 7, BYTE); // send highest three bits ]] to: ]] Restore March 25, 2008, at 03: 10 PM by Paul Badger Changed lines 57- 58 from: The modulo operator can also be used to strip off the high bytes of a variable. The example below is from the Firmata library. to: The modulo operator can also be used to strip off the high bits of a variable. The example below is from the Firmata library. Changed lines 60- 61 from: / / send analog input information (0 - 1023) Serial.print(value % 128, BYTE); //send lowest 7 bits to:
- 349. // send the analog input information (0 - 1023) Serial.print(value % 128, BYTE); // send lowest 7 bits Restore March 25, 2008, at 03: 09 PM by Paul Badger Changed lines 57- 58 from: to: The modulo operator can also be used to strip off the high bytes of a variable. The example below is from the Firmata library. [[ / / send analog input information (0 - 1023) Serial.print(value % 128, BYTE); //send lowest 7 bits Serial.print(value >> 7, BYTE); // send highest three bits ]] Restore J uly 16, 2007, at 04: 55 AM by Paul Badger Changed line 34 from: if ((i % 10) == 0){ / / read sensor every ten times through loop to: if ((i % 10) == 0){ / / read sensor every ten times through loop Restore J uly 16, 2007, at 04: 54 AM by Paul Badger Changed lines 34- 35 from: if ((i % 10) == 0){ x = analogRead(sensPin); // read sensor every ten times through loop to: if ((i % 10) == 0){ / / read sensor every ten times through loop x = analogRead(sensPin); Restore May 28, 2007, at 08: 12 PM by Paul Badger Changed lines 65- 66 from: division? to: division Restore May 28, 2007, at 08: 12 PM by Paul Badger Changed lines 65- 66 from: division? to: division? Restore May 28, 2007, at 08: 11 PM by Paul Badger Changed lines 65- 66 from: ? to: division? Restore
- 350. May 28, 2007, at 08: 11 PM by Paul Badger Changed lines 65- 66 from: / ? to: ? Restore May 05, 2007, at 07: 46 AM by Paul Badger Deleted line 39: Restore May 05, 2007, at 07: 45 AM by Paul Badger Changed lines 34- 35 from: if ((i % 10) == 0){x = analogRead(sensPin); } to: if ((i % 10) == 0){ x = analogRead(sensPin); } // read sensor every ten times through loop / ... } Restore May 05, 2007, at 07: 43 AM by Paul Badger Changed lines 27- 28 from: The modulo operator is useful for tasks like making an event occur at regular periods or making a memory array roll over to: The modulo operator is useful for tasks such as making an event occur at regular periods or making a memory array roll over Restore April 16, 2007, at 10: 54 AM by Paul Badger Added line 60: Restore April 16, 2007, at 10: 54 AM by Paul Badger Deleted lines 61- 62: Reference Home Restore April 16, 2007, at 10: 54 AM by Paul Badger Changed lines 27- 28 from: The modulo operator is useful for making an event occur at regular periods and tasks like making a memory array roll over to: The modulo operator is useful for tasks like making an event occur at regular periods or making a memory array roll over Restore April 15, 2007, at 03: 57 PM by Paul Badger Changed lines 8- 9 from: x % y to: result = value1 % value2 Changed lines 12- 15 from: x: a byte, char, int, or long y: a byte, char, int, or long to:
- 351. value1: a byte, char, int, or long value2: a byte, char, int, or long Restore April 15, 2007, at 02: 07 PM by Paul Badger Deleted line 35: Deleted lines 54- 55: Restore April 15, 2007, at 02: 06 PM by Paul Badger Changed line 58 from: Common Programming Errors to: Tip Restore April 13, 2007, at 10: 45 PM by Paul Badger Changed lines 63- 65 from: / ? to: / ? Restore April 13, 2007, at 10: 43 PM by Paul Badger Changed lines 27- 28 from: The modulo operator is useful for making an event occur at regular periods, and tasks like making a memory array roll over to: The modulo operator is useful for making an event occur at regular periods and tasks like making a memory array roll over Restore April 13, 2007, at 10: 42 PM by Paul Badger Changed lines 6- 9 from: to: Syntax x % y Changed lines 12- 15 from: x: the first number, a byte, char, int, or long y: the second number, a byte, char, int, or long to: x: a byte, char, int, or long y: a byte, char, int, or long Changed line 21 from: [@x = 7 % 5; / / x now contains 2 to: [@x = 7 % 5; / / x now contains 2 Changed lines 46- 47 from: sensVal[i++ % 5] = analogRead(sensPin); to:
- 352. sensVal[(i++) % 5] = analogRead(sensPin); average = 0; Changed line 49 from: average = sensVal[j]; / / add up the samples to: average += sensVal[j]; / / add up the samples Restore April 13, 2007, at 10: 33 PM by Paul Badger Changed line 18 from: [@x = 7 % 5; / / x now contains 2 to: [@x = 7 % 5; / / x now contains 2 Changed line 26 from: Example Programs to: Example Code Restore April 13, 2007, at 10: 33 PM by Paul Badger Changed line 18 from: [@x = 7 % 5; / / x now contains 2 to: [@x = 7 % 5; / / x now contains 2 Changed lines 24- 33 from: The modulo operator is useful for generating repeating patterns or series of numbers, such as getting a memory array to roll over Example Program [@/ / setup a buffer that averages the last five samples of a sensor int senVal[5]; / / create an array for sensor data int i, j; / / counter variables long average; / / variable to store average ... to: The modulo operator is useful for making an event occur at regular periods, and tasks like making a memory array roll over Example Programs [@ / / check a sensor every 10 times through a loop Added lines 30- 41: i++; if ((i % 10) == 0){x = analogRead(sensPin); } / / setup a buffer that averages the last five samples of a sensor int senVal[5]; / / create an array for sensor data int i, j; / / counter variables long average; / / variable to store average ... void loop(){ Restore April 13, 2007, at 10: 25 PM by Paul Badger Changed line 18 from: x = 7 % 5; / / x now contains 2 to:
- 353. [@x = 7 % 5; / / x now contains 2 Changed lines 22- 23 from: to: @] Changed lines 27- 28 from: {@/ / setup a buffer that averages the last five samples of a sensor to: [@/ / setup a buffer that averages the last five samples of a sensor Restore April 13, 2007, at 10: 23 PM by Paul Badger Changed lines 26- 33 from: / / setup a buffer that averages the last five samples of a sensor int senVal[5]; / / create an array for sensor data to: {@/ / setup a buffer that averages the last five samples of a sensor int senVal[5]; / / create an array for sensor data int i, j; / / counter variables long average; / / variable to store average ... void loop(){ / / input sensor data into oldest memory slot sensVal[i++ % 5] = analogRead(sensPin); for (j=0; j<5; j++){ average = sensVal[j]; / / add up the samples } average = average / 5; / / divide by total @] Restore April 13, 2007, at 10: 15 PM by Paul Badger Added lines 1- 42: % (modulo) Description Returns the remainder from an integer division Parameters x: the first number, a byte, char, int, or long y: the second number, a byte, char, int, or long Returns The remainder from an integer division. Examples x = 7 % 5; / / x now contains 2 x = 9 % 5; / / x now contains 4 x = 5 % 5; / / x now contains 0 x = 4 % 5; / / x now contains 4 The modulo operator is useful for generating repeating patterns or series of numbers, such as getting a memory array to roll over Example Program / / setup a buffer that averages the last five samples of a sensor int senVal[5]; / / create an array for sensor data Common Programming Errors the modulo operator will not work on floats See also
- 354. / ? Reference Home Restore Edit Page | Page History | Printable View | All Recent Site Changes
- 355. Arduino : Reference / Modulo Reference Language (extended) | Libraries | Comparison | Board % (modulo) Description Returns the remainder from an integer division Syntax result = value1 % value2 Parameters value1: a byte, char, int, or long value2: a byte, char, int, or long Returns The remainder from an integer division. Examples x x x x = = = = 7 9 5 4 % % % % 5; 5; 5; 5; // // // // x x x x now now now now contains contains contains contains 2 4 0 4 The modulo operator is useful for tasks such as making an event occur at regular periods or making a memory array roll over Example Code // check a sensor every 10 times through a loop void loop(){ i++; if ((i % 10) == 0){ // read sensor every ten times through loop x = analogRead(sensPin); } / ... } // setup a buffer that averages the last five samples of a sensor int senVal[5]; int i, j; long average; ... // create an array for sensor data // counter variables // variable to store average void loop(){ // input sensor data into oldest memory slot sensVal[(i++) % 5] = analogRead(sensPin); average = 0; for (j=0; j<5; j++){ average += sensVal[j]; // add up the samples } average = average / 5; // divide by total The modulo operator can also be used to strip off the high bits of a variable. The example below is from the Firmata library.
- 356. // send the analog input information (0 - 1023) Serial.print(value % 128, BYTE); // send lowest 7 bits Serial.print(value >> 7, BYTE); // send highest three bits Tip the modulo operator will not work on floats See also division Reference Home Corrections, suggestions, and new documentation should be posted to the Forum. The text of the Arduino reference is licensed under a Creative Commons Attribution-ShareAlike 3.0 License . Code samples in the reference are released into the public domain. (Printable View of http://www.arduino.cc/en/Reference/Modulo)
- 357. Arduino Buy | Download | Getting Started | Learning | Reference | Hardware | FAQ Login to Arduino Username: Password: Keep me logged in: ✔ Login Edit Page | Page History | Printable View | All Recent Site Changes search Blog » | Forum » | Playground »
- 358. Arduino Buy | Download | Getting Started | Learning | Reference | Hardware | FAQ search Blog » | Forum » | Playground » Reference.DigitalWrite History Hide minor edits - Show changes to markup March 31, 2008, at 06: 15 AM by Paul Badger Changed lines 5- 6 from: Ouputs either HI GH or LOW at a specified pin. to: Sets a pin configured as OUTPUT to either a HI GH or a LOW state at the specified pin. The digitalWrite() function is also used to set pullup resistors when a pin is configured as an I NPUT. Restore February 13, 2008, at 09: 29 PM by David A. Mellis Changed line 40 from: Description of the pins on an Arduino board to: Description of the pins on an Arduino board Restore February 02, 2008, at 09: 05 AM by Paul Badger Changed lines 37- 38 from: The analog input pins can be used as digital pins, referred to as numbers 14 (analog input 0) to 19 (analog input 5). to: The analog input pins can also be used as digital pins, referred to as numbers 14 (analog input 0) to 19 (analog input 5). Restore J anuary 19, 2008, at 09: 40 AM by David A. Mellis - i'm not sure digitalWrite() needs to link to an explanation of ADCs, etc. Deleted line 40: analog pins Restore J anuary 18, 2008, at 12: 30 PM by Paul Badger Restore J anuary 18, 2008, at 10: 53 AM by Paul Badger Changed lines 37- 38 from: The analog input pins can be used as digital pins w/ numbers 14 (analog input 0) to 19 (analog input 5). to: The analog input pins can be used as digital pins, referred to as numbers 14 (analog input 0) to 19 (analog input 5). Restore J anuary 18, 2008, at 09: 14 AM by David A. Mellis Deleted lines 9- 11: valid pin numbers on most boards are 0 to 19, valid pin numbers on the Mini are 0 to 21. Pins 0 to 13 refer to the digital pins and pins 14 to 19 refer to the analog pins, when using the digitalWrite and pinMode commands. Changed lines 35- 38 from:
- 359. to: Note The analog input pins can be used as digital pins w/ numbers 14 (analog input 0) to 19 (analog input 5). Restore J anuary 17, 2008, at 11: 17 PM by Paul Badger Changed lines 11- 12 from: valid pin numbers on most boards are 0 to 19, valid pin numbers on the Mini are 0 to 21. Pins 0 to 13 refer to the digital pins and pins 14 to 19 refer to the analog pins, when using the digitalWrite, and pinMode commands. to: valid pin numbers on most boards are 0 to 19, valid pin numbers on the Mini are 0 to 21. Pins 0 to 13 refer to the digital pins and pins 14 to 19 refer to the analog pins, when using the digitalWrite and pinMode commands. Restore J anuary 17, 2008, at 11: 16 PM by Paul Badger Added line 10: Restore J anuary 17, 2008, at 11: 16 PM by Paul Badger Added line 9: Restore J anuary 17, 2008, at 11: 15 PM by Paul Badger Changed lines 9- 10 from: valid pin numbers on most boards are 0 to 19, valid pin number on the Mini are 0 to 21. Pins 0 to 13 refer to the digital pins and pins 14 to 19 refer to the analog pins, when using the digitalWrite, and pinMode commands. to: valid pin numbers on most boards are 0 to 19, valid pin numbers on the Mini are 0 to 21. Pins 0 to 13 refer to the digital pins and pins 14 to 19 refer to the analog pins, when using the digitalWrite, and pinMode commands. Restore J anuary 17, 2008, at 11: 14 PM by Paul Badger Changed lines 8- 9 from: pin: the pin number, valid pin numbers on most boards are 0 to 19, valid pin number on the Mini are 0 to 21. Pins 0 to 13 refer to the digital pins and pins 14 to 19 refer to the analog pins, when using the digitalWrite command. to: pin: the pin number valid pin numbers on most boards are 0 to 19, valid pin number on the Mini are 0 to 21. Pins 0 to 13 refer to the digital pins and pins 14 to 19 refer to the analog pins, when using the digitalWrite, and pinMode commands. Added line 39: analog pins Restore J anuary 17, 2008, at 11: 11 PM by Paul Badger Changed lines 8- 9 from: pin: the pin number to: pin: the pin number, valid pin numbers on most boards are 0 to 19, valid pin number on the Mini are 0 to 21. Pins 0 to 13 refer to the digital pins and pins 14 to 19 refer to the analog pins, when using the digitalWrite command. Deleted line 41: Reference Home Restore J anuary 11, 2008, at 11: 40 AM by David A. Mellis Changed line 37 from:
- 360. delay to: Description of the pins on an Arduino board Restore J anuary 12, 2006, at 05: 37 PM by 82.186.237.10 Added lines 40- 42: Reference Home Restore December 28, 2005, at 03: 46 PM by 82.186.237.10 Changed lines 1- 4 from: DigitalWrite What it does to: digitalWrite(pin, value) Description Changed lines 7- 13 from: What parametres does it take You need to specify the number of the pin you want to set followed by the word HI GH or LOW. This function returns nothing to: Parameters pin: the pin number value: HI GH or LOW Returns none Restore December 03, 2005, at 12: 47 PM by 213.140.6.103 Changed lines 5- 7 from: Outputs a series of digital pulses that act like an analogue voltage. to: Ouputs either HI GH or LOW at a specified pin. Changed lines 9- 11 from: you need to specify the number of the pin y ou want to configure followed by the word I NPUT or OUTPUT. to: You need to specify the number of the pin you want to set followed by the word HI GH or LOW. Changed lines 32- 34 from: configures pin number 13 to work as an output pin. to: Sets pin 13 to HI GH, makes a one- second- long delay, and sets the pin back to LOW.
- 361. Changed lines 36- 37 from: digitalWrite to: delay pinMode Restore December 03, 2005, at 12: 42 PM by 213.140.6.103 Changed lines 16- 17 from: [@ to: [@ Deleted line 18: Deleted line 19: Deleted line 20: Deleted line 21: Deleted line 24: Deleted line 25: Deleted line 26: Deleted line 27: Deleted line 28: Deleted line 29: Restore December 03, 2005, at 12: 40 PM by 213.140.6.103 Added line 20: Added line 22: Added line 24: Added line 26: Added line 30: Added line 32: Added line 34: Added line 36: Added line 38: Added line 40: Restore December 03, 2005, at 12: 39 PM by 213.140.6.103 Changed lines 16- 17 from: [= to: [@ Changed lines 32- 33 from: =] to: @] Restore December 03, 2005, at 12: 39 PM by 213.140.6.103 Changed lines 16- 17 from: [@ to: [= Changed lines 32- 33 from:
- 362. @] to: =] Restore November 27, 2005, at 10: 20 AM by 81.154.199.248 Added lines 1- 39: DigitalWrite What it does Outputs a series of digital pulses that act like an analogue voltage. What parametres does it take you need to specify the number of the pin y ou want to configure followed by the word I NPUT or OUTPUT. This function returns nothing Example int ledPin = 13; void setup() { pinMode(ledPin, OUTPUT); } void loop() { digitalWrite(ledPin, HIGH); delay(1000); digitalWrite(ledPin, LOW); delay(1000); } // LED connected to digital pin 13 // sets the digital pin as output // // // // sets the LED on waits for a second sets the LED off waits for a second configures pin number 13 to work as an output pin. See also digitalWrite digitalRead Restore Edit Page | Page History | Printable View | All Recent Site Changes
- 363. Arduino : Reference / Digital Write Reference Language (extended) | Libraries | Comparison | Board digitalWrite(pin, value) Description Sets a pin configured as OUTPUT to either a HI GH or a LOW state at the specified pin. The digitalWrite() function is also used to set pullup resistors when a pin is configured as an I NPUT. Parameters pin: the pin number value: HI GH or LOW Returns none Example int ledPin = 13; // LED connected to digital pin 13 void setup() { pinMode(ledPin, OUTPUT); } // sets the digital pin as output void loop() { digitalWrite(ledPin, HIGH); delay(1000); digitalWrite(ledPin, LOW); delay(1000); } // // // // sets the LED on waits for a second sets the LED off waits for a second Sets pin 13 to HI GH, makes a one-second-long delay, and sets the pin back to LOW. Note The analog input pins can also be used as digital pins, referred to as numbers 14 (analog input 0) to 19 (analog input 5). See also Description of the pins on an Arduino board pinMode digitalRead Reference Home Corrections, suggestions, and new documentation should be posted to the Forum. The text of the Arduino reference is licensed under a Creative Commons Attribution-ShareAlike 3.0 License . Code samples in the reference are released into the public domain. (Printable View of http://www.arduino.cc/en/Reference/DigitalWrite)
- 364. Arduino Buy | Download | Getting Started | Learning | Reference | Hardware | FAQ Login to Arduino Username: Password: Keep me logged in: ✔ Login Edit Page | Page History | Printable View | All Recent Site Changes search Blog » | Forum » | Playground »
- 365. Arduino Buy | Download | Getting Started | Learning | Reference | Hardware | FAQ search Blog » | Forum » | Playground » Reference.DigitalRead History Hide minor edits - Show changes to markup J une 29, 2008, at 01: 08 PM by David A. Mellis Changed lines 8- 9 from: pin: the number of the pin you want to read. to: pin: the number of the digital pin you want to read. Restore February 13, 2008, at 09: 29 PM by David A. Mellis Changed line 40 from: Description of the pins on an Arduino board to: Description of the pins on an Arduino board Restore J anuary 18, 2008, at 09: 15 AM by David A. Mellis Changed lines 8- 9 from: pin: the number of the pin you want to read. I t has to be one of the digital pins of the board, thus it should be a number between 0 and 13. I t could also be a variable representing a value in that range. to: pin: the number of the pin you want to read. Changed lines 37- 38 from: to: The analog input pins can be used as digital pins w/ numbers 14 (analog input 0) to 19 (analog input 5). Restore J anuary 11, 2008, at 11: 41 AM by David A. Mellis Changed line 39 from: description of the pins on an Arduino board to: Description of the pins on an Arduino board Restore J anuary 11, 2008, at 11: 40 AM by David A. Mellis Added line 39: description of the pins on an Arduino board Restore August 10, 2007, at 11: 01 AM by David A. Mellis - adding a note about unconnected pins Changed lines 34- 37 from: to: Note
- 366. I f the pin isn't connected to anything, digitalRead() can return either HI GH or LOW (and this can change randomly). Restore December 28, 2005, at 03: 48 PM by 82.186.237.10 Changed lines 1- 2 from: digitalRead to: digitalRead(pin) Changed lines 7- 10 from: What parametres does it take You need to specify the number of the pin you want to read. I t has to be one of the digital pins of the board, thus it should be a number between 0 and 13. I t could also be a variable representing one value in that range. This function returns to: Parameters pin: the number of the pin you want to read. I t has to be one of the digital pins of the board, thus it should be a number between 0 and 13. I t could also be a variable representing a value in that range. Returns Restore December 03, 2005, at 01: 11 PM by 213.140.6.103 Changed line 37 from: digitalRead to: digitalWrite Restore December 03, 2005, at 12: 57 PM by 213.140.6.103 Added lines 3- 37: What it does Reads the value from a specified pin, it will be either HI GH or LOW. What parametres does it take You need to specify the number of the pin you want to read. I t has to be one of the digital pins of the board, thus it should be a number between 0 and 13. I t could also be a variable representing one value in that range. This function returns Either HI GH or LOW Example int ledPin = 13; // LED connected to digital pin 13 int inPin = 7; // pushbutton connected to digital pin 7 int val = 0; // variable to store the read value void setup() { pinMode(ledPin, OUTPUT); pinMode(inPin, INPUT); } // sets the digital pin 13 as output // sets the digital pin 7 as input
- 367. void loop() { val = digitalRead(inPin); digitalWrite(ledPin, val); // read the input pin // sets the LED to the button's value } Sets pin 13 to the same value as the pin 7, which is an input. See also pinMode digitalRead Restore November 27, 2005, at 10: 42 AM by 81.154.199.248 Added lines 1- 2: digitalRead Restore Edit Page | Page History | Printable View | All Recent Site Changes
- 368. Arduino : Reference / Digital Read Reference Language (extended) | Libraries | Comparison | Board digitalRead(pin) What it does Reads the value from a specified pin, it will be either HI GH or LOW. Parameters pin: the number of the digital pin you want to read. Returns Either HI GH or LOW Example int ledPin = 13; // LED connected to digital pin 13 int inPin = 7; // pushbutton connected to digital pin 7 int val = 0; // variable to store the read value void setup() { pinMode(ledPin, OUTPUT); pinMode(inPin, INPUT); } // sets the digital pin 13 as output // sets the digital pin 7 as input void loop() { val = digitalRead(inPin); digitalWrite(ledPin, val); } // read the input pin // sets the LED to the button's value Sets pin 13 to the same value as the pin 7, which is an input. Note I f the pin isn't connected to anything, digitalRead() can return either HI GH or LOW (and this can change randomly). The analog input pins can be used as digital pins w/ numbers 14 (analog input 0) to 19 (analog input 5). See also Description of the pins on an Arduino board pinMode digitalWrite Reference Home Corrections, suggestions, and new documentation should be posted to the Forum. The text of the Arduino reference is licensed under a Creative Commons Attribution-ShareAlike 3.0 License . Code samples in the reference are released into the public domain. (Printable View of http://www.arduino.cc/en/Reference/DigitalRead)
- 369. Arduino Buy | Download | Getting Started | Learning | Reference | Hardware | FAQ Login to Arduino Username: Password: Keep me logged in: ✔ Login Edit Page | Page History | Printable View | All Recent Site Changes search Blog » | Forum » | Playground »
- 370. Arduino Buy | Download | Getting Started | Learning | Reference | Hardware | FAQ search Blog » | Forum » | Playground » Reference.AnalogRead History Hide minor edits - Show changes to markup J une 18, 2008, at 09: 41 AM by David A. Mellis Changed lines 5- 6 from: Reads the value from the specified analog pin. The Arduino board contains a 6 channel (8 channels on the Mini), 10- bit analog to digital converter. This means that it will map input voltages between 0 and 5 volts into integer values between 0 and 1023. This yields a resolution between readings of: 5 volts / 1024 units or, .0049 volts (4.9 mV) per unit. to: Reads the value from the specified analog pin. The Arduino board contains a 6 channel (8 channels on the Mini and Nano), 10- bit analog to digital converter. This means that it will map input voltages between 0 and 5 volts into integer values between 0 and 1023. This yields a resolution between readings of: 5 volts / 1024 units or, .0049 volts (4.9 mV) per unit. Changed lines 11- 12 from: pin: the number of the analog input pin to read from (0 to 5 on most boards, 0 to 7 on the Mini) to: pin: the number of the analog input pin to read from (0 to 5 on most boards, 0 to 7 on the Mini and Nano) Restore February 13, 2008, at 09: 29 PM by David A. Mellis Changed line 38 from: Description of the analog input pins to: Description of the analog input pins Restore J anuary 31, 2008, at 02: 34 PM by David A. Mellis Added lines 13- 15: Returns An integer value in the range of 0 to 1023. Changed lines 17- 21 from: Analog pins default to inputs and unlike digital ones, do not need to be declared as I NPUT nor OUTPUT Returns An integer value in the range of 0 to 1023. to: I f the analog input pin is not connected to anything, the value returned by analogRead() will fluctuate based on a number of factors (e.g. the values of the other analog inputs, how close your hand is to the board, etc.). Deleted line 20: int ledPin = 13; / / LED connected to digital pin 13 Changed lines 24- 25 from:
- 371. int threshold = 512; / / threshold to: Deleted line 26: pinMode(ledPin, OUTPUT); // sets the digital pin 13 as output Deleted lines 33- 38: if (val >= threshold) { digitalWrite(ledPin, HIGH); // sets the LED on } else { digitalWrite(ledPin, LOW); // sets the LED off } Deleted lines 36- 38: Sets pin 13 to HI GH or LOW depending if the input at analog pin is higher than a certain threshold. Deleted lines 38- 39: pinMode digitalWrite Restore J anuary 25, 2008, at 05: 09 PM by David A. Mellis - removing duplicate link Deleted line 50: analogPins Restore J anuary 25, 2008, at 05: 09 PM by David A. Mellis Changed lines 5- 8 from: Reads the value from the specified analog pin. The Arduino board contains a 6 channel (8 channels on the mini), 10- bit analog to digital converter. This means that it will map input voltages between 0 and 5 volts into integer values between 0 and 1023. This yields a resolution between readings of: 5 volts / 1024 units or, .0049 volts (4.9 mV) per A/ D unit. I t takes about 100 us (.0001 s) to read an analog input, so the maximum reading rate is about 10000 times a second. to: Reads the value from the specified analog pin. The Arduino board contains a 6 channel (8 channels on the Mini), 10- bit analog to digital converter. This means that it will map input voltages between 0 and 5 volts into integer values between 0 and 1023. This yields a resolution between readings of: 5 volts / 1024 units or, .0049 volts (4.9 mV) per unit. I t takes about 100 us (0.0001 s) to read an analog input, so the maximum reading rate is about 10,000 times a second. Changed lines 11- 14 from: int pin AnalogRead() accepts one integer specifying the number of the pin to read. Values between 0 and 5 are valid on most boards, and between 0 and 7 on the mini. to: pin: the number of the analog input pin to read from (0 to 5 on most boards, 0 to 7 on the Mini) Restore J anuary 11, 2008, at 12: 06 PM by David A. Mellis Added line 52: Description of the analog input pins Deleted lines 57- 58: Reference Home Restore December 22, 2007, at 07: 42 AM by Paul Badger Changed line 32 from:
- 372. Serial.begin(9600); / / setup serial to: Serial.begin(9600); // setup serial Changed lines 38- 39 from: Serial.begin(9600); // debug value to: Serial.println(val); // debug value Restore December 22, 2007, at 07: 41 AM by Paul Badger Changed lines 5- 6 from: Reads the value from the specified analog pin. The Arduino board contains a 6 channel (8 channels on the mini), 10- bit analog to digital converter. This means that it will map input voltages between 0 and 5 volts into integer values between 0 and 1023. This yields a resolution between readings of: 5 volts / 1024 units or, .0049 volts (4.9 mV) per A/ D unit. to: Reads the value from the specified analog pin. The Arduino board contains a 6 channel (8 channels on the mini), 10- bit analog to digital converter. This means that it will map input voltages between 0 and 5 volts into integer values between 0 and 1023. This yields a resolution between readings of: 5 volts / 1024 units or, .0049 volts (4.9 mV) per A/ D unit. Added line 32: Serial.begin(9600); / / setup serial Added lines 38- 39: Serial.begin(9600); // debug value Restore November 03, 2007, at 11: 27 PM by Paul Badger Changed lines 5- 6 from: Reads the value from the specified analog pin. The Arduino board contains a 6 channel (8 channels on the mini), 10- bit analog to digital converter. This means that it will map input voltages between 0 and 5 volts into integer values between 0 and 1023. This yields a resolution between readings of 5 volts / 1024 units or .0049 volts (4.9 mV) per A/ D unit. to: Reads the value from the specified analog pin. The Arduino board contains a 6 channel (8 channels on the mini), 10- bit analog to digital converter. This means that it will map input voltages between 0 and 5 volts into integer values between 0 and 1023. This yields a resolution between readings of: 5 volts / 1024 units or, .0049 volts (4.9 mV) per A/ D unit. Restore November 03, 2007, at 11: 25 PM by Paul Badger Changed lines 5- 6 from: Reads the value from the specified analog pin. The Arduino board contains a 6 channel (8 channels on the mini), 10- bit analog to digital converter. This means that it will map input voltages between 0 and 5 volts into integer values between 0 and 1023. This yields a resolution between readings of 5 / 1024 or .0049 volts (4.9 mV) per A/ D unit. to: Reads the value from the specified analog pin. The Arduino board contains a 6 channel (8 channels on the mini), 10- bit analog to digital converter. This means that it will map input voltages between 0 and 5 volts into integer values between 0 and 1023. This yields a resolution between readings of 5 volts / 1024 units or .0049 volts (4.9 mV) per A/ D unit. Restore November 03, 2007, at 11: 21 PM by Paul Badger Changed lines 5- 6 from: Reads the value from the specified analog pin. The Arduino board contains a 6 channel (8 channels on the mini), 10- bit analog to digital converter. This means that it will map input voltages between 0 and 5 volts into integer values between 0 and 1023. This yields a resolution between readings of 5 / 1024 or .0049 volts (4.9 mV) per A/ D unit. to:
- 373. Reads the value from the specified analog pin. The Arduino board contains a 6 channel (8 channels on the mini), 10- bit analog to digital converter. This means that it will map input voltages between 0 and 5 volts into integer values between 0 and 1023. This yields a resolution between readings of 5 / 1024 or .0049 volts (4.9 mV) per A/ D unit. I t takes about 100 us (.0001 s) to read an analog input, so the maximum reading rate is about 10000 times a second. Restore November 03, 2007, at 11: 06 PM by Paul Badger Added line 47: analogPins Restore November 03, 2007, at 11: 05 PM by Paul Badger Changed lines 11- 12 from: AnalogRead() accepts one int parameter specifing the number of the pin to read. Values between 0 and 5 are valid on most boards, and between 0 and 7 on the mini. to: AnalogRead() accepts one integer specifying the number of the pin to read. Values between 0 and 5 are valid on most boards, and between 0 and 7 on the mini. Changed lines 21- 24 from: int ledPin = 13; / / LED connected to digital pin 13 int analogPin = 3; / / potentiometer wiper (middle terminal) connected to analog pin 3 / / outside leads to ground and +5V int val = 0; / / variable to store the read value to: int ledPin = 13; / / LED connected to digital pin 13 int analogPin = 3; / / potentiometer wiper (middle terminal) connected to analog pin 3 // outside leads to ground and +5V int val = 0; / / variable to store the value read Changed line 34 from: val = analogRead(analogPin); // read the input pin to: val = analogRead(analogPin); // read the input pin Changed line 38 from: digitalWrite(ledPin, LOW); // sets the LED off to: digitalWrite(ledPin, LOW); // sets the LED off Restore November 03, 2007, at 11: 03 PM by Paul Badger Changed lines 4- 6 from: Reads the value from a specified analog pin, the Arduino board makes a 10- bit analog to digital conversion. This means that it will map input voltages between 0 and 5 volts into integer values between 0 and 1023. to: Reads the value from the specified analog pin. The Arduino board contains a 6 channel (8 channels on the mini), 10- bit analog to digital converter. This means that it will map input voltages between 0 and 5 volts into integer values between 0 and 1023. This yields a resolution between readings of 5 / 1024 or .0049 volts (4.9 mV) per A/ D unit. Changed lines 8- 9 from: You need to specify the number of the pin you want to read. I t has to be one of the analog pins of the board, thus it should be a number between 0 and 5. I t could also be a variable representing one value in that range. to:
- 374. int pin AnalogRead() accepts one int parameter specifing the number of the pin to read. Values between 0 and 5 are valid on most boards, and between 0 and 7 on the mini. Changed lines 14- 16 from: Analog pins unlike digital ones, do not need to be declared as I NPUT nor OUTPUT This function returns to: Analog pins default to inputs and unlike digital ones, do not need to be declared as I NPUT nor OUTPUT Returns Changed lines 22- 23 from: int analogPin = 3; / / potentiometer connected to analog pin 3 to: int analogPin = 3; / / potentiometer wiper (middle terminal) connected to analog pin 3 / / outside leads to ground and +5V Restore September 26, 2007, at 10: 05 PM by David A. Mellis - changing 1024 to 1023 Changed lines 4- 6 from: Reads the value from a specified analog pin, the Arduino board makes a 10- bit analog to digital conversion. This means that it will map input voltages between 0 and 5 volts into integer values between 0 and 1024. to: Reads the value from a specified analog pin, the Arduino board makes a 10- bit analog to digital conversion. This means that it will map input voltages between 0 and 5 volts into integer values between 0 and 1023. Changed lines 14- 15 from: An integer value in the range of 0 to 1024. to: An integer value in the range of 0 to 1023. Restore J uly 13, 2006, at 06: 32 AM by Massimo Banzi Changed line 34 from: digitalWrite(ledPin, LOW); // sets the LED on digitalWrite(ledPin, LOW); // sets the LED off to: Restore J anuary 12, 2006, at 05: 38 PM by 82.186.237.10 Changed lines 1- 3 from: analogRead What it does to: int analogRead(pin) Description Changed line 7 from: What parametres does it take
- 375. to: Parameters Added lines 47- 48: Reference Home Restore December 03, 2005, at 01: 58 PM by 213.140.6.103 Changed line 18 from: int ledPin = 13; / / LED connected to digital pin 13 to: int ledPin = 13; / / LED connected to digital pin 13 Changed line 20 from: int val = 0; / / variable to store the read value to: int val = 0; / / variable to store the read value Changed line 25 from: pinMode(ledPin, OUTPUT); // sets the digital pin 13 as output to: pinMode(ledPin, OUTPUT); // sets the digital pin 13 as output Changed line 32 from: digitalWrite(ledPin, HIGH); // sets the LED on to: digitalWrite(ledPin, HIGH); // sets the LED on Changed line 34 from: digitalWrite(ledPin, LOW); // sets the LED on to: digitalWrite(ledPin, LOW); // sets the LED on Restore December 03, 2005, at 01: 57 PM by 213.140.6.103 Added lines 3- 46: What it does Reads the value from a specified analog pin, the Arduino board makes a 10- bit analog to digital conversion. This means that it will map input voltages between 0 and 5 volts into integer values between 0 and 1024. What parametres does it take You need to specify the number of the pin you want to read. I t has to be one of the analog pins of the board, thus it should be a number between 0 and 5. I t could also be a variable representing one value in that range. Note Analog pins unlike digital ones, do not need to be declared as I NPUT nor OUTPUT This function returns An integer value in the range of 0 to 1024. Example
- 376. int ledPin = 13; // LED connected to digital pin 13 int analogPin = 3; // potentiometer connected to analog pin 3 int val = 0; // variable to store the read value int threshold = 512; // threshold void setup() { pinMode(ledPin, OUTPUT); // sets the digital pin 13 as output } void loop() { val = analogRead(analogPin); // read the input pin if (val >= threshold) { digitalWrite(ledPin, HIGH); } else { digitalWrite(ledPin, LOW); // sets the LED on // sets the LED on } } Sets pin 13 to HI GH or LOW depending if the input at analog pin is higher than a certain threshold. See also pinMode digitalWrite analogWrite Restore November 27, 2005, at 10: 42 AM by 81.154.199.248 Added lines 1- 2: analogRead Restore Edit Page | Page History | Printable View | All Recent Site Changes
- 377. Arduino : Reference / Analog Read Reference Language (extended) | Libraries | Comparison | Board int analogRead(pin) Description Reads the value from the specified analog pin. The Arduino board contains a 6 channel (8 channels on the Mini and Nano), 10-bit analog to digital converter. This means that it will map input voltages between 0 and 5 volts into integer values between 0 and 1023. This yields a resolution between readings of: 5 volts / 1024 units or, .0049 volts (4.9 mV) per unit. I t takes about 100 us (0.0001 s) to read an analog input, so the maximum reading rate is about 10,000 times a second. Parameters pin: the number of the analog input pin to read from (0 to 5 on most boards, 0 to 7 on the Mini and Nano) Returns An integer value in the range of 0 to 1023. Note I f the analog input pin is not connected to anything, the value returned by analogRead() will fluctuate based on a number of factors (e.g. the values of the other analog inputs, how close your hand is to the board, etc.). Example int analogPin = 3; int val = 0; // potentiometer wiper (middle terminal) connected to analog pin 3 // outside leads to ground and +5V // variable to store the value read void setup() { Serial.begin(9600); } void loop() { val = analogRead(analogPin); Serial.println(val); } // setup serial // read the input pin // debug value See also Description of the analog input pins analogWrite Reference Home Corrections, suggestions, and new documentation should be posted to the Forum. The text of the Arduino reference is licensed under a Creative Commons Attribution-ShareAlike 3.0 License . Code samples in the reference are released into the public domain. (Printable View of http://www.arduino.cc/en/Reference/AnalogRead)
- 378. Arduino Buy | Download | Getting Started | Learning | Reference | Hardware | FAQ Login to Arduino Username: Password: Keep me logged in: ✔ Login Edit Page | Page History | Printable View | All Recent Site Changes search Blog » | Forum » | Playground »
- 379. Arduino Buy | Download | Getting Started | Learning | Reference | Hardware | FAQ search Blog » | Forum » | Playground » Reference.AnalogWrite History Hide minor edits - Show changes to markup J une 08, 2008, at 11: 18 AM by David A. Mellis Changed lines 4- 7 from: Writes an analog value (PWM wave) to a pin. On newer Arduino boards (including the Mini and BT) with the ATmega168 chip, this function works on pins 3, 5, 6, 9, 10, and 11. Older USB and serial Arduino boards with an ATmega8 only support analogWrite() on pins 9, 10, and 11. Can be used to light a LED at varying brightnesses or drive a motor at various speeds. After a call to analogWrite, the pin will generate a steady wave until the next call to analogWrite (or a call to digitalRead or digitalWrite on the same pin). to: Writes an analog value (PWM wave) to a pin. Can be used to light a LED at varying brightnesses or drive a motor at various speeds. After a call to analogWrite, the pin will generate a steady wave until the next call to analogWrite (or a call to digitalRead or digitalWrite on the same pin). The frequency of the PWM signal is approximately 490 Hz. On newer Arduino boards (including the Mini and BT) with the ATmega168 chip, this function works on pins 3, 5, 6, 9, 10, and 11. Older USB and serial Arduino boards with an ATmega8 only support analogWrite() on pins 9, 10, and 11. Changed lines 11- 12 from: value: the duty cycle: between 0 and 255. A value of 0 generates a constant 0 volts output at the specified pin; a value of 255 generates a constant 5 volts output at the specified pin. For values in between 0 and 255, the pin rapidly alternates between 0 and 5 volts - the higher the value, the more often the pin is high (5 volts). For example, a value of 64 will be 0 volts three- quarters of the time, and 5 volts one quarter of the time; a value of 128 will be at 0 half the time and 255 half the time; and a value of 192 will be 0 volts one quarter of the time and 5 volts three- quarters of the time. to: value: the duty cycle: between 0 (always off) and 255 (always on). Deleted lines 18- 19: The frequency of the PWM signal is approximately 490 Hz. Restore April 10, 2008, at 09: 58 AM by David A. Mellis Changed lines 21- 22 from: The PWM outputs generated on pins 5 and 6 will have higher- than- expected duty cycles. This is because the internal timer used to generate the PWM signals on pins 5 and 6 is also used for the millis() and delay() functions. to: The PWM outputs generated on pins 5 and 6 will have higher- than- expected duty cycles. This is because of interactions with the millis() and delay() functions, which share the same internal timer used to generate those PWM outputs. Restore April 10, 2008, at 09: 56 AM by David A. Mellis Changed lines 21- 22 from: The millis() and delay() functions apparently interfere with the PWM signal on pins 5 and 6 causing them to report a higherthan- expected average voltage. to: The PWM outputs generated on pins 5 and 6 will have higher- than- expected duty cycles. This is because the internal timer
- 380. used to generate the PWM signals on pins 5 and 6 is also used for the millis() and delay() functions. Restore April 10, 2008, at 09: 54 AM by David A. Mellis Added line 47: Explanation of PWM Restore February 18, 2008, at 03: 51 PM by Paul Badger Changed line 16 from: Note to: Notes and Known I ssues Added lines 21- 22: The millis() and delay() functions apparently interfere with the PWM signal on pins 5 and 6 causing them to report a higherthan- expected average voltage. Restore J uly 17, 2007, at 01: 09 PM by David A. Mellis - clarifying a couple of things Changed lines 17- 18 from: Pins taking analogWrite (9- 11), unlike standard digital ones (1- 8, 12, 13), do not need to be declared as I NPUT nor OUTPUT to: You do not need to call pinMode() to set the pin as an output before calling analogWrite(). Deleted lines 20- 21: analogWrite only works on pins 9, 10, and 11; on all other pins it will write a digital value of 0 or 5 volts. Restore J uly 16, 2007, at 10: 32 PM by Paul Badger Deleted lines 49- 51: Reference Home Restore J uly 16, 2007, at 10: 31 PM by Paul Badger Added lines 24- 26: Sets the output to the LED proportional to the value read from the potentiometer. Changed line 28 from: int ledPin = 9; / / LED connected to digital pin 9 to: int ledPin = 9; / / LED connected to digital pin 9 Changed lines 30- 31 from: int val = 0; / / variable to store the read value to: int val = 0; / / variable to store the read value Changed lines 44- 45 from: Sets the output to the LED proportional to the value read from the potentiometer. to: Restore J une 15, 2007, at 04: 45 PM by David A. Mellis - updating to reflect the fact that the atmega168 (and thus 6 pwm pins) is now standard.
- 381. Changed lines 4- 5 from: Writes an analog value (PWM wave) to a pin. On normal Arduino boards (e.g. Arduino NG), this works on pins 9, 10, or 11. On the Arduino Mini, this also works on pins 3, 5, and 6. to: Writes an analog value (PWM wave) to a pin. On newer Arduino boards (including the Mini and BT) with the ATmega168 chip, this function works on pins 3, 5, 6, 9, 10, and 11. Older USB and serial Arduino boards with an ATmega8 only support analogWrite() on pins 9, 10, and 11. Restore February 26, 2007, at 04: 32 PM by David A. Mellis Changed lines 19- 20 from: The frequency of the PWM signal is approximately 30769 Hz to: The frequency of the PWM signal is approximately 490 Hz. Restore November 11, 2006, at 02: 33 AM by David A. Mellis Changed lines 4- 5 from: Writes an analog value (PWM wave) to pins 9, 10, or 11. Can be used to light a LED at varying brightnesses or drive a motor at various speeds. After a call to analogWrite, the pin will generate a steady wave until the next call to analogWrite (or a call to digitalRead or digitalWrite on the same pin). to: Writes an analog value (PWM wave) to a pin. On normal Arduino boards (e.g. Arduino NG), this works on pins 9, 10, or 11. On the Arduino Mini, this also works on pins 3, 5, and 6. Can be used to light a LED at varying brightnesses or drive a motor at various speeds. After a call to analogWrite, the pin will generate a steady wave until the next call to analogWrite (or a call to digitalRead or digitalWrite on the same pin). Restore April 13, 2006, at 11: 03 AM by Clay Shirky - Updated PWM description to include pin 11 Changed lines 4- 5 from: Writes an analog value (PWM wave) to pin 9 or 10. Can be used to light a LED at varying brightnesses or drive a motor at various speeds. After a call to analogWrite, the pin will generate a steady wave until the next call to analogWrite (or a call to digitalRead or digitalWrite on the same pin). to: Writes an analog value (PWM wave) to pins 9, 10, or 11. Can be used to light a LED at varying brightnesses or drive a motor at various speeds. After a call to analogWrite, the pin will generate a steady wave until the next call to analogWrite (or a call to digitalRead or digitalWrite on the same pin). Changed lines 9- 10 from: value: the duty cycle: between 0 and 255. 0 corresponds to constant low output (no voltage); 255 is a constantly on output (5 volts). For values in- between, the pin rapidly alternates between 0 and 5 volts - the higher the value, the more often the pin is high (5 volts). to: value: the duty cycle: between 0 and 255. A value of 0 generates a constant 0 volts output at the specified pin; a value of 255 generates a constant 5 volts output at the specified pin. For values in between 0 and 255, the pin rapidly alternates between 0 and 5 volts - the higher the value, the more often the pin is high (5 volts). For example, a value of 64 will be 0 volts three- quarters of the time, and 5 volts one quarter of the time; a value of 128 will be at 0 half the time and 255 half the time; and a value of 192 will be 0 volts one quarter of the time and 5 volts three- quarters of the time. Changed lines 15- 16 from: Analog pins unlike digital ones, do not need to be declared as I NPUT nor OUTPUT to: Pins taking analogWrite (9- 11), unlike standard digital ones (1- 8, 12, 13), do not need to be declared as I NPUT nor OUTPUT
- 382. Changed lines 19- 20 from: analogWrite only works on pins 9 and 10; on all other pins it will write a digital value of 0 or 5 volts. to: analogWrite only works on pins 9, 10, and 11; on all other pins it will write a digital value of 0 or 5 volts. Restore March 31, 2006, at 03: 43 AM by David A. Mellis Changed lines 4- 5 from: Writes an analog value (PWM wave) to a pin. Can be used to light a LED at varying brightnesses or drive a motor at various speeds. analogWrite only works on pins 9 and 10; on all other pins it will write a digital value of 0 or 5 volts. to: Writes an analog value (PWM wave) to pin 9 or 10. Can be used to light a LED at varying brightnesses or drive a motor at various speeds. After a call to analogWrite, the pin will generate a steady wave until the next call to analogWrite (or a call to digitalRead or digitalWrite on the same pin). Changed lines 9- 10 from: value: the value between 0 and 255. 0 corresponds to constant low output (no voltage); 255 is a constantly on output (5 volts). For values in- between, the pin rapidly alternates between 0 and 5 volts - the higher the value, the more often the pin is high (5 volts). to: value: the duty cycle: between 0 and 255. 0 corresponds to constant low output (no voltage); 255 is a constantly on output (5 volts). For values in- between, the pin rapidly alternates between 0 and 5 volts - the higher the value, the more often the pin is high (5 volts). Added lines 19- 20: analogWrite only works on pins 9 and 10; on all other pins it will write a digital value of 0 or 5 volts. Restore J anuary 19, 2006, at 05: 01 AM by 85.18.81.162 Added lines 17- 18: The frequency of the PWM signal is approximately 30769 Hz Restore J anuary 12, 2006, at 05: 39 PM by 82.186.237.10 Changed lines 4- 5 from: Writes an analog value (PWM wave) to a pin. Can be used to light a LED at varying brightnesses or drive a motor at various speeds. analogWrite only works on pins 9 and 10; on all other pins it will write a digital value of 0 or 5 volts. to: Writes an analog value (PWM wave) to a pin. Can be used to light a LED at varying brightnesses or drive a motor at various speeds. analogWrite only works on pins 9 and 10; on all other pins it will write a digital value of 0 or 5 volts. Changed line 11 from: This function returns to: Returns Added lines 42- 43: Reference Home Restore J anuary 03, 2006, at 03: 36 AM by 82.186.237.10 Changed lines 1- 10 from: analogWrite
- 383. What it does Writes an analog value (PWM wave) to a pin. Can be used to light a LED at varying brightnesses or drive a motor at various speeds. What parameters does it take The pin to write to. analogWrite only works on pins 9 and 10; on all other pins it will write a digital value of 0 or 5 volts. The value between 0 and 255. 0 corresponds to constant low output (no voltage); 255 is a constantly on output (5 volts). For values in- between, the pin rapidly alternates between 0 and 5 volts - the higher the value, the more often the pin is high (5 volts). to: analogWrite(pin, value) Description Writes an analog value (PWM wave) to a pin. Can be used to light a LED at varying brightnesses or drive a motor at various speeds. analogWrite only works on pins 9 and 10; on all other pins it will write a digital value of 0 or 5 volts. Parameters pin: the pin to write to. value: the value between 0 and 255. 0 corresponds to constant low output (no voltage); 255 is a constantly on output (5 volts). For values in- between, the pin rapidly alternates between 0 and 5 volts - the higher the value, the more often the pin is high (5 volts). Restore December 16, 2005, at 03: 14 PM by 85.18.81.162 Added lines 11- 13: This function returns nothing Restore December 16, 2005, at 03: 09 PM by 85.18.81.162 Added lines 1- 38: analogWrite What it does Writes an analog value (PWM wave) to a pin. Can be used to light a LED at varying brightnesses or drive a motor at various speeds. What parameters does it take The pin to write to. analogWrite only works on pins 9 and 10; on all other pins it will write a digital value of 0 or 5 volts. The value between 0 and 255. 0 corresponds to constant low output (no voltage); 255 is a constantly on output (5 volts). For values in- between, the pin rapidly alternates between 0 and 5 volts - the higher the value, the more often the pin is high (5 volts). Note Analog pins unlike digital ones, do not need to be declared as I NPUT nor OUTPUT Example int ledPin = 9; // LED connected to digital pin 9 int analogPin = 3; // potentiometer connected to analog pin 3 int val = 0; void setup() // variable to store the read value
- 384. { pinMode(ledPin, OUTPUT); // sets the pin as output } void loop() { val = analogRead(analogPin); // read the input pin analogWrite(ledPin, val / 4); // analogRead values go from 0 to 1023, analogWrite values from 0 to 255 } Sets the output to the LED proportional to the value read from the potentiometer. See also pinMode digitalWrite analogRead Restore Edit Page | Page History | Printable View | All Recent Site Changes
- 385. Arduino : Reference / Analog Write Reference Language (extended) | Libraries | Comparison | Board analogWrite(pin, value) Description Writes an analog value (PWM wave) to a pin. Can be used to light a LED at varying brightnesses or drive a motor at various speeds. After a call to analogWrite, the pin will generate a steady wave until the next call to analogWrite (or a call to digitalRead or digitalWrite on the same pin). The frequency of the PWM signal is approximately 490 Hz. On newer Arduino boards (including the Mini and BT) with the ATmega168 chip, this function works on pins 3, 5, 6, 9, 10, and 11. Older USB and serial Arduino boards with an ATmega8 only support analogWrite() on pins 9, 10, and 11. Parameters pin: the pin to write to. value: the duty cycle: between 0 (always off) and 255 (always on). Returns nothing Notes and Known I ssues You do not need to call pinMode() to set the pin as an output before calling analogWrite(). The PWM outputs generated on pins 5 and 6 will have higher-than-expected duty cycles. This is because of interactions with the millis() and delay() functions, which share the same internal timer used to generate those PWM outputs. Example Sets the output to the LED proportional to the value read from the potentiometer. int ledPin = 9; int analogPin = 3; int val = 0; // LED connected to digital pin 9 // potentiometer connected to analog pin 3 // variable to store the read value void setup() { pinMode(ledPin, OUTPUT); } // sets the pin as output void loop() { val = analogRead(analogPin); analogWrite(ledPin, val / 4); to 255 } See also Explanation of PWM pinMode digitalWrite // read the input pin // analogRead values go from 0 to 1023, analogWrite values from 0
- 386. analogRead Reference Home Corrections, suggestions, and new documentation should be posted to the Forum. The text of the Arduino reference is licensed under a Creative Commons Attribution-ShareAlike 3.0 License . Code samples in the reference are released into the public domain. (Printable View of http://www.arduino.cc/en/Reference/AnalogWrite)
- 387. Arduino Buy | Download | Getting Started | Learning | Reference | Hardware | FAQ Login to Arduino Username: Password: Keep me logged in: ✔ Login Edit Page | Page History | Printable View | All Recent Site Changes search Blog » | Forum » | Playground »
- 388. Arduino Buy | Download | Getting Started | Learning | Reference | Hardware | FAQ search Blog » | Forum » | Playground » Reference.ShiftOut History Hide minor edits - Show changes to markup December 22, 2007, at 07: 47 AM by Paul Badger Changed lines 59- 60 from: shiftOut(data, clock, MSBFI RST, data); to: shiftOut(data, clock, LSBFI RST, data); Changed line 62 from: shiftOut(data, clock, MSBFI RST, (data >> 8)); to: shiftOut(data, clock, LSBFI RST, (data >> 8)); Restore December 22, 2007, at 07: 46 AM by Paul Badger Changed line 48 from: / / " >> " is bitshift operator - moves top 8 bit (high byte) into low byte to: / / " >> " is bitshift operator - moves top 8 bits (high byte) into low byte Restore December 22, 2007, at 07: 45 AM by Paul Badger Changed lines 27- 28 from: Note also that this function, as it is currently written, is hard- wired to output 8 bits at a time. An int holds two bytes (16 bits), so if one tries to outputing an int with shiftout requires a two- step operation: to: Note also that this function, as it is currently written, is hard- wired to output 8 bits at a time. An int holds two bytes (16 bits), so outputting an int with shiftout requires a two- step operation: Restore December 05, 2007, at 12: 56 PM by Paul Badger Changed lines 13- 16 from: bitOrder: which order to shift out the bits; either MSBFI RST or LSBFI RST. (Most Significant Bit First, or, Least Significant Bit First) to: bitOrder: which order to shift out the bits; either MSBFI RST or LSBFI RST. (Most Significant Bit First, or, Least Significant Bit First) Restore December 05, 2007, at 12: 56 PM by Paul Badger Changed lines 13- 14 from: bitOrder: which order to shift out the bits; either MSBFI RST or LSBFI RST. to:
- 389. bitOrder: which order to shift out the bits; either MSBFI RST or LSBFI RST. Restore December 05, 2007, at 12: 55 PM by Paul Badger Changed lines 14- 15 from: (Most Significant Bit First, or, Least Significant Bit First) to: (Most Significant Bit First, or, Least Significant Bit First) Restore December 05, 2007, at 12: 55 PM by Paul Badger Restore December 05, 2007, at 12: 53 PM by Paul Badger Changed lines 14- 15 from: (Most Significant Bit First, or, Least Significant Bit First) to: (Most Significant Bit First, or, Least Significant Bit First) Restore December 05, 2007, at 12: 52 PM by Paul Badger Changed line 13 from: bitOrder: which order to shift out the bits; either MSBFI RST or LSBFI RST. to: bitOrder: which order to shift out the bits; either MSBFI RST or LSBFI RST. Restore December 05, 2007, at 12: 52 PM by Paul Badger Changed lines 13- 14 from: bitOrder: which order to shift out the bits (either MSBFI RST or LSBFI RST). to: bitOrder: which order to shift out the bits; either MSBFI RST or LSBFI RST. (Most Significant Bit First, or, Least Significant Bit First) Restore December 05, 2007, at 12: 50 PM by Paul Badger Changed lines 26- 27 from: Note also that this function, as it is currently written, is hard- wired to output 8 bits at a time. An int holds two bytes (16 bits), so if one tries to do something like this: to: Note also that this function, as it is currently written, is hard- wired to output 8 bits at a time. An int holds two bytes (16 bits), so if one tries to outputing an int with shiftout requires a two- step operation: Example: Restore November 03, 2007, at 11: 35 PM by Paul Badger Changed lines 4- 5 from: Shifts out a byte of data one bit at a time. Starts from either the most (i.e. the leftmost) or least (rightmost) significant bit. Each bit is written in turn to a pin, after which another pin is toggled to indicate that the bit is available. to: Shifts out a byte of data one bit at a time. Starts from either the most (i.e. the leftmost) or least (rightmost) significant bit. Each bit is written in turn to the dataPin, after which the clockPin is toggled to indicate that the bit is available. Restore J uly 14, 2007, at 06: 10 PM by Paul Badger Added line 47: Added line 55: / / shift out lowbyte
- 390. Changed lines 57- 58 from: / / shift out lowbyte to: / / shift out highbyte Changed lines 60- 62 from: / / shift out highbyte @] to: @] Restore J uly 14, 2007, at 06: 09 PM by Paul Badger Changed lines 45- 46 from: shiftOut(data, clock, MSBFI RST, (data >> 8)); / / >> is bitshift operator - moves highbyte into lowbyte to: / / " >> " is bitshift operator - moves top 8 bit (high byte) into low byte shiftOut(data, clock, MSBFI RST, (data >> 8)); Restore J uly 14, 2007, at 06: 08 PM by Paul Badger Deleted line 43: shiftOut(data, clock, MSBFI RST, (data >> 8)); Added lines 45- 46: shiftOut(data, clock, MSBFI RST, (data >> 8)); / / >> is bitshift operator - moves highbyte into lowbyte / / shift out lowbyte Added lines 48- 53: / / And do this for LSBFI RST serial data = 500; shiftOut(data, clock, MSBFI RST, data); Deleted lines 54- 59: / / And do this for LSBFI RST serial data = 500; shiftOut(data, clock, MSBFI RST, data); / / shift out lowbyte Restore April 13, 2007, at 11: 30 PM by Paul Badger Changed lines 6- 7 from: This is known as synchronous serial protocol and is a common way that microcontrollers communicate with sensors, and with other microcontrollers. The two devices always stay synchronized, and communicate at close to maximum speeds, since they both share the same clock line. Often referred to in hardware documentation as SPI . to: This is known as synchronous serial protocol and is a common way that microcontrollers communicate with sensors, and with other microcontrollers. The two devices always stay synchronized, and communicate at close to maximum speeds, since they both share the same clock line. Often referred to as SPI (synchronous protocol interface) in hardware documentation. Restore April 13, 2007, at 09: 44 PM by Paul Badger Restore April 13, 2007, at 09: 43 PM by Paul Badger Changed line 25 from: Common Errors to: Common Programming Errors Restore April 13, 2007, at 09: 42 PM by Paul Badger -
- 391. Changed lines 25- 27 from: Warning Note also that this function, as it is currently written, only outputs 8 bits at a time. An int holds two bytes (16 bits), so if one tries to do something like this: to: Common Errors Note also that this function, as it is currently written, is hard- wired to output 8 bits at a time. An int holds two bytes (16 bits), so if one tries to do something like this: Restore April 13, 2007, at 09: 27 PM by Paul Badger Changed lines 26- 27 from: Note also that this function, as it is currently written, only outputs 8 bits at a time. An int holds two bytes, so if one tries to do something like this: to: Note also that this function, as it is currently written, only outputs 8 bits at a time. An int holds two bytes (16 bits), so if one tries to do something like this: Restore April 13, 2007, at 09: 26 PM by Paul Badger Changed lines 26- 27 from: Note also that this function, as it is currently written, only outputs 8 bits at a time. An int holds two bytes so if one tries to do something like this: to: Note also that this function, as it is currently written, only outputs 8 bits at a time. An int holds two bytes, so if one tries to do something like this: Restore April 13, 2007, at 09: 25 PM by Paul Badger Changed lines 4- 5 from: Shifts out a byte of data one bit at a time. Starts from either the most (i.e. the leftmost) or least (rightmost) significant bit. Each bit is written in turn to a pin, after which another pin is toggled to indicate that the bit is available. to: Shifts out a byte of data one bit at a time. Starts from either the most (i.e. the leftmost) or least (rightmost) significant bit. Each bit is written in turn to a pin, after which another pin is toggled to indicate that the bit is available. This is known as synchronous serial protocol and is a common way that microcontrollers communicate with sensors, and with other microcontrollers. The two devices always stay synchronized, and communicate at close to maximum speeds, since they both share the same clock line. Often referred to in hardware documentation as SPI . Added lines 24- 57: Warning Note also that this function, as it is currently written, only outputs 8 bits at a time. An int holds two bytes so if one tries to do something like this: int data; int clock; int cs; ... digitalWrite(cs, LOW); data = 500; shiftOut(data, clock, MSBFIRST, data) digitalWrite(cs, HIGH);
- 392. // this will actually only output 244 because // 500 % 256 = 244 // since only the low 8 bits are output // Instead do this for MSBFIRST serial data = 500; shiftOut(data, clock, MSBFIRST, (data >> 8)); // shift out highbyte shiftOut(data, clock, MSBFIRST, data); // shift out lowbyte // And do this for LSBFIRST serial data = 500; shiftOut(data, clock, MSBFIRST, data); // shift out lowbyte shiftOut(data, clock, MSBFIRST, (data >> 8)); // shift out highbyte Restore December 02, 2006, at 09: 42 AM by David A. Mellis Changed lines 25- 26 from: [@//**************************************************************// to: [@/ / * * * * * * * * * * * * * * * * * * * * * * * * * * * * * * * * * * * * * * * * * * * * * * * * * * * * * * * * * * * * * * / / Restore December 02, 2006, at 09: 42 AM by David A. Mellis Changed line 25 from: [@ //**************************************************************// to: [@//**************************************************************// Restore December 02, 2006, at 09: 42 AM by David A. Mellis Changed lines 25- 27 from: [@ //**************************************************************// to: [@ //**************************************************************// Deleted lines 40- 41: Restore December 02, 2006, at 09: 41 AM by David A. Mellis Added lines 23- 25: For accompanying circuit, see the tutorial on controlling a 74HC595 shift register . Changed lines 65- 66 from: For accompanying circuit, see the tutorial on controlling a 74HC595 shift register . to: Restore December 02, 2006, at 09: 41 AM by David A. Mellis Changed lines 60- 62 from: } @] to: } @]
- 393. Restore December 02, 2006, at 09: 41 AM by David A. Mellis Added lines 18- 21: Note The dataPin and clockPin must already be configured as outputs by a call to pinMode. Deleted line 60: Changed lines 63- 66 from: Note The dataPin and clockPin must already be configured as outputs by a call to pinMode. to: For accompanying circuit, see the tutorial on controlling a 74HC595 shift register . Restore December 02, 2006, at 09: 39 AM by David A. Mellis Changed lines 21- 22 from: / / Name : shiftOutCode, Hello World / / / / Author : Carlyn Maw,Tom I goe / / to: / / Name : shiftOutCode, Hello World / / / / Author : Carlyn Maw,Tom I goe / / Added line 57: Restore December 02, 2006, at 09: 38 AM by David A. Mellis Added lines 1- 63: shiftOut(dataPin, clockPin, bitOrder, value) Description Shifts out a byte of data one bit at a time. Starts from either the most (i.e. the leftmost) or least (rightmost) significant bit. Each bit is written in turn to a pin, after which another pin is toggled to indicate that the bit is available. Parameters dataPin: the pin on which to output each bit ( int ) clockPin: the pin to toggle once the dataPin has been set to the correct value ( int) bitOrder: which order to shift out the bits (either MSBFI RST or LSBFI RST). value: the data to shift out. ( byte) Returns None Example //**************************************************************// // Name : shiftOutCode, Hello World // Author : Carlyn Maw,Tom Igoe // // // // // Date : 25 Oct, 2006 Version : 1.0 Notes : Code for using a 74HC595 Shift Register : to count from 0 to 255 // // // // //**************************************************************** //Pin connected to ST_CP of 74HC595 int latchPin = 8; //
- 394. //Pin connected to SH_CP of 74HC595 int clockPin = 12; ////Pin connected to DS of 74HC595 int dataPin = 11; void setup() { //set pins to output because they are addressed in the main loop pinMode(latchPin, OUTPUT); pinMode(clockPin, OUTPUT); pinMode(dataPin, OUTPUT); } void loop() { //count up routine for (int j = 0; j < 256; j++) { //ground latchPin and hold low for as long as you are transmitting digitalWrite(latchPin, LOW); shiftOut(dataPin, clockPin, LSBFIRST, j); //return the latch pin high to signal chip that it //no longer needs to listen for information digitalWrite(latchPin, HIGH); delay(1000); } } Note The dataPin and clockPin must already be configured as outputs by a call to pinMode. Reference Home Restore Edit Page | Page History | Printable View | All Recent Site Changes
- 395. Arduino : Reference / Shift Out Reference Language (extended) | Libraries | Comparison | Board shiftOut(dataPin, clockPin, bitOrder, value) Description Shifts out a byte of data one bit at a time. Starts from either the most (i.e. the leftmost) or least (rightmost) significant bit. Each bit is written in turn to the dataPin, after which the clockPin is toggled to indicate that the bit is available. This is known as synchronous serial protocol and is a common way that microcontrollers communicate with sensors, and with other microcontrollers. The two devices always stay synchronized, and communicate at close to maximum speeds, since they both share the same clock line. Often referred to as SPI (synchronous protocol interface) in hardware documentation. Parameters dataPin: the pin on which to output each bit (int) clockPin: the pin to toggle once the dataPin has been set to the correct value (int) bitOrder: which order to shift out the bits; either MSBFI RST or LSBFI RST. (Most Significant Bit First, or, Least Significant Bit First) value: the data to shift out. (byte) Returns None Note The dataPin and clockPin must already be configured as outputs by a call to pinMode. Common Programming Errors Note also that this function, as it is currently written, is hard-wired to output 8 bits at a time. An int holds two bytes (16 bits), so outputting an int with shiftout requires a two-step operation: Example: int data; int clock; int cs; ... digitalWrite(cs, LOW); data = 500; shiftOut(data, clock, MSBFIRST, data) digitalWrite(cs, HIGH); // this will actually only output 244 because // 500 % 256 = 244 // since only the low 8 bits are output // Instead do this for MSBFIRST serial data = 500; // shift out highbyte // " >> " is bitshift operator - moves top 8 bits (high byte) into low byte shiftOut(data, clock, MSBFIRST, (data >> 8));
- 396. // shift out lowbyte shiftOut(data, clock, MSBFIRST, data); // And do this for LSBFIRST serial data = 500; // shift out lowbyte shiftOut(data, clock, LSBFIRST, data); // shift out highbyte shiftOut(data, clock, LSBFIRST, (data >> 8)); Example For accompanying circuit, see the tutorial on controlling a 74HC595 shift register . //**************************************************************// // Name : shiftOutCode, Hello World // // Author : Carlyn Maw,Tom Igoe // // Date : 25 Oct, 2006 // // Version : 1.0 // // Notes : Code for using a 74HC595 Shift Register // // : to count from 0 to 255 // //**************************************************************** //Pin connected to ST_CP of 74HC595 int latchPin = 8; //Pin connected to SH_CP of 74HC595 int clockPin = 12; ////Pin connected to DS of 74HC595 int dataPin = 11; void setup() { //set pins to output because they are addressed in the main loop pinMode(latchPin, OUTPUT); pinMode(clockPin, OUTPUT); pinMode(dataPin, OUTPUT); } void loop() { //count up routine for (int j = 0; j < 256; j++) { //ground latchPin and hold low for as long as you are transmitting digitalWrite(latchPin, LOW); shiftOut(dataPin, clockPin, LSBFIRST, j); //return the latch pin high to signal chip that it //no longer needs to listen for information digitalWrite(latchPin, HIGH); delay(1000); } } Reference Home Reference Home Corrections, suggestions, and new documentation should be posted to the Forum. The text of the Arduino reference is licensed under a Creative Commons Attribution-ShareAlike 3.0 License . Code samples in the reference are released into the public domain. (Printable View of http://www.arduino.cc/en/Reference/ShiftOut)
- 397. Arduino Buy | Download | Getting Started | Learning | Reference | Hardware | FAQ Login to Arduino Username: Password: Keep me logged in: ✔ Login Edit Page | Page History | Printable View | All Recent Site Changes search Blog » | Forum » | Playground »
- 398. Arduino Buy | Download | Getting Started | Learning | Reference | Hardware | FAQ search Blog » | Forum » | Playground » Reference.PulseIn History Hide minor edits - Show changes to markup March 29, 2008, at 10: 09 AM by David A. Mellis Changed lines 2- 3 from: to: unsigned long pulseIn(pin, value, timeout) Changed lines 5- 9 from: Reads a pulse (either HI GH or LOW) on a pin. For example, if value is HI GH, pulseI n() waits for the pin to go HI GH, starts timing, then waits for the pin to go LOW and stops timing. Returns the length of the pulse in microseconds. The timing of this function has been determined empirically and will probably show errors in longer pulses. Works on pulses from 10 microseconds to 3 minutes in length. Note that this function will not return until a pulse is detected. to: Reads a pulse (either HI GH or LOW) on a pin. For example, if value is HI GH, pulseI n() waits for the pin to go HI GH, starts timing, then waits for the pin to go LOW and stops timing. Returns the length of the pulse in microseconds. Gives up and returns 0 if no pulse starts within a specified time out. The timing of this function has been determined empirically and will probably show errors in longer pulses. Works on pulses from 10 microseconds to 3 minutes in length. Added lines 15- 16: timeout (optional): the number of microseconds to wait for the pulse to start; default is one second ( unsigned long) Changed lines 18- 19 from: the length of the pulse (in microseconds) to: the length of the pulse (in microseconds) or 0 if no pulse started before the timeout Changed lines 39- 41 from: pinMode to: pinMode Restore September 26, 2007, at 10: 10 PM by David A. Mellis - describing what the function does, not what it doesn't do. Changed lines 6- 8 from: The timing of this function has been determined empirically and will probably show errors in longer pulses.Works on pulses from 10 microseconds to 3 minutes in length. Note that this function does not have a timeout built into it, so can appear to lock the Arduino if it misses the pulse. to: The timing of this function has been determined empirically and will probably show errors in longer pulses. Works on pulses from 10 microseconds to 3 minutes in length. Note that this function will not return until a pulse is detected. Restore
- 399. April 18, 2007, at 07: 20 AM by Paul Badger Added line 38: Restore April 18, 2007, at 07: 20 AM by Paul Badger Deleted lines 37- 38: Reference Home Restore April 18, 2007, at 07: 14 AM by Paul Badger Changed lines 6- 8 from: Works on pulses from 10 microseconds to 3 minutes in length. to: The timing of this function has been determined empirically and will probably show errors in longer pulses.Works on pulses from 10 microseconds to 3 minutes in length. Note that this function does not have a timeout built into it, so can appear to lock the Arduino if it misses the pulse. Restore April 18, 2007, at 07: 07 AM by Paul Badger Added lines 6- 8: Works on pulses from 10 microseconds to 3 minutes in length. Restore April 14, 2006, at 07: 56 AM by David A. Mellis - Documented pulseI n() Added lines 1- 36: unsigned long pulseIn(pin, value) Description Reads a pulse (either HI GH or LOW) on a pin. For example, if value is HI GH, pulseI n() waits for the pin to go HI GH, starts timing, then waits for the pin to go LOW and stops timing. Returns the length of the pulse in microseconds. Parameters pin: the number of the pin on which you want to read the pulse. ( int) value: type type of pulse to read: either HI GH or LOW. ( int) Returns the length of the pulse (in microseconds) Example int pin = 7; unsigned long duration; void setup() { pinMode(pin, INPUT); } void loop() { duration = pulseIn(pin, HIGH); } See also pinMode
- 400. Reference Home Restore Edit Page | Page History | Printable View | All Recent Site Changes
- 401. Arduino : Reference / Pulse I n Reference Language (extended) | Libraries | Comparison | Board unsigned long pulseI n(pin, value) unsigned long pulseI n(pin, value, timeout) Description Reads a pulse (either HI GH or LOW) on a pin. For example, if value is HI GH, pulseI n() waits for the pin to go HI GH, starts timing, then waits for the pin to go LOW and stops timing. Returns the length of the pulse in microseconds. Gives up and returns 0 if no pulse starts within a specified time out. The timing of this function has been determined empirically and will probably show errors in longer pulses. Works on pulses from 10 microseconds to 3 minutes in length. Parameters pin: the number of the pin on which you want to read the pulse. (int) value: type type of pulse to read: either HI GH or LOW. (int) timeout (optional): the number of microseconds to wait for the pulse to start; default is one second (unsigned long) Returns the length of the pulse (in microseconds) or 0 if no pulse started before the timeout Example int pin = 7; unsigned long duration; void setup() { pinMode(pin, INPUT); } void loop() { duration = pulseIn(pin, HIGH); } See also pinMode Reference Home Corrections, suggestions, and new documentation should be posted to the Forum. The text of the Arduino reference is licensed under a Creative Commons Attribution-ShareAlike 3.0 License . Code samples in the reference are released into the public domain. (Printable View of http://www.arduino.cc/en/Reference/PulseIn)
- 402. Arduino Buy | Download | Getting Started | Learning | Reference | Hardware | FAQ Login to Arduino Username: Password: Keep me logged in: ✔ Login Edit Page | Page History | Printable View | All Recent Site Changes search Blog » | Forum » | Playground »
- 403. Arduino Buy | Download | Getting Started | Learning | Reference | Hardware | FAQ search Blog » | Forum » | Playground » Reference.Millis History Hide minor edits - Show changes to markup April 22, 2008, at 11: 39 PM by Paul Badger Changed lines 10- 11 from: The number of milliseconds since the current program started running, as an unsigned long. This number will overflow (go back to zero), after approximately 9 hours. to: The number of milliseconds since the current program started running, as an unsigned long. This number will overflow (go back to zero), after approximately 9 hours and 32 minutes. Restore December 05, 2007, at 12: 42 PM by Paul Badger Changed lines 71- 72 from: [@int startTime; / / should be "unsigned long startTime; to: [@int startTime; / / should be "unsigned long startTime; " Restore December 05, 2007, at 12: 41 PM by Paul Badger Changed lines 71- 72 from: int startTime; / / should be "unsigned long startTime; to: [@int startTime; / / should be "unsigned long startTime; Changed lines 75- 79 from: startTime = millis(); / / datatype not large enough to hold data, will generate errors to: startTime = millis(); / / datatype not large enough to hold data, will generate errors@] Restore December 05, 2007, at 12: 41 PM by Paul Badger Changed line 65 from: Note: to: Warning: Restore December 05, 2007, at 12: 40 PM by Paul Badger Changed lines 65- 67 from: Note: Note that the parameter for millis is an unsigned long, errors may be generated if a programmer, tries to do math with other datatypes such as ints. to:
- 404. Note: Note that the parameter for millis is an unsigned long, errors may be generated if a programmer, tries to do math with other datatypes such as ints. Changed lines 71- 72 from: int startTime; / / should be "unsigned long startTime; to: int startTime; / / should be "unsigned long startTime; Changed lines 75- 79 from: startTime = millis(); to: startTime = millis(); / / datatype not large enough to hold data, will generate errors Restore December 05, 2007, at 12: 38 PM by Paul Badger Restore December 05, 2007, at 12: 37 PM by Paul Badger Added lines 64- 78: Note: Note that the parameter for millis is an unsigned long, errors may be generated if a programmer, tries to do math with other datatypes such as ints. Example: int startTime; / / should be "unsigned long startTime; / / ... startTime = millis(); Changed lines 82- 83 from: to: cast Restore May 07, 2007, at 06: 57 AM by Paul Badger Changed line 34 from: depending on specific part number. to: depending on specific device. Changed line 58 from: // to determine period, then take inverse to convert to hz to: // to determine period, then take inverse to convert to hertz Restore May 07, 2007, at 06: 56 AM by Paul Badger Deleted line 68: Reference Home Restore April 19, 2007, at 09: 48 PM by Paul Badger Changed line 57 from: hz = (1 /((float)time / 100000000.0)); // divide by 100,000 cycles and 10000 milliseconds per second
- 405. to: hz = (1 /((float)time / 100000000.0)); // divide by 100,000 cycles and 1000 milliseconds per second Deleted line 61: Restore April 19, 2007, at 09: 47 PM by Paul Badger Changed lines 64- 65 from: } @] to: }@] Restore April 19, 2007, at 09: 47 PM by Paul Badger Deleted line 28: Deleted lines 64- 65: Deleted line 65: Restore April 19, 2007, at 09: 46 PM by Paul Badger Changed lines 12- 13 from: Example to: Examples Added lines 28- 67: / * Frequency Test Paul Badger 2007 Program to empirically determine the time delay to generate the proper frequency for a an I nfrared (I R) Remote Control Receiver module These modules typically require 36 - 52 khz communication frequency depending on specific part number. / int tdelay; unsigned long i, hz; unsigned long time; int outPin = 11; void setup(){ pinMode(outPin, OUTPUT); Serial.begin(9600); } void loop() { for (tdelay = 1; tdelay < 12; tdelay++){ // scan across a range of time delays to find the right frequency time = millis(); // get start time of inner loop for (i = 0; i < 100000; i++){ digitalWrite(outPin, HIGH); delayMicroseconds(tdelay); digitalWrite(outPin, LOW); // time 100,000 cycles through the loop delayMicroseconds(tdelay); } time = millis() - time; // compute time through inner loop in milliseconds hz = (1 /((float)time / 100000000.0)); // divide by 100,000 cycles and 10000 milliseconds per second // to determine period, then take inverse to convert to hz Serial.print(tdelay, DEC); Serial.print(" "); Serial.println(hz, DEC); }
- 406. } Restore October 04, 2006, at 01: 41 AM by David A. Mellis Changed lines 10- 11 from: The number of milliseconds since the current program started running, as an unsigned long. This number will overflow (go back to zero), after approximately 50 days. to: The number of milliseconds since the current program started running, as an unsigned long. This number will overflow (go back to zero), after approximately 9 hours. Restore March 28, 2006, at 03: 17 AM by David A. Mellis - added delay(1000) and changed baud rate to 9600. Changed line 18 from: Serial.begin(19200); to: Serial.begin(9600); Added lines 25- 26: // wait a second so as not to send massive amounts of data delay(1000); Restore March 27, 2006, at 06: 20 PM by J eff Gray Added line 23: //prints time since program started Restore March 27, 2006, at 06: 13 PM by J eff Gray Added lines 12- 26: Example long time; void setup(){ Serial.begin(19200); } void loop(){ Serial.print("Time: "); time = millis(); Serial.println(time); } Restore J anuary 12, 2006, at 05: 46 PM by 82.186.237.10 Changed lines 14- 17 from: delayMicroseconds to: delayMicroseconds Reference Home Restore December 29, 2005, at 08: 05 AM by 82.186.237.10 Added lines 1- 14: unsigned long millis()
- 407. Description Returns the number of milliseconds since the Arduino board began running the current program. Parameters None Returns The number of milliseconds since the current program started running, as an unsigned long. This number will overflow (go back to zero), after approximately 50 days. See also delay delayMicroseconds Restore Edit Page | Page History | Printable View | All Recent Site Changes
- 408. Arduino : Reference / Millis Reference Language (extended) | Libraries | Comparison | Board unsigned long millis() Description Returns the number of milliseconds since the Arduino board began running the current program. Parameters None Returns The number of milliseconds since the current program started running, as an unsigned long. This number will overflow (go back to zero), after approximately 9 hours and 32 minutes. Examples long time; void setup(){ Serial.begin(9600); } void loop(){ Serial.print("Time: "); time = millis(); //prints time since program started Serial.println(time); // wait a second so as not to send massive amounts of data delay(1000); } /* * * * * * */ Frequency Test Paul Badger 2007 Program to empirically determine the time delay to generate the proper frequency for a an Infrared (IR) Remote Control Receiver module These modules typically require 36 - 52 khz communication frequency depending on specific device. int tdelay; unsigned long i, hz; unsigned long time; int outPin = 11; void setup(){ pinMode(outPin, OUTPUT); Serial.begin(9600); } void loop() { for (tdelay = 1; tdelay < 12; tdelay++){ // scan across a range of time delays to find the right frequency time = millis(); // get start time of inner loop for (i = 0; i < 100000; i++){ // time 100,000 cycles through the loop digitalWrite(outPin, HIGH); delayMicroseconds(tdelay); digitalWrite(outPin, LOW); delayMicroseconds(tdelay); } time = millis() - time; // compute time through inner loop in milliseconds hz = (1 /((float)time / 100000000.0)); // divide by 100,000 cycles and 1000 milliseconds per second // to determine period, then take inverse to convert to hertz Serial.print(tdelay, DEC); Serial.print(" "); Serial.println(hz, DEC); }
- 409. } Warning: Note that the parameter for millis is an unsigned long, errors may be generated if a programmer, tries to do math with other datatypes such as ints. Example: int startTime; // should be "unsigned long startTime;" // ... startTime = millis(); // datatype not large enough to hold data, will generate errors See also delay delayMicroseconds cast Reference Home Corrections, suggestions, and new documentation should be posted to the Forum. The text of the Arduino reference is licensed under a Creative Commons Attribution-ShareAlike 3.0 License . Code samples in the reference are released into the public domain. (Printable View of http://www.arduino.cc/en/Reference/Millis)
- 410. Arduino Buy | Download | Getting Started | Learning | Reference | Hardware | FAQ Login to Arduino Username: Password: Keep me logged in: ✔ Login Edit Page | Page History | Printable View | All Recent Site Changes search Blog » | Forum » | Playground »
- 411. Arduino Buy | Download | Getting Started | Learning | Reference | Hardware | FAQ search Blog » | Forum » | Playground » Reference.Delay History Hide minor edits - Show changes to markup February 17, 2008, at 11: 45 PM by Paul Badger Changed lines 15- 16 from: e.g. delay(60000UL); Similarly casting variables to unsigned longs will insure that they are handled correctly by the compiler. e.g. delay((unsigned long)tdelay * 100UL); to: e.g. delay(60000UL); Similarly, casting variables to unsigned longs will insure that they are handled correctly by the compiler. e.g. delay((unsigned long)tdelay * 100UL); Restore February 17, 2008, at 11: 44 PM by Paul Badger Changed lines 15- 16 from: e.g. delay(60000UL); Similarly casting variables to unsigned longs will insure that they are handled correctly by the compiler. e.g. delay((unsigned long)tdelay * 100UL); to: e.g. delay(60000UL); Similarly casting variables to unsigned longs will insure that they are handled correctly by the compiler. e.g. delay((unsigned long)tdelay * 100UL); Restore February 17, 2008, at 11: 44 PM by Paul Badger Changed lines 15- 16 from: e.g. delay(60000UL); Similarly casting variables to unsigned longs will insure that they are handled correctly by the compiler. e.g. 'delay((unsigned long)tdelay * 100UL); ' to: e.g. delay(60000UL); Similarly casting variables to unsigned longs will insure that they are handled correctly by the compiler. e.g. delay((unsigned long)tdelay * 100UL); Restore February 17, 2008, at 11: 43 PM by Paul Badger Changed lines 15- 16 from: e.g. delay(60000UL); Similarly casting variables to unsigned longs will insure that they are handled correctly by the compiler. e.g. delay((unsigned long)tdelay * 100UL); to: e.g. delay(60000UL); Similarly casting variables to unsigned longs will insure that they are handled correctly by the compiler. e.g. 'delay((unsigned long)tdelay * 100UL); ' Restore February 17, 2008, at 11: 43 PM by Paul Badger Changed lines 15- 16 from: e.g. delay(60000UL); Similarly casting variables to unsigned longs will insure that they are handled correctly by the compiler. e.g. delay((unsigned long)tdelay * 100UL); to:
- 412. e.g. delay(60000UL); Similarly casting variables to unsigned longs will insure that they are handled correctly by the compiler. e.g. delay((unsigned long)tdelay * 100UL); Restore February 17, 2008, at 11: 42 PM by Paul Badger Changed line 14 from: When using a number larger than about 32767 as a parameter for delay, append an "UL" suffix to the end. to: When using an integer constant larger than about 32767 as a parameter for delay, append an "UL" suffix to the end. Restore February 17, 2008, at 11: 42 PM by Paul Badger Changed lines 14- 16 from: When using a number larger than about 32000 as a parameter for delay, append an "UL" suffix to the end. e.g. delay(60000UL); Similarly casting variables to unsigned longs will insure that they are handled correctly by the compiler. e.g. delay((unsigned long)tdelay); to: When using a number larger than about 32767 as a parameter for delay, append an "UL" suffix to the end. e.g. delay(60000UL); Similarly casting variables to unsigned longs will insure that they are handled correctly by the compiler. e.g. delay((unsigned long)tdelay * 100UL); Restore February 17, 2008, at 11: 41 PM by Paul Badger Changed lines 15- 16 from: e.g. delay(60000UL);. Similarly casting variables to unsigned longs will insure that they are handled correctly by the compiler. e.g. delay((unsigned long)tdelay). to: e.g. delay(60000UL); Similarly casting variables to unsigned longs will insure that they are handled correctly by the compiler. e.g. delay((unsigned long)tdelay); Restore February 17, 2008, at 11: 40 PM by Paul Badger Changed lines 14- 15 from: When using a number larger than about 32000 as a parameter for delay, append an "UL" suffix to the end. e.g. delay(60000UL). Similarly casting variables to unsigned longs will insure that they are handled correctly by the compiler. e.g. delay((unsigned long)tdelay). to: When using a number larger than about 32000 as a parameter for delay, append an "UL" suffix to the end. e.g. delay(60000UL);. Similarly casting variables to unsigned longs will insure that they are handled correctly by the compiler. e.g. delay((unsigned long)tdelay). Restore February 17, 2008, at 11: 39 PM by Paul Badger Changed line 38 from: integer constants? to: Changed line 41 from: to: integer constants Restore February 17, 2008, at 11: 38 PM by Paul Badger Changed lines 14- 15 from: When using a number larger than about 32000 as a parameter for delay, append an "UL" suffix to the end. e.g. delay(60000UL). Similarly casting variables to unsigned longs will insure that they are handled correctly by the compiler. e.g.
- 413. delay((unsigned long)tdelay) to: When using a number larger than about 32000 as a parameter for delay, append an "UL" suffix to the end. e.g. delay(60000UL). Similarly casting variables to unsigned longs will insure that they are handled correctly by the compiler. e.g. delay((unsigned long)tdelay). Added line 38: integer constants? Restore February 17, 2008, at 11: 36 PM by Paul Badger Changed lines 14- 15 from: When using a number larger than about 32000 as a parameter for delay, append an UL suffix to the end. e.g. delay(60000UL) to: When using a number larger than about 32000 as a parameter for delay, append an "UL" suffix to the end. e.g. delay(60000UL). Similarly casting variables to unsigned longs will insure that they are handled correctly by the compiler. e.g. delay((unsigned long)tdelay) Restore February 17, 2008, at 11: 34 PM by Paul Badger Changed lines 13- 14 from: When using numbers larger than about 32000 as parameters, append an UL suffix to the end. e.g. delay(60000UL) to: The parameter for delay is an unsigned long. When using a number larger than about 32000 as a parameter for delay, append an UL suffix to the end. e.g. delay(60000UL) Restore February 17, 2008, at 11: 33 PM by Paul Badger Changed lines 12- 13 from: Warning: When using numbers larger than about 32000 as parameters, append an UL suffix to the end. e.g. delay(60000UL) to: Warning: When using numbers larger than about 32000 as parameters, append an UL suffix to the end. e.g. delay(60000UL) Restore February 17, 2008, at 11: 33 PM by Paul Badger Changed lines 7- 8 from: ms: the number of milliseconds to pause (there are 1000 milliseconds in a second) to: unsigned long ms - the number of milliseconds to pause (there are 1000 milliseconds in a second) Added lines 12- 13: Warning: When using numbers larger than about 32000 as parameters, append an UL suffix to the end. e.g. delay(60000UL) Restore J anuary 21, 2008, at 10: 54 AM by David A. Mellis Deleted lines 36- 38: Reference Home Restore J anuary 12, 2006, at 05: 47 PM by 82.186.237.10 -
- 414. Changed line 9 from: This function returns to: Returns Added lines 36- 39: Reference Home Restore December 29, 2005, at 08: 00 AM by 82.186.237.10 Changed lines 1- 9 from: delay What it does I t pauses your program for the amount of time (in miliseconds) specified as parameter. What parametres does it take I t takes one integer value as parameter. This value represents miliseconds (there are 1000 milliseconds in a second). to: delay(ms) Description Pauses your program for the amount of time (in miliseconds) specified as parameter. Parameters ms: the number of milliseconds to pause (there are 1000 milliseconds in a second) Changed lines 34- 35 from: digitalWrite pinMode to: millis Restore December 16, 2005, at 03: 16 PM by 85.18.81.162 Changed lines 8- 9 from: I t takes one integer value as parameter. This value represents miliseconds. to: I t takes one integer value as parameter. This value represents miliseconds (there are 1000 milliseconds in a second). Restore December 03, 2005, at 01: 30 PM by 213.140.6.103 Added line 37: delayMicroseconds Restore December 03, 2005, at 01: 28 PM by 213.140.6.103 Added lines 1- 36: delay What it does I t pauses your program for the amount of time (in miliseconds) specified as parameter.
- 415. What parametres does it take I t takes one integer value as parameter. This value represents miliseconds. This function returns nothing Example int ledPin = 13; // LED connected to digital pin 13 void setup() { pinMode(ledPin, OUTPUT); // sets the digital pin as output } void loop() { digitalWrite(ledPin, HIGH); // sets the LED on delay(1000); // waits for a second digitalWrite(ledPin, LOW); delay(1000); // sets the LED off // waits for a second } configures pin number 13 to work as an output pin. I t sets the pin to HI GH, waits for 1000 miliseconds (1 second), sets it back to LOW and waits for 1000 miliseconds. See also digitalWrite pinMode Restore Edit Page | Page History | Printable View | All Recent Site Changes
- 416. Arduino : Reference / Delay Reference Language (extended) | Libraries | Comparison | Board delay(ms) Description Pauses your program for the amount of time (in miliseconds) specified as parameter. Parameters unsigned long ms - the number of milliseconds to pause (there are 1000 milliseconds in a second) Returns nothing Warning: The parameter for delay is an unsigned long. When using an integer constant larger than about 32767 as a parameter for delay, append an "UL" suffix to the end. e.g. delay(60000UL); Similarly, casting variables to unsigned longs will insure that they are handled correctly by the compiler. e.g. delay((unsigned long)tdelay * 100UL); Example int ledPin = 13; // LED connected to digital pin 13 void setup() { pinMode(ledPin, OUTPUT); } // sets the digital pin as output void loop() { digitalWrite(ledPin, HIGH); delay(1000); digitalWrite(ledPin, LOW); delay(1000); } // // // // sets the LED on waits for a second sets the LED off waits for a second configures pin number 13 to work as an output pin. I t sets the pin to HI GH, waits for 1000 miliseconds (1 second), sets it back to LOW and waits for 1000 miliseconds. See also millis delayMicroseconds integer constants Reference Home Corrections, suggestions, and new documentation should be posted to the Forum. The text of the Arduino reference is licensed under a Creative Commons Attribution-ShareAlike 3.0 License . Code samples in the reference are released into the public domain. (Printable View of http://www.arduino.cc/en/Reference/Delay)
- 417. Arduino Buy | Download | Getting Started | Learning | Reference | Hardware | FAQ Login to Arduino Username: Password: Keep me logged in: ✔ Login Edit Page | Page History | Printable View | All Recent Site Changes search Blog » | Forum » | Playground »
- 418. Arduino Buy | Download | Getting Started | Learning | Reference | Hardware | FAQ search Blog » | Forum » | Playground » Reference.DelayMicroseconds History Hide minor edits - Show changes to markup J anuary 17, 2008, at 11: 30 PM by Paul Badger Changed lines 4- 5 from: Pauses your program for the amount of time (in microseconds) specified as parameter. For delays longer than a few thousand microseconds, you should use delay() instead. to: Pauses the program for the amount of time (in microseconds) specified as parameter. For delays longer than a few thousand microseconds, you should use delay() instead. Restore October 16, 2007, at 10: 00 AM by David A. Mellis - the reference is not a place for coordinating development Changed lines 40- 43 from: Users should use care when using a variable as the parameter for delayMicroseconds. delayMicroseconds(0) will generate a much longer delay than expected (~1020 us) as will negative numbers, if passed as a parameters to delayMicroseconds. Users desiring to patch delayMicroseconds(0) to work correctly (return immediately) should see this forum thread. to: delayMicroseconds(0) will generate a much longer delay than expected (~1020 us) as will negative numbers. Restore October 12, 2007, at 11: 04 PM by Paul Badger Changed lines 40- 41 from: Users should use care when using a variable as the parameter of delayMicroseconds. delayMicroseconds(0) will generate a much longer delay than expected ~1020 us as will negative numbers, if passed as a parameters to delayMicroseconds. to: Users should use care when using a variable as the parameter for delayMicroseconds. delayMicroseconds(0) will generate a much longer delay than expected (~1020 us) as will negative numbers, if passed as a parameters to delayMicroseconds. Restore October 12, 2007, at 11: 02 PM by Paul Badger Changed lines 42- 43 from: Users desiring to patch delayMicroseconds(0) to work correctly (return immediately) should see this forum thread. to: Users desiring to patch delayMicroseconds(0) to work correctly (return immediately) should see this forum thread. Restore October 12, 2007, at 11: 00 PM by Paul Badger Changed line 35 from: Warning to: Caveats and Known I ssues Added lines 40- 43:
- 419. Users should use care when using a variable as the parameter of delayMicroseconds. delayMicroseconds(0) will generate a much longer delay than expected ~1020 us as will negative numbers, if passed as a parameters to delayMicroseconds. Users desiring to patch delayMicroseconds(0) to work correctly (return immediately) should see this forum thread. Restore August 29, 2007, at 09: 50 PM by Paul Badger Restore August 29, 2007, at 09: 36 PM by Paul Badger Changed lines 6- 7 from: to: Currently, the largest value that will produce an accurate delay is 16383. This could change in future Arduino releases. Restore August 27, 2007, at 11: 12 AM by David A. Mellis - don't document exact maximum as it may change, instead recommend delay() for longer delays. Changed lines 4- 6 from: Pauses your program for the amount of time (in microseconds) specified as parameter. to: Pauses your program for the amount of time (in microseconds) specified as parameter. For delays longer than a few thousand microseconds, you should use delay() instead. Changed lines 8- 10 from: us: the number of microseconds to pause. (There are a thousand microseconds in a millisecond, and a million microseconds in a second.) The largest value that will result in an accurate delay is 16383. to: us: the number of microseconds to pause. (There are a thousand microseconds in a millisecond, and a million microseconds in a second.) Restore August 27, 2007, at 08: 30 AM by Paul Badger Changed lines 8- 9 from: us: the number of microseconds to pause. (there are a thousand microseconds in a millisecond, and a million microseconds in a second) to: us: the number of microseconds to pause. (There are a thousand microseconds in a millisecond, and a million microseconds in a second.) The largest value that will result in an accurate delay is 16383. Restore May 07, 2007, at 06: 44 AM by Paul Badger Deleted lines 40- 42: Reference Home Restore September 17, 2006, at 05: 08 AM by David A. Mellis Changed lines 34- 35 from: This function works very accurately in the range 10 microseconds and up. We cannot assure that delayMicroseconds will perform precisely for smaller delay- times. to: This function works very accurately in the range 3 microseconds and up. We cannot assure that delayMicroseconds will perform precisely for smaller delay- times. To ensure more accurate delays, this functions disables interrupts during its operation, meaning that some things (like receiving serial data, or incrementing the value returned by millis()) will not happen during the delay. Thus, you should only use this function for short delays, and use delay() for longer ones. Restore
- 420. J anuary 12, 2006, at 05: 47 PM by 82.186.237.10 Added lines 39- 41: Reference Home Restore December 29, 2005, at 08: 02 AM by 82.186.237.10 Changed lines 1- 12 from: delayMicroseconds What it does I t pauses your program for the amount of time (in microseconds) specified as parameter. What parametres does it take I t takes one integer value as parameter. This value represents microseconds. This function returns nothing to: delayMicroseconds(us) Description Pauses your program for the amount of time (in microseconds) specified as parameter. Parameters us: the number of microseconds to pause. (there are a thousand microseconds in a millisecond, and a million microseconds in a second) Returns None Changed line 33 from: Note: Disclaimer to: Warning Deleted line 35: Changed lines 37- 38 from: digitalWrite pinMode to: millis Restore December 03, 2005, at 01: 38 PM by 213.140.6.103 Added lines 1- 40: delayMicroseconds What it does I t pauses your program for the amount of time (in microseconds) specified as parameter. What parametres does it take
- 421. I t takes one integer value as parameter. This value represents microseconds. This function returns nothing Example int outPin = 8; // digital pin 8 void setup() { pinMode(outPin, OUTPUT); // sets the digital pin as output } void loop() { digitalWrite(outPin, HIGH); delayMicroseconds(50); // sets the pin on // pauses for 50 microseconds digitalWrite(outPin, LOW); delayMicroseconds(50); // sets the pin off // pauses for 50 microseconds } configures pin number 8 to work as an output pin. I t sends a train of pulses with 100 microseconds period. Note: Disclaimer This function works very accurately in the range 10 microseconds and up. We cannot assure that delayMicroseconds will perform precisely for smaller delay- times. See also digitalWrite pinMode delay Restore Edit Page | Page History | Printable View | All Recent Site Changes
- 422. Arduino : Reference / Delay Microseconds Reference Language (extended) | Libraries | Comparison | Board delayMicroseconds(us) Description Pauses the program for the amount of time (in microseconds) specified as parameter. For delays longer than a few thousand microseconds, you should use delay() instead. Currently, the largest value that will produce an accurate delay is 16383. This could change in future Arduino releases. Parameters us: the number of microseconds to pause. (There are a thousand microseconds in a millisecond, and a million microseconds in a second.) Returns None Example int outPin = 8; // digital pin 8 void setup() { pinMode(outPin, OUTPUT); } // sets the digital pin as output void loop() { digitalWrite(outPin, HIGH); delayMicroseconds(50); digitalWrite(outPin, LOW); delayMicroseconds(50); } // // // // sets the pin on pauses for 50 microseconds sets the pin off pauses for 50 microseconds configures pin number 8 to work as an output pin. I t sends a train of pulses with 100 microseconds period. Caveats and Known I ssues This function works very accurately in the range 3 microseconds and up. We cannot assure that delayMicroseconds will perform precisely for smaller delay-times. To ensure more accurate delays, this functions disables interrupts during its operation, meaning that some things (like receiving serial data, or incrementing the value returned by millis()) will not happen during the delay. Thus, you should only use this function for short delays, and use delay() for longer ones. delayMicroseconds(0) will generate a much longer delay than expected (~1020 us) as will negative numbers. See also millis delay Reference Home
- 423. Corrections, suggestions, and new documentation should be posted to the Forum. The text of the Arduino reference is licensed under a Creative Commons Attribution-ShareAlike 3.0 License . Code samples in the reference are released into the public domain. (Printable View of http://www.arduino.cc/en/Reference/DelayMicroseconds)
- 424. Arduino Buy | Download | Getting Started | Learning | Reference | Hardware | FAQ Login to Arduino Username: Password: Keep me logged in: ✔ Login Edit Page | Page History | Printable View | All Recent Site Changes search Blog » | Forum » | Playground »
- 425. Arduino search Buy | Download | Getting Started | Learning | Reference | Hardware | FAQ Blog » | Forum » | Playground » Reference.Min History Hide minor edits - Show changes to markup November 03, 2007, at 11: 32 PM by Paul Badger Changed lines 19- 20 from: // ensuring that it never gets above 100. @] to: // ensuring that it never gets above 100.@] Restore November 03, 2007, at 11: 32 PM by Paul Badger Deleted line 20: Restore November 03, 2007, at 11: 32 PM by Paul Badger Changed lines 18- 19 from: [@sensVal = min(sensVal, 100); / / assigns sensVal to the smaller of sensVal or 100, ensuring that it never gets above 100. to: [@sensVal = min(sensVal, 100); / / assigns sensVal to the smaller of sensVal or 100 // ensuring that it never gets above 100. Added lines 22- 24: Note Perhaps counter - intuitively, max() is often used to constrain the lower end of a variable's range, while min() is used to constrain the upper end of the range. Restore April 16, 2007, at 11: 06 AM by Paul Badger Changed line 26 from: Reference Home to: Restore April 16, 2007, at 02: 13 AM by David A. Mellis Changed line 18 from: [@sensVal = min(senVal, 100); / / limits sensor's top reading to 100 maximum to: [@sensVal = min(sensVal, 100); / / assigns sensVal to the smaller of sensVal or 100, ensuring that it never gets above 100. Deleted lines 20- 24: Tip min is useful for limiting the range a variable (say reading a sensor) can move. Even though the name min would seem to suggest it should be used to limit the sensor's minimum value, its real effect is to limit the variable's highest value. This can be slightly counterintuitive.
- 426. Programmers coming to C from the BASI C language may alsoexpect min to affect a variable without assigning the returned result to anything. Restore April 14, 2007, at 08: 43 PM by Paul Badger Changed line 18 from: [@sensVal = min(senVal, 100); / / limits sensor to 100 MAXI MUM to: [@sensVal = min(senVal, 100); / / limits sensor's top reading to 100 maximum Changed lines 21- 25 from: Common Programming Errors Paradoxically, even though min would seem to limit the desired variable to a minimum value, it is really used to set the maximum value a variable can hold. Programmers coming to C from the BASI C language may expect min to affect a variable without assigning the returned result to anything to: Tip min is useful for limiting the range a variable (say reading a sensor) can move. Even though the name min would seem to suggest it should be used to limit the sensor's minimum value, its real effect is to limit the variable's highest value. This can be slightly counterintuitive. Programmers coming to C from the BASI C language may alsoexpect min to affect a variable without assigning the returned result to anything. Restore April 14, 2007, at 12: 55 AM by Paul Badger Changed lines 22- 23 from: Paradoxically, even though min would seem to limit the desired variable to a minimum value, it is really used to set the maximum value a variable can achieve. to: Paradoxically, even though min would seem to limit the desired variable to a minimum value, it is really used to set the maximum value a variable can hold. Restore April 14, 2007, at 12: 54 AM by Paul Badger Changed line 18 from: [@sensVal = min(senVal, 100); / / limits sensor to 100 MAX to: [@sensVal = min(senVal, 100); / / limits sensor to 100 MAXI MUM Restore April 13, 2007, at 11: 13 PM by Paul Badger Restore April 13, 2007, at 11: 06 PM by Paul Badger Restore April 13, 2007, at 11: 05 PM by Paul Badger Changed line 18 from: [@sensVal = min(senVal, 100); / / limits sensor to 100 max to: [@sensVal = min(senVal, 100); / / limits sensor to 100 MAX Restore
- 427. April 13, 2007, at 11: 04 PM by Paul Badger Changed lines 9- 12 from: x: the first number y: the second number to: x: the first number, any data type y: the second number, any data type Added lines 17- 25: Examples sensVal = min(senVal, 100); // limits sensor to 100 max Common Programming Errors Paradoxically, even though min would seem to limit the desired variable to a minimum value, it is really used to set the maximum value a variable can achieve. Programmers coming to C from the BASI C language may expect min to affect a variable without assigning the returned result to anything Restore December 02, 2006, at 11: 59 AM by David A. Mellis Changed lines 20- 22 from: constrain() to: constrain() Reference Home Restore December 02, 2006, at 11: 10 AM by David A. Mellis Added lines 1- 20: min(x, y) Description Calculates the minimum of two numbers. Parameters x: the first number y: the second number Returns The smaller of the two numbers. See also max() constrain() Restore Edit Page | Page History | Printable View | All Recent Site Changes
- 428. Arduino : Reference / Min Reference Language (extended) | Libraries | Comparison | Board min(x, y) Description Calculates the minimum of two numbers. Parameters x: the first number, any data type y: the second number, any data type Returns The smaller of the two numbers. Examples sensVal = min(sensVal, 100); // assigns sensVal to the smaller of sensVal or 100 // ensuring that it never gets above 100. Note Perhaps counter-intuitively, max() is often used to constrain the lower end of a variable's range, while min() is used to constrain the upper end of the range. See also max() constrain() Reference Home Corrections, suggestions, and new documentation should be posted to the Forum. The text of the Arduino reference is licensed under a Creative Commons Attribution-ShareAlike 3.0 License . Code samples in the reference are released into the public domain. (Printable View of http://www.arduino.cc/en/Reference/Min)
- 429. Arduino Buy | Download | Getting Started | Learning | Reference | Hardware | FAQ Login to Arduino Username: Password: Keep me logged in: ✔ Login Edit Page | Page History | Printable View | All Recent Site Changes search Blog » | Forum » | Playground »
- 430. Arduino search Buy | Download | Getting Started | Learning | Reference | Hardware | FAQ Blog » | Forum » | Playground » Reference.Max History Hide minor edits - Show changes to markup November 03, 2007, at 11: 30 PM by Paul Badger Changed lines 19- 21 from: // (effectively ensuring that it is at least 20) @] to: // (effectively ensuring that it is at least 20)@] Restore November 03, 2007, at 11: 30 PM by Paul Badger Added lines 22- 25: Note Perhaps counter - intuitively, max() is often used to constrain the lower end of a variable's range, while min() is used to constrain the upper end of the range. Restore November 03, 2007, at 11: 24 PM by Paul Badger Changed lines 15- 16 from: The larger of the two numbers. to: The larger of the two parameter values. Restore November 03, 2007, at 11: 24 PM by Paul Badger Changed line 18 from: [@sensVal = max(senVal, 20); / / assigns sensVal to the bigger of sensVal or 20 to: [@sensVal = max(senVal, 20); / / assigns sensVal to the larger of sensVal or 20 Restore November 03, 2007, at 11: 23 PM by Paul Badger Changed line 19 from: // (effectively ensuring that it is at least 20) to: // (effectively ensuring that it is at least 20) Restore November 03, 2007, at 11: 23 PM by Paul Badger Changed lines 18- 19 from: [@sensVal = max(senVal, 20); / / assigns sensVal to the bigger of sensVal or 20 (effectively ensuring that it is at least 20) to:
- 431. [@sensVal = max(senVal, 20); / / assigns sensVal to the bigger of sensVal or 20 // (effectively ensuring that it is at least 20) Restore April 16, 2007, at 11: 05 AM by Paul Badger Changed line 26 from: Reference Home to: Restore April 16, 2007, at 02: 12 AM by David A. Mellis Changed line 18 from: [@sensVal = max(senVal, 20); / / limits sensor value to at least 20 to: [@sensVal = max(senVal, 20); / / assigns sensVal to the bigger of sensVal or 20 (effectively ensuring that it is at least 20) Deleted lines 20- 24: Tips max is useful for limiting the range a variable (say reading a sensor) can move. Even though the name max would seem to suggest it should be used to limit the sensor's maximum value, its real effect is to limit the variable's lowest value. This can be slightly counterintuitive. Programmers coming to C from the BASI C language may also expect max to affect a variable without assigning the returned result to anything. Restore April 14, 2007, at 08: 49 PM by Paul Badger Changed lines 17- 18 from: Examples [@sensVal = max(senVal, 20); / / limits sensor value to 20 MI NI MUM to: Example [@sensVal = max(senVal, 20); / / limits sensor value to at least 20 Changed lines 21- 26 from: Common Programming Errors Paradoxically, even though max would seem to limit the desired variable to a maximum value, it is really used to set the minimum value to which a variable can descend. Programmers coming to C from the BASI C language may expect max to affect a variable without assigning the returned result to anything to: Tips max is useful for limiting the range a variable (say reading a sensor) can move. Even though the name max would seem to suggest it should be used to limit the sensor's maximum value, its real effect is to limit the variable's lowest value. This can be slightly counterintuitive. Programmers coming to C from the BASI C language may also expect max to affect a variable without assigning the returned result to anything. Restore April 13, 2007, at 11: 11 PM by Paul Badger Changed lines 9- 12 from: x: the first number
- 432. y: the second number to: x: the first number, any data type y: the second number, any data type Changed lines 15- 16 from: The bigger of the two numbers. to: The larger of the two numbers. Examples sensVal = max(senVal, 20); // limits sensor value to 20 MINIMUM Common Programming Errors Paradoxically, even though max would seem to limit the desired variable to a maximum value, it is really used to set the minimum value to which a variable can descend. Programmers coming to C from the BASI C language may expect max to affect a variable without assigning the returned result to anything Restore December 02, 2006, at 12: 00 PM by David A. Mellis Changed lines 20- 22 from: constrain() to: constrain() Reference Home Restore December 02, 2006, at 11: 10 AM by David A. Mellis Added lines 1- 20: max(x, y) Description Calculates the maximum of two numbers. Parameters x: the first number y: the second number Returns The bigger of the two numbers. See also min() constrain() Restore Edit Page | Page History | Printable View | All Recent Site Changes
- 433. Arduino : Reference / Max Reference Language (extended) | Libraries | Comparison | Board max(x, y) Description Calculates the maximum of two numbers. Parameters x: the first number, any data type y: the second number, any data type Returns The larger of the two parameter values. Example sensVal = max(senVal, 20); // assigns sensVal to the larger of sensVal or 20 // (effectively ensuring that it is at least 20) Note Perhaps counter-intuitively, max() is often used to constrain the lower end of a variable's range, while min() is used to constrain the upper end of the range. See also min() constrain() Reference Home Corrections, suggestions, and new documentation should be posted to the Forum. The text of the Arduino reference is licensed under a Creative Commons Attribution-ShareAlike 3.0 License . Code samples in the reference are released into the public domain. (Printable View of http://www.arduino.cc/en/Reference/Max)
- 434. Arduino Buy | Download | Getting Started | Learning | Reference | Hardware | FAQ Login to Arduino Username: Password: Keep me logged in: ✔ Login Edit Page | Page History | Printable View | All Recent Site Changes search Blog » | Forum » | Playground »
- 435. Arduino Buy | Download | Getting Started | Learning | Reference | Hardware | FAQ Reference.Abs History Hide minor edits - Show changes to markup April 16, 2007, at 11: 07 AM by Paul Badger Deleted line 16: Reference Home Restore December 02, 2006, at 11: 59 AM by David A. Mellis Added lines 1- 17: abs(x) Description Computes the absolute value of a number. Parameters x: the number Returns x: if x is greater than or equal to 0. -x: if x is less than 0. Reference Home Restore Edit Page | Page History | Printable View | All Recent Site Changes search Blog » | Forum » | Playground »
- 436. Arduino : Reference / Abs Reference Language (extended) | Libraries | Comparison | Board abs(x) Description Computes the absolute value of a number. Parameters x: the number Returns x: if x is greater than or equal to 0. - x: if x is less than 0. Reference Home Corrections, suggestions, and new documentation should be posted to the Forum. The text of the Arduino reference is licensed under a Creative Commons Attribution-ShareAlike 3.0 License . Code samples in the reference are released into the public domain. (Printable View of http://www.arduino.cc/en/Reference/Abs)
- 437. Arduino Buy | Download | Getting Started | Learning | Reference | Hardware | FAQ Login to Arduino Username: Password: Keep me logged in: ✔ Login Edit Page | Page History | Printable View | All Recent Site Changes search Blog » | Forum » | Playground »
- 438. Arduino Buy | Download | Getting Started | Learning | Reference | Hardware | FAQ Reference.Constrain History Hide minor edits - Show changes to markup April 16, 2007, at 09: 37 AM by Paul Badger Changed line 32 from: Reference Home to: Restore April 16, 2007, at 09: 36 AM by Paul Badger Restore April 15, 2007, at 10: 15 PM by Paul Badger Changed lines 1- 2 from: constrain(x, a, b) to: constrain(x, a, b) Restore April 15, 2007, at 10: 15 PM by Paul Badger Changed lines 1- 2 from: constrain(x, a, b) to: constrain(x, a, b) Restore April 15, 2007, at 10: 14 PM by Paul Badger Changed lines 1- 2 from: constain(x, a, b) to: constrain(x, a, b) Restore April 14, 2007, at 08: 54 PM by Paul Badger Changed lines 25- 26 from: / / limits range of sensor from 10 to 150 @] to: / / limits range of sensor values to between 10 and 150 @] Restore April 14, 2007, at 08: 52 PM by Paul Badger Changed lines 9- 14 from: x: the number to constrain a: the lower end of the range search Blog » | Forum » | Playground »
- 439. b: the upper end of the range to: x: the number to constrain, all data types a: the lower end of the range, all data types b: the upper end of the range, all data types Added lines 23- 26: Example sensVal = constrain(sensVal, 10, 150); // limits range of sensor from 10 to 150 Restore December 02, 2006, at 12: 00 PM by David A. Mellis Changed lines 26- 28 from: max() to: max() Reference Home Restore December 02, 2006, at 11: 14 AM by David A. Mellis Changed lines 11- 14 from: a: the minimum value b: the maximum value to: a: the lower end of the range b: the upper end of the range Restore December 02, 2006, at 11: 13 AM by David A. Mellis Added lines 1- 26: constain(x, a, b) Description Constrains a number to be within a range. Parameters x: the number to constrain a: the minimum value b: the maximum value Returns x: if x is between a and b a: if x is less than a b: if x is greater than b See also min() max()
- 440. Restore Edit Page | Page History | Printable View | All Recent Site Changes
- 441. Arduino : Reference / Constrain Reference Language (extended) | Libraries | Comparison | Board constrain(x, a, b) Description Constrains a number to be within a range. Parameters x: the number to constrain, all data types a: the lower end of the range, all data types b: the upper end of the range, all data types Returns x: if x is between a and b a: if x is less than a b: if x is greater than b Example sensVal = constrain(sensVal, 10, 150); // limits range of sensor values to between 10 and 150 See also min() max() Reference Home Corrections, suggestions, and new documentation should be posted to the Forum. The text of the Arduino reference is licensed under a Creative Commons Attribution-ShareAlike 3.0 License . Code samples in the reference are released into the public domain. (Printable View of http://www.arduino.cc/en/Reference/Constrain)
- 442. Arduino Buy | Download | Getting Started | Learning | Reference | Hardware | FAQ Login to Arduino Username: Password: Keep me logged in: ✔ Login Edit Page | Page History | Printable View | All Recent Site Changes search Blog » | Forum » | Playground »
- 443. Arduino Buy | Download | Getting Started | Learning | Reference | Hardware | FAQ search Blog » | Forum » | Playground » Reference.Map History Hide minor edits - Show changes to markup April 22, 2008, at 11: 44 PM by Paul Badger Changed lines 7- 8 from: Does not constrain values to within the range, because out- of- range values are something intended and useful. to: Does not constrain values to within the range, because out- of- range values are sometimes intended and useful. Restore March 29, 2008, at 09: 31 AM by David A. Mellis Added lines 25- 37: Example void setup() {} void loop() { int val = analogRead(0); val = map(val, 0, 1023, 0, 255); analogWrite(9, val); } Restore March 29, 2008, at 09: 15 AM by David A. Mellis Added lines 1- 27: map(value, fromLow, fromHigh, toLow, toHigh) Description Re- maps a number from one range to another. That is, a value of fromLow would get mapped to toLow , a value of fromHigh to toHigh, values in- between to values in- between, etc. Does not constrain values to within the range, because out- of- range values are something intended and useful. Parameters value: the number to map fromLow: the lower bound of the value's current range fromHigh: the upper bound of the value's current range toLow: the lower bound of the value's target range toHigh: the upper bound of the value's target range Returns The mapped value. See Also
- 444. constrain() Restore Edit Page | Page History | Printable View | All Recent Site Changes
- 445. Arduino : Reference / Map Reference Language (extended) | Libraries | Comparison | Board map(value, fromLow, fromHigh, toLow, toHigh) Description Re-maps a number from one range to another. That is, a value of fromLow would get mapped to toLow, a value of fromHigh to toHigh, values in-between to values in-between, etc. Does not constrain values to within the range, because out-of-range values are sometimes intended and useful. Parameters value: the number to map fromLow: the lower bound of the value's current range fromHigh: the upper bound of the value's current range toLow: the lower bound of the value's target range toHigh: the upper bound of the value's target range Returns The mapped value. Example void setup() {} void loop() { int val = analogRead(0); val = map(val, 0, 1023, 0, 255); analogWrite(9, val); } See Also constrain() Reference Home Corrections, suggestions, and new documentation should be posted to the Forum. The text of the Arduino reference is licensed under a Creative Commons Attribution-ShareAlike 3.0 License . Code samples in the reference are released into the public domain. (Printable View of http://www.arduino.cc/en/Reference/Map)
- 446. Arduino Buy | Download | Getting Started | Learning | Reference | Hardware | FAQ Login to Arduino Username: Password: Keep me logged in: ✔ Login Edit Page | Page History | Printable View | All Recent Site Changes search Blog » | Forum » | Playground »
- 447. Arduino Buy | Download | Getting Started | Learning | Reference | Hardware | FAQ search Blog » | Forum » | Playground » Reference.Pow History Hide minor edits - Show changes to markup December 22, 2007, at 09: 41 AM by David A. Mellis Changed lines 24- 27 from: float() double() to: float double Restore December 22, 2007, at 09: 32 AM by David A. Mellis Changed lines 5- 7 from: Calculates the value of a number raised to a power. Pow() can be used to raise a number to a fractional power. This is useful for generating exponential mapping of values or curves. Pow() makes use of the avr- libc library . to: Calculates the value of a number raised to a power. Pow() can be used to raise a number to a fractional power. This is useful for generating exponential mapping of values or curves. Restore December 22, 2007, at 08: 43 AM by Paul Badger Changed lines 25- 26 from: to: float() double() Restore December 22, 2007, at 08: 41 AM by Paul Badger Changed lines 20- 21 from: See the fscale? function in the code library. to: See the fscale function in the code library. Restore December 22, 2007, at 08: 41 AM by Paul Badger Changed lines 20- 21 from: See the fscale? function in the code library. to: See the fscale? function in the code library. Restore December 22, 2007, at 08: 40 AM by Paul Badger Changed lines 20- 21 from: See the fscale function in the code library.
- 448. to: See the fscale? function in the code library. Restore December 22, 2007, at 08: 38 AM by Paul Badger Added lines 18- 21: Example See the fscale function in the code library. Restore December 22, 2007, at 08: 37 AM by Paul Badger Changed line 5 from: Calculates the value of a number raised to a power. Pow() can be used to raise a number to a fractional power. This is useful for generating exponential mapping of values / curves. to: Calculates the value of a number raised to a power. Pow() can be used to raise a number to a fractional power. This is useful for generating exponential mapping of values or curves. Restore December 22, 2007, at 08: 36 AM by Paul Badger Changed lines 5- 6 from: Calculates the value of a number raised to a power. to: Calculates the value of a number raised to a power. Pow() can be used to raise a number to a fractional power. This is useful for generating exponential mapping of values / curves. Pow() makes use of the avr- libc library . Changed lines 10- 13 from: base: the number exponent: the power to raise it to to: base: the number ( float) exponent: the power to which the base is raised ( float) Changed lines 16- 17 from: The result of the exponentiation. to: The result of the exponentiation ( double) Restore November 21, 2007, at 09: 26 AM by David A. Mellis Added lines 1- 21: pow(base, exponent) Description Calculates the value of a number raised to a power. Parameters base: the number exponent: the power to raise it to Returns
- 449. The result of the exponentiation. See also sqrt() Restore Edit Page | Page History | Printable View | All Recent Site Changes
- 450. Arduino : Reference / Pow Reference Language (extended) | Libraries | Comparison | Board pow(base, exponent) Description Calculates the value of a number raised to a power. Pow() can be used to raise a number to a fractional power. This is useful for generating exponential mapping of values or curves. Parameters base: the number (float) exponent: the power to which the base is raised (float) Returns The result of the exponentiation (double) Example See the fscale function in the code library. See also sqrt() float double Reference Home Corrections, suggestions, and new documentation should be posted to the Forum. The text of the Arduino reference is licensed under a Creative Commons Attribution-ShareAlike 3.0 License . Code samples in the reference are released into the public domain. (Printable View of http://www.arduino.cc/en/Reference/Pow)
- 451. Arduino Buy | Download | Getting Started | Learning | Reference | Hardware | FAQ Login to Arduino Username: Password: Keep me logged in: ✔ Login Edit Page | Page History | Printable View | All Recent Site Changes search Blog » | Forum » | Playground »
- 452. Arduino Buy | Download | Getting Started | Learning | Reference | Hardware | FAQ Reference.Sqrt History Hide minor edits - Show changes to markup December 22, 2007, at 09: 32 AM by David A. Mellis Changed lines 5- 7 from: Calculates the square root of a number. Sqrt() makes use of the avr- libc library . to: Calculates the square root of a number. Restore December 22, 2007, at 08: 47 AM by Paul Badger Restore December 22, 2007, at 08: 45 AM by Paul Badger Changed lines 6- 7 from: Sqrt() is part of the avr- libc library . to: Sqrt() makes use of the avr- libc library . Changed lines 19- 20 from: to: float double Restore December 22, 2007, at 08: 44 AM by Paul Badger Changed lines 5- 6 from: Calculates the square root of a number. sqrt() is part of the avr- libc library . to: Calculates the square root of a number. Sqrt() is part of the avr- libc library . Restore December 22, 2007, at 08: 13 AM by Paul Badger Restore December 22, 2007, at 08: 13 AM by Paul Badger Changed lines 9- 10 from: x: the number to: x: the number, any data type Changed lines 13- 14 from: The number's square root. to: search Blog » | Forum » | Playground »
- 453. double, the number's square root. Restore December 22, 2007, at 07: 58 AM by Paul Badger Changed lines 5- 6 from: Calculates the square root of a number. to: Calculates the square root of a number. sqrt() is part of the avr- libc library . Restore November 21, 2007, at 09: 33 AM by David A. Mellis Added lines 1- 19: sqrt(x) Description Calculates the square root of a number. Parameters x: the number Returns The number's square root. See also pow() Restore Edit Page | Page History | Printable View | All Recent Site Changes
- 454. Arduino : Reference / Sqrt Reference Language (extended) | Libraries | Comparison | Board sqrt(x) Description Calculates the square root of a number. Parameters x: the number, any data type Returns double, the number's square root. See also pow() float double Reference Home Corrections, suggestions, and new documentation should be posted to the Forum. The text of the Arduino reference is licensed under a Creative Commons Attribution-ShareAlike 3.0 License . Code samples in the reference are released into the public domain. (Printable View of http://www.arduino.cc/en/Reference/Sqrt)
- 455. Arduino Buy | Download | Getting Started | Learning | Reference | Hardware | FAQ Login to Arduino Username: Password: Keep me logged in: ✔ Login Edit Page | Page History | Printable View | All Recent Site Changes search Blog » | Forum » | Playground »
- 456. Arduino Buy | Download | Getting Started | Learning | Reference | Hardware | FAQ search Blog » | Forum » | Playground » Reference.Sin History Hide minor edits - Show changes to markup December 22, 2007, at 09: 32 AM by David A. Mellis Changed lines 5- 7 from: Calculates the sine of an angle (in radians). The result will be between - 1 and 1. Sin() makes use of the avr- libc library . to: Calculates the sine of an angle (in radians). The result will be between - 1 and 1. Restore December 22, 2007, at 08: 33 AM by Paul Badger Restore December 22, 2007, at 08: 32 AM by Paul Badger Changed lines 5- 6 from: Calculates the sine of an angle (in radians). The result will be between - 1 and 1. Sin() makes use of the avr- libc library . to: Calculates the sine of an angle (in radians). The result will be between - 1 and 1. Sin() makes use of the avr- libc library . Restore December 22, 2007, at 08: 32 AM by Paul Badger Changed lines 5- 6 from: Calculates the sine of an angle (in radians). The result will be between - 1 and 1. sin() is part of the avr- libc library . to: Calculates the sine of an angle (in radians). The result will be between - 1 and 1. Sin() makes use of the avr- libc library . Restore December 22, 2007, at 08: 22 AM by Paul Badger Restore December 22, 2007, at 08: 21 AM by Paul Badger Changed lines 13- 14 from: double, the sine of the angle. to: the sine of the angle ( double) Restore December 22, 2007, at 08: 21 AM by Paul Badger Changed lines 13- 14 from: The sine of the angle as a double. to: double, the sine of the angle. Restore December 22, 2007, at 08: 18 AM by Paul Badger -
- 457. Changed lines 13- 14 from: double, The sine of the angle in radians. to: The sine of the angle as a double. Restore December 22, 2007, at 08: 16 AM by Paul Badger Changed lines 5- 6 from: Calculates the sin of an angle (in radians). The result will be between - 1 and 1. to: Calculates the sine of an angle (in radians). The result will be between - 1 and 1. sin() is part of the avr- libc library . Changed lines 13- 14 from: The sin of the angle. to: double, The sine of the angle in radians. Changed lines 22- 23 from: to: float double Restore November 21, 2007, at 09: 20 AM by David A. Mellis Added lines 1- 23: sin(rad) Description Calculates the sin of an angle (in radians). The result will be between - 1 and 1. Parameters rad: the angle in radians ( float) Returns The sin of the angle. Note Serial.print() and Serial.println() do not currently support printing floats. See also cos() tan() Restore Edit Page | Page History | Printable View | All Recent Site Changes
- 458. Arduino : Reference / Sin Reference Language (extended) | Libraries | Comparison | Board sin(rad) Description Calculates the sine of an angle (in radians). The result will be between -1 and 1. Parameters rad: the angle in radians (float) Returns the sine of the angle (double) Note Serial.print() and Serial.println() do not currently support printing floats. See also cos() tan() float double Reference Home Corrections, suggestions, and new documentation should be posted to the Forum. The text of the Arduino reference is licensed under a Creative Commons Attribution-ShareAlike 3.0 License . Code samples in the reference are released into the public domain. (Printable View of http://www.arduino.cc/en/Reference/Sin)
- 459. Arduino Buy | Download | Getting Started | Learning | Reference | Hardware | FAQ Login to Arduino Username: Password: Keep me logged in: ✔ Login Edit Page | Page History | Printable View | All Recent Site Changes search Blog » | Forum » | Playground »
- 460. Arduino Buy | Download | Getting Started | Learning | Reference | Hardware | FAQ search Blog » | Forum » | Playground » Reference.Cos History Hide minor edits - Show changes to markup December 22, 2007, at 09: 41 AM by David A. Mellis Changed lines 22- 24 from: float() double() to: float double Restore December 22, 2007, at 09: 31 AM by David A. Mellis - people shouldn't need to know where a function is defined. Changed lines 6- 8 from: Cos() is part of the avr- libc library . to: Restore December 22, 2007, at 08: 28 AM by Paul Badger Restore December 22, 2007, at 08: 25 AM by Paul Badger Changed lines 5- 7 from: Calculates the cos of an angle (in radians). The result will be between - 1 and 1. Cos() is part of the avr- libc library . to: Calculates the cos of an angle (in radians). The result will be between - 1 and 1. Cos() is part of the avr- libc library . Restore December 22, 2007, at 08: 24 AM by Paul Badger Changed lines 5- 7 from: Calculates the cos of an angle (in radians). The result will be between - 1 and 1. cos() is part of the avr- libc library . to: Calculates the cos of an angle (in radians). The result will be between - 1 and 1. Cos() is part of the avr- libc library . Restore December 22, 2007, at 08: 24 AM by Paul Badger Changed lines 5- 6 from: Calculates the cos of an angle (in radians). The result will be between - 1 and 1. to: Calculates the cos of an angle (in radians). The result will be between - 1 and 1. cos() is part of the avr- libc library . Changed lines 14- 15 from: The cos of the angle. to:
- 461. The cos of the angle ("double") Changed lines 23- 24 from: to: float() double() Restore November 21, 2007, at 09: 21 AM by David A. Mellis Added lines 1- 23: cos(rad) Description Calculates the cos of an angle (in radians). The result will be between - 1 and 1. Parameters rad: the angle in radians ( float) Returns The cos of the angle. Note Serial.print() and Serial.println() do not currently support printing floats. See also sin() tan() Restore Edit Page | Page History | Printable View | All Recent Site Changes
- 462. Arduino : Reference / Cos Reference Language (extended) | Libraries | Comparison | Board cos(rad) Description Calculates the cos of an angle (in radians). The result will be between -1 and 1. Parameters rad: the angle in radians (float) Returns The cos of the angle ("double") Note Serial.print() and Serial.println() do not currently support printing floats. See also sin() tan() float double Reference Home Corrections, suggestions, and new documentation should be posted to the Forum. The text of the Arduino reference is licensed under a Creative Commons Attribution-ShareAlike 3.0 License . Code samples in the reference are released into the public domain. (Printable View of http://www.arduino.cc/en/Reference/Cos)
- 463. Arduino Buy | Download | Getting Started | Learning | Reference | Hardware | FAQ Login to Arduino Username: Password: Keep me logged in: ✔ Login Edit Page | Page History | Printable View | All Recent Site Changes search Blog » | Forum » | Playground »
- 464. Arduino Buy | Download | Getting Started | Learning | Reference | Hardware | FAQ search Blog » | Forum » | Playground » Reference.Tan History Hide minor edits - Show changes to markup December 22, 2007, at 09: 41 AM by David A. Mellis Changed lines 22- 23 from: float() double() to: float double Restore December 22, 2007, at 09: 31 AM by David A. Mellis - don't need a link to math.h, it's included automatically. Changed lines 5- 7 from: Calculates the tangent of an angle (in radians). The result will be between negative infinity and infinity. Tan() uses the avrlibc library. to: Calculates the tangent of an angle (in radians). The result will be between negative infinity and infinity. Restore December 22, 2007, at 08: 31 AM by Paul Badger Changed lines 14- 15 from: The tangent of the angle ("double") to: The tangent of the angle ( double) Restore December 22, 2007, at 08: 30 AM by Paul Badger Changed lines 5- 7 from: Calculates the tangent of an angle (in radians). The result will be between negative infinity and infinity. * tan() to: Calculates the tangent of an angle (in radians). The result will be between negative infinity and infinity. Tan() uses the avrlibc library. Changed lines 14- 15 from: The tangent of the angle. to: The tangent of the angle ("double") Changed lines 23- 24 from: to: float() double()
- 465. Restore December 22, 2007, at 08: 27 AM by Paul Badger Changed lines 5- 6 from: Calculates the tangent of an angle (in radians). The result will be between negative infinity and infinity. to: Calculates the tangent of an angle (in radians). The result will be between negative infinity and infinity. * tan() Restore November 21, 2007, at 09: 21 AM by David A. Mellis Added lines 1- 23: tan(rad) Description Calculates the tangent of an angle (in radians). The result will be between negative infinity and infinity. Parameters rad: the angle in radians ( float) Returns The tangent of the angle. Note Serial.print() and Serial.println() do not currently support printing floats. See also sin() cos() Restore Edit Page | Page History | Printable View | All Recent Site Changes
- 466. Arduino : Reference / Tan Reference Language (extended) | Libraries | Comparison | Board tan(rad) Description Calculates the tangent of an angle (in radians). The result will be between negative infinity and infinity. Parameters rad: the angle in radians (float) Returns The tangent of the angle (double) Note Serial.print() and Serial.println() do not currently support printing floats. See also sin() cos() float double Reference Home Corrections, suggestions, and new documentation should be posted to the Forum. The text of the Arduino reference is licensed under a Creative Commons Attribution-ShareAlike 3.0 License . Code samples in the reference are released into the public domain. (Printable View of http://www.arduino.cc/en/Reference/Tan)
- 467. Arduino Buy | Download | Getting Started | Learning | Reference | Hardware | FAQ Login to Arduino Username: Password: Keep me logged in: ✔ Login Edit Page | Page History | Printable View | All Recent Site Changes search Blog » | Forum » | Playground »
- 468. Arduino Buy | Download | Getting Started | Learning | Reference | Hardware | FAQ search Blog » | Forum » | Playground » Reference.RandomSeed History Hide minor edits - Show changes to markup February 08, 2008, at 10: 20 AM by David A. Mellis Deleted line 35: millis Restore September 27, 2007, at 07: 56 AM by David A. Mellis - millis() isn't random if there's no human intervention. Changed lines 6- 7 from: I f it is important for a sequence of values generated by random() to differ, on subsequent executions of a sketch, use randomSeed() to initialize the random number generator with a fairly random input, such as analogRead() on an unconnected pin, or read the time by calling millis(). to: I f it is important for a sequence of values generated by random() to differ, on subsequent executions of a sketch, use randomSeed() to initialize the random number generator with a fairly random input, such as analogRead() on an unconnected pin. Added line 23: randomSeed(analogRead(0)); Deleted line 26: randomSeed(analogRead(0)); Restore September 26, 2007, at 11: 08 PM by Paul Badger Changed lines 6- 7 from: I f it is important for a sequence of values generated by random() to differ on subsequent executions of a sketch, use randomSeed() to initialize the random number generator with a fairly random input, such as analogRead() on an unconnected pin, or read the time by calling millis(). to: I f it is important for a sequence of values generated by random() to differ, on subsequent executions of a sketch, use randomSeed() to initialize the random number generator with a fairly random input, such as analogRead() on an unconnected pin, or read the time by calling millis(). Restore September 26, 2007, at 11: 05 PM by Paul Badger Changed lines 4- 5 from: randomSeed initializes the pseudo- random number generator, causing it to start at an arbitrary point in its random sequence. This sequence, while very long, and random, is always the same. to: randomSeed() initializes the pseudo- random number generator, causing it to start at an arbitrary point in its random sequence. This sequence, while very long, and random, is always the same. Restore September 26, 2007, at 11: 04 PM by Paul Badger Changed lines 6- 7 from:
- 469. I f it is important for sequence of values generated by random() to differ on subsequent executions of a sketch, use randomSeed() to initialize the random number generator with a fairly random input, such as analogRead() on an unconnected pin, or read the time with millis(). to: I f it is important for a sequence of values generated by random() to differ on subsequent executions of a sketch, use randomSeed() to initialize the random number generator with a fairly random input, such as analogRead() on an unconnected pin, or read the time by calling millis(). Restore September 26, 2007, at 11: 03 PM by Paul Badger Changed lines 4- 5 from: randomSeed initializes the pseudo- random number generator, which helps it to generate "random" numbers. There are a variety of different variables you can use in this function. Commonly used are current time values (using millis() ), but you could also try something else like user intervention on a switch or antennae noise through an analog pin. to: randomSeed initializes the pseudo- random number generator, causing it to start at an arbitrary point in its random sequence. This sequence, while very long, and random, is always the same. I f it is important for sequence of values generated by random() to differ on subsequent executions of a sketch, use randomSeed() to initialize the random number generator with a fairly random input, such as analogRead() on an unconnected pin, or read the time with millis(). Conversely, it can occasionally be useful to use pseudo- random sequences that repeat exactly. This can be accomplished by calling randomSeed() with a fixed number, before starting the random sequence. Changed line 22 from: Serial.begin(19200); to: Serial.begin(9600); Added lines 29- 30: delay(50); Restore September 26, 2007, at 10: 56 PM by Paul Badger Changed lines 4- 5 from: This allows you to place a variable into your random number generator, which helps it to generate "random" numbers. There are a variety of different variables you can use in this function. Commonly used are current time values (using millis() ), but you could also try something else like user intervention on a switch or antennae noise through an analog pin. to: randomSeed initializes the pseudo- random number generator, which helps it to generate "random" numbers. There are a variety of different variables you can use in this function. Commonly used are current time values (using millis() ), but you could also try something else like user intervention on a switch or antennae noise through an analog pin. Restore May 26, 2007, at 07: 33 PM by Paul Badger Deleted lines 30- 32: Reference Home Restore May 08, 2007, at 12: 22 PM by David A. Mellis Deleted line 14: int time; Changed lines 22- 23 from: time = millis(); randomSeed(time);
- 470. to: randomSeed(analogRead(0)); Changed line 24 from: Serial.println(r); to: Serial.println(randNumber); Restore September 18, 2006, at 10: 04 AM by J eff Gray Changed lines 4- 5 from: This allows you to place a variable into your random number generator, which helps it to generate "random" numbers. There are a variety of different variables you can use in this function. Commonly used are current time values (using millis(), but you could also try something else like user intervention on a switch or antennae noise through an analog pin. to: This allows you to place a variable into your random number generator, which helps it to generate "random" numbers. There are a variety of different variables you can use in this function. Commonly used are current time values (using millis() ), but you could also try something else like user intervention on a switch or antennae noise through an analog pin. Restore September 11, 2006, at 09: 59 AM by J eff Gray Changed lines 1- 2 from: randomSeed(long seedValue) to: randomSeed(seed) Changed lines 7- 8 from: long - pass a number to generate the seed. to: long, int - pass a number to generate the seed. Restore September 11, 2006, at 09: 57 AM by J eff Gray Added lines 1- 35: randomSeed(long seedValue) Description This allows you to place a variable into your random number generator, which helps it to generate "random" numbers. There are a variety of different variables you can use in this function. Commonly used are current time values (using millis(), but you could also try something else like user intervention on a switch or antennae noise through an analog pin. Parameters long - pass a number to generate the seed. Returns no returns Example int time; long randNumber; void setup(){ Serial.begin(19200);
- 471. } void loop(){ time = millis(); randomSeed(time); randNumber = random(300); Serial.println(r); } See also random millis Reference Home Restore Edit Page | Page History | Printable View | All Recent Site Changes
- 472. Arduino : Reference / Random Seed Reference Language (extended) | Libraries | Comparison | Board randomSeed(seed) Description randomSeed() initializes the pseudo- random number generator, causing it to start at an arbitrary point in its random sequence. This sequence, while very long, and random, is always the same. I f it is important for a sequence of values generated by random() to differ, on subsequent executions of a sketch, use randomSeed() to initialize the random number generator with a fairly random input, such as analogRead() on an unconnected pin. Conversely, it can occasionally be useful to use pseudo-random sequences that repeat exactly. This can be accomplished by calling randomSeed() with a fixed number, before starting the random sequence. Parameters long, int - pass a number to generate the seed. Returns no returns Example long randNumber; void setup(){ Serial.begin(9600); randomSeed(analogRead(0)); } void loop(){ randNumber = random(300); Serial.println(randNumber); } delay(50); See also random Reference Home Corrections, suggestions, and new documentation should be posted to the Forum. The text of the Arduino reference is licensed under a Creative Commons Attribution-ShareAlike 3.0 License . Code samples in the reference are released into the public domain. (Printable View of http://www.arduino.cc/en/Reference/RandomSeed)
- 473. Arduino Buy | Download | Getting Started | Learning | Reference | Hardware | FAQ Login to Arduino Username: Password: Keep me logged in: ✔ Login Edit Page | Page History | Printable View | All Recent Site Changes search Blog » | Forum » | Playground »
- 474. Arduino Buy | Download | Getting Started | Learning | Reference | Hardware | FAQ search Blog » | Forum » | Playground » Reference.Random History Hide minor edits - Show changes to markup September 26, 2007, at 11: 06 PM by Paul Badger Changed lines 16- 17 from: I f it is important for sequence of values generated by random() to differ on subsequent executions of a sketch, use randomSeed() to initialize the random number generator with a fairly random input, such as analogRead() on an unconnected pin. to: I f it is important for a sequence of values generated by random() to differ, on subsequent executions of a sketch, use randomSeed() to initialize the random number generator with a fairly random input, such as analogRead() on an unconnected pin. Restore September 26, 2007, at 10: 53 PM by Paul Badger Changed line 29 from: // noise will cause the calls to randomSeed() to generate to: // noise will cause the call to randomSeed() to generate Changed line 31 from: // randomSeed() then shuffles the random function to: // randomSeed() will then shuffle the random function. Restore September 26, 2007, at 10: 51 PM by Paul Badger Restore September 26, 2007, at 10: 50 PM by Paul Badger Changed lines 18- 19 from: Conversely, it can occasionally be useful to use pseudo- random sequences that repeat exactly. This can be accomplished by calling randomSeed() with a fixed number. to: Conversely, it can occasionally be useful to use pseudo- random sequences that repeat exactly. This can be accomplished by calling randomSeed() with a fixed number, before starting the random sequence. Restore September 26, 2007, at 10: 49 PM by Paul Badger Changed lines 8- 9 from: min - lower bound of the random value, inclusive (optional parameter) to: min - lower bound of the random value, inclusive (optional parameter) Restore September 26, 2007, at 10: 49 PM by Paul Badger -
- 475. Changed lines 8- 9 from: min - lower bound of the random value, inclusive (optional parameter) to: min - lower bound of the random value, inclusive (optional parameter) Restore September 26, 2007, at 10: 48 PM by Paul Badger Changed lines 8- 11 from: min - lower bound on the random value, inclusive (optional) max - upper bound on the random number, exclusive to: min - lower bound of the random value, inclusive (optional parameter) max - upper bound of the random value, exclusive Restore September 26, 2007, at 10: 46 PM by Paul Badger Changed lines 26- 27 from: Serial.begin(19200); to: Serial.begin(9600); Added lines 43- 44: delay(50); Restore September 26, 2007, at 10: 44 PM by Paul Badger Deleted line 39: Deleted line 42: Restore September 26, 2007, at 10: 44 PM by Paul Badger Changed lines 29- 30 from: // noise will cause the calls to random() to generate // different numbers each time the sketch runs. to: // noise will cause the calls to randomSeed() to generate // different seed numbers each time the sketch runs. // randomSeed() then shuffles the random function Deleted lines 35- 38: // print a random number from 10 to 19 randNumber = random(10, 20); Serial.println(randNumber); Added lines 38- 42: Serial.println(randNumber); // print a random number from 10 to 19 randNumber = random(10, 20); Added line 44: Restore September 26, 2007, at 10: 41 PM by Paul Badger Changed lines 18- 19 from: Conversely, it can occasionally be useful to use sequences pseudo- random numbers that repeat exactly. This can be accomplished by calling randomSeed() with a fixed number.
- 476. to: Conversely, it can occasionally be useful to use pseudo- random sequences that repeat exactly. This can be accomplished by calling randomSeed() with a fixed number. Changed lines 28- 29 from: // if analog input pin 0 is unconnected, this // will cause the calls to random() to generate to: // if analog input pin 0 is unconnected, random analog // noise will cause the calls to random() to generate Restore September 26, 2007, at 10: 00 PM by David A. Mellis Changed lines 5- 6 from: The random function allows convenient access to pseudo- random numbers for use in sketches. to: The random function generates pseudo- random numbers. Changed lines 8- 21 from: min - optional starting range (ie: from "50" - 300). max - the largest random number returned (plus one). I n the current version of this function, the max parameter will not be returned, although the minimum will, so for example: random(10); // returns numbers from 0 to 9 random(-5, 5); // returns numbers from -5 to 4 Consequently, enter a maximum parameter one larger than the maximum integer desired. min and max are long integers so numbers between - 2,147,483,648 and 2,147,483,647 are valid. to: min - lower bound on the random value, inclusive (optional) max - upper bound on the random number, exclusive Changed lines 13- 14 from: long - the random number. to: long - a random number between min and max - 1 Changed lines 16- 19 from: I f it is important for a random number sequence to begin on a random number, then call the randomSeed() function using something for a parameter that is fairly random, such as millis(), or analogRead() on a pin with no electrical connection. Conversely, it can occasionally be useful to use pseudo- random numbers that repeat exactly. This can be accomplished by calling randomSeed() with the same number as a parameter. to: I f it is important for sequence of values generated by random() to differ on subsequent executions of a sketch, use randomSeed() to initialize the random number generator with a fairly random input, such as analogRead() on an unconnected pin. Conversely, it can occasionally be useful to use sequences pseudo- random numbers that repeat exactly. This can be accomplished by calling randomSeed() with a fixed number. Added lines 27- 31: // if analog input pin 0 is unconnected, this
- 477. // will cause the calls to random() to generate // different numbers each time the sketch runs. randomSeed(analogRead(0)); Changed lines 34- 42 from: void loop(){ randomSeed(analogRead(0)); // return a random number from 50 - 300 randNumber = random(50,301); // example with only a range, which would return // a number between 0 - 300 // randNumber = random(301); Serial.println(r); to: void loop() { // print a random number from 10 to 19 randNumber = random(10, 20); Serial.println(randNumber); // print a random number from 0 to 299 randNumber = random(300); Serial.println(randNumber); Changed lines 47- 48 from: millis to: Restore September 26, 2007, at 09: 37 PM by Paul Badger Changed lines 10- 11 from: max - the largest random numbers you'd like returned. to: max - the largest random number returned (plus one). Changed lines 18- 19 from: Consequently, enter a maximum parameter one larger than the maximum integer dersired. to: Consequently, enter a maximum parameter one larger than the maximum integer desired. Changed lines 23- 24 from: long - returns the random number. to: long - the random number. Changed lines 26- 29 from: I f it is important for a random number series to begin on a random number, then call the randomSeed() function using something for a parameter that is fairly random, such as millis(), or analogRead() on a pin with no electrical connection. Conversely it can occasionally be useful to use pseudo- random numbers that repeat exactly. This can be accomplished by calling randomSeed with the same number. to: I f it is important for a random number sequence to begin on a random number, then call the randomSeed() function using something for a parameter that is fairly random, such as millis(), or analogRead() on a pin with no electrical connection. Conversely, it can occasionally be useful to use pseudo- random numbers that repeat exactly. This can be accomplished by
- 478. calling randomSeed() with the same number as a parameter. Restore September 26, 2007, at 09: 31 PM by Paul Badger Changed lines 42- 43 from: randNumber = random(50,300); to: randNumber = random(50,301); Changed line 46 from: // randNumber = random(300); to: // randNumber = random(301); Restore September 26, 2007, at 09: 31 PM by Paul Badger Changed lines 26- 27 from: I f it is important for a random number series to begin on a random number, then call the randomSeed() function using something that is fairly random such as millis() or analogRead() on a pin with no electrical connection. to: I f it is important for a random number series to begin on a random number, then call the randomSeed() function using something for a parameter that is fairly random, such as millis(), or analogRead() on a pin with no electrical connection. Restore September 26, 2007, at 09: 30 PM by Paul Badger Changed lines 25- 26 from: Note: I f it is important for a random number series to begin on a random number, then call the randomSeed() function using something that is fairly random such as millis() or analogRead() on a pin with no electrical connection. to: Note: I f it is important for a random number series to begin on a random number, then call the randomSeed() function using something that is fairly random such as millis() or analogRead() on a pin with no electrical connection. Restore September 26, 2007, at 09: 29 PM by Paul Badger Changed lines 25- 26 from: Note: I f it is important for a random number series to begin on a random number then call the randomSeed() function using something that is fairly random such as millis() or analogRead() on a pin with no electrical connection. to: Note: I f it is important for a random number series to begin on a random number, then call the randomSeed() function using something that is fairly random such as millis() or analogRead() on a pin with no electrical connection. Restore September 26, 2007, at 09: 29 PM by Paul Badger Changed lines 5- 6 from: The random function allows convenient access to pseudo- random numbers for use in an applications. NOTE: Use this after using the randomSeed() function. to: The random function allows convenient access to pseudo- random numbers for use in sketches. Changed lines 12- 13 from:
- 479. I n the current version of this function, the max parameter will not be returned, although the minimum will so, for example: to: I n the current version of this function, the max parameter will not be returned, although the minimum will, so for example: random(10); // returns numbers from 0 to 9 Changed lines 18- 19 from: Consequently enter a maximum parameter one more than the meximum dersired. to: Consequently, enter a maximum parameter one larger than the maximum integer dersired. Added lines 25- 28: Note: I f it is important for a random number series to begin on a random number then call the randomSeed() function using something that is fairly random such as millis() or analogRead() on a pin with no electrical connection. Conversely it can occasionally be useful to use pseudo- random numbers that repeat exactly. This can be accomplished by calling randomSeed with the same number. Restore September 26, 2007, at 09: 17 PM by Paul Badger Changed lines 5- 6 from: The random function allows you to return pseudo- random numbers for use in your applications. NOTE: Use this after using the randomSeed() function. to: The random function allows convenient access to pseudo- random numbers for use in an applications. NOTE: Use this after using the randomSeed() function. Changed lines 10- 11 from: max - the overall range of random numbers you'd like returned. to: max - the largest random numbers you'd like returned. I n the current version of this function, the max parameter will not be returned, although the minimum will so, for example: random(-5, 5); // returns numbers from -5 to 4 Consequently enter a maximum parameter one more than the meximum dersired. Restore September 26, 2007, at 08: 23 PM by Paul Badger Added lines 12- 13: min and max are long integers so numbers between - 2,147,483,648 and 2,147,483,647 are valid. Restore May 26, 2007, at 07: 33 PM by Paul Badger Restore May 26, 2007, at 07: 32 PM by Paul Badger Deleted lines 39- 40: Reference Home Restore May 08, 2007, at 12: 22 PM by David A. Mellis Deleted line 17: int time; Changed lines 25- 26 from: time = millis(); randomSeed(time);
- 480. to: randomSeed(analogRead(0)); Restore September 15, 2006, at 11: 21 AM by David A. Mellis Changed lines 1- 3 from: long random(max) long random(min, max) to: long random(max) long random(min, max) Restore September 15, 2006, at 11: 21 AM by David A. Mellis Changed lines 1- 2 from: long random([min,] max) to: long random(max) long random(min, max) Restore September 11, 2006, at 10: 15 AM by J eff Gray Changed lines 1- 2 from: long random([start,] range) to: long random([min,] max) Changed lines 7- 10 from: start - optional starting range (ie: from "50" - 300). range - the overall range of random numbers you'd like returned. to: min - optional starting range (ie: from "50" - 300). max - the overall range of random numbers you'd like returned. Restore September 11, 2006, at 10: 05 AM by J eff Gray Added lines 29- 32: // example with only a range, which would return // a number between 0 - 300 // randNumber = random(300); Restore September 11, 2006, at 10: 04 AM by J eff Gray Added lines 1- 38: long random([start,] range) Description The random function allows you to return pseudo- random numbers for use in your applications. NOTE: Use this after using the randomSeed() function. Parameters
- 481. start - optional starting range (ie: from "50" - 300). range - the overall range of random numbers you'd like returned. Returns long - returns the random number. Example int time; long randNumber; void setup(){ Serial.begin(19200); } void loop(){ time = millis(); randomSeed(time); // return a random number from 50 - 300 randNumber = random(50,300); Serial.println(r); } See also randomSeed millis Reference Home Restore Edit Page | Page History | Printable View | All Recent Site Changes
- 482. Arduino : Reference / Random Reference Language (extended) | Libraries | Comparison | Board long random(max) long random(min, max) Description The random function generates pseudo-random numbers. Parameters min - lower bound of the random value, inclusive (optional parameter) max - upper bound of the random value, exclusive Returns long - a random number between min and max - 1 Note: I f it is important for a sequence of values generated by random() to differ, on subsequent executions of a sketch, use randomSeed() to initialize the random number generator with a fairly random input, such as analogRead() on an unconnected pin. Conversely, it can occasionally be useful to use pseudo-random sequences that repeat exactly. This can be accomplished by calling randomSeed() with a fixed number, before starting the random sequence. Example long randNumber; void setup(){ Serial.begin(9600); } // if analog input pin 0 is unconnected, random analog // noise will cause the call to randomSeed() to generate // different seed numbers each time the sketch runs. // randomSeed() will then shuffle the random function. randomSeed(analogRead(0)); void loop() { // print a random number from 0 to 299 randNumber = random(300); Serial.println(randNumber); // print a random number from 10 to 19 randNumber = random(10, 20); Serial.println(randNumber); } delay(50); See also randomSeed Reference Home
- 483. Corrections, suggestions, and new documentation should be posted to the Forum. The text of the Arduino reference is licensed under a Creative Commons Attribution-ShareAlike 3.0 License . Code samples in the reference are released into the public domain. (Printable View of http://www.arduino.cc/en/Reference/Random)
- 484. Arduino Buy | Download | Getting Started | Learning | Reference | Hardware | FAQ Login to Arduino Username: Password: Keep me logged in: ✔ Login Edit Page | Page History | Printable View | All Recent Site Changes search Blog » | Forum » | Playground »
- 485. Arduino Buy | Download | Getting Started | Learning | Reference | Hardware | FAQ Reference.Boolean History Hide minor edits - Show changes to markup September 14, 2007, at 10: 48 AM by Paul Badger Changed lines 8- 9 from: if (x > 0 && x < 5) { to: if (digitalRead(2) == 1 && digitalRead(3) == 1) { / / read two switches Restore J uly 16, 2007, at 07: 18 AM by Paul Badger Changed line 46 from: ^ (bitwise NOT to: ~ (bitwise NOT Restore J uly 16, 2007, at 07: 17 AM by Paul Badger Added line 46: ^ (bitwise NOT Restore J uly 16, 2007, at 07: 14 AM by Paul Badger Added lines 44- 45: & (bitwise AND) | (bitwise OR) Restore J uly 16, 2007, at 07: 08 AM by Paul Badger Changed lines 46- 49 from: Reference Home to: Restore April 15, 2007, at 10: 29 AM by David A. Mellis Changed line 8 from: if (x > 0 && x< 5) { to: if (x > 0 && x < 5) { Changed line 22 from: True if the operand is true, e.g. to: True if the operand is false, e.g. Restore search Blog » | Forum » | Playground »
- 486. April 15, 2007, at 10: 28 AM by David A. Mellis Changed lines 38- 39 from: [@ if (a >= 10 && a <= 20){} / / true if a is between 10 and 20 to: [@ Restore April 15, 2007, at 10: 28 AM by David A. Mellis - matching formatting tags and removing incorrect example. Changed lines 41- 43 from: digitalWrite(ledPin, !a); / / this will turn on the LED every other time through the loop to: @] Restore April 14, 2007, at 09: 15 PM by Paul Badger Changed lines 29- 30 from: Example to: Warning Make sure you don't mistake the boolean AND operator, && (double ampersand) for the bitwise AND operator & (single ampersand). They are entirely different beasts. Similarly, do not confuse the boolean | | (double pipe) operator with the bitwise OR operator | (single pipe). The bitwise not ~ (tilde) looks much different than the boolean not ! (exclamation point or "bang" as the programmers say) but you still have to be sure which one you want where. Examples [@ if (a >= 10 && a <= 20){} / / true if a is between 10 and 20 if (a >= 10 && a <= 20){} / / true if a is between 10 and 20 digitalWrite(ledPin, !a); / / this will turn on the LED every other time through the loop Restore August 01, 2006, at 07: 16 AM by David A. Mellis Changed lines 5- 6 from: && (logical and): true only if both operands are true, e.g. to: && (logical and) True only if both operands are true, e.g. Changed lines 13- 14 from: | | (logical or): true if either operand is true, e.g. to: || (logical or) True if either operand is true, e.g. Changed lines 21- 22 from: ! (not): true if the operand is true, e.g. to: ! (not)
- 487. True if the operand is true, e.g. Restore August 01, 2006, at 07: 15 AM by David A. Mellis Changed lines 5- 10 from: && (logical and): true only if both operands are true, e.g. if (x > 0 && x< 5) { } is true only if x is 1, 2, 3, or 4. | | (logical or): true if either operand is true, e.g. if (x > 0 | | y > 0) { } is true if either x or y is greater than 0. ! (not): true if the operand is true, e.g. if (!x) { } is true if x is false (i.e. if x equals 0). to: && (logical and): true only if both operands are true, e.g. i f ( x > 0 && x< 5) { // ... } is true only if x is 1, 2, 3, or 4. | | (logical or): true if either operand is true, e.g. i f ( x > 0 || y > 0) { // ... } is true if either x or y is greater than 0. ! (not): true if the operand is true, e.g. if (!x) { // ... } is true if x is false (i.e. if x equals 0). Restore August 01, 2006, at 07: 13 AM by David A. Mellis Added lines 1- 20: Boolean Operators These can be used inside the condition of an if statement. && (logical and): true only if both operands are true, e.g. if (x > 0 && x< 5) { } is true only if x is 1, 2, 3, or 4. | | (logical or): true if either operand is true, e.g. if (x > 0 | | y > 0) { } is true if either x or y is greater than 0. ! (not): true if the operand is true, e.g. if (!x) { } is true if x is false (i.e. if x equals 0). Example See also if Reference Home Restore Edit Page | Page History | Printable View | All Recent Site Changes
- 488. Arduino : Reference / Boolean Reference Language (extended) | Libraries | Comparison | Board Boolean Operators These can be used inside the condition of an if statement. && (logical and) True only if both operands are true, e.g. if (digitalRead(2) == 1 && digitalRead(3) == 1) { // read two switches // ... } is true only if x is 1, 2, 3, or 4. | | (logical or) True if either operand is true, e.g. if (x > 0 || y > 0) { // ... } is true if either x or y is greater than 0. ! (not) True if the operand is false, e.g. if (!x) { // ... } is true if x is false (i.e. if x equals 0). Warning Make sure you don't mistake the boolean AND operator, && (double ampersand) for the bitwise AND operator & (single ampersand). They are entirely different beasts. Similarly, do not confuse the boolean | | (double pipe) operator with the bitwise OR operator | (single pipe). The bitwise not ~ (tilde) looks much different than the boolean not ! (exclamation point or "bang" as the programmers say) but you still have to be sure which one you want where. Examples if (a >= 10 && a <= 20){} // true if a is between 10 and 20 See also & (bitwise AND) | (bitwise OR) ~ (bitwise NOT if Reference Home Corrections, suggestions, and new documentation should be posted to the Forum. The text of the Arduino reference is licensed under a Creative Commons Attribution-ShareAlike 3.0 License . Code
- 489. samples in the reference are released into the public domain. (Printable View of http://www.arduino.cc/en/Reference/Boolean)
- 490. Arduino Buy | Download | Getting Started | Learning | Reference | Hardware | FAQ Login to Arduino Username: Password: Keep me logged in: ✔ Login Edit Page | Page History | Printable View | All Recent Site Changes search Blog » | Forum » | Playground »
- 491. Arduino Buy | Download | Getting Started | Learning | Reference | Hardware | FAQ search Blog » | Forum » | Playground » Reference.Increment History Hide minor edits - Show changes to markup J uly 16, 2007, at 09: 35 AM by David A. Mellis Added line 34: Restore J uly 16, 2007, at 09: 35 AM by David A. Mellis Changed line 13 from: x- - ; / / decrement x by one and returns the old value of x @] to: x- - ; / / decrement x by one and returns the old value of x Restore J uly 16, 2007, at 09: 35 AM by David A. Mellis - clarifying x++ and ++x, etc. Changed lines 10- 12 from: x++ ; / / equivalent to the expression x = x + 1; x- - ; / / equivalent to the expression x = x - 1; @] to: x++; / / increment x by one and returns the old value of x ++x; / / increment x by one and returns the new value of x x- - ; / / decrement x by one and returns the old value of x @] - - x ; / / decrement x by one and returns the new value of x @] Changed lines 18- 19 from: x: any variable type to: x: an integer or long (possibly unsigned) Changed lines 22- 23 from: I ncremented or decremented variable to: The original or newly incremented / decremented value of the variable. Changed lines 27- 30 from: x++; / / x now contains 3 x- - ; / / x contains 2 again@] to: y = ++x; / / x now contains 3, y contains 3 y = x- - ; / / x contains 2 again, y still contains 3 @] Deleted lines 31- 32: Deleted line 33: Restore J uly 16, 2007, at 05: 18 AM by Paul Badger Restore J uly 16, 2007, at 05: 17 AM by Paul Badger Changed line 23 from: [@x = 2; / / x now contains 2
- 492. to: [@x = 2; Restore J uly 16, 2007, at 05: 17 AM by Paul Badger Changed lines 24- 27 from: x++; / / x now contains 3 x- - ; / / x contains 2 again@] to: x++; / / x now contains 3 x- - ; / / x contains 2 again@] Restore J uly 16, 2007, at 05: 16 AM by Paul Badger Restore J uly 16, 2007, at 05: 16 AM by Paul Badger Deleted lines 4- 7: The ++ operator is The - - operator is equivalent to the expression x = x - 1; Restore J uly 16, 2007, at 05: 14 AM by Paul Badger Changed lines 3- 4 from: Description to: Description Restore J uly 16, 2007, at 05: 14 AM by Paul Badger Changed line 35 from: += to: += Restore J uly 16, 2007, at 05: 13 AM by Paul Badger Changed lines 35- 36 from: division to: += - = Restore J uly 16, 2007, at 05: 08 AM by Paul Badger Deleted lines 26- 28: Deleted lines 31- 63: Example Code // check a sensor every 10 times through a loop void loop(){ i++; if ((i % 10) == 0){ x = analogRead(sensPin); } / ... } // read sensor every ten times through loop
- 493. // setup a buffer that averages the last five samples of a sensor int senVal[5]; int i, j; // create an array for sensor data // counter variables long average; // variable to store average ... void loop(){ // input sensor data into oldest memory slot sensVal[(i++) % 5] = analogRead(sensPin); average = 0; for (j=0; j<5; j++){ average += sensVal[j]; } average = average / 5; // add up the samples // divide by total Tip the modulo operator will not work on floats Restore J uly 16, 2007, at 05: 07 AM by Paul Badger Added line 13: [@ Changed lines 15- 17 from: x- - ; / / equivalent to the expression x = x - 1; to: x- - ; / / equivalent to the expression x = x - 1; @] Restore J uly 16, 2007, at 05: 06 AM by Paul Badger Added line 14: Restore J uly 16, 2007, at 05: 06 AM by Paul Badger Changed lines 1- 8 from: ++ (increment) I ncrement a variable Syntax x++; to: ++ (increment) / -- (decrement) Description The ++ operator is The - - operator is equivalent to the expression x = x - 1; I ncrement or decrement a variable Syntax x++ ; / / equivalent to the expression x = x + 1; x- - ; / / equivalent to the expression x = x - 1; Parameters x: any variable type
- 494. Returns I ncremented or decremented variable Examples x = 2; x++; x--; // x now contains 2 // x now contains 3 // x contains 2 again Example Code // check a sensor every 10 times through a loop void loop(){ i++; if ((i % 10) == 0){ // read sensor every ten times through loop x = analogRead(sensPin); } / ... } // setup a buffer that averages the last five samples of a sensor int senVal[5]; int i, j; long average; ... // create an array for sensor data // counter variables // variable to store average void loop(){ // input sensor data into oldest memory slot sensVal[(i++) % 5] = analogRead(sensPin); average = 0; for (j=0; j<5; j++){ average += sensVal[j]; // add up the samples } average = average / 5; // divide by total Tip the modulo operator will not work on floats See also division Restore J uly 16, 2007, at 04: 51 AM by Paul Badger Added lines 1- 8: ++ (increment) I ncrement a variable Syntax x++; Restore Edit Page | Page History | Printable View | All Recent Site Changes
- 495. Arduino : Reference / I ncrement Reference Language (extended) | Libraries | Comparison | Board ++ (increment) / -- (decrement) Description I ncrement or decrement a variable Syntax x++; ++x; // increment x by one and returns the old value of x // increment x by one and returns the new value of x x-- ; --x ; // decrement x by one and returns the old value of x // decrement x by one and returns the new value of x Parameters x: an integer or long (possibly unsigned) Returns The original or newly incremented / decremented value of the variable. Examples x = 2; y = ++x; y = x--; // x now contains 3, y contains 3 // x contains 2 again, y still contains 3 See also += -= Reference Home Corrections, suggestions, and new documentation should be posted to the Forum. The text of the Arduino reference is licensed under a Creative Commons Attribution-ShareAlike 3.0 License . Code samples in the reference are released into the public domain. (Printable View of http://www.arduino.cc/en/Reference/Increment)
- 496. Arduino Buy | Download | Getting Started | Learning | Reference | Hardware | FAQ Login to Arduino Username: Password: Keep me logged in: ✔ Login Edit Page | Page History | Printable View | All Recent Site Changes search Blog » | Forum » | Playground »
- 497. Arduino Buy | Download | Getting Started | Learning | Reference | Hardware | FAQ Reference.IncrementCompound History Hide minor edits - Show changes to markup J uly 16, 2007, at 05: 51 AM by Paul Badger Deleted lines 30- 36: See also += -= Restore J uly 16, 2007, at 05: 50 AM by Paul Badger Deleted line 33: Added lines 36- 37: Restore J uly 16, 2007, at 05: 50 AM by Paul Badger Changed line 36 from: -= to: -= Restore J uly 16, 2007, at 05: 48 AM by Paul Badger Added line 19: Restore J uly 16, 2007, at 05: 47 AM by Paul Badger Deleted line 18: Restore J uly 16, 2007, at 05: 47 AM by Paul Badger Deleted line 19: Restore J uly 16, 2007, at 05: 47 AM by Paul Badger Changed lines 18- 20 from: x: any variable type to: x: any variable type Restore J uly 16, 2007, at 05: 47 AM by Paul Badger Changed line 18 from: x: any variable type to: x: any variable type Restore J uly 16, 2007, at 05: 46 AM by Paul Badger Changed lines 18- 20 from: search Blog » | Forum » | Playground »
- 498. x: any variable type / / y: any variable type or constant to: x: any variable type y: any variable type or constant Restore J uly 16, 2007, at 05: 46 AM by Paul Badger Changed lines 19- 20 from: y: any variable type or constant to: / / y: any variable type or constant Restore J uly 16, 2007, at 05: 45 AM by Paul Badger Changed lines 18- 19 from: x: any variable type y: any variable type or constant to: x: any variable type y: any variable type or constant Restore J uly 16, 2007, at 05: 45 AM by Paul Badger Changed lines 18- 20 from: x: any variable type y: any variable type or constant to: x: any variable type y: any variable type or constant Restore J uly 16, 2007, at 05: 45 AM by Paul Badger Changed line 18 from: x: any variable type to: x: any variable type Restore J uly 16, 2007, at 05: 45 AM by Paul Badger Changed line 26 from: x * = 10; / / x now contains 30 to: x * = 10; / / x now contains 30 Restore J uly 16, 2007, at 05: 44 AM by Paul Badger Changed lines 5- 6 from: Perform a mathematical operation on a variable with another constant or variable. The += (et al) operators are just a convenient shorthand for the expanded syntax below. to: Perform a mathematical operation on a variable with another constant or variable. The += (et al) operators are just a convenient shorthand for the expanded syntax, listed below. Changed lines 10- 13 from: x+=2; / / equivalent to the expression x = x + 2; x- =2; / / equivalent to the expression x = x - 1; x* =2; / / equivalent to the expression x = x * 2; x/ =2; / / equivalent to the expression x = x / 2; to:
- 499. x += y; / / equivalent to the expression x = x + y; x - = y; / / equivalent to the expression x = x - y; x * = y; / / equivalent to the expression x = x * y; x / = y; / / equivalent to the expression x = x / y; Changed lines 18- 19 from: x: any variable type to: x: any variable type y: any variable type or constant Changed lines 24- 27 from: x++; / / x now contains 3 x- - ; / / x contains 2 again@] to: x += 4; / / x now contains 6 x - = 3; / / x now contains 3 x * = 10; / / x now contains 30 x / = 2; / / x now contains 15 @] Restore J uly 16, 2007, at 05: 27 AM by Paul Badger Added lines 1- 31: += , -= , *= , / = Description Perform a mathematical operation on a variable with another constant or variable. The += (et al) operators are just a convenient shorthand for the expanded syntax below. Syntax x+=2; x - =2; x*=2; x/=2; // // // // equivalent equivalent equivalent equivalent to to to to the the the the expression expression expression expression x x x x = = = = x x x x + * / 2; 1; 2; 2; Parameters x: any variable type Examples x = 2; x++; x--; // x now contains 3 // x contains 2 again See also += -= Restore Edit Page | Page History | Printable View | All Recent Site Changes
- 500. Arduino : Reference / I ncrement Compound Reference Language (extended) | Libraries | Comparison | Board += , -= , * = , / = Description Perform a mathematical operation on a variable with another constant or variable. The += (et al) operators are just a convenient shorthand for the expanded syntax, listed below. Syntax x x x x += -= *= /= y; y; y; y; // // // // equivalent equivalent equivalent equivalent to to to to the the the the expression expression expression expression x x x x = = = = x x x x + * / y; y; y; y; Parameters x: any variable type y: any variable type or constant Examples x x x x x = 2; += 4; -= 3; *= 10; /= 2; // // // // x x x x now now now now contains contains contains contains 6 3 30 15 Reference Home Corrections, suggestions, and new documentation should be posted to the Forum. The text of the Arduino reference is licensed under a Creative Commons Attribution-ShareAlike 3.0 License . Code samples in the reference are released into the public domain. (Printable View of http://www.arduino.cc/en/Reference/IncrementCompound)
- 501. Arduino Buy | Download | Getting Started | Learning | Reference | Hardware | FAQ Login to Arduino Username: Password: Keep me logged in: ✔ Login Edit Page | Page History | Printable View | All Recent Site Changes search Blog » | Forum » | Playground »
- 502. Arduino Buy | Download | Getting Started | Learning | Reference | Hardware | FAQ search Blog » | Forum » | Playground » Reference.Constants History Hide minor edits - Show changes to markup May 09, 2008, at 11: 57 PM by David A. Mellis Changed lines 26- 27 from: When a pin is configured as an I NPUT with pinMode, and read with digitalRead, the microcontroller will report HI GH (0) if a voltage of 3 volts or more is present at the pin. to: When a pin is configured as an I NPUT with pinMode, and read with digitalRead, the microcontroller will report HI GH if a voltage of 3 volts or more is present at the pin. Changed lines 32- 33 from: The meaning of LOW also has a different meaning depending on whether a pin is set to I NPUT or OUTPUT. When a pin is configured as an I NPUT with pinMode, and read with digitalRead, the microcontroller will report LOW (0) if a voltage of 2 volts or less is present at the pin. to: The meaning of LOW also has a different meaning depending on whether a pin is set to I NPUT or OUTPUT. When a pin is configured as an I NPUT with pinMode, and read with digitalRead, the microcontroller will report LOW if a voltage of 2 volts or less is present at the pin. Restore March 29, 2008, at 11: 43 AM by David A. Mellis Changed lines 6- 7 from: There are two boolean constants defined in the C language, upon which Arduino is based: TRUE and FALSE. to: There are two constants used to represent truth and falsity in the Arduino language: true, and false. Restore March 27, 2008, at 08: 48 PM by Paul Badger Changed lines 41- 42 from: Arduino (Atmega) pins configured as I NPUT are said to be in a high- impedance state. One way of explaining this is that pins configured as I NPUT make extremely small demands on the circuit that they are sampling, say equivalent to a series resistor of 100 Megohms in front of the pin. This makes them useful for reading a sensor, but not powering an LED. to: Arduino (Atmega) pins configured as I NPUT with pinMode() are said to be in a high- impedance state. One way of explaining this is that pins configured as I NPUT make extremely small demands on the circuit that they are sampling, say equivalent to a series resistor of 100 Megohms in front of the pin. This makes them useful for reading a sensor, but not powering an LED. Changed lines 45- 47 from: Pins configured as OUTPUT are said to be in a low- impedance state. This means that they can provide a substantial amount of current to other circuits. Atmega pins can source (provide positive current) or sink (provide negative current) up to 40 mA (milliamps) of current to other devices/ circuits. This makes them useful for powering LED's but useless for connecting to sensors. Pins configured as outputs can also be damaged or destroyed if short circuited to either ground or 5 volt power rails. The amount of current provided by an Atmega pin is also not enough to power most relays or motors, and some interface circuitry will be required.
- 503. to: Pins configured as OUTPUT with pinMode() are said to be in a low- impedance state. This means that they can provide a substantial amount of current to other circuits. Atmega pins can source (provide positive current) or sink (provide negative current) up to 40 mA (milliamps) of current to other devices/ circuits. This makes them useful for powering LED's but useless for reading sensors. Pins configured as outputs can also be damaged or destroyed if short circuited to either ground or 5 volt power rails. The amount of current provided by an Atmega pin is also not enough to power most relays or motors, and some interface circuitry will be required. Restore March 27, 2008, at 08: 45 PM by Paul Badger Changed lines 27- 28 from: When an output pin is configured to OUTPUT with pinMode, and set to HI GH with digitalWrite, the pin is at 5 volts. I n this state it can source current, i.e. light an LED that is connected through a series resistor to ground, or to another pin configured as an output, and set to LOW. to: When a pin is configured to OUTPUT with pinMode, and set to HI GH with digitalWrite, the pin is at 5 volts. I n this state it can source current, e.g. light an LED that is connected through a series resistor to ground, or to another pin configured as an output, and set to LOW. Changed lines 31- 33 from: The meaning of LOW also has a different meaning depending on whether a pin is set to I NPUT or OUTPUT. When a pin is configured as an I NPUT with pinMode, and read with digitalRead, the microcontroller will report LOW (0) if a voltage of 2 volts or less is present at the pin. to: The meaning of LOW also has a different meaning depending on whether a pin is set to I NPUT or OUTPUT. When a pin is configured as an I NPUT with pinMode, and read with digitalRead, the microcontroller will report LOW (0) if a voltage of 2 volts or less is present at the pin. Restore March 27, 2008, at 08: 43 PM by Paul Badger Changed line 24 from: The meaning of HI GH has a somewhat different meaning depending on whether a pin is set to an I NPUT or OUTPUT. to: The meaning of HI GH (in reference to a pin) is somewhat different depending on whether a pin is set to an I NPUT or OUTPUT. Restore March 17, 2008, at 10: 40 PM by Paul Badger Added lines 8- 9: false Changed lines 12- 13 from: true is often said to be defined as 1, which is correct, but true has a wider definition. Any integer which is non- zero is TRUE, in a Boolean sense. So - 1, 2 and - 200 are all defined as true, too, in a Boolean sense. Consequently true is often said to be defined as "non- zero". to: true true is often said to be defined as 1, which is correct, but true has a wider definition. Any integer which is non- zero is TRUE, in a Boolean sense. So - 1, 2 and - 200 are all defined as true, too, in a Boolean sense. Deleted line 18: Restore March 17, 2008, at 11: 18 AM by Paul Badger Changed line 27 from: The meaning of LOW also has a different meaning depending on whether the pin is set to I NPUT or OUTPUT.
- 504. to: The meaning of LOW also has a different meaning depending on whether a pin is set to I NPUT or OUTPUT. Restore March 17, 2008, at 11: 16 AM by Paul Badger Changed lines 10- 11 from: true is often said to be defined as 1, which is correct, but true has a wider definition. Any integer which is non- zero is TRUE, in a Boolean sense. So - 1, 2 and - 200 are all defined as true, too, in a Boolean sense. Consequently true is often said to be defined as non- zero. to: true is often said to be defined as 1, which is correct, but true has a wider definition. Any integer which is non- zero is TRUE, in a Boolean sense. So - 1, 2 and - 200 are all defined as true, too, in a Boolean sense. Consequently true is often said to be defined as "non- zero". Restore March 17, 2008, at 11: 16 AM by Paul Badger Changed lines 10- 11 from: true is often said to be defined as 1, which is correct, but true has a wider definition. Any integer which is non- zero is TRUE, in a Boolean sense. So - 1, 2 and - 200 are all defined as true, too, in a Boolean sense. to: true is often said to be defined as 1, which is correct, but true has a wider definition. Any integer which is non- zero is TRUE, in a Boolean sense. So - 1, 2 and - 200 are all defined as true, too, in a Boolean sense. Consequently true is often said to be defined as non- zero. Restore March 17, 2008, at 11: 14 AM by Paul Badger Changed line 27 from: The meaning of LOW has a somewhat different meaning depending on whether the pin is set to I NPUT or OUTPUT. to: The meaning of LOW also has a different meaning depending on whether the pin is set to I NPUT or OUTPUT. Restore March 17, 2008, at 11: 12 AM by Paul Badger Changed lines 18- 19 from: HI GH to: HI GH Changed lines 25- 26 from: LOW to: LOW Restore March 17, 2008, at 11: 12 AM by Paul Badger Changed line 5 from: Defining Logical Levels, TRUE and FALSE (Boolean Constants) to: Defining Logical Levels, true and false (Boolean Constants) Changed lines 8- 9 from: FALSE is the easier of the two to define. FALSE is defined as 0 (zero).
- 505. to: false is the easier of the two to define. false is defined as 0 (zero). Changed lines 12- 14 from: to: Note that the true and false constants are typed in lowercase unlike HI GH, LOW, I NPUT, & OUTPUT. Restore March 17, 2008, at 11: 08 AM by Paul Badger Changed lines 5- 12 from: Defining Logical Levels, true and false (Boolean Constants) There are two boolean constants defined in the C language, upon which Arduino is based: true and false. false is the easier of the two to define. false is defined as 0 (zero). true is often said to be defined as 1, which is true, but true has a wider definition. Any integer which is non- zero is TRUE, in a Boolean sense. So - 1, 2 and - 200 are all defined as true, too, in a Boolean sense. to: Defining Logical Levels, TRUE and FALSE (Boolean Constants) There are two boolean constants defined in the C language, upon which Arduino is based: TRUE and FALSE. FALSE is the easier of the two to define. FALSE is defined as 0 (zero). true is often said to be defined as 1, which is correct, but true has a wider definition. Any integer which is non- zero is TRUE, in a Boolean sense. So - 1, 2 and - 200 are all defined as true, too, in a Boolean sense. Changed lines 16- 18 from: HI GH represents the programming equivalent to 5 volts. When reading the value at a digital pin if there is 3 volts or more at the input pin, the microprocessor will understand it as HI GH. This constant is also represented by the integer number 1 . LOW represents the programming equivalent to 0 volts. The meaning of LOW has a somewhat different meaning depending on whether the pin is set to an I NPUT or OUTPUT. to: HI GH The meaning of HI GH has a somewhat different meaning depending on whether a pin is set to an I NPUT or OUTPUT. When a pin is configured as an I NPUT with pinMode, and read with digitalRead, the microcontroller will report HI GH (0) if a voltage of 3 volts or more is present at the pin. When an output pin is configured to OUTPUT with pinMode, and set to HI GH with digitalWrite, the pin is at 5 volts. I n this state it can source current, i.e. light an LED that is connected through a series resistor to ground, or to another pin configured as an output, and set to LOW. LOW The meaning of LOW has a somewhat different meaning depending on whether the pin is set to I NPUT or OUTPUT. Changed lines 26- 27 from: When an output pin is configured to OUTPUT with pinMode, and set to LOW with digitalWrite, the pin is at 0 volts. I n this state it can sink current, i.e. light an LED that is connected through a series resistor to +5 volts, or to another pin configured as an output, and set to HI GH. to: When a pin is configured to OUTPUT with pinMode, and set to LOW with digitalWrite, the pin is at 0 volts. I n this state it can sink current, i.e. light an LED that is connected through a series resistor to, +5 volts, or to another pin configured as an output, and set to HI GH. Changed lines 38- 40 from: Pins configured as OUTPUT are said to be in a low- impedance state. This means that they can provide a substantial amount of current to other circuits. Atmega pins can sorce (provide positive current) or sink (provide negative current) up to 40 mA (milliamps) of current to other devices/ circuits. This makes them useful for powering LED's but useless for connecting to sensors. Pins configured as outputs can also be damaged or destroyed if short circuited to either ground or 5 volt power rails. to:
- 506. Pins configured as OUTPUT are said to be in a low- impedance state. This means that they can provide a substantial amount of current to other circuits. Atmega pins can source (provide positive current) or sink (provide negative current) up to 40 mA (milliamps) of current to other devices/ circuits. This makes them useful for powering LED's but useless for connecting to sensors. Pins configured as outputs can also be damaged or destroyed if short circuited to either ground or 5 volt power rails. The amount of current provided by an Atmega pin is also not enough to power most relays or motors, and some interface circuitry will be required. Restore March 17, 2008, at 10: 59 AM by Paul Badger Changed lines 21- 22 from: Setting an output pin to low with digitalWrite, means that the pin is at 0 volts. I n this state it can sink current, i.e. light an LED that is connected through a series resistor to +5 volts, or to another pin configured as an output, and set to HI GH. to: When an output pin is configured to OUTPUT with pinMode, and set to LOW with digitalWrite, the pin is at 0 volts. I n this state it can sink current, i.e. light an LED that is connected through a series resistor to +5 volts, or to another pin configured as an output, and set to HI GH. Restore March 17, 2008, at 10: 57 AM by Paul Badger Changed lines 18- 20 from: LOW represents the programming equivalent to 0 volts. The meaning of LOW has a somewhat different meaning, depending on whether the pin is set to an input or output. When reading a pin is set to an input with digitalRead, if a voltage of 2 volts or less is present at the pin, the microcontroller will report LOW (0). to: LOW represents the programming equivalent to 0 volts. The meaning of LOW has a somewhat different meaning depending on whether the pin is set to an I NPUT or OUTPUT. When a pin is configured as an I NPUT with pinMode, and read with digitalRead, the microcontroller will report LOW (0) if a voltage of 2 volts or less is present at the pin. Restore March 17, 2008, at 10: 55 AM by Paul Badger Changed lines 18- 19 from: LOW is representing the programming equivalent to 0 volts. When reading the value at a digital pin, if we get 2 volts or less, the microprocessor will understand it as LOW . This constant if also represented by the integer number 0 . to: LOW represents the programming equivalent to 0 volts. The meaning of LOW has a somewhat different meaning, depending on whether the pin is set to an input or output. When reading a pin is set to an input with digitalRead, if a voltage of 2 volts or less is present at the pin, the microcontroller will report LOW (0). Setting an output pin to low with digitalWrite, means that the pin is at 0 volts. I n this state it can sink current, i.e. light an LED that is connected through a series resistor to +5 volts, or to another pin configured as an output, and set to HI GH. Restore March 17, 2008, at 10: 45 AM by Paul Badger Changed line 5 from: Defining Logical Levels, true and false (Boolean Constants) to: Defining Logical Levels, true and false (Boolean Constants) Changed line 13 from: Defining Pin Levels, HI GH and LOW to: Defining Pin Levels, HIGH and LOW Changed lines 20- 21 from: Defining Digital Pins, I NPUT and OUTPUT
- 507. to: Defining Digital Pins, INPUT and OUTPUT Changed lines 28- 29 from: Pins Configured as Outputs to: Pins Configured as Outputs Restore March 17, 2008, at 10: 45 AM by Paul Badger Changed lines 24- 25 from: Pins Configured as I nputs to: Pins Configured as I nputs Restore March 17, 2008, at 10: 44 AM by Paul Badger Changed lines 24- 25 from: Pins Configured as I nputs to: Pins Configured as I nputs Changed lines 28- 29 from: Pins Configured as Outputs to: Pins Configured as Outputs Restore March 17, 2008, at 10: 14 AM by Paul Badger Changed line 5 from: Defining Logical Levels, true and false (Boolean Constants) to: Defining Logical Levels, true and false (Boolean Constants) Changed line 13 from: Defining Pin Levels, HIGH and LOW to: Defining Pin Levels, HI GH and LOW Changed lines 20- 21 from: Defining Digital Pins, INPUT and OUTPUT to: Defining Digital Pins, I NPUT and OUTPUT Restore J anuary 21, 2008, at 10: 57 AM by David A. Mellis Changed lines 16- 19 from:
- 508. HI GH represents the programming equivalent to 5 volts. When reading the value at a digital pin if there is 3 volts or more at the input pin, the microprocessor will understand it as HI GH. This constant is also represented by the integer number 1 , and also the truth level TRUE. LOW is representing the programming equivalent to 0 volts. When reading the value at a digital pin, if we get 2 volts or less, the microprocessor will understand it as LOW . This constant if also represented by the integer number 0 , and also the truth level FALSE. to: HI GH represents the programming equivalent to 5 volts. When reading the value at a digital pin if there is 3 volts or more at the input pin, the microprocessor will understand it as HI GH. This constant is also represented by the integer number 1 . LOW is representing the programming equivalent to 0 volts. When reading the value at a digital pin, if we get 2 volts or less, the microprocessor will understand it as LOW . This constant if also represented by the integer number 0 . Restore J anuary 21, 2008, at 10: 57 AM by David A. Mellis Changed lines 5- 12 from: Defining Logical Levels, TRUE and FALSE (Boolean Constants) There are two boolean constants defined in the C language, upon which Arduino is based: TRUE and FALSE. FALSE is the easier of the two to define. FALSE is defined as 0 (zero). TRUE is often said to be defined as 1, which is true, but TRUE has a wider definition. Any integer which is non- zero is TRUE, in a Boolean sense. So - 1, 2 and - 200 are all defined as TRUE, too, in a Boolean sense. to: Defining Logical Levels, true and false (Boolean Constants) There are two boolean constants defined in the C language, upon which Arduino is based: true and false. false is the easier of the two to define. false is defined as 0 (zero). true is often said to be defined as 1, which is true, but true has a wider definition. Any integer which is non- zero is TRUE, in a Boolean sense. So - 1, 2 and - 200 are all defined as true, too, in a Boolean sense. Restore J une 09, 2007, at 08: 47 PM by Paul Badger Restore J une 09, 2007, at 08: 44 PM by Paul Badger Changed line 5 from: Defining Logical Levels (Boolean Constants) to: Defining Logical Levels, TRUE and FALSE (Boolean Constants) Changed line 13 from: Defining Pin Levels to: Defining Pin Levels, HIGH and LOW Changed lines 20- 21 from: Defining Digital Pins to: Defining Digital Pins, INPUT and OUTPUT Restore J une 09, 2007, at 08: 33 PM by Paul Badger Changed lines 30- 33 from:
- 509. Pins configured as OUTPUT are said to be in a low- impedance state. This means that they can provide a substantial amount of current to other circuits. Atmega pins can sorce (provide positive current) or sink (provide negative current) up to 40 mA (milliamps) of current to other devices/ circuits. This makes them useful for powering LED's but useless for connecting to sensors. Pins configured as outputs can also be damaged or destroyed if short circuited to either ground or 5 volt power rails. For this reason it is a good idea to connect output pins with 470O or 1k resistors. to: Pins configured as OUTPUT are said to be in a low- impedance state. This means that they can provide a substantial amount of current to other circuits. Atmega pins can sorce (provide positive current) or sink (provide negative current) up to 40 mA (milliamps) of current to other devices/ circuits. This makes them useful for powering LED's but useless for connecting to sensors. Pins configured as outputs can also be damaged or destroyed if short circuited to either ground or 5 volt power rails. Restore J une 09, 2007, at 08: 32 PM by Paul Badger Changed lines 5- 6 from: Defining Logical levels (Boolean Constants) to: Defining Logical Levels (Boolean Constants) There are two boolean constants defined in the C language, upon which Arduino is based: TRUE and FALSE. FALSE is the easier of the two to define. FALSE is defined as 0 (zero). TRUE is often said to be defined as 1, which is true, but TRUE has a wider definition. Any integer which is non- zero is TRUE, in a Boolean sense. So - 1, 2 and - 200 are all defined as TRUE, too, in a Boolean sense. Defining Pin Levels Changed lines 16- 17 from: HI GH is representing the programming equivalent to 5 Volts. When reading the value at a digital pin if we get 3 Volts or more the microprocessor will understad it as HI GH. This constant is also represented the integer number 1 , and also the truth level TRUE. to: HI GH represents the programming equivalent to 5 volts. When reading the value at a digital pin if there is 3 volts or more at the input pin, the microprocessor will understand it as HI GH. This constant is also represented by the integer number 1 , and also the truth level TRUE. Changed lines 26- 27 from: Arduino (Atmega) pins configured as inputs are said to be in a high- impedance state. One way of explaining this is that pins configured as I NPUT make extremely small demands on the circuit that they are sampling, say equivalent to a series resistor of 100 Megohms in front of the pin. This makes them useful for reading a sensor, but not powering an LED. to: Arduino (Atmega) pins configured as I NPUT are said to be in a high- impedance state. One way of explaining this is that pins configured as I NPUT make extremely small demands on the circuit that they are sampling, say equivalent to a series resistor of 100 Megohms in front of the pin. This makes them useful for reading a sensor, but not powering an LED. Changed lines 30- 33 from: Pins configured as OUTPUT are said to be in a low- impedance state. This means that they can provide a substantial amount of current to other circuits. Atmega pins can sorce (provide positive current) or sink (provide negative current) up to 40 mA (milliamps) of current to other devices/ circuits. This makes them useful for powering LED's but useless for connecting to sensors. to: Pins configured as OUTPUT are said to be in a low- impedance state. This means that they can provide a substantial amount of current to other circuits. Atmega pins can sorce (provide positive current) or sink (provide negative current) up to 40 mA (milliamps) of current to other devices/ circuits. This makes them useful for powering LED's but useless for connecting to sensors. Pins configured as outputs can also be damaged or destroyed if short circuited to either ground or 5 volt power rails. For this reason it is a good idea to connect output pins with 470O or 1k resistors. Restore
- 510. May 28, 2007, at 01: 24 PM by Paul Badger Changed lines 31- 41 from: boolean to: boolean variables Restore May 28, 2007, at 01: 23 PM by Paul Badger Changed lines 15- 16 from: Digital pins can be used either as I NPUT or OUTPUT. These values drastically change the electrical behavior of the pins. to: Digital pins can be used either as I NPUT or OUTPUT. Changing a pin from I NPUT TO OUTPUT with pinMode() drastically changes the electrical behavior of the pin. Changed lines 19- 20 from: Arduino (Atmega) pins configured as inputs are said to be in a high- impedance state. One way of explaining this is that input pins make extremely small demands on the circuit that they are sampling, say equivalent to a series resistor of 100 Megohms in front of the pin. This makes them useful for reading a sensor, but not powering an LED. to: Arduino (Atmega) pins configured as inputs are said to be in a high- impedance state. One way of explaining this is that pins configured as I NPUT make extremely small demands on the circuit that they are sampling, say equivalent to a series resistor of 100 Megohms in front of the pin. This makes them useful for reading a sensor, but not powering an LED. Changed lines 23- 26 from: Pins configured as outputs are said to be in a low- impedance state. This means that they can provide a substantial amount of current to other circuits. Atmega pins can sorce (provide positive current) or sink (provide negative current) up to 40 mA (milliamps) of current to other devices/ circuits. This makes them useful for powering LED's but useless for connecting to sensors. to: Pins configured as OUTPUT are said to be in a low- impedance state. This means that they can provide a substantial amount of current to other circuits. Atmega pins can sorce (provide positive current) or sink (provide negative current) up to 40 mA (milliamps) of current to other devices/ circuits. This makes them useful for powering LED's but useless for connecting to sensors. Restore May 28, 2007, at 01: 20 PM by Paul Badger Changed lines 3- 6 from: Constants are predefined variables in the system. They are used to make the programs easier to read. We classify constants in groups. Defining Logical levels to: Constants are predefined variables in the Arduino language. They are used to make the programs easier to read. We classify constants in groups. Defining Logical levels (Boolean Constants) Changed lines 9- 12 from: HI GH is representing the programming equivalent to 5 Volts. When reading the value at a digital pin if we get 3 Volts or more the microprocessor will understad it as HI GH. This constant represents the integer number 1 , and also the truth level TRUE. LOW is representing the programming equivalen to 0 Volts. When reading the value at a digital pin if we get 2 Volts or less the microprocessor will understand it as LOW . This constant represents the integer number 0 , and also the truth level FALSE. to:
- 511. HI GH is representing the programming equivalent to 5 Volts. When reading the value at a digital pin if we get 3 Volts or more the microprocessor will understad it as HI GH. This constant is also represented the integer number 1 , and also the truth level TRUE. LOW is representing the programming equivalent to 0 volts. When reading the value at a digital pin, if we get 2 volts or less, the microprocessor will understand it as LOW . This constant if also represented by the integer number 0 , and also the truth level FALSE. Changed lines 15- 16 from: Digital pins can be used either as I NPUT or OUTPUT. These values represent precisely what their meaning stands for. to: Digital pins can be used either as I NPUT or OUTPUT. These values drastically change the electrical behavior of the pins. Pins Configured as I nputs Arduino (Atmega) pins configured as inputs are said to be in a high- impedance state. One way of explaining this is that input pins make extremely small demands on the circuit that they are sampling, say equivalent to a series resistor of 100 Megohms in front of the pin. This makes them useful for reading a sensor, but not powering an LED. Pins Configured as Outputs Pins configured as outputs are said to be in a low- impedance state. This means that they can provide a substantial amount of current to other circuits. Atmega pins can sorce (provide positive current) or sink (provide negative current) up to 40 mA (milliamps) of current to other devices/ circuits. This makes them useful for powering LED's but useless for connecting to sensors. See also pinMode() I nteger Constants boolean Restore May 26, 2007, at 07: 43 PM by Paul Badger Changed lines 1- 2 from: Constants to: constants Restore April 16, 2007, at 09: 33 AM by Paul Badger Deleted lines 16- 17: Reference Home Restore March 24, 2006, at 05: 40 PM by J eff Gray Changed lines 1- 2 from: Constants to: Constants Restore J anuary 12, 2006, at 05: 48 PM by 82.186.237.10 Changed lines 15- 18 from: Digital pins can be used either as I NPUT or OUTPUT. These values represent precisely what their meaning stands for. to: Digital pins can be used either as I NPUT or OUTPUT. These values represent precisely what their meaning stands for.
- 512. Reference Home Restore December 03, 2005, at 01: 10 PM by 213.140.6.103 Added lines 1- 15: Constants Constants are predefined variables in the system. They are used to make the programs easier to read. We classify constants in groups. Defining Logical levels When reading or writing to a digital pin there are only two possible values a pin can take/ be- set- to: HI GH and LOW . HI GH is representing the programming equivalent to 5 Volts. When reading the value at a digital pin if we get 3 Volts or more the microprocessor will understad it as HI GH. This constant represents the integer number 1 , and also the truth level TRUE. LOW is representing the programming equivalen to 0 Volts. When reading the value at a digital pin if we get 2 Volts or less the microprocessor will understand it as LOW . This constant represents the integer number 0 , and also the truth level FALSE. Defining Digital Pins Digital pins can be used either as I NPUT or OUTPUT. These values represent precisely what their meaning stands for. Restore Edit Page | Page History | Printable View | All Recent Site Changes
- 513. Arduino : Reference / Constants Reference Language (extended) | Libraries | Comparison | Board constants Constants are predefined variables in the Arduino language. They are used to make the programs easier to read. We classify constants in groups. Defining Logical Levels, true and false (Boolean Constants) There are two constants used to represent truth and falsity in the Arduino language: true, and false. false false is the easier of the two to define. false is defined as 0 (zero). true true is often said to be defined as 1, which is correct, but true has a wider definition. Any integer which is nonzero is TRUE, in a Boolean sense. So - 1, 2 and -200 are all defined as true, too, in a Boolean sense. Note that the true and false constants are typed in lowercase unlike HI GH, LOW, I NPUT, & OUTPUT. Defining Pin Levels, HI GH and LOW When reading or writing to a digital pin there are only two possible values a pin can take/ be-set-to: HI GH and LOW . HI GH The meaning of HI GH (in reference to a pin) is somewhat different depending on whether a pin is set to an I NPUT or OUTPUT. When a pin is configured as an I NPUT with pinMode, and read with digitalRead, the microcontroller will report HI GH if a voltage of 3 volts or more is present at the pin. When a pin is configured to OUTPUT with pinMode, and set to HI GH with digitalWrite, the pin is at 5 volts. I n this state it can source current, e.g. light an LED that is connected through a series resistor to ground, or to another pin configured as an output, and set to LOW. LOW The meaning of LOW also has a different meaning depending on whether a pin is set to I NPUT or OUTPUT. When a pin is configured as an I NPUT with pinMode, and read with digitalRead, the microcontroller will report LOW if a voltage of 2 volts or less is present at the pin. When a pin is configured to OUTPUT with pinMode, and set to LOW with digitalWrite, the pin is at 0 volts. I n this state it can sink current, i.e. light an LED that is connected through a series resistor to, +5 volts, or to another pin configured as an output, and set to HI GH. Defining Digital Pins, I NPUT and OUTPUT Digital pins can be used either as I NPUT or OUTPUT. Changing a pin from I NPUT TO OUTPUT with pinMode() drastically changes the electrical behavior of the pin. Pins Configured as I nputs Arduino (Atmega) pins configured as I NPUT with pinMode() are said to be in a high- impedance state. One way of
- 514. explaining this is that pins configured as I NPUT make extremely small demands on the circuit that they are sampling, say equivalent to a series resistor of 100 Megohms in front of the pin. This makes them useful for reading a sensor, but not powering an LED. Pins Configured as Outputs Pins configured as OUTPUT with pinMode() are said to be in a low-impedance state. This means that they can provide a substantial amount of current to other circuits. Atmega pins can source (provide positive current) or sink (provide negative current) up to 40 mA (milliamps) of current to other devices/ circuits. This makes them useful for powering LED's but useless for reading sensors. Pins configured as outputs can also be damaged or destroyed if short circuited to either ground or 5 volt power rails. The amount of current provided by an Atmega pin is also not enough to power most relays or motors, and some interface circuitry will be required. See also pinMode() I nteger Constants boolean variables Reference Home Corrections, suggestions, and new documentation should be posted to the Forum. The text of the Arduino reference is licensed under a Creative Commons Attribution-ShareAlike 3.0 License . Code samples in the reference are released into the public domain. (Printable View of http://www.arduino.cc/en/Reference/Constants)
- 515. Arduino Buy | Download | Getting Started | Learning | Reference | Hardware | FAQ Login to Arduino Username: Password: Keep me logged in: ✔ Login Edit Page | Page History | Printable View | All Recent Site Changes search Blog » | Forum » | Playground »
- 516. Arduino Buy | Download | Getting Started | Learning | Reference | Hardware | FAQ search Blog » | Forum » | Playground » Reference.IntegerConstants History Hide minor edits - Show changes to markup March 17, 2008, at 11: 21 AM by Paul Badger Changed lines 52- 53 from: By default, an integer constant is treated as an int with the attendant limitations in values. To specify an integer constant with another data type, follow it with: : to: By default, an integer constant is treated as an int with the attendant limitations in values. To specify an integer constant with another data type, follow it with: Restore February 13, 2008, at 10: 41 AM by David A. Mellis Changed lines 3- 5 from: I nteger constants are numbers used directly in a sketch, like 123. Normally, these numbers are treated as base 10 (decimal) integers, but special notation (formatters) may be used to enter numbers in other bases. to: I nteger constants are numbers used directly in a sketch, like 123. By default, these numbers are treated as int 's but you can change this with the U and L modifiers (see below). Normally, integer constants are treated as base 10 (decimal) integers, but special notation (formatters) may be used to enter numbers in other bases. Changed lines 52- 53 from: An integer constant may be followed by: to: By default, an integer constant is treated as an int with the attendant limitations in values. To specify an integer constant with another data type, follow it with: : Restore November 23, 2007, at 05: 06 PM by Paul Badger Changed lines 3- 5 from: I nteger constants are the numbers you type directly into your sketch, like 123. Normally, these numbers are treated as base 10 (decimal) integers, but you can use special notation (formatters) to enter numbers in other bases. to: I nteger constants are numbers used directly in a sketch, like 123. Normally, these numbers are treated as base 10 (decimal) integers, but special notation (formatters) may be used to enter numbers in other bases. Restore J uly 17, 2007, at 01: 26 PM by David A. Mellis Changed lines 50- 51 from: I n the C language, an integer constant may be followed by: to: An integer constant may be followed by:
- 517. Restore J uly 17, 2007, at 01: 25 PM by David A. Mellis - hex digits can be lowercase too Changed line 16 from: 16 (hexadecimal) 0x7B leading 0x characters 0- 9, A- F valid to: 16 (hexadecimal) 0x7B leading 0x characters 0- 9, A- F, a- f valid Restore J uly 17, 2007, at 07: 34 AM by Paul Badger Changed lines 7- 8 from: Base Example Formatter Comment to: Base Example Formatter Comment Changed lines 11- 16 from: 2 (binary) B1111011 capital 'B' only works with 8 bit values characters 0-1 valid 8 (octal) 0173 leading zero characters 0- 7 valid 16 (hexadecimal) 0x7B leading 0x characters 0- 9, A- F valid to: 2 (binary) B1111011 capital 'B' only works with 8 bit values characters 0-1 valid 8 (octal) 0173 leading zero characters 0- 7 valid 16 (hexadecimal) 0x7B leading 0x characters 0- 9, A- F valid Restore J uly 17, 2007, at 07: 33 AM by Paul Badger Changed lines 7- 8 from: Base Example Formatter Comment to: Base Example Formatter Comment Changed lines 11- 16 from: 2 (binary) B1111011 capital 'B' (only works with 8 bit values) characters 0-1 valid 8 (octal) 0173 leading zero characters 0- 7 valid 16 (hexadecimal) 0x7B leading 0x characters 0- 9, A- F valid to: 2 (binary) B1111011 capital 'B' only works with 8 bit values characters 0-1 valid 8 (octal) 0173 leading zero characters 0- 7 valid 16 (hexadecimal) 0x7B leading 0x characters 0- 9, A- F valid Restore J uly 17, 2007, at 07: 33 AM by Paul Badger Changed lines 12- 13 from: to: characters 0-1 valid
- 518. Restore J uly 17, 2007, at 07: 30 AM by Paul Badger Changed lines 51- 53 from: a 'u' or 'U' to force the constant into an unsigned data format, like 33u a 'l' or 'L' to indicate a long constant, like 100000L a 'ul' or 'UL' to indicate an unsigned long constant, like 32767ul to: a 'u' or 'U' to force the constant into an unsigned data format. Example: 33u a 'l' or 'L' to force the constant into a long data format. Example: 100000L a 'ul' or 'UL' to force the constant into an unsigned long constant. Example: 32767ul Restore J uly 17, 2007, at 07: 28 AM by Paul Badger Changed line 51 from: a 'u' or 'U' to indicate an unsigned constant, like 33u to: a 'u' or 'U' to force the constant into an unsigned data format, like 33u Restore J uly 17, 2007, at 07: 24 AM by Paul Badger Changed line 38 from: You can generate a hard- to- find bug by unintentionally including a leading zero before a constant and having the compiler unintentionally interpret your contstant as octal to: You can generate a hard- to- find bug by (unintentionally) including a leading zero before a constant and having the compiler unintentionally interpret your constant as octal Restore J uly 17, 2007, at 07: 23 AM by Paul Badger Added line 55: Restore J uly 17, 2007, at 07: 23 AM by Paul Badger Changed line 54 from: to: Restore J uly 17, 2007, at 07: 22 AM by Paul Badger Changed lines 54- 55 from: to: Restore J uly 17, 2007, at 07: 22 AM by Paul Badger Changed lines 54- 57 from: to: Restore J uly 17, 2007, at 07: 21 AM by Paul Badger Changed line 23 from:
- 519. to: Restore J une 09, 2007, at 08: 09 PM by Paul Badger Changed line 60 from: #Define to: #define Restore J une 09, 2007, at 08: 08 PM by Paul Badger Added line 60: #Define Restore May 28, 2007, at 10: 19 PM by David A. Mellis - fixing typo 2 - > 10 in decimal example Changed lines 21- 22 from: Example: 101 == 101 decimal ((1 * 2^2) + (0 * 2^1) + 1) to: Example: 101 == 101 decimal ((1 * 10^2) + (0 * 10^1) + 1) Restore May 28, 2007, at 02: 01 PM by Paul Badger Changed line 59 from: Constants to: constants Restore May 28, 2007, at 02: 00 PM by Paul Badger Changed line 52 from: a 'l' or 'L' to indicate a long constant, like 100000l to: a 'l' or 'L' to indicate a long constant, like 100000L Restore May 28, 2007, at 01: 08 PM by Paul Badger Added line 62: unsigned int Changed lines 64- 65 from: to: unsigned long Restore May 28, 2007, at 01: 07 PM by Paul Badger Added line 52: a 'l' or 'L' to indicate a long constant, like 100000l Restore May 28, 2007, at 01: 05 PM by Paul Badger Added lines 47- 56: U & L formatters
- 520. I n the C language, an integer constant may be followed by: a 'u' or 'U' to indicate an unsigned constant, like 33u a 'ul' or 'UL' to indicate an unsigned long constant, like 32767ul Restore May 28, 2007, at 01: 03 PM by Paul Badger Deleted line 23: Restore May 28, 2007, at 01: 02 PM by Paul Badger Added line 22: Restore May 28, 2007, at 01: 01 PM by Paul Badger Changed lines 22- 23 from: to: Restore May 28, 2007, at 01: 01 PM by Paul Badger Changed lines 5- 6 from: to: Changed lines 22- 24 from: to: Restore May 28, 2007, at 12: 58 PM by Paul Badger Changed lines 8- 9 from: Base Example Formatter Comment to: Base Example Formatter Comment Changed lines 12- 16 from: 2 (binary) B1111011 capital 'B' (only works with 8 bit values) 8 (octal) 0173 leading zero 16 (hexadecimal) 0x7B leading 0x to: 2 (binary) B1111011 capital 'B' (only works with 8 bit values) 8 (octal) 0173 leading zero characters 0- 7 valid 16 (hexadecimal) 0x7B leading 0x characters 0- 9, A- F valid Restore May 28, 2007, at 12: 56 PM by Paul Badger Changed lines 8- 16 from: Base Example Comment 10 (decimal) 123 2 (binary) B1111011 (only works with 1 to 8 bit values)
- 521. 8 (octal) 0173 16 (hexadecimal) 0x7B to: Base Example Formatter Comment 10 (decimal) 123 none 2 (binary) B1111011 capital 'B' (only works with 8 bit values) 8 (octal) 0173 leading zero 16 (hexadecimal) 0x7B leading 0x Restore May 28, 2007, at 12: 46 PM by Paul Badger Changed line 40 from: You can generate a hard- to- find bug by unintentionally including a leading zero before a constant and having the compiler interpreting your constant unintentionally interpreted as octal to: You can generate a hard- to- find bug by unintentionally including a leading zero before a constant and having the compiler unintentionally interpret your contstant as octal Restore May 28, 2007, at 12: 45 PM by Paul Badger Changed lines 39- 40 from: One can generate a hard- to- find bug by unintentionally including a leading zero before a constant and having the compiler interpreting your constant (unwantedly) as octal to: Warning You can generate a hard- to- find bug by unintentionally including a leading zero before a constant and having the compiler interpreting your constant unintentionally interpreted as octal Restore April 29, 2007, at 05: 08 AM by David A. Mellis Changed lines 10- 16 from: 10 (decimal) 123 default format - cannot start with 0 (zero) 2 (binary) B1111011 use capital B only (not C++ 0b), only works on bytes 8 (octal) 0173 start constant with zero (0) 16 (hexadecimal) 0x7B start with zero - x (0x) to: 10 (decimal) 123 2 (binary) B1111011 (only works with 1 to 8 bit values) 8 (octal) 0173 16 (hexadecimal) 0x7B Restore April 29, 2007, at 05: 07 AM by David A. Mellis - don't confuse things with extraneous information. Deleted lines 4- 6: So why would one want to enter numbers in another base? Often it is convenient to enter numbers in binary form if they are being used to set port variables . This often corresponds to setting one pin HI GH and another LOW, for example. Numbers are sometimes entered in hexidecimal to save characters in entering larger numbers. This is something that comes with practice to programmers but is often confusing to beginners.
- 522. Restore April 25, 2007, at 10: 55 PM by Paul Badger Restore April 25, 2007, at 10: 54 PM by Paul Badger Changed line 7 from: Numbers are sometimes entered in hexidecimal to save characters in entering larger numbers. This is something that comes with practice to programmers but is often confusing to beginning programmers. to: Numbers are sometimes entered in hexidecimal to save characters in entering larger numbers. This is something that comes with practice to programmers but is often confusing to beginners. Restore April 25, 2007, at 10: 52 PM by Paul Badger Added line 46: Restore April 25, 2007, at 10: 51 PM by Paul Badger Changed lines 10- 11 from: [@ to: [@ Restore April 25, 2007, at 10: 50 PM by Paul Badger Changed lines 8- 10 from: to: Restore April 25, 2007, at 10: 50 PM by Paul Badger Changed lines 3- 4 from: I nteger constants are the numbers you type directly into your sketch, like 123. Normally, these numbers are treated as base 10 (decimal) integers, but you can use special notation (formatters) to enter numbers in other bases. See the following table for details. to: I nteger constants are the numbers you type directly into your sketch, like 123. Normally, these numbers are treated as base 10 (decimal) integers, but you can use special notation (formatters) to enter numbers in other bases. So why would one want to enter numbers in another base? Often it is convenient to enter numbers in binary form if they are being used to set port variables . This often corresponds to setting one pin HI GH and another LOW, for example. Numbers are sometimes entered in hexidecimal to save characters in entering larger numbers. This is something that comes with practice to programmers but is often confusing to beginning programmers. Restore April 25, 2007, at 10: 43 PM by Paul Badger Changed lines 26- 27 from: Example: B101 == 5 decimal. a to: Example: B101 == 5 decimal ((1 * 2^2) + (0 * 2^1) + 1) Restore April 25, 2007, at 10: 42 PM by Paul Badger Changed lines 26- 27 from: Example: B101 == 5 decimal. to:
- 523. Example: B101 == 5 decimal. a Restore April 25, 2007, at 10: 41 PM by Paul Badger Changed lines 36- 37 from: Example: 0101 == 65 decimal ((1 * 8^2) + (0 * 8^1) + 1) to: Example: 0101 == 65 decimal ((1 * 8^2) + (0 * 8^1) + 1) Restore April 25, 2007, at 10: 34 PM by Paul Badger Changed line 20 from: Example: 101 == 101 decimal ((1 * 2^2) + (0 * 2^1) + 1) to: Example: 101 == 101 decimal ((1 * 2^2) + (0 * 2^1) + 1) Restore April 25, 2007, at 10: 34 PM by Paul Badger Restore April 25, 2007, at 10: 29 PM by Paul Badger Changed line 20 from: Example: 101 == 101 decimal ((1 * 2^2) + (0 * 2^1) + 1) to: Example: 101 == 101 decimal ((1 * 2^2) + (0 * 2^1) + 1) Restore April 25, 2007, at 10: 27 PM by Paul Badger Changed line 20 from: Example: 101 == 101 decimal ((1 * 2^2) + (0 * 2^1) + 1) to: Example: 101 == 101 decimal ((1 * 2^2) + (0 * 2^1) + 1) Changed lines 36- 37 from: Example: 0101 == 65 decimal ((1 * 8^2) + (0 * 8^1) + 1) to: Example: 0101 == 65 decimal ((1 * 8^2) + (0 * 8^1) + 1) Restore April 25, 2007, at 10: 26 PM by Paul Badger Changed line 20 from: Example: 101 == 101 decimal ((1 * 2^2) + (0 * 2^1) + 1) to: Example: 101 == 101 decimal ((1 * 2^2) + (0 * 2^1) + 1) Changed lines 36- 37 from: Example: 0101 == 65 decimal ((1 * 8^2) + (0 * 8^1) + 1) to: Example: 0101 == 65 decimal ((1 * 8^2) + (0 * 8^1) + 1) Changed line 43 from: Example: 0x101 == 257 decimal ((1 * 16^2) + (0 * 16^1) + 1)
- 524. to: Example: 0x101 == 257 decimal ((1 * 16^2) + (0 * 16^1) + 1) Restore April 25, 2007, at 10: 25 PM by Paul Badger Changed line 20 from: Example: 101 == 101 decimal to: Example: 101 == 101 decimal ((1 * 2^2) + (0 * 2^1) + 1) Changed lines 36- 37 from: Example: 0101 == 65 decimal (1 * 8^2) + (0 * 8^1) + 1 to: Example: 0101 == 65 decimal ((1 * 8^2) + (0 * 8^1) + 1) Added line 40: Changed lines 43- 45 from: Example: 0x101 == 257 decimal (1 * 16^2) + (0 * 16^1) + 1 to: Example: 0x101 == 257 decimal ((1 * 16^2) + (0 * 16^1) + 1) Added line 47: Constants Restore April 25, 2007, at 10: 22 PM by Paul Badger Added line 23: Restore April 25, 2007, at 10: 18 PM by Paul Badger Changed lines 21- 23 from: to: Changed lines 37- 38 from: to: One can generate a hard- to- find bug by unintentionally including a leading zero before a constant and having the compiler interpreting your constant (unwantedly) as octal Changed lines 43- 47 from: To decode a two- digit hex value into decimal multiply the most significant (left- most) digit by 16 and add the right digit. Example to: Restore April 25, 2007, at 10: 14 PM by Paul Badger Changed lines 31- 33 from: to: Restore
- 525. April 25, 2007, at 10: 13 PM by Paul Badger Changed lines 31- 33 from: to: Restore April 25, 2007, at 10: 13 PM by Paul Badger Changed lines 31- 33 from: to: Restore April 25, 2007, at 10: 11 PM by Paul Badger Changed lines 28- 33 from: to: The binary formatter only works on bytes (8 bits) between 0 (B0) and 255 (B11111111). I f it's convenient to input an int (16 bits) in binary form you can do it a two- step procedure such as this: myInt = (B11001100 * 256) + B10101010; // B11001100 is the high byte Changed lines 36- 45 from: Example: 0101 == 65 decimal Notice that in hexadecimal, valid characters are 0 through 9 and A through F; A has the value 10, B is 11, up to F, which is 15. To decode a two- digit hex value into decimal multiply the most significant (left- most) digit by 16 and add the right digit. The binary formatter only works on bytes (8 bits) between 0 (B0) and 255 (B11111111). I f it's convenient to input an int (16 bits) in binary form you can do it a two- step procedure such as this: myInt = (B11001100 * 256) + B10101010; // B11001100 is the high byte to: Example: 0101 == 65 decimal (1 * 8^2) + (0 * 8^1) + 1 Hexadecimal (or hex) is base sixteen. Valid characters are 0 through 9 and letters A through F; A has the value 10, B is 11, up to F, which is 15. Example: 0x101 == 257 decimal (1 * 16^2) + (0 * 16^1) + 1 To decode a two- digit hex value into decimal multiply the most significant (left- most) digit by 16 and add the right digit. Restore April 25, 2007, at 10: 02 PM by Paul Badger Changed lines 18- 20 from: Decimal is base 10, this is the common- sense math with which you are aquainted. Example: 101 == 101 decimal to: Decimal is base 10, this is the common- sense math with which you are aquainted. Example: 101 == 101 decimal Added line 28: Added lines 33- 34: Restore April 25, 2007, at 10: 01 PM by Paul Badger Changed lines 18- 24 from: Binary is base two. Only characters 0 and 1 are valid. Example: B101 == 5 decimal.
- 526. to: Decimal is base 10, this is the common- sense math with which you are aquainted. Example: 101 == 101 decimal Binary is base two. Only characters 0 and 1 are valid. Example: B101 == 5 decimal. Octal is base eight. Only characters 0 through 7 are valid. Example: 0101 == 65 decimal Restore April 25, 2007, at 09: 54 PM by Paul Badger Added lines 18- 20: Restore April 25, 2007, at 09: 54 PM by Paul Badger Added lines 17- 21: Binary is base two. Only characters 0 and 1 are valid. Example: B101 == 5 decimal. Restore April 25, 2007, at 09: 51 PM by Paul Badger Changed lines 6- 14 from: Base Example Comment 10 (decimal) 123 default format - cannot start with 0 (zero) 2 (binary) B1111011 8 (octal) 0173 16 (hexadecimal) 0x7B to: Base Example Comment 10 (decimal) 123 default format - cannot start with 0 (zero) 2 (binary) B1111011 use capital B only (not C++ 0b), only works on bytes 8 (octal) 0173 start constant with zero (0) 16 (hexadecimal) 0x7B start with zero - x (0x) Restore April 25, 2007, at 09: 48 PM by Paul Badger Changed lines 3- 4 from: I nteger constants are the numbers you type directly into your sketch, like 123. Normally, these numbers are treated as base 10 (decimal) integers, but you can use special notation to enter numbers in other bases. See the following table for details. to: I nteger constants are the numbers you type directly into your sketch, like 123. Normally, these numbers are treated as base 10 (decimal) integers, but you can use special notation (formatters) to enter numbers in other bases. See the following table for details. Changed lines 6- 7 from: Base Example 10 (decimal) 123 to: Base Example Comment 10 (decimal) 123 default format - cannot start with 0 (zero) Added line 11: Added line 13:
- 527. Changed lines 15- 16 from: @] to: @] Restore April 24, 2007, at 06: 19 PM by Paul Badger Changed lines 13- 14 from: Notice that in hexadecimal, valid characters are 0 through 9 and A through F; A has the value 10, B is 11, up to F, which is 15. to: Notice that in hexadecimal, valid characters are 0 through 9 and A through F; A has the value 10, B is 11, up to F, which is 15. To decode a two- digit hex value into decimal multiply the most significant (left- most) digit by 16 and add the right digit. Deleted lines 18- 20: Deleted line 25: Reference Home Restore April 24, 2007, at 06: 17 PM by Paul Badger Changed lines 17- 21 from: @@myI nt = (B11001100 * 256) + B10101010; / / first constant is the high byte to: myInt = (B11001100 * 256) + B10101010; // B11001100 is the high byte Restore April 24, 2007, at 06: 16 PM by Paul Badger Changed lines 13- 16 from: Notice that in hexadecimal, some digits can be letters; A has the value 10, B is 11, up to F, which is 15. The binary constants only work between 0 (B0) and 255 (B11111111). The others can be negative and bigger. to: Notice that in hexadecimal, valid characters are 0 through 9 and A through F; A has the value 10, B is 11, up to F, which is 15. The binary formatter only works on bytes (8 bits) between 0 (B0) and 255 (B11111111). I f it's convenient to input an int (16 bits) in binary form you can do it a two- step procedure such as this: @@myI nt = (B11001100 * 256) + B10101010; / / first constant is the high byte Restore December 02, 2006, at 09: 30 AM by David A. Mellis Added lines 15- 16: The binary constants only work between 0 (B0) and 255 (B11111111). The others can be negative and bigger. Restore December 02, 2006, at 09: 28 AM by David A. Mellis Changed lines 6- 10 from: Name Base Prefix Example Value Decimal 10 none 123 123 Binary 2 B B1111011 123 Octal 8 0 0173 123 Hexadecimal 16 0x 0x7B 123 to: Base Example 10 (decimal) 123 2 (binary) B1111011 8 (octal) 0173 16 (hexadecimal) 0x7B Restore December 02, 2006, at 09: 26 AM by David A. Mellis Added lines 1- 22:
- 528. Integer Constants I nteger constants are the numbers you type directly into your sketch, like 123. Normally, these numbers are treated as base 10 (decimal) integers, but you can use special notation to enter numbers in other bases. See the following table for details. Name Decimal Hexadecimal Prefix none Example 123 Value 123 2 8 Binary Octal Base 10 B 0 B1111011 0173 123 123 16 0x 0x7B 123 Notice that in hexadecimal, some digits can be letters; A has the value 10, B is 11, up to F, which is 15. Example See also byte int long Reference Home Restore Edit Page | Page History | Printable View | All Recent Site Changes
- 529. Arduino : Reference / I nteger Constants Reference Language (extended) | Libraries | Comparison | Board I nteger Constants I nteger constants are numbers used directly in a sketch, like 123. By default, these numbers are treated as int's but you can change this with the U and L modifiers (see below). Normally, integer constants are treated as base 10 (decimal) integers, but special notation (formatters) may be used to enter numbers in other bases. Base Example 10 (decimal) 2 (binary) 123 B1111011 Formatter Comment none capital 'B' only works with 8 bit values characters 0-1 valid 8 (octal) 0173 leading zero characters 0-7 valid 16 (hexadecimal) 0x7B leading 0x characters 0-9, A-F, a-f valid Decimal is base 10, this is the common- sense math with which you are aquainted. Example: 101 == 101 decimal ((1 * 10^2) + (0 * 10^1) + 1) Binary is base two. Only characters 0 and 1 are valid. Example: B101 == 5 decimal ((1 * 2^2) + (0 * 2^1) + 1) The binary formatter only works on bytes (8 bits) between 0 (B0) and 255 (B11111111). I f it's convenient to input an int (16 bits) in binary form you can do it a two-step procedure such as this: myInt = (B11001100 * 256) + B10101010; // B11001100 is the high byte Octal is base eight. Only characters 0 through 7 are valid. Example: 0101 == 65 decimal ((1 * 8^2) + (0 * 8^1) + 1) Warning You can generate a hard-to- find bug by (unintentionally) including a leading zero before a constant and having the compiler unintentionally interpret your constant as octal Hexadecimal (or hex) is base sixteen. Valid characters are 0 through 9 and letters A through F; A has the value 10, B is 11, up to F, which is 15. Example: 0x101 == 257 decimal ((1 * 16^2) + (0 * 16^1) + 1) U & L formatters By default, an integer constant is treated as an int with the attendant limitations in values. To specify an integer constant with another data type, follow it with: a 'u' or 'U' to force the constant into an unsigned data format. Example: 33u a 'l' or 'L' to force the constant into a long data format. Example: 100000L
- 530. a 'ul' or 'UL' to force the constant into an unsigned long constant. Example: 32767ul See also constants #define byte int unsigned int long unsigned long Reference Home Corrections, suggestions, and new documentation should be posted to the Forum. The text of the Arduino reference is licensed under a Creative Commons Attribution-ShareAlike 3.0 License . Code samples in the reference are released into the public domain. (Printable View of http://www.arduino.cc/en/Reference/IntegerConstants)
- 531. Arduino Buy | Download | Getting Started | Learning | Reference | Hardware | FAQ Login to Arduino Username: Password: Keep me logged in: ✔ Login Edit Page | Page History | Printable View | All Recent Site Changes search Blog » | Forum » | Playground »
- 532. Arduino Buy | Download | Getting Started | Learning | Reference | Hardware | FAQ search Blog » | Forum » | Playground » Reference.BooleanVariables History Hide minor edits - Show changes to markup J anuary 21, 2008, at 10: 58 AM by David A. Mellis - boolean variables actually take up a full byte of memory. Changed lines 3- 4 from: boolean variables are one- bit variables that can only hold two values, true and false. to: boolean variables are hold one of two values, true and false. Restore August 27, 2007, at 11: 11 AM by David A. Mellis - should only use true and false for booleans (not 0 and 1 or HI GH and LOW) Changed lines 3- 4 from: boolean variables are one- bit variables that can only hold two values, 1 and 0. Note that the constants HI GH and LOW are also defined as 1 and 0, as are the variables TRUE and FALSE. to: boolean variables are one- bit variables that can only hold two values, true and false. Changed lines 10- 11 from: boolean running; to: boolean running = false; Restore August 23, 2007, at 02: 21 PM by Paul Badger Changed lines 8- 9 from: int switchPin = 13; / / momentary switch on 13 to: int switchPin = 13; / / momentary switch on 13, other side connected to ground Restore May 28, 2007, at 10: 28 PM by David A. Mellis Changed lines 7- 9 from: 1. define LEDpin 5 / / LED on pin 5 2. define switchPin 13 / / momentary switch on 13 [@ to: int LEDpin = 5; / / LED on pin 5 int switchPin = 13; / / momentary switch on 13 Changed lines 11- 12 from: int x; to: Restore
- 533. May 28, 2007, at 10: 28 PM by David A. Mellis - cleaning up example code Changed lines 22- 26 from: if (digitalRead(switchPin) == LOW){ delay(100); running = !running; // switch is pressed - pullup keeps pin high normally // delay to debounce switch // toggle running variable digitalWrite(LEDpin, running) // indicate via LED / / more statements to: if (digitalRead(switchPin) == LOW) { // switch is pressed - pullup keeps pin high normally delay(100); // delay to debounce switch running = !running; digitalWrite(LEDpin, running) // toggle running variable // indicate via LED } Restore May 28, 2007, at 10: 27 PM by David A. Mellis - we shouldn't encourage people to assign non- boolean values to boolean variables. Changed line 5 from: All of the following will set the variable running to a TRUE condition: to: Example Added lines 7- 9: 1. define LEDpin 5 / / LED on pin 5 2. define switchPin 13 / / momentary switch on 13 [@ Deleted lines 10- 23: running = 35; / / any non- zero number is TRUE running = - 7; / / negative numbers are non- zero (TRUE) running = HI GH; / / HI GH is defined as 1 running = TRUE; / / TRUE defined as 1 running = .125 / / non- zero float defined as TRUE Example [@ 1. define LEDpin 5 / / LED on pin 5 2. define switchPin 13 / / momentary switch on 13 [@ boolean running; Changed lines 13- 16 from: void setup(){ pinMode( LEDpin, OUTPUT); pinMode(switchPin, I NPUT); digitalWrite(switchPin, HI GH); / / turn on pullup resistor to: void setup() { pinMode(LEDpin, OUTPUT); pinMode(switchPin, INPUT); digitalWrite(switchPin, HIGH); // turn on pullup resistor Changed lines 20- 24 from: void loop(){ if (digitalRead(switchPin) == 0){ / / switch is pressed - pullup keeps pin high normally delay(100); / / delay to debounce switch running = !running; / / toggle running variable digitalWrite(LEDpin, running) / / indicate via LED to: void loop() { if (digitalRead(switchPin) == LOW){ // switch is pressed - pullup keeps pin high normally
- 534. delay(100); // delay to debounce switch running = !running; digitalWrite(LEDpin, running) // toggle running variable // indicate via LED Restore May 28, 2007, at 01: 53 PM by Paul Badger Changed line 10 from: running = - 7; / / negative numbers are non- zero to: running = - 7; / / negative numbers are non- zero (TRUE) Added line 12: running = TRUE; / / TRUE defined as 1 Restore May 28, 2007, at 01: 52 PM by Paul Badger Changed line 26 from: digitalWrite(switchPin, HI GH); / / turn on pullup resistors to: digitalWrite(switchPin, HI GH); / / turn on pullup resistor Changed line 30 from: if (digitalRead(switchPin) == 0){ / / switch is pressed - pullups keep pin high normally to: if (digitalRead(switchPin) == 0){ / / switch is pressed - pullup keeps pin high normally Restore May 28, 2007, at 01: 51 PM by Paul Badger Changed line 30 from: if (digitalRead(switchPin) == 0){ / / switch is pressed to: if (digitalRead(switchPin) == 0){ / / switch is pressed - pullups keep pin high normally Restore May 28, 2007, at 01: 50 PM by Paul Badger Changed line 31 from: delay(100); / / delay to debounce switch to: delay(100); / / delay to debounce switch Restore May 28, 2007, at 01: 49 PM by Paul Badger Changed line 39 from: Constants to: constants Restore May 28, 2007, at 01: 48 PM by Paul Badger Changed line 40 from: boolean operators ? to: boolean operators
- 535. Restore May 28, 2007, at 01: 47 PM by Paul Badger Changed lines 3- 6 from: boolean variables are one- bit variables that can only hold two values, 1 and 0. Note that the constants HI GH and LOW are also defined as 1 and 0, as are the variables TRUE and FALSE. Example to: boolean variables are one- bit variables that can only hold two values, 1 and 0. Note that the constants HI GH and LOW are also defined as 1 and 0, as are the variables TRUE and FALSE. All of the following will set the variable running to a TRUE condition: Deleted lines 6- 8: 1. define LEDpin 5 / / LED on pin 5 2. define switchPin 13 / / momentary switch on 13 [@ Changed lines 8- 20 from: boolean LEDon; to: running = 35; / / any non- zero number is TRUE running = - 7; / / negative numbers are non- zero running = HI GH; / / HI GH is defined as 1 running = .125 / / non- zero float defined as TRUE Example [@ 1. define LEDpin 5 / / LED on pin 5 2. define switchPin 13 / / momentary switch on 13 [@ boolean running; Changed line 31 from: delay(50); / / delay to debounce switch to: delay(100); / / delay to debounce switch Changed line 34 from: to: / / more statements Changed lines 36- 40 from: @] to: @] See also Constants boolean operators ? Restore May 28, 2007, at 01: 37 PM by Paul Badger Changed line 28 from: ]
- 536. to: @] Restore May 28, 2007, at 01: 37 PM by Paul Badger Changed line 7 from: to: [@ Added line 28: ] Restore May 28, 2007, at 01: 36 PM by Paul Badger Added lines 1- 27: boolean variables boolean variables are one- bit variables that can only hold two values, 1 and 0. Note that the constants HI GH and LOW are also defined as 1 and 0, as are the variables TRUE and FALSE. Example 1. define LEDpin 5 / / LED on pin 5 2. define switchPin 13 / / momentary switch on 13 [@ boolean running; boolean LEDon; int x; void setup(){ pinMode( LEDpin, OUTPUT); pinMode(switchPin, I NPUT); digitalWrite(switchPin, HI GH); / / turn on pullup resistors } void loop(){ if (digitalRead(switchPin) == 0){ / / switch is pressed delay(50); / / delay to debounce switch running = !running; / / toggle running variable digitalWrite(LEDpin, running) / / indicate via LED } Restore Edit Page | Page History | Printable View | All Recent Site Changes
- 537. Arduino : Reference / Boolean Variables Reference Language (extended) | Libraries | Comparison | Board boolean variables boolean variables are hold one of two values, true and false. Example int LEDpin = 5; int switchPin = 13; // LED on pin 5 // momentary switch on 13, other side connected to ground boolean running = false; void setup() { pinMode(LEDpin, OUTPUT); pinMode(switchPin, INPUT); digitalWrite(switchPin, HIGH); } // turn on pullup resistor void loop() { if (digitalRead(switchPin) == LOW) { // switch is pressed - pullup keeps pin high normally delay(100); // delay to debounce switch running = !running; // toggle running variable digitalWrite(LEDpin, running) // indicate via LED } } See also constants boolean operators Reference Home Corrections, suggestions, and new documentation should be posted to the Forum. The text of the Arduino reference is licensed under a Creative Commons Attribution-ShareAlike 3.0 License . Code samples in the reference are released into the public domain. (Printable View of http://www.arduino.cc/en/Reference/BooleanVariables)
- 538. Arduino Buy | Download | Getting Started | Learning | Reference | Hardware | FAQ Login to Arduino Username: Password: Keep me logged in: ✔ Login Edit Page | Page History | Printable View | All Recent Site Changes search Blog » | Forum » | Playground »
- 539. Arduino Buy | Download | Getting Started | Learning | Reference | Hardware | FAQ search Blog » | Forum » | Playground » Reference.Char History Hide minor edits - Show changes to markup September 08, 2007, at 09: 22 AM by Paul Badger Changed lines 7- 8 from: Characters are stored as numbers however. You can see the specific encoding in the ASCI I chart. I t is also possible to do arithmetic on characters, in which the ASCI I value of the character is used (e.g. 'A' + 1 has the value 66, since the ASCI I value of the capital letter A is 65). See Serial.println reference for more on how characters are translated to numbers. to: Characters are stored as numbers however. You can see the specific encoding in the ASCI I chart. This means that it is possible to do arithmetic on characters, in which the ASCI I value of the character is used (e.g. 'A' + 1 has the value 66, since the ASCI I value of the capital letter A is 65). See Serial.println reference for more on how characters are translated to numbers. Restore J uly 19, 2007, at 06: 11 PM by David A. Mellis Changed lines 9- 10 from: The char datatype is a signed type, meaning that it encodes numbers from - 127 to 127. For an unsigned, one- byte (8 bit) data type, use the byte data type. to: The char datatype is a signed type, meaning that it encodes numbers from - 128 to 127. For an unsigned, one- byte (8 bit) data type, use the byte data type. Restore J uly 18, 2007, at 08: 12 PM by Paul Badger Changed lines 9- 10 from: The char datatype is a signed type, meaning that it encodes numbers from - 127 to 127. For an unsigned, one- byte (8 bit) data type, use the byte data type. to: The char datatype is a signed type, meaning that it encodes numbers from - 127 to 127. For an unsigned, one- byte (8 bit) data type, use the byte data type. Restore J uly 18, 2007, at 08: 12 PM by Paul Badger Changed lines 9- 10 from: The char datatype is a signed type, meaning that it encodes numbers from - 127 to 127. For an unsigned, one- byte (8 bit) data type, use the !!!byte data type. to: The char datatype is a signed type, meaning that it encodes numbers from - 127 to 127. For an unsigned, one- byte (8 bit) data type, use the byte data type. Restore J uly 18, 2007, at 08: 11 PM by Paul Badger Restore J uly 18, 2007, at 08: 09 PM by Paul Badger Changed lines 9- 10 from:
- 540. The char datatype is a signed type, meaning that it encodes numbers from - 127 to 127. to: The char datatype is a signed type, meaning that it encodes numbers from - 127 to 127. For an unsigned, one- byte (8 bit) data type, use the !!!byte data type. Restore J uly 18, 2007, at 08: 05 PM by Paul Badger Changed line 20 from: Println? to: Serial.println Restore J uly 18, 2007, at 08: 04 PM by Paul Badger Changed lines 7- 8 from: Characters are stored as numbers however. You can see the specific encoding in the ASCI I chart. I t is also possible to do arithmetic on characters, in which the ASCI I value of the character is used (e.g. 'A' + 1 has the value 66, since the ASCI I value of the capital letter A is 65). See Serial.println? reference for more on how characters are translated to numbers. to: Characters are stored as numbers however. You can see the specific encoding in the ASCI I chart. I t is also possible to do arithmetic on characters, in which the ASCI I value of the character is used (e.g. 'A' + 1 has the value 66, since the ASCI I value of the capital letter A is 65). See Serial.println reference for more on how characters are translated to numbers. Restore J uly 18, 2007, at 08: 03 PM by Paul Badger Changed lines 7- 8 from: Characters are stored as numbers however. You can see the specific encoding in the ASCI I chart. I t is also possible to do arithmetic on characters, in which the ASCI I value of the character is used (e.g. 'A' + 1 has the value 66, since the ASCI I value of the capital letter A is 65). See Serial.println? reference for more on how characters are translated to numbers. to: Characters are stored as numbers however. You can see the specific encoding in the ASCI I chart. I t is also possible to do arithmetic on characters, in which the ASCI I value of the character is used (e.g. 'A' + 1 has the value 66, since the ASCI I value of the capital letter A is 65). See Serial.println? reference for more on how characters are translated to numbers. Restore J uly 18, 2007, at 08: 03 PM by Paul Badger Restore J uly 18, 2007, at 08: 02 PM by Paul Badger Changed lines 7- 8 from: Characters are stored as numbers however. You can see the specific encoding in the ASCI I chart. I t is aslo possible to do arithmetic on characters, in which the ASCI I value of the character is used (e.g. 'A' + 1 has the value 66, since the ASCI I value of the capital letter A is 65). See the [[Serial.println example for more on how this works. to: Characters are stored as numbers however. You can see the specific encoding in the ASCI I chart. I t is also possible to do arithmetic on characters, in which the ASCI I value of the character is used (e.g. 'A' + 1 has the value 66, since the ASCI I value of the capital letter A is 65). See Serial.println? reference for more on how characters are translated to numbers. The char datatype is a signed type, meaning that it encodes numbers from - 127 to 127. Added line 20: Println? Restore J uly 18, 2007, at 07: 48 PM by Paul Badger Changed lines 7- 10 from: Characters are stored as numbers however. You can see the specific encoding in the ASCI I chart. I t is aslo possible to do
- 541. arithmetic on characters, in which the ASCI I value of the character is used (e.g. myChar ='A' + 1 has the value 66, since the ASCI I value of the capital letter A is 65). See the Serial.prinln example for more on how this works. to: Characters are stored as numbers however. You can see the specific encoding in the ASCI I chart. I t is aslo possible to do arithmetic on characters, in which the ASCI I value of the character is used (e.g. 'A' + 1 has the value 66, since the ASCI I value of the capital letter A is 65). See the [[Serial.println example for more on how this works. Restore J uly 18, 2007, at 07: 47 PM by Paul Badger Changed lines 7- 8 from: Characters are stored as numbers however. You can see the specific encoding in the ASCI I chart You can also do arithmetic on characters, in which the ASCI I value of the character is used (e.g. 'A' + 1 has the value 66, since the ASCI I value of the capital letter A is 65). to: Characters are stored as numbers however. You can see the specific encoding in the ASCI I chart. I t is aslo possible to do arithmetic on characters, in which the ASCI I value of the character is used (e.g. myChar ='A' + 1 has the value 66, since the ASCI I value of the capital letter A is 65). Restore J uly 18, 2007, at 07: 44 PM by Paul Badger Changed lines 5- 6 from: A data type that takes up 1 byte of memory that stores a character value. Character literals are written in single quotes, like this: 'A' (for multiple characters - strings - use double quotes: "ABC"). You can do arithmetic on characters, in which the ASCI I value of the character is used (e.g. 'A' + 1 has the value 66, since the ASCI I value of the capital letter A is 65). to: A data type that takes up 1 byte of memory that stores a character value. Character literals are written in single quotes, like this: 'A' (for multiple characters - strings - use double quotes: "ABC"). Characters are stored as numbers however. You can see the specific encoding in the ASCI I chart You can also do arithmetic on characters, in which the ASCI I value of the character is used (e.g. 'A' + 1 has the value 66, since the ASCI I value of the capital letter A is 65). See the Serial.prinln example for more on how this works. Restore May 28, 2007, at 10: 21 PM by David A. Mellis Deleted lines 6- 8: Synonymous with type byte in Arduino. Restore May 28, 2007, at 08: 06 PM by Paul Badger Changed lines 7- 9 from: to: Synonymous with type byte in Arduino. Changed lines 12- 26 from: char sign = ' '; Parameters char var = 'x'; var - your char variable name x - the value (single character) you assign to that variable... ie: a, 4, #, etc. to: char myChar = 'A';
- 542. See also byte int array Restore May 28, 2007, at 08: 03 PM by Paul Badger Added line 7: Restore April 16, 2007, at 10: 57 AM by Paul Badger Changed lines 1- 2 from: char to: char Deleted lines 21- 24: Reference Home Restore August 01, 2006, at 06: 55 AM by David A. Mellis Changed lines 5- 6 from: A data type that takes up 1 byte of memory that stores a character value. to: A data type that takes up 1 byte of memory that stores a character value. Character literals are written in single quotes, like this: 'A' (for multiple characters - strings - use double quotes: "ABC"). You can do arithmetic on characters, in which the ASCI I value of the character is used (e.g. 'A' + 1 has the value 66, since the ASCI I value of the capital letter A is 65). Changed lines 13- 14 from: char var = 'val'; to: char var = 'x'; Changed lines 16- 22 from: val - the value (single character) you assign to that variable... ie: a, 4, #, etc. to: x - the value (single character) you assign to that variable... ie: a, 4, #, etc. Restore March 31, 2006, at 02: 54 PM by J eff Gray Changed lines 1- 2 from: int to: char Restore March 31, 2006, at 02: 53 PM by J eff Gray Changed lines 1- 8 from: to: int Description A data type that takes up 1 byte of memory that stores a character value.
- 543. Example Changed lines 11- 27 from: A data type that takes up 1 byte of memory that stores a character value. to: Parameters char var = 'val'; var - your char variable name val - the value (single character) you assign to that variable... ie: a, 4, #, etc. Reference Home Restore February 14, 2006, at 09: 54 AM by Erica Calogero Added lines 1- 3: char sign = ' '; Restore February 14, 2006, at 09: 53 AM by Erica Calogero Added line 1: A data type that takes up 1 byte of memory that stores a character value. Restore Edit Page | Page History | Printable View | All Recent Site Changes
- 544. Arduino : Reference / Char Reference Language (extended) | Libraries | Comparison | Board char Description A data type that takes up 1 byte of memory that stores a character value. Character literals are written in single quotes, like this: 'A' (for multiple characters - strings - use double quotes: "ABC"). Characters are stored as numbers however. You can see the specific encoding in the ASCI I chart. This means that it is possible to do arithmetic on characters, in which the ASCI I value of the character is used (e.g. 'A' + 1 has the value 66, since the ASCI I value of the capital letter A is 65). See Serial.println reference for more on how characters are translated to numbers. The char datatype is a signed type, meaning that it encodes numbers from -128 to 127. For an unsigned, one-byte (8 bit) data type, use the byte data type. Example char myChar = 'A'; See also byte int array Serial.println Reference Home Corrections, suggestions, and new documentation should be posted to the Forum. The text of the Arduino reference is licensed under a Creative Commons Attribution-ShareAlike 3.0 License . Code samples in the reference are released into the public domain. (Printable View of http://www.arduino.cc/en/Reference/Char)
- 545. Arduino Buy | Download | Getting Started | Learning | Reference | Hardware | FAQ Login to Arduino Username: Password: Keep me logged in: ✔ Login Edit Page | Page History | Printable View | All Recent Site Changes search Blog » | Forum » | Playground »
- 546. Arduino Buy | Download | Getting Started | Learning | Reference | Hardware | FAQ search Blog » | Forum » | Playground » Reference.Byte History Hide minor edits - Show changes to markup March 09, 2008, at 07: 35 PM by David A. Mellis Changed lines 18- 21 from: Serial.println to: Restore J uly 18, 2007, at 08: 17 PM by Paul Badger Changed lines 18- 21 from: Serial.printLn? to: Serial.println Restore J uly 18, 2007, at 08: 16 PM by Paul Badger Restore J uly 18, 2007, at 08: 15 PM by Paul Badger Changed lines 5- 6 from: Bytes store an 8- bit number, from 0 to 255. to: Bytes store an 8- bit number, from 0 to 255. byte is an unsigned data type, meaning that it does not store negative numbers. Changed lines 18- 21 from: to: Serial.printLn? Restore May 28, 2007, at 10: 21 PM by David A. Mellis - bytes are actually unsigned chars, not chars (but saying so seems confusing) Changed lines 5- 6 from: Bytes store an 8- bit number, from 0 to 255. Synonymous with type char. to: Bytes store an 8- bit number, from 0 to 255. Restore May 28, 2007, at 08: 04 PM by Paul Badger Changed lines 5- 6 from: Bytes store an 8- bit number, from 0 to 255. to: Bytes store an 8- bit number, from 0 to 255. Synonymous with type char. Restore April 16, 2007, at 05: 10 PM by David A. Mellis Added line 14:
- 547. unsigned int Added line 16: unsigned long Restore April 16, 2007, at 11: 11 AM by Paul Badger Changed line 19 from: Reference Home to: Restore April 15, 2007, at 03: 25 PM by Paul Badger Changed lines 9- 10 from: byte b = B10010; to: byte b = B10010; // "B" is the binary formatter (18 decimal) Restore December 02, 2006, at 10: 17 AM by David A. Mellis Changed lines 15- 17 from: to: integer constants Restore December 02, 2006, at 10: 16 AM by David A. Mellis Changed lines 11- 14 from: to: See also int long Restore December 02, 2006, at 10: 16 AM by David A. Mellis Changed lines 5- 6 from: Bytes store an 8- bit number, from 0 to 255 (2^8 - 1). to: Bytes store an 8- bit number, from 0 to 255. Restore December 02, 2006, at 10: 15 AM by David A. Mellis Added lines 1- 15: byte Description Bytes store an 8- bit number, from 0 to 255 (2^8 - 1). Example byte b = B10010; Reference Home Restore Edit Page | Page History | Printable View | All Recent Site Changes
- 549. Arduino : Reference / Byte Reference Language (extended) | Libraries | Comparison | Board byte Description Bytes store an 8-bit number, from 0 to 255. byte is an unsigned data type, meaning that it does not store negative numbers. Example byte b = B10010; // "B" is the binary formatter (18 decimal) See also int unsigned int long unsigned long integer constants Reference Home Corrections, suggestions, and new documentation should be posted to the Forum. The text of the Arduino reference is licensed under a Creative Commons Attribution-ShareAlike 3.0 License . Code samples in the reference are released into the public domain. (Printable View of http://www.arduino.cc/en/Reference/Byte)
- 550. Arduino Buy | Download | Getting Started | Learning | Reference | Hardware | FAQ Login to Arduino Username: Password: Keep me logged in: ✔ Login Edit Page | Page History | Printable View | All Recent Site Changes search Blog » | Forum » | Playground »
- 551. Arduino Buy | Download | Getting Started | Learning | Reference | Hardware | FAQ search Blog » | Forum » | Playground » Reference.Int History Hide minor edits - Show changes to markup May 26, 2007, at 08: 52 PM by Paul Badger Changed lines 25- 26 from: When variables are made to exceed their maximum capacity they "roll over" back to their minimum capacitiy, note that this happens in both directions to: When variables are made to exceed their maximum capacity they "roll over" back to their minimum capacitiy, note that this happens in both directions. Restore May 26, 2007, at 08: 44 PM by Paul Badger Changed lines 9- 11 from: The Arduino takes care of dealing with negative numbers for you, so that arithmetic operations work transparently in the expected manner. There can be an unexpected complication in dealing with the bitshift right operator (>>) however. to: The Arduino takes care of dealing with negative numbers for you, so that arithmetic operations work transparently in the expected manner. There can be an unexpected complication in dealing with the bitshift right operator (>>) however. Restore April 29, 2007, at 05: 15 AM by David A. Mellis Deleted line 41: >> Restore April 24, 2007, at 06: 02 PM by Paul Badger Changed line 42 from: >>? to: >> Restore April 24, 2007, at 06: 01 PM by Paul Badger Changed lines 7- 11 from: I nt's store negative numbers with a technique called 2's complement math. The highest bit, sometimes refered to as the "sign" bit is flags the number as a negative number. The rest of the bits are inverted and 1 is added. The Arduino takes care of dealing with negative numbers for you, so that arithmetic operations work trasparently in the expected manner. There can be an additional complication in dealing with the bitshift right operator (>>) however. to: I nt's store negative numbers with a technique called 2's complement math. The highest bit, sometimes refered to as the "sign" bit, flags the number as a negative number. The rest of the bits are inverted and 1 is added. The Arduino takes care of dealing with negative numbers for you, so that arithmetic operations work transparently in the expected manner. There can be an unexpected complication in dealing with the bitshift right operator (>>) however.
- 552. Restore April 24, 2007, at 06: 00 PM by Paul Badger Changed lines 9- 11 from: The Arduino takes care of dealing with negative numbers for you so arithmetic operations work in the expected manner. There can be an additional complication in dealing with the bitshift right operator (>>) however. to: The Arduino takes care of dealing with negative numbers for you, so that arithmetic operations work trasparently in the expected manner. There can be an additional complication in dealing with the bitshift right operator (>>) however. Restore April 24, 2007, at 05: 59 PM by Paul Badger Changed lines 5- 6 from: I ntegers are your primary datatype for number storage, and store a 2 byte value. This gives you a range of - 32,768 to 32,767 (minimum value of - 2^15 and a maximum value of (2^15) - 1). to: I ntegers are your primary datatype for number storage, and store a 2 byte value. This yields a range of - 32,768 to 32,767 (minimum value of - 2^15 and a maximum value of (2^15) - 1). I nt's store negative numbers with a technique called 2's complement math. The highest bit, sometimes refered to as the "sign" bit is flags the number as a negative number. The rest of the bits are inverted and 1 is added. The Arduino takes care of dealing with negative numbers for you so arithmetic operations work in the expected manner. There can be an additional complication in dealing with the bitshift right operator (>>) however. Changed line 42 from: to: >>? Restore April 16, 2007, at 05: 08 PM by David A. Mellis Changed line 22 from: [@ unsigned int x to: [@ int x Restore April 16, 2007, at 05: 08 PM by David A. Mellis Changed lines 11- 12 from: Parameters to: Syntax Restore April 16, 2007, at 05: 07 PM by David A. Mellis Changed lines 31- 32 from: to: See Also byte unsigned int long unsigned long Restore April 16, 2007, at 02: 25 PM by Paul Badger Changed lines 18- 20 from:
- 553. to: Coding Tip When variables are made to exceed their maximum capacity they "roll over" back to their minimum capacitiy, note that this happens in both directions unsigned int x x = -32,768; x = x - 1; // x now contains 32,767 - rolls over in neg. direction x = 32,767; x = x + 1; // x now contains -32,768 - rolls over Restore April 16, 2007, at 11: 12 AM by Paul Badger Deleted lines 20- 22: Reference Home Restore April 16, 2007, at 01: 08 AM by Paul Badger Changed lines 5- 6 from: I ntegers are your primary datatype for number storage, and store a 2 byte value. This gives you a range of - 32,768 to 32,767 (minimum value of - 2^15 and a maximum value of 2^15 - 1). to: I ntegers are your primary datatype for number storage, and store a 2 byte value. This gives you a range of - 32,768 to 32,767 (minimum value of - 2^15 and a maximum value of (2^15) - 1). Restore April 16, 2006, at 03: 27 PM by David A. Mellis Changed lines 5- 6 from: I ntegers are your primary datatype for number storage, and store a 2 byte value. This gives you a range of - 32,768 to 32,768 (minimum value of - 2^15 and a maximum value of 2^15 - 1). to: I ntegers are your primary datatype for number storage, and store a 2 byte value. This gives you a range of - 32,768 to 32,767 (minimum value of - 2^15 and a maximum value of 2^15 - 1). Restore April 16, 2006, at 03: 27 PM by David A. Mellis - int is 2 bytes, not 4. Changed lines 5- 6 from: I ntegers are your primary datatype for number storage, and store a 4 byte value. This gives you a range of - 2147483647 to 2147483647 (minimum value of - 2^31 and a maximum value of 2^31 - 1). to: I ntegers are your primary datatype for number storage, and store a 2 byte value. This gives you a range of - 32,768 to 32,768 (minimum value of - 2^15 and a maximum value of 2^15 - 1). Restore March 24, 2006, at 01: 55 PM by J eff Gray Changed lines 5- 6 from: I ntegers are your primary form of number storage, and store a 4 byte value. This gives you a range of - 2147483647 to 2147483647 (minimum value of - 2^31 and a maximum value of 2^31 - 1). to: I ntegers are your primary datatype for number storage, and store a 4 byte value. This gives you a range of - 2147483647 to 2147483647 (minimum value of - 2^31 and a maximum value of 2^31 - 1). Restore March 24, 2006, at 01: 55 PM by J eff Gray -
- 554. Changed lines 13- 14 from: int var = val; to: int var = val; Restore March 24, 2006, at 01: 55 PM by J eff Gray Changed lines 13- 14 from: [int var = val; ] to: int var = val; Restore March 24, 2006, at 01: 55 PM by J eff Gray Changed lines 13- 14 from: int var = val; to: [int var = val; ] Restore March 24, 2006, at 01: 54 PM by J eff Gray Added lines 1- 8: int Description I ntegers are your primary form of number storage, and store a 4 byte value. This gives you a range of - 2147483647 to 2147483647 (minimum value of - 2^31 and a maximum value of 2^31 - 1). Example Changed lines 11- 23 from: A data type that is 4 bytes long with a minimum value of - 2^31 and a maximum value of 2^31 - 1. Needed before declaring a new variable in your code. to: Parameters int var = val; var - your int variable name val - the value you assign to that variable Reference Home Restore February 14, 2006, at 09: 58 AM by Erica Calogero Added lines 1- 3: int ledPin = 13; A data type that is 4 bytes long with a minimum value of - 2^31 and a maximum value of 2^31 - 1. Needed before declaring a new variable in your code. Restore Edit Page | Page History | Printable View | All Recent Site Changes
- 555. Arduino : Reference / I nt Reference Language (extended) | Libraries | Comparison | Board int Description I ntegers are your primary datatype for number storage, and store a 2 byte value. This yields a range of -32,768 to 32,767 (minimum value of - 2^15 and a maximum value of (2^15) - 1). I nt's store negative numbers with a technique called 2's complement math. The highest bit, sometimes refered to as the "sign" bit, flags the number as a negative number. The rest of the bits are inverted and 1 is added. The Arduino takes care of dealing with negative numbers for you, so that arithmetic operations work transparently in the expected manner. There can be an unexpected complication in dealing with the bitshift right operator (>>) however. Example int ledPin = 13; Syntax int var = val; var - your int variable name val - the value you assign to that variable Coding Tip When variables are made to exceed their maximum capacity they "roll over" back to their minimum capacitiy, note that this happens in both directions. int x x = -32,768; x = x - 1; // x now contains 32,767 - rolls over in neg. direction x = 32,767; x = x + 1; // x now contains -32,768 - rolls over See Also byte unsigned int long unsigned long Reference Home Corrections, suggestions, and new documentation should be posted to the Forum. The text of the Arduino reference is licensed under a Creative Commons Attribution-ShareAlike 3.0 License . Code samples in the reference are released into the public domain. (Printable View of http://www.arduino.cc/en/Reference/Int)
- 556. Arduino Buy | Download | Getting Started | Learning | Reference | Hardware | FAQ Login to Arduino Username: Password: Keep me logged in: ✔ Login Edit Page | Page History | Printable View | All Recent Site Changes search Blog » | Forum » | Playground »
- 557. Arduino Buy | Download | Getting Started | Learning | Reference | Hardware | FAQ search Blog » | Forum » | Playground » Reference.UnsignedInt History Hide minor edits - Show changes to markup May 05, 2008, at 11: 51 PM by David A. Mellis Changed lines 12- 13 from: int ledPin = 13; to: unsigned int ledPin = 13; Changed lines 16- 18 from: int var = val; var - your int variable name to: unsigned int var = val; var - your unsigned int variable name Restore May 26, 2007, at 08: 51 PM by Paul Badger Changed lines 8- 9 from: The difference lies in the way the highest bit, sometimes refered to as the "sign" bit is interpreted. I n the Arduino int type (which is signed), if the high bit is a "1", the number is interpreted as a negative number, and the other 15 bits are interpreted with 2's complement math. to: The difference between unsigned ints and (signed) ints, lies in the way the highest bit, sometimes refered to as the "sign" bit, is interpreted. I n the Arduino int type (which is signed), if the high bit is a "1", the number is interpreted as a negative number, and the other 15 bits are interpreted with 2's complement math. Restore May 17, 2007, at 10: 41 PM by Paul Badger Changed lines 8- 9 from: The difference lies in the way the highest bit, sometimes refered to as the "sign" bit is interpreted. I n the Arduino int type, which is signed, if the high bit is a "1", the number is interpreted as a negative number and the other 15 bits are interpreted with 2's complement math. to: The difference lies in the way the highest bit, sometimes refered to as the "sign" bit is interpreted. I n the Arduino int type (which is signed), if the high bit is a "1", the number is interpreted as a negative number, and the other 15 bits are interpreted with 2's complement math. Restore May 17, 2007, at 10: 39 PM by Paul Badger Changed lines 8- 9 from: The difference lies in the way the highest bit, sometimes refered to as the "sign" bit is interpreted. I n the Arduino int type, if the high bit is a "1", the number is interpreted as a negative number and the other 15 bits are interpreted with 2's complement math.
- 558. to: The difference lies in the way the highest bit, sometimes refered to as the "sign" bit is interpreted. I n the Arduino int type, which is signed, if the high bit is a "1", the number is interpreted as a negative number and the other 15 bits are interpreted with 2's complement math. Restore April 24, 2007, at 05: 52 PM by Paul Badger Restore April 16, 2007, at 05: 09 PM by David A. Mellis - not sure that unsigned int x = 65536; does what you expect (constant are signed ints, I believe) Deleted lines 28- 29: x = 65535; Restore April 16, 2007, at 05: 08 PM by David A. Mellis Changed lines 14- 15 from: Parameters to: Syntax Changed lines 34- 36 from: to: See Also byte int long unsigned long Restore April 16, 2007, at 02: 23 PM by Paul Badger Added lines 24- 25: When variables are made to exceed their maximum capacity they "roll over" back to their minimum capacitiy, note that this happens in both directions Restore April 16, 2007, at 11: 35 AM by Paul Badger Changed lines 24- 28 from: [@unsigned int x x = 0; x = x - 1; / / x now contains 65535 - rolls over x = 65535; x = x + 1; / / x now contains 0 to: [@ unsigned int x x = 0; x = x - 1; // x now contains 65535 - rolls over in neg direction x = 65535; x = x + 1; // x now contains 0 - rolls over Restore April 16, 2007, at 11: 33 AM by Paul Badger Changed lines 29- 33 from: to: @] Restore April 16, 2007, at 11: 32 AM by Paul Badger Added lines 1- 33:
- 559. unsigned int Description Unsigned ints (unsigned integers) are the same as ints in that they store a 2 byte value. I nstead of storing negative numbers however they only store positive values, yielding a useful range of 0 to 65,535 (2^16) - 1). The difference lies in the way the highest bit, sometimes refered to as the "sign" bit is interpreted. I n the Arduino int type, if the high bit is a "1", the number is interpreted as a negative number and the other 15 bits are interpreted with 2's complement math. Example int ledPin = 13; Parameters int var = val; var - your int variable name val - the value you assign to that variable Coding Tip [@unsigned int x x = 0; x = x - 1; / / x now contains 65535 - rolls over x = 65535; x = x + 1; / / x now contains 0 Restore Edit Page | Page History | Printable View | All Recent Site Changes
- 560. Arduino : Reference / Unsigned I nt Reference Language (extended) | Libraries | Comparison | Board unsigned int Description Unsigned ints (unsigned integers) are the same as ints in that they store a 2 byte value. I nstead of storing negative numbers however they only store positive values, yielding a useful range of 0 to 65,535 (2^16) - 1). The difference between unsigned ints and (signed) ints, lies in the way the highest bit, sometimes refered to as the "sign" bit, is interpreted. I n the Arduino int type (which is signed), if the high bit is a "1", the number is interpreted as a negative number, and the other 15 bits are interpreted with 2's complement math. Example unsigned int ledPin = 13; Syntax unsigned int var = val; var - your unsigned int variable name val - the value you assign to that variable Coding Tip When variables are made to exceed their maximum capacity they "roll over" back to their minimum capacitiy, note that this happens in both directions unsigned int x x = 0; x = x - 1; x = x + 1; // x now contains 65535 - rolls over in neg direction // x now contains 0 - rolls over See Also byte int long unsigned long Reference Home Corrections, suggestions, and new documentation should be posted to the Forum. The text of the Arduino reference is licensed under a Creative Commons Attribution-ShareAlike 3.0 License . Code samples in the reference are released into the public domain. (Printable View of http://www.arduino.cc/en/Reference/UnsignedInt)
- 561. Arduino Buy | Download | Getting Started | Learning | Reference | Hardware | FAQ Login to Arduino Username: Password: Keep me logged in: ✔ Login Edit Page | Page History | Printable View | All Recent Site Changes search Blog » | Forum » | Playground »
- 562. Arduino Buy | Download | Getting Started | Learning | Reference | Hardware | FAQ search Blog » | Forum » | Playground » Reference.Long History Hide minor edits - Show changes to markup April 16, 2007, at 05: 06 PM by David A. Mellis Changed lines 24- 25 from: Parameters to: Syntax Changed lines 36- 37 from: to: unsigned int unsigned long Restore April 16, 2007, at 04: 17 PM by Paul Badger Deleted lines 37- 38: Reference Home Restore April 16, 2007, at 01: 53 AM by David A. Mellis Changed line 34 from: [[byte] to: byte Restore April 16, 2007, at 01: 53 AM by David A. Mellis Changed lines 32- 35 from: to: See Also [[byte] int Restore April 16, 2007, at 01: 07 AM by Paul Badger Changed lines 5- 6 from: Long variables are extended size varialbes for number storage, and store 32 bits, from - 2,147,483,648 to 2,147,483,647. to: Long variables are extended size variables for number storage, and store 32 bits (4 bytes), from - 2,147,483,648 to 2,147,483,647. Restore March 31, 2006, at 02: 58 PM by J eff Gray Changed line 28 from:
- 563. var - your int variable name to: var - your long variable name Restore March 31, 2006, at 02: 50 PM by J eff Gray Changed lines 1- 2 from: long to: long Restore March 31, 2006, at 02: 50 PM by J eff Gray Deleted line 23: Restore March 31, 2006, at 02: 49 PM by J eff Gray Changed lines 9- 10 from: int ledPin = 13; to: long time; void setup(){ Serial.begin(9600); } void loop(){ Serial.print("Time: "); time = millis(); //prints time since program started Serial.println(time); // wait a second so as not to send massive amounts of data delay(1000); } Restore March 31, 2006, at 02: 48 PM by J eff Gray Changed lines 1- 2 from: 32 bits, from - 2,147,483,648 to 2,147,483,647. to: long Description Long variables are extended size varialbes for number storage, and store 32 bits, from - 2,147,483,648 to 2,147,483,647. Example int ledPin = 13; Parameters long var = val; var - your int variable name val - the value you assign to that variable Reference Home Restore March 31, 2006, at 02: 46 PM by J eff Gray -
- 564. Added lines 1- 2: 32 bits, from - 2,147,483,648 to 2,147,483,647. Restore Edit Page | Page History | Printable View | All Recent Site Changes
- 565. Arduino : Reference / Long Reference Language (extended) | Libraries | Comparison | Board long Description Long variables are extended size variables for number storage, and store 32 bits (4 bytes), from -2,147,483,648 to 2,147,483,647. Example long time; void setup(){ Serial.begin(9600); } void loop(){ Serial.print("Time: "); time = millis(); //prints time since program started Serial.println(time); // wait a second so as not to send massive amounts of data delay(1000); } Syntax long var = val; var - your long variable name val - the value you assign to that variable See Also byte int unsigned int unsigned long Reference Home Corrections, suggestions, and new documentation should be posted to the Forum. The text of the Arduino reference is licensed under a Creative Commons Attribution-ShareAlike 3.0 License . Code samples in the reference are released into the public domain. (Printable View of http://www.arduino.cc/en/Reference/Long)
- 566. Arduino Buy | Download | Getting Started | Learning | Reference | Hardware | FAQ Login to Arduino Username: Password: Keep me logged in: ✔ Login Edit Page | Page History | Printable View | All Recent Site Changes search Blog » | Forum » | Playground »
- 567. Arduino Buy | Download | Getting Started | Learning | Reference | Hardware | FAQ search Blog » | Forum » | Playground » Reference.UnsignedLong History Hide minor edits - Show changes to markup J uly 17, 2007, at 01: 22 PM by David A. Mellis Changed lines 10- 11 from: long time; to: unsigned long time; Restore J uly 17, 2007, at 01: 16 PM by David A. Mellis - minor edits Changed lines 5- 6 from: Unsigned long variables are extended size variables for number storage, and store 32 bits (4 bytes). Unlike standard longs unsigned longs won't store negative numbers, making their range from 0 to 4,294,967,295 (2^32) - 1). to: Unsigned long variables are extended size variables for number storage, and store 32 bits (4 bytes). Unlike standard longs unsigned longs won't store negative numbers, making their range from 0 to 4,294,967,295 (2^32 - 1). Changed lines 12- 13 from: void setup(){ to: void setup() { Changed lines 16- 18 from: void loop(){ to: void loop() { Restore April 16, 2007, at 05: 10 PM by David A. Mellis Changed lines 26- 27 from: long var = val; to: unsigned long var = val; Restore April 16, 2007, at 05: 06 PM by David A. Mellis Changed lines 24- 25 from: Parameters to: Syntax Added line 36:
- 568. unsigned int Restore April 16, 2007, at 04: 22 PM by Paul Badger Added lines 1- 38: unsigned long Description Unsigned long variables are extended size variables for number storage, and store 32 bits (4 bytes). Unlike standard longs unsigned longs won't store negative numbers, making their range from 0 to 4,294,967,295 (2^32) - 1). Example long time; void setup(){ Serial.begin(9600); } void loop(){ Serial.print("Time: "); time = millis(); //prints time since program started Serial.println(time); // wait a second so as not to send massive amounts of data delay(1000); } Parameters long var = val; var - your long variable name val - the value you assign to that variable See Also byte int long Restore Edit Page | Page History | Printable View | All Recent Site Changes
- 569. Arduino : Reference / Unsigned Long Reference Language (extended) | Libraries | Comparison | Board unsigned long Description Unsigned long variables are extended size variables for number storage, and store 32 bits (4 bytes). Unlike standard longs unsigned longs won't store negative numbers, making their range from 0 to 4,294,967,295 (2^32 1). Example unsigned long time; void setup() { Serial.begin(9600); } void loop() { Serial.print("Time: "); time = millis(); //prints time since program started Serial.println(time); // wait a second so as not to send massive amounts of data delay(1000); } Syntax unsigned long var = val; var - your long variable name val - the value you assign to that variable See Also byte int unsigned int long Reference Home Corrections, suggestions, and new documentation should be posted to the Forum. The text of the Arduino reference is licensed under a Creative Commons Attribution-ShareAlike 3.0 License . Code samples in the reference are released into the public domain. (Printable View of http://www.arduino.cc/en/Reference/UnsignedLong)
- 570. Arduino Buy | Download | Getting Started | Learning | Reference | Hardware | FAQ Login to Arduino Username: Password: Keep me logged in: ✔ Login Edit Page | Page History | Printable View | All Recent Site Changes search Blog » | Forum » | Playground »
- 571. Arduino Buy | Download | Getting Started | Learning | Reference | Hardware | FAQ search Blog » | Forum » | Playground » Reference.Float History Hide minor edits - Show changes to markup May 28, 2007, at 10: 24 PM by David A. Mellis Changed lines 7- 8 from: Floating point math is much slower than integer math in performing calculations, so should be avoided if, for example, a loop has to run at top speed for a critical timing function. Programmers often go to some lengths to convert floating point calculations to integer math to increase speed. to: Floating point numbers are not exact, and may yield strange results when compared. For example 6.0 / 3.0 may not equal 2.0 . You should instead check that the absolute value of the difference between the numbers is less than some small number. Floating point math is also much slower than integer math in performing calculations, so should be avoided if, for example, a loop has to run at top speed for a critical timing function. Programmers often go to some lengths to convert floating point calculations to integer math to increase speed. Restore May 28, 2007, at 08: 08 PM by Paul Badger Changed line 31 from: y = x / 2; // y now contains 0, integers can't hold fractions to: y = x / 2; // y now contains 0, ints can't hold fractions Restore April 16, 2007, at 05: 05 PM by David A. Mellis Changed lines 17- 18 from: Parameters to: Syntax Restore April 16, 2007, at 11: 38 AM by Paul Badger Changed lines 26- 33 from: int x; int y; float z; x = 1; y = x / 2; / / y now contains 0, integers can't hold fractions z = (float)x / 2.0; / / z now contains .5 (you have to use 2.0, not 2)@] to: int x; int y; float z; x = 1; y = x / 2; // y now contains 0, integers can't hold fractions z = (float)x / 2.0; // z now contains .5 (you have to use 2.0, not 2)@]
- 572. Restore April 16, 2007, at 11: 36 AM by Paul Badger Deleted line 37: Reference Home Restore April 14, 2007, at 03: 14 PM by Paul Badger Changed lines 32- 33 from: z = x / 2.0; / / z now contains .5 (you have to use 2.0, not 2)@] to: z = (float)x / 2.0; / / z now contains .5 (you have to use 2.0, not 2)@] Restore April 14, 2007, at 11: 01 AM by David A. Mellis - correcting float = int / int; to float = int / float; Changed lines 32- 33 from: z = x / 2; / / z now contains .5@] to: z = x / 2.0; / / z now contains .5 (you have to use 2.0, not 2)@] Restore April 14, 2007, at 12: 06 AM by Paul Badger Changed line 9 from: That being said, floating point math is one of the things missing from many beginning microcontroller systems. to: That being said, floating point math is useful for a wide range of physical computing tasks, and is one of the things missing from many beginning microcontroller systems. Changed lines 22- 24 from: val - the value you assign to that variable to: val - the value you assign to that variable Example Code int x; int y; float z; x = 1; y = x / 2; z = x / 2; // y now contains 0, integers can't hold fractions // z now contains .5 Programming Tip Serial.println() truncates floats (throws away the fractions) into integers when sending serial. Multiply by power of ten to preserve resolution. Restore April 13, 2007, at 11: 54 PM by Paul Badger Changed lines 14- 15 from: float myfloat; float sensorCalbrate = 1.117; to: float myfloat; float sensorCalbrate = 1.117;
- 573. Restore April 13, 2007, at 11: 51 PM by Paul Badger Changed lines 7- 9 from: Floats are much slower than integers to perform calculations with, so should be avoided if, for example, a loop has to run at top speed for a critical timing function. to: Floating point math is much slower than integer math in performing calculations, so should be avoided if, for example, a loop has to run at top speed for a critical timing function. Programmers often go to some lengths to convert floating point calculations to integer math to increase speed. That being said, floating point math is one of the things missing from many beginning microcontroller systems. Changed lines 18- 20 from: int var = val; var - your int variable name to: float var = val; var - your float variable name Deleted lines 23- 26: Restore April 13, 2007, at 11: 43 PM by Paul Badger Added lines 1- 26: float Description Datatype for floating- point numbers, a number that has a decimal point. Floating- point numbers are often used to approximate analog and continuous values because they have greater resolution than integers. Floating- point numbers can be as large as 3.4028235E+38 and as low as - 3.4028235E+38. They are stored as 32 bits (4 bytes) of information. Floats are much slower than integers to perform calculations with, so should be avoided if, for example, a loop has to run at top speed for a critical timing function. Examples float myfloat; float sensorCalbrate = 1.117; Parameters int var = val; var - your int variable name val - the value you assign to that variable Reference Home Restore Edit Page | Page History | Printable View | All Recent Site Changes
- 574. Arduino : Reference / Float Reference Language (extended) | Libraries | Comparison | Board float Description Datatype for floating-point numbers, a number that has a decimal point. Floating-point numbers are often used to approximate analog and continuous values because they have greater resolution than integers. Floating-point numbers can be as large as 3.4028235E+38 and as low as -3.4028235E+38. They are stored as 32 bits (4 bytes) of information. Floating point numbers are not exact, and may yield strange results when compared. For example 6.0 / 3.0 may not equal 2.0. You should instead check that the absolute value of the difference between the numbers is less than some small number. Floating point math is also much slower than integer math in performing calculations, so should be avoided if, for example, a loop has to run at top speed for a critical timing function. Programmers often go to some lengths to convert floating point calculations to integer math to increase speed. That being said, floating point math is useful for a wide range of physical computing tasks, and is one of the things missing from many beginning microcontroller systems. Examples float myfloat; float sensorCalbrate = 1.117; Syntax float var = val; var - your float variable name val - the value you assign to that variable Example Code int x; int y; float z; x = 1; y = x / 2; z = (float)x / 2.0; // y now contains 0, ints can't hold fractions // z now contains .5 (you have to use 2.0, not 2) Programming Tip Serial.println() truncates floats (throws away the fractions) into integers when sending serial. Multiply by power of ten to preserve resolution. Reference Home Corrections, suggestions, and new documentation should be posted to the Forum. The text of the Arduino reference is licensed under a Creative Commons Attribution-ShareAlike 3.0 License . Code samples in the reference are released into the public domain. (Printable View of http://www.arduino.cc/en/Reference/Float)
- 575. Arduino Buy | Download | Getting Started | Learning | Reference | Hardware | FAQ Login to Arduino Username: Password: Keep me logged in: ✔ Login Edit Page | Page History | Printable View | All Recent Site Changes search Blog » | Forum » | Playground »
- 576. Arduino Buy | Download | Getting Started | Learning | Reference | Hardware | FAQ search Blog » | Forum » | Playground » Reference.Double History Hide minor edits - Show changes to markup April 09, 2008, at 09: 01 AM by David A. Mellis Changed lines 5- 6 from: Double precision floating point number. Occupies 8 bytes. The maximum value a double can represent is 1.7976931348623157 x 10^308. Yes that's 10 to the 308th power. J ust in case you get your Arduino project a spot as a space shuttle experiment. to: Double precision floating point number. Occupies 4 bytes. Restore April 27, 2007, at 10: 22 PM by Paul Badger Added lines 3- 4: Desciption Restore April 27, 2007, at 10: 16 PM by Paul Badger Changed lines 5- 6 from: See: to: See: Restore April 27, 2007, at 10: 15 PM by Paul Badger Added lines 1- 7: double Double precision floating point number. Occupies 8 bytes. The maximum value a double can represent is 1.7976931348623157 x 10^308. Yes that's 10 to the 308th power. J ust in case you get your Arduino project a spot as a space shuttle experiment. See: Float Restore Edit Page | Page History | Printable View | All Recent Site Changes
- 577. Arduino : Reference / Double Reference Language (extended) | Libraries | Comparison | Board double Desciption Double precision floating point number. Occupies 4 bytes. See: Float Reference Home Corrections, suggestions, and new documentation should be posted to the Forum. The text of the Arduino reference is licensed under a Creative Commons Attribution-ShareAlike 3.0 License . Code samples in the reference are released into the public domain. (Printable View of http://www.arduino.cc/en/Reference/Double)
- 578. Arduino Buy | Download | Getting Started | Learning | Reference | Hardware | FAQ Login to Arduino Username: Password: Keep me logged in: ✔ Login Edit Page | Page History | Printable View | All Recent Site Changes search Blog » | Forum » | Playground »
- 579. Arduino Buy | Download | Getting Started | Learning | Reference | Hardware | FAQ search Blog » | Forum » | Playground » Reference.String History Hide minor edits - Show changes to markup J anuary 10, 2008, at 10: 52 PM by Paul Badger Changed lines 50- 51 from: I t is often convenient when working with large amounts of text, such as a project with an LCD display, to setup an array of strings. Because strings themselves are arrays, this is in actually an example of a two- dimensional array. to: I t is often convenient, when working with large amounts of text, such as a project with an LCD display, to setup an array of strings. Because strings themselves are arrays, this is in actually an example of a two- dimensional array. Restore November 17, 2007, at 11: 14 PM by Paul Badger Restore November 17, 2007, at 11: 11 PM by Paul Badger Changed lines 29- 32 from: Generally, strings are terminated with a null character (ASCI I code 0). This allows function (like Serial.print()) to tell where the end of a string is. Otherwise, they would continue reading subsequent bytes of memory that aren't actually part of the string. This means that your string needs to have space for one more character than the text you want it to contain. That is why Str2 and Str5 need to be eight characters, even though "arduino" is only seven - the last position is automatically filled by a null character. Str4 will be automatically sized to eight characters, one for the extra null. I n Str3, we've explicitly included the null character (written ' 0') ourselves. to: Generally, strings are terminated with a null character (ASCI I code 0). This allows functions (like Serial.print()) to tell where the end of a string is. Otherwise, they would continue reading subsequent bytes of memory that aren't actually part of the string. This means that your string needs to have space for one more character than the text you want it to contain. That is why Str2 and Str5 need to be eight characters, even though "arduino" is only seven - the last position is automatically filled with a null character. Str4 will be automatically sized to eight characters, one for the extra null. I n Str3, we've explicitly included the null character (written ' 0') ourselves. Restore November 05, 2007, at 03: 02 PM by Paul Badger Changed lines 50- 53 from: I t is often convenient when working with large amounts of text, such as a project with an LCD display, to setup an array of strings. Because strings themselves are arrays, this is in actually an expample of a two- dimensional array. I t isn't necessary to understand this construction in detail to use it effectively. The code fragments below illustrate the idea. to: I t is often convenient when working with large amounts of text, such as a project with an LCD display, to setup an array of strings. Because strings themselves are arrays, this is in actually an example of a two- dimensional array. I n the code below, the asterisk after the datatype char "char* " indicates that this is an array of "pointers". All array names are actually pointers, so this is required to make an array of arrays. Pointers are one of the more esoteric parts of C for beginners to understand, but it isn't necessary to understand pointers in detail to use them effectively here. Example
- 580. Restore October 27, 2007, at 09: 58 PM by Paul Badger Changed lines 72- 79 from: array PROGMEM to: array PROGMEM Restore October 27, 2007, at 09: 58 PM by Paul Badger Changed lines 70- 76 from: to: See Also array PROGMEM Restore October 27, 2007, at 09: 50 PM by Paul Badger Changed line 65 from: Serial.print(myStrings[i]); to: Serial.println(myStrings[i]); Restore October 27, 2007, at 09: 36 PM by Paul Badger Restore October 27, 2007, at 09: 29 PM by Paul Badger Changed lines 50- 53 from: I t is often convenient when working with large amounts of text, such as a project with an LCD display, to setup an array of strings. Because strings themselves are arrays, this is in actually a two- dimensional array. I t isn't necessary to understand this contruction in detail to use it effectively. The code fragments below illustrate the idea. to: I t is often convenient when working with large amounts of text, such as a project with an LCD display, to setup an array of strings. Because strings themselves are arrays, this is in actually an expample of a two- dimensional array. I t isn't necessary to understand this construction in detail to use it effectively. The code fragments below illustrate the idea. Restore October 27, 2007, at 09: 26 PM by Paul Badger Deleted line 63: Restore October 27, 2007, at 09: 26 PM by Paul Badger Changed line 56 from: char* myStrings[]={"This is string 1", "This is string 2", "This is string 3",/ / to: char* myStrings[]={"This is string 1", "This is string 2", "This is string 3", Restore October 27, 2007, at 09: 25 PM by Paul Badger Changed lines 56- 59 from: char* myStrings[]={"This is string 1", "This is string 2", "This is string 3", "This is string 4", "This is string 5","This is string 6", }; to:
- 581. char* myStrings[]={"This is string 1", "This is string 2", "This is string 3",/ / "This is string 4", "This is string 5","This is string 6"}; Restore October 27, 2007, at 09: 24 PM by Paul Badger Changed lines 50- 51 from: I t is often useful when working with several strings, such as a project with an LCD display, to setup an array of strings. Because strings themselves are arrays, this is in actually a two- dimensional array. The code fragments below illustrate the idea. to: I t is often convenient when working with large amounts of text, such as a project with an LCD display, to setup an array of strings. Because strings themselves are arrays, this is in actually a two- dimensional array. I t isn't necessary to understand this contruction in detail to use it effectively. The code fragments below illustrate the idea. Changed lines 56- 57 from: char* myStrings[]={"This is string 1", "This is string 2"}; to: char* myStrings[]={"This is string 1", "This is string 2", "This is string 3", "This is string 4", "This is string 5","This is string 6", }; Changed lines 65- 68 from: Serial.print(myStrings[0]); delay(100); Serial.print(myStrings[1]); delay(100); to: for (int i = 0; i < 6; i++){ Serial.print(myStrings[i]); delay(500); } Restore October 27, 2007, at 09: 16 PM by Paul Badger Changed lines 18- 19 from: Possibilities for declaring strings to: Possibilities for declaring strings Changed lines 35- 36 from: Single quotes or double quotes? to: Single quotes or double quotes? Changed lines 39- 40 from: Wrapping long strings to: Wrapping long strings Changed lines 48- 53 from: to: Arrays of strings I t is often useful when working with several strings, such as a project with an LCD display, to setup an array of strings. Because strings themselves are arrays, this is in actually a two- dimensional array. The code fragments below illustrate the idea.
- 582. char* myStrings[]={"This is string 1", "This is string 2"}; void setup(){ Serial.begin(9600); } void loop(){ Serial.print(myStrings[0]); delay(100); Serial.print(myStrings[1]); delay(100); } Restore October 27, 2007, at 09: 09 PM by Paul Badger Changed lines 27- 28 from: Null termination to: Null termination Restore September 27, 2007, at 12: 34 PM by David A. Mellis Changed lines 5- 6 from: Strings in the C programming language are represented as arrays of type char. to: Strings are represented as arrays of type char and are null- terminated. Restore September 27, 2007, at 10: 50 AM by Paul Badger Changed lines 5- 6 from: Strings in the C programming language are represented as arrays of chars. to: Strings in the C programming language are represented as arrays of type char. Restore September 27, 2007, at 10: 47 AM by Paul Badger Changed lines 31- 32 from: This means that your string needs to have space for more character than the text you want it to contain. That is why Str2 and Str5 need to be eight characters, even though "arduino" is only seven - the last position is automatically filled by a null character. Str4 will be automatically sized to eight characters, one for the extra null. I n Str3, we've explicitly included the null character (written ' 0') ourselves. to: This means that your string needs to have space for one more character than the text you want it to contain. That is why Str2 and Str5 need to be eight characters, even though "arduino" is only seven - the last position is automatically filled by a null character. Str4 will be automatically sized to eight characters, one for the extra null. I n Str3, we've explicitly included the null character (written ' 0') ourselves. Restore May 31, 2007, at 09: 30 AM by David A. Mellis Changed line 7 from: String declarations to: Examples Restore
- 583. May 31, 2007, at 09: 29 AM by David A. Mellis - Clarifying the language. Changed lines 5- 6 from: Strings in the C programming language are defined as arrays of type char. to: Strings in the C programming language are represented as arrays of chars. Changed line 12 from: char Str3[8] = {'a', 'r', 'd', 'u', 'i', 'n', 'o','0'}; to: char Str3[8] = {'a', 'r', 'd', 'u', 'i', 'n', 'o', '0'}; Changed lines 23- 24 from: I nitialization is in the form of a string constant in quotation marks, the compiler will size the array to fit the constant and add the extra null, Str4 I nitialize the array with an explicit size, Str5 to: I nitialize with a string constant in quotation marks; the compiler will size the array to fit the string constant and a terminating null character, Str4 I nitialize the array with an explicit size and string constant, Str5 Deleted line 26: Changed lines 29- 32 from: Note the differences between Str2 & Str3, in theory it seems the array of Str1 should be able to be contained with a declaration of 7 elements in the array, since there are only 7 letters in "Arduino". However the Arduino language enforces "null termination" meaning that the last character of an array must be a null (denoted by 0), as in Str2. When declaring a string, you must declare an extra character for this null or the compiler will complain with an error about the initialization string being too long. For the same reasons, Str3 can hold only 14 characters, not 15, as one might assume. to: Generally, strings are terminated with a null character (ASCI I code 0). This allows function (like Serial.print()) to tell where the end of a string is. Otherwise, they would continue reading subsequent bytes of memory that aren't actually part of the string. This means that your string needs to have space for more character than the text you want it to contain. That is why Str2 and Str5 need to be eight characters, even though "arduino" is only seven - the last position is automatically filled by a null character. Str4 will be automatically sized to eight characters, one for the extra null. I n Str3, we've explicitly included the null character (written ' 0') ourselves. Note that it's possible to have a string without a final null character (e.g. if you had specified the length of Str2 as seven instead of eight). This will break most functions that use strings, so you shouldn't do it intentionally. I f you notice something behaving strangely (operating on characters not in the string), however, this could be the problem. Restore May 31, 2007, at 09: 16 AM by David A. Mellis - don't want {} around a multi- line string - it makes it into an array of strings. Changed line 42 from: char myString[] = {"This is the first line" to: char myString[] = "This is the first line" Changed line 44 from: " etcetera"}; to: " etcetera"; Restore
- 584. May 29, 2007, at 02: 16 PM by Paul Badger Changed lines 38- 39 from: to: Wrapping long strings You can wrap long strings like this: char myString[] = {"This is the first line" " this is the second line" " etcetera"}; Restore April 16, 2007, at 11: 03 AM by Paul Badger Changed line 39 from: Reference Home to: Restore April 15, 2007, at 03: 00 PM by Paul Badger Changed lines 21- 27 from: Declare an array of chars (with one extra char)and the compiler will add the required null character Explicitly add the null character I nitialization is in the form of a string constant in quotation marks, the compiler will size the array to fit the constant and add the extra null I nitialize the array with an explicit size I nitialize the array, leaving extra space for a larger string to: Declare an array of chars (with one extra char) and the compiler will add the required null character, as in Str2 Explicitly add the null character, Str3 I nitialization is in the form of a string constant in quotation marks, the compiler will size the array to fit the constant and add the extra null, Str4 I nitialize the array with an explicit size, Str5 I nitialize the array, leaving extra space for a larger string, Str6 Restore April 15, 2007, at 12: 54 PM by Paul Badger Changed line 8 from: All of the following are valid declarations of valid strings. to: All of the following are valid declarations for strings. Changed lines 17- 18 from: Facts about strings to: Restore April 15, 2007, at 12: 53 PM by Paul Badger Changed line 8 from: Strings can be declared in any of the following manners to: All of the following are valid declarations of valid strings. Changed lines 10- 12 from: char Str1[8] = {'a', 'r', 'd', 'u', 'i', 'n', 'o'}; char Str2[8] = {'a', 'r', 'd', 'u', 'i', 'n', 'o','0'}; char Str3[4]; to:
- 585. char Str1[15]; char Str2[8] = {'a', 'r', 'd', 'u', 'i', 'n', 'o'}; char Str3[8] = {'a', 'r', 'd', 'u', 'i', 'n', 'o','0'}; Changed lines 17- 56 from: Null termination Note the differences between Str1 & Str2, in theory it seems the array of Str1 should be able to be contained with a declaration of 7 elements in the array, since there are only 7 letters in "Arduino". However the Arduino language enforces "null termination" meaning that the last character of an array must be a null (denoted by 0), as in Str2. I f you haven't declared an extra character for this null, the compiler will complain with an error about the initialization string being too long. I n the first example the array is initialized with constants of type char, 'a', 'r'. 'd', etc. These constants (letters in this case, but any ASCI I symbols really) are declared by enclosing them in single quotes. I n example four, the initialization of the string is shown with the whole word in quotation marks as in "arduino" Note that in example 4 above, the Example long time; void setup(){ Serial.begin(9600); } void loop(){ Serial.print("Time: "); time = millis(); //prints time since program started Serial.println(time); // wait a second so as not to send massive amounts of data delay(1000); } Parameters long var = val; var - your long variable name val - the value you assign to that variable to: Facts about strings Possibilities for declaring strings Declare an array of chars without initializing it as in Str1 Declare an array of chars (with one extra char)and the compiler will add the required null character Explicitly add the null character I nitialization is in the form of a string constant in quotation marks, the compiler will size the array to fit the constant and add the extra null I nitialize the array with an explicit size I nitialize the array, leaving extra space for a larger string Null termination Note the differences between Str2 & Str3, in theory it seems the array of Str1 should be able to be contained with a declaration of 7 elements in the array, since there are only 7 letters in "Arduino". However the Arduino language enforces "null termination" meaning that the last character of an array must be a null (denoted by 0), as in Str2. When declaring a string, you must declare an extra character for this null or the compiler will complain with an error about the initialization string being too long. For the same reasons, Str3 can hold only 14 characters, not 15, as one might assume. Single quotes or double quotes? Strings are always defined inside double quotes ("Abc") and characters are always defined inside single quotes('A').
- 586. Restore April 14, 2007, at 11: 24 PM by Paul Badger Restore April 14, 2007, at 11: 24 PM by Paul Badger Changed lines 10- 15 from: char myStr1[8] = {'a', 'r', 'd', 'u', 'i', 'n', 'o'}; char myStr2[8] = {'a', 'r', 'd', 'u', 'i', 'n', 'o','0'}; char myStr3[4]; char myStr4[ ] = "arduino"; char myStr5[8] = "arduino"; char myStr6[15] = "arduino"; to: char Str1[8] = {'a', 'r', 'd', 'u', 'i', 'n', 'o'}; char Str2[8] = {'a', 'r', 'd', 'u', 'i', 'n', 'o','0'}; char Str3[4]; char Str4[ ] = "arduino"; char Str5[8] = "arduino"; char Str6[15] = "arduino"; Changed lines 17- 18 from: A couple of things to note. to: Null termination Note the differences between Str1 & Str2, in theory it seems the array of Str1 should be able to be contained with a declaration of 7 elements in the array, since there are only 7 letters in "Arduino". However the Arduino language enforces "null termination" meaning that the last character of an array must be a null (denoted by 0), as in Str2. I f you haven't declared an extra character for this null, the compiler will complain with an error about the initialization string being too long. Restore April 14, 2007, at 11: 12 PM by Paul Badger Changed lines 10- 15 from: char char char char char char myStr[7] = {'a', 'r', 'd', 'u', 'i' 'n' 'o'}; myStr[8] = {'a', 'r', 'd', 'u', 'i', 'n', 'o','0'}; myStr[4]; myStr[ ] = "arduino"; myStr[7] = "arduino"; myStr[15] = "arduino"; to: char myStr1[8] = {'a', 'r', 'd', 'u', 'i', 'n', 'o'}; char myStr2[8] = {'a', 'r', 'd', 'u', 'i', 'n', 'o','0'}; char myStr3[4]; char myStr4[ ] = "arduino"; char myStr5[8] = "arduino"; char myStr6[15] = "arduino"; Changed lines 19- 22 from: I n the first example the array is initialized with constants of type char 'a', 'r'. 'd', etc. These constants (letters in this case, but any ASCI I symbols really) are declared by enclosing in single quotes. I n example four, the initialization of the string is shown with the whole word in quotation marks to: I n the first example the array is initialized with constants of type char, 'a', 'r'. 'd', etc. These constants (letters in this case, but any ASCI I symbols really) are declared by enclosing them in single quotes. I n example four, the initialization of the string is shown with the whole word in quotation marks as in "arduino" Restore April 14, 2007, at 11: 07 PM by Paul Badger Changed lines 10- 15 from:
- 587. char str[5] = {'a', 'r', 'd', 'u', 'i' 'n' 'o'}; char str[6] = {'a', 'r', 'd', 'u', 'i', 'n', 'o','0'}; char str[3]; char str[ ] = "arduino"; char str[7] = "arduino"; char str[15] = "arduino"; to: char myStr[7] = {'a', 'r', 'd', 'u', 'i' 'n' 'o'}; char myStr[8] = {'a', 'r', 'd', 'u', 'i', 'n', 'o','0'}; char myStr[4]; char myStr[ ] = "arduino"; char myStr[7] = "arduino"; char myStr[15] = "arduino"; Changed lines 19- 21 from: I n the first example the array is initialized with constants of type char. to: I n the first example the array is initialized with constants of type char 'a', 'r'. 'd', etc. These constants (letters in this case, but any ASCI I symbols really) are declared by enclosing in single quotes. I n example four, the initialization of the string is shown with the whole word in quotation marks Restore April 14, 2007, at 11: 02 PM by Paul Badger Added lines 1- 53: string Description Strings in the C programming language are defined as arrays of type char. String declarations Strings can be declared in any of the following manners char char char char char char str[5] = {'a', 'r', 'd', 'u', 'i' 'n' 'o'}; str[6] = {'a', 'r', 'd', 'u', 'i', 'n', 'o','0'}; str[3]; str[ ] = "arduino"; str[7] = "arduino"; str[15] = "arduino"; A couple of things to note. I n the first example the array is initialized with constants of type char. Note that in example 4 above, the Example long time; void setup(){ Serial.begin(9600); } void loop(){ Serial.print("Time: "); time = millis(); //prints time since program started Serial.println(time); // wait a second so as not to send massive amounts of data delay(1000); }
- 588. Parameters long var = val; var - your long variable name val - the value you assign to that variable Reference Home Restore Edit Page | Page History | Printable View | All Recent Site Changes
- 589. Arduino : Reference / String Reference Language (extended) | Libraries | Comparison | Board string Description Strings are represented as arrays of type char and are null-terminated. Examples All of the following are valid declarations for strings. char Str1[15]; char Str2[8] = {'a', 'r', 'd', 'u', 'i', 'n', 'o'}; char Str3[8] = {'a', 'r', 'd', 'u', 'i', 'n', 'o', '0'}; char Str4[ ] = "arduino"; char Str5[8] = "arduino"; char Str6[15] = "arduino"; Possibilities for declaring strings Declare an array of chars without initializing it as in Str1 Declare an array of chars (with one extra char) and the compiler will add the required null character, as in Str2 Explicitly add the null character, Str3 I nitialize with a string constant in quotation marks; the compiler will size the array to fit the string constant and a terminating null character, Str4 I nitialize the array with an explicit size and string constant, Str5 I nitialize the array, leaving extra space for a larger string, Str6 Null termination Generally, strings are terminated with a null character (ASCI I code 0). This allows functions (like Serial.print()) to tell where the end of a string is. Otherwise, they would continue reading subsequent bytes of memory that aren't actually part of the string. This means that your string needs to have space for one more character than the text you want it to contain. That is why Str2 and Str5 need to be eight characters, even though "arduino" is only seven - the last position is automatically filled with a null character. Str4 will be automatically sized to eight characters, one for the extra null. I n Str3, we've explicitly included the null character (written ' 0') ourselves. Note that it's possible to have a string without a final null character (e.g. if you had specified the length of Str2 as seven instead of eight). This will break most functions that use strings, so you shouldn't do it intentionally. I f you notice something behaving strangely (operating on characters not in the string), however, this could be the problem. Single quotes or double quotes? Strings are always defined inside double quotes ("Abc") and characters are always defined inside single quotes('A'). Wrapping long strings You can wrap long strings like this: char myString[] = "This is the first line" " this is the second line" " etcetera"; Arrays of strings
- 590. I t is often convenient, when working with large amounts of text, such as a project with an LCD display, to setup an array of strings. Because strings themselves are arrays, this is in actually an example of a two-dimensional array. I n the code below, the asterisk after the datatype char "char* " indicates that this is an array of "pointers". All array names are actually pointers, so this is required to make an array of arrays. Pointers are one of the more esoteric parts of C for beginners to understand, but it isn't necessary to understand pointers in detail to use them effectively here. Example char* myStrings[]={"This is string 1", "This is string 2", "This is string 3", "This is string 4", "This is string 5","This is string 6"}; void setup(){ Serial.begin(9600); } void loop(){ for (int i = 0; i < 6; i++){ Serial.println(myStrings[i]); delay(500); } } See Also array PROGMEM Reference Home Corrections, suggestions, and new documentation should be posted to the Forum. The text of the Arduino reference is licensed under a Creative Commons Attribution-ShareAlike 3.0 License . Code samples in the reference are released into the public domain. (Printable View of http://www.arduino.cc/en/Reference/String)
- 591. Arduino Buy | Download | Getting Started | Learning | Reference | Hardware | FAQ Login to Arduino Username: Password: Keep me logged in: ✔ Login Edit Page | Page History | Printable View | All Recent Site Changes search Blog » | Forum » | Playground »
- 592. Arduino search Buy | Download | Getting Started | Learning | Reference | Hardware | FAQ Blog » | Forum » | Playground » Reference.Array History Hide minor edits - Show changes to markup J anuary 10, 2008, at 10: 49 PM by Paul Badger Changed lines 35- 36 from: Unlike in some version of BASI C, the C compiler does no checking to see if array access is within legal bounds of the array size that you have declared. to: Unlike in some versions of BASI C, the C compiler does no checking to see if array access is within legal bounds of the array size that you have declared. Restore May 26, 2007, at 08: 07 PM by Paul Badger Added lines 35- 36: Unlike in some version of BASI C, the C compiler does no checking to see if array access is within legal bounds of the array size that you have declared. Restore May 26, 2007, at 08: 05 PM by Paul Badger Added lines 32- 34: For this reason you should be careful in accessing arrays. Accessing past the end of an array (using an index number greater than your declared array size - 1) is reading from memory that is in use for other purposes. Reading from these locations is probably not going to do much except yield invalid data. Writing to random memory locations is definitely a bad idea and can often lead to unhappy results such as crashes or program malfunction. This can also be a difficult bug to track down. Deleted lines 55- 58: Coding Tip Be careful in accessing arrays. Accessing past the end of an array (using an index number greater than your declared array size - 1) is reading from memory that is in use for other purposes. Reading from these locations is probably not going to do much except yield invalid data. Writing to random memory locations is definitely a bad idea and can often lead to unhappy results such as crashes or program malfunction. This can also be a difficult bug to track down. Restore May 26, 2007, at 08: 01 PM by Paul Badger Changed line 26 from: I t also means that in an array with ten elements, that index nine is the last element. Hence: to: I t also means that in an array with ten elements, index nine is the last element. Hence: Restore May 26, 2007, at 08: 01 PM by Paul Badger Changed line 30 from: // myArray[10] is invalid and contains random information (other memory address) // myArray[10] is invalid and contains random information (other memory address) to:
- 593. Restore May 26, 2007, at 08: 00 PM by Paul Badger Changed lines 31- 32 from: to: @] Restore May 26, 2007, at 08: 00 PM by Paul Badger Changed line 26 from: To assign a value to an array: to: I t also means that in an array with ten elements, that index nine is the last element. Hence: Added lines 28- 34: int myArray[10]={9,3,2,4,3,2,7,8,9,11}; // myArray[9] // myArray[10] contains 11 is invalid and contains random information (other memory address) To assign a value to an array: [@ Changed lines 56- 57 from: Be careful in accessing arrays. Accessing past the end of an array is reading from memory that is in use for other purposes. Reading from these locations is probably not going to do much except yield invalid data. Writing to random memory locations is definitely a bad idea and can often lead to unhappy results such as crashes or program malfunction. This can also be a difficult bug to track down. to: Be careful in accessing arrays. Accessing past the end of an array (using an index number greater than your declared array size - 1) is reading from memory that is in use for other purposes. Reading from these locations is probably not going to do much except yield invalid data. Writing to random memory locations is definitely a bad idea and can often lead to unhappy results such as crashes or program malfunction. This can also be a difficult bug to track down. Restore May 26, 2007, at 07: 52 PM by Paul Badger Deleted line 42: Restore May 26, 2007, at 07: 51 PM by Paul Badger Changed line 23 from: Arrays are zero indexed, that is, refering to the assignment above, the first element of the array is at index 0, hence to: Arrays are zero indexed, that is, referring to the array initialization above, the first element of the array is at index 0, hence Restore May 26, 2007, at 07: 49 PM by Paul Badger Changed line 23 from: Arrays are zero indexed, that is, the first element of the array is at index 0, hence to: Arrays are zero indexed, that is, refering to the assignment above, the first element of the array is at index 0, hence Restore April 18, 2007, at 02: 00 AM by David A. Mellis Changed line 11 from: int myPins[] = {1, 5, 17, -2, 3};
- 594. to: int myPins[] = {2, 4, 8, 3, 6}; Added line 13: char message[6] = "hello"; Changed lines 17- 18 from: I n myPins we declare an array without explicitly choosing a size. The compiler counts the elements and adds one more element for a required null character terminator. to: I n myPins we declare an array without explicitly choosing a size. The compiler counts the elements and creates an array of the appropriate size. Changed line 40 from: Serial.println(pins[i]); to: Serial.println(myPins[i]); Restore April 17, 2007, at 08: 29 PM by Paul Badger Changed line 25 from: To assign a value to an array: to: To assign a value to an array: Changed lines 27- 28 from: mySensVals[0] = 10; @] To retrieve a value from an array: to: mySensVals[0] = 10; @] To retrieve a value from an array: Changed lines 34- 35 from: Arrays are often manipulated inside for loops, where the loop counter is used as the index for each array element. To print the elements of an array over the serial port, you could do something like this: to: Arrays are often manipulated inside for loops, where the loop counter is used as the index for each array element. For example, to print the elements of an array over the serial port, you could do something like this: Restore April 17, 2007, at 08: 27 PM by Paul Badger Changed lines 28- 29 from: @] To retrieve a value from an array: to: @] To retrieve a value from an array: Added lines 31- 32: Arrays and FOR Loops Restore April 17, 2007, at 08: 26 PM by Paul Badger Changed lines 18- 19 from:
- 595. Finally you can both initialize and size your array, as in mySensVals. Note however that one more element than your initialization is required, to hold the required null character. to: Finally you can both initialize and size your array, as in mySensVals. Note that when declaring an array of type char, one more element than your initialization is required, to hold the required null character. Changed lines 22- 24 from: Arrays are zero indexed, that is, the first element of the array is at index 0, hence mySensVals[0] == 2, mySensVals[1] == 4, and so forth. To assign a value to an array, do something like this to: Arrays are zero indexed, that is, the first element of the array is at index 0, hence mySensVals[0] == 2, mySensVals[1] == 4, and so forth. To assign a value to an array: Changed line 29 from: To retrieve a value from an array, something like to: To retrieve a value from an array: Restore April 16, 2007, at 11: 49 PM by Paul Badger Changed lines 22- 23 from: Arrays are zero indexed, that is, the first element of the array is at index 0, hence @@mySensVals[0] == 2, mySensVals[1] == 4, and so forth. to: Arrays are zero indexed, that is, the first element of the array is at index 0, hence mySensVals[0] == 2, mySensVals[1] == 4, and so forth. Restore April 16, 2007, at 11: 47 PM by Paul Badger Changed lines 22- 23 from: Arrays are zero indexed, that is, the first element of the array is at index 0 so @@mySensVals[0] == 2, mySensVals[1] == 4, and so forth. to: Arrays are zero indexed, that is, the first element of the array is at index 0, hence @@mySensVals[0] == 2, mySensVals[1] == 4, and so forth. Restore April 16, 2007, at 11: 46 PM by Paul Badger Changed lines 16- 19 from: I n myPins we declare an array without explicitly choosing a size. The compiler counts the elements and adds one more element for a required null character. Finally you can both initialize and size your array. Note however that one more element than your initialization is required, to hold the required null character. to: I n myPins we declare an array without explicitly choosing a size. The compiler counts the elements and adds one more element for a required null character terminator. Finally you can both initialize and size your array, as in mySensVals. Note however that one more element than your initialization is required, to hold the required null character.
- 596. Changed lines 31- 32 from: To print the elements of an array over the serial port, you could do something like this: to: Arrays are often manipulated inside for loops, where the loop counter is used as the index for each array element. To print the elements of an array over the serial port, you could do something like this: Restore April 16, 2007, at 11: 42 PM by Paul Badger Changed lines 3- 4 from: An array is a collection of variables that are accessed with an index number. Arrays in the C programming language, on which Arduino is based, can be complicated, but using simple arrays is relatively easy. to: An array is a collection of variables that are accessed with an index number. Arrays in the C programming language, on which Arduino is based, can be complicated, but using simple arrays is relatively straightforward. Restore April 16, 2007, at 11: 41 PM by Paul Badger Changed lines 7- 8 from: To create an array, of, say, 5 integers, place a statement like this at the top of your sketch or the start of a function: to: All of the methods below are valid ways to create (declare) an array. Changed lines 10- 12 from: int pins[5]; to: int myInts[6]; int myPins[] = {1, 5, 17, -2, 3}; int mySensVals[6] = {2, 4, -8, 3, 2}; Changed lines 15- 16 from: I f you want to give the elements of the array initial values, use a statement like this instead: to: You can declare an array without initializing it as in myI nts. I n myPins we declare an array without explicitly choosing a size. The compiler counts the elements and adds one more element for a required null character. Finally you can both initialize and size your array. Note however that one more element than your initialization is required, to hold the required null character. Accessing an Array Arrays are zero indexed, that is, the first element of the array is at index 0 so @@mySensVals[0] == 2, mySensVals[1] == 4, and so forth. To assign a value to an array, do something like this Changed line 26 from: int pins[5] = { 11, 3, 5, 4, 2 }; to: mySensVals[0] = 10; Changed lines 28- 34 from: This will assign the value 11 to the first elements in the array, the value 3 to the second, etc.
- 597. Accessing an Array The first thing you need to know is that arrays are zero indexed, that is, the first element of the array is at index 0 and is accessed with a statement like: to: To retrieve a value from an array, something like x = mySensVals[4]; To print the elements of an array over the serial port, you could do something like this: Changed lines 34- 37 from: pins[0] = 10; to: int i; for (i = 0; i < 5; i = i + 1) { Serial.println(pins[i]); } Deleted lines 39- 47: To print the elements of an array over the serial port, you could do something like this: int i; f o r ( i = 0; i < 5; i = i + 1) { Serial.println(pins[i]); } Restore April 16, 2007, at 11: 19 PM by Paul Badger Changed lines 3- 4 from: An array is a group of variables that is accessed with an index number. Arrays in the C programming language, on which Arduino is based, can be complicated, but simple things should be relatively easy. The basics operations are: to: An array is a collection of variables that are accessed with an index number. Arrays in the C programming language, on which Arduino is based, can be complicated, but using simple arrays is relatively easy. Restore April 16, 2007, at 11: 50 AM by Paul Badger Changed lines 5- 6 from: Creating (declaring) an array to: Creating (Declaring) an Array Changed lines 21- 22 from: Accessing an Array to: Accessing an Array Changed lines 38- 39 from: Example to: Example Restore
- 598. April 16, 2007, at 11: 48 AM by Paul Badger Changed lines 5- 6 from: Creating an Array to: Creating (declaring) an array Restore April 16, 2007, at 11: 44 AM by Paul Badger Changed lines 44- 45 from: Be careful in accessing arrays. Accessing past the end of an array is reading from memory that is in use for other purposes. Reading from these locations is probably not going to do much except yield invalid data. Writing to random memory locations is definitely a bad idea and can often lead to unhappy results such as crashes or program malfunction. This can also be a difficult bug to track down. to: Be careful in accessing arrays. Accessing past the end of an array is reading from memory that is in use for other purposes. Reading from these locations is probably not going to do much except yield invalid data. Writing to random memory locations is definitely a bad idea and can often lead to unhappy results such as crashes or program malfunction. This can also be a difficult bug to track down. Restore April 16, 2007, at 11: 43 AM by Paul Badger Changed lines 3- 6 from: Arrays in the C programming language, on which Arduino is based, can be complicated, but simple things should be relatively easy. The basics operations are: Creating an Array to: An array is a group of variables that is accessed with an index number. Arrays in the C programming language, on which Arduino is based, can be complicated, but simple things should be relatively easy. The basics operations are: Creating an Array Restore April 16, 2007, at 11: 40 AM by Paul Badger Changed lines 1- 2 from: Arrays to: Arrays Changed lines 42- 43 from: Tip to: Coding Tip Restore April 15, 2007, at 10: 13 PM by Paul Badger Restore April 15, 2007, at 10: 12 PM by Paul Badger Changed lines 42- 43 from: Tip to: Tip
- 599. Restore April 15, 2007, at 10: 11 PM by Paul Badger Deleted lines 37- 40: Tip Be careful in accessing arrays. Accessing past the end of an array is reading from memory that is in use for other purposes. Reading from these locations is probably not going to do much except yield invalid data. Writing to random memory locations is definitely a bad idea and can often lead to unhappy results such as crashes or program malfunction. This can also be a difficult bug to track down. Changed lines 40- 44 from: For a complete program that demonstrates the use of arrays, see the Knight Rider example from the Tutorials. to: For a complete program that demonstrates the use of arrays, see the Knight Rider example from the Tutorials. Tip Be careful in accessing arrays. Accessing past the end of an array is reading from memory that is in use for other purposes. Reading from these locations is probably not going to do much except yield invalid data. Writing to random memory locations is definitely a bad idea and can often lead to unhappy results such as crashes or program malfunction. This can also be a difficult bug to track down. Restore April 15, 2007, at 10: 10 PM by Paul Badger Added lines 38- 41: Tip Be careful in accessing arrays. Accessing past the end of an array is reading from memory that is in use for other purposes. Reading from these locations is probably not going to do much except yield invalid data. Writing to random memory locations is definitely a bad idea and can often lead to unhappy results such as crashes or program malfunction. This can also be a difficult bug to track down. Restore August 12, 2006, at 12: 00 PM by David A. Mellis - adding link to Knight Rider example Changed lines 36- 40 from: @] to: @] Example For a complete program that demonstrates the use of arrays, see the Knight Rider example from the Tutorials. Restore August 01, 2006, at 02: 01 PM by David A. Mellis Changed lines 5- 6 from: Creating an Array to: Creating an Array Changed lines 21- 22 from: Accessing an Array to: Accessing an Array Restore August 01, 2006, at 01: 57 PM by David A. Mellis -
- 600. Changed lines 23- 36 from: The first thing you need to know is that arrays are zero indexed, that is, the first element of the array is at index 0. to: The first thing you need to know is that arrays are zero indexed, that is, the first element of the array is at index 0 and is accessed with a statement like: pins[0] = 10; To print the elements of an array over the serial port, you could do something like this: int i; f o r ( i = 0; i < 5; i = i + 1) { Serial.println(pins[i]); } Restore August 01, 2006, at 01: 39 PM by David A. Mellis Added lines 1- 23: Arrays Arrays in the C programming language, on which Arduino is based, can be complicated, but simple things should be relatively easy. The basics operations are: Creating an Array To create an array, of, say, 5 integers, place a statement like this at the top of your sketch or the start of a function: int pins[5]; I f you want to give the elements of the array initial values, use a statement like this instead: int pins[5] = { 11, 3, 5, 4, 2 }; This will assign the value 11 to the first elements in the array, the value 3 to the second, etc. Accessing an Array The first thing you need to know is that arrays are zero indexed, that is, the first element of the array is at index 0. Restore Edit Page | Page History | Printable View | All Recent Site Changes
- 601. Arduino : Reference / Array Reference Language (extended) | Libraries | Comparison | Board Arrays An array is a collection of variables that are accessed with an index number. Arrays in the C programming language, on which Arduino is based, can be complicated, but using simple arrays is relatively straightforward. Creating (Declaring) an Array All of the methods below are valid ways to create (declare) an array. int myInts[6]; int myPins[] = {2, 4, 8, 3, 6}; int mySensVals[6] = {2, 4, -8, 3, 2}; char message[6] = "hello"; You can declare an array without initializing it as in myI nts. I n myPins we declare an array without explicitly choosing a size. The compiler counts the elements and creates an array of the appropriate size. Finally you can both initialize and size your array, as in mySensVals. Note that when declaring an array of type char, one more element than your initialization is required, to hold the required null character. Accessing an Array Arrays are zero indexed, that is, referring to the array initialization above, the first element of the array is at index 0, hence mySensVals[0] == 2, mySensVals[1] == 4, and so forth. I t also means that in an array with ten elements, index nine is the last element. Hence: int myArray[10]={9,3,2,4,3,2,7,8,9,11}; // myArray[9] contains 11 // myArray[10] is invalid and contains random information (other memory address) For this reason you should be careful in accessing arrays. Accessing past the end of an array (using an index number greater than your declared array size - 1) is reading from memory that is in use for other purposes. Reading from these locations is probably not going to do much except yield invalid data. Writing to random memory locations is definitely a bad idea and can often lead to unhappy results such as crashes or program malfunction. This can also be a difficult bug to track down. Unlike in some versions of BASI C, the C compiler does no checking to see if array access is within legal bounds of the array size that you have declared. To assign a value to an array: mySensVals[0] = 10; To retrieve a value from an array: x = mySensVals[4]; Arrays and FOR Loops Arrays are often manipulated inside for loops, where the loop counter is used as the index for each array element.
- 602. For example, to print the elements of an array over the serial port, you could do something like this: int i; for (i = 0; i < 5; i = i + 1) { Serial.println(myPins[i]); } Example For a complete program that demonstrates the use of arrays, see the Knight Rider example from the Tutorials. Reference Home Corrections, suggestions, and new documentation should be posted to the Forum. The text of the Arduino reference is licensed under a Creative Commons Attribution-ShareAlike 3.0 License . Code samples in the reference are released into the public domain. (Printable View of http://www.arduino.cc/en/Reference/Array)
- 603. Arduino Buy | Download | Getting Started | Learning | Reference | Hardware | FAQ Login to Arduino Username: Password: Keep me logged in: ✔ Login Edit Page | Page History | Printable View | All Recent Site Changes search Blog » | Forum » | Playground »
- 604. Arduino Buy | Download | Getting Started | Learning | Reference | Hardware | FAQ search Blog » | Forum » | Playground » Reference.ASCIIchart History Hide minor edits - Show changes to markup February 14, 2008, at 12: 03 AM by Paul Badger Changed lines 45- 46 from: 32 space to: Added line 53: 32 space Changed lines 85- 86 from: 64 @ to: Added line 93: 64 @ Changed lines 125- 126 from: 96 ` to: Added line 133: 96 ` Restore May 31, 2007, at 09: 38 AM by David A. Mellis - space prints Changed lines 5- 6 from: Note that the first 33 characters (0- 32) are non- printing characters, often called control characters. The more useful characters have been labeled. to: Note that the first 32 characters (0- 31) are non- printing characters, often called control characters. The more useful characters have been labeled. Restore May 30, 2007, at 11: 26 AM by Paul Badger Changed line 7 from: (: table width=90% border=0 cellpadding=5 cellspacing=0: ) to: (: table width=80% border=0 cellpadding=5 cellspacing=0: ) Restore May 30, 2007, at 11: 26 AM by Paul Badger Changed line 8 from:
- 605. (: cell width=25% : ) to: (: cell width=20% : ) Restore May 30, 2007, at 11: 20 AM by Paul Badger Deleted line 9: Restore May 30, 2007, at 11: 19 AM by Paul Badger Deleted line 13: Changed lines 51- 53 from: to: DEC Character Value Changed lines 90- 92 from: to: DEC Character Value Changed lines 129- 131 from: to: DEC Character Value Restore May 30, 2007, at 11: 18 AM by Paul Badger Changed lines 11- 15 from: 0 NULL to: DEC Character Value 0 null Restore May 30, 2007, at 11: 13 AM by Paul Badger Added line 10: Changed line 46 from: (: cell width=20% : ) to: (: cell width=18% : ) Changed line 83 from: (: cell width=20% : ) to: (: cell width=18% : ) Changed line 120 from: (: cell width=20% : ) to: (: cell width=18% : ) Restore May 30, 2007, at 11: 12 AM by Paul Badger Changed lines 79- 80 from: to:
- 606. 64 @ Deleted line 84: 64 @ Restore May 30, 2007, at 11: 11 AM by Paul Badger Deleted line 117: Deleted line 121: Restore May 30, 2007, at 11: 11 AM by Paul Badger Changed line 155 from: to: @] Restore May 30, 2007, at 11: 10 AM by Paul Badger Changed line 45 from: (: cell width=33% : ) to: (: cell width=20% : ) Changed line 81 from: (: cell width=33% : ) to: (: cell width=20% : ) Changed line 120 from: (: cell width=33% : ) to: (: cell width=20% : ) Restore May 30, 2007, at 11: 09 AM by Paul Badger Added lines 79- 83: @] (: cell width=33% : ) [@ Added lines 117- 123: @] (: cell width=33% : ) [@ Changed lines 154- 156 from: 127 to: 127 (: tableend: ) Restore May 30, 2007, at 11: 08 AM by Paul Badger Changed lines 35- 36 from: 25 to:
- 607. 25 Added lines 43- 47: @] (: cell width=33% : ) [@ Restore May 30, 2007, at 11: 07 AM by Paul Badger Changed lines 10- 138 from: 0 NULL to: 0 NULL 1 2 3 4 5 6 7 8 9 tab 10 line feed 11 12 13 carriage return 14 15 16 17 18 19 20 21 22 23 24 25 26 27 28 29 30 31 32 space 33 ! 34 " 35 # 36 $ 37 % 38 & 39 ' 40 ( 41 ) 42 * 43 + 44 , 3 52 4 53 5 54 6 55 7 56 8 57 9 58 : 59 ; 60 < 61 = 62 > 63 ? 64 @ 65 A 66 B 67 C 68 75 K 76 L 77 M 78 N 79 O 80 P 81 Q 82 R 83 S 84 T 85 U 86 V 87 W 88 X 89 Y 90 Z 91 [ b 99 c 100 d 101 e 102 f 103 g 104 h 105 i 106 j 107 k 108 l 109 m 110 n 111 o 112 p 118 v 119 w 120 x 121 y 122 z 123 { 124 | 125 } 126 ~ 127 Restore May 30, 2007, at 11: 00 AM by Paul Badger Changed lines 1- 10 from: 45 - 46 . 47 / 48 0 49 1 50 2 51 D 69 E 70 F 71 G 72 H 73 I 74 J 92 93 ] 94 ^ 95 _ 96 ` 97 a 98 113 q 114 r 115 s 116 t 117 u
- 608. to: ASCII chart The ASCI I (American Standard Code for I nformation I nterchange) encoding dates to the 1960's. I t is the standard way that text is encoded numerically. Note that the first 33 characters (0- 32) are non- printing characters, often called control characters. The more useful characters have been labeled.
- 609. (: table width=90% border=0 cellpadding=5 cellspacing=0: ) (: cell width=25% : ) [@ 0 NULL Restore May 30, 2007, at 10: 32 AM by Paul Badger Added line 1: Restore
- 610. Edit Page | Page History | Printable View | All Recent Site Changes
- 611. Arduino : Reference / ASCI I chart Reference Language (extended) | Libraries | Comparison | Board ASCI I chart The ASCI I (American Standard Code for I nformation I nterchange) encoding dates to the 1960's. I t is the standard way that text is encoded numerically. Note that the first 32 characters (0- 31) are non- printing characters, often called control characters. The more useful characters have been labeled. DEC Value Character DEC Value Character DEC Value Character DEC Value Character 0 1 2 3 4 5 6 7 8 9 10 11 12 13 return 14 15 16 17 18 19 20 21 22 23 24 25 26 27 28 29 30 31 null 32 33 34 35 36 37 38 39 40 41 42 43 44 45 46 47 48 49 50 51 52 53 54 55 56 57 58 59 60 61 62 63 space ! " # $ % & ' ( ) * + , . / 0 1 2 3 4 5 6 7 8 9 : ; < = > ? 64 65 66 67 68 69 70 71 72 73 74 75 76 77 78 79 80 81 82 83 84 85 86 87 88 89 90 91 92 93 94 95 @ A B C D E F G H I J K L M N O P Q R S T U V W X Y Z [ ] ^ _ 96 97 98 99 100 101 102 103 104 105 106 107 108 109 110 111 112 113 114 115 116 117 118 119 120 121 122 123 124 125 126 127 ` a b c d e f g h i j k l m n o p q r s t u v w x y z { | } ~ tab line feed carriage Reference Home Corrections, suggestions, and new documentation should be posted to the Forum. The text of the Arduino reference is licensed under a Creative Commons Attribution-ShareAlike 3.0 License . Code samples in the reference are released into the public domain. (Printable View of http://www.arduino.cc/en/Reference/ASCIIchart)
- 612. Arduino Buy | Download | Getting Started | Learning | Reference | Hardware | FAQ search Blog » | Forum » | Playground » Reference.HomePage History Show minor edits - Show changes to markup J uly 02, 2008, at 03: 11 PM by David A. Mellis Changed lines 2- 3 from: Arduino Reference to: Language Reference Restore May 07, 2008, at 02: 40 PM by David A. Mellis Changed line 41 from: plus (addition) to: + (addition) Restore April 29, 2008, at 10: 33 AM by David A. Mellis Changed lines 4- 5 from: ''See the extended reference for more advanced features of the Arduino languages and the libraries page for interfacing with particular types of hardware. to: See the extended reference for more advanced features of the Arduino languages and the libraries page for interfacing with particular types of hardware. Restore April 29, 2008, at 10: 33 AM by David A. Mellis Changed lines 4- 5 from: See the extended reference for more advanced features of the Arduino languages and the libraries page for interfacing with particular types of hardware. The foundations page has extended descriptions of some hardware and software features. to: ''See the extended reference for more advanced features of the Arduino languages and the libraries page for interfacing with particular types of hardware. Restore April 23, 2008, at 10: 30 PM by David A. Mellis Changed line 8 from: (: table width=90% border=0 cellpadding=5 cellspacing=0: ) to: (: table width=100% border=0 cellpadding=5 cellspacing=0: ) Restore March 31, 2008, at 06: 24 AM by Paul Badger Restore
- 613. March 29, 2008, at 11: 39 AM by David A. Mellis Changed lines 128- 135 from: to: pow(base, exponent) sqrt(x) Trigonometry sin(rad) cos(rad) tan(rad) Restore March 29, 2008, at 09: 18 AM by David A. Mellis Changed lines 127- 128 from: to: map(value, fromLow, fromHigh, toLow, toHigh) Restore March 07, 2008, at 10: 05 PM by Paul Badger Changed lines 4- 5 from: See the extended reference for more advanced features of the Arduino languages and the libraries page for interfacing with particular types of hardware. The Foundations page has extended descriptions of some hardware and software features. to: See the extended reference for more advanced features of the Arduino languages and the libraries page for interfacing with particular types of hardware. The foundations page has extended descriptions of some hardware and software features. Restore March 07, 2008, at 10: 04 PM by Paul Badger Changed lines 4- 5 from: See the extended reference for more advanced features of the Arduino languages and the libraries page for interfacing with particular types of hardware. The Foundations page has extended descriptions of hardware and software features. to: See the extended reference for more advanced features of the Arduino languages and the libraries page for interfacing with particular types of hardware. The Foundations page has extended descriptions of some hardware and software features. Restore March 07, 2008, at 10: 03 PM by Paul Badger Changed lines 4- 5 from: See the extended reference for more advanced features of the Arduino languages and the libraries page for interfacing with particular types of hardware. The [[Tutorial/ Foundations| Foundations page has extended descriptions of hardware and software features. to: See the extended reference for more advanced features of the Arduino languages and the libraries page for interfacing with particular types of hardware. The Foundations page has extended descriptions of hardware and software features. Restore March 07, 2008, at 10: 03 PM by Paul Badger Changed lines 4- 5 from: See the extended reference for more advanced features of the Arduino languages and the libraries page for interfacing with particular types of hardware. to: See the extended reference for more advanced features of the Arduino languages and the libraries page for interfacing with particular types of hardware. The [[Tutorial/ Foundations| Foundations page has extended descriptions of hardware and software features. Restore March 06, 2008, at 09: 01 AM by David A. Mellis -
- 614. Changed lines 4- 5 from: See the extended reference for more advanced features of the Arduino languages. to: See the extended reference for more advanced features of the Arduino languages and the libraries page for interfacing with particular types of hardware. Changed lines 147- 148 from: Didn't find something? Check the extended reference. to: Didn't find something? Check the extended reference or the libraries. Restore February 28, 2008, at 09: 49 AM by David A. Mellis Changed lines 77- 78 from: to: true | false Restore November 24, 2007, at 12: 42 AM by Paul Badger Changed line 14 from: void setup(). to: void setup() Restore November 24, 2007, at 12: 39 AM by Paul Badger - test the summary feature Changed line 14 from: void setup() to: void setup(). Restore November 05, 2007, at 03: 44 AM by David A. Mellis Deleted line 108: analog pins Restore November 03, 2007, at 10: 53 PM by Paul Badger Added line 109: analog pins Deleted line 110: analog pins Restore November 03, 2007, at 10: 01 PM by Paul Badger Changed line 110 from: configuring analog pins to: analog pins Restore November 03, 2007, at 09: 58 PM by Paul Badger Restore November 03, 2007, at 09: 58 PM by Paul Badger -
- 615. Changed lines 109- 110 from: int analogRead(pin) to: int analogRead(pin) configuring analog pins Restore August 31, 2007, at 11: 05 PM by David A. Mellis Changed lines 2- 3 from: Arduino Reference (standard) to: Arduino Reference Restore August 31, 2007, at 10: 46 PM by David A. Mellis Changed lines 6- 7 from: Arduino programs can be divided in three main parts: structure, values (variables and constants), and functions. The Arduino language is based on C/ C++. to: Arduino programs can be divided in three main parts: structure, values (variables and constants), and functions. The Arduino language is based on C/ C++. Restore August 31, 2007, at 10: 46 PM by David A. Mellis Changed lines 4- 5 from: See the extended reference for more advanced features of the Arduino languages. to: See the extended reference for more advanced features of the Arduino languages. Restore August 31, 2007, at 10: 45 PM by David A. Mellis Changed lines 4- 5 from: See the extended reference for more advanced features of the Arduino languages. to: See the extended reference for more advanced features of the Arduino languages. Restore August 31, 2007, at 10: 45 PM by David A. Mellis Changed lines 4- 5 from: The extended reference covers more advanced features of the Arduino language. to: See the extended reference for more advanced features of the Arduino languages. Restore August 31, 2007, at 10: 44 PM by David A. Mellis Changed lines 39- 41 from: #define #include to: Restore August 31, 2007, at 10: 43 PM by David A. Mellis Added lines 146- 147:
- 616. Restore August 31, 2007, at 10: 43 PM by David A. Mellis Added lines 146- 147: Didn't find something? Check the extended reference. Restore August 31, 2007, at 10: 40 PM by David A. Mellis - removing things that only belong in the extended reference. Deleted lines 61- 68: Bitwise Operators & (bitwise and) | (bitwise or) ^ (bitwise xor) ~ (bitwise not) << (bitshift left) >> (bitshift right) Deleted lines 69- 71: &= (compound bitwise and) | = (compound bitwise or) Deleted lines 97- 109: Variable Scope & Qualifiers variable scope static volatile const Utilities cast (cast operator) Deleted line 99: keywords Deleted lines 134- 140: External I nterrupts These functions allow you to trigger a function when the input to a pin changes value. attachI nterrupt(interrupt, function, mode) detachI nterrupt(interrupt) Restore August 31, 2007, at 10: 26 PM by David A. Mellis Changed lines 121- 122 from: sizeof() (sizeof operator) to: Changed lines 177- 178 from: Extended to: Restore August 31, 2007, at 10: 25 PM by David A. Mellis Changed lines 2- 3 from: Arduino Reference (basic) to:
- 617. Arduino Reference (standard) Restore August 31, 2007, at 10: 24 PM by David A. Mellis Changed lines 4- 6 from: The extended reference covers more advanced features of the Arduino language. to: The extended reference covers more advanced features of the Arduino language. Restore August 31, 2007, at 10: 24 PM by David A. Mellis Changed lines 4- 6 from: The extended reference covers more advanced features of the Arduino language. to: The extended reference covers more advanced features of the Arduino language. Restore August 31, 2007, at 10: 24 PM by David A. Mellis Changed lines 4- 6 from: The extended reference covers more advanced features of the Arduino language. to: The extended reference covers more advanced features of the Arduino language. Restore August 31, 2007, at 10: 23 PM by David A. Mellis Changed lines 6- 7 from: to: Restore August 31, 2007, at 10: 23 PM by David A. Mellis Added lines 6- 7: Restore August 31, 2007, at 10: 23 PM by David A. Mellis Changed lines 4- 5 from: For more advanced features of the Arduino language, see the extended reference. to: The extended reference covers more advanced features of the Arduino language. Restore August 31, 2007, at 10: 22 PM by David A. Mellis Changed lines 2- 3 from: Arduino Reference to: Arduino Reference (basic) For more advanced features of the Arduino language, see the extended reference. Restore August 31, 2007, at 10: 19 PM by David A. Mellis Changed lines 84- 85 from: Constants are labels for certain values which are preset in the Arduino compiler. You do not need to define or initialize
- 618. constants. Arduino includes the following pre- defined constants. to: Constants are particular values with specific meanings. Restore August 31, 2007, at 10: 18 PM by David A. Mellis Changed lines 81- 82 from: Variables are expressions that you can use in programs to store values, such as a sensor reading from an analog pin. They can have various types, which are described below. to: Variables are expressions that you can use in programs to store values, such as a sensor reading from an analog pin. Constants Constants are labels for certain values which are preset in the Arduino compiler. You do not need to define or initialize constants. Arduino includes the following pre- defined constants. HI GH | LOW I NPUT | OUTPUT I nteger Constants Added lines 93- 94: Variables can have various types, which are described below. Changed lines 115- 122 from: Constants Constants are labels for certain values which are preset in the Arduino compiler. You do not need to define or initialize constants. Arduino includes the following pre- defined constants. HI GH | LOW I NPUT | OUTPUT I ntegerConstants to: Restore August 31, 2007, at 09: 46 PM by David A. Mellis - removing PROGMEM (doesn't belong in the basic reference) Changed lines 104- 105 from: PROGMEM to: Restore August 31, 2007, at 09: 45 PM by David A. Mellis Changed lines 10- 11 from: I n Arduino, the standard program entry point (main) is defined in the core and calls into two functions in a sketch. setup() is called once, then loop() is called repeatedly (until you reset your board). to: An Arduino program run in two parts: Added lines 15- 16: setup() is preparation, and loop() is execution. I n the setup section, always at the top of your program, you would set pinModes, initialize serial communication, etc. The loop section is the code to be executed - - reading inputs, triggering outputs, etc. Restore August 31, 2007, at 09: 44 PM by David A. Mellis Changed lines 10- 11 from: An Arduino program run in two parts:
- 619. to: I n Arduino, the standard program entry point (main) is defined in the core and calls into two functions in a sketch. setup() is called once, then loop() is called repeatedly (until you reset your board). Deleted lines 14- 15: setup() is preparation, and loop() is execution. I n the setup section, always at the top of your program, you would set pinModes, initialize serial communication, etc. The loop section is the code to be executed - - reading inputs, triggering outputs, etc. Restore August 23, 2007, at 02: 24 PM by Paul Badger Changed lines 15- 16 from: setup() is preparation, and loop() is execution. I n the setup section, always at the top of your program, you would set pinMode, initialize serial communication, etc. The loop section is the code to be executed - - reading inputs, triggering outputs, etc. to: setup() is preparation, and loop() is execution. I n the setup section, always at the top of your program, you would set pinModes, initialize serial communication, etc. The loop section is the code to be executed - - reading inputs, triggering outputs, etc. Restore August 23, 2007, at 02: 19 PM by Paul Badger Changed lines 81- 82 from: Variables are expressions that you can use in programs to store values, like e.g. sensor reading from an analog pin. They can have various types, which are described below. to: Variables are expressions that you can use in programs to store values, such as a sensor reading from an analog pin. They can have various types, which are described below. Restore J uly 17, 2007, at 11: 10 AM by Paul Badger Changed lines 19- 20 from: void keyword to: void Restore J uly 17, 2007, at 10: 27 AM by Paul Badger Restore J uly 17, 2007, at 10: 27 AM by Paul Badger Changed lines 174- 175 from: to: Extended Restore J uly 17, 2007, at 06: 36 AM by Paul Badger Restore J uly 17, 2007, at 06: 35 AM by Paul Badger Changed lines 19- 20 from: to: void keyword Restore J uly 16, 2007, at 11: 47 PM by Paul Badger Added lines 31- 38: Further Syntax
- 620. ; (semicolon) {} (curly braces) / / (single line comment) / * * / (multi- line comment) #define #include Deleted lines 77- 85: Further Syntax ; (semicolon) {} (curly braces) / / (single line comment) / * * / (multi- line comment) #define #include Restore J uly 16, 2007, at 11: 05 PM by Paul Badger Changed lines 29- 30 from: to: return Restore J uly 16, 2007, at 09: 42 PM by Paul Badger Changed lines 173- 174 from: Alpha to: Restore J uly 16, 2007, at 09: 41 PM by Paul Badger Restore J uly 16, 2007, at 09: 41 PM by Paul Badger Restore J uly 16, 2007, at 09: 40 PM by Paul Badger Changed lines 173- 174 from: to: Alpha Restore J uly 16, 2007, at 05: 56 AM by Paul Badger Changed lines 31- 36 from: plus(addition) - (subtraction) * (multiplication) / (division) % (modulo) to: plus (addition) - (subtraction) * (multiplication) / (division) % (modulo) Restore J uly 16, 2007, at 05: 55 AM by Paul Badger Changed lines 63- 69 from: += (compound multiplication) - = (compound division) &= (bitwise and)
- 621. | = (bitwise or) to: * = (compound multiplication) / = (compound division) &= (compound bitwise and) | = (compound bitwise or) Restore J uly 16, 2007, at 05: 54 AM by Paul Badger Changed lines 61- 62 from: += (compound increment) - = (compound decrement) to: += (compound addition) - = (compound subtraction) += (compound multiplication) - = (compound division) Restore J uly 16, 2007, at 05: 12 AM by Paul Badger Changed lines 60- 62 from: - - ? (decrement) to: - - (decrement) += (compound increment) - = (compound decrement) Restore J uly 16, 2007, at 04: 48 AM by Paul Badger Changed lines 60- 64 from: | ? (decrement) (bitwise and) (bitwise or) to: - - ? (decrement) &= (bitwise and) | = (bitwise or) Restore J uly 16, 2007, at 04: 46 AM by Paul Badger Added lines 58- 64: Compound Operators ++ (increment) | ? (decrement) (bitwise and) (bitwise or) Restore J une 11, 2007, at 06: 57 PM by Paul Badger Changed lines 91- 92 from: to: PROGMEM Restore May 29, 2007, at 02: 34 PM by Paul Badger Changed lines 85- 86 from:
- 622. Variable Scope to: Variable Scope & Qualifiers Changed lines 90- 91 from: to: const Restore May 28, 2007, at 01: 50 PM by Paul Badger Added line 72: boolean Restore May 26, 2007, at 07: 41 PM by Paul Badger Changed lines 106- 107 from: ASCI I chart? to: ASCI I chart Restore May 26, 2007, at 07: 41 PM by Paul Badger Changed lines 106- 107 from: to: ASCI I chart? Restore May 26, 2007, at 07: 08 AM by Paul Badger Changed line 26 from: do... while to: do... while Restore May 26, 2007, at 07: 07 AM by Paul Badger Added line 26: do... while Restore May 26, 2007, at 06: 36 AM by Paul Badger Changed lines 26- 28 from: to: break continue Restore May 17, 2007, at 10: 36 PM by Paul Badger Changed lines 85- 86 from: to: volatile Restore May 17, 2007, at 11: 51 AM by David A. Mellis Changed lines 4- 5 from: Arduino programs can be divided in three main parts: structure, values (variables and constants), and functions. to:
- 623. Arduino programs can be divided in three main parts: structure, values (variables and constants), and functions. The Arduino language is based on C/ C++. Restore May 17, 2007, at 11: 09 AM by Paul Badger Changed lines 110- 111 from: pullup resistors? to: Restore May 17, 2007, at 11: 08 AM by Paul Badger Changed lines 110- 111 from: pullup resistors to: pullup resistors? Restore May 17, 2007, at 11: 08 AM by Paul Badger Changed lines 110- 111 from: to: pullup resistors Restore May 04, 2007, at 06: 01 AM by Paul Badger Changed lines 83- 85 from: Variable scope Static to: variable scope static Restore May 04, 2007, at 06: 00 AM by Paul Badger Added lines 80- 85: Variable Scope Variable scope Static Restore April 29, 2007, at 05: 06 AM by David A. Mellis - math.h isn't supported, so don't document it here. Changed lines 123- 124 from: math.h(trig,sqrt,pow etc.) to: Restore April 29, 2007, at 05: 03 AM by David A. Mellis - API changes (including exposing internal registers) should be discussed on the developers list Changed lines 54- 55 from: port manipulation to: Changed lines 96- 98 from: Atmega8 hardware Atmega168 hardware to: Restore April 27, 2007, at 10: 18 PM by Paul Badger -
- 624. Changed lines 126- 127 from: math.h(math.h - trig,sqrt,pow etc.) to: math.h(trig,sqrt,pow etc.) Restore April 27, 2007, at 10: 18 PM by Paul Badger Changed lines 126- 127 from: math ?(math.h - trig,sqrt,pow etc.) to: math.h(math.h - trig,sqrt,pow etc.) Restore April 27, 2007, at 10: 17 PM by Paul Badger Changed lines 126- 127 from: mathHeader(trig,sqrt,pow etc.) to: math ?(math.h - trig,sqrt,pow etc.) Restore April 27, 2007, at 10: 08 PM by Paul Badger Added line 77: double Restore April 27, 2007, at 10: 06 PM by Paul Badger Changed lines 125- 126 from: math.h(trig,sqrt,pow etc.) to: mathHeader(trig,sqrt,pow etc.) Restore April 27, 2007, at 09: 25 PM by Paul Badger Changed lines 125- 126 from: to: math.h(trig,sqrt,pow etc.) Restore April 25, 2007, at 09: 34 PM by Paul Badger Changed lines 86- 87 from: Constants to: I ntegerConstants Restore April 25, 2007, at 09: 31 PM by Paul Badger Changed lines 86- 87 from: I nteger Constants to: Constants Changed line 90 from: cast(cast operator)
- 625. to: cast (cast operator) Restore April 25, 2007, at 09: 24 PM by Paul Badger Changed lines 62- 63 from: #include to: #include Restore April 25, 2007, at 08: 58 PM by Paul Badger Changed lines 62- 63 from: to: #include Restore April 24, 2007, at 10: 32 AM by Paul Badger Changed lines 54- 55 from: to: port manipulation Changed lines 97- 98 from: port manipulation to: Restore April 24, 2007, at 12: 58 AM by Paul Badger Changed lines 96- 97 from: Port Manipulation to: port manipulation Restore April 24, 2007, at 12: 57 AM by Paul Badger Changed lines 91- 92 from: Reference to: Reference Restore April 24, 2007, at 12: 29 AM by Paul Badger Changed lines 96- 97 from: to: Port Manipulation Restore April 23, 2007, at 10: 29 PM by Paul Badger Changed lines 94- 96 from: to: Atmega8 hardware Atmega168 hardware Restore April 18, 2007, at 08: 49 AM by Paul Badger Changed line 50 from:
- 626. ^ (bitwise xor) to: ^ (bitwise xor) Restore April 17, 2007, at 11: 22 PM by Paul Badger Changed lines 93- 94 from: keywords) to: keywords Restore April 17, 2007, at 11: 21 PM by Paul Badger Changed lines 93- 94 from: keywords(keywords) to: keywords) Restore April 17, 2007, at 11: 11 PM by Paul Badger Changed lines 91- 94 from: to: Reference keywords(keywords) Restore April 17, 2007, at 09: 08 PM by Paul Badger Changed line 50 from: ^ (bitwise xor) to: ^ (bitwise xor) Restore April 17, 2007, at 08: 49 PM by Paul Badger Changed line 51 from: ~ (bitwise not) to: ~ (bitwise not) Restore April 17, 2007, at 08: 31 PM by Paul Badger Changed lines 48- 49 from: & (bitwise and) | (bitwise or) to: & (bitwise and) | (bitwise or) Restore April 16, 2007, at 11: 15 AM by Paul Badger Added line 71: unsigned int
- 627. Added line 73: unsigned long Restore April 16, 2007, at 11: 02 AM by Paul Badger Changed lines 2- 3 from: Arduino Reference to: Arduino Reference Restore April 16, 2007, at 02: 02 AM by David A. Mellis Added lines 66- 67: Data Types Changed lines 75- 77 from: cast(cast operator) sizeof() (sizeof operator) to: Changed lines 84- 85 from: to: Utilities cast(cast operator) sizeof() (sizeof operator) Restore April 16, 2007, at 01: 56 AM by Paul Badger Changed line 28 from: Arithmetic(addition) to: plus(addition) Restore April 16, 2007, at 01: 55 AM by David A. Mellis Changed line 28 from: plus(addition) to: Arithmetic(addition) Changed lines 48- 51 from: & (and) | (or) ^ (xor) ~ (not) to: & (bitwise and) | (bitwise or) ^ (bitwise xor) ~ (bitwise not) Restore April 16, 2007, at 12: 22 AM by Paul Badger Changed lines 52- 54 from:
- 628. to: << (bitshift left) >> (bitshift right) Restore April 16, 2007, at 12: 19 AM by Paul Badger Restore April 15, 2007, at 11: 47 PM by Paul Badger Changed lines 51- 52 from: ! (not) to: ~ (not) Restore April 15, 2007, at 11: 35 PM by Paul Badger Changed line 42 from: Boolean Operations to: Boolean Operators Changed line 47 from: Bitwise Operations to: Bitwise Operators Restore April 15, 2007, at 11: 34 PM by Paul Badger Added lines 47- 52: Bitwise Operations & (and) | (or) ^ (xor) ! (not) Restore April 15, 2007, at 11: 31 PM by Paul Badger Changed lines 66- 67 from: sizeof(sizeof operator) to: sizeof() (sizeof operator) Restore April 15, 2007, at 04: 40 PM by Paul Badger Changed lines 66- 67 from: to: sizeof(sizeof operator) Restore April 15, 2007, at 04: 17 PM by Paul Badger Changed lines 65- 66 from: to: cast(cast operator) Restore
- 629. April 15, 2007, at 03: 05 PM by Paul Badger Changed lines 28- 31 from: Addition?(addition) - ?(subtraction) * ?(multiplication) / ?(division) to: plus(addition) - (subtraction) * (multiplication) / (division) Restore April 15, 2007, at 02: 58 PM by Paul Badger Restore April 15, 2007, at 02: 55 PM by Paul Badger Restore April 15, 2007, at 02: 49 PM by Paul Badger Changed lines 28- 31 from: Addition?(modulo) - ?(modulo) * ?(modulo) / ?(modulo) to: Addition?(addition) - ?(subtraction) * ?(multiplication) / ?(division) Restore April 15, 2007, at 02: 47 PM by Paul Badger Restore April 15, 2007, at 02: 47 PM by Paul Badger Added lines 28- 31: Addition?(modulo) - ?(modulo) * ?(modulo) / ?(modulo) Restore April 13, 2007, at 11: 27 PM by David A. Mellis Changed lines 28- 29 from: % (modulo) to: % (modulo) Restore April 13, 2007, at 11: 20 PM by Paul Badger Restore April 13, 2007, at 11: 18 PM by Paul Badger Restore April 13, 2007, at 11: 17 PM by Paul Badger Restore April 13, 2007, at 10: 53 PM by David A. Mellis - moving % (modulo) the left column under "arithmetic operators"; keeping the right col. for functions Changed lines 15- 16 from: setup() is preparation, and loop() is execution. I n the setup section, always at the top of your program, you woiuld set pinMode, initialize serial communication, etc. The loop section is the code to be executed - - reading inputs, triggering outputs, etc.
- 630. to: setup() is preparation, and loop() is execution. I n the setup section, always at the top of your program, you would set pinMode, initialize serial communication, etc. The loop section is the code to be executed - - reading inputs, triggering outputs, etc. Added lines 27- 29: Arithmetic Operators % (modulo) Deleted line 93: % (modulo) Restore April 13, 2007, at 10: 50 PM by Paul Badger Changed line 91 from: % to: % (modulo) Restore April 13, 2007, at 10: 00 PM by Paul Badger Changed line 91 from: % (modulo) to: % Restore April 13, 2007, at 09: 49 PM by Paul Badger Changed line 91 from: to: % (modulo) Restore December 25, 2006, at 06: 25 PM by David A. Mellis Changed lines 4- 6 from: Arduino provides a library of functions on top of the standard AVR C/ C++ routines. The main file of your sketch is compiled as C++, but you can add straight C files as well. Arduino programs can be divided in three main parts: program structure, values (variables and constants), and functions. to: Arduino programs can be divided in three main parts: structure, values (variables and constants), and functions. Changed lines 8- 11 from: Program Structure Getting Started to: Structure Added line 52: byte Changed lines 65- 66 from: to:
- 631. I nteger Constants Changed lines 75- 77 from: int digitalRead(pin) unsigned long pulseI n (pin, value) to: int digitalRead(pin) Changed lines 81- 85 from: Handling Time to: Advanced I / O shiftOut(dataPin, clockPin, bitOrder, value) unsigned long pulseI n (pin, value) Time Changed lines 90- 93 from: Random number generation New in Arduino 0005. to: Math min(x, y) max(x, y) abs(x) constrain(x, a, b) Random Numbers Added lines 103- 109: External I nterrupts These functions allow you to trigger a function when the input to a pin changes value. attachI nterrupt(interrupt, function, mode) detachI nterrupt(interrupt) Changed lines 115- 116 from: Serial.available() Serial.read() to: int Serial.available() int Serial.read() Serial.flush() Deleted lines 120- 137: Old serial library (deprecated). beginSerial (speed) serialWrite(c) int serialAvailable() int serialRead() printMode(mode) printByte(c) printString(str) printI nteger(num) printHex(num)
- 632. printOctal(num) printBinary(num) printNewline() Expert/ I nternal Functions avr- libc is the standard library of C functions that Arduino builds on. To use these, you may need to add the corresponding #include statement to the top of your sketch. Restore November 12, 2006, at 11: 51 AM by David A. Mellis - removing bit about floats not being supported Changed lines 52- 53 from: Variables are expressions that you can use in programs to store values, like e.g. sensor reading from an analog pin. They can have various types, which are described below. Floating point variables and operations are not currently supported. to: Variables are expressions that you can use in programs to store values, like e.g. sensor reading from an analog pin. They can have various types, which are described below. Added line 57: float Restore November 04, 2006, at 01: 19 PM by David A. Mellis Deleted lines 5- 6: I f you're used to Processing or J ava, please check out the Arduino/ Processing language comparison. Restore November 04, 2006, at 01: 18 PM by David A. Mellis Deleted lines 123- 137: Libraries These are the "official" libraries that are included in the Arduino distribution. They are compatible with the Wiring versions, and the links below point to the (excellent) Wiring documentation. Matrix - Basic LED Matrix display manipulation library Sprite - Basic image sprite manipulation library for use in animations with an LED matrix Wire - Two Wire I nterface for sending and receiving data over a net of devices or sensors. These are not (yet) included with the Arduino distribution and may change. Simple Message System LCD Library TextString Library Metro Restore October 21, 2006, at 03: 32 PM by David A. Mellis - adding link to metro library Added lines 137- 138: Metro Restore October 21, 2006, at 03: 07 PM by David A. Mellis - adding libraries included in the distribution Added lines 126- 131: These are the "official" libraries that are included in the Arduino distribution. They are compatible with the Wiring versions, and the links below point to the (excellent) Wiring documentation. Matrix - Basic LED Matrix display manipulation library Sprite - Basic image sprite manipulation library for use in animations with an LED matrix Wire - Two Wire I nterface for sending and receiving data over a net of devices or sensors. Restore October 20, 2006, at 11: 57 AM by Tom I goe Added line 130:
- 633. TextString Library Restore October 01, 2006, at 03: 55 PM by David A. Mellis - adding libraries Added lines 123- 129: Libraries These are not (yet) included with the Arduino distribution and may change. Simple Message System LCD Library Restore September 05, 2006, at 08: 58 AM by David A. Mellis Changed lines 4- 5 from: These are the basics about the Arduino language, which implemented in C. I f you're used to Processing or J ava, please check out the Arduino/ Processing language comparison. to: Arduino provides a library of functions on top of the standard AVR C/ C++ routines. The main file of your sketch is compiled as C++, but you can add straight C files as well. I f you're used to Processing or J ava, please check out the Arduino/ Processing language comparison. Restore August 27, 2006, at 10: 58 AM by David A. Mellis Added lines 81- 93: Handling Time unsigned long millis() delay(ms) delayMicroseconds(us) Random number generation New in Arduino 0005. randomSeed(seed) long random(max) long random(min, max) Changed lines 118- 122 from: Handling Time unsigned long millis() delay(ms) delayMicroseconds(us) to: Restore August 26, 2006, at 04: 07 PM by David A. Mellis Changed line 1 from: (: title API Reference: ) to: (: title Reference: ) Restore August 26, 2006, at 04: 07 PM by David A. Mellis Changed lines 1- 2 from: (: title Arduino API Reference: ) !!Arduino Reference to: (: title API Reference: )
- 634. Arduino Reference Restore August 26, 2006, at 04: 07 PM by David A. Mellis Changed lines 1- 2 from: Arduino Reference to: (: title Arduino API Reference: ) !!Arduino Reference Restore August 01, 2006, at 12: 55 PM by David A. Mellis - Adding string and array. Changed lines 56- 58 from: to: string array Restore August 01, 2006, at 07: 18 AM by David A. Mellis Added lines 30- 31: == (equal to) != (not equal to) Restore August 01, 2006, at 07: 17 AM by David A. Mellis Changed lines 30- 34 from: < (less than) > (greater than) <= (less than or equal to) >= (greater than or equal to) to: < (less than) > (greater than) <= (less than or equal to) >= (greater than or equal to) Restore August 01, 2006, at 07: 04 AM by David A. Mellis - adding comparison and boolean operators Added lines 29- 39: Comparison Operators < (less than) > (greater than) <= (less than or equal to) >= (greater than or equal to) Boolean Operations && (and) | | (or) ! (not) Restore J uly 09, 2006, at 07: 47 AM by David A. Mellis - adding link to avr- libc Added lines 93- 95: Expert/ I nternal Functions avr- libc is the standard library of C functions that Arduino builds on. To use these, you may need to add the corresponding #include statement to the top of your sketch. Restore
- 635. May 28, 2006, at 05: 03 PM by David A. Mellis Changed lines 38- 39 from: Variables are expressions that you can use in programs to store values, like e.g. sensor reading from an analog pin. They can have various types, which are described below. Warning: floating point variables and operations are not currently supported. to: Variables are expressions that you can use in programs to store values, like e.g. sensor reading from an analog pin. They can have various types, which are described below. Floating point variables and operations are not currently supported. Changed lines 67- 68 from: Used for communication between the Arduino board and a computer or other devices. This communication happens via the Arduino board's serial or USB connection and on digital pins 0 (RX) and 1 (TX). Thus, if you use these functions, you cannot also use pins 0 and 1 for digital i/ o. to: Used for communication between the Arduino board and a computer or other devices. This communication happens via the Arduino board's serial or USB connection and on digital pins 0 (RX) and 1 (TX). Thus, if you use these functions, you cannot also use pins 0 and 1 for digital i/ o. Restore May 28, 2006, at 05: 01 PM by David A. Mellis - clarifying serial communication Changed lines 67- 68 from: Used for communication between the Arduino board and the computer, via the USB or serial connection. This communication happens on digital pins 0 (RX) and 1 (TX). This means that these functions can be used to communicate with a serial device on those pins, but also that any digital i/ o on pins 0 and 1 will interfere with this communication. to: Used for communication between the Arduino board and a computer or other devices. This communication happens via the Arduino board's serial or USB connection and on digital pins 0 (RX) and 1 (TX). Thus, if you use these functions, you cannot also use pins 0 and 1 for digital i/ o. Restore May 28, 2006, at 04: 55 PM by David A. Mellis Changed lines 67- 68 from: Used for communication between the Arduino board and the computer, via the USB or serial connection. Or used for serial communication on digital pins 0 (RX) and 1 (TX). Note: if you are using these functions, you cannot also use pins 0 and 1 for digital i/ o. to: Used for communication between the Arduino board and the computer, via the USB or serial connection. This communication happens on digital pins 0 (RX) and 1 (TX). This means that these functions can be used to communicate with a serial device on those pins, but also that any digital i/ o on pins 0 and 1 will interfere with this communication. Restore May 28, 2006, at 04: 52 PM by David A. Mellis - serial notes Changed lines 67- 68 from: Used for communication between the Arduino board and the computer, via the USB or serial connection (both appear as serial ports to software on the computer). Or used for serial communication on digital pins 0 (RX) and 1 (TX). to: Used for communication between the Arduino board and the computer, via the USB or serial connection. Or used for serial communication on digital pins 0 (RX) and 1 (TX). Note: if you are using these functions, you cannot also use pins 0 and 1 for digital i/ o. Serial.begin(speed) Serial.available() Serial.read() Serial.print(data) Serial.println(data) Old serial library (deprecated).
- 636. Deleted lines 88- 96: Serial Library as of version 0004 Serial.begin(speed) Serial.available() Serial.read() Serial.print(data) Serial.println(data) Restore April 19, 2006, at 06: 45 AM by David A. Mellis - Clarifying serial communication (USB or serial) Added lines 66- 68: Used for communication between the Arduino board and the computer, via the USB or serial connection (both appear as serial ports to software on the computer). Or used for serial communication on digital pins 0 (RX) and 1 (TX). Restore April 17, 2006, at 06: 47 AM by Massimo Banzi Restore April 14, 2006, at 07: 49 AM by David A. Mellis - Adding pulseI n() Changed lines 59- 60 from: to: unsigned long pulseI n (pin, value) Restore March 31, 2006, at 06: 19 AM by Clay Shirky Changed line 5 from: Arduino programs can be divided in three main parts: program structure, values (variables and constants), and functions. to: Arduino programs can be divided in three main parts: program structure, values (variables and constants), and functions. Changed lines 17- 18 from: setup() is preparation, and loop() is execution. I n the setup section, always at the top of your program, you initialize variables ?, set pinMode, etc. The loop section is the code to be executed - - reading inputs, triggering outputs, etc. to: setup() is preparation, and loop() is execution. I n the setup section, always at the top of your program, you woiuld set pinMode, initialize serial communication, etc. The loop section is the code to be executed - - reading inputs, triggering outputs, etc. Restore March 31, 2006, at 03: 39 AM by David A. Mellis - Clarifying analogWrite == pwm Changed line 46 from: Digital Pins to: Digital I / O Changed line 51 from: Analog Pins to: Analog I / O Changed lines 53- 54 from: analogWrite(pin, value) to: analogWrite(pin, value) - PWM
- 637. Restore March 30, 2006, at 08: 02 PM by Tom I goe Changed line 17 from: else? to: if...else Restore March 30, 2006, at 08: 01 PM by Tom I goe Added line 17: else? Restore March 27, 2006, at 01: 10 PM by Tom I goe Changed lines 24- 25 from: to: Define Changed lines 35- 36 from: Another form of variables are constants, which are preset variables that you do not need to define or initialize. to: Constants are labels for certain values which are preset in the Arduino compiler. You do not need to define or initialize constants. Arduino includes the following pre- defined constants. Changed lines 40- 53 from: Finally, defines are a useful C component that allow you to specify something before it is compiled. Defines You can define numbers in arduino that don't take up any program memory space on the chip. Arduino defines have the same syntax as C defines: #define constantName value Note that the # is necessary. For example: #define ledPin 3 The compiler will replace any mentions of ledPin with the value 3 at compile time. to: Restore March 27, 2006, at 12: 56 PM by Tom I goe Restore March 27, 2006, at 12: 28 PM by Tom I goe Changed lines 83- 87 from: to: Serial.print(data) Serial.println(data) Restore March 27, 2006, at 12: 23 PM by Tom I goe Changed lines 82- 83 from: to: Serial.read() Restore March 27, 2006, at 12: 19 PM by Tom I goe Changed lines 81- 82 from: to:
- 638. Serial.available() Restore March 27, 2006, at 12: 14 PM by Tom I goe Added lines 79- 81: Serial Library as of version 0004 Serial.begin(speed) Restore March 26, 2006, at 02: 21 PM by J eff Gray Changed line 18 from: select case? to: switch case Restore March 26, 2006, at 02: 21 PM by J eff Gray Added line 18: select case? Restore March 26, 2006, at 11: 29 AM by J eff Gray Deleted line 5: Restore March 25, 2006, at 02: 21 PM by J eff Gray Changed lines 9- 10 from: Program Structure to: Program Structure Changed lines 25- 26 from: Variables to: Variables Changed lines 54- 55 from: Functions to: Functions Restore March 25, 2006, at 02: 20 PM by J eff Gray Changed lines 7- 8 from: (: table border=0 cellpadding=5 cellspacing=0: ) (: cell: ) to: (: table width=90% border=0 cellpadding=5 cellspacing=0: ) (: cell width=50% : ) Changed line 53 from: (: cell: ) to: (: cell width=50% : )
- 639. Restore March 25, 2006, at 02: 19 PM by J eff Gray Changed lines 7- 8 from: to: (: table border=0 cellpadding=5 cellspacing=0: ) (: cell: ) Changed line 53 from: to: (: cell: ) Changed line 83 from: to: (: tableend: ) Restore March 25, 2006, at 02: 17 PM by J eff Gray Added lines 7- 8: Added line 53: Added line 83: Restore March 25, 2006, at 12: 20 AM by J eff Gray Restore March 24, 2006, at 05: 46 PM by J eff Gray Changed lines 41- 42 from: You can define constants in arduino, that don't take up any program memory space on the chip. Arduino defines have the same syntax as C defines: to: You can define numbers in arduino that don't take up any program memory space on the chip. Arduino defines have the same syntax as C defines: Restore March 24, 2006, at 05: 45 PM by J eff Gray Added line 31: Constants Changed lines 39- 40 from: Defines to: Defines Restore March 24, 2006, at 05: 44 PM by J eff Gray Added lines 36- 49: Finally, defines are a useful C component that allow you to specify something before it is compiled. Defines You can define constants in arduino, that don't take up any program memory space on the chip. Arduino defines have the same syntax as C defines: #define constantName value Note that the # is necessary. For example: #define ledPin 3 The compiler will replace any mentions of ledPin with the value 3 at compile time. Deleted lines 78- 91: Creating New Functions
- 640. Defines You can define constants in arduino, that don't take up any program memory space on the chip. Arduino defines have the same syntax as C defines: #define constantName value Note that the # is necessary. For example: #define ledPin 3 The compiler will replace any mentions of ledPin with the value 3 at compile time. Restore March 24, 2006, at 05: 42 PM by J eff Gray Added lines 31- 35: Another form of variables are constants, which are preset variables that you do not need to define or initialize. HI GH | LOW I NPUT | OUTPUT Deleted lines 65- 69: Constants HI GH | LOW I NPUT | OUTPUT Restore March 24, 2006, at 04: 46 PM by J eff Gray Added lines 5- 6: Arduino programs can be divided in three main parts: Changed lines 9- 11 from: Arduino programs can be divided in three main parts: Variable Declaration to: Getting Started Added lines 12- 14: Variable Declaration Function Declaration Further Syntax Restore February 09, 2006, at 08: 25 AM by 85.18.81.162 Changed lines 22- 23 from: Variables are expressions that you can use in programs to store values, like e.g. sensor reading from an analog pin. They can have various types, which are described below. to: Variables are expressions that you can use in programs to store values, like e.g. sensor reading from an analog pin. They can have various types, which are described below. Warning: floating point variables and operations are not currently supported. Restore J anuary 20, 2006, at 10: 44 AM by 85.18.81.162 Changed lines 3- 6 from: These are the basics about the arduino language. to:
- 641. These are the basics about the Arduino language, which implemented in C. I f you're used to Processing or J ava, please check out the Arduino/ Processing language comparison. Restore J anuary 08, 2006, at 12: 46 PM by 82.186.237.10 Changed lines 53- 54 from: to: printNewline() Restore J anuary 03, 2006, at 03: 35 AM by 82.186.237.10 Deleted lines 65- 79: Writing Comments Comments are parts in the program that are used to inform about the way the program works. They are not going to be compiled, nor will be exported to the processor. They are useful for you to understand what a certain program you downloaded is doing or to inform to your colleagues about what one of its lines is. There are two different ways of marking a line as a comment: you could use a double- slash in the beginning of a line: / / you could use a combination of slash- asterisk - - > asterisk- slash encapsulating your comments: / * blabla * / Tip When experimenting with code the ability of commenting parts of your program becomes very useful for you to "park" part of the code for a while. Restore December 30, 2005, at 05: 41 AM by 82.186.237.10 Deleted lines 6- 9: Variables Variables are expressions that you can use in programs to store values, like e.g. sensor reading from an analog pin. Added lines 22- 29: Variables Variables are expressions that you can use in programs to store values, like e.g. sensor reading from an analog pin. They can have various types, which are described below. char int long Restore December 29, 2005, at 08: 08 AM by 82.186.237.10 Changed lines 18- 25 from: to: if for while ; (semicolon) {} (curly braces) / / (single line comment) / * * / (multi- line comment) Restore December 28, 2005, at 03: 59 PM by 82.186.237.10 Changed lines 22- 25 from: void pinMode(int pin, int mode) void digitalWrite(int pin, int val) int digitalRead(int pin) to: pinMode(pin, mode) digitalWrite(pin, value)
- 642. int digitalRead(pin) Changed lines 27- 29 from: int analogRead(int pin) void analogWrite(int pin, int val) to: int analogRead(pin) analogWrite(pin, value) Changed lines 31- 32 from: void beginSerial (int baud) void serialWrite(unsigned char c) to: beginSerial (speed) serialWrite(c) Changed lines 35- 42 from: void printMode(int mode) void printByte(unsigned char c) void printString(unsigned char * s) void printI nteger(int n) void printHex(unsigned int n) void printOctal(unsigned int n) void printBinary(unsigned int n) to: printMode(mode) printByte(c) printString(str) printI nteger(num) printHex(num) printOctal(num) printBinary(num) Changed lines 44- 47 from: unsigned long millis?() void delay(unsigned long ms) void delayMicroseconds(unsigned long us) to: unsigned long millis() delay(ms) delayMicroseconds(us) Restore December 16, 2005, at 02: 58 PM by 85.18.81.162 Added lines 67- 80: Defines You can define constants in arduino, that don't take up any program memory space on the chip. Arduino defines have the same syntax as C defines: #define constantName value Note that the # is necessary. For example: #define ledPin 3 The compiler will replace any mentions of ledPin with the value 3 at compile time. Restore
- 643. December 09, 2005, at 11: 39 AM by 195.178.229.25 Changed lines 4- 6 from: These are the functions available in the arduino language to: These are the basics about the arduino language. Changed line 15 from: variable declaration to: Variable Declaration Restore December 03, 2005, at 02: 02 PM by 213.140.6.103 Changed lines 50- 52 from: HI GH | LOW I NPUT | OUTPUT to: HI GH | LOW I NPUT | OUTPUT Restore December 03, 2005, at 01: 41 PM by 213.140.6.103 Changed line 21 from: Digital Pins to: Digital Pins Changed line 26 from: Analog Pins to: Analog Pins Changed line 30 from: Serial Communication to: Serial Communication Changed line 43 from: Handling Time to: Handling Time Restore December 03, 2005, at 01: 40 PM by 213.140.6.103 Added lines 20- 21: Digital Pins Added lines 25- 26: Analog Pins
- 644. Added lines 29- 30: Serial Communication Added lines 42- 43: Handling Time Restore December 03, 2005, at 12: 48 PM by 213.140.6.103 Added lines 40- 44: Constants HI GH | LOW I NPUT | OUTPUT Restore December 03, 2005, at 12: 37 PM by 213.140.6.103 Added lines 40- 43: Creating New Functions Restore December 03, 2005, at 10: 53 AM by 213.140.6.103 Changed lines 9- 10 from: to: Variables are expressions that you can use in programs to store values, like e.g. sensor reading from an analog pin. Added lines 12- 15: Arduino programs can be divided in three main parts: variable declaration Changed lines 38- 49 from: void delayMicroseconds(unsigned long us) to: void delayMicroseconds(unsigned long us) Writing Comments Comments are parts in the program that are used to inform about the way the program works. They are not going to be compiled, nor will be exported to the processor. They are useful for you to understand what a certain program you downloaded is doing or to inform to your colleagues about what one of its lines is. There are two different ways of marking a line as a comment: you could use a double- slash in the beginning of a line: / / you could use a combination of slash- asterisk - - > asterisk- slash encapsulating your comments: / * blabla * / Tip When experimenting with code the ability of commenting parts of your program becomes very useful for you to "park" part of the code for a while. Restore November 27, 2005, at 10: 42 AM by 81.154.199.248 Changed lines 12- 13 from: voide loop() to: void loop() Restore November 27, 2005, at 10: 17 AM by 81.154.199.248 Changed lines 24- 33 from: void printMode(int mode)
- 645. void printByte(unsigned char c) void printString(unsigned char * s) void printI nteger(int n) void printHex(unsigned int n) void printOctal(unsigned int n) void printBinary(unsigned int n) unsigned long millis() void delay(unsigned long ms) void delayMicroseconds(unsigned long us) to: void printMode(int mode) void printByte(unsigned char c) void printString(unsigned char * s) void printI nteger(int n) void printHex(unsigned int n) void printOctal(unsigned int n) void printBinary(unsigned int n) unsigned long millis?() void delay(unsigned long ms) void delayMicroseconds(unsigned long us) Restore November 27, 2005, at 10: 15 AM by 81.154.199.248 Changed lines 16- 23 from: void digitalWrite(int pin, int val) int digitalRead(int pin) int analogRead(int pin) void analogWrite(int pin, int val) void beginSerial(int baud) void serialWrite(unsigned char c) int serialAvailable() int serialRead() to: void digitalWrite(int pin, int val) int digitalRead(int pin) int analogRead(int pin) void analogWrite(int pin, int val) void beginSerial (int baud) void serialWrite(unsigned char c) int serialAvailable() int serialRead() Restore November 27, 2005, at 09: 58 AM by 81.154.199.248 Changed lines 11- 13 from: void setup voide loop to: void setup() voide loop() Restore November 27, 2005, at 09: 58 AM by 81.154.199.248 Added lines 9- 13: Program Structure void setup voide loop Restore
- 646. November 27, 2005, at 09: 56 AM by 81.154.199.248 Added lines 6- 9: Variables Functions Restore November 27, 2005, at 09: 49 AM by 81.154.199.248 Added lines 1- 24: Arduino Reference These are the functions available in the arduino language void pinMode(int pin, int mode) void digitalWrite(int pin, int val) int digitalRead(int pin) int analogRead(int pin) void analogWrite(int pin, int val) void beginSerial(int baud) void serialWrite(unsigned char c) int serialAvailable() int serialRead() void printMode(int mode) void printByte(unsigned char c) void printString(unsigned char * s) void void void void printI nteger(int n) printHex(unsigned int n) printOctal(unsigned int n) printBinary(unsigned int n) unsigned long millis() void delay(unsigned long ms) void delayMicroseconds(unsigned long us) Restore Edit Page | Page History | Printable View | All Recent Site Changes
- 647. Arduino Buy | Download | Getting Started | Learning | Reference | Hardware | FAQ search Blog » | Forum » | Playground » Reference.HomePage History Hide minor edits - Show changes to output J uly 02, 2008, at 03: 11 PM by David A. Mellis Changed lines 2- 3 from: !Arduino Reference to: !Language Reference Restore May 07, 2008, at 02: 40 PM by David A. Mellis Changed line 41 from: * [[Arithmetic | plus ]] (addition) to: * [[Arithmetic | + (addition)]] Restore April 29, 2008, at 10: 33 AM by David A. Mellis Changed lines 4- 5 from: ''See the '''[[Extended | extended reference]]''' for more advanced features of the Arduino languages and the '''[[Libraries | libraries page]]''' for interfacing with particular types of hardware. to: ''See the '''[[Extended | extended reference]]''' for more advanced features of the Arduino languages and the '''[[Libraries | libraries page]]''' for interfacing with particular types of hardware.'' Restore April 29, 2008, at 10: 33 AM by David A. Mellis Changed lines 4- 5 from: ''See the '''[[Extended | extended reference]]''' for more advanced features of the Arduino languages and the '''[[Libraries | libraries page]]''' for interfacing with particular types of hardware. The '''[[Tutorial/ Foundations| foundations page]]''' has extended descriptions of some hardware and software features.'' to: ''See the '''[[Extended | extended reference]]''' for more advanced features of the Arduino languages and the '''[[Libraries | libraries page]]''' for interfacing with particular types of hardware. Restore April 23, 2008, at 10: 30 PM by David A. Mellis Changed line 8 from: (: table width=90% border=0 cellpadding=5 cellspacing=0: ) to: (: table width=100% border=0 cellpadding=5 cellspacing=0: ) Restore March 31, 2008, at 06: 24 AM by Paul Badger Restore March 29, 2008, at 11: 39 AM by David A. Mellis Changed lines 128- 135 from: to: * [[pow]](base, exponent) * [[sqrt]](x) '''Trigonometry''' * [[sin]](rad) * [[cos]](rad) * [[tan]](rad) Restore March 29, 2008, at 09: 18 AM by David A. Mellis Changed lines 127- 128 from:
- 648. to: * [[map]](value, fromLow, fromHigh, toLow, toHigh) Restore March 07, 2008, at 10: 05 PM by Paul Badger Changed lines 4- 5 from: ''See the '''[[Extended | extended reference]]''' for more advanced features of the Arduino languages and the '''[[Libraries | libraries page]]''' for interfacing with particular types of hardware. The '''[[Tutorial/ Foundations| Foundations page]]''' has extended descriptions of some hardware and software features.'' to: ''See the '''[[Extended | extended reference]]''' for more advanced features of the Arduino languages and the '''[[Libraries | libraries page]]''' for interfacing with particular types of hardware. The '''[[Tutorial/ Foundations| foundations page]]''' has extended descriptions of some hardware and software features.'' Restore March 07, 2008, at 10: 04 PM by Paul Badger Changed lines 4- 5 from: ''See the '''[[Extended | extended reference]]''' for more advanced features of the Arduino languages and the '''[[Libraries | libraries page]]''' for interfacing with particular types of hardware. The [[Tutorial/ Foundations| Foundations page]] has extended descriptions of hardware and software features.'' to: ''See the '''[[Extended | extended reference]]''' for more advanced features of the Arduino languages and the '''[[Libraries | libraries page]]''' for interfacing with particular types of hardware. The '''[[Tutorial/ Foundations| Foundations page]]''' has extended descriptions of some hardware and software features.'' Restore March 07, 2008, at 10: 03 PM by Paul Badger Changed lines 4- 5 from: ''See the '''[[Extended | extended reference]]''' for more advanced features of the Arduino languages and libraries page]]''' for interfacing with particular types of hardware. The [[Tutorial/ Foundations| Foundations descriptions of hardware and software features.'' to: ''See the '''[[Extended | extended reference]]''' for more advanced features of the Arduino languages and libraries page]]''' for interfacing with particular types of hardware. The [[Tutorial/ Foundations| Foundations extended descriptions of hardware and software features.'' Restore the '''[[Libraries | page has extended the '''[[Libraries | page]] has March 07, 2008, at 10: 03 PM by Paul Badger Changed lines 4- 5 from: ''See the '''[[Extended | extended reference]]''' for more advanced features of the Arduino languages and the '''[[Libraries | libraries page]]''' for interfacing with particular types of hardware.'' to: ''See the '''[[Extended | extended reference]]''' for more advanced features of the Arduino languages and the '''[[Libraries | libraries page]]''' for interfacing with particular types of hardware. The [[Tutorial/ Foundations| Foundations page has extended descriptions of hardware and software features.'' Restore March 06, 2008, at 09: 01 AM by David A. Mellis Changed lines 4- 5 from: ''See the '''[[Extended | extended reference]]''' for more advanced features of the Arduino languages.'' to: ''See the '''[[Extended | extended reference]]''' for more advanced features of the Arduino languages and the '''[[Libraries | libraries page]]''' for interfacing with particular types of hardware.'' Changed lines 147- 148 from: '''Didn't find something?''' Check the [[Extended | extended reference]]. to: '''Didn't find something?''' Check the [[Extended | extended reference]] or the [[Libraries | libraries]]. Restore February 28, 2008, at 09: 49 AM by David A. Mellis Changed lines 77- 78 from: to: * [[Constants| true]] | [[Constants| false]] Restore November 24, 2007, at 12: 42 AM by Paul Badger Changed line 14 from: * void [[setup]](). to: * void [[setup]]() Restore November 24, 2007, at 12: 39 AM by Paul Badger - test the summary feature
- 649. Changed line 14 from: * void [[setup]]() to: * void [[setup]](). Restore November 05, 2007, at 03: 44 AM by David A. Mellis Deleted line 108: * [[analogPins | analog pins]] Restore November 03, 2007, at 10: 53 PM by Paul Badger Added line 109: * [[analogPins | analog pins]] Deleted line 110: * [[analogPins | analog pins]] Restore November 03, 2007, at 10: 01 PM by Paul Badger Changed line 110 from: * [[analogPins | configuring analog pins]] to: * [[analogPins | analog pins]] Restore November 03, 2007, at 09: 58 PM by Paul Badger Restore November 03, 2007, at 09: 58 PM by Paul Badger Changed lines 109- 110 from: * int [[analogRead]](pin) to: * int [[analogRead]](pin) * [[analogPins | configuring analog pins]] Restore August 31, 2007, at 11: 05 PM by David A. Mellis Changed lines 2- 3 from: !Arduino Reference (standard) to: !Arduino Reference Restore August 31, 2007, at 10: 46 PM by David A. Mellis Changed lines 6- 7 from: Arduino programs can be divided in three main parts: '''structure''', '''values''' (variables and constants), and '''functions'''. The Arduino language is based on C/ C++. to: Arduino programs can be divided in three main parts: ''structure'', ''values'' (variables and constants), and ''functions''. The Arduino language is based on C/ C++. Restore August 31, 2007, at 10: 46 PM by David A. Mellis Changed lines 4- 5 from: ''See the'' '''[[Extended | extended reference]]''' ''for more advanced features of the Arduino languages.'' to: ''See the '''[[Extended | extended reference]]''' for more advanced features of the Arduino languages.'' Restore August 31, 2007, at 10: 45 PM by David A. Mellis Changed lines 4- 5 from: See the '''[[Extended | extended reference]]''' for more advanced features of the Arduino languages. to: ''See the'' '''[[Extended | extended reference]]''' ''for more advanced features of the Arduino languages.'' Restore August 31, 2007, at 10: 45 PM by David A. Mellis Changed lines 4- 5 from: ''The [[Extended | extended reference]] covers more advanced features of the Arduino language.'' to: See the '''[[Extended | extended reference]]''' for more advanced features of the Arduino languages. Restore August 31, 2007, at 10: 44 PM by David A. Mellis Changed lines 39- 41 from:
- 650. * [[Define | #define]] * [[I nclude | #include]] to: Restore August 31, 2007, at 10: 43 PM by David A. Mellis Added lines 146- 147: [[<<]] Restore August 31, 2007, at 10: 43 PM by David A. Mellis Added lines 146- 147: '''Didn't find something?''' Check the [[Extended | extended reference]]. Restore August 31, 2007, at 10: 40 PM by David A. Mellis - removing things that only belong in the extended reference. Deleted lines 61- 68: !!!!Bitwise Operators * [[BitwiseAnd | &]] (bitwise and) * [[BitwiseAnd | | ]] (bitwise or) * [[BitwiseAnd | ^]] (bitwise xor) * [[BitwiseXorNot | ~]] (bitwise not) * [[Bitshift | <<]] (bitshift left) * [[Bitshift | >>]] (bitshift right) Deleted lines 69- 71: * [[bitwiseCompound | &= ]] (compound bitwise and) * [[bitwiseCompound | | = ]] (compound bitwise or) Deleted lines 97- 109: !!!!Variable Scope & Qualifiers * * * * [[scope | variable scope]] [[static]] [[volatile]] [[const]] !!!!Utilities * [[cast]] (cast operator) Deleted line 99: * [[keywords]] Deleted lines 134- 140: '''External I nterrupts''' These functions allow you to trigger a function when the input to a pin changes value. * [[attachI nterrupt]](interrupt, function, mode) * [[detachI nterrupt]](interrupt) Restore August 31, 2007, at 10: 26 PM by David A. Mellis Changed lines 121- 122 from: * [[sizeof]]() (sizeof operator) to: Changed lines 177- 178 from: [[Extended]] to: Restore August 31, 2007, at 10: 25 PM by David A. Mellis Changed lines 2- 3 from: !Arduino Reference (basic) to: !Arduino Reference (standard) Restore August 31, 2007, at 10: 24 PM by David A. Mellis Changed lines 4- 6 from: ''The [[Extended | extended reference]] covers more advanced features of the Arduino language.'' [[<<]]
- 651. to: ''The [[Extended | extended reference]] covers more advanced features of the Arduino language.'' Restore August 31, 2007, at 10: 24 PM by David A. Mellis Changed lines 4- 6 from: ''The [[Extended | extended reference]] covers more advanced features of the Arduino language.'' to: ''The [[Extended | extended reference]] covers more advanced features of the Arduino language.'' [[<<]] Restore August 31, 2007, at 10: 24 PM by David A. Mellis Changed lines 4- 6 from: ''The [[Extended | extended reference]] covers more advanced features of the Arduino language.'' to: ''The [[Extended | extended reference]] covers more advanced features of the Arduino language.'' Restore August 31, 2007, at 10: 23 PM by David A. Mellis Changed lines 6- 7 from: [[<<]] to: Restore August 31, 2007, at 10: 23 PM by David A. Mellis Added lines 6- 7: [[<<]] Restore August 31, 2007, at 10: 23 PM by David A. Mellis Changed lines 4- 5 from: ''For more advanced features of the Arduino language, see the [[Extended | extended reference]].'' to: ''The [[Extended | extended reference]] covers more advanced features of the Arduino language.'' Restore August 31, 2007, at 10: 22 PM by David A. Mellis Changed lines 2- 3 from: !Arduino Reference to: !Arduino Reference (basic) ''For more advanced features of the Arduino language, see the [[Extended | extended reference]].'' Restore August 31, 2007, at 10: 19 PM by David A. Mellis Changed lines 84- 85 from: Constants are labels for certain values which are preset in the Arduino compiler. You do not need to define or initialize constants. Arduino includes the following pre- defined constants. to: Constants are particular values with specific meanings. Restore August 31, 2007, at 10: 18 PM by David A. Mellis Changed lines 81- 82 from: Variables are expressions that you can use in programs to store values, such as a sensor reading from an analog pin. They can have various types, which are described below. to: Variables are expressions that you can use in programs to store values, such as a sensor reading from an analog pin. !!!!Constants Constants are labels for certain values which are preset in the Arduino compiler. You do not need to define or initialize constants. Arduino includes the following pre- defined constants. * [[Constants| HI GH]] | [[Constants| LOW]] * [[Constants| I NPUT]] | [[Constants| OUTPUT]] * [[I nteger Constants]]
- 652. Added lines 93- 94: Variables can have various types, which are described below. Changed lines 115- 122 from: !!!!Constants Constants are labels for certain values which are preset in the Arduino compiler. You do not need to define or initialize constants. Arduino includes the following pre- defined constants. * [[Constants| HI GH]] | [[Constants| LOW]] * [[Constants| I NPUT]] | [[Constants| OUTPUT]] * [[I ntegerConstants]] to: Restore August 31, 2007, at 09: 46 PM by David A. Mellis - removing PROGMEM (doesn't belong in the basic reference) Changed lines 104- 105 from: * [[PROGMEM]] to: Restore August 31, 2007, at 09: 45 PM by David A. Mellis Changed lines 10- 11 from: I n Arduino, the standard program entry point (main) is defined in the core and calls into two functions in a sketch. '''setup()''' is called once, then '''loop()''' is called repeatedly (until you reset your board). to: An Arduino program run in two parts: Added lines 15- 16: setup() is preparation, and loop() is execution. I n the setup section, always at the top of your program, you would set [[pinMode| pinModes]], initialize serial communication, etc. The loop section is the code to be executed - - reading inputs, triggering outputs, etc. Restore August 31, 2007, at 09: 44 PM by David A. Mellis Changed lines 10- 11 from: An Arduino program run in two parts: to: I n Arduino, the standard program entry point (main) is defined in the core and calls into two functions in a sketch. '''setup()''' is called once, then '''loop()''' is called repeatedly (until you reset your board). Deleted lines 14- 15: setup() is preparation, and loop() is execution. I n the setup section, always at the top of your program, you would set [[pinMode| pinModes]], initialize serial communication, etc. The loop section is the code to be executed - - reading inputs, triggering outputs, etc. Restore August 23, 2007, at 02: 24 PM by Paul Badger Changed lines 15- 16 from: setup() is preparation, and loop() is execution. I n the setup section, always at the top of your program, you would set [[pinMode]], initialize serial communication, etc. The loop section is the code to be executed - - reading inputs, triggering outputs, etc. to: setup() is preparation, and loop() is execution. I n the setup section, always at the top of your program, you would set [[pinMode| pinModes]], initialize serial communication, etc. The loop section is the code to be executed - - reading inputs, triggering outputs, etc. Restore August 23, 2007, at 02: 19 PM by Paul Badger Changed lines 81- 82 from: Variables are expressions that you can use in programs to store values, like e.g. sensor reading from an analog pin. They can have various types, which are described below. to: Variables are expressions that you can use in programs to store values, such as a sensor reading from an analog pin. They can have various types, which are described below. Restore J uly 17, 2007, at 11: 10 AM by Paul Badger Changed lines 19- 20 from: * * [[void | void keyword]] to: * * [[void | void]] Restore J uly 17, 2007, at 10: 27 AM by Paul Badger -
- 653. Restore J uly 17, 2007, at 10: 27 AM by Paul Badger Changed lines 174- 175 from: to: [[Extended]] Restore J uly 17, 2007, at 06: 36 AM by Paul Badger Restore J uly 17, 2007, at 06: 35 AM by Paul Badger Changed lines 19- 20 from: to: * * [[void | void keyword]] Restore J uly 16, 2007, at 11: 47 PM by Paul Badger Added lines 31- 38: !!!!Further Syntax * [[SemiColon| ; ]] (semicolon) * [[Braces| {}]] (curly braces) * [[Comments| / / ]] (single line comment) * [[Comments| / * * / ]] (multi- line comment) * [[Define | #define]] * [[I nclude | #include]] Deleted lines 77- 85: !!!!Further Syntax * [[SemiColon| ; ]] (semicolon) * [[Braces| {}]] (curly braces) * [[Comments| / / ]] (single line comment) * [[Comments| / * * / ]] (multi- line comment) * [[Define | #define]] * [[I nclude | #include]] Restore J uly 16, 2007, at 11: 05 PM by Paul Badger Changed lines 29- 30 from: to: * [[return]] Restore J uly 16, 2007, at 09: 42 PM by Paul Badger Changed lines 173- 174 from: [[Alpha]] to: Restore J uly 16, 2007, at 09: 41 PM by Paul Badger Restore J uly 16, 2007, at 09: 41 PM by Paul Badger Restore J uly 16, 2007, at 09: 40 PM by Paul Badger Changed lines 173- 174 from: to: [[Alpha]] Restore J uly 16, 2007, at 05: 56 AM by Paul Badger Changed lines * [[Arithmetic * [[Arithmetic * [[Arithmetic 31- 36 from: | plus ]](addition) | - ]](subtraction) | * ]](multiplication) * [[Arithmetic | / ]](division) * [[modulo | % ]](modulo) to: * [[Arithmetic | plus ]] (addition) * [[Arithmetic | - ]] (subtraction) * [[Arithmetic | * ]] (multiplication)
- 654. * [[Arithmetic | / ]] (division) * [[modulo | % ]] (modulo) Restore J uly 16, 2007, at 05: 55 AM by Paul Badger Changed lines 63- 69 from: * [[incrementCompound | += ]] (compound multiplication) * [[incrementCompound | - = ]] (compound division) * [[bitwiseCompound | &= ]] (bitwise and) * [[bitwiseCompound | | = ]] (bitwise or) to: * [[incrementCompound | * = ]] (compound multiplication) * [[incrementCompound | / = ]] (compound division) * [[bitwiseCompound | &= ]] (compound bitwise and) * [[bitwiseCompound | | = ]] (compound bitwise or) Restore J uly 16, 2007, at 05: 54 AM by Paul Badger Changed lines 61- 62 from: * [[incrementCompound | += ]] (compound increment) * [[incrementCompound to: * [[incrementCompound * [[incrementCompound * [[incrementCompound * [[incrementCompound Restore | - = ]] (compound decrement) | | | | += ]] (compound addition) - = ]] (compound subtraction) += ]] (compound multiplication) - = ]] (compound division) J uly 16, 2007, at 05: 12 AM by Paul Badger Changed lines 60- 62 from: * [[decrement | - - ]] (decrement) to: * [[increment | - - ]] (decrement) * [[incrementCompound | += ]] (compound increment) * [[incrementCompound | - = ]] (compound decrement) Restore J uly 16, 2007, at 04: 48 AM by Paul Badger Changed lines 60- 64 from: * [[decrement | | ]] (decrement) * [[ | &= ]] (bitwise and) * [[ | | = ]] (bitwise or) to: * [[decrement | - - ]] (decrement) * [[bitwiseCompound | &= ]] (bitwise and) * [[bitwiseCompound | | = ]] (bitwise or) Restore J uly 16, 2007, at 04: 46 AM by Paul Badger Added lines 58- 64: !!!!Compound Operators * [[increment | ++]] (increment) * [[decrement | | ]] (decrement) * [[ | &= ]] (bitwise and) * [[ | | = ]] (bitwise or) Restore J une 11, 2007, at 06: 57 PM by Paul Badger Changed lines 91- 92 from: to: * [[PROGMEM]] Restore May 29, 2007, at 02: 34 PM by Paul Badger Changed lines 85- 86 from:
- 655. !!!!Variable Scope to: !!!!Variable Scope & Qualifiers Changed lines 90- 91 from: to: * [[const]] Restore May 28, 2007, at 01: 50 PM by Paul Badger Added line 72: * [[BooleanVariables| boolean]] Restore May 26, 2007, at 07: 41 PM by Paul Badger Changed lines 106- 107 from: * [[ASCI I chart]] to: * [[ASCI I chart| ASCI I chart]] Restore May 26, 2007, at 07: 41 PM by Paul Badger Changed lines 106- 107 from: to: * [[ASCI I chart]] Restore May 26, 2007, at 07: 08 AM by Paul Badger Changed line 26 from: * [[do... while]] to: * [[doWhile | do... while]] Restore May 26, 2007, at 07: 07 AM by Paul Badger Added line 26: * [[do... while]] Restore May 26, 2007, at 06: 36 AM by Paul Badger Changed lines 26- 28 from: to: * [[break]] * [[continue]] Restore May 17, 2007, at 10: 36 PM by Paul Badger Changed lines 85- 86 from: to: * [[volatile]] Restore May 17, 2007, at 11: 51 AM by David A. Mellis Changed lines 4- 5 from: Arduino programs can be divided in three main parts: '''structure''', '''values''' (variables and constants), and '''functions'''. to: Arduino programs can be divided in three main parts: '''structure''', '''values''' (variables and constants), and '''functions'''. The Arduino language is based on C/ C++. Restore May 17, 2007, at 11: 09 AM by Paul Badger Changed lines 110- 111 from: * [[pullups | pullup resistors]] to: Restore May 17, 2007, at 11: 08 AM by Paul Badger Changed lines 110- 111 from: * pullup resistors to: * [[pullups | pullup resistors]] Restore May 17, 2007, at 11: 08 AM by Paul Badger Changed lines 110- 111 from: to:
- 656. * pullup resistors Restore May 04, 2007, at 06: 01 AM by Paul Badger Changed lines 83- 85 from: * Variable scope * Static to: * [[scope | variable scope]] * [[static]] Restore May 04, 2007, at 06: 00 AM by Paul Badger Added lines 80- 85: !!!!Variable Scope * Variable scope * Static Restore April 29, 2007, at 05: 06 AM by David A. Mellis - math.h isn't supported, so don't document it here. Changed lines 123- 124 from: * [[mathHeader| math.h]](trig,sqrt,pow etc.) to: Restore April 29, 2007, at 05: 03 AM by David A. Mellis - API changes (including exposing internal registers) should be discussed on the developers list Changed lines 54- 55 from: * [[port manipulation]] to: Changed lines 96- 98 from: * [[Atmega8 hardware]] * [[Atmega168 hardware]] to: Restore April 27, 2007, at 10: 18 PM by Paul Badger Changed lines 126- 127 from: * [[mathHeader| math.h]](math.h - trig,sqrt,pow etc.) to: * [[mathHeader| math.h]](trig,sqrt,pow etc.) Restore April 27, 2007, at 10: 18 PM by Paul Badger Changed lines 126- 127 from: * [[math]](math.h - trig,sqrt,pow etc.) to: * [[mathHeader| math.h]](math.h - trig,sqrt,pow etc.) Restore April 27, 2007, at 10: 17 PM by Paul Badger Changed lines 126- 127 from: * [[mathHeader]](trig,sqrt,pow etc.) to: * [[math]](math.h - trig,sqrt,pow etc.) Restore April 27, 2007, at 10: 08 PM by Paul Badger Added line 77: * [[double]] Restore April 27, 2007, at 10: 06 PM by Paul Badger Changed lines 125- 126 from: * [[math.h]](trig,sqrt,pow etc.) to: * [[mathHeader]](trig,sqrt,pow etc.) Restore April 27, 2007, at 09: 25 PM by Paul Badger Changed lines 125- 126 from: to: * [[math.h]](trig,sqrt,pow etc.)
- 657. Restore April 25, 2007, at 09: 34 PM by Paul Badger Changed lines 86- 87 from: * [[Constants]] to: * [[I ntegerConstants]] Restore April 25, 2007, at 09: 31 PM by Paul Badger Changed lines 86- 87 from: * [[I nteger Constants]] to: * [[Constants]] Changed line 90 from: * [[cast]](cast operator) to: * [[cast]] (cast operator) Restore April 25, 2007, at 09: 24 PM by Paul Badger Changed lines 62- 63 from: * [[Define | #include]] to: * [[I nclude | #include]] Restore April 25, 2007, at 08: 58 PM by Paul Badger Changed lines 62- 63 from: to: * [[Define | #include]] Restore April 24, 2007, at 10: 32 AM by Paul Badger Changed lines 54- 55 from: to: * [[port manipulation]] Changed lines 97- 98 from: * [[port manipulation]] to: Restore April 24, 2007, at 12: 58 AM by Paul Badger Changed lines 96- 97 from: * [[Port Manipulation]] to: * [[port manipulation]] Restore April 24, 2007, at 12: 57 AM by Paul Badger Changed lines 91- 92 from: !!!!Reference to: !!Reference Restore April 24, 2007, at 12: 29 AM by Paul Badger Changed lines 96- 97 from: to: * [[Port Manipulation]] Restore April 23, 2007, at 10: 29 PM by Paul Badger Changed lines 94- 96 from: to: * [[Atmega8 hardware]] * [[Atmega168 hardware]] Restore April 18, 2007, at 08: 49 AM by Paul Badger Changed line 50 from: * [[BitwiseXorNot | ^]] (bitwise xor) to: * [[BitwiseAnd | ^]] (bitwise xor)
- 658. Restore April 17, 2007, at 11: 22 PM by Paul Badger Changed lines 93- 94 from: * [[keywords]]) to: * [[keywords]] Restore April 17, 2007, at 11: 21 PM by Paul Badger Changed lines 93- 94 from: * [[keywords]](keywords) to: * [[keywords]]) Restore April 17, 2007, at 11: 11 PM by Paul Badger Changed lines 91- 94 from: to: !!!!Reference * [[keywords]](keywords) Restore April 17, 2007, at 09: 08 PM by Paul Badger Changed line 50 from: * [[Bitwise | ^]] (bitwise xor) to: * [[BitwiseXorNot | ^]] (bitwise xor) Restore April 17, 2007, at 08: 49 PM by Paul Badger Changed line 51 from: * [[Bitwise | ~]] (bitwise not) to: * [[BitwiseXorNot | ~]] (bitwise not) Restore April 17, 2007, at 08: 31 PM by Paul Badger Changed lines 48- 49 from: * [[Bitwise | &]] (bitwise and) * [[Bitwise | | ]] (bitwise or) to: * [[BitwiseAnd | &]] (bitwise and) * [[BitwiseAnd | | ]] (bitwise or) Restore April 16, 2007, at 11: 15 AM by Paul Badger Added line 71: * [[unsigned int]] Added line 73: * [[unsigned long]] Restore April 16, 2007, at 11: 02 AM by Paul Badger Changed lines 2- 3 from: !!Arduino Reference to: !Arduino Reference Restore April 16, 2007, at 02: 02 AM by David A. Mellis Added lines 66- 67: !!!!Data Types Changed lines 75- 77 from: * [[cast]](cast operator) * [[sizeof]]() (sizeof operator) to: Changed lines 84- 85 from: to: !!!!Utilities * [[cast]](cast operator)
- 659. * [[sizeof]]() (sizeof operator) Restore April 16, 2007, at 01: 56 AM by Paul Badger Changed line 28 from: * [[Arithmetic | + ]](addition) to: * [[Arithmetic | plus ]](addition) Restore April 16, 2007, at 01: 55 AM by David A. Mellis Changed line 28 from: * [[Arithmetic | plus ]](addition) to: * [[Arithmetic | + ]](addition) Changed lines 48- 51 from: * [[Bitwise | &]] (and) * [[Bitwise | | ]] (or) * [[Bitwise | ^]] (xor) * [[Bitwise | ~]] (not) to: * [[Bitwise | &]] (bitwise and) * [[Bitwise | | ]] (bitwise or) * [[Bitwise | ^]] (bitwise xor) * [[Bitwise | ~]] (bitwise not) Restore April 16, 2007, at 12: 22 AM by Paul Badger Changed lines 52- 54 from: to: * [[Bitshift | <<]] (bitshift left) * [[Bitshift | >>]] (bitshift right) Restore April 16, 2007, at 12: 19 AM by Paul Badger Restore April 15, 2007, at 11: 47 PM by Paul Badger Changed lines 51- 52 from: * [[Bitwise | !]] (not) to: * [[Bitwise | ~]] (not) Restore April 15, 2007, at 11: 35 PM by Paul Badger Changed line 42 from: !!!!Boolean Operations to: !!!!Boolean Operators Changed line 47 from: !!!!Bitwise Operations to: !!!!Bitwise Operators Restore April 15, 2007, at 11: 34 PM by Paul Badger Added lines 47- 52: !!!!Bitwise Operations * [[Bitwise | &]] (and) * [[Bitwise | | ]] (or) * [[Bitwise | ^]] (xor) * [[Bitwise | !]] (not) Restore April 15, 2007, at 11: 31 PM by Paul Badger Changed lines 66- 67 from: * [[sizeof]](sizeof operator) to: * [[sizeof]]() (sizeof operator) Restore April 15, 2007, at 04: 40 PM by Paul Badger -
- 660. Changed lines 66- 67 from: to: * [[sizeof]](sizeof operator) Restore April 15, 2007, at 04: 17 PM by Paul Badger Changed lines 65- 66 from: to: * [[cast]](cast operator) Restore April 15, 2007, at 03: 05 PM by Paul Badger Changed lines 28- 31 from: * [[addition | + ]](addition) * [[subtraction | - ]](subtraction) * [[multiplication | * ]](multiplication) * [[division | / ]](division) to: * [[Arithmetic | plus ]](addition) * [[Arithmetic | - ]](subtraction) * [[Arithmetic | * ]](multiplication) * [[Arithmetic | / ]](division) Restore April 15, 2007, at 02: 58 PM by Paul Badger Restore April 15, 2007, at 02: 55 PM by Paul Badger Restore April 15, 2007, at 02: 49 PM by Paul Badger Changed lines 28- 31 from: * [[addition | +]](modulo) * [[subtraction | - ]](modulo) * [[multiplication | * ]](modulo) * [[dvivision | / ]](modulo) to: * [[addition | + ]](addition) * [[subtraction | - ]](subtraction) * [[multiplication | * ]](multiplication) * [[division | / ]](division) Restore April 15, 2007, at 02: 47 PM by Paul Badger Restore April 15, 2007, at 02: 47 PM by Paul Badger Added lines 28- 31: * [[addition | +]](modulo) * [[subtraction | - ]](modulo) - - * [[multiplication | * ]](modulo) * [[dvivision | / ]](modulo) Restore April 13, 2007, at 11: 27 PM by David A. Mellis Changed lines 28- 29 from: * [[% ]](modulo) to: * [[modulo | % ]](modulo) Restore April 13, 2007, at 11: 20 PM by Paul Badger Restore April 13, 2007, at 11: 18 PM by Paul Badger Restore April 13, 2007, at 11: 17 PM by Paul Badger Restore April 13, 2007, at 10: 53 PM by David A. Mellis - moving % (modulo) the left column under "arithmetic operators"; keeping the right col. for functions Changed lines 15- 16 from: setup() is preparation, and loop() is execution. I n the setup section, always at the top of your program, you woiuld set [[pinMode]], initialize serial communication, etc. The loop section is the code to be executed - - reading inputs, triggering outputs, etc. to:
- 661. setup() is preparation, and loop() is execution. I n the setup section, always at the top of your program, you would set [[pinMode]], initialize serial communication, etc. The loop section is the code to be executed - - reading inputs, triggering outputs, etc. Added lines 27- 29: !!!!Arithmetic Operators * [[% ]](modulo) Deleted line 93: * [[% ]](modulo) Restore April 13, 2007, at 10: 50 PM by Paul Badger Changed line 91 from: * [[% (modulo)]] to: * [[% ]](modulo) Restore April 13, 2007, at 10: 00 PM by Paul Badger Changed line 91 from: * [[% ]] (modulo) to: * [[% (modulo)]] Restore April 13, 2007, at 09: 49 PM by Paul Badger Changed line 91 from: to: * [[% ]] (modulo) Restore December 25, 2006, at 06: 25 PM by David A. Mellis Changed lines 4- 6 from: Arduino provides a library of functions on top of the standard AVR C/ C++ routines. The main file of your sketch is compiled as C++, but you can add straight C files as well. Arduino programs can be divided in three main parts: '''program structure''', '''values''' (variables and constants), and '''functions'''. to: Arduino programs can be divided in three main parts: '''structure''', '''values''' (variables and constants), and '''functions'''. Changed lines 8- 11 from: !! Program Structure !!!!Getting Started to: !! Structure Added line 52: * [[byte]] Changed lines 65- 66 from: to: * [[I nteger Constants]] Changed lines 75- 77 from: * int [[digitalRead]](pin) * unsigned long [[pulseI n]](pin, value) to: * int [[digitalRead]](pin) Changed lines 81- 85 from: '''Handling Time''' to: '''Advanced I / O''' * [[shiftOut]](dataPin, clockPin, bitOrder, value) * unsigned long [[pulseI n]](pin, value) '''Time''' Changed lines 90- 93 from: '''Random number generation'''
- 662. New in Arduino 0005. to: '''Math''' * [[min]](x, y) * [[max]](x, y) * [[abs]](x) * [[constrain]](x, a, b) '''Random Numbers''' Added lines 103- 109: '''External I nterrupts''' These functions allow you to trigger a function when the input to a pin changes value. * [[attachI nterrupt]](interrupt, function, mode) * [[detachI nterrupt]](interrupt) Changed lines 115- 116 from: * [[Serial.available]]() * [[Serial.read]]() to: * int [[Serial.available]]() * int [[Serial.read]]() * [[Serial.flush]]() Deleted lines 120- 137: ''Old serial library (deprecated).'' * [[beginSerial]](speed) * [[serialWrite]](c) * int [[serialAvailable]]() * int [[serialRead]]() * [[printMode]](mode) * [[printByte]](c) * [[printString]](str) * [[printI nteger]](num) * [[printHex]](num) * [[printOctal]](num) * [[printBinary]](num) * [[printNewline]]() '''Expert/ I nternal Functions''' * [[http: / / www.nongnu.org/ avr- libc/ user- manual/ modules.html | avr- libc]] is the standard library of C functions that Arduino builds on. To use these, you may need to add the corresponding '''#include''' statement to the top of your sketch. Restore November 12, 2006, at 11: 51 AM by David A. Mellis - removing bit about floats not being supported Changed lines 52- 53 from: Variables are expressions that you can use in programs to store values, like e.g. sensor reading from an analog pin. They can have various types, which are described below. ''Floating point variables and operations are not currently supported.'' to: Variables are expressions that you can use in programs to store values, like e.g. sensor reading from an analog pin. They can have various types, which are described below. Added line 57: * [[float]] Restore November 04, 2006, at 01: 19 PM by David A. Mellis Deleted lines 5- 6: I f you're used to Processing or J ava, please check out the [[http: / / arduino.berlios.de/ index.php/ Main/ ComparisonProcessing | Arduino/ Processing language comparison]]. Restore November 04, 2006, at 01: 18 PM by David A. Mellis Deleted lines 123- 137: !!Libraries ''These are the "official" libraries that are included in the Arduino distribution. They are compatible with the Wiring versions,
- 663. and the links below point to the (excellent) Wiring documentation.'' * [[http: / / wiring.org.co/ reference/ libraries/ Matrix/ index.html | Matrix]] - Basic LED Matrix display manipulation library * [[http: / / wiring.org.co/ reference/ libraries/ Sprite/ index.html | Sprite]] - Basic image sprite manipulation library for use in animations with an LED matrix * [[http: / / wiring.org.co/ reference/ libraries/ Wire/ index.html | Wire]] - Two Wire I nterface for sending and receiving data over a net of devices or sensors. ''These are not (yet) included with the Arduino distribution and may change.'' * [[http: / / www.arduino.cc/ playground/ Code/ SimpleMessageSystem | Simple Message System]] * [[http: / / www.arduino.cc/ en/ Tutorial/ LCDLibrary | LCD Library]] * [[Tutorial/ TextString| TextString Library]] * [[http: / / www.arduino.cc/ playground/ Code/ Metro | Metro]] Restore October 21, 2006, at 03: 32 PM by David A. Mellis - adding link to metro library Added lines 137- 138: * [[http: / / www.arduino.cc/ playground/ Code/ Metro | Metro]] Restore October 21, 2006, at 03: 07 PM by David A. Mellis - adding libraries included in the distribution Added lines 126- 131: ''These are the "official" libraries that are included in the Arduino distribution. They are compatible with the Wiring versions, and the links below point to the (excellent) Wiring documentation.'' * [[http: / / wiring.org.co/ reference/ libraries/ Matrix/ index.html | Matrix]] - Basic LED Matrix display manipulation library * [[http: / / wiring.org.co/ reference/ libraries/ Sprite/ index.html | Sprite]] - Basic image sprite manipulation library for use in animations with an LED matrix * [[http: / / wiring.org.co/ reference/ libraries/ Wire/ index.html | Wire]] - Two Wire I nterface for sending and receiving data over a net of devices or sensors. Restore October 20, 2006, at 11: 57 AM by Tom I goe Added line 130: * [[Tutorial/ TextString| TextString Library]] Restore October 01, 2006, at 03: 55 PM by David A. Mellis - adding libraries Added lines 123- 129: !!Libraries ''These are not (yet) included with the Arduino distribution and may change.'' * [[http: / / www.arduino.cc/ playground/ Code/ SimpleMessageSystem | Simple Message System]] * [[http: / / www.arduino.cc/ en/ Tutorial/ LCDLibrary | LCD Library]] Restore September 05, 2006, at 08: 58 AM by David A. Mellis Changed lines 4- 5 from: These are the basics about the Arduino language, which implemented in C. I f you're used to Processing or J ava, please check out the [[http: / / arduino.berlios.de/ index.php/ Main/ ComparisonProcessing | Arduino/ Processing language comparison]]. to: Arduino provides a library of functions on top of the standard AVR C/ C++ routines. The main file of your sketch is compiled as C++, but you can add straight C files as well. I f you're used to Processing or J ava, please check out the [[http: / / arduino.berlios.de/ index.php/ Main/ ComparisonProcessing | Arduino/ Processing language comparison]]. Restore August 27, 2006, at 10: 58 AM by David A. Mellis Added lines 81- 93: '''Handling Time''' * unsigned long [[millis]]() * [[delay]](ms) * [[delayMicroseconds]](us) '''Random number generation'''
- 664. New in Arduino 0005. * [[randomSeed]](seed) * long [[random]](max) * long [[random]](min, max) Changed lines 118- 122 from: '''Handling Time''' * unsigned long [[millis]]() * [[delay]](ms) * [[delayMicroseconds]](us) to: Restore August 26, 2006, at 04: 07 PM by David A. Mellis Changed line 1 from: (: title API Reference: ) to: (: title Reference: ) Restore August 26, 2006, at 04: 07 PM by David A. Mellis Changed lines 1- 2 from: (: title Arduino API Reference: ) !!Arduino Reference to: (: title API Reference: ) !!Arduino Reference Restore August 26, 2006, at 04: 07 PM Changed lines 1- 2 from: !!Arduino Reference to: (: title Arduino API Reference: ) Restore August 01, 2006, at 12: 55 PM Changed lines 56- 58 from: to: * [[string]] * [[array]] Restore August 01, 2006, at 07: 18 AM Added lines 30- 31: * [[if| ==]] (equal to) * [[if| !=]] (not equal to) Restore by David A. Mellis - !!Arduino Reference by David A. Mellis - Adding string and array. by David A. Mellis - August 01, 2006, at 07: 17 AM by David A. Mellis Changed lines 30- 34 from: * [[Comparison| <]] (less than) * [[Comparison| >]] (greater than) * [[Comparison| <=]] (less than or equal to) * [[Comparison| >=]] (greater than or equal to) to: * [[if| <]] (less than) * [[if| >]] (greater than) * [[if| <=]] (less than or equal to) * [[if| >=]] (greater than or equal to) Restore August 01, 2006, at 07: 04 AM by David A. Mellis - adding comparison and boolean operators Added lines 29- 39: !!!!Comparison Operators * [[Comparison| <]] (less than) * [[Comparison| >]] (greater than) * [[Comparison| <=]] (less than or equal to) * [[Comparison| >=]] (greater than or equal to) !!!!Boolean Operations * [[Boolean | &&]] (and) * [[Boolean | | | ]] (or)
- 665. * [[Boolean | !]] (not) Restore J uly 09, 2006, at 07: 47 AM by David A. Mellis - adding link to avr- libc Added lines 93- 95: '''Expert/ I nternal Functions''' * [[http: / / www.nongnu.org/ avr- libc/ user- manual/ modules.html | avr- libc]] is the standard library of C functions that Arduino builds on. To use these, you may need to add the corresponding '''#include''' statement to the top of your sketch. Restore May 28, 2006, at 05: 03 PM by David A. Mellis Changed lines 38- 39 from: Variables are expressions that you can use in programs to store values, like e.g. sensor reading from an analog pin. They can have various types, which are described below. '''Warning''': floating point variables and operations are not currently supported. to: Variables are expressions that you can use in programs to store values, like e.g. sensor reading from an analog pin. They can have various types, which are described below. ''Floating point variables and operations are not currently supported.'' Changed lines 67- 68 from: Used for communication between the Arduino board and a computer or other devices. This communication happens via the Arduino board's serial or USB connection and on digital pins 0 (RX) and 1 (TX). Thus, if you use these functions, you cannot also use pins 0 and 1 for digital i/ o. to: Used for communication between the Arduino board and a computer or other devices. This communication happens via the Arduino board's serial or USB connection and on digital pins 0 (RX) and 1 (TX). Thus, if you use these functions, ''you cannot also use pins 0 and 1 for digital i/ o.'' Restore May 28, 2006, at 05: 01 PM by David A. Mellis - clarifying serial communication Changed lines 67- 68 from: Used for communication between the Arduino board and the computer, via the USB or serial connection. This communication happens on digital pins 0 (RX) and 1 (TX). This means that these functions can be used to communicate with a serial device on those pins, but also that any digital i/ o on pins 0 and 1 will interfere with this communication. to: Used for communication between the Arduino board and a computer or other devices. This communication happens via the Arduino board's serial or USB connection and on digital pins 0 (RX) and 1 (TX). Thus, if you use these functions, you cannot also use pins 0 and 1 for digital i/ o. Restore May 28, 2006, at 04: 55 PM by David A. Mellis Changed lines 67- 68 from: Used for communication between the Arduino board and the computer, via the USB or serial connection. Or used for serial communication on digital pins 0 (RX) and 1 (TX). ''Note: if you are using these functions, you cannot also use pins 0 and 1 for digital i/ o.'' to: Used for communication between the Arduino board and the computer, via the USB or serial connection. This communication happens on digital pins 0 (RX) and 1 (TX). This means that these functions can be used to communicate with a serial device on those pins, but also that any digital i/ o on pins 0 and 1 will interfere with this communication. Restore May 28, 2006, at 04: 52 PM by David A. Mellis - serial notes Changed lines 67- 68 from: ''Used for communication between the Arduino board and the computer, via the USB or serial connection (both appear as serial ports to software on the computer). Or used for serial communication on digital pins 0 (RX) and 1 (TX).'' to: Used for communication between the Arduino board and the computer, via the USB or serial connection. Or used for serial communication on digital pins 0 (RX) and 1 (TX). ''Note: if you are using these functions, you cannot also use pins 0 and 1 for digital i/ o.'' * [[Serial.begin]](speed) * [[Serial.available]]() * [[Serial.read]]() * [[Serial.print]](data) * [[Serial.println]](data) ''Old serial library (deprecated).'' Deleted lines 88- 96: '' Serial Library as of version 0004''
- 666. * [[Serial.begin]](speed) * [[Serial.available]]() * [[Serial.read]]() * [[Serial.print]](data) * [[Serial.println]](data) Restore April 19, 2006, at 06: 45 AM by David A. Mellis - Clarifying serial communication (USB or serial) Added lines 66- 68: ''Used for communication between the Arduino board and the computer, via the USB or serial connection (both appear as serial ports to software on the computer). Or used for serial communication on digital pins 0 (RX) and 1 (TX).'' Restore April 17, 2006, at 06: 47 AM by Massimo Banzi Restore April 14, 2006, at 07: 49 AM by David A. Mellis - Adding pulseI n() Changed lines 59- 60 from: to: * unsigned long [[pulseI n]](pin, value) Restore March 31, 2006, at 06: 19 AM by Clay Shirky Changed line 5 from: Arduino programs can be divided in three main parts: program structure, values (variables and constants), and functions. to: Arduino programs can be divided in three main parts: '''program structure''', '''values''' (variables and constants), and '''functions'''. Changed lines 17- 18 from: setup() is preparation, and loop() is execution. I n the setup section, always at the top of your program, you initialize [[variables]], set [[pinMode]], etc. The loop section is the code to be executed - - reading inputs, triggering outputs, etc. to: setup() is preparation, and loop() is execution. I n the setup section, always at the top of your program, you woiuld set [[pinMode]], initialize serial communication, etc. The loop section is the code to be executed - - reading inputs, triggering outputs, etc. Restore March 31, 2006, at 05: 02 AM by Clay Shirky Added lines 11- 13: An Arduino program run in two parts: Added lines 16- 18: setup() is preparation, and loop() is execution. I n the setup section, always at the top of your program, you initialize [[variables]], set [[pinMode]], etc. The loop section is the code to be executed - - reading inputs, triggering outputs, etc. Changed lines 21- 22 from: !!!!Further Syntax to: !!!!Control Structures Added lines 28- 29: !!!!Further Syntax Restore March 31, 2006, at 04: 48 AM by Clay Shirky Changed line 5 from: Arduino programs can be divided in three main parts: to: Arduino programs can be divided in three main parts: program structure, values (variables and constants), and functions. Restore March 31, 2006, at 03: 39 AM by David A. Mellis - Clarifying analogWrite == pwm Changed line 46 from: '''Digital Pins''' to: '''Digital I / O''' Changed line 51 from: '''Analog Pins'''
- 667. to: '''Analog I / O''' Changed lines 53- 54 from: * [[analogWrite]](pin, value) to: * [[analogWrite]](pin, value) - ''PWM'' Restore March 30, 2006, at 08: 02 PM by Tom I goe Changed line 17 from: * [[if/ else]] to: * [[if...else]] Restore March 30, 2006, at 08: 01 PM by Tom I goe Added line 17: * [[if/ else]] Restore March 28, 2006, at 03: 19 AM by David A. Mellis - Changed "Define" to "#define" Changed lines 24- 25 from: * [[Define]] to: * [[Define | #define]] Restore March 27, 2006, at 01: 10 PM by Tom I goe Changed lines 24- 25 from: to: * [[Define]] Changed lines 35- 36 from: Another form of variables are constants, which are preset variables that you do not need to define or initialize. to: Constants are labels for certain values which are preset in the Arduino compiler. You do not need to define or initialize constants. Arduino includes the following pre- defined constants. Changed lines 40- 53 from: Finally, defines are a useful C component that allow you to specify something before it is compiled. !!!!Defines You can define numbers in arduino that don't take up any program memory space on the chip. Arduino defines have the same syntax as C defines: @@#define constantName value@@ Note that the # is necessary. For example: @@#define ledPin 3@@ The compiler will replace any mentions of ledPin with the value 3 at compile time. to: Restore March 27, 2006, at 12: 56 PM by Tom I goe Restore March 27, 2006, at 12: 28 PM by Tom I goe Changed lines 83- 87 from: to: * [[Serial.print]](data) * [[Serial.println]](data) Restore March 27, 2006, at 12: 23 PM by Tom I goe Changed lines 82- 83 from: to: * [[Serial.read]]()
- 668. Restore March 27, 2006, at 12: 19 PM by Tom I goe Changed lines 81- 82 from: to: * [[Serial.available]]() Restore March 27, 2006, at 12: 14 PM by Tom I goe Added lines 79- 81: '' Serial Library as of version 0004'' * [[Serial.begin]](speed) Restore March 26, 2006, at 02: 21 PM by J eff Gray Changed line 18 from: * [[select case]] to: * [[switch case]] Restore March 26, 2006, at 02: 21 PM by J eff Gray Added line 18: * [[select case]] Restore March 26, 2006, at 11: 29 AM by J eff Gray Deleted line 5: Restore March 25, 2006, at 02: 21 PM by J eff Gray Changed lines 9- 10 from: !!! Program Structure to: !! Program Structure Changed lines 25- 26 from: !!! Variables to: !! Variables Changed lines 54- 55 from: !!! Functions to: !! Functions Restore March 25, 2006, at 02: 20 PM by J eff Gray Changed lines 7- 8 from: (: table border=0 cellpadding=5 cellspacing=0: ) (: cell: ) to: (: table width=90% border=0 cellpadding=5 cellspacing=0: ) (: cell width=50% : ) Changed line 53 from: (: cell: ) to: (: cell width=50% : ) Restore March 25, 2006, at 02: 19 PM by J eff Gray Changed lines 7- 8 from: | | border = 0 || to: (: table border=0 cellpadding=5 cellspacing=0: ) (: cell: ) Changed line 53 from: || to: (: cell: ) Changed line 83 from: || to: (: tableend: )
- 669. Restore March 25, 2006, at 02: 17 PM by J eff Gray Added lines 7- 8: | | border = 0 || Added line 53: || Added line 83: || Restore March 25, 2006, at 12: 20 AM by J eff Gray Restore March 24, 2006, at 05: 46 PM by J eff Gray Changed lines 41- 42 from: You can define constants in arduino, that don't take up any program memory space on the chip. Arduino defines have the same syntax as C defines: to: You can define numbers in arduino that don't take up any program memory space on the chip. Arduino defines have the same syntax as C defines: Restore March 24, 2006, at 05: 45 PM by J eff Gray Added line 31: !!!!Constants Changed lines 39- 40 from: !!!Defines to: !!!!Defines Restore March 24, 2006, at 05: 44 PM by J eff Gray Added lines 36- 49: Finally, defines are a useful C component that allow you to specify something before it is compiled. !!!Defines You can define constants in arduino, that don't take up any program memory space on the chip. Arduino defines have the same syntax as C defines: @@#define constantName value@@ Note that the # is necessary. For example: @@#define ledPin 3@@ The compiler will replace any mentions of ledPin with the value 3 at compile time. Deleted lines 78- 91: !!! Creating New Functions !!!Defines You can define constants in arduino, that don't take up any program memory space on the chip. Arduino defines have the same syntax as C defines: @@#define constantName value@@ Note that the # is necessary. For example: @@#define ledPin 3@@ The compiler will replace any mentions of ledPin with the value 3 at compile time. Restore March 24, 2006, at 05: 42 PM by J eff Gray Added lines 31- 35: Another form of variables are constants, which are preset variables that you do not need to define or initialize.
- 670. * [[Constants| HI GH]] | [[Constants| LOW]] * [[Constants| I NPUT]] | [[Constants| OUTPUT]] Deleted lines 65- 69: !!! Constants * [[Constants| HI GH]] | [[Constants| LOW]] * [[Constants| I NPUT]] | [[Constants| OUTPUT]] Restore March 24, 2006, at 04: 46 PM by J eff Gray Added lines 5- 6: Arduino programs can be divided in three main parts: Changed lines 9- 11 from: Arduino programs can be divided in three main parts: * [[Variable Declaration]] to: !!!!Getting Started Added lines 12- 14: * [[Variable Declaration]] * [[Function Declaration]] !!!!Further Syntax Restore February 09, 2006, at 08: 25 AM by 85.18.81.162 Changed lines 22- 23 from: Variables are expressions that you can use in programs to store values, like e.g. sensor reading from an analog pin. They can have various types, which are described below. to: Variables are expressions that you can use in programs to store values, like e.g. sensor reading from an analog pin. They can have various types, which are described below. '''Warning''': floating point variables and operations are not currently supported. Restore J anuary 20, 2006, at 10: 44 AM by 85.18.81.162 Changed lines 3- 6 from: These are the basics about the arduino language. to: These are the basics about the Arduino language, which implemented in C. I f you're used to Processing or J ava, please check out the [[http: / / arduino.berlios.de/ index.php/ Main/ ComparisonProcessing | Arduino/ Processing language comparison]]. Restore J anuary 08, 2006, at 12: 46 PM by 82.186.237.10 Changed lines 53- 54 from: to: * [[printNewline]]() Restore J anuary 03, 2006, at 03: 35 AM by 82.186.237.10 Deleted lines 65- 79: !!! Writing Comments Comments are parts in the program that are used to inform about the way the program works. They are not going to be compiled, nor will be exported to the processor. They are useful for you to understand what a certain program you downloaded is doing or to inform to your colleagues about what one of its lines is. There are two different ways of marking a line as a comment: * you could use a double- slash in the beginning of a line: '''/ / ''' * you could use a combination of slash- asterisk - - > asterisk- slash encapsulating your comments: '''/ * blabla * / ''' '''Tip''' When experimenting with code the ability of commenting parts of your program becomes very useful for you to "park" part of the code for a while.
- 671. Restore December 30, 2005, at 05: 41 AM by 82.186.237.10 Deleted lines 6- 9: !!! Variables Variables are expressions that you can use in programs to store values, like e.g. sensor reading from an analog pin. Added lines 22- 29: !!! Variables Variables are expressions that you can use in programs to store values, like e.g. sensor reading from an analog pin. They can have various types, which are described below. * [[char]] * [[int]] * [[long]] Restore December 29, 2005, at 08: 08 AM by 82.186.237.10 Changed lines 18- 25 from: to: * [[if]] * [[for]] * [[while]] * [[SemiColon| ; ]] (semicolon) * [[Braces| {}]] (curly braces) * [[Comments| / / ]] (single line comment) * [[Comments| / * * / ]] (multi- line comment) Restore December 28, 2005, at 03: 59 PM by 82.186.237.10 Changed lines 22- 25 from: * void [[pinMode]](int pin, int mode) * void [[digitalWrite]](int pin, int val) * int [[digitalRead]](int pin) to: * [[pinMode]](pin, mode) * [[digitalWrite]](pin, value) * int [[digitalRead]](pin) Changed lines 27- 29 from: * int [[analogRead]](int pin) * void [[analogWrite]](int pin, int val) to: * int [[analogRead]](pin) * [[analogWrite]](pin, value) Changed lines 31- 32 from: * void [[beginSerial]](int baud) * void [[serialWrite]](unsigned char c) to: * [[beginSerial]](speed) * [[serialWrite]](c) Changed lines 35- 42 from: * void [[printMode]](int mode) * * * * void void void void [[printByte]](unsigned char c) [[printString]](unsigned char * s) [[printI nteger]](int n) [[printHex]](unsigned int n) * void [[printOctal]](unsigned int n) * void [[printBinary]](unsigned int n) to: * [[printMode]](mode) * * * * [[printByte]](c) [[printString]](str) [[printI nteger]](num) [[printHex]](num) * [[printOctal]](num) * [[printBinary]](num)
- 672. Changed lines 44- 47 from: * unsigned [[long millis]]() * void [[delay]](unsigned long ms) * void [[delayMicroseconds]](unsigned long us) to: * unsigned long [[millis]]() * [[delay]](ms) * [[delayMicroseconds]](us) Restore December 16, 2005, at 02: 58 PM by 85.18.81.162 Added lines 67- 80: !!!Defines You can define constants in arduino, that don't take up any program memory space on the chip. Arduino defines have the same syntax as C defines: @@#define constantName value@@ Note that the # is necessary. For example: @@#define ledPin 3@@ The compiler will replace any mentions of ledPin with the value 3 at compile time. Restore December 09, 2005, at 11: 39 AM by 195.178.229.25 Changed lines 4- 6 from: These are the functions available in the arduino language to: These are the basics about the arduino language. Changed line 15 from: * variable declaration to: * [[Variable Declaration]] Restore December 03, 2005, at 02: 02 PM by 213.140.6.103 Changed lines 50- 52 from: * HI GH | LOW * I NPUT | OUTPUT to: * [[Constants| HI GH]] | [[Constants| LOW]] * [[Constants| I NPUT]] | [[Constants| OUTPUT]] Restore December 03, 2005, at 01: 41 PM by 213.140.6.103 Changed line 21 from: !!!! Digital Pins to: '''Digital Pins''' Changed line 26 from: !!!! Analog Pins to: '''Analog Pins''' Changed line 30 from: !!!! Serial Communication to: '''Serial Communication''' Changed line 43 from: !!!! Handling Time to: '''Handling Time''' Restore
- 673. December 03, 2005, at 01: 40 PM by 213.140.6.103 Added lines 20- 21: !!!! Digital Pins Added lines 25- 26: !!!! Analog Pins Added lines 29- 30: !!!! Serial Communication Added lines 42- 43: !!!! Handling Time Restore December 03, 2005, at 12: 48 PM by 213.140.6.103 Added lines 40- 44: !!! Constants * HI GH | LOW * I NPUT | OUTPUT Restore December 03, 2005, at 12: 37 PM by 213.140.6.103 Added lines 40- 43: !!! Creating New Functions Restore December 03, 2005, at 10: 53 AM by 213.140.6.103 Changed lines 9- 10 from: to: Variables are expressions that you can use in programs to store values, like e.g. sensor reading from an analog pin. Added lines 12- 15: Arduino programs can be divided in three main parts: * variable declaration Changed lines 38- 49 from: * void [[delayMicroseconds]](unsigned long us) to: * void [[delayMicroseconds]](unsigned long us) !!! Writing Comments Comments are parts in the program that are used to inform about the way the program works. They are not going to be compiled, nor will be exported to the processor. They are useful for you to understand what a certain program you downloaded is doing or to inform to your colleagues about what one of its lines is. There are two different ways of marking a line as a comment: * you could use a double- slash in the beginning of a line: '''/ / ''' * you could use a combination of slash- asterisk - - > asterisk- slash encapsulating your comments: '''/ * blabla * / ''' '''Tip''' When experimenting with code the ability of commenting parts of your program becomes very useful for you to "park" part of the code for a while. Restore November 27, 2005, at 10: 42 AM by 81.154.199.248 Changed lines 12- 13 from: * voide [[loop]]() to: * void [[loop]]() Restore November 27, 2005, at 10: 17 AM by 81.154.199.248 Changed lines 24- 33 from: * void printMode(int mode)
- 674. * void printByte(unsigned char c) * void printString(unsigned char * s) * void printI nteger(int n) * void printHex(unsigned int n) * void printOctal(unsigned int n) * void printBinary(unsigned int n) * unsigned long millis() * void delay(unsigned long ms) * void delayMicroseconds(unsigned long us) to: * void [[printMode]](int mode) * void [[printByte]](unsigned char c) * void [[printString]](unsigned char * s) * void [[printI nteger]](int n) * void [[printHex]](unsigned int n) * void [[printOctal]](unsigned int n) * void [[printBinary]](unsigned int n) * unsigned [[long millis]]() * void [[delay]](unsigned long ms) * void [[delayMicroseconds]](unsigned long us) Restore November 27, 2005, at 10: 15 AM by 81.154.199.248 Changed lines 16- 23 from: * void digitalWrite(int pin, int val) * int digitalRead(int pin) * int analogRead(int pin) * void analogWrite(int pin, int val) * void beginSerial(int baud) * void serialWrite(unsigned char c) * int serialAvailable() * int serialRead() to: * void [[digitalWrite]](int pin, int val) * int [[digitalRead]](int pin) * int [[analogRead]](int pin) * void [[analogWrite]](int pin, int val) * void [[beginSerial]](int baud) * void [[serialWrite]](unsigned char c) * int [[serialAvailable]]() * int [[serialRead]]() Restore November 27, 2005, at 09: 58 AM by 81.154.199.248 Changed lines 11- 13 from: * void [[setup()]] * voide [[loop()]] to: * void [[setup]]() * voide [[loop]]() Restore November 27, 2005, at 09: 58 AM by 81.154.199.248 Added lines 9- 13: !!! Program Structure * void [[setup()]] * voide [[loop()]] Restore November 27, 2005, at 09: 56 AM by 81.154.199.248 Added lines 6- 9: !!! Variables !!! Functions Restore November 27, 2005, at 09: 49 AM by 81.154.199.248 Added lines 1- 24:
- 675. !!Arduino Reference These are the functions available in the arduino language * void [[pinMode]](int pin, int mode) * void digitalWrite(int pin, int val) * int digitalRead(int pin) * int analogRead(int pin) * void analogWrite(int pin, int val) * void beginSerial(int baud) * void serialWrite(unsigned char c) * int serialAvailable() * int serialRead() * void printMode(int mode) * void printByte(unsigned char c) * void printString(unsigned char * s) * void printI nteger(int n) * void printHex(unsigned int n) * void printOctal(unsigned int n) * void printBinary(unsigned int n) * unsigned long millis() * void delay(unsigned long ms) * void delayMicroseconds(unsigned long us) Restore Edit Page | Page History | Printable View | All Recent Site Changes