

![Page 4
Program 2
AIM: WAP to Access the data from a Database using JDBC.
SOURCE CODE:
package javaapplication1;
//Name of the project or application for implementing Java Database Connectivity
import java.util.*;
import java.sql.*;
//importing java packages for accessing the required classes
public class JavaApplication1
{
public static void main(String[] args)
{
try{
Class.forName("com.mysql.cj.jdbc.Driver");
//Registering Drivers for accessing MySQL
Connection con =
DriverManager.getConnection("jdbc:mysql://localhost:3306/infodb","root","Password");
// Creating an instance of Connection with MySQL by providing URL, aUsername & password
for the database
Statement st=con.createStatement();
//Instantiating a statement object for providing a platform for executing queries
ResultSet rs= st.executeQuery("Select * from infotable");
//Query processed and Result stored in a resultSet object
while(rs.next()){
//Looping until end of file is reached
System.out.println(rs.getString("Fname")+" " +rs.getString("RollNo")+ " " + rs.getString
("Course"));
}
}
catch(Exception e)
{ //Catch every type of exception
}
}
}](https://image.slidesharecdn.com/aj-190511082212/85/Advance-Java-Practical-file-4-320.jpg?cb=1744175052)

![Page 6
Program 3
AIM: WAP to Add records in the Database using JDBC.
SOURCE CODE:
package javaapplication1;
//Name of the project or application for implementing Java Database Connectivity
import java.util.*;
import java.sql.*;
//importing java packages for accessing the required classes
public class JavaApplication1
{
public static void main(String[] args)
{
try{
Class.forName("com.mysql.cj.jdbc.Driver");
//Registering Drivers for accessing MySQL
Connection con =
DriverManager.getConnection("jdbc:mysql://localhost:3306/infodb","root","Password");
// Creating an instance of Connection with MySQL by providing URL, aUsername & password
for the database
Statement st=con.createStatement();
//Instantiating a statement object for providing a platform for executing queries
st.executeUpdate("insert into infotable values('rohan',2667,'PCM')");
//Execute query for updating database
ResultSet rs= st.executeQuery("Select * from infotable");
//Query processed and Result stored in a resultSet object
while(rs.next()){
//Looping until end of file is reached
System.out.println(rs.getString("Fname")+" " +rs.getString("RollNo")+ " " + rs.getString
("Course"));
}
}
catch(Exception e)
{ //Catch every type of exception
}
}
}](https://image.slidesharecdn.com/aj-190511082212/85/Advance-Java-Practical-file-6-320.jpg?cb=1744175052)


![Page 20
LogInServletCookie.java
import java.io.IOException;
import java.io.PrintWriter;
import javax.servlet.ServletException;
import javax.servlet.http.Cookie;
import javax.servlet.http.HttpServlet;
import javax.servlet.http.HttpServletRequest;
import javax.servlet.http.HttpServletResponse;
//Java packages imported for accessing java classes
public class LogInServletCookie extends HttpServlet {
protected void processRequest(HttpServletRequest request, HttpServletResponse response)
throws ServletException, IOException {
response.setContentType("text/html;charset=UTF-8");
try (PrintWriter out = response.getWriter()) {
String u1=request.getParameter("login_uname");
String p1=request.getParameter("login_pswd");
//Storing the values user entered for a login request in string variables
Cookie ck[]=request.getCookies();
//Acquiring all the cookies from the HttpRequest Object
if(ck!=null)
//proceeding if cookies are available
{
String u2=ck[0].getValue();
String p2=ck[1].getValue();
String f1=ck[2].getValue();
String l1=ck[3].getValue();
//Storing all the values from cookies to Variables
if(u2.equals(u1))
{//proceed if username Is correct
if(p2.equals(p1))
{//proceed if password is correct
out.println("Welcome "+ f1 +" "+ l1 + "You've Successfully logged in.");
}
Else
{ out.println(“Entered password is wrong”); }
}
Else
//Incase username was Wrong
{out.println("Entered Username doesn't exist"); }
}](https://image.slidesharecdn.com/aj-190511082212/85/Advance-Java-Practical-file-20-320.jpg?cb=1744175052)


![Page 32
<meta http-equiv="Content-Type" content="text/html; charset=UTF-8">
<title>JSP Page</title>
</head>
<body>
<%
String u1=request.getParameter("login_uname");
String p1=request.getParameter("login_pswd");
Cookie ck[]=request.getCookies();
if(ck!=null)
{
String u2=ck[1].getValue();
String p2=ck[2].getValue();
String f1=ck[3].getValue();
String l1=ck[4].getValue();
if(u1.equals(u2))
{
if(p1.equals(p2))
out.println("Welcome "+ f1 +" "+ l1 + "You've Successfully logged in.");
else
out.println("Wrong password");
}
else
{
out.println("Entered Username doesn't exist");
}
}
else
{
out.println("Something's wrong with cookies i guess.");
}
%>
//Java code wrapped up in scriptlets
</body>
</html>](https://image.slidesharecdn.com/aj-190511082212/85/Advance-Java-Practical-file-32-320.jpg?cb=1744175052)


![Page 42
Program 13
AIM: WAP to add two numbers using the concept of RMI.
SOURCE CODE:
AddI.java
import java.rmi.Remote;
//package for RMI
public interface AddI extends Remote
{
public int add(int x,int y)throws Exception;
}
//Interface AddI for declaring add method by extending Remote Class from the mentioned package
Addc.java
import java.rmi.server.*;
public class AddC extends UnicastRemoteObject implements AddI
{
public AddC() throws Exception
{ super(); }
public int add(int x,int y)
{ return x+y; }
}
//Java class implementing the interface created before for defining the method declared in another
system
Client.java
import java.rmi.*;
public class Client
{
public static void main(String args[]) throws Exception
{ AddI obj = (AddI)Naming.lookup("ADD");
int n = obj.add(5,4);
System.out.println("Sum is : " + n);
}](https://image.slidesharecdn.com/aj-190511082212/85/Advance-Java-Practical-file-42-320.jpg?cb=1744175052)
![Page 43
}
//Client machine requesting for the information from the bean using the lookup method of Naming
Class
Server.java
import java.rmi.*;
public class Server
{
public static void main(String args[]) throws Exception
{
AddC obj = new AddC();
Naming.rebind ("ADD",obj);
System.out.println("Server Started");
}
}
//Server machine responding with the information from the bean using the rebind method of Naming
Class](https://image.slidesharecdn.com/aj-190511082212/85/Advance-Java-Practical-file-43-320.jpg?cb=1744175052)

Advance Java Practical file
- 1. Page 1 Program 1 AIM: Give a Brief Introduction of JDBC. THEORY: JDBC i.e. Java database connectivity is an application programming interface (API) for java which enables an application to access one or more database for executing query to traverse through, update or modify contents of a database, in other words it's a java based data access technology. With the help of JDBC drivers multiple databases can be connected to the application, this driver acts as an interface between the client and a database server. JDBC is an advancement over ODBC which is written in C, C++, Python & is platform dependent because of the languages. JDBC possesses many classes and interfaces, compatible with the application, for sending requests made by user to any specific Database. Classes are contained in java packages : java.sql & javax.sql The JDBC library includes APIs for each task that is commonly associated with database usage. The API allows multiple implementations to be used by the same application, it dynamically loads the packages and registers with driver manager which is required for communication with the database. It acts as a connection factory for the JDBC connections. These connections support creation and execution of statements like create, insert, update, delete & select. To improve hit ratio or to successfully complete the operation all the commands from the program are enclosed in error handling code (try n catch block). Making a connection to the database. Creating MySQL statements. Executing MySQL queries in the database. Viewing & Modifying the resulting records. JDBC Components: Java Application: A Java program that runs stand alone in a client or server. JDCB API: This provides the application-to-JDBC Manager connection. JDBC driver manager: It ensures that the correct driver is used to access each data source. The driver manager is capable of supporting multiple concurrent drivers connected to multiple heterogeneous databases. JDBC Driver: It handles the communications with the database server. Connection: This interface with all methods for contacting a database. The connection object represents communication context, i.e., all communication with database is through connection object only. Statement: You use objects created from this interface to submit the SQL statements to the database. Some derived interfaces accept parameters in addition to executing stored procedures. ResultSet: These objects hold data retrieved from a database after you execute an SQL query using Statement objects. It acts as an iterator to allow you to move through its data. SQL Exception: This class handles any errors that occur in a database application
- 2. Page 2 Steps to Create JDBC Connection: 1. Importing JDBC Packages Including the packages containing the JDBC classes needed for the database programming. Importing java.sql.* will provide most of the classes needed for every basic operation. 2. Loading and Registering the JDBC Driver To create and open a communication channel between the java program and the concerned database. This line of code loads and registers the drivers Class.forName("com.mysql.cj.jdbc.Driver"); 3. Establishing a Connection with Database After the library packages and the drivers are registered, a connection is established. A call to getConnection() method of DriverManager class instantiates the connection. This method takes three arguments: URL to the database, UserName for database, Password for database as Connection Connection_Object = DriverManager.getConnection("URL","UserName","Password"); 4. Create an instance of Statement Class for Performing Query The createStatement() method is invoked from the created Class_object of Connection class which stores the result in another object of Statement Class as Statement Statement_Object= Connection_Object.createStatement(); 5. Executing the Query and Storing the result in ResultSet Object The Statement_Object contains the method for executing the queries as Statement_Object.executeQuery & Statement_Object.executeUpdate Depending upon the nature of the SQL query, a need might arise where the values returning from this method are retrieved for further processing, in which case an object of ResultSet class is Instantiated which holds the result of sql query as ResultSet ResultSet_Object = Statement_Object.executeQuery("SQL_Query"); Statement_Object.executeUpdate("SQL_Query"); 6. Processing of Result In Case the Query returns some value and is retrieved in ResultSet_Object, the retrieved data which is present in the form of columns can be processed by utilizing the next() method of ResultSet_Object as while(restest.next()) { ……. } The method Is enclosed in while loop as there’s no way to know how many entries can be there in the database. In many JDBC programs this step is optional as there are multiple requests for updating and fewer for only traversing.
- 3. Page 3 7. Closing Instances This step is another optional step but closing the open connections and instances is considered good for programming. This is achieved through activating the close() method of Connection_Object, Statement_Object and ResultSet_Object as Connection_Object.close() //Closes connection to the database Statement_Object.close() //Closes Statement instance for executing Query ResultSet_Object.close() //Closes the instance of Retrieved data
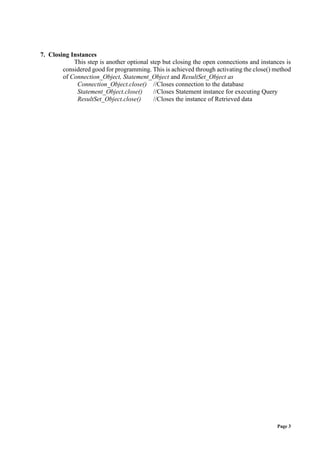
- 4. Page 4 Program 2 AIM: WAP to Access the data from a Database using JDBC. SOURCE CODE: package javaapplication1; //Name of the project or application for implementing Java Database Connectivity import java.util.*; import java.sql.*; //importing java packages for accessing the required classes public class JavaApplication1 { public static void main(String[] args) { try{ Class.forName("com.mysql.cj.jdbc.Driver"); //Registering Drivers for accessing MySQL Connection con = DriverManager.getConnection("jdbc:mysql://localhost:3306/infodb","root","Password"); // Creating an instance of Connection with MySQL by providing URL, aUsername & password for the database Statement st=con.createStatement(); //Instantiating a statement object for providing a platform for executing queries ResultSet rs= st.executeQuery("Select * from infotable"); //Query processed and Result stored in a resultSet object while(rs.next()){ //Looping until end of file is reached System.out.println(rs.getString("Fname")+" " +rs.getString("RollNo")+ " " + rs.getString ("Course")); } } catch(Exception e) { //Catch every type of exception } } }
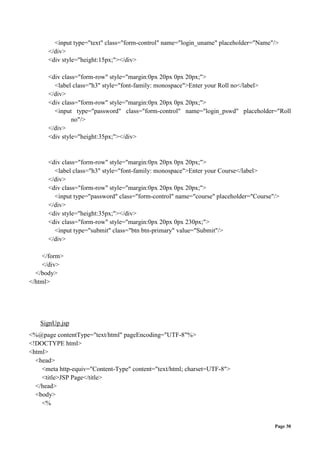
- 6. Page 6 Program 3 AIM: WAP to Add records in the Database using JDBC. SOURCE CODE: package javaapplication1; //Name of the project or application for implementing Java Database Connectivity import java.util.*; import java.sql.*; //importing java packages for accessing the required classes public class JavaApplication1 { public static void main(String[] args) { try{ Class.forName("com.mysql.cj.jdbc.Driver"); //Registering Drivers for accessing MySQL Connection con = DriverManager.getConnection("jdbc:mysql://localhost:3306/infodb","root","Password"); // Creating an instance of Connection with MySQL by providing URL, aUsername & password for the database Statement st=con.createStatement(); //Instantiating a statement object for providing a platform for executing queries st.executeUpdate("insert into infotable values('rohan',2667,'PCM')"); //Execute query for updating database ResultSet rs= st.executeQuery("Select * from infotable"); //Query processed and Result stored in a resultSet object while(rs.next()){ //Looping until end of file is reached System.out.println(rs.getString("Fname")+" " +rs.getString("RollNo")+ " " + rs.getString ("Course")); } } catch(Exception e) { //Catch every type of exception } } }
- 8. Page 8 Program 4 AIM: Give a brief Introduction on Servlets. THEORY: Servlet is a class that handles requests, processes them and reply back with a response. Example : A Servlet to collect input from a user through an HTML form, query records from a database, and create web pages dynamically. Servlets are under the control of another Java application called a Servlet Container. When an application running in a web server receives a request, the Server hands the request to the Servlet Container – which in turn passes it to the target Servlet.Server And Client communicate over WEB using a stateless protocol known as HTTP Protocol using various methods like GET, POST etc. Servlets are used to create web applications. It uses Java language to create web applications which in general are web sites with dynamic functionality on the server. Working of Servlet The Web Server handles http requests from the client side and responds with an http response. Servlet Container or Servlet Engine is the part that interacts with the Servlet. When the web server starts up it deploys and loads all the servlets. Once the servlet is loaded, the servlet container creates the instance of servlet class. Client (user browser) sends an Http request to web server on a certain port. Each time the web server receives a request, the servlet container creates HttpServletRequest and HttpServletResponse objects. The HttpServletRequest object provides the access to the request information and the HttpServletResponse object allows us to format and change the http response before sending it to the client. The servlet container spawns a new thread that calls service() method for each client request. The service() method dispatches the request to the correct handler method based on the type of request. These are the phases in servlet lifecycle: Loading servlet class When the first request is recieved Create servlet instances (Instantiation, calling init() method )
- 9. Page 9 Web container creates instances of Servlet class after loading it. Calling the Service() method Each time the request is received ,service() is called. Calling the Destroy() method. Before removing servlet instances, destroy is called for cleanup.
- 10. Page 10 Program 5 AIM: WAP to generate a random number by taking upper and lower limit from user using Servlets. SOURCE CODE: Index.html <!DOCTYPE html> <html> <head> <title>To do supply a title</title> <meta charset="UTF-8"> <meta name="viewport" content="width=device-width> <link href="bootstrap.min.css" rel="stylesheet" type="text/css"/> //Link to Bootstrap CSS files </head> <body> <form action="RandomNumberGenerator" method="GET"> //Form tag containing all the input fields and Labels for them with inline styling <div class="row" style="height:80px"></div> <div class="form-group"> <div class="row form-row"><div class="col-sm-1"></div> <label class="col-sm-3 h3"> Enter first number </label> <input class="col-sm-4 form-control" style="width:500px" type="text" name="first" placeholder="Lower limit"/> </div> <div class="row form-row" style="height:20px"></div> <div class="row form-row"><div class="col-sm-1"></div> <label class="col-sm-3 h3"> Enter second number </label> <input class="col-sm-4 form-control" style="width:500px" type="text" name="second" placeholder="Upper limit"/> </div> <div class="row form-row" style="height:20px"></div> <div class="row form-row"><div class="col-sm-4"></div> <input class="btn btn-primary col-sm-2" type="submit" value="Find Random Number"/> </div> <div class="row form-row" style="height:20px"></div> <div class="row form-row"><div class="col-sm-4"></div> <a href="SignIn.html">Sign Up</a> <div class="col-sm-1"> <h5 style="font-family: cursive; text-align: center;">OR</h5> </div> <a href="LogIn.html">Login</a> </div> </div> </form>
- 11. Page 11 </body> </html> RandomNumberGenerator.java //importing Java Packages for using Predefined classes import java.io.IOException; import java.io.PrintWriter; import javax.servlet.ServletException; import javax.servlet.http.HttpServlet; import javax.servlet.http.HttpServletRequest; import javax.servlet.http.HttpServletResponse; public class RandomNumberGenerator extends HttpServlet { protected void processRequest(HttpServletRequest request, HttpServletResponse response) throws ServletException, IOException { response.setContentType("text/html;charset=UTF-8"); //it tells the client what’s the type of content try (PrintWriter out = response.getWriter()) { //TypeCasting the string value entered by user which is accessed by //request Object of HttpServletRequest int lower = Integer.parseInt(request.getParameter("first")); int upper = Integer.parseInt(request.getParameter("second")); //Generating a Random number from the upper and lower limit double d=(Math.random()*((upper-lower)+1))+lower; //Creating the output string String s= "<h1> </h1>A random number was generated from the lower " + "and upper limit entered by you between " + lower + " and " + upper + " which came out to be : " + Integer.toString((int)d); //out object processess the output string and displays it.
- 12. Page 12 out.println(s); out.println("<a href='index.html'>Go Back</a> "); } } protected void doGet(HttpServletRequest request, HttpServletResponse response) throws ServletException, IOException { processRequest(request, response); } protected void doPost(HttpServletRequest request, HttpServletResponse response) throws ServletException, IOException { processRequest(request, response); } public String getServletInfo() { return "Short description"; } }
- 13. Page 13 OUTPUT:
- 14. Page 14 Program 6 AIM: WAP to create a Registration & Login form using Servlets. SOURCE CODE: SignIn.html <!DOCTYPE html> <html> <head> <title>Sign In Page</title> <link href="bootstrap.min.css" rel="stylesheet" type="text/css"/> //linking external cascading stylesheet file <meta charset="UTF-8"> <meta name="viewport" content="width=device-width, initial-scale=1.0"> <style> .center_div{ margin: 0 auto; width:600px; height:500px; border:1px solid whitesmoke; border-radius:10px; text-align:center; background-color:#000000; color:white; } .form-group{ text-align:center; } </style> //Internal styles for tags mentioned </head> <body style="background-color:#818182 "> <div class="row" style="height:30px;"></div> <div class="container center_div"> <form class="form-group" action="SignInServletCookie" method="GET"> <div class="form-row"> <label class="h1" style="font-family:monospace; margin-left:175px; margin- top:10px;"> Registration form </label>
- 15. Page 15 </div> <div class="form-row"> <label class="h3" style="font-family: monospace"> First Name </label></div> <div class="form-row"> <input type="text" class="form-control" name="fname" placeholder="Enter first name"/> </div> <div style="height:15px;"></div> <div class="form-row"> <label class="h3" style="font-family: monospace">Last Name</label> </div> <div class="form-row"> <input type="text" class="form-control" name="lname" placeholder="Enter last name"/> </div> <div style="height:15px;"></div> <div class="form-row"> <label class="h3" style="font-family: monospace">User Name</label> </div> <div class="form-row"> <input type="text" class="form-control" name="uname" placeholder="Enter User name or Email"/> </div> <div style="height:15px;"></div> <div class="form-row"> <label class="h3" style="font-family: monospace">Password</label> </div> <div class="form-row"> <input type="password" class="form-control" name="pswd" placeholder="Enter Password"/> </div> <div style="height:35px;"></div> <div class="form-row"> <input type="submit" class="btn form-control btn-primary" value="Submit"/> </div>
- 16. Page 16 </form> //form tag containing the input fields and other labelling stuff with styling </div> </body> </html> LogIn.html <!DOCTYPE html> <html> <head> <title>TODO supply a title</title> <meta charset="UTF-8"> <meta name="viewport" content="width=device-width, initial-scale=1.0"> <link href="bootstrap.min.css" rel="stylesheet" type="text/css"/> <style> .center_div{ margin:0 auto; width:600px; height:330px; border-radius:10px; } .form-group{ text-align:center; } .form-control{ background-color:whitesmoke; } </style> //internal styling for web application </head> <body style="background-color:whitesmoke;"> <div class="row" style="height:30px;"></div> <div class="container center_div"> <form class="form-group" action="LogInServletCookie" method="GET"> <div class="form-row"> <label class="h1" style="font-family:monospace; margin-left:175px; margin-top:10px;"> Login Here</label>
- 17. Page 17 </div> <div class="form-row" style="margin:0px 20px 0px 20px;"> <label class="h3" style="font-family: monospace"> Enter your Name</label> </div> <div class="form-row" style="margin:0px 20px 0px 20px;"> <input type="text" class="form-control" name="login_uname" placeholder="Name"/> </div> <div style="height:15px;"></div> <div class="form-row" style="margin:0px 20px 0px 20px;"> <label class="h3" style="font-family: monospace">Enter your Roll no</label> </div> <div class="form-row" style="margin:0px 20px 0px 20px;"> <input type="password" class="form-control" name="login_pswd" placeholder="Roll no"/> </div> <div style="height:35px;"></div> <div class="form-row" style="margin:0px 20px 0px 20px;"> <label class="h3" style="font-family: monospace">Enter your Course</label> </div> <div class="form-row" style="margin:0px 20px 0px 20px;"> <input type="password" class="form-control" name="course" placeholder="Course"/> </div> <div style="height:35px;"></div> <div class="form-row" style="margin:0px 20px 0px 230px;"> <input type="submit" class="btn btn-primary" value="Submit"/> </div> </form> //form tag has all input and label fields with submit button </div> </body> </html>
- 18. Page 18 SignInServletCookie.java import java.io.IOException; import java.io.PrintWriter; import javax.servlet.ServletException; import javax.servlet.http.Cookie; import javax.servlet.http.HttpServlet; import javax.servlet.http.HttpServletRequest; import javax.servlet.http.HttpServletResponse; //Java packages imported for accessing java classes public class SignInServletCookie extends HttpServlet { protected void processRequest(HttpServletRequest request, HttpServletResponse response) throws ServletException, IOException { response.setContentType("text/html;charset=UTF-8"); try (PrintWriter out = response.getWriter()) { Cookie first_name = new Cookie("fn",request.getParameter("fname")); Cookie last_name = new Cookie("ln",request.getParameter("lname")); Cookie user_name = new Cookie("un",request.getParameter("uname")); Cookie password = new Cookie("pd",request.getParameter("pswd")); //Creating and assigning values to the Cookie Objects String fn=first_name.getValue(); String ln=last_name.getValue(); String un=user_name.getValue(); String ps=password.getValue(); //Using cookies to store the values in variables of type string if(fn.equals("") || ln.equals("") || un.equals("") || ps.equals("") ) //Performing a check to confirm none of the field is left empty { out.println("You must've left some field, let's try it again"); out.println("<a href=SignIn.html>Try again</a>"); } Else //if all fields were valid and none was empty { out.println("<html><body onLoad="inside()"><script>function inside(){alert("Registeration completed");}</script></body></html>"); response.addCookie(user_name); response.addCookie(password); response.addCookie(first_name);
- 19. Page 19 response.addCookie(last_name); //Adding Cookies to HttpResponse object out.println("First name :"+first_name.getValue()+"<br>"); out.println("Last name :"+last_name.getValue()+"<br>"); out.println("User name :"+user_name.getValue()+"<br>"); out.println("Password :"+password.getValue()+"<br>"); //Showing user the information with which the registration is performed out.println("<a href=LogIn.html>Log In Now</a>"); //Linking the Servlet to another HTML page } } } protected void doGet(HttpServletRequest request, HttpServletResponse response) throws ServletException, IOException { processRequest(request, response); } protected void doPost(HttpServletRequest request, HttpServletResponse response) throws ServletException, IOException { processRequest(request, response); } public String getServletInfo() { return "Short description"; } }
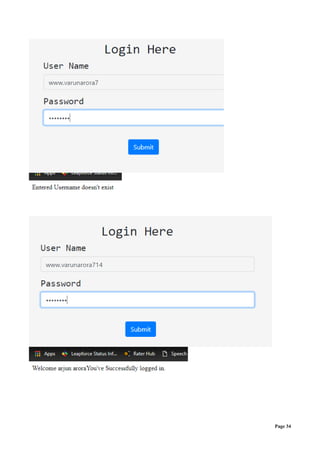
- 20. Page 20 LogInServletCookie.java import java.io.IOException; import java.io.PrintWriter; import javax.servlet.ServletException; import javax.servlet.http.Cookie; import javax.servlet.http.HttpServlet; import javax.servlet.http.HttpServletRequest; import javax.servlet.http.HttpServletResponse; //Java packages imported for accessing java classes public class LogInServletCookie extends HttpServlet { protected void processRequest(HttpServletRequest request, HttpServletResponse response) throws ServletException, IOException { response.setContentType("text/html;charset=UTF-8"); try (PrintWriter out = response.getWriter()) { String u1=request.getParameter("login_uname"); String p1=request.getParameter("login_pswd"); //Storing the values user entered for a login request in string variables Cookie ck[]=request.getCookies(); //Acquiring all the cookies from the HttpRequest Object if(ck!=null) //proceeding if cookies are available { String u2=ck[0].getValue(); String p2=ck[1].getValue(); String f1=ck[2].getValue(); String l1=ck[3].getValue(); //Storing all the values from cookies to Variables if(u2.equals(u1)) {//proceed if username Is correct if(p2.equals(p1)) {//proceed if password is correct out.println("Welcome "+ f1 +" "+ l1 + "You've Successfully logged in."); } Else { out.println(“Entered password is wrong”); } } Else //Incase username was Wrong {out.println("Entered Username doesn't exist"); } }
- 21. Page 21 Else //If cookies aren’t present { out.println("Something's wrong with cookies i guess."); } } } protected void doGet(HttpServletRequest request, HttpServletResponse response) throws ServletException, IOException { processRequest(request, response); } protected void doPost(HttpServletRequest request, HttpServletResponse response) throws ServletException, IOException { processRequest(request, response); } public String getServletInfo() { return "Short description"; } }
- 22. Page 22 OUTPUT:
- 23. Page 23
- 24. Page 24 Program 7 AIM: Give a brief Introduction on JSP. THEORY: Java Server Page (JSP) is a technology for controlling the content or appearance of Web pages through the use of servlets, small programs that are specified in the Web page and run on the Web server to modify the Web page before it is sent to the user who requested it. JSP pages are opposite of Servlets as a servlet adds HTML code inside Java code, while JSP adds Java code inside HTML using JSP tags or scriplets. JSP directives are used for controlling the processing of a JSP page. Directives provide information to the server on how the page should be processed. We can use java code in JSP using scriptlets. The JSP container moves the scipetlet content into the _jspService() method which is available to the server during processing of the request. JSP has many advantages over servlets: 1. JSP does not require additional files like, java class files, web.xml etc. 2. Any change in the JSP code is handled by Web Container (Application server like tomcat), and doesn't require re-compilation. 3. JSP pages can be directly accessed, and web.xml mapping is not required like in servlets. 4. Easy To Maintain and Code, High Performance and Scalability, Platform Independent Lifecycle of JSP A JSP page is converted into Servlet in order to service requests. The translation of a JSP page to a Servlet is called Lifecycle of JSP. JSP Lifecycle is exactly same as the Servlet Lifecycle, with one additional first step, which is, translation of JSP code to Servlet code. Following are the JSP Lifecycle steps: 1. Translation of JSP to Servlet code. 2. Compilation of Servlet to bytecode. 3. Loading Servlet class. 4. Creating servlet instance. 5. Initialization by calling jspInit() method 6. Request Processing by calling _jspService() method 7. Destroying by calling jspDestroy() method Implicit Objects in JSP JSP provide access to some implicit object which represent some commonly used objects for servlets. Some implicit objects are : Request : The HttpServletRequest object associated with the request.
- 25. Page 25 Response : The HttpServletRequest object associated with the response that is sent back to the browser. Out : The JspWriter object associated with the output stream of the response. Etc. JSP Scripting Elements JSP Scripting elements are written inside <% %> tags. These code inside <% %> tags are processed by the JSP engine during translation of the JSP page. Any other text in the JSP page is considered as HTML code or plain text. There are five different types of scripting elements that JSP uses most widely <%-- Comments--%> <%@ Directive @%> <%! Declarations %> <% Scriptlets %> <%= expression %>
- 26. Page 26 Program 8 AIM: WAP to get local Date & Time using JSP. SOURCE CODE: <%@page contentType="text/html" pageEncoding="UTF-8"%> <!DOCTYPE html> <html> <head> <meta http-equiv="Content-Type" content="text/html; charset=UTF-8"> <title>JSP Page</title> </head> <body> <h1>The time of this output is :</h1> <%= new java.util.Date() %> // Java command to get the local machine’s Date & time information wrapped in scriptlets </body> </html> OUTPUT
- 27. Page 27 Program 9 AIM: WAP to generate Registration and Login forms using JSP. SOURCE CODE: SignIn.html <!DOCTYPE html> <html> <head> <title>Sign In Page</title> <link href="bootstrap.min.css" rel="stylesheet" type="text/css"/> <meta charset="UTF-8"> <meta name="viewport" content="width=device-width, initial-scale=1.0"> <style> .center_div{ margin:0 auto; width:600px; height:330px; border-radius:10px; } .form-group{ text-align:center; } .form-control{ background-color:whitesmoke; } </style> //Internal Styling </head> <body style="background-color:whitesmoke"> <div class="row" style="height:30px;"></div> <div class="container center_div"> <form class="form-group" action="SignUp.jsp" method="GET"> <div class="form-row"> <label class="h1" style="font-family:monospace; margin-left:175px; margin- top:10px;"> Registration form </label> </div>
- 28. Page 28 <div class="form-row"> <label class="h3" style="font-family: monospace"> First Name </label></div> <div class="form-row"> <input type="text" class="form-control" name="fname" placeholder="Enter first name"/> </div> <div style="height:15px;"></div> <div class="form-row"> <label class="h3" style="font-family: monospace">Last Name</label> </div> <div class="form-row"> <input type="text" class="form-control" name="lname" placeholder="Enter last name"/> </div> <div style="height:15px;"></div> <div class="form-row"> <label class="h3" style="font-family: monospace">User Name</label> </div> <div class="form-row"> <input type="text" class="form-control" name="uname" placeholder="Enter User name or Email"/> </div> <div style="height:15px;"></div> <div class="form-row"> <label class="h3" style="font-family: monospace">Password</label> </div> <div class="form-row"> <input type="password" class="form-control" name="pswd" placeholder="Enter Password"/> </div> <div style="height:35px;"></div> <div class="form-row"> <input type="submit" class="btn form-control btn-primary" value="Submit"/> </div> </form> // Form tag containing multiple input tags and labels </div> </body> </html>
- 29. Page 29 LogIn.html <!DOCTYPE html> <html> <head> <title>TODO supply a title</title> <meta charset="UTF-8"> <meta name="viewport" content="width=device-width, initial-scale=1.0"> <link href="bootstrap.min.css" rel="stylesheet" type="text/css"/> <style> .center_div{ margin:0 auto; width:600px; height:330px; border-radius:10px; } .form-group{ text-align:center; } .form-control{ background-color:whitesmoke; } </style> //Internal styling </head> <body style="background-color:whitesmoke;"> <div class="row" style="height:30px;"></div> <div class="container center_div"> //wrapper container <form class="form-group" action="LogUp.jsp" method="GET"> <div class="form-row"> <label class="h1" style="font-family:monospace; margin-left:175px; margin-top:10px;"> Login Here</label> </div> <div class="form-row" style="margin:0px 20px 0px 20px;"> <label class="h3" style="font-family: monospace"> Enter your Name</label> </div> <div class="form-row" style="margin:0px 20px 0px 20px;">
- 30. Page 30 <input type="text" class="form-control" name="login_uname" placeholder="Name"/> </div> <div style="height:15px;"></div> <div class="form-row" style="margin:0px 20px 0px 20px;"> <label class="h3" style="font-family: monospace">Enter your Roll no</label> </div> <div class="form-row" style="margin:0px 20px 0px 20px;"> <input type="password" class="form-control" name="login_pswd" placeholder="Roll no"/> </div> <div style="height:35px;"></div> <div class="form-row" style="margin:0px 20px 0px 20px;"> <label class="h3" style="font-family: monospace">Enter your Course</label> </div> <div class="form-row" style="margin:0px 20px 0px 20px;"> <input type="password" class="form-control" name="course" placeholder="Course"/> </div> <div style="height:35px;"></div> <div class="form-row" style="margin:0px 20px 0px 230px;"> <input type="submit" class="btn btn-primary" value="Submit"/> </div> </form> </div> </body> </html> SignUp.jsp <%@page contentType="text/html" pageEncoding="UTF-8"%> <!DOCTYPE html> <html> <head> <meta http-equiv="Content-Type" content="text/html; charset=UTF-8"> <title>JSP Page</title> </head> <body> <%
- 31. Page 31 Cookie first_name = new Cookie("fn",request.getParameter("fname")); Cookie last_name = new Cookie("ln",request.getParameter("lname")); Cookie user_name = new Cookie("un",request.getParameter("uname")); Cookie password = new Cookie("pd",request.getParameter("pswd")); //Cookie objects storing values entered by user in registration form String fn=first_name.getValue(); String ln=last_name.getValue(); String un=user_name.getValue(); String ps=password.getValue(); //Values being stored in String variables if(fn.equals("") || ln.equals("") || un.equals("") || ps.equals("") ) { out.println("You must've left some field, let's try it again"); out.println("<a href=index.html>Try again</a>"); } //Check on values for being non-empty //proceed if every variable has some value else { out.println("<html><body onLoad="inside()"><script>function inside(){alert("Registeration completed");}</script></body></html>"); response.addCookie(user_name); response.addCookie(password); response.addCookie(first_name); response.addCookie(last_name); //Adding Cookies to the response object out.println("First name :"+first_name.getValue()+"<br>"); out.println("Last name :"+last_name.getValue()+"<br>"); out.println("User name :"+user_name.getValue()+"<br>"); out.println("Password :"+password.getValue()+"<br>"); out.println("<a href=Login.html>Log In Now</a>"); } %> </body> </html> LogUp.jsp <%@page contentType="text/html" pageEncoding="UTF-8"%> <!DOCTYPE html> <html> <head>
- 32. Page 32 <meta http-equiv="Content-Type" content="text/html; charset=UTF-8"> <title>JSP Page</title> </head> <body> <% String u1=request.getParameter("login_uname"); String p1=request.getParameter("login_pswd"); Cookie ck[]=request.getCookies(); if(ck!=null) { String u2=ck[1].getValue(); String p2=ck[2].getValue(); String f1=ck[3].getValue(); String l1=ck[4].getValue(); if(u1.equals(u2)) { if(p1.equals(p2)) out.println("Welcome "+ f1 +" "+ l1 + "You've Successfully logged in."); else out.println("Wrong password"); } else { out.println("Entered Username doesn't exist"); } } else { out.println("Something's wrong with cookies i guess."); } %> //Java code wrapped up in scriptlets </body> </html>
- 33. Page 33 OUTPUT
- 34. Page 34
- 35. Page 35 Program 10 AIM: Give a brief introduction to JAVA Beans THEORY: A Java Bean is a Java class that is mainly responsible for holding onto some data without a large degree of functionality built into the class. A Java class is said to a Bean class if they have the following properties: Has no-arguments constructors. Implements the Serializable interface. Exposes its properties via getter/setter methods. JavaBeans Properties Its property may be read, write, read-only, or write-only. The JavaBean properties are accessed through two methods, they are: getPropertyName() Used to get the the property; for example if we have a property named uname then it should be getUname: setPropertyName() Used to set the property; for example if we have a property named uname then it should be setUname. Advantages of JavaBeans The following are the advantages of using JavaBeans: It may be possible to register to receive events from other objects and can generate an event that sent to other objects. It provides the ability for properties, events, and methods of a bean to be reused in another application. The configuration setting of a bean can be saved in a persistent storage and restored at a later time. Since Java Beans are Java Classes, that can be used inside JSP to create dynamic Pages. There are three basic tags that allows to use, access, modify the Java Bean Components and its Properties. 1. jsp:useBean It initializes/instantiates the bean class from the mentioned java package. If bean object of the Bean class is already created, it doesn't create the bean depending on the scope. But if object of bean is not created, it instantiates the bean. <jsp:useBean id="" scope=” ” class=" " /> 2. jsp:setProperty sets up the value from request object <jsp:setProperty name="usebean_ID" property="*" /> 3. jsp:getProperty provides value to the response object <jsp:getProperty name="usebean_ID" property="name" />
- 36. Page 36 Program 11 AIM: WAP to access the data entered in a form using Java Beans. SOURCE CODE: Index.html <html> <head> <title>TODO supply a title</title> <meta charset="UTF-8"> <meta name="viewport" content="width=device-width, initial-scale=1.0"> <style> .center_div{ margin:0 auto; width:600px; height:330px; border-radius:10px; } .form-group{ text-align:center; } .form-control{ background-color:whitesmoke; } </style> //internal styling <link href="bootstrap.min.css" rel="stylesheet" type="text/css"/> </head> <body style="background-color:whitesmoke;"> <div class="row" style="height:30px;"></div> <div class="container center_div"> <form class="form-group" action="jb.jsp" method="GET"> //Form for interaction with user to register by providing the required information <div class="form-row"><label class="h1" style="font- family:monospace; margin-left:175px; margin-top:10px;"> JavaBeans</label> </div> <div class="form-row" style="margin:0px 20px 0px 20px;"><label class="h3" style="font-family: monospace">Enter your Name</label> </div>
- 37. Page 37 <div class="form-row" style="margin:0px 20px 0px 20px;"><input type="text" class="form-control" name="fname" placeholder="Name"/> </div> <div style="height:15px;"></div> <div class="form-row" style="margin:0px 20px 0px 20px;"><label class="h3" style="font-family: monospace">Enter your Roll no</label> </div> <div class="form-row" style="margin:0px 20px 0px 20px;"><input type="text" class="form-control" name="roll" placeholder="Roll no"/> </div> <div style="height:15px;"></div> <div class="form-row" style="margin:0px 20px 0px 20px;"><label class="h3" style="font-family: monospace">Enter your Course</label> </div> <div class="form-row" style="margin:0px 20px 0px 20px;"><input type="text" class="form-control" name="course" placeholder="Course"/> </div> <div style="height:35px;"></div> <div class="form-row" style="margin:0px 20px 0px 230px;"><input type="submit" class="btn btn-primary" value="Submit"/> </div> </form> </div> </body> </html>
- 38. Page 38 Jb.jsp <%@page contentType="text/html" pageEncoding="UTF-8"%> <!DOCTYPE html> <html> <head> <meta http-equiv="Content-Type" content="text/html; charset=UTF-8"> <title>JSP Page</title> </head> <body> //XML tags for Implementing javabeans <jsp:useBean id="info" scope="request" class="beanpack.infobean"/> //action useBean declares the javabean in question with a scope for its lifetime and class //attribute for mentioning it’s location <jsp:setProperty name="info" property="*" /> // action filling up the values among their variables from the values entered by the user <jsp:forward page="display.jsp" /> //action redirecting to another jsp for displaying data stored. </body> </html> display.jsp <%@page contentType="text/html" pageEncoding="UTF-8"%> <!DOCTYPE html> <html> <head> <meta http-equiv="Content-Type" content="text/html; charset=UTF-8"> <title>JSP Page</title> </head> <body> <jsp:useBean id="info" scope="request" class="beanpack.infobean"/> //action useBean declares the javabean in question with a scope for its lifetime and class //attribute for mentioning it’s location Name : <jsp:getProperty name="info" property="fname"/><br> Roll no : <jsp:getProperty name="info" property="roll"/><br> Course : <jsp:getProperty name="info" property="course"/><br> // getProperty action retrieves the values from the variables for us to do whatever we want. </body> </html>
- 39. Page 39 infobean.java import java.io.Serializable; public class infobean implements Serializable { private String fname; private String roll; private String course; //All variables are kept private according to rules of java beans public infobean() {} //Empty public constructor for automatic instantiation of java framework public infobean(String fname, String roll, String course){ this.fname=fname; this.roll=roll; this.course=course; } //public constructor with arguments to provide values to all private variables. public String getFname() { return fname; } public void setFname(String name) { this.fname = name; } //Getter and Setter public methods for provate variable name public String getRoll() { return roll; } public void setRoll(String Roll) { this.roll = Roll; } //Getter and Setter public methods for provate variable roll public String getCourse() { return course; } public void setCourse(String Course) { this.course = Course; } //Getter and Setter public methods for provate variable course }
- 40. Page 40 OUTPUT:
- 41. Page 41 Program 12 AIM: Give a brief introduction to Remote Method Invocation. Theory: Remote Method Invocation (RMI) is an API through which object running in a JVM present on a computer (Client side) can invoke methods on an object present in another JVM (Server side). RMI creates a public remote server object that enables client and server side communications through simple method calls on the server object. The communication between client and server is handled by using two intermediate objects: Stub object (on client side) The stub object on the client machine builds an information block and sends this information to the s erver. The block consists of An identifier of the remote object to be used Method name which is to be invoked Parameters to the remote JVM Skeleton object (on server side) The skeleton object passes the request from the stub object to the remote object. It performs following tasks It calls the desired method on the real object present on the server. It forwards the parameters received from the stub object to the method. Steps to implement Interface 1. Defining a remote interface An interface will declare the methods that can be invoked by the client by extending remote interface by throwing some exception. 2. Implementing the remote interface Another java class implements this interface by by extending UnicastRemoteObject and handling the remote exception. 3. Creating Stub and Skeleton objects from the implementation class using rmic (rmi complier) The rmic tool is used to invoke the rmi compiler that creates the Stub and Skeleton objects. Its prototype is rmic classname. 4. Start the rmiregistry By using the command : Start rmiregistry, registry service is started 5. Create and execute the server application program The rebind method of Naming class is used to bind the remote object to the new name. 6. Create and execute the client application program. The lookup method of Naming class is used to get the reference of the Stub object.
- 42. Page 42 Program 13 AIM: WAP to add two numbers using the concept of RMI. SOURCE CODE: AddI.java import java.rmi.Remote; //package for RMI public interface AddI extends Remote { public int add(int x,int y)throws Exception; } //Interface AddI for declaring add method by extending Remote Class from the mentioned package Addc.java import java.rmi.server.*; public class AddC extends UnicastRemoteObject implements AddI { public AddC() throws Exception { super(); } public int add(int x,int y) { return x+y; } } //Java class implementing the interface created before for defining the method declared in another system Client.java import java.rmi.*; public class Client { public static void main(String args[]) throws Exception { AddI obj = (AddI)Naming.lookup("ADD"); int n = obj.add(5,4); System.out.println("Sum is : " + n); }
- 43. Page 43 } //Client machine requesting for the information from the bean using the lookup method of Naming Class Server.java import java.rmi.*; public class Server { public static void main(String args[]) throws Exception { AddC obj = new AddC(); Naming.rebind ("ADD",obj); System.out.println("Server Started"); } } //Server machine responding with the information from the bean using the rebind method of Naming Class
- 44. Page 44 OUTPUT: