Basic powershell scripts
1 like693 views

This document discusses performing SharePoint tasks using PowerShell scripts with the Client Side Object Model (CSOM) for SharePoint Online. It provides code samples for getting lists from a website, creating, deleting, updating lists, and modifying list settings and properties. It also includes examples for working with list items, content types, fields, views, folders, files, versions, groups, permissions and taxonomy terms. The prerequisites for using CSOM with PowerShell scripts for SharePoint Online are also outlined.


![©2014 C# CORNER.
SHARE THIS DOCUMENT AS IT IS. PLEASE DO NOT REPRODUCE, REPUBLISH, CHANGE OR COPY.
### References
# Specify the path where the dll's are located.
Add-Type -Path "c:Program FilesCommon Filesmicrosoft sharedWeb Server
Extensions15ISAPIMicrosoft.SharePoint.Client.dll"
Add-Type -Path "c:Program FilesCommon Filesmicrosoft sharedWeb Server
Extensions15ISAPIMicrosoft.SharePoint.Client.Runtime.dll"
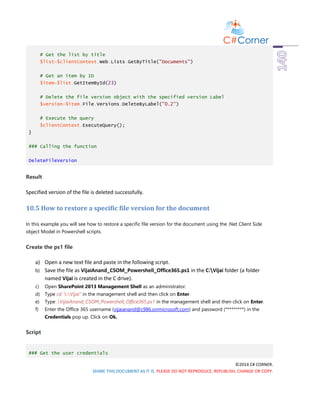
### Function
function CreateList()
{
# Connect to SharePoint Online and get ClientContext object.
$clientContext = New-Object Microsoft.SharePoint.Client.ClientContext($url)
$credentials = New-Object
Microsoft.SharePoint.Client.SharePointOnlineCredentials($username, $securePassword)
$clientContext.Credentials = $credentials
# Specifies the properties of the new custom list
$creationInfo= New-Object Microsoft.SharePoint.Client.ListCreationInformation;
$creationInfo.Title="CSOM List";
$creationInfo.Description="CSOM custom list created using Powershell";
$creationInfo.TemplateType=[int][Microsoft.SharePoint.Client.ListTemplateType]::Gener
icList
# Create a new custom list
$newList=$clientContext.Web.Lists.Add($creationInfo);
$clientContext.Load($newList);
# Execute the query
$clientContext.ExecuteQuery();
# Display the newly created list and ID
write-host -ForegroundColor Green "List Name: " $newList.Title " ID: "
$newList.Id
}
### Calling the function
CreateList](https://image.slidesharecdn.com/powershellscripts-170206065521/85/Basic-powershell-scripts-13-320.jpg)


![©2014 C# CORNER.
SHARE THIS DOCUMENT AS IT IS. PLEASE DO NOT REPRODUCE, REPUBLISH, CHANGE OR COPY.
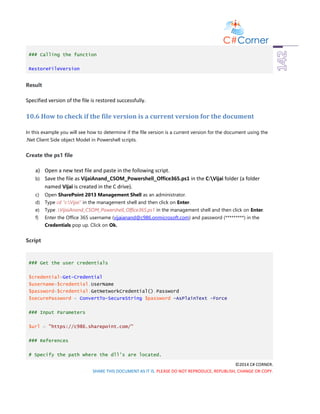
f) Enter the Office 365 username (vijaianand@c986.onmicrosoft.com) and password (*********) in the
Credentials pop up. Click on Ok.
Script
### Get the user credentials
$credential=Get-Credential
$username=$credential.UserName
$password=$credential.GetNetworkCredential().Password
$securePassword = ConvertTo-SecureString $password -AsPlainText -Force
### Input Parameters
$url = "https://c986.sharepoint.com/"
### References
# Specify the path where the dll's are located.
Add-Type -Path "c:Program FilesCommon Filesmicrosoft sharedWeb Server
Extensions15ISAPIMicrosoft.SharePoint.Client.dll"
Add-Type -Path "c:Program FilesCommon Filesmicrosoft sharedWeb Server
Extensions15ISAPIMicrosoft.SharePoint.Client.Runtime.dll"
### Function
function DraftVersionVisibility()
{
# Connect to SharePoint Online and get ClientContext object.
$clientContext = New-Object Microsoft.SharePoint.Client.ClientContext($url)
$credentials = New-Object
Microsoft.SharePoint.Client.SharePointOnlineCredentials($username, $securePassword)
$clientContext.Credentials = $credentials
# Get the document library by title
$dl=$clientContext.Web.Lists.GetByTitle("Documents");
# Specify the permissions required to view minor versions and drafts within the
document library
$dl.DraftVersionVisibility=[Microsoft.SharePoint.Client.DraftVisibilityType]::Approve
r;
# Update the document library](https://image.slidesharecdn.com/powershellscripts-170206065521/85/Basic-powershell-scripts-33-320.jpg)


![©2014 C# CORNER.
SHARE THIS DOCUMENT AS IT IS. PLEASE DO NOT REPRODUCE, REPUBLISH, CHANGE OR COPY.
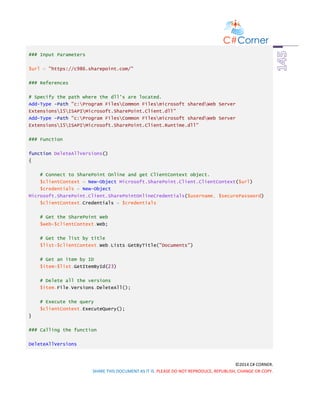
"Microsoft.SharePoint.Client, Version=15.0.0.0, Culture=neutral,
PublicKeyToken=71e9bce111e9429c",
"Microsoft.SharePoint.Client.Runtime, Version=15.0.0.0, Culture=neutral,
PublicKeyToken=71e9bce111e9429c",
"System.Core, Version=3.5.0.0, Culture=neutral,
PublicKeyToken=b77a5c561934e089")
$sourceCode = @"
using Microsoft.SharePoint.Client;
using System.Collections.Generic;
using System.Linq;
public static class QueryHelper
{
public static void LoadListWithLimtedFields(ClientContext ctx, Web web)
{
ctx.Load(
web,
w => w.Title);
}
}
"@
Add-Type -ReferencedAssemblies $referencedAssemblies -TypeDefinition $sourceCode
-Language CSharp;
# Get the SharePoint web
$web=$ctx.Web;
[QueryHelper]::LoadListWithLimtedFields($ctx, $web)
# Execute the query
$ctx.ExecuteQuery()
# Display the web title
Write-Host -ForegroundColor Green "Web Title: " $web.Title
}
### Calling the function
GetSpecificProperties
Result](https://image.slidesharecdn.com/powershellscripts-170206065521/85/Basic-powershell-scripts-42-320.jpg)


![©2014 C# CORNER.
SHARE THIS DOCUMENT AS IT IS. PLEASE DO NOT REPRODUCE, REPUBLISH, CHANGE OR COPY.
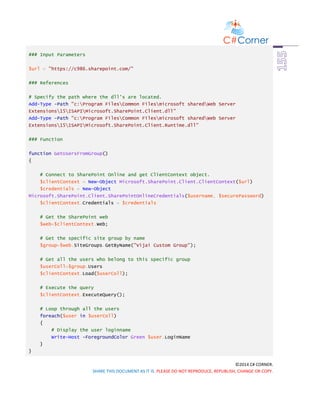
f) Enter the Office 365 username (vijaianand@c986.onmicrosoft.com) and password (*********) in the
Credentials pop up. Click on Ok.
Script
### Get the user credentials
$credential=Get-Credential
$username=$credential.UserName
$password=$credential.GetNetworkCredential().Password
$securePassword = ConvertTo-SecureString $password -AsPlainText -Force
### Input Parameters
$url = "https://c986.sharepoint.com/"
### References
# Specify the path where the dll's are located.
Add-Type -Path "c:Program FilesCommon Filesmicrosoft sharedWeb Server
Extensions15ISAPIMicrosoft.SharePoint.Client.dll"
Add-Type -Path "c:Program FilesCommon Filesmicrosoft sharedWeb Server
Extensions15ISAPIMicrosoft.SharePoint.Client.Runtime.dll"
### Function
function GetListItems()
{
# Connect to SharePoint Online and get ClientContext object.
$clientContext = New-Object Microsoft.SharePoint.Client.ClientContext($url)
$credentials = New-Object
Microsoft.SharePoint.Client.SharePointOnlineCredentials($username, $securePassword)
$clientContext.Credentials = $credentials
# Get the list items
$list=$clientContext.Web.Lists.GetByTitle("Employee Details")
$camlQuery= [Microsoft.SharePoint.Client.CamlQuery]::CreateAllItemsQuery()
$itemColl=$list.GetItems($camlQuery)
$clientContext.Load($itemColl)
# Execute the query
$clientContext.ExecuteQuery();](https://image.slidesharecdn.com/powershellscripts-170206065521/85/Basic-powershell-scripts-46-320.jpg)
![©2014 C# CORNER.
SHARE THIS DOCUMENT AS IT IS. PLEASE DO NOT REPRODUCE, REPUBLISH, CHANGE OR COPY.
# Loop through all the items and display the title field
foreach($item in $itemColl)
{
Write-Host -ForegroundColor Green $item["Title"]
}
}
### Calling the function
GetListItems
Result
Figure 5.1.1: Get all the list items
5.2 How to create a new item in the list
In this example you will see how to create a new item in the list using the .Net Client Side Object Model in
Powershell scripts.
Create the ps1 file
a) Open a new text file and paste in the following script.
b) Save the file as VijaiAnand_CSOM_Powershell_Office365.ps1 in the C:Vijai folder (a folder
named Vijai is created in the C drive).
c) Open SharePoint 2013 Management Shell as an administrator.
d) Type cd “c:Vijai” in the management shell and then click on Enter.
e) Type .VijaiAnand_CSOM_Powershell_Office365.ps1 in the management shell and then click on Enter.
f) Enter the Office 365 username (vijaianand@c986.onmicrosoft.com) and password (*********) in the
Credentials pop up. Click on Ok.](https://image.slidesharecdn.com/powershellscripts-170206065521/85/Basic-powershell-scripts-47-320.jpg)
![©2014 C# CORNER.
SHARE THIS DOCUMENT AS IT IS. PLEASE DO NOT REPRODUCE, REPUBLISH, CHANGE OR COPY.
Script
### Get the user credentials
$credential=Get-Credential
$username=$credential.UserName
$password=$credential.GetNetworkCredential().Password
$securePassword = ConvertTo-SecureString $password -AsPlainText -Force
### Input Parameters
$url = "https://c986.sharepoint.com/"
### References
# Specify the path where the dll's are located.
Add-Type -Path "c:Program FilesCommon Filesmicrosoft sharedWeb Server
Extensions15ISAPIMicrosoft.SharePoint.Client.dll"
Add-Type -Path "c:Program FilesCommon Filesmicrosoft sharedWeb Server
Extensions15ISAPIMicrosoft.SharePoint.Client.Runtime.dll"
### Function
function AddNewitem()
{
# Connect to SharePoint Online and get ClientContext object.
$clientContext = New-Object Microsoft.SharePoint.Client.ClientContext($url)
$credentials = New-Object
Microsoft.SharePoint.Client.SharePointOnlineCredentials($username, $securePassword)
$clientContext.Credentials = $credentials
# Get the list by title
$list=$clientContext.Web.Lists.GetByTitle("Employee Details")
# Add new item to the list
$creationInfo= New-Object Microsoft.SharePoint.Client.ListItemCreationInformation
$newItem=$list.AddItem($creationInfo)
# Set the title value for the new item
$newItem["Title"]="Rakesh";](https://image.slidesharecdn.com/powershellscripts-170206065521/85/Basic-powershell-scripts-48-320.jpg)
![©2014 C# CORNER.
SHARE THIS DOCUMENT AS IT IS. PLEASE DO NOT REPRODUCE, REPUBLISH, CHANGE OR COPY.
# Update the item
$newItem.Update();
$clientContext.Load($newItem)
# Execute the query
$clientContext.ExecuteQuery();
# Display the new item field value
Write-Host -ForegroundColor Green $newItem["Title"]
}
### Calling the function
AddNewitem
Result
Figure5.2.1: Create a new list item
5.3 How to update an item in the list
In this example you will see how to update an item in the list using the .Net Client Side Object Model in
Powershell scripts.
Create the ps1 file
a) Open a new text file and paste in the following script.
b) Save the file as VijaiAnand_CSOM_Powershell_Office365.ps1 in the C:Vijai folder (a folder
named Vijai is created in the C drive).
c) Open SharePoint 2013 Management Shell as an administrator.
d) Type cd “c:Vijai” in the management shell and then click on Enter.
e) Type .VijaiAnand_CSOM_Powershell_Office365.ps1 in the management shell and then click on Enter.
f) Enter the Office 365 username (vijaianand@c986.onmicrosoft.com) and password (*********) in the
Credentials pop up. Click on Ok.](https://image.slidesharecdn.com/powershellscripts-170206065521/85/Basic-powershell-scripts-49-320.jpg)
![©2014 C# CORNER.
SHARE THIS DOCUMENT AS IT IS. PLEASE DO NOT REPRODUCE, REPUBLISH, CHANGE OR COPY.
Script
### Get the user credentials
$credential=Get-Credential
$username=$credential.UserName
$password=$credential.GetNetworkCredential().Password
$securePassword = ConvertTo-SecureString $password -AsPlainText -Force
### Input Parameters
$url = "https://c986.sharepoint.com/"
### References
# Specify the path where the dll's are located.
Add-Type -Path "c:Program FilesCommon Filesmicrosoft sharedWeb Server
Extensions15ISAPIMicrosoft.SharePoint.Client.dll"
Add-Type -Path "c:Program FilesCommon Filesmicrosoft sharedWeb Server
Extensions15ISAPIMicrosoft.SharePoint.Client.Runtime.dll"
### Function
function UpdateItem()
{
# Connect to SharePoint Online and get ClientContext object.
$clientContext = New-Object Microsoft.SharePoint.Client.ClientContext($url)
$credentials = New-Object
Microsoft.SharePoint.Client.SharePointOnlineCredentials($username, $securePassword)
$clientContext.Credentials = $credentials
# Get the list by title
$list=$clientContext.Web.Lists.GetByTitle("Employee Details")
# Get the item by ID
$item=$list.GetItemById(9);
# Set the title value for the new item
$item["Title"]="Kavya M";
# Update the item
$item.Update();
$clientContext.Load($item)](https://image.slidesharecdn.com/powershellscripts-170206065521/85/Basic-powershell-scripts-50-320.jpg)
![©2014 C# CORNER.
SHARE THIS DOCUMENT AS IT IS. PLEASE DO NOT REPRODUCE, REPUBLISH, CHANGE OR COPY.
# Execute the query
$clientContext.ExecuteQuery();
# Display the update item Title field value
Write-Host -ForegroundColor Green $item["Title"]
}
### Calling the function
UpdateItem
Result
Figure5.3.1: Update an item
5.4 How to delete an item in the list
In this example you will see how to delete an item in the list using the .Net Client Side Object Model in
Powershell scripts.
Create the ps1 file
a) Open a new text file and paste in the following script.
b) Save the file as VijaiAnand_CSOM_Powershell_Office365.ps1 in the C:Vijai folder (a folder
named Vijai is created in the C drive).
c) Open SharePoint 2013 Management Shell as an administrator.
d) Type cd “c:Vijai” in the management shell and then click on Enter.
e) Type .VijaiAnand_CSOM_Powershell_Office365.ps1 in the management shell and then click on Enter.
f) Enter the Office 365 username (vijaianand@c986.onmicrosoft.com) and password (*********) in the
Credentials pop up. Click on Ok.
Script](https://image.slidesharecdn.com/powershellscripts-170206065521/85/Basic-powershell-scripts-51-320.jpg)
![©2014 C# CORNER.
SHARE THIS DOCUMENT AS IT IS. PLEASE DO NOT REPRODUCE, REPUBLISH, CHANGE OR COPY.
### Get the user credentials
$credential=Get-Credential
$username=$credential.UserName
$password=$credential.GetNetworkCredential().Password
$securePassword = ConvertTo-SecureString $password -AsPlainText -Force
### Input Parameters
$url = "https://c986.sharepoint.com/"
### References
# Specify the path where the dll's are located.
Add-Type -Path "c:Program FilesCommon Filesmicrosoft sharedWeb Server
Extensions15ISAPIMicrosoft.SharePoint.Client.dll"
Add-Type -Path "c:Program FilesCommon Filesmicrosoft sharedWeb Server
Extensions15ISAPIMicrosoft.SharePoint.Client.Runtime.dll"
### Function
function DeleteItem()
{
# Connect to SharePoint Online and get ClientContext object.
$clientContext = New-Object Microsoft.SharePoint.Client.ClientContext($url)
$credentials = New-Object
Microsoft.SharePoint.Client.SharePointOnlineCredentials($username, $securePassword)
$clientContext.Credentials = $credentials
# Get the list by title
$list=$clientContext.Web.Lists.GetByTitle("Employee Details")
# Get the item by ID
$item=$list.GetItemById(9);
# Set the title value for the new item
$item["Title"]="Kavya M";
# Delete the Item
$item.DeleteObject();
# Execute the query](https://image.slidesharecdn.com/powershellscripts-170206065521/85/Basic-powershell-scripts-52-320.jpg)

![©2014 C# CORNER.
SHARE THIS DOCUMENT AS IT IS. PLEASE DO NOT REPRODUCE, REPUBLISH, CHANGE OR COPY.
# Specify the path where the dll's are located.
Add-Type -Path "c:Program FilesCommon Filesmicrosoft sharedWeb Server
Extensions15ISAPIMicrosoft.SharePoint.Client.dll"
Add-Type -Path "c:Program FilesCommon Filesmicrosoft sharedWeb Server
Extensions15ISAPIMicrosoft.SharePoint.Client.Runtime.dll"
### Function
function GetListItemsFromFolder()
{
# Connect to SharePoint Online and get ClientContext object.
$clientContext = New-Object Microsoft.SharePoint.Client.ClientContext($url)
$credentials = New-Object
Microsoft.SharePoint.Client.SharePointOnlineCredentials($username, $securePassword)
$clientContext.Credentials = $credentials
# Get the list items
$list=$clientContext.Web.Lists.GetByTitle("Custom List")
# CamlQuery to retrieve the items from the list
$camlQuery= New-Object Microsoft.SharePoint.Client.CamlQuery
# Specify the server relative URL of a list folder
$camlQuery.FolderServerRelativeUrl="/Lists/Custom List/FolderA";
$itemColl=$list.GetItems($camlQuery)
$clientContext.Load($itemColl)
# Execute the query
$clientContext.ExecuteQuery();
# Loop through all the items and display the title field
foreach($item in $itemColl)
{
Write-Host -ForegroundColor Green $item["Title"]
}
}
### Calling the function
GetListItemsFromFolder](https://image.slidesharecdn.com/powershellscripts-170206065521/85/Basic-powershell-scripts-54-320.jpg)


![©2014 C# CORNER.
SHARE THIS DOCUMENT AS IT IS. PLEASE DO NOT REPRODUCE, REPUBLISH, CHANGE OR COPY.
### Get the user credentials
$credential=Get-Credential
$username=$credential.UserName
$password=$credential.GetNetworkCredential().Password
$securePassword = ConvertTo-SecureString $password -AsPlainText -Force
### Input Parameters
$url = "https://c986.sharepoint.com/"
### References
# Specify the path where the dll's are located.
Add-Type -Path "c:Program FilesCommon Filesmicrosoft sharedWeb Server
Extensions15ISAPIMicrosoft.SharePoint.Client.dll"
Add-Type -Path "c:Program FilesCommon Filesmicrosoft sharedWeb Server
Extensions15ISAPIMicrosoft.SharePoint.Client.Runtime.dll"
### Function
function AddField()
{
# Connect to SharePoint Online and get ClientContext object.
$clientContext = New-Object Microsoft.SharePoint.Client.ClientContext($url)
$credentials = New-Object
Microsoft.SharePoint.Client.SharePointOnlineCredentials($username, $securePassword)
$clientContext.Credentials = $credentials
# Get the SharePoint web
$web=$clientContext.Web;
# Get the custom list by Title
$list=$web.Lists.GetByTitle("Employee Details");
# String variable to store the field schema XML
$schemaXML="<Field DisplayName='CustomField' Type='Text' />";
# Add a field to the list
$list.Fields.AddFieldAsXml($schemaXML,
$true,[Microsoft.SharePoint.Client.AddFieldOptions]::DefaultValue);](https://image.slidesharecdn.com/powershellscripts-170206065521/85/Basic-powershell-scripts-78-320.jpg)


![©2014 C# CORNER.
SHARE THIS DOCUMENT AS IT IS. PLEASE DO NOT REPRODUCE, REPUBLISH, CHANGE OR COPY.
$list=$web.Lists.GetByTitle("Employee Details");
# Get a specific field bt title
$field=$list.Fields.GetByTitle("Calculated");
# Cast the field
$calculatedField=New-Object
Microsoft.SharePoint.Client.FieldCalculated($clientContext,$field.Path);
# Set the formula for the calculated value
$calculatedField.Formula="=[Employee ID]";
# Update the field
$calculatedField.Update();
# Execute the query
$clientContext.ExecuteQuery();
}
### Calling the function
SetCalculatedFieldFormula
Result
Figure7.8.1: Values are updated based on the formula](https://image.slidesharecdn.com/powershellscripts-170206065521/85/Basic-powershell-scripts-88-320.jpg)


![©2014 C# CORNER.
SHARE THIS DOCUMENT AS IT IS. PLEASE DO NOT REPRODUCE, REPUBLISH, CHANGE OR COPY.
### References
# Specify the path where the dll's are located.
Add-Type -Path "c:Program FilesCommon Filesmicrosoft sharedWeb Server
Extensions15ISAPIMicrosoft.SharePoint.Client.dll"
Add-Type -Path "c:Program FilesCommon Filesmicrosoft sharedWeb Server
Extensions15ISAPIMicrosoft.SharePoint.Client.Runtime.dll"
### Function
function FileCheckIn()
{
# Connect to SharePoint Online and get ClientContext object.
$clientContext = New-Object Microsoft.SharePoint.Client.ClientContext($url)
$credentials = New-Object
Microsoft.SharePoint.Client.SharePointOnlineCredentials($username, $securePassword)
$clientContext.Credentials = $credentials
# Get the SharePoint web
$web=$clientContext.Web;
# Get the list by title
$list=$web.Lists.GetByTitle("Documents");
# Get an item by ID
$item=$list.GetItemById(19);
# Get the file that is represented by the item from a document library
$file=$item.File;
# Check in the file
$file.CheckIn("Checked in using powershell",
[Microsoft.SharePoint.Client.CheckInType]::MajorCheckIn);
# Execute the query
$clientContext.ExecuteQuery();
}
### Calling the function
FileCheckIn](https://image.slidesharecdn.com/powershellscripts-170206065521/85/Basic-powershell-scripts-125-320.jpg)


![©2014 C# CORNER.
SHARE THIS DOCUMENT AS IT IS. PLEASE DO NOT REPRODUCE, REPUBLISH, CHANGE OR COPY.
$url = "https://c986.sharepoint.com/"
### References
# Specify the path where the dll's are located.
Add-Type -Path "c:Program FilesCommon Filesmicrosoft sharedWeb Server
Extensions15ISAPIMicrosoft.SharePoint.Client.dll"
Add-Type -Path "c:Program FilesCommon Filesmicrosoft sharedWeb Server
Extensions15ISAPIMicrosoft.SharePoint.Client.Runtime.dll"
### Function
function CreatePermissionLevel()
{
# Connect to SharePoint Online and get ClientContext object.
$clientContext = New-Object Microsoft.SharePoint.Client.ClientContext($url)
$credentials = New-Object
Microsoft.SharePoint.Client.SharePointOnlineCredentials($username, $securePassword)
$clientContext.Credentials = $credentials
# Get the SharePoint Web
$web= $clientContext.Web;
# Base Permissions that has to be added to the role definition
$permissions = New-Object Microsoft.SharePoint.Client.BasePermissions;
$permissions.Set([Microsoft.SharePoint.Client.PermissionKind]::ViewListItems);
$permissions.Set([Microsoft.SharePoint.Client.PermissionKind]::ViewVersions);
# Initialize the role definition
$creationInfo = New-Object
Microsoft.SharePoint.Client.RoleDefinitionCreationInformation;
$creationInfo.Name = "My role";
$creationInfo.Description = "My role created using powershell";
$creationInfo.BasePermissions = $permissions;
# Add the role definitin to the site
$web.RoleDefinitions.Add($creationInfo);
# Execute the query
$clientContext.ExecuteQuery();
}](https://image.slidesharecdn.com/powershellscripts-170206065521/85/Basic-powershell-scripts-166-320.jpg)

![©2014 C# CORNER.
SHARE THIS DOCUMENT AS IT IS. PLEASE DO NOT REPRODUCE, REPUBLISH, CHANGE OR COPY.
# Specify the path where the dll's are located.
Add-Type -Path "c:Program FilesCommon Filesmicrosoft sharedWeb Server
Extensions15ISAPIMicrosoft.SharePoint.Client.dll"
Add-Type -Path "c:Program FilesCommon Filesmicrosoft sharedWeb Server
Extensions15ISAPIMicrosoft.SharePoint.Client.Runtime.dll"
### Function
function UpdatePermissionLevel()
{
# Connect to SharePoint Online and get ClientContext object.
$clientContext = New-Object Microsoft.SharePoint.Client.ClientContext($url)
$credentials = New-Object
Microsoft.SharePoint.Client.SharePointOnlineCredentials($username, $securePassword)
$clientContext.Credentials = $credentials
# Get the SharePoint Web
$web= $clientContext.Web;
# Get the role definition by name
$roleDef=$web.RoleDefinitions.GetByName("My Role");
# Update the description
$roleDef.Description = " Description updated";
# Add the permissions
$permissions = New-Object Microsoft.SharePoint.Client.BasePermissions;
$permissions.Set([Microsoft.SharePoint.Client.PermissionKind]::ApproveItems);
$permissions.Set([Microsoft.SharePoint.Client.PermissionKind]::CreateAlerts);
$roleDef.BasePermissions = $permissions;
# Update the permission level
$roleDef.Update();
$clientContext.Load($roleDef);
# Execute the query
$clientContext.ExecuteQuery();
}
### Calling the function
UpdatePermissionLevel](https://image.slidesharecdn.com/powershellscripts-170206065521/85/Basic-powershell-scripts-168-320.jpg)


![©2014 C# CORNER.
SHARE THIS DOCUMENT AS IT IS. PLEASE DO NOT REPRODUCE, REPUBLISH, CHANGE OR COPY.
$permissions = New-Object Microsoft.SharePoint.Client.BasePermissions;
$permissions.Clear([Microsoft.SharePoint.Client.PermissionKind]::ApproveItems);
$roleDef.BasePermissions = $permissions;
# Update the permission level
$roleDef.Update();
$clientContext.Load($roleDef);
# Execute the query
$clientContext.ExecuteQuery();
}
### Calling the function
RemovePermission
Result
Navigate to the SharePoint site. Click on Settings and then click on Site Settings. Click on Site Permissions
available under the Users and Permissions section. Click on Permission Levels available in the ribbon interface.
Click on My role permission level. You will see the permissions are removed successfully from the role.
11.5 How to delete the permission level from the website
In this example you will see how to delete the role or permission level from the website using the .Net Client
Side object Model in Powershell scripts.
Create the ps1 file
a) Open a new text file and paste in the following script.
b) Save the file as VijaiAnand_CSOM_Powershell_Office365.ps1 in the C:Vijai folder (a folder
named Vijai is created in the C drive).
c) Open SharePoint 2013 Management Shell as an administrator.
d) Type cd “c:Vijai” in the management shell and then click on Enter.
e) Type .VijaiAnand_CSOM_Powershell_Office365.ps1 in the management shell and then click on Enter.
f) Enter the Office 365 username (vijaianand@c986.onmicrosoft.com) and password (*********) in the
Credentials pop up. Click on Ok.
Script
### Get the user credentials](https://image.slidesharecdn.com/powershellscripts-170206065521/85/Basic-powershell-scripts-171-320.jpg)


![©2014 C# CORNER.
SHARE THIS DOCUMENT AS IT IS. PLEASE DO NOT REPRODUCE, REPUBLISH, CHANGE OR COPY.
{
public static void LoadListWithLimtedFields(ClientContext ctx,
TaxonomySession taxonomySession)
{
ctx.Load(
taxonomySession.TermStores,
termStores => termStores.Include
(termStore => termStore.Name)
);
}
}
"@
Add-Type -ReferencedAssemblies $referencedAssemblies -TypeDefinition $sourceCode
-Language CSharp;
# Get the taxonomy session
$taxonomySession=[Microsoft.SharePoint.Client.Taxonomy.TaxonomySession]::GetTaxonomyS
ession($ctx);
[QueryHelper]::LoadListWithLimtedFields($ctx, $taxonomySession)
# Execute the query
$ctx.ExecuteQuery()
if($taxonomySession -ne $null)
{
Write-Host -ForegroundColor Green "Termstores available for the taxonomy
session"
foreach($termStore in $taxonomySession.TermStores)
{
# Display the termstore name
$termStore.Name
}
}
}
### Calling the function
GetTaxonomyStores
Result](https://image.slidesharecdn.com/powershellscripts-170206065521/85/Basic-powershell-scripts-175-320.jpg)


![©2014 C# CORNER.
SHARE THIS DOCUMENT AS IT IS. PLEASE DO NOT REPRODUCE, REPUBLISH, CHANGE OR COPY.
ctx.Load(
termstore.Groups,
termGroups => termGroups.Include
(termGroup => termGroup.Name)
);
}
}
"@
Add-Type -ReferencedAssemblies $referencedAssemblies -TypeDefinition $sourceCode
-Language CSharp;
# Get the taxonomy session
$taxonomySession=[Microsoft.SharePoint.Client.Taxonomy.TaxonomySession]::GetTaxonomyS
ession($ctx);
# Get the term store by name
$termstore=$taxonomySession.TermStores.GetByName("Taxonomy_DoxF1n/9qNkL60u1n5J+tQ==")
;
[QueryHelper]::LoadListWithLimtedFields($ctx, $termstore)
# Execute the query
$ctx.ExecuteQuery()
Write-Host -ForegroundColor Green "Termstore Groups:"
# Loop through all the term groups for the termstore
foreach($group in $termstore.Groups)
{
# Display the group name
$group.Name
}
}
### Calling the function
GetTermStoreGroups
Result](https://image.slidesharecdn.com/powershellscripts-170206065521/85/Basic-powershell-scripts-178-320.jpg)

![©2014 C# CORNER.
SHARE THIS DOCUMENT AS IT IS. PLEASE DO NOT REPRODUCE, REPUBLISH, CHANGE OR COPY.
Add-Type -Path "c:Program FilesCommon Filesmicrosoft sharedWeb Server
Extensions15ISAPIMicrosoft.SharePoint.Client.dll"
Add-Type -Path "c:Program FilesCommon Filesmicrosoft sharedWeb Server
Extensions15ISAPIMicrosoft.SharePoint.Client.Runtime.dll"
Add-Type -Path "c:Program FilesCommon Filesmicrosoft sharedWeb Server
Extensions15ISAPIMicrosoft.SharePoint.Client.Taxonomy.dll"
### Function
function CreateTermGroup()
{
# Connect to SharePoint Online and get ClientContext object.
$ctx = New-Object Microsoft.SharePoint.Client.ClientContext($url)
$credentials = New-Object
Microsoft.SharePoint.Client.SharePointOnlineCredentials($username, $securePassword)
$ctx.Credentials = $credentials
# Get the taxonomy session
$taxonomySession=[Microsoft.SharePoint.Client.Taxonomy.TaxonomySession]::GetTaxonomyS
ession($ctx);
# Get the term store by name
$termstore=$taxonomySession.TermStores.GetByName("Taxonomy_DoxF1n/9qNkL60u1n5J+tQ==")
;
# Create a new guid for group
$guid=[System.Guid]::NewGuid()
# Create a new group
$termGroup=$termStore.CreateGroup("NewGroup",$guid)
# Commit all the changes
$termStore.CommitAll();
# Execute the query
$ctx.ExecuteQuery()
}
### Calling the function](https://image.slidesharecdn.com/powershellscripts-170206065521/85/Basic-powershell-scripts-180-320.jpg)

![©2014 C# CORNER.
SHARE THIS DOCUMENT AS IT IS. PLEASE DO NOT REPRODUCE, REPUBLISH, CHANGE OR COPY.
$taxonomySession=[Microsoft.SharePoint.Client.Taxonomy.TaxonomySession]::GetTaxonomyS
ession($ctx);
# Get the term store by name
$termstore=$taxonomySession.TermStores.GetByName("Taxonomy_DoxF1n/9qNkL60u1n5J+tQ==")
;
# Group Guid
$guid=New-Object System.Guid("4b6caff1-6f6b-4c62-87e1-2d077eb62558")
# Get the term group by Guid
$termGroup=$termStore.GetGroup($guid)
# Delete the term group
$termGroup.DeleteObject();
# Execute the query
$ctx.ExecuteQuery()
}
### Calling the function
DeleteTermGroup
Result
The specified taxonomy group is deleted successfully from the termstore.
12.5 How to get all the termsets for the taxonomy group
In this example you will see how to get all the termsets for the taxonomy group using the .Net Client Side Object
Model in Powershell scripts.
Create the ps1 file
a) Open a new text file and paste in the following script.
b) Save the file as VijaiAnand_CSOM_Powershell_Office365.ps1 in the C:Vijai folder (a folder
named Vijai is created in the C drive).
c) Open SharePoint 2013 Management Shell as an administrator.
d) Type cd “c:Vijai” in the management shell and then click on Enter.](https://image.slidesharecdn.com/powershellscripts-170206065521/85/Basic-powershell-scripts-183-320.jpg)
![©2014 C# CORNER.
SHARE THIS DOCUMENT AS IT IS. PLEASE DO NOT REPRODUCE, REPUBLISH, CHANGE OR COPY.
e) Type .VijaiAnand_CSOM_Powershell_Office365.ps1 in the management shell and then click on Enter.
f) Enter the Office 365 username (vijaianand@c986.onmicrosoft.com) and password (*********) in the
Credentials pop up. Click on Ok.
Script
### Get the user credentials
$credential=Get-Credential
$username=$credential.UserName
$password=$credential.GetNetworkCredential().Password
$securePassword = ConvertTo-SecureString $password -AsPlainText -Force
### Input Parameters
$url = "https://c986.sharepoint.com/"
### References
# Specify the path where the dll's are located.
Add-Type -Path "c:Program FilesCommon Filesmicrosoft sharedWeb Server
Extensions15ISAPIMicrosoft.SharePoint.Client.dll"
Add-Type -Path "c:Program FilesCommon Filesmicrosoft sharedWeb Server
Extensions15ISAPIMicrosoft.SharePoint.Client.Runtime.dll"
Add-Type -Path "c:Program FilesCommon Filesmicrosoft sharedWeb Server
Extensions15ISAPIMicrosoft.SharePoint.Client.Taxonomy.dll"
### Function
function GetTermSets()
{
# Connect to SharePoint Online and get ClientContext object.
$ctx = New-Object Microsoft.SharePoint.Client.ClientContext($url)
$credentials = New-Object
Microsoft.SharePoint.Client.SharePointOnlineCredentials($username, $securePassword)
$ctx.Credentials = $credentials
# Get the taxonomy session
$taxonomySession=[Microsoft.SharePoint.Client.Taxonomy.TaxonomySession]::GetTaxonomyS
ession($ctx);](https://image.slidesharecdn.com/powershellscripts-170206065521/85/Basic-powershell-scripts-184-320.jpg)

![©2014 C# CORNER.
SHARE THIS DOCUMENT AS IT IS. PLEASE DO NOT REPRODUCE, REPUBLISH, CHANGE OR COPY.
function CreateTermSet()
{
# Connect to SharePoint Online and get ClientContext object.
$ctx = New-Object Microsoft.SharePoint.Client.ClientContext($url)
$credentials = New-Object
Microsoft.SharePoint.Client.SharePointOnlineCredentials($username, $securePassword)
$ctx.Credentials = $credentials
# Get the taxonomy session
$taxonomySession=[Microsoft.SharePoint.Client.Taxonomy.TaxonomySession]::GetTaxonomyS
ession($ctx);
# Get the term store by name
$termstore=$taxonomySession.TermStores.GetByName("Taxonomy_DoxF1n/9qNkL60u1n5J+tQ==")
;
# Group Guid
$guid=New-Object System.Guid("da52b879-4c2c-4697-a574-ef5be1255d62")
# Get the term group by Guid
$termGroup=$termStore.GetGroup($guid)
# New termset name
$termSetName = "New TermSet";
# New Term Set GUID
$guid=[System.Guid]::NewGuid()
# New Term Set LCID
$LCID=1033;
# Create a new term set
$termSetColl=$termGroup.CreateTermSet($termSetName,$guid, $LCID);
# Execute the query
$ctx.ExecuteQuery()
}
### Calling the function](https://image.slidesharecdn.com/powershellscripts-170206065521/85/Basic-powershell-scripts-187-320.jpg)


![©2014 C# CORNER.
SHARE THIS DOCUMENT AS IT IS. PLEASE DO NOT REPRODUCE, REPUBLISH, CHANGE OR COPY.
# Get the taxonomy session
$taxonomySession=[Microsoft.SharePoint.Client.Taxonomy.TaxonomySession]::GetTaxonomyS
ession($ctx);
# Get the term store by name
$termstore=$taxonomySession.TermStores.GetByName("Taxonomy_DoxF1n/9qNkL60u1n5J+tQ==")
;
# Get the term group by name
$termGroup=$termStore.Groups.GetByName("Global Navigation");
# Get the term set by name
$termSet = $termGroup.TermSets.GetByName("New TermSet");
# Delete the term set
$termSet.DeleteObject();
# Execute the query
$ctx.ExecuteQuery();
}
### Calling the function
DeleteTermSet
Result
The termset is deleted successfully from the specified taxonomy group.
12.8 How to get all the terms for the termset
In this example you will see how to get all the terms for the termset using the .Net Client Side Object Model in
Powershell scripts.
Create the ps1 file
a) Open a new text file and paste in the following script.](https://image.slidesharecdn.com/powershellscripts-170206065521/85/Basic-powershell-scripts-190-320.jpg)

![©2014 C# CORNER.
SHARE THIS DOCUMENT AS IT IS. PLEASE DO NOT REPRODUCE, REPUBLISH, CHANGE OR COPY.
# Get the taxonomy session
$taxonomySession=[Microsoft.SharePoint.Client.Taxonomy.TaxonomySession]::GetTaxonomyS
ession($ctx);
# Get the term store by name
$termstore=$taxonomySession.TermStores.GetByName("Taxonomy_DoxF1n/9qNkL60u1n5J+tQ==")
;
# Get the term group by name
$termGroup=$termStore.Groups.GetByName("Global Navigation");
# Get the term set by name
$termSet = $termGroup.TermSets.GetByName("Technology");
# Get all the terms
$termColl=$termSet.Terms;
$ctx.Load($termColl);
# Execute the query
$ctx.ExecuteQuery();
Write-Host -ForegroundColor Green "Terms:"
# Loop through all the terms
foreach($term in $termColl)
{
# Display the term name
$term.Name
}
}
### Calling the function
GetTerms
Result](https://image.slidesharecdn.com/powershellscripts-170206065521/85/Basic-powershell-scripts-192-320.jpg)

![©2014 C# CORNER.
SHARE THIS DOCUMENT AS IT IS. PLEASE DO NOT REPRODUCE, REPUBLISH, CHANGE OR COPY.
### References
# Specify the path where the dll's are located.
Add-Type -Path "c:Program FilesCommon Filesmicrosoft sharedWeb Server
Extensions15ISAPIMicrosoft.SharePoint.Client.dll"
Add-Type -Path "c:Program FilesCommon Filesmicrosoft sharedWeb Server
Extensions15ISAPIMicrosoft.SharePoint.Client.Runtime.dll"
Add-Type -Path "c:Program FilesCommon Filesmicrosoft sharedWeb Server
Extensions15ISAPIMicrosoft.SharePoint.Client.Taxonomy.dll"
### Function
function CreateTerm()
{
# Connect to SharePoint Online and get ClientContext object.
$ctx = New-Object Microsoft.SharePoint.Client.ClientContext($url)
$credentials = New-Object
Microsoft.SharePoint.Client.SharePointOnlineCredentials($username, $securePassword)
$ctx.Credentials = $credentials
# Get the taxonomy session
$taxonomySession=[Microsoft.SharePoint.Client.Taxonomy.TaxonomySession]::GetTaxonomyS
ession($ctx);
# Get the term store by name
$termstore=$taxonomySession.TermStores.GetByName("Taxonomy_DoxF1n/9qNkL60u1n5J+tQ==")
;
# Get the term group by name
$termGroup=$termStore.Groups.GetByName("Global Navigation");
# Get the term set by name
$termSet = $termGroup.TermSets.GetByName("Technology");
# String Variable - New term name
$termName = "New Term";
# Guid - New Term GUID
$guid=[System.Guid]::NewGuid()](https://image.slidesharecdn.com/powershellscripts-170206065521/85/Basic-powershell-scripts-194-320.jpg)


![©2014 C# CORNER.
SHARE THIS DOCUMENT AS IT IS. PLEASE DO NOT REPRODUCE, REPUBLISH, CHANGE OR COPY.
function DeleteTerm()
{
# Connect to SharePoint Online and get ClientContext object.
$ctx = New-Object Microsoft.SharePoint.Client.ClientContext($url)
$credentials = New-Object
Microsoft.SharePoint.Client.SharePointOnlineCredentials($username, $securePassword)
$ctx.Credentials = $credentials
# Get the taxonomy session
$taxonomySession=[Microsoft.SharePoint.Client.Taxonomy.TaxonomySession]::GetTaxonomyS
ession($ctx);
# Get the term store by name
$termstore=$taxonomySession.TermStores.GetByName("Taxonomy_DoxF1n/9qNkL60u1n5J+tQ==")
;
# Get the term group by name
$termGroup=$termStore.Groups.GetByName("Global Navigation");
# Get the term set by name
$termSet = $termGroup.TermSets.GetByName("Technology");
# Get the term by name
$term = $termSet.Terms.GetByName("New Term");
# Delete the term
$term.DeleteObject();
# Execute the query
$ctx.ExecuteQuery();
}
### Calling the function
DeleteTerm
Result
The specified term is deleted successfully from the termset.](https://image.slidesharecdn.com/powershellscripts-170206065521/85/Basic-powershell-scripts-197-320.jpg)

![©2014 C# CORNER.
SHARE THIS DOCUMENT AS IT IS. PLEASE DO NOT REPRODUCE, REPUBLISH, CHANGE OR COPY.
function CopyTerm()
{
# Connect to SharePoint Online and get ClientContext object.
$ctx = New-Object Microsoft.SharePoint.Client.ClientContext($url)
$credentials = New-Object
Microsoft.SharePoint.Client.SharePointOnlineCredentials($username, $securePassword)
$ctx.Credentials = $credentials
# Get the taxonomy session
$taxonomySession=[Microsoft.SharePoint.Client.Taxonomy.TaxonomySession]::GetTaxonomyS
ession($ctx);
# Get the term store by name
$termstore=$taxonomySession.TermStores.GetByName("Taxonomy_DoxF1n/9qNkL60u1n5J+tQ==")
;
# Get the term group by name
$termGroup=$termStore.Groups.GetByName("Global Navigation");
# Get the term set by name
$termSet = $termGroup.TermSets.GetByName("Technology");
# Get the term by name
$term = $termSet.Terms.GetByName("Silverlight");
# Make a copy of the term within the termset
# Need to pass a bool parameter - whether to copy the child terms or not
$copyTerm=$term.Copy($false);
# Execute the query
$ctx.ExecuteQuery();
}
### Calling the function
CopyTerm
Result](https://image.slidesharecdn.com/powershellscripts-170206065521/85/Basic-powershell-scripts-199-320.jpg)

![©2014 C# CORNER.
SHARE THIS DOCUMENT AS IT IS. PLEASE DO NOT REPRODUCE, REPUBLISH, CHANGE OR COPY.
e) Type .VijaiAnand_CSOM_Powershell_Office365.ps1 in the management shell and then click on Enter.
f) Enter the Office 365 username (vijaianand@c986.onmicrosoft.com) and password (*********) in the
Credentials pop up. Click on Ok.
Script
### Get the user credentials
$credential=Get-Credential
$username=$credential.UserName
$password=$credential.GetNetworkCredential().Password
$securePassword = ConvertTo-SecureString $password -AsPlainText -Force
### Input Parameters
$url = "https://c986.sharepoint.com/"
### References
# Specify the path where the dll's are located.
Add-Type -Path "c:Program FilesCommon Filesmicrosoft sharedWeb Server
Extensions15ISAPIMicrosoft.SharePoint.Client.dll"
Add-Type -Path "c:Program FilesCommon Filesmicrosoft sharedWeb Server
Extensions15ISAPIMicrosoft.SharePoint.Client.Runtime.dll"
Add-Type -Path "c:Program FilesCommon Filesmicrosoft sharedWeb Server
Extensions15ISAPIMicrosoft.SharePoint.Client.Taxonomy.dll"
### Function
function DeprecateTerm()
{
# Connect to SharePoint Online and get ClientContext object.
$ctx = New-Object Microsoft.SharePoint.Client.ClientContext($url)
$credentials = New-Object
Microsoft.SharePoint.Client.SharePointOnlineCredentials($username, $securePassword)
$ctx.Credentials = $credentials
# Get the taxonomy session
$taxonomySession=[Microsoft.SharePoint.Client.Taxonomy.TaxonomySession]::GetTaxonomyS
ession($ctx);](https://image.slidesharecdn.com/powershellscripts-170206065521/85/Basic-powershell-scripts-201-320.jpg)


![©2014 C# CORNER.
SHARE THIS DOCUMENT AS IT IS. PLEASE DO NOT REPRODUCE, REPUBLISH, CHANGE OR COPY.
Script
### Get the user credentials
$credential=Get-Credential
$username=$credential.UserName
$password=$credential.GetNetworkCredential().Password
$securePassword = ConvertTo-SecureString $password -AsPlainText -Force
### Input Parameters
$url = "https://c986.sharepoint.com/"
### References
# Specify the path where the dll's are located.
Add-Type -Path "c:Program FilesCommon Filesmicrosoft sharedWeb Server
Extensions15ISAPIMicrosoft.SharePoint.Client.dll"
Add-Type -Path "c:Program FilesCommon Filesmicrosoft sharedWeb Server
Extensions15ISAPIMicrosoft.SharePoint.Client.Runtime.dll"
Add-Type -Path "c:Program FilesCommon Filesmicrosoft sharedWeb Server
Extensions15ISAPIMicrosoft.SharePoint.Client.Taxonomy.dll"
### Function
function GetLabels()
{
# Connect to SharePoint Online and get ClientContext object.
$ctx = New-Object Microsoft.SharePoint.Client.ClientContext($url)
$credentials = New-Object
Microsoft.SharePoint.Client.SharePointOnlineCredentials($username, $securePassword)
$ctx.Credentials = $credentials
# Get the taxonomy session
$taxonomySession=[Microsoft.SharePoint.Client.Taxonomy.TaxonomySession]::GetTaxonomyS
ession($ctx);
# Get the term store by name](https://image.slidesharecdn.com/powershellscripts-170206065521/85/Basic-powershell-scripts-204-320.jpg)


![©2014 C# CORNER.
SHARE THIS DOCUMENT AS IT IS. PLEASE DO NOT REPRODUCE, REPUBLISH, CHANGE OR COPY.
### Function
function CreateLabel()
{
# Connect to SharePoint Online and get ClientContext object.
$ctx = New-Object Microsoft.SharePoint.Client.ClientContext($url)
$credentials = New-Object
Microsoft.SharePoint.Client.SharePointOnlineCredentials($username, $securePassword)
$ctx.Credentials = $credentials
# Get the taxonomy session
$taxonomySession=[Microsoft.SharePoint.Client.Taxonomy.TaxonomySession]::GetTaxonomyS
ession($ctx);
# Get the term store by name
$termstore=$taxonomySession.TermStores.GetByName("Taxonomy_DoxF1n/9qNkL60u1n5J+tQ==")
;
# Get the term group by name
$termGroup=$termStore.Groups.GetByName("Global Navigation");
# Get the term set by name
$termSet = $termGroup.TermSets.GetByName("Technology");
# Get the term by name
$term = $termSet.Terms.GetByName("SharePoint 2013");
# String Variable - New label name
$labelName = "Office 365";
# Bool variable - IsDefault
$isDefault=$false
# Int Variable - New label LCID
$LCID=1033;
# Create a new label for the term
$newLabel=$term.CreateLabel($labelName, $LCID, $isDefault);
# Execute the query](https://image.slidesharecdn.com/powershellscripts-170206065521/85/Basic-powershell-scripts-207-320.jpg)

![©2014 C# CORNER.
SHARE THIS DOCUMENT AS IT IS. PLEASE DO NOT REPRODUCE, REPUBLISH, CHANGE OR COPY.
$taxonomySession=[Microsoft.SharePoint.Client.Taxonomy.TaxonomySession]::GetTaxonomyS
ession($ctx);
# Get the term store by name
$termstore=$taxonomySession.TermStores.GetByName("Taxonomy_DoxF1n/9qNkL60u1n5J+tQ==")
;
# Get the term group by name
$termGroup=$termStore.Groups.GetByName("Global Navigation");
# Get the term set by name
$termSet = $termGroup.TermSets.GetByName("Technology");
# Get the term by name
$term = $termSet.Terms.GetByName("SharePoint 2013");
# Get the label for the term
$label = $term.Labels.GetByValue("Office 365");
# Delete the label
$label.DeleteObject();
# Execute the query
$ctx.ExecuteQuery();
}
### Calling the function
DeleteLabel
Result
The specified label is deleted successfully for the term.](https://image.slidesharecdn.com/powershellscripts-170206065521/85/Basic-powershell-scripts-210-320.jpg)

Basic powershell scripts
- 2. ©2014 C# CORNER. SHARE THIS DOCUMENT AS IT IS. PLEASE DO NOT REPRODUCE, REPUBLISH, CHANGE OR COPY. Powershell Scripts Basic Operations on SharePoint 2013 Online using CSOM This free book is provided by courtesy of C# Corner and Mindcracker Network and its authors. Feel free to share this book with your friends and co-workers. Please do not reproduce, republish, edit or copy this book. Vijai Anand Author Sam Hobbs Editor, C# Corner
- 3. ©2014 C# CORNER. SHARE THIS DOCUMENT AS IT IS. PLEASE DO NOT REPRODUCE, REPUBLISH, CHANGE OR COPY. About the Author: Vijai Anand has been working in the IT industry for over 5 years. He holds a Bachelor's degree in Electronics and Communication Engineering. He works as a SharePoint Developer in Cognizant Technology Solutions, New Jersey. Vijai has worked on Microsoft Office SharePoint® Server 2007, Microsoft SharePoint® 2010 and Microsoft SharePoint® 2013. Vijai is a frequent contributor to C# Corner (www.c-sharpcorner.com). He has authored around 500 articles and 400 blogs on www.c-sharpcorner.com for SharePoint 2013, SharePoint 2010, SharePoint Workspace, SharePoint Designer 2010, Powershell, C # and Silverlight. He currently holds Microsoft Most Valuable Professional and Mindcracker Most Valuable Professional award for SharePoint Server. He has authored the following eBooks: SharePoint 2013 .Net Client Side Object Model Cookbook that was published in CSHARPCORNER.com Getting Started with Managed Metadata Service in SharePoint 2010 that was published in CSHARPCORNER.com Business Data Connectivity Services - Step by Step tutorial that was published in ITFUNDA.com He has accomplished the following Microsoft Certifications: Microsoft SharePoint® 2013, Developing Microsoft SharePoint Server 2013 Core Solutions Microsoft SharePoint® 2010, Application Development Microsoft SharePoint® 2010, Designing and Developing Microsoft SharePoint 2010 Applications. Microsoft Office SharePoint® Server 2007, Application Development Microsoft Office SharePoint® Server 2007, Configuration Who can read this book SharePoint Developers with basic knowledge of the SharePoint 2013 .Net Client Side Object Model and Powershell scripting will find this book helpful for understanding and working with Powershell scripts using the .Net Client Side Object Model. This book is mainly focused for beginners and contains the Powershell scripts to perform basic operations using the .Net Client Side Object Model. For advanced developers, section 14 will be more useful; it explains the operations that can be performed by the new assemblies added to the SharePoint 2013 Client Side Object Model. With respect to the Powershell scripts in this book, you should be familiar with SharePoint Client Side Object Model, Powershell and Out-of-the-box features.
- 4. ©2014 C# CORNER. SHARE THIS DOCUMENT AS IT IS. PLEASE DO NOT REPRODUCE, REPUBLISH, CHANGE OR COPY. Acknowledgments I am really thankful to each and every one that has motivated me to write articles and to publish my fourth eBook. I would like to express my special thanks to Mahesh Chand (Microsoft MVP, Founder of Mindcracker Networks) and to the entire CSharpcorner team for motivating me to publish my third eBook. Thanks to all the reviewers for reviewing my eBook. I would like to express my thanks to all my colleagues and Architects who supported me in writing this book. Thanks to all my friends who helped me to publish this eBook.
- 5. ©2014 C# CORNER. SHARE THIS DOCUMENT AS IT IS. PLEASE DO NOT REPRODUCE, REPUBLISH, CHANGE OR COPY. TABLE OF CONTENTS 1 SharePoint 2013 Online Management Shell: an Overview......................................................................8 2 Prerequisites ............................................................................................................................................8 3 Perform SharePoint list tasks using CSOM in Powershell script ..............................................................9 3.1 How to get all the lists from the website .......................................................................................9 3.2 How to create a new list in the website.......................................................................................11 3.3 How to delete a list from the website..........................................................................................13 3.4 How to update a list in the website .............................................................................................14 3.5 How to enable folder creation for the list in the website............................................................16 3.6 How to disable attachments to list items in the list.....................................................................18 3.7 How to display the list in the quick launch bar ............................................................................20 3.8 How to enable versioning for the list...........................................................................................23 3.9 How to enable minor versions for the document library.............................................................25 3.10 How to enable Require Check Out for the document library ......................................................27 3.11 How to enable content approval for the list................................................................................29 3.12 How to specify the permission required to view minor versions and drafts within the list........31 3.13 How to get all the list templates available for creating lists........................................................33 4 Perform SharePoint website tasks using CSOM in Powershell script ....................................................36 4.1 How to get the properties of a website .......................................................................................36 4.2 How to update the properties of a website.................................................................................37 4.3 How to get only specific properties of a website.........................................................................39 4.4 How to get all the active features from website..........................................................................42 5 Perform SharePoint list item tasks using CSOM in Powershell script....................................................44 5.1 How to get all the items from the list ..........................................................................................44 5.2 How to create a new item in the list............................................................................................46 5.3 How to update an item in the list.................................................................................................48 5.4 How to delete an item in the list..................................................................................................50 5.5 How to get the items from a list folder........................................................................................52 5.6 How to get all the attachments for the list item..........................................................................54
- 6. ©2014 C# CORNER. SHARE THIS DOCUMENT AS IT IS. PLEASE DO NOT REPRODUCE, REPUBLISH, CHANGE OR COPY. 5.7 How to delete an attachment for the list item ............................................................................56 6 Perform SharePoint content type tasks using CSOM in Powershell script............................................58 6.1 How to get all the content types from the website.....................................................................58 6.2 How to create a site content type................................................................................................60 6.3 How to delete the site content type ............................................................................................62 6.4 How to set the site content type read only..................................................................................64 6.5 How to get all the content types from the list.............................................................................66 6.6 How to delete the content type from the list ..............................................................................68 6.7 How to add existing content type to the list................................................................................70 7 Perform SharePoint field tasks using CSOM in Powershell script..........................................................72 7.1 How to get all the fields from the list...........................................................................................72 7.2 How to update a specific field available in the list.......................................................................74 7.3 How to add a field in the list ........................................................................................................76 7.4 How to add an existing field to the list.........................................................................................78 7.5 How to delete a field from the list ...............................................................................................80 7.6 How to set the default value for the list field ..............................................................................81 7.7 How to get the calculated field formula.......................................................................................83 7.8 How to set the formula for the calculated field...........................................................................85 8 Perform SharePoint list view tasks using CSOM in Powershell script....................................................88 8.1 How to get all the views for the list .............................................................................................88 8.2 How to get all the fields available in the list view........................................................................90 8.3 How to set the default view in the list .........................................................................................92 8.4 How to add a field to the list view................................................................................................94 8.5 How to delete a field from the list view.......................................................................................95 8.6 How to delete a list view..............................................................................................................97 9 Perform SharePoint folder tasks using CSOM in Powershell script .......................................................99 9.1 How to get all the top level folders from the website .................................................................99 9.2 How to get all the top level folders from the list .......................................................................101 9.3 How to get the subfolders from the list.....................................................................................103
- 7. ©2014 C# CORNER. SHARE THIS DOCUMENT AS IT IS. PLEASE DO NOT REPRODUCE, REPUBLISH, CHANGE OR COPY. 9.4 How to delete a folder from the list...........................................................................................105 9.5 How to create a new folder in the document library.................................................................107 9.6 How to get the number of items inside the folder ....................................................................109 10 Perform SharePoint file tasks using CSOM in Powershell script..........................................................111 10.1 How to get the major version of the file....................................................................................111 10.2 How to get the minor version of the file....................................................................................113 10.3 How to check out the file in the document library ....................................................................115 10.4 How to get the user login name that has checked out the file..................................................117 10.5 How to get the user login name who added the file..................................................................119 10.6 How to get the check out type associated with the file.............................................................121 10.7 How to check in the file..............................................................................................................123 10.8 How to get the check in comment of the file.............................................................................125 10.9 How to unpublish the major version of the file .........................................................................127 10.10 How to discard check out of the file ...........................................................................................128 10.11 How to delete the file from the document library .....................................................................130 11 Perform SharePoint file version tasks using CSOM in Powershell script.............................................132 11.1 How to get all the versions for the file.......................................................................................132 11.2 How to get the file version for the document by version Id......................................................134 11.3 How to delete a file version by version ID for the document ....................................................137 11.4 How to delete a file version by version label for the document................................................138 11.5 How to restore a specific file version for the document............................................................140 11.6 How to check if the file version is a current version for the document.....................................142 11.7 How to delete all the file versions for the document ................................................................144 12 Perform SharePoint group tasks using CSOM in Powershell script .....................................................146 12.1 How to get all the site groups ....................................................................................................146 12.2 How to create a new site group.................................................................................................148 12.3 How to set the user as owner for the site group .......................................................................150 12.4 How to set the group as owner for the site group.....................................................................152 12.5 How to get all the users from the site group .............................................................................154
- 8. ©2014 C# CORNER. SHARE THIS DOCUMENT AS IT IS. PLEASE DO NOT REPRODUCE, REPUBLISH, CHANGE OR COPY. 12.6 How to add a user to the site group...........................................................................................156 12.7 How to remove a user from the site group................................................................................158 12.8 How to delete a site group.........................................................................................................160 13 Perform SharePoint role tasks using CSOM in Powershell script ........................................................161 13.1 How to get all the permission levels from the website..............................................................162 13.2 How to create a permission level in the website.......................................................................164 13.3 How to update the permission level in the website ..................................................................166 13.4 How to remove the permissions from the permission level......................................................168 13.5 How to delete the permission level from the website...............................................................170 14 Perform SharePoint Taxonomy related tasks using CSOM in Powershell Script .................................172 14.1 How to get all the Term Stores for the provided site.................................................................172 14.2 How to get all the groups for the termstore..............................................................................175 14.3 How to create a new group for the term store..........................................................................178 14.4 How to delete the group from the term store...........................................................................180 14.5 How to get all the termsets for the taxonomy group ................................................................182 14.6 How to create a term set for the specified group......................................................................185 14.7 How to delete the term set from the specified group...............................................................187 14.8 How to get all the terms for the termset...................................................................................189 14.9 How to create a new term for the termset................................................................................192 14.10 How to delete the term from the term set.................................................................................195 14.11 How to create a copy of the term within the termset................................................................197 14.12 How to deprecate the specified term.........................................................................................199 14.13 How to get all the labels for specified term................................................................................202 14.14 How to create a new label for specified term.............................................................................205 14.15 How to delete the label for specified term.................................................................................207 Summary:..................................................................................................................................................210
- 9. ©2014 C# CORNER. SHARE THIS DOCUMENT AS IT IS. PLEASE DO NOT REPRODUCE, REPUBLISH, CHANGE OR COPY. 1 SharePoint 2013 Online Management Shell: an Overview Windows Powershell is a command-line scripting tool introduced in SharePoint 2010 to perform both simple and complex administrative tasks. The Stsadm command-line tool has been deprecated and Windows PowerShell was used to perform command-line administrative tasks. Windows Powershell was used to manipulate web applications, site collections, sites, lists and much more with the help of cmdlets available and by scripting custom cmdlets to perform complex opertaions. Similarly for SharePoint 2013 Online, SharePoint Online Management Shell can be used to efficiently manage SharePoint Online users, sites, site collections, and organizations. The Windows PowerShell Command Builder tool helps you to build commands for SharePoint Online by simple drag and drop. SharePoint Online Management Shell includes a set of cmdlets. Nearly 30 cmdlets are provided to manage users, sites, and organizations instead of using the SharePoint Online Administration Center. But this covers only the basic operations whereas for SharePoint 2013 On-Premise there are nearly 780 cmdlets that can be extensively used to perform most of the SharePoint tasks. To know more about the cmdlets available for SharePoint Online refer to http://technet.microsoft.com/en-us/library/fp161364(v=office.15).aspx. To overcome this we could use Powershell using the Client Side Object Model (CSOM) that enables running scripts against SharePoint Online remotely and it can be used in the same way that we are accustomed to (on-premises SharePoint). The scripts created using the Client Side Object Model can be reused for SharePoint 2013 On-Premise also. 2 Prerequisites In this section you will see the prerequisites required to create the Powershell script using Client Side Object Model to run against SharePoint Online remotely. The following are the prerequisites required: 1. Make sure that you have installed Windows PowerShell 3.0. If you do not have PowerShell 3.0, you will need to download the Windows Management Framework 3.0. 2. You will need to install the SharePoint Online Management Shell, that can be downloaded from the Microsoft Download Center. 3. Make sure SharePoint Client Runtime assemblies are available and this can be downloaded here. 4. Authentication: You can connect to SharePoint Online using the new SharePointOnlineCredentials class.
- 10. ©2014 C# CORNER. SHARE THIS DOCUMENT AS IT IS. PLEASE DO NOT REPRODUCE, REPUBLISH, CHANGE OR COPY. Note: I am using the cloudshare environment (development environments) where all the above prerequisites are available to execute the Powershell scipt using Client Side Object Model against SharePoint 2013 Online. Thus in this section you have seen the prerequisites required to create the Powershell script using the Client Side Object Model. 3 Perform SharePoint list tasks using CSOM in Powershell script In this section you will see how to perform list related tasks using the SharePoint 2013 .Net Client Side Object Model in Powershell scripts. 3.1 How to get all the lists from the website In this example you will see how to get all the lists from the website using the .Net Client Side Object Model in Powershell scripts. Create the ps1 file a) Open a new text file and paste in the following script. b) Save the file as VijaiAnand_CSOM_Powershell_Office365.ps1 in C:Vijai folder (a folder named Vijai is created in C drive). c) Open SharePoint 2013 Management Shell as an administrator. d) Type cd “c:Vijai” in the management shell and then click on Enter. e) Type .VijaiAnand_CSOM_Powershell_Office365.ps1 in the management shell and then click on Enter. f) Enter the Office 365 username ([email protected]) and password (*********) in the Credentials pop up. Click on Ok. Script ### Get the user credentials $credential=Get-Credential $username=$credential.UserName $password=$credential.GetNetworkCredential().Password $securePassword = ConvertTo-SecureString $password -AsPlainText -Force ### Input Parameters
- 11. ©2014 C# CORNER. SHARE THIS DOCUMENT AS IT IS. PLEASE DO NOT REPRODUCE, REPUBLISH, CHANGE OR COPY. $url = "https://c986.sharepoint.com/" ### References # Specify the path where the dll's are located. Add-Type -Path "c:Program FilesCommon Filesmicrosoft sharedWeb Server Extensions15ISAPIMicrosoft.SharePoint.Client.dll" Add-Type -Path "c:Program FilesCommon Filesmicrosoft sharedWeb Server Extensions15ISAPIMicrosoft.SharePoint.Client.Runtime.dll" ### Function function GetAllLists() { # Connect to SharePoint Online and get ClientContext object. $clientContext = New-Object Microsoft.SharePoint.Client.ClientContext($url) $credentials = New-Object Microsoft.SharePoint.Client.SharePointOnlineCredentials($username, $securePassword) $clientContext.Credentials = $credentials # Get the SharePoint Web $web=$clientContext.Web; # Get all the lists $listColl=$web.Lists; $clientContext.Load($listColl); # Execute the query $clientContext.ExecuteQuery(); # Loop through all the lists foreach($list in $listColl) { # Display the list name and ID write-host -ForegroundColor Green "List Name: " $list.Title " ID: " $list.Id } } ### Calling the function GetAllLists Result
- 12. ©2014 C# CORNER. SHARE THIS DOCUMENT AS IT IS. PLEASE DO NOT REPRODUCE, REPUBLISH, CHANGE OR COPY. Figure3.1.1: Get all the lists from the web 3.2 How to create a new list in the website In this example you will see how to create a new list in the website using the .Net Client Side Object Model in Powershell scripts. Create the ps1 file a) Open a new text file and paste in the following script. b) Save the file as VijaiAnand_CSOM_Powershell_Office365.ps1 in the C:Vijai folder (a folder named Vijai is created in the C drive). c) Open SharePoint 2013 Management Shell as an administrator. d) Type cd “c:Vijai” in the management shell and then click on Enter. e) Type .VijaiAnand_CSOM_Powershell_Office365.ps1 in the management shell and then click on Enter. f) Enter the Office 365 username ([email protected]) and password (*********) in the Credentials pop up. Click on Ok. Script ### Get the user credentials $credential=Get-Credential $username=$credential.UserName $password=$credential.GetNetworkCredential().Password $securePassword = ConvertTo-SecureString $password -AsPlainText -Force ### Input Parameters $url = "https://c986.sharepoint.com/"
- 13. ©2014 C# CORNER. SHARE THIS DOCUMENT AS IT IS. PLEASE DO NOT REPRODUCE, REPUBLISH, CHANGE OR COPY. ### References # Specify the path where the dll's are located. Add-Type -Path "c:Program FilesCommon Filesmicrosoft sharedWeb Server Extensions15ISAPIMicrosoft.SharePoint.Client.dll" Add-Type -Path "c:Program FilesCommon Filesmicrosoft sharedWeb Server Extensions15ISAPIMicrosoft.SharePoint.Client.Runtime.dll" ### Function function CreateList() { # Connect to SharePoint Online and get ClientContext object. $clientContext = New-Object Microsoft.SharePoint.Client.ClientContext($url) $credentials = New-Object Microsoft.SharePoint.Client.SharePointOnlineCredentials($username, $securePassword) $clientContext.Credentials = $credentials # Specifies the properties of the new custom list $creationInfo= New-Object Microsoft.SharePoint.Client.ListCreationInformation; $creationInfo.Title="CSOM List"; $creationInfo.Description="CSOM custom list created using Powershell"; $creationInfo.TemplateType=[int][Microsoft.SharePoint.Client.ListTemplateType]::Gener icList # Create a new custom list $newList=$clientContext.Web.Lists.Add($creationInfo); $clientContext.Load($newList); # Execute the query $clientContext.ExecuteQuery(); # Display the newly created list and ID write-host -ForegroundColor Green "List Name: " $newList.Title " ID: " $newList.Id } ### Calling the function CreateList
- 14. ©2014 C# CORNER. SHARE THIS DOCUMENT AS IT IS. PLEASE DO NOT REPRODUCE, REPUBLISH, CHANGE OR COPY. Result Figure3.2.1: Create a new list 3.3 How to delete a list from the website In this example you will see how to delete a list from the website using the .Net Client Side Object Model in Powershell scripts. Create the ps1 file a) Open a new text file and paste in the following script. b) Save the file as VijaiAnand_CSOM_Powershell_Office365.ps1 in the C:Vijai folder (a folder named Vijai is created in the C drive). c) Open SharePoint 2013 Management Shell as an administrator. d) Type cd “c:Vijai” in the management shell and then click on Enter. e) Type .VijaiAnand_CSOM_Powershell_Office365.ps1 in the management shell and then click on Enter. f) Enter the Office 365 username ([email protected]) and password (*********) in the Credentials pop up. Click on Ok. Script ### Get the user credentials $credential=Get-Credential $username=$credential.UserName $password=$credential.GetNetworkCredential().Password $securePassword = ConvertTo-SecureString $password -AsPlainText -Force
- 15. ©2014 C# CORNER. SHARE THIS DOCUMENT AS IT IS. PLEASE DO NOT REPRODUCE, REPUBLISH, CHANGE OR COPY. ### Input Parameters $url = "https://c986.sharepoint.com/" ### References # Specify the path where the dll's are located. Add-Type -Path "c:Program FilesCommon Filesmicrosoft sharedWeb Server Extensions15ISAPIMicrosoft.SharePoint.Client.dll" Add-Type -Path "c:Program FilesCommon Filesmicrosoft sharedWeb Server Extensions15ISAPIMicrosoft.SharePoint.Client.Runtime.dll" ### Function function DeleteList() { # Connect to SharePoint Online and get ClientContext object. $clientContext = New-Object Microsoft.SharePoint.Client.ClientContext($url) $credentials = New-Object Microsoft.SharePoint.Client.SharePointOnlineCredentials($username, $securePassword) $clientContext.Credentials = $credentials # Get the list by Title $list=$clientContext.Web.Lists.GetByTitle("CSOM List"); # Delete the list $list.DeleteObject(); # Execute the query $clientContext.ExecuteQuery(); } ### Calling the function DeleteList Result Custom list is deleted successfully. 3.4 How to update a list in the website
- 16. ©2014 C# CORNER. SHARE THIS DOCUMENT AS IT IS. PLEASE DO NOT REPRODUCE, REPUBLISH, CHANGE OR COPY. In this example you will see how to update a list in the website using the .Net Client Side Object Model in Powershell scripts. Create the ps1 file a) Open a new text file and paste in the following script. b) Save the file as VijaiAnand_CSOM_Powershell_Office365.ps1 in the C:Vijai folder (a folder named Vijai is created in the C drive). c) Open SharePoint 2013 Management Shell as an administrator. d) Type cd “c:Vijai” in the management shell and then click on Enter. e) Type .VijaiAnand_CSOM_Powershell_Office365.ps1 in the management shell and then click on Enter. f) Enter the Office 365 username ([email protected]) and password (*********) in the Credentials pop up. Click on Ok. Script ### Get the user credentials $credential=Get-Credential $username=$credential.UserName $password=$credential.GetNetworkCredential().Password $securePassword = ConvertTo-SecureString $password -AsPlainText -Force ### Input Parameters $url = "https://c986.sharepoint.com/" ### References # Specify the path where the dll's are located. Add-Type -Path "c:Program FilesCommon Filesmicrosoft sharedWeb Server Extensions15ISAPIMicrosoft.SharePoint.Client.dll" Add-Type -Path "c:Program FilesCommon Filesmicrosoft sharedWeb Server Extensions15ISAPIMicrosoft.SharePoint.Client.Runtime.dll" ### Function function UpdateList() { # Connect to SharePoint Online and get ClientContext object. $clientContext = New-Object Microsoft.SharePoint.Client.ClientContext($url)
- 17. ©2014 C# CORNER. SHARE THIS DOCUMENT AS IT IS. PLEASE DO NOT REPRODUCE, REPUBLISH, CHANGE OR COPY. $credentials = New-Object Microsoft.SharePoint.Client.SharePointOnlineCredentials($username, $securePassword) $clientContext.Credentials = $credentials # Get the list by Title $list=$clientContext.Web.Lists.GetByTitle("Employee Details"); # Update the list description $list.Description="Employee Details list updated using Powershell"; $list.Update(); $clientContext.Load($list); # Execute the query $clientContext.ExecuteQuery(); # Display the output Write-Host -ForegroundColor Green "List Name: " $list.Title " Description: " $list.Description } ### Calling the function UpdateList Result Figure3.4.1: Update the list 3.5 How to enable folder creation for the list in the website In this example you will see how to enable folder creation for the list in the website using the .Net Client Side Object Model in Powershell scripts.
- 18. ©2014 C# CORNER. SHARE THIS DOCUMENT AS IT IS. PLEASE DO NOT REPRODUCE, REPUBLISH, CHANGE OR COPY. Create the ps1 file a) Open a new text file and paste in the following script. b) Save the file as VijaiAnand_CSOM_Powershell_Office365.ps1 in the C:Vijai folder (a folder named Vijai is created in the C drive). c) Open SharePoint 2013 Management Shell as an administrator. d) Type cd “c:Vijai” in the the management shell and then click on Enter. e) Type .VijaiAnand_CSOM_Powershell_Office365.ps1 in the the management shell and then click on Enter. f) Enter the Office 365 username ([email protected]) and password (*********) in the the Credentials pop up. Click on Ok. Script ### Get the user credentials $credential=Get-Credential $username=$credential.UserName $password=$credential.GetNetworkCredential().Password $securePassword = ConvertTo-SecureString $password -AsPlainText -Force ### Input Parameters $url = "https://c986.sharepoint.com/" ### References # Specify the path where the dll's are located. Add-Type -Path "c:Program FilesCommon Filesmicrosoft sharedWeb Server Extensions15ISAPIMicrosoft.SharePoint.Client.dll" Add-Type -Path "c:Program FilesCommon Filesmicrosoft sharedWeb Server Extensions15ISAPIMicrosoft.SharePoint.Client.Runtime.dll" ### Function function EnableFolderCreation() { # Connect to SharePoint Online and get ClientContext object. $clientContext = New-Object Microsoft.SharePoint.Client.ClientContext($url) $credentials = New-Object Microsoft.SharePoint.Client.SharePointOnlineCredentials($username, $securePassword) $clientContext.Credentials = $credentials
- 19. ©2014 C# CORNER. SHARE THIS DOCUMENT AS IT IS. PLEASE DO NOT REPRODUCE, REPUBLISH, CHANGE OR COPY. # Get the list by title $list=$clientContext.Web.Lists.GetByTitle("Employee Details"); # Enable the folder creation for the list $list.EnableFolderCreation=$true; # Update the list $list.Update(); # Execute the query $clientContext.ExecuteQuery(); } ### Calling the function EnableFolderCreation Result Navigate to the SharePoint site. Click on the Employee Details link in the quick launch bar. Click on the List Settings button in the ribbon interface. Click on the Advance Settings link available in the General Settings section. You will see that the folder creation for the list is enabled successfully. Figure3.5.1: Enable folder creation for the list Reference http://msdn.microsoft.com/en-IN/library/microsoft.sharepoint.client.list.enablefoldercreation.aspx 3.6 How to disable attachments to list items in the list In this example you will see how to disable attachments to list items in the list using the .Net Client Side Object Model in Powershell scripts. Create the ps1 file
- 20. ©2014 C# CORNER. SHARE THIS DOCUMENT AS IT IS. PLEASE DO NOT REPRODUCE, REPUBLISH, CHANGE OR COPY. a) Open a new text file and paste in the following script. b) Save the file as VijaiAnand_CSOM_Powershell_Office365.ps1 in the C:Vijai folder (a folder named Vijai is created in the C drive). c) Open SharePoint 2013 Management Shell as an administrator. d) Type cd “c:Vijai” in the management shell and then click on Enter. e) Type .VijaiAnand_CSOM_Powershell_Office365.ps1 in the management shell and then click on Enter. f) Enter the Office 365 username ([email protected]) and password (*********) in the Credentials pop up. Click on Ok. Source Code ### Get the user credentials $credential=Get-Credential $username=$credential.UserName $password=$credential.GetNetworkCredential().Password $securePassword = ConvertTo-SecureString $password -AsPlainText -Force ### Input Parameters $url = "https://c986.sharepoint.com/" ### References # Specify the path where the dll's are located. Add-Type -Path "c:Program FilesCommon Filesmicrosoft sharedWeb Server Extensions15ISAPIMicrosoft.SharePoint.Client.dll" Add-Type -Path "c:Program FilesCommon Filesmicrosoft sharedWeb Server Extensions15ISAPIMicrosoft.SharePoint.Client.Runtime.dll" ### Function function DisableAttachments() { # Connect to SharePoint Online and get ClientContext object. $clientContext = New-Object Microsoft.SharePoint.Client.ClientContext($url) $credentials = New-Object Microsoft.SharePoint.Client.SharePointOnlineCredentials($username, $securePassword) $clientContext.Credentials = $credentials # Get the list by title
- 21. ©2014 C# CORNER. SHARE THIS DOCUMENT AS IT IS. PLEASE DO NOT REPRODUCE, REPUBLISH, CHANGE OR COPY. $list=$clientContext.Web.Lists.GetByTitle("Employee Details"); # Disable the attachments for the list $list.EnableAttachments=$false; # Update the list $list.Update(); # Execute the query $clientContext.ExecuteQuery(); } ### Calling the function DisableAttachments Result Navigate to the SharePoint site. Click on the Employee Details link in the quick launch bar. Click on the List Settings button in the ribbon interface. Click on the Advance Settings link available in the General Settings section. You will see the attachments to the list items disabled successfully. Figure3.6.1: Disable attachments to list items Reference http://msdn.microsoft.com/en-IN/library/microsoft.sharepoint.client.list.enableattachments.aspx 3.7 How to display the list in the quick launch bar In this example you will see how to display the list in the quick launch bar using the .Net Client Side Object Model in Powershell scripts. Create the ps1 file
- 22. ©2014 C# CORNER. SHARE THIS DOCUMENT AS IT IS. PLEASE DO NOT REPRODUCE, REPUBLISH, CHANGE OR COPY. a) Open a new text file and paste in the following script. b) Save the file as VijaiAnand_CSOM_Powershell_Office365.ps1 in the C:Vijai folder (a folder named Vijai is created in the C drive). c) Open SharePoint 2013 Management Shell as an administrator. d) Type cd “c:Vijai” in the management shell and then click on Enter. e) Type .VijaiAnand_CSOM_Powershell_Office365.ps1 in the management shell and then click on Enter. f) Enter the Office 365 username ([email protected]) and password (*********) in the Credentials pop up. Click on Ok. Script ### Get the user credentials $credential=Get-Credential $username=$credential.UserName $password=$credential.GetNetworkCredential().Password $securePassword = ConvertTo-SecureString $password -AsPlainText -Force ### Input Parameters $url = "https://c986.sharepoint.com/" ### References # Specify the path where the dll's are located. Add-Type -Path "c:Program FilesCommon Filesmicrosoft sharedWeb Server Extensions15ISAPIMicrosoft.SharePoint.Client.dll" Add-Type -Path "c:Program FilesCommon Filesmicrosoft sharedWeb Server Extensions15ISAPIMicrosoft.SharePoint.Client.Runtime.dll" ### Function function OnQuickLaunch() { # Connect to SharePoint Online and get ClientContext object. $clientContext = New-Object Microsoft.SharePoint.Client.ClientContext($url) $credentials = New-Object Microsoft.SharePoint.Client.SharePointOnlineCredentials($username, $securePassword) $clientContext.Credentials = $credentials # Get the list by title
- 23. ©2014 C# CORNER. SHARE THIS DOCUMENT AS IT IS. PLEASE DO NOT REPRODUCE, REPUBLISH, CHANGE OR COPY. $list=$clientContext.Web.Lists.GetByTitle("Employee Details"); # Display the list on the quick launch $list.OnQuickLaunch=$true; # Update the list $list.Update(); # Execute the query $clientContext.ExecuteQuery(); } ### Calling the function OnQuickLaunch Result Navigate to the SharePoint site. Click on the Employee Details link in the quick launch bar. Click on the List Settings button in the ribbon interface. Click on the List name, description and navigation link available under the General Settings section. You will see the option to display the list in the quick launch is enabled successfully.
- 24. ©2014 C# CORNER. SHARE THIS DOCUMENT AS IT IS. PLEASE DO NOT REPRODUCE, REPUBLISH, CHANGE OR COPY. Figure3.7.1: Display the list on the quick launch Reference http://msdn.microsoft.com/en-us/library/microsoft.sharepoint.client.list.onquicklaunch.aspx 3.8 How to enable versioning for the list In this example you will see how to enable versioning for the list using the .Net Client Side Object Model in Powershell scripts. Create the ps1 file a) Open a new text file and paste in the following script. b) Save the file as VijaiAnand_CSOM_Powershell_Office365.ps1 in the C:Vijai folder (a folder named Vijai is created in the C drive). c) Open SharePoint 2013 Management Shell as an administrator. d) Type cd “c:Vijai” in the management shell and then click on Enter. e) Type .VijaiAnand_CSOM_Powershell_Office365.ps1 in the management shell and then click on Enter. f) Enter the Office 365 username ([email protected]) and password (*********) in the Credentials pop up. Click on Ok. Script ### Get the user credentials $credential=Get-Credential $username=$credential.UserName $password=$credential.GetNetworkCredential().Password $securePassword = ConvertTo-SecureString $password -AsPlainText -Force ### Input Parameters $url = "https://c986.sharepoint.com/" ### References # Specify the path where the dll's are located. Add-Type -Path "c:Program FilesCommon Filesmicrosoft sharedWeb Server Extensions15ISAPIMicrosoft.SharePoint.Client.dll"
- 25. ©2014 C# CORNER. SHARE THIS DOCUMENT AS IT IS. PLEASE DO NOT REPRODUCE, REPUBLISH, CHANGE OR COPY. Add-Type -Path "c:Program FilesCommon Filesmicrosoft sharedWeb Server Extensions15ISAPIMicrosoft.SharePoint.Client.Runtime.dll" ### Function function EnableVersioning() { # Connect to SharePoint Online and get ClientContext object. $clientContext = New-Object Microsoft.SharePoint.Client.ClientContext($url) $credentials = New-Object Microsoft.SharePoint.Client.SharePointOnlineCredentials($username, $securePassword) $clientContext.Credentials = $credentials # Get the list by title $list=$clientContext.Web.Lists.GetByTitle("Employee Details"); # Enable versioning for the list $list.EnableVersioning=$true; # Update the list $list.Update(); # Execute the query $clientContext.ExecuteQuery(); } ### Calling the function EnableVersioning Result Navigate to the SharePoint site. Click on the Employee Details link in the quick launch bar. Click on the List Settings button in the ribbon interface. Click on the Version Settings link available under the Settings section. You will see versioning settings for the list is enabled successfully.
- 26. ©2014 C# CORNER. SHARE THIS DOCUMENT AS IT IS. PLEASE DO NOT REPRODUCE, REPUBLISH, CHANGE OR COPY. Figure3.8.1: Enable versioning for the list Reference http://msdn.microsoft.com/en-us/library/microsoft.sharepoint.client.list.enableversioning.aspx 3.9 How to enable minor versions for the document library In this example you will see how to enable minor versions for the document library using the .Net Client Side Object Model in Powershell scripts. Create the ps1 file a) Open a new text file and paste in the following script. b) Save the file as VijaiAnand_CSOM_Powershell_Office365.ps1 in the C:Vijai folder (a folder named Vijai is created in the C drive). c) Open SharePoint 2013 Management Shell as an administrator. d) Type cd “c:Vijai” in the management shell and then click on Enter. e) Type .VijaiAnand_CSOM_Powershell_Office365.ps1 in the management shell and then click on Enter. f) Enter the Office 365 username ([email protected]) and password (*********) in the Credentials pop up. Click on Ok. Script ### Get the user credentials $credential=Get-Credential $username=$credential.UserName $password=$credential.GetNetworkCredential().Password $securePassword = ConvertTo-SecureString $password -AsPlainText -Force
- 27. ©2014 C# CORNER. SHARE THIS DOCUMENT AS IT IS. PLEASE DO NOT REPRODUCE, REPUBLISH, CHANGE OR COPY. ### Input Parameters $url = "https://c986.sharepoint.com/" ### References # Specify the path where the dll's are located. Add-Type -Path "c:Program FilesCommon Filesmicrosoft sharedWeb Server Extensions15ISAPIMicrosoft.SharePoint.Client.dll" Add-Type -Path "c:Program FilesCommon Filesmicrosoft sharedWeb Server Extensions15ISAPIMicrosoft.SharePoint.Client.Runtime.dll" ### Function function EnableMinorVersions() { # Connect to SharePoint Online and get ClientContext object. $clientContext = New-Object Microsoft.SharePoint.Client.ClientContext($url) $credentials = New-Object Microsoft.SharePoint.Client.SharePointOnlineCredentials($username, $securePassword) $clientContext.Credentials = $credentials # Get the document library by title $dl=$clientContext.Web.Lists.GetByTitle("Documents"); # Enable minor versions for the document library $dl.EnableMinorVersions=$true; # Update the document library $dl.Update(); # Execute the query $clientContext.ExecuteQuery(); } ### Calling the function EnableMinorVersions Result
- 28. ©2014 C# CORNER. SHARE THIS DOCUMENT AS IT IS. PLEASE DO NOT REPRODUCE, REPUBLISH, CHANGE OR COPY. Navigate to the SharePoint site. Click on the Documents link in the quick launch bar. Click on the Library Settings button in the ribbon interface. Click on the Versioning Settings link available under the Settings section. You will see minor versions for the document library is enabled successfully. Figure3.9.1: Enable minor versions for the list Reference http://msdn.microsoft.com/en-us/library/microsoft.sharepoint.client.list.enableminorversions.aspx 3.10 How to enable Require Check Out for the document library In this example you will see how to enable Require Check Out for the document library using the .Net Client Side Object Model in Powershell scripts. Create the ps1 file a) Open a new text file and paste in the following script. b) Save the file as VijaiAnand_CSOM_Powershell_Office365.ps1 in the C:Vijai folder (a folder named Vijai is created in the C drive). c) Open SharePoint 2013 Management Shell as an administrator. d) Type cd “c:Vijai” in the management shell and then click on Enter. e) Type .VijaiAnand_CSOM_Powershell_Office365.ps1 in the management shell and then click on Enter. f) Enter the Office 365 username ([email protected]) and password (*********) in the Credentials pop up. Click on Ok.
- 29. ©2014 C# CORNER. SHARE THIS DOCUMENT AS IT IS. PLEASE DO NOT REPRODUCE, REPUBLISH, CHANGE OR COPY. Script ### Get the user credentials $credential=Get-Credential $username=$credential.UserName $password=$credential.GetNetworkCredential().Password $securePassword = ConvertTo-SecureString $password -AsPlainText -Force ### Input Parameters $url = "https://c986.sharepoint.com/" ### References # Specify the path where the dll's are located. Add-Type -Path "c:Program FilesCommon Filesmicrosoft sharedWeb Server Extensions15ISAPIMicrosoft.SharePoint.Client.dll" Add-Type -Path "c:Program FilesCommon Filesmicrosoft sharedWeb Server Extensions15ISAPIMicrosoft.SharePoint.Client.Runtime.dll" ### Function function ForceCheckOut() { # Connect to SharePoint Online and get ClientContext object. $clientContext = New-Object Microsoft.SharePoint.Client.ClientContext($url) $credentials = New-Object Microsoft.SharePoint.Client.SharePointOnlineCredentials($username, $securePassword) $clientContext.Credentials = $credentials # Get the document library by title $dl=$clientContext.Web.Lists.GetByTitle("Documents"); # Enable force check out for the document library $dl.ForceCheckOut=$true; # Update the document library $dl.Update(); # Execute the query $clientContext.ExecuteQuery();
- 30. ©2014 C# CORNER. SHARE THIS DOCUMENT AS IT IS. PLEASE DO NOT REPRODUCE, REPUBLISH, CHANGE OR COPY. } ### Calling the function ForceCheckOut Result Navigate to the SharePoint site. Click on the Documents link in the quick launch bar. Click on the Library Settings button in the ribbon interface. Click on the Versioning Settings link available under the Settings section. You will see Require Check Out for the document library is enabled successfully. Figure3.10.1: Enable Require Check Out for the list Reference http://msdn.microsoft.com/en- us/library/microsoft.sharepoint.client.list.forcecheckout%28v=office.14%29.aspx 3.11 How to enable content approval for the list In this example you will see how to enable content approval for the list using the .Net Client Side Object Model in Powershell scripts. Create the ps1 file a) Open a new text file and paste in the following script. b) Save the file as VijaiAnand_CSOM_Powershell_Office365.ps1 in the C:Vijai folder (a folder named Vijai is created in the C drive). c) Open SharePoint 2013 Management Shell as an administrator. d) Type cd “c:Vijai” in the management shell and then click on Enter. e) Type .VijaiAnand_CSOM_Powershell_Office365.ps1 in the management shell and then click on Enter. f) Enter the Office 365 username ([email protected]) and password (*********) in the Credentials pop up. Click on Ok.
- 31. ©2014 C# CORNER. SHARE THIS DOCUMENT AS IT IS. PLEASE DO NOT REPRODUCE, REPUBLISH, CHANGE OR COPY. Script ### Get the user credentials $credential=Get-Credential $username=$credential.UserName $password=$credential.GetNetworkCredential().Password $securePassword = ConvertTo-SecureString $password -AsPlainText -Force ### Input Parameters $url = "https://c986.sharepoint.com/" ### References # Specify the path where the dll's are located. Add-Type -Path "c:Program FilesCommon Filesmicrosoft sharedWeb Server Extensions15ISAPIMicrosoft.SharePoint.Client.dll" Add-Type -Path "c:Program FilesCommon Filesmicrosoft sharedWeb Server Extensions15ISAPIMicrosoft.SharePoint.Client.Runtime.dll" ### Function function EnableModeration() { # Connect to SharePoint Online and get ClientContext object. $clientContext = New-Object Microsoft.SharePoint.Client.ClientContext($url) $credentials = New-Object Microsoft.SharePoint.Client.SharePointOnlineCredentials($username, $securePassword) $clientContext.Credentials = $credentials # Get the document library by title $dl=$clientContext.Web.Lists.GetByTitle("Documents"); # Enable the content approval for the document library $dl.EnableModeration=$true; # Update the document library $dl.Update();
- 32. ©2014 C# CORNER. SHARE THIS DOCUMENT AS IT IS. PLEASE DO NOT REPRODUCE, REPUBLISH, CHANGE OR COPY. # Execute the query $clientContext.ExecuteQuery(); } ### Calling the function EnableModeration Result Navigate to the SharePoint site. Click on the Documents link in the quick launch bar. Click on the Library Settings button in the ribbon interface. Click on the Versioning Settings link available under the General Settings section. Figure3.11.1: Enable content approval for the list Reference http://msdn.microsoft.com/en-us/library/microsoft.sharepoint.client.list.draftversionvisibility.aspx 3.12 How to specify the permission required to view minor versions and drafts within the list In this example you will see how to specify the permission required viewing minor versions and drafts within the list using the .Net Client Side Object Model in Powershell scripts. Create the ps1 file a) Open a new text file and paste in the following script. b) Save the file as VijaiAnand_CSOM_Powershell_Office365.ps1 in the C:Vijai folder (a folder named Vijai is created in the C drive). c) Open SharePoint 2013 Management Shell as an administrator. d) Type cd “c:Vijai” in the management shell and then click on Enter. e) Type .VijaiAnand_CSOM_Powershell_Office365.ps1 in the management shell and then click on Enter.
- 33. ©2014 C# CORNER. SHARE THIS DOCUMENT AS IT IS. PLEASE DO NOT REPRODUCE, REPUBLISH, CHANGE OR COPY. f) Enter the Office 365 username ([email protected]) and password (*********) in the Credentials pop up. Click on Ok. Script ### Get the user credentials $credential=Get-Credential $username=$credential.UserName $password=$credential.GetNetworkCredential().Password $securePassword = ConvertTo-SecureString $password -AsPlainText -Force ### Input Parameters $url = "https://c986.sharepoint.com/" ### References # Specify the path where the dll's are located. Add-Type -Path "c:Program FilesCommon Filesmicrosoft sharedWeb Server Extensions15ISAPIMicrosoft.SharePoint.Client.dll" Add-Type -Path "c:Program FilesCommon Filesmicrosoft sharedWeb Server Extensions15ISAPIMicrosoft.SharePoint.Client.Runtime.dll" ### Function function DraftVersionVisibility() { # Connect to SharePoint Online and get ClientContext object. $clientContext = New-Object Microsoft.SharePoint.Client.ClientContext($url) $credentials = New-Object Microsoft.SharePoint.Client.SharePointOnlineCredentials($username, $securePassword) $clientContext.Credentials = $credentials # Get the document library by title $dl=$clientContext.Web.Lists.GetByTitle("Documents"); # Specify the permissions required to view minor versions and drafts within the document library $dl.DraftVersionVisibility=[Microsoft.SharePoint.Client.DraftVisibilityType]::Approve r; # Update the document library
- 34. ©2014 C# CORNER. SHARE THIS DOCUMENT AS IT IS. PLEASE DO NOT REPRODUCE, REPUBLISH, CHANGE OR COPY. $dl.Update(); # Execute the query $clientContext.ExecuteQuery(); } ### Calling the function DraftVersionVisibility Result Navigate to the SharePoint site. Click on the Documents link in the quick launch bar. Click on the Library Settings button in the ribbon interface. Click on the Versioning Settings link available under the General Settings section. Figure3.13.1: Specify which users should be able to view drafts in this list Reference http://msdn.microsoft.com/en-us/library/microsoft.sharepoint.client.list.draftversionvisibility.aspx 3.13 How to get all the list templates available for creating lists In this example you will see how to get all the list templates available for creating lists using the .Net Client Side Object Model in Powershell scripts. Create the ps1 file a) Open a new text file and paste in the following script. b) Save the file as VijaiAnand_CSOM_Powershell_Office365.ps1 in the C:Vijai folder (a folder named Vijai is created in the C drive). c) Open SharePoint 2013 Management Shell as an administrator. d) Type cd “c:Vijai” in the management shell and then click on Enter.
- 35. ©2014 C# CORNER. SHARE THIS DOCUMENT AS IT IS. PLEASE DO NOT REPRODUCE, REPUBLISH, CHANGE OR COPY. e) Type .VijaiAnand_CSOM_Powershell_Office365.ps1 in the management shell and then click on Enter. f) Enter the Office 365 username ([email protected]) and password (*********) in the Credentials pop up. Click on Ok. Script ### Get the user credentials $credential=Get-Credential $username=$credential.UserName $password=$credential.GetNetworkCredential().Password $securePassword = ConvertTo-SecureString $password -AsPlainText -Force ### Input Parameters $url = "https://c986.sharepoint.com/" ### References # Specify the path where the dll's are located. Add-Type -Path "c:Program FilesCommon Filesmicrosoft sharedWeb Server Extensions15ISAPIMicrosoft.SharePoint.Client.dll" Add-Type -Path "c:Program FilesCommon Filesmicrosoft sharedWeb Server Extensions15ISAPIMicrosoft.SharePoint.Client.Runtime.dll" ### Function function GetListTemplates() { # Connect to SharePoint Online and get ClientContext object. $clientContext = New-Object Microsoft.SharePoint.Client.ClientContext($url) $credentials = New-Object Microsoft.SharePoint.Client.SharePointOnlineCredentials($username, $securePassword) $clientContext.Credentials = $credentials # Get the list templates $tempColl=$clientContext.Web.ListTemplates; $clientContext.Load($tempColl); # Execute the query $clientContext.ExecuteQuery();
- 36. ©2014 C# CORNER. SHARE THIS DOCUMENT AS IT IS. PLEASE DO NOT REPRODUCE, REPUBLISH, CHANGE OR COPY. # Loop through the list templates foreach($template in $tempColl) { Write-Host -ForegroundColor Green "Template Name: " $template.Name } } ### Calling the function GetListTemplates Result Figure3.13.1: Get all the available list templates
- 37. ©2014 C# CORNER. SHARE THIS DOCUMENT AS IT IS. PLEASE DO NOT REPRODUCE, REPUBLISH, CHANGE OR COPY. 4 Perform SharePoint website tasks using CSOM in Powershell script In this section you will see how to perform website related tasks using the SharePoint 2013 .Net Client Side Object Model in Powershell scripts. 4.1 How to get the properties of a website In this example you will see how to retrieve the website properties using the .Net Client Side Object Model in Powershell scripts. Create the ps1 file a) Open a new text file and paste in the following script. b) Save the file as VijaiAnand_CSOM_Powershell_Office365.ps1 in the C:Vijai folder (a folder named Vijai is created in the C drive). c) Open SharePoint 2013 Management Shell as an administrator. d) Type cd “c:Vijai” in the management shell and then click on Enter. e) Type .VijaiAnand_CSOM_Powershell_Office365.ps1 in the management shell and then click on Enter. f) Enter the Office 365 username ([email protected]) and password (*********) in the Credentials pop up. Click on Ok. Script ### Get the user credentials $credential=Get-Credential $username=$credential.UserName $password=$credential.GetNetworkCredential().Password $securePassword = ConvertTo-SecureString $password -AsPlainText -Force ### Input Parameters $url = "https://c986.sharepoint.com/" ### References # Specify the path where the dll's are located. Add-Type -Path "c:Program FilesCommon Filesmicrosoft sharedWeb Server Extensions15ISAPIMicrosoft.SharePoint.Client.dll"
- 38. ©2014 C# CORNER. SHARE THIS DOCUMENT AS IT IS. PLEASE DO NOT REPRODUCE, REPUBLISH, CHANGE OR COPY. Add-Type -Path "c:Program FilesCommon Filesmicrosoft sharedWeb Server Extensions15ISAPIMicrosoft.SharePoint.Client.Runtime.dll" ### Function function GetWebProperties() { # Connect to SharePoint Online and get ClientContext object. $clientContext = New-Object Microsoft.SharePoint.Client.ClientContext($url) $credentials = New-Object Microsoft.SharePoint.Client.SharePointOnlineCredentials($username, $securePassword) $clientContext.Credentials = $credentials # Get the SharePoint web $web=$clientContext.Web; $clientContext.Load($web); # Execute the query $clientContext.ExecuteQuery(); # Display the web properties Write-Host -ForegroundColor Green "Title: " $web.Title " - Description: " $web.Description } ### Calling the function GetWebProperties Result Figur4.1.1: Properties of the website 4.2 How to update the properties of a website
- 39. ©2014 C# CORNER. SHARE THIS DOCUMENT AS IT IS. PLEASE DO NOT REPRODUCE, REPUBLISH, CHANGE OR COPY. In this example you will see how to update the website properties using the .Net Client Side Object Model in Powershell scripts. Create the ps1 file a) Open a new text file and paste in the following script. b) Save the file as VijaiAnand_CSOM_Powershell_Office365.ps1 in the C:Vijai folder (a folder named Vijai is created in the C drive). c) Open SharePoint 2013 Management Shell as an administrator. d) Type cd “c:Vijai” in the management shell and then click on Enter. e) Type .VijaiAnand_CSOM_Powershell_Office365.ps1 in the management shell and then click on Enter. f) Enter the Office 365 username ([email protected]) and password (*********) in the Credentials pop up. Click on Ok. Script ### Get the user credentials $credential=Get-Credential $username=$credential.UserName $password=$credential.GetNetworkCredential().Password $securePassword = ConvertTo-SecureString $password -AsPlainText -Force ### Input Parameters $url = "https://c986.sharepoint.com/" ### References # Specify the path where the dll's are located. Add-Type -Path "c:Program FilesCommon Filesmicrosoft sharedWeb Server Extensions15ISAPIMicrosoft.SharePoint.Client.dll" Add-Type -Path "c:Program FilesCommon Filesmicrosoft sharedWeb Server Extensions15ISAPIMicrosoft.SharePoint.Client.Runtime.dll" ### Function function UpdateWeb() { # Connect to SharePoint Online and get ClientContext object. $clientContext = New-Object Microsoft.SharePoint.Client.ClientContext($url)
- 40. ©2014 C# CORNER. SHARE THIS DOCUMENT AS IT IS. PLEASE DO NOT REPRODUCE, REPUBLISH, CHANGE OR COPY. $credentials = New-Object Microsoft.SharePoint.Client.SharePointOnlineCredentials($username, $securePassword) $clientContext.Credentials = $credentials # Get the SharePoint web $web=$clientContext.Web; # Update the web title and description $web.Title="CSOM Online"; $web.Description="Updated using Powershell"; $clientContext.Load($web); # Execute the query $clientContext.ExecuteQuery(); # Display the web properties Write-Host -ForegroundColor Green "Title: " $web.Title " - Description: " $web.Description } ### Calling the function UpdateWeb Result Figure4.2.1: Update the properties of the website 4.3 How to get only specific properties of a website In this example you will see how to get specific website properties using the .Net Client Side Object Model in Powershell scripts. Create the ps1 file a) Open a new text file and paste in the following script.
- 41. ©2014 C# CORNER. SHARE THIS DOCUMENT AS IT IS. PLEASE DO NOT REPRODUCE, REPUBLISH, CHANGE OR COPY. b) Save the file as VijaiAnand_CSOM_Powershell_Office365.ps1 in the C:Vijai folder (a folder named Vijai is created in the C drive). c) Open SharePoint 2013 Management Shell as an administrator. d) Type cd “c:Vijai” in the management shell and then click on Enter. e) Type .VijaiAnand_CSOM_Powershell_Office365.ps1 in the management shell and then click on Enter. f) Enter the Office 365 username ([email protected]) and password (*********) in the Credentials pop up. Click on Ok. Script ### Get the user credentials $credential=Get-Credential $username=$credential.UserName $password=$credential.GetNetworkCredential().Password $securePassword = ConvertTo-SecureString $password -AsPlainText -Force ### Input Parameters $url = "https://c986.sharepoint.com/" ### References # Specify the path where the dll's are located. Add-Type -Path "c:Program FilesCommon Filesmicrosoft sharedWeb Server Extensions15ISAPIMicrosoft.SharePoint.Client.dll" Add-Type -Path "c:Program FilesCommon Filesmicrosoft sharedWeb Server Extensions15ISAPIMicrosoft.SharePoint.Client.Runtime.dll" ### Function function GetSpecificProperties() { # Connect to SharePoint Online and get ClientContext object. $ctx = New-Object Microsoft.SharePoint.Client.ClientContext($url) $credentials = New-Object Microsoft.SharePoint.Client.SharePointOnlineCredentials($username, $securePassword) $ctx.Credentials = $credentials $referencedAssemblies = (
- 42. ©2014 C# CORNER. SHARE THIS DOCUMENT AS IT IS. PLEASE DO NOT REPRODUCE, REPUBLISH, CHANGE OR COPY. "Microsoft.SharePoint.Client, Version=15.0.0.0, Culture=neutral, PublicKeyToken=71e9bce111e9429c", "Microsoft.SharePoint.Client.Runtime, Version=15.0.0.0, Culture=neutral, PublicKeyToken=71e9bce111e9429c", "System.Core, Version=3.5.0.0, Culture=neutral, PublicKeyToken=b77a5c561934e089") $sourceCode = @" using Microsoft.SharePoint.Client; using System.Collections.Generic; using System.Linq; public static class QueryHelper { public static void LoadListWithLimtedFields(ClientContext ctx, Web web) { ctx.Load( web, w => w.Title); } } "@ Add-Type -ReferencedAssemblies $referencedAssemblies -TypeDefinition $sourceCode -Language CSharp; # Get the SharePoint web $web=$ctx.Web; [QueryHelper]::LoadListWithLimtedFields($ctx, $web) # Execute the query $ctx.ExecuteQuery() # Display the web title Write-Host -ForegroundColor Green "Web Title: " $web.Title } ### Calling the function GetSpecificProperties Result
- 43. ©2014 C# CORNER. SHARE THIS DOCUMENT AS IT IS. PLEASE DO NOT REPRODUCE, REPUBLISH, CHANGE OR COPY. Figure4.3.1: Get the specific property of the website 4.4 How to get all the active features from website In this example you will see how to get all the active web features using the .Net Client Side Object Model in Powershell scripts. Create the ps1 file a) Open a new text file and paste in the following script. b) Save the file as VijaiAnand_CSOM_Powershell_Office365.ps1 in the C:Vijai folder (a folder named Vijai is created in the C drive). c) Open SharePoint 2013 Management Shell as an administrator. d) Type cd “c:Vijai” in the management shell and then click on Enter. e) Type .VijaiAnand_CSOM_Powershell_Office365.ps1 in the management shell and then click on Enter. f) Enter the Office 365 username ([email protected]) and password (*********) in the Credentials pop up. Click on Ok. Script ### Get the user credentials $credential=Get-Credential $username=$credential.UserName $password=$credential.GetNetworkCredential().Password $securePassword = ConvertTo-SecureString $password -AsPlainText -Force ### Input Parameters $url = "https://c986.sharepoint.com" ### References
- 44. ©2014 C# CORNER. SHARE THIS DOCUMENT AS IT IS. PLEASE DO NOT REPRODUCE, REPUBLISH, CHANGE OR COPY. # Specify the path where the dll's are located. Add-Type -Path "c:Program FilesCommon Filesmicrosoft sharedWeb Server Extensions15ISAPIMicrosoft.SharePoint.Client.dll" Add-Type -Path "c:Program FilesCommon Filesmicrosoft sharedWeb Server Extensions15ISAPIMicrosoft.SharePoint.Client.Runtime.dll" ### Function function GetActiveFeatures() { # Connect to SharePoint Online and get ClientContext object. $clientContext = New-Object Microsoft.SharePoint.Client.ClientContext($url) $credentials = New-Object Microsoft.SharePoint.Client.SharePointOnlineCredentials($username, $securePassword) $clientContext.Credentials = $credentials # Get the SharePoint web $web=$clientContext.Web; # Get all the active features $featureColl=$web.Features; $clientContext.Load($featureColl); # Execute the query $clientContext.ExecuteQuery(); # Loop through all the features foreach($feature in $featureColl) { # Display the feature ID Write-Host -ForegroundColor Green "Feature ID: " $feature.DefinitionId } } ### Calling the function GetActiveFeatures Result
- 45. ©2014 C# CORNER. SHARE THIS DOCUMENT AS IT IS. PLEASE DO NOT REPRODUCE, REPUBLISH, CHANGE OR COPY. Figure4.4.1: Get all the active features 5 Perform SharePoint list item tasks using CSOM in Powershell script In this section you will see how to perform list item related tasks using the SharePoint 2013 .Net Client Side Object Model in Powershell scripts. 5.1 How to get all the items from the list In this example you will see how to get all the items from the list using the .Net Client Side Object Model in Powershell scripts. Create the ps1 file a) Open a new text file and paste in the following script. b) Save the file as VijaiAnand_CSOM_Powershell_Office365.ps1 in the C:Vijai folder (a folder named Vijai is created in the C drive). c) Open SharePoint 2013 Management Shell as an administrator. d) Type cd “c:Vijai” in the management shell and then click on Enter. e) Type .VijaiAnand_CSOM_Powershell_Office365.ps1 in the management shell and then click on Enter.
- 46. ©2014 C# CORNER. SHARE THIS DOCUMENT AS IT IS. PLEASE DO NOT REPRODUCE, REPUBLISH, CHANGE OR COPY. f) Enter the Office 365 username ([email protected]) and password (*********) in the Credentials pop up. Click on Ok. Script ### Get the user credentials $credential=Get-Credential $username=$credential.UserName $password=$credential.GetNetworkCredential().Password $securePassword = ConvertTo-SecureString $password -AsPlainText -Force ### Input Parameters $url = "https://c986.sharepoint.com/" ### References # Specify the path where the dll's are located. Add-Type -Path "c:Program FilesCommon Filesmicrosoft sharedWeb Server Extensions15ISAPIMicrosoft.SharePoint.Client.dll" Add-Type -Path "c:Program FilesCommon Filesmicrosoft sharedWeb Server Extensions15ISAPIMicrosoft.SharePoint.Client.Runtime.dll" ### Function function GetListItems() { # Connect to SharePoint Online and get ClientContext object. $clientContext = New-Object Microsoft.SharePoint.Client.ClientContext($url) $credentials = New-Object Microsoft.SharePoint.Client.SharePointOnlineCredentials($username, $securePassword) $clientContext.Credentials = $credentials # Get the list items $list=$clientContext.Web.Lists.GetByTitle("Employee Details") $camlQuery= [Microsoft.SharePoint.Client.CamlQuery]::CreateAllItemsQuery() $itemColl=$list.GetItems($camlQuery) $clientContext.Load($itemColl) # Execute the query $clientContext.ExecuteQuery();
- 47. ©2014 C# CORNER. SHARE THIS DOCUMENT AS IT IS. PLEASE DO NOT REPRODUCE, REPUBLISH, CHANGE OR COPY. # Loop through all the items and display the title field foreach($item in $itemColl) { Write-Host -ForegroundColor Green $item["Title"] } } ### Calling the function GetListItems Result Figure 5.1.1: Get all the list items 5.2 How to create a new item in the list In this example you will see how to create a new item in the list using the .Net Client Side Object Model in Powershell scripts. Create the ps1 file a) Open a new text file and paste in the following script. b) Save the file as VijaiAnand_CSOM_Powershell_Office365.ps1 in the C:Vijai folder (a folder named Vijai is created in the C drive). c) Open SharePoint 2013 Management Shell as an administrator. d) Type cd “c:Vijai” in the management shell and then click on Enter. e) Type .VijaiAnand_CSOM_Powershell_Office365.ps1 in the management shell and then click on Enter. f) Enter the Office 365 username ([email protected]) and password (*********) in the Credentials pop up. Click on Ok.
- 48. ©2014 C# CORNER. SHARE THIS DOCUMENT AS IT IS. PLEASE DO NOT REPRODUCE, REPUBLISH, CHANGE OR COPY. Script ### Get the user credentials $credential=Get-Credential $username=$credential.UserName $password=$credential.GetNetworkCredential().Password $securePassword = ConvertTo-SecureString $password -AsPlainText -Force ### Input Parameters $url = "https://c986.sharepoint.com/" ### References # Specify the path where the dll's are located. Add-Type -Path "c:Program FilesCommon Filesmicrosoft sharedWeb Server Extensions15ISAPIMicrosoft.SharePoint.Client.dll" Add-Type -Path "c:Program FilesCommon Filesmicrosoft sharedWeb Server Extensions15ISAPIMicrosoft.SharePoint.Client.Runtime.dll" ### Function function AddNewitem() { # Connect to SharePoint Online and get ClientContext object. $clientContext = New-Object Microsoft.SharePoint.Client.ClientContext($url) $credentials = New-Object Microsoft.SharePoint.Client.SharePointOnlineCredentials($username, $securePassword) $clientContext.Credentials = $credentials # Get the list by title $list=$clientContext.Web.Lists.GetByTitle("Employee Details") # Add new item to the list $creationInfo= New-Object Microsoft.SharePoint.Client.ListItemCreationInformation $newItem=$list.AddItem($creationInfo) # Set the title value for the new item $newItem["Title"]="Rakesh";
- 49. ©2014 C# CORNER. SHARE THIS DOCUMENT AS IT IS. PLEASE DO NOT REPRODUCE, REPUBLISH, CHANGE OR COPY. # Update the item $newItem.Update(); $clientContext.Load($newItem) # Execute the query $clientContext.ExecuteQuery(); # Display the new item field value Write-Host -ForegroundColor Green $newItem["Title"] } ### Calling the function AddNewitem Result Figure5.2.1: Create a new list item 5.3 How to update an item in the list In this example you will see how to update an item in the list using the .Net Client Side Object Model in Powershell scripts. Create the ps1 file a) Open a new text file and paste in the following script. b) Save the file as VijaiAnand_CSOM_Powershell_Office365.ps1 in the C:Vijai folder (a folder named Vijai is created in the C drive). c) Open SharePoint 2013 Management Shell as an administrator. d) Type cd “c:Vijai” in the management shell and then click on Enter. e) Type .VijaiAnand_CSOM_Powershell_Office365.ps1 in the management shell and then click on Enter. f) Enter the Office 365 username ([email protected]) and password (*********) in the Credentials pop up. Click on Ok.
- 50. ©2014 C# CORNER. SHARE THIS DOCUMENT AS IT IS. PLEASE DO NOT REPRODUCE, REPUBLISH, CHANGE OR COPY. Script ### Get the user credentials $credential=Get-Credential $username=$credential.UserName $password=$credential.GetNetworkCredential().Password $securePassword = ConvertTo-SecureString $password -AsPlainText -Force ### Input Parameters $url = "https://c986.sharepoint.com/" ### References # Specify the path where the dll's are located. Add-Type -Path "c:Program FilesCommon Filesmicrosoft sharedWeb Server Extensions15ISAPIMicrosoft.SharePoint.Client.dll" Add-Type -Path "c:Program FilesCommon Filesmicrosoft sharedWeb Server Extensions15ISAPIMicrosoft.SharePoint.Client.Runtime.dll" ### Function function UpdateItem() { # Connect to SharePoint Online and get ClientContext object. $clientContext = New-Object Microsoft.SharePoint.Client.ClientContext($url) $credentials = New-Object Microsoft.SharePoint.Client.SharePointOnlineCredentials($username, $securePassword) $clientContext.Credentials = $credentials # Get the list by title $list=$clientContext.Web.Lists.GetByTitle("Employee Details") # Get the item by ID $item=$list.GetItemById(9); # Set the title value for the new item $item["Title"]="Kavya M"; # Update the item $item.Update(); $clientContext.Load($item)
- 51. ©2014 C# CORNER. SHARE THIS DOCUMENT AS IT IS. PLEASE DO NOT REPRODUCE, REPUBLISH, CHANGE OR COPY. # Execute the query $clientContext.ExecuteQuery(); # Display the update item Title field value Write-Host -ForegroundColor Green $item["Title"] } ### Calling the function UpdateItem Result Figure5.3.1: Update an item 5.4 How to delete an item in the list In this example you will see how to delete an item in the list using the .Net Client Side Object Model in Powershell scripts. Create the ps1 file a) Open a new text file and paste in the following script. b) Save the file as VijaiAnand_CSOM_Powershell_Office365.ps1 in the C:Vijai folder (a folder named Vijai is created in the C drive). c) Open SharePoint 2013 Management Shell as an administrator. d) Type cd “c:Vijai” in the management shell and then click on Enter. e) Type .VijaiAnand_CSOM_Powershell_Office365.ps1 in the management shell and then click on Enter. f) Enter the Office 365 username ([email protected]) and password (*********) in the Credentials pop up. Click on Ok. Script
- 52. ©2014 C# CORNER. SHARE THIS DOCUMENT AS IT IS. PLEASE DO NOT REPRODUCE, REPUBLISH, CHANGE OR COPY. ### Get the user credentials $credential=Get-Credential $username=$credential.UserName $password=$credential.GetNetworkCredential().Password $securePassword = ConvertTo-SecureString $password -AsPlainText -Force ### Input Parameters $url = "https://c986.sharepoint.com/" ### References # Specify the path where the dll's are located. Add-Type -Path "c:Program FilesCommon Filesmicrosoft sharedWeb Server Extensions15ISAPIMicrosoft.SharePoint.Client.dll" Add-Type -Path "c:Program FilesCommon Filesmicrosoft sharedWeb Server Extensions15ISAPIMicrosoft.SharePoint.Client.Runtime.dll" ### Function function DeleteItem() { # Connect to SharePoint Online and get ClientContext object. $clientContext = New-Object Microsoft.SharePoint.Client.ClientContext($url) $credentials = New-Object Microsoft.SharePoint.Client.SharePointOnlineCredentials($username, $securePassword) $clientContext.Credentials = $credentials # Get the list by title $list=$clientContext.Web.Lists.GetByTitle("Employee Details") # Get the item by ID $item=$list.GetItemById(9); # Set the title value for the new item $item["Title"]="Kavya M"; # Delete the Item $item.DeleteObject(); # Execute the query
- 53. ©2014 C# CORNER. SHARE THIS DOCUMENT AS IT IS. PLEASE DO NOT REPRODUCE, REPUBLISH, CHANGE OR COPY. $clientContext.ExecuteQuery(); } ### Calling the function DeleteItem Result The list item is deleted successfully. 5.5 How to get the items from a list folder In this example you will see how to get the items from the specified server relative URL of a list folder using the .Net Client Side Object Model in Powershell scripts. Create the ps1 file a) Open a new text file and paste in the following script. b) Save the file as VijaiAnand_CSOM_Powershell_Office365.ps1 in the C:Vijai folder (a folder named Vijai is created in the C drive). c) Open SharePoint 2013 Management Shell as an administrator. d) Type cd “c:Vijai” in the management shell and then click on Enter. e) Type .VijaiAnand_CSOM_Powershell_Office365.ps1 in the management shell and then click on Enter. f) Enter the Office 365 username ([email protected]) and password (*********) in the Credentials pop up. Click on Ok. Script ### Get the user credentials $credential=Get-Credential $username=$credential.UserName $password=$credential.GetNetworkCredential().Password $securePassword = ConvertTo-SecureString $password -AsPlainText -Force ### Input Parameters $url = "https://c986.sharepoint.com/" ### References
- 54. ©2014 C# CORNER. SHARE THIS DOCUMENT AS IT IS. PLEASE DO NOT REPRODUCE, REPUBLISH, CHANGE OR COPY. # Specify the path where the dll's are located. Add-Type -Path "c:Program FilesCommon Filesmicrosoft sharedWeb Server Extensions15ISAPIMicrosoft.SharePoint.Client.dll" Add-Type -Path "c:Program FilesCommon Filesmicrosoft sharedWeb Server Extensions15ISAPIMicrosoft.SharePoint.Client.Runtime.dll" ### Function function GetListItemsFromFolder() { # Connect to SharePoint Online and get ClientContext object. $clientContext = New-Object Microsoft.SharePoint.Client.ClientContext($url) $credentials = New-Object Microsoft.SharePoint.Client.SharePointOnlineCredentials($username, $securePassword) $clientContext.Credentials = $credentials # Get the list items $list=$clientContext.Web.Lists.GetByTitle("Custom List") # CamlQuery to retrieve the items from the list $camlQuery= New-Object Microsoft.SharePoint.Client.CamlQuery # Specify the server relative URL of a list folder $camlQuery.FolderServerRelativeUrl="/Lists/Custom List/FolderA"; $itemColl=$list.GetItems($camlQuery) $clientContext.Load($itemColl) # Execute the query $clientContext.ExecuteQuery(); # Loop through all the items and display the title field foreach($item in $itemColl) { Write-Host -ForegroundColor Green $item["Title"] } } ### Calling the function GetListItemsFromFolder
- 55. ©2014 C# CORNER. SHARE THIS DOCUMENT AS IT IS. PLEASE DO NOT REPRODUCE, REPUBLISH, CHANGE OR COPY. Result Figure 5.5.1: Get items from the list folder 5.6 How to get all the attachments for the list item In this example you will see how to get all the attachments for the list item using the .Net Client Side Object Model in Powershell scripts. Create the ps1 file a) Open a new text file and paste in the following script. b) Save the file as VijaiAnand_CSOM_Powershell_Office365.ps1 in the C:Vijai folder (a folder named Vijai is created in the C drive). c) Open SharePoint 2013 Management Shell as an administrator. d) Type cd “c:Vijai” in the management shell and then click on Enter. e) Type .VijaiAnand_CSOM_Powershell_Office365.ps1 in the management shell and then click on Enter. f) Enter the Office 365 username ([email protected]) and password (*********) in the Credentials pop up. Click on Ok. Script ### Get the user credentials $credential=Get-Credential $username=$credential.UserName $password=$credential.GetNetworkCredential().Password $securePassword = ConvertTo-SecureString $password -AsPlainText -Force
- 56. ©2014 C# CORNER. SHARE THIS DOCUMENT AS IT IS. PLEASE DO NOT REPRODUCE, REPUBLISH, CHANGE OR COPY. ### Input Parameters $url = "https://c986.sharepoint.com/" ### References # Specify the path where the dll's are located. Add-Type -Path "c:Program FilesCommon Filesmicrosoft sharedWeb Server Extensions15ISAPIMicrosoft.SharePoint.Client.dll" Add-Type -Path "c:Program FilesCommon Filesmicrosoft sharedWeb Server Extensions15ISAPIMicrosoft.SharePoint.Client.Runtime.dll" ### Function function GetAttachments() { # Connect to SharePoint Online and get ClientContext object. $clientContext = New-Object Microsoft.SharePoint.Client.ClientContext($url) $credentials = New-Object Microsoft.SharePoint.Client.SharePointOnlineCredentials($username, $securePassword) $clientContext.Credentials = $credentials # Get the list by title $list=$clientContext.Web.Lists.GetByTitle("Custom List") # Get the item by ID $item=$list.GetItemById(1); # Get all the attachments for the list item $attachColl=$item.AttachmentFiles; $clientContext.Load($attachColl) # Execute the query $clientContext.ExecuteQuery(); #Loop through all the attachment for the list item foreach($attachment in $attachColl) { write-host -ForegroundColor Green $attachment.FileName } }
- 57. ©2014 C# CORNER. SHARE THIS DOCUMENT AS IT IS. PLEASE DO NOT REPRODUCE, REPUBLISH, CHANGE OR COPY. ### Calling the function GetAttachments Result Figure 5.6.1: Get all the attachments 5.7 How to delete an attachment for the list item In this example you will see how to delete an attachment for the list item using the .Net Client Side Object Model in Powershell scripts. Create the ps1 file a) Open a new text file and paste in the following script. b) Save the file as VijaiAnand_CSOM_Powershell_Office365.ps1 in the C:Vijai folder (a folder named Vijai is created in the C drive). c) Open SharePoint 2013 Management Shell as an administrator. d) Type cd “c:Vijai” in the management shell and then click on Enter. e) Type .VijaiAnand_CSOM_Powershell_Office365.ps1 in the management shell and then click on Enter. f) Enter the Office 365 username ([email protected]) and password (*********) in the Credentials pop up. Click on Ok. Script ### Get the user credentials $credential=Get-Credential $username=$credential.UserName $password=$credential.GetNetworkCredential().Password $securePassword = ConvertTo-SecureString $password -AsPlainText -Force ### Input Parameters
- 58. ©2014 C# CORNER. SHARE THIS DOCUMENT AS IT IS. PLEASE DO NOT REPRODUCE, REPUBLISH, CHANGE OR COPY. $url = "https://c986.sharepoint.com/" ### References # Specify the path where the dll's are located. Add-Type -Path "c:Program FilesCommon Filesmicrosoft sharedWeb Server Extensions15ISAPIMicrosoft.SharePoint.Client.dll" Add-Type -Path "c:Program FilesCommon Filesmicrosoft sharedWeb Server Extensions15ISAPIMicrosoft.SharePoint.Client.Runtime.dll" ### Function function DeleteAttachment() { # Connect to SharePoint Online and get ClientContext object. $clientContext = New-Object Microsoft.SharePoint.Client.ClientContext($url) $credentials = New-Object Microsoft.SharePoint.Client.SharePointOnlineCredentials($username, $securePassword) $clientContext.Credentials = $credentials # Get the list by title $list=$clientContext.Web.Lists.GetByTitle("Custom List") # Get the item by ID $item=$list.GetItemById(1); # Get the attachment by file name $attach=$item.AttachmentFiles.GetByFileName("Lighthouse.jpg"); # Delete the attachment $attach.DeleteObject(); # Execute the query $clientContext.ExecuteQuery(); } ### Calling the function DeleteAttachment Result
- 59. ©2014 C# CORNER. SHARE THIS DOCUMENT AS IT IS. PLEASE DO NOT REPRODUCE, REPUBLISH, CHANGE OR COPY. The attachment is deleted successfully for the list item. 6 Perform SharePoint content type tasks using CSOM in Powershell script In this section you will see how to perform content type related tasks using SharePoint 2013 .Net Client Side Object Model in Powershell scripts. 6.1 How to get all the content types from the website In this example you will see how to get all the content types from the website using the .Net Client Side Object Model in Powershell scripts. Create the ps1 file a) Open a new text file and paste in the following script. b) Save the file as VijaiAnand_CSOM_Powershell_Office365.ps1 in the C:Vijai folder (a folder named Vijai is created in the C drive). c) Open SharePoint 2013 Management Shell as an administrator. d) Type cd “c:Vijai” in the management shell and then click on Enter. e) Type .VijaiAnand_CSOM_Powershell_Office365.ps1 in the management shell and then click on Enter. f) Enter the Office 365 username ([email protected]) and password (*********) in the Credentials pop up. Click on Ok. Script ### Get the user credentials $credential=Get-Credential $username=$credential.UserName $password=$credential.GetNetworkCredential().Password $securePassword = ConvertTo-SecureString $password -AsPlainText -Force ### Input Parameters $url = "https://c986.sharepoint.com/" ### References # Specify the path where the dll's are located.
- 60. ©2014 C# CORNER. SHARE THIS DOCUMENT AS IT IS. PLEASE DO NOT REPRODUCE, REPUBLISH, CHANGE OR COPY. Add-Type -Path "c:Program FilesCommon Filesmicrosoft sharedWeb Server Extensions15ISAPIMicrosoft.SharePoint.Client.dll" Add-Type -Path "c:Program FilesCommon Filesmicrosoft sharedWeb Server Extensions15ISAPIMicrosoft.SharePoint.Client.Runtime.dll" ### Function function GetSiteContentTypes() { # Connect to SharePoint Online and get ClientContext object. $clientContext = New-Object Microsoft.SharePoint.Client.ClientContext($url) $credentials = New-Object Microsoft.SharePoint.Client.SharePointOnlineCredentials($username, $securePassword) $clientContext.Credentials = $credentials # Get the SharePoint web $web=$clientContext.Web; # Get the site content types $ctColl=$web.ContentTypes $clientContext.Load($ctColl); # Execute the query $clientContext.ExecuteQuery(); # Display all the site content types foreach($ct in $ctColl) { write-host -ForegroundColor Green $ct.Name } } ### Calling the function GetSiteContentTypes
- 61. ©2014 C# CORNER. SHARE THIS DOCUMENT AS IT IS. PLEASE DO NOT REPRODUCE, REPUBLISH, CHANGE OR COPY. Result Figure6.1.1: Get all the content types from the website 6.2 How to create a site content type In this example you will see how to create a new site content type using the .Net Client Side Object Model in Powershell scripts. Create the ps1 file a) Open a new text file and paste in the following script. b) Save the file as VijaiAnand_CSOM_Powershell_Office365.ps1 in the C:Vijai folder (a folder named Vijai is created in the C drive). c) Open SharePoint 2013 Management Shell as an administrator. d) Type cd “c:Vijai” in the management shell and then click on Enter. e) Type .VijaiAnand_CSOM_Powershell_Office365.ps1 in the management shell and then click on Enter. f) Enter the Office 365 username ([email protected]) and password (*********) in the Credentials pop up. Click on Ok. Script
- 62. ©2014 C# CORNER. SHARE THIS DOCUMENT AS IT IS. PLEASE DO NOT REPRODUCE, REPUBLISH, CHANGE OR COPY. ### Get the user credentials $credential=Get-Credential $username=$credential.UserName $password=$credential.GetNetworkCredential().Password $securePassword = ConvertTo-SecureString $password -AsPlainText -Force ### Input Parameters $url = "https://c986.sharepoint.com/" ### References # Specify the path where the dll's are located. Add-Type -Path "c:Program FilesCommon Filesmicrosoft sharedWeb Server Extensions15ISAPIMicrosoft.SharePoint.Client.dll" Add-Type -Path "c:Program FilesCommon Filesmicrosoft sharedWeb Server Extensions15ISAPIMicrosoft.SharePoint.Client.Runtime.dll" ### Function function CreateContentType() { # Connect to SharePoint Online and get ClientContext object. $clientContext = New-Object Microsoft.SharePoint.Client.ClientContext($url) $credentials = New-Object Microsoft.SharePoint.Client.SharePointOnlineCredentials($username, $securePassword) $clientContext.Credentials = $credentials # Get the SharePoint web $web=$clientContext.Web; # Get all the content types from the website $ctColl=$web.ContentTypes; # Get the parent content type - Item (0x01) $parentCT=$web.ContentTypes.GetById("0x01"); # Specify the properties that are used as parameters to initialize a new content type $ctCreationInfo=New-Object Microsoft.SharePoint.Client.ContentTypeCreationInformation; $ctCreationInfo.Name="Vijai Content Types";
- 63. ©2014 C# CORNER. SHARE THIS DOCUMENT AS IT IS. PLEASE DO NOT REPRODUCE, REPUBLISH, CHANGE OR COPY. $ctCreationInfo.Description="My custom content types created using Powershell"; $ctCreationInfo.Group="Vijai Content Types"; $ctCreationInfo.ParentContentType=$parentCT; # Add the new content type to the collection $ct=$ctColl.Add($ctCreationInfo); # Execute the query $clientContext.ExecuteQuery(); } ### Calling the function CreateContentType Result Navigate to the SharePoint site. Click on Settings. Click on Site Settings. Click on Content Types available under the Galleries section. You will see a newly created content type under the Vijai Content Types group as shown in Figure 6.2.1. Figure 6.2.1: Newly created site content type 6.3 How to delete the site content type In this example you will see how to delete the content type using the .Net Client Side Object Model in Powershell scripts. Create the ps1 file a) Open a new text file and paste in the following script.
- 64. ©2014 C# CORNER. SHARE THIS DOCUMENT AS IT IS. PLEASE DO NOT REPRODUCE, REPUBLISH, CHANGE OR COPY. b) Save the file as VijaiAnand_CSOM_Powershell_Office365.ps1 in the C:Vijai folder (a folder named Vijai is created in the C drive). c) Open SharePoint 2013 Management Shell as an administrator. d) Type cd “c:Vijai” in the management shell and then click on Enter. e) Type .VijaiAnand_CSOM_Powershell_Office365.ps1 in the management shell and then click on Enter. f) Enter the Office 365 username ([email protected]) and password (*********) in the Credentials pop up. Click on Ok. Script ### Get the user credentials $credential=Get-Credential $username=$credential.UserName $password=$credential.GetNetworkCredential().Password $securePassword = ConvertTo-SecureString $password -AsPlainText -Force ### Input Parameters $url = "https://c986.sharepoint.com/" ### References # Specify the path where the dll's are located. Add-Type -Path "c:Program FilesCommon Filesmicrosoft sharedWeb Server Extensions15ISAPIMicrosoft.SharePoint.Client.dll" Add-Type -Path "c:Program FilesCommon Filesmicrosoft sharedWeb Server Extensions15ISAPIMicrosoft.SharePoint.Client.Runtime.dll" ### Function function DeleteContentType() { # Connect to SharePoint Online and get ClientContext object. $clientContext = New-Object Microsoft.SharePoint.Client.ClientContext($url) $credentials = New-Object Microsoft.SharePoint.Client.SharePointOnlineCredentials($username, $securePassword) $clientContext.Credentials = $credentials
- 65. ©2014 C# CORNER. SHARE THIS DOCUMENT AS IT IS. PLEASE DO NOT REPRODUCE, REPUBLISH, CHANGE OR COPY. # Get the SharePoint web $web=$clientContext.Web; # Get all the content types from the website $ctColl=$web.ContentTypes; # Get the content type by Id that has to be deleted $ct=$web.ContentTypes.GetById("0x01001A2242ED35BAF34382F7653DEDDA1B13"); # Delete the content type $ct.DeleteObject(); # Execute the query $clientContext.ExecuteQuery(); } ### Calling the function DeleteContentType Result The site content type is deleted successfully. 6.4 How to set the site content type read only In this example you will see how to set the site content type read only using the .Net Client Side Object Model in Powershell scripts. Create the ps1 file a) Open a new text file and paste in the following script. b) Save the file as VijaiAnand_CSOM_Powershell_Office365.ps1 in the C:Vijai folder (a folder named Vijai is created in the C drive). c) Open SharePoint 2013 Management Shell as an administrator. d) Type cd “c:Vijai” in the management shell and then click on Enter. e) Type .VijaiAnand_CSOM_Powershell_Office365.ps1 in the management shell and then click on Enter. f) Enter the Office 365 username ([email protected]) and password (*********) in the Credentials pop up. Click on Ok. Script
- 66. ©2014 C# CORNER. SHARE THIS DOCUMENT AS IT IS. PLEASE DO NOT REPRODUCE, REPUBLISH, CHANGE OR COPY. ### Get the user credentials $credential=Get-Credential $username=$credential.UserName $password=$credential.GetNetworkCredential().Password $securePassword = ConvertTo-SecureString $password -AsPlainText -Force ### Input Parameters $url = "https://c986.sharepoint.com/" ### References # Specify the path where the dll's are located. Add-Type -Path "c:Program FilesCommon Filesmicrosoft sharedWeb Server Extensions15ISAPIMicrosoft.SharePoint.Client.dll" Add-Type -Path "c:Program FilesCommon Filesmicrosoft sharedWeb Server Extensions15ISAPIMicrosoft.SharePoint.Client.Runtime.dll" ### Function function UpdateContentType() { # Connect to SharePoint Online and get ClientContext object. $clientContext = New-Object Microsoft.SharePoint.Client.ClientContext($url) $credentials = New-Object Microsoft.SharePoint.Client.SharePointOnlineCredentials($username, $securePassword) $clientContext.Credentials = $credentials # Get the SharePoint web $web=$clientContext.Web; # Get all the content types from the website $ctColl=$web.ContentTypes; # Get the content type by Id that has to be updated $ct=$web.ContentTypes.GetById("0x0100EF709A405E1CD549B22C8B2A4D5D9748"); # Make the content type as read only $ct.ReadOnly=$true; $ct.Update($true);
- 67. ©2014 C# CORNER. SHARE THIS DOCUMENT AS IT IS. PLEASE DO NOT REPRODUCE, REPUBLISH, CHANGE OR COPY. # Execute the query $clientContext.ExecuteQuery(); } ### Calling the function UpdateContentType Result Navigate to the SharePoint site. Click on Settings. Click on Site Settings. Click on Content Types available under the Galleries section. Click on Vijai Content Type available under the Vijai Content Types group. You will see the content type is set as read only as shown in Figure 6.4.1. Figure 6.4.1: Read only content type Reference http://msdn.microsoft.com/en-us/library/microsoft.sharepoint.client.contenttype.readonly.aspx 6.5 How to get all the content types from the list In this example you will see how to get all the content types from the list using the .Net Client Side Object Model in Powershell scripts. Create the ps1 file
- 68. ©2014 C# CORNER. SHARE THIS DOCUMENT AS IT IS. PLEASE DO NOT REPRODUCE, REPUBLISH, CHANGE OR COPY. a) Open a new text file and paste in the following script. b) Save the file as VijaiAnand_CSOM_Powershell_Office365.ps1 in the C:Vijai folder (a folder named Vijai is created in the C drive). c) Open SharePoint 2013 Management Shell as an administrator. d) Type cd “c:Vijai” in the management shell and then click on Enter. e) Type .VijaiAnand_CSOM_Powershell_Office365.ps1 in the management shell and then click on Enter. f) Enter the Office 365 username ([email protected]) and password (*********) in the Credentials pop up. Click on Ok. Script ### Get the user credentials $credential=Get-Credential $username=$credential.UserName $password=$credential.GetNetworkCredential().Password $securePassword = ConvertTo-SecureString $password -AsPlainText -Force ### Input Parameters $url = "https://c986.sharepoint.com/" ### References # Specify the path where the dll's are located. Add-Type -Path "c:Program FilesCommon Filesmicrosoft sharedWeb Server Extensions15ISAPIMicrosoft.SharePoint.Client.dll" Add-Type -Path "c:Program FilesCommon Filesmicrosoft sharedWeb Server Extensions15ISAPIMicrosoft.SharePoint.Client.Runtime.dll" ### Function function GetListContentTypes() { # Connect to SharePoint Online and get ClientContext object. $clientContext = New-Object Microsoft.SharePoint.Client.ClientContext($url) $credentials = New-Object Microsoft.SharePoint.Client.SharePointOnlineCredentials($username, $securePassword) $clientContext.Credentials = $credentials # Get the SharePoint web
- 69. ©2014 C# CORNER. SHARE THIS DOCUMENT AS IT IS. PLEASE DO NOT REPRODUCE, REPUBLISH, CHANGE OR COPY. $web=$clientContext.Web; # Get the custom list by title $list=$web.Lists.GetByTitle("Employee Details"); # Get all the content types from the custom list $ctColl=$list.ContentTypes; $clientContext.Load($ctColl); # Execute the query $clientContext.ExecuteQuery(); # Display all the list content types foreach($ct in $ctColl) { write-host -ForegroundColor Green $ct.Name } } ### Calling the function GetListContentTypes Result Figure 6.5.1: Get all the content types from the list 6.6 How to delete the content type from the list In this example you will see how to delete the content type from the list using the .Net Client Side Object Model in Powershell scripts. Create the ps1 file
- 70. ©2014 C# CORNER. SHARE THIS DOCUMENT AS IT IS. PLEASE DO NOT REPRODUCE, REPUBLISH, CHANGE OR COPY. a) Open a new text file and paste in the following script. b) Save the file as VijaiAnand_CSOM_Powershell_Office365.ps1 in the C:Vijai folder (a folder named Vijai is created in the C drive). c) Open SharePoint 2013 Management Shell as an administrator. d) Type cd “c:Vijai” in the management shell and then click on Enter. e) Type .VijaiAnand_CSOM_Powershell_Office365.ps1 in the management shell and then click on Enter. f) Enter the Office 365 username ([email protected]) and password (*********) in the Credentials pop up. Click on Ok. Script ### Get the user credentials $credential=Get-Credential $username=$credential.UserName $password=$credential.GetNetworkCredential().Password $securePassword = ConvertTo-SecureString $password -AsPlainText -Force ### Input Parameters $url = "https://c986.sharepoint.com/" ### References # Specify the path where the dll's are located. Add-Type -Path "c:Program FilesCommon Filesmicrosoft sharedWeb Server Extensions15ISAPIMicrosoft.SharePoint.Client.dll" Add-Type -Path "c:Program FilesCommon Filesmicrosoft sharedWeb Server Extensions15ISAPIMicrosoft.SharePoint.Client.Runtime.dll" ### Function function DeleteListContentType() { # Connect to SharePoint Online and get ClientContext object. $clientContext = New-Object Microsoft.SharePoint.Client.ClientContext($url) $credentials = New-Object Microsoft.SharePoint.Client.SharePointOnlineCredentials($username, $securePassword) $clientContext.Credentials = $credentials # Get the SharePoint web
- 71. ©2014 C# CORNER. SHARE THIS DOCUMENT AS IT IS. PLEASE DO NOT REPRODUCE, REPUBLISH, CHANGE OR COPY. $web=$clientContext.Web; # Get the custom list by title $list=$web.Lists.GetByTitle("Employee Details"); # Get all the content types from the custom list $ctColl=$list.ContentTypes; $clientContext.Load($ctColl); # Execute the query $clientContext.ExecuteQuery(); # Loop through all the content types foreach($ct in $ctColl) { # Delete the content type from the list if($ct.Name -eq "Vijai Content Type") { $ct.DeleteObject(); break; } } # Execute the query $clientContext.ExecuteQuery(); } ### Calling the function DeleteListContentType Result Content type is deleted successfully from the list. 6.7 How to add existing content type to the list In this example you will see how to add existing content type to the list using the .Net Client Side Object Model in Powershell scripts. Create the ps1 file a) Open a new text file and paste in the following script.
- 72. ©2014 C# CORNER. SHARE THIS DOCUMENT AS IT IS. PLEASE DO NOT REPRODUCE, REPUBLISH, CHANGE OR COPY. b) Save the file as VijaiAnand_CSOM_Powershell_Office365.ps1 in the C:Vijai folder (a folder named Vijai is created in the C drive). c) Open SharePoint 2013 Management Shell as an administrator. d) Type cd “c:Vijai” in the management shell and then click on Enter. e) Type .VijaiAnand_CSOM_Powershell_Office365.ps1 in the management shell and then click on Enter. f) Enter the Office 365 username ([email protected]) and password (*********) in the Credentials pop up. Click on Ok. Script ### Get the user credentials $credential=Get-Credential $username=$credential.UserName $password=$credential.GetNetworkCredential().Password $securePassword = ConvertTo-SecureString $password -AsPlainText -Force ### Input Parameters $url = "https://c986.sharepoint.com/" ### References # Specify the path where the dll's are located. Add-Type -Path "c:Program FilesCommon Filesmicrosoft sharedWeb Server Extensions15ISAPIMicrosoft.SharePoint.Client.dll" Add-Type -Path "c:Program FilesCommon Filesmicrosoft sharedWeb Server Extensions15ISAPIMicrosoft.SharePoint.Client.Runtime.dll" ### Function function AddExistingCT() { # Connect to SharePoint Online and get ClientContext object. $clientContext = New-Object Microsoft.SharePoint.Client.ClientContext($url) $credentials = New-Object Microsoft.SharePoint.Client.SharePointOnlineCredentials($username, $securePassword) $clientContext.Credentials = $credentials # Get the SharePoint Web $web=$clientContext.Web;
- 73. ©2014 C# CORNER. SHARE THIS DOCUMENT AS IT IS. PLEASE DO NOT REPRODUCE, REPUBLISH, CHANGE OR COPY. # Get the list by title $list=$clientContext.Web.Lists.GetByTitle("Custom List") # Get the content type by ID $ct=$web.ContentTypes.GetById("0x0100EF709A405E1CD549B22C8B2A4D5D9748"); # Add the existing content type to the list $addedCt=$list.ContentTypes.AddExistingContentType($ct); # Execute the query $clientContext.ExecuteQuery(); } ### Calling the function AddExistingCT Result Content type is added successfully to the list. 7 Perform SharePoint field tasks using CSOM in Powershell script In this section you will see how to perform field related tasks using SharePoint 2013 .Net Client Side Object Model in Powershell scripts. 7.1 How to get all the fields from the list In this example you will see how to get all the fields from the list using the .Net Client Side Object Model in Powershell scripts. Create the ps1 file a) Open a new text file and paste in the following script. b) Save the file as VijaiAnand_CSOM_Powershell_Office365.ps1 in the C:Vijai folder (a folder named Vijai is created in the C drive). c) Open SharePoint 2013 Management Shell as an administrator. d) Type cd “c:Vijai” in the management shell and then click on Enter. e) Type .VijaiAnand_CSOM_Powershell_Office365.ps1 in the management shell and then click on Enter.
- 74. ©2014 C# CORNER. SHARE THIS DOCUMENT AS IT IS. PLEASE DO NOT REPRODUCE, REPUBLISH, CHANGE OR COPY. f) Enter the Office 365 username ([email protected]) and password (*********) in the Credentials pop up. Click on Ok. Script ### Get the user credentials $credential=Get-Credential $username=$credential.UserName $password=$credential.GetNetworkCredential().Password $securePassword = ConvertTo-SecureString $password -AsPlainText -Force ### Input Parameters $url = "https://c986.sharepoint.com/" ### References # Specify the path where the dll's are located. Add-Type -Path "c:Program FilesCommon Filesmicrosoft sharedWeb Server Extensions15ISAPIMicrosoft.SharePoint.Client.dll" Add-Type -Path "c:Program FilesCommon Filesmicrosoft sharedWeb Server Extensions15ISAPIMicrosoft.SharePoint.Client.Runtime.dll" ### Function function GetListFields() { # Connect to SharePoint Online and get ClientContext object. $clientContext = New-Object Microsoft.SharePoint.Client.ClientContext($url) $credentials = New-Object Microsoft.SharePoint.Client.SharePointOnlineCredentials($username, $securePassword) $clientContext.Credentials = $credentials # Get the SharePoint web $web=$clientContext.Web; # Get the custom list by Title $list=$web.Lists.GetByTitle("Employee Details"); # Get all the list fields $fieldColl=$list.Fields
- 75. ©2014 C# CORNER. SHARE THIS DOCUMENT AS IT IS. PLEASE DO NOT REPRODUCE, REPUBLISH, CHANGE OR COPY. $clientContext.Load($fieldColl); # Execute the query $clientContext.ExecuteQuery(); # Loop through all the fields foreach($field in $fieldColl) { # Display the field title and ID Write-Host -ForegroundColor Green "Field Name: " $field.Title " ID: " $field.ID } } ### Calling the function GetListFields Result All the fields available for the list will be displayed. 7.2 How to update a specific field available in the list In this example you will see how to update a specific field available in the list using the .Net Client Side Object Model in Powershell scripts. Create the ps1 file a) Open a new text file and paste in the following script. b) Save the file as VijaiAnand_CSOM_Powershell_Office365.ps1 in the C:Vijai folder (a folder named Vijai is created in the C drive). c) Open SharePoint 2013 Management Shell as an administrator. d) Type cd “c:Vijai” in the management shell and then click on Enter. e) Type .VijaiAnand_CSOM_Powershell_Office365.ps1 in the management shell and then click on Enter. f) Enter the Office 365 username ([email protected]) and password (*********) in the Credentials pop up. Click on Ok. Script
- 76. ©2014 C# CORNER. SHARE THIS DOCUMENT AS IT IS. PLEASE DO NOT REPRODUCE, REPUBLISH, CHANGE OR COPY. ### Get the user credentials $credential=Get-Credential $username=$credential.UserName $password=$credential.GetNetworkCredential().Password $securePassword = ConvertTo-SecureString $password -AsPlainText -Force ### Input Parameters $url = "https://c986.sharepoint.com/" ### References # Specify the path where the dll's are located. Add-Type -Path "c:Program FilesCommon Filesmicrosoft sharedWeb Server Extensions15ISAPIMicrosoft.SharePoint.Client.dll" Add-Type -Path "c:Program FilesCommon Filesmicrosoft sharedWeb Server Extensions15ISAPIMicrosoft.SharePoint.Client.Runtime.dll" ### Function function UpdateListField() { # Connect to SharePoint Online and get ClientContext object. $clientContext = New-Object Microsoft.SharePoint.Client.ClientContext($url) $credentials = New-Object Microsoft.SharePoint.Client.SharePointOnlineCredentials($username, $securePassword) $clientContext.Credentials = $credentials # Get the SharePoint web $web=$clientContext.Web; # Get the custom list by Title $list=$web.Lists.GetByTitle("Employee Details"); # Get a specific field by title $field=$list.Fields.GetByTitle("Department"); # Update the description $field.Description= "Department description updated."; $field.Update(); $clientContext.Load($field);
- 77. ©2014 C# CORNER. SHARE THIS DOCUMENT AS IT IS. PLEASE DO NOT REPRODUCE, REPUBLISH, CHANGE OR COPY. # Execute the query $clientContext.ExecuteQuery(); # Display the field name and description Write-Host -ForegroundColor Green "Field Name: " $field.Title " Description: " $field.Description } ### Calling the function UpdateListField Result Figure7.2.1: Update a specific field 7.3 How to add a field in the list In this example you will see how to add a field to a list using the .Net Client Side Object Model in Powershell scripts. Create the ps1 file a) Open a new text file and paste in the following script. b) Save the file as VijaiAnand_CSOM_Powershell_Office365.ps1 in the C:Vijai folder (a folder named Vijai is created in the C drive). c) Open SharePoint 2013 Management Shell as an administrator. d) Type cd “c:Vijai” in the management shell and then click on Enter. e) Type .VijaiAnand_CSOM_Powershell_Office365.ps1 in the management shell and then click on Enter. f) Enter the Office 365 username ([email protected]) and password (*********) in the Credentials pop up. Click on Ok. Script
- 78. ©2014 C# CORNER. SHARE THIS DOCUMENT AS IT IS. PLEASE DO NOT REPRODUCE, REPUBLISH, CHANGE OR COPY. ### Get the user credentials $credential=Get-Credential $username=$credential.UserName $password=$credential.GetNetworkCredential().Password $securePassword = ConvertTo-SecureString $password -AsPlainText -Force ### Input Parameters $url = "https://c986.sharepoint.com/" ### References # Specify the path where the dll's are located. Add-Type -Path "c:Program FilesCommon Filesmicrosoft sharedWeb Server Extensions15ISAPIMicrosoft.SharePoint.Client.dll" Add-Type -Path "c:Program FilesCommon Filesmicrosoft sharedWeb Server Extensions15ISAPIMicrosoft.SharePoint.Client.Runtime.dll" ### Function function AddField() { # Connect to SharePoint Online and get ClientContext object. $clientContext = New-Object Microsoft.SharePoint.Client.ClientContext($url) $credentials = New-Object Microsoft.SharePoint.Client.SharePointOnlineCredentials($username, $securePassword) $clientContext.Credentials = $credentials # Get the SharePoint web $web=$clientContext.Web; # Get the custom list by Title $list=$web.Lists.GetByTitle("Employee Details"); # String variable to store the field schema XML $schemaXML="<Field DisplayName='CustomField' Type='Text' />"; # Add a field to the list $list.Fields.AddFieldAsXml($schemaXML, $true,[Microsoft.SharePoint.Client.AddFieldOptions]::DefaultValue);
- 79. ©2014 C# CORNER. SHARE THIS DOCUMENT AS IT IS. PLEASE DO NOT REPRODUCE, REPUBLISH, CHANGE OR COPY. # Execute the query $clientContext.ExecuteQuery(); } ### Calling the function AddField Result Navigate to the SharePoint site. Click on the Employee Details link available in the quick launch bar. Click on List Settings in the ribbon interface. You will see a new field added to the list available under the Columns section. 7.4 How to add an existing field to the list In this example you will see how to add an existing field to the list using the .Net Client Side Object Model in Powershell scripts. Create the ps1 file a) Open a new text file and paste in the following script. b) Save the file as VijaiAnand_CSOM_Powershell_Office365.ps1 in the C:Vijai folder (a folder named Vijai is created in the C drive). c) Open SharePoint 2013 Management Shell as an administrator. d) Type cd “c:Vijai” in the management shell and then click on Enter. e) Type .VijaiAnand_CSOM_Powershell_Office365.ps1 in the management shell and then click on Enter. f) Enter the Office 365 username ([email protected]) and password (*********) in the Credentials pop up. Click on Ok. Script ### Get the user credentials $credential=Get-Credential $username=$credential.UserName $password=$credential.GetNetworkCredential().Password $securePassword = ConvertTo-SecureString $password -AsPlainText -Force ### Input Parameters
- 80. ©2014 C# CORNER. SHARE THIS DOCUMENT AS IT IS. PLEASE DO NOT REPRODUCE, REPUBLISH, CHANGE OR COPY. $url = "https://c986.sharepoint.com/" ### References # Specify the path where the dll's are located. Add-Type -Path "c:Program FilesCommon Filesmicrosoft sharedWeb Server Extensions15ISAPIMicrosoft.SharePoint.Client.dll" Add-Type -Path "c:Program FilesCommon Filesmicrosoft sharedWeb Server Extensions15ISAPIMicrosoft.SharePoint.Client.Runtime.dll" ### Function function AddExistingField() { # Connect to SharePoint Online and get ClientContext object. $clientContext = New-Object Microsoft.SharePoint.Client.ClientContext($url) $credentials = New-Object Microsoft.SharePoint.Client.SharePointOnlineCredentials($username, $securePassword) $clientContext.Credentials = $credentials # Get the SharePoint web $web=$clientContext.Web; # Get the custom list by Title $list=$web.Lists.GetByTitle("Employee Details"); # Get a specific field bt title from site columns $field=$web.Fields.GetByTitle("MultiChoice"); # Add the existing field to the list $list.Fields.Add($field); # Execute the query $clientContext.ExecuteQuery(); } ### Calling the function AddExistingField Result
- 81. ©2014 C# CORNER. SHARE THIS DOCUMENT AS IT IS. PLEASE DO NOT REPRODUCE, REPUBLISH, CHANGE OR COPY. Navigate to the SharePoint site. Click on the Employee Details link available in the quick launch bar. Click on List Settings in the ribbon interface. You will see a new field added to the list available under the Columns section. 7.5 How to delete a field from the list In this example you will see how to delete a field from the list using the .Net Client Side Object Model in Powershell scripts. Create the ps1 file a) Open a new text file and paste in the following script. b) Save the file as VijaiAnand_CSOM_Powershell_Office365.ps1 in the C:Vijai folder (a folder named Vijai is created in the C drive). c) Open SharePoint 2013 Management Shell as an administrator. d) Type cd “c:Vijai” in the management shell and then click on Enter. e) Type .VijaiAnand_CSOM_Powershell_Office365.ps1 in the management shell and then click on Enter. f) Enter the Office 365 username ([email protected]) and password (*********) in the Credentials pop up. Click on Ok. Script ### Get the user credentials $credential=Get-Credential $username=$credential.UserName $password=$credential.GetNetworkCredential().Password $securePassword = ConvertTo-SecureString $password -AsPlainText -Force ### Input Parameters $url = "https://c986.sharepoint.com/" ### References # Specify the path where the dll's are located. Add-Type -Path "c:Program FilesCommon Filesmicrosoft sharedWeb Server Extensions15ISAPIMicrosoft.SharePoint.Client.dll" Add-Type -Path "c:Program FilesCommon Filesmicrosoft sharedWeb Server Extensions15ISAPIMicrosoft.SharePoint.Client.Runtime.dll"
- 82. ©2014 C# CORNER. SHARE THIS DOCUMENT AS IT IS. PLEASE DO NOT REPRODUCE, REPUBLISH, CHANGE OR COPY. ### Function function DeleteListField() { # Connect to SharePoint Online and get ClientContext object. $clientContext = New-Object Microsoft.SharePoint.Client.ClientContext($url) $credentials = New-Object Microsoft.SharePoint.Client.SharePointOnlineCredentials($username, $securePassword) $clientContext.Credentials = $credentials # Get the SharePoint web $web=$clientContext.Web; # Get the custom list by Title $list=$web.Lists.GetByTitle("Employee Details"); # Get a specific field bt title $field=$list.Fields.GetByTitle("MultiChoice"); # Delete the field from the list $field.DeleteObject();; # Execute the query $clientContext.ExecuteQuery(); } ### Calling the function DeleteListField Result Navigate to the SharePoint site. Click on the Employee Details link available in the quick launch bar. Click on List Settings in the ribbon interface. You will see a field is deleted from the list available under the Columns section. 7.6 How to set the default value for the list field In this example you will see how to set the default value for the list field using the .Net Client Side Object Model in Powershell scripts.
- 83. ©2014 C# CORNER. SHARE THIS DOCUMENT AS IT IS. PLEASE DO NOT REPRODUCE, REPUBLISH, CHANGE OR COPY. Create the ps1 file a) Open a new text file and paste in the following script. b) Save the file as VijaiAnand_CSOM_Powershell_Office365.ps1 in the C:Vijai folder (a folder named Vijai is created in the C drive). c) Open SharePoint 2013 Management Shell as an administrator. d) Type cd “c:Vijai” in the management shell and then click on Enter. e) Type .VijaiAnand_CSOM_Powershell_Office365.ps1 in the management shell and then click on Enter. f) Enter the Office 365 username ([email protected]) and password (*********) in the Credentials pop up. Click on Ok. Script ### Get the user credentials $credential=Get-Credential $username=$credential.UserName $password=$credential.GetNetworkCredential().Password $securePassword = ConvertTo-SecureString $password -AsPlainText -Force ### Input Parameters $url = "https://c986.sharepoint.com/" ### References # Specify the path where the dll's are located. Add-Type -Path "c:Program FilesCommon Filesmicrosoft sharedWeb Server Extensions15ISAPIMicrosoft.SharePoint.Client.dll" Add-Type -Path "c:Program FilesCommon Filesmicrosoft sharedWeb Server Extensions15ISAPIMicrosoft.SharePoint.Client.Runtime.dll" ### Function function SetDefaultValue() { # Connect to SharePoint Online and get ClientContext object. $clientContext = New-Object Microsoft.SharePoint.Client.ClientContext($url) $credentials = New-Object Microsoft.SharePoint.Client.SharePointOnlineCredentials($username, $securePassword) $clientContext.Credentials = $credentials
- 84. ©2014 C# CORNER. SHARE THIS DOCUMENT AS IT IS. PLEASE DO NOT REPRODUCE, REPUBLISH, CHANGE OR COPY. # Get the SharePoint web $web=$clientContext.Web; # Get the custom list by Title $list=$web.Lists.GetByTitle("Employee Details"); # Get a specific field bt title $field=$list.Fields.GetByTitle("CustomField"); # Set the default value for the field $field.DefaultValue="Default"; # Update the field $field.Update(); # Execute the query $clientContext.ExecuteQuery(); } ### Calling the function SetDefaultValue Result Navigate to the SharePoint site. Click on the Employee Details link available in the quick launch bar. Click on List Settings in the ribbon interface. Click on the CustomField available under the Columns section. You will see a default value is set for the field. 7.7 How to get the calculated field formula In this example you will see how to get the calculated field formula using the .Net Client Side Object Model in Powershell scripts. Create the ps1 file a) Open a new text file and paste in the following script. b) Save the file as VijaiAnand_CSOM_Powershell_Office365.ps1 in the C:Vijai folder (a folder named Vijai is created in the C drive). c) Open SharePoint 2013 Management Shell as an administrator.
- 85. ©2014 C# CORNER. SHARE THIS DOCUMENT AS IT IS. PLEASE DO NOT REPRODUCE, REPUBLISH, CHANGE OR COPY. d) Type cd “c:Vijai” in the management shell and then click on Enter. e) Type .VijaiAnand_CSOM_Powershell_Office365.ps1 in the management shell and then click on Enter. f) Enter the Office 365 username ([email protected]) and password (*********) in the Credentials pop up. Click on Ok. Script ### Get the user credentials $credential=Get-Credential $username=$credential.UserName $password=$credential.GetNetworkCredential().Password $securePassword = ConvertTo-SecureString $password -AsPlainText -Force ### Input Parameters $url = "https://c986.sharepoint.com/" ### References # Specify the path where the dll's are located. Add-Type -Path "c:Program FilesCommon Filesmicrosoft sharedWeb Server Extensions15ISAPIMicrosoft.SharePoint.Client.dll" Add-Type -Path "c:Program FilesCommon Filesmicrosoft sharedWeb Server Extensions15ISAPIMicrosoft.SharePoint.Client.Runtime.dll" ### Function function GetCalculatedFieldFormula() { # Connect to SharePoint Online and get ClientContext object. $clientContext = New-Object Microsoft.SharePoint.Client.ClientContext($url) $credentials = New-Object Microsoft.SharePoint.Client.SharePointOnlineCredentials($username, $securePassword) $clientContext.Credentials = $credentials # Get the SharePoint web $web=$clientContext.Web; # Get the custom list by Title $list=$web.Lists.GetByTitle("Employee Details");
- 86. ©2014 C# CORNER. SHARE THIS DOCUMENT AS IT IS. PLEASE DO NOT REPRODUCE, REPUBLISH, CHANGE OR COPY. # Get a specific field bt title $field=$list.Fields.GetByTitle("Calculated"); # Cast the field $calculatedField=New-Object Microsoft.SharePoint.Client.FieldCalculated($clientContext,$field.Path); $clientContext.Load($calculatedField); # Execute the query $clientContext.ExecuteQuery(); # Display the calculated field formula Write-Host -ForegroundColor Green $calculatedField.Formula } ### Calling the function GetCalculatedFieldFormula Result Figure7.7.1: Calculated field formula 7.8 How to set the formula for the calculated field In this example you will see how to set the formula for the calculated field using the .Net Client Side Object Model in Powershell scripts. Create the ps1 file a) Open a new text file and paste in the following script. b) Save the file as VijaiAnand_CSOM_Powershell_Office365.ps1 in the C:Vijai folder (a folder named Vijai is created in the C drive).
- 87. ©2014 C# CORNER. SHARE THIS DOCUMENT AS IT IS. PLEASE DO NOT REPRODUCE, REPUBLISH, CHANGE OR COPY. c) Open SharePoint 2013 Management Shell as an administrator. d) Type cd “c:Vijai” in the management shell and then click on Enter. e) Type .VijaiAnand_CSOM_Powershell_Office365.ps1 in the management shell and then click on Enter. f) Enter the Office 365 username ([email protected]) and password (*********) in the Credentials pop up. Click on Ok. Script ### Get the user credentials $credential=Get-Credential $username=$credential.UserName $password=$credential.GetNetworkCredential().Password $securePassword = ConvertTo-SecureString $password -AsPlainText -Force ### Input Parameters $url = "https://c986.sharepoint.com/" ### References # Specify the path where the dll's are located. Add-Type -Path "c:Program FilesCommon Filesmicrosoft sharedWeb Server Extensions15ISAPIMicrosoft.SharePoint.Client.dll" Add-Type -Path "c:Program FilesCommon Filesmicrosoft sharedWeb Server Extensions15ISAPIMicrosoft.SharePoint.Client.Runtime.dll" ### Function function SetCalculatedFieldFormula() { # Connect to SharePoint Online and get ClientContext object. $clientContext = New-Object Microsoft.SharePoint.Client.ClientContext($url) $credentials = New-Object Microsoft.SharePoint.Client.SharePointOnlineCredentials($username, $securePassword) $clientContext.Credentials = $credentials # Get the SharePoint web $web=$clientContext.Web; # Get the custom list by Title
- 88. ©2014 C# CORNER. SHARE THIS DOCUMENT AS IT IS. PLEASE DO NOT REPRODUCE, REPUBLISH, CHANGE OR COPY. $list=$web.Lists.GetByTitle("Employee Details"); # Get a specific field bt title $field=$list.Fields.GetByTitle("Calculated"); # Cast the field $calculatedField=New-Object Microsoft.SharePoint.Client.FieldCalculated($clientContext,$field.Path); # Set the formula for the calculated value $calculatedField.Formula="=[Employee ID]"; # Update the field $calculatedField.Update(); # Execute the query $clientContext.ExecuteQuery(); } ### Calling the function SetCalculatedFieldFormula Result Figure7.8.1: Values are updated based on the formula
- 89. ©2014 C# CORNER. SHARE THIS DOCUMENT AS IT IS. PLEASE DO NOT REPRODUCE, REPUBLISH, CHANGE OR COPY. Perform SharePoint list view tasks using CSOM in Powershell script In this section you will see how to perform list view related tasks using the SharePoint 2013 .Net Client Side Object Model in Powershell scripts. 7.9 How to get all the views for the list In this example you will see how to get all the views for the list using the .Net Client Side Object Model in Powershell scripts. Create the ps1 file a) Open a new text file and paste in the following script. b) Save the file as VijaiAnand_CSOM_Powershell_Office365.ps1 in the C:Vijai folder (a folder named Vijai is created in the C drive). c) Open SharePoint 2013 Management Shell as an administrator. d) Type cd “c:Vijai” in the management shell and then click on Enter. e) Type .VijaiAnand_CSOM_Powershell_Office365.ps1 in the management shell and then click on Enter. f) Enter the Office 365 username ([email protected]) and password (*********) in the Credentials pop up. Click on Ok. Script ### Get the user credentials $credential=Get-Credential $username=$credential.UserName $password=$credential.GetNetworkCredential().Password $securePassword = ConvertTo-SecureString $password -AsPlainText -Force ### Input Parameters $url = "https://c986.sharepoint.com/" ### References # Specify the path where the dll's are located. Add-Type -Path "c:Program FilesCommon Filesmicrosoft sharedWeb Server Extensions15ISAPIMicrosoft.SharePoint.Client.dll" Add-Type -Path "c:Program FilesCommon Filesmicrosoft sharedWeb Server Extensions15ISAPIMicrosoft.SharePoint.Client.Runtime.dll"
- 90. ©2014 C# CORNER. SHARE THIS DOCUMENT AS IT IS. PLEASE DO NOT REPRODUCE, REPUBLISH, CHANGE OR COPY. ### Function function GetListViews() { # Connect to SharePoint Online and get ClientContext object. $clientContext = New-Object Microsoft.SharePoint.Client.ClientContext($url) $credentials = New-Object Microsoft.SharePoint.Client.SharePointOnlineCredentials($username, $securePassword) $clientContext.Credentials = $credentials # Get the SharePoint web $web=$clientContext.Web; # Get the custom list by Title $list=$web.Lists.GetByTitle("Employee Details"); # Get all the views for the custom list $viewColl=$list.Views; $clientContext.Load($viewColl); # Execute the query $clientContext.ExecuteQuery(); # Loop through all the views foreach($view in $viewColl) { # Display the view name write-host -ForegroundColor Green $view.Title } } ### Calling the function GetListViews Result
- 91. ©2014 C# CORNER. SHARE THIS DOCUMENT AS IT IS. PLEASE DO NOT REPRODUCE, REPUBLISH, CHANGE OR COPY. Figure8.1.1: Get all the list views 7.10 How to get all the fields available in the list view In this example you will see how to get all the fields available in the list view using the .Net Client Side Object Model in Powershell scripts. Create the ps1 file a) Open a new text file and paste in the following script. b) Save the file as VijaiAnand_CSOM_Powershell_Office365.ps1 in the C:Vijai folder (a folder named Vijai is created in the C drive). c) Open SharePoint 2013 Management Shell as an administrator. d) Type cd “c:Vijai” in the management shell and then click on Enter. e) Type .VijaiAnand_CSOM_Powershell_Office365.ps1 in the management shell and then click on Enter. f) Enter the Office 365 username ([email protected]) and password (*********) in the Credentials pop up. Click on Ok. Script ### Get the user credentials $credential=Get-Credential $username=$credential.UserName $password=$credential.GetNetworkCredential().Password $securePassword = ConvertTo-SecureString $password -AsPlainText -Force ### Input Parameters $url = "https://c986.sharepoint.com/" ### References # Specify the path where the dll's are located.
- 92. ©2014 C# CORNER. SHARE THIS DOCUMENT AS IT IS. PLEASE DO NOT REPRODUCE, REPUBLISH, CHANGE OR COPY. Add-Type -Path "c:Program FilesCommon Filesmicrosoft sharedWeb Server Extensions15ISAPIMicrosoft.SharePoint.Client.dll" Add-Type -Path "c:Program FilesCommon Filesmicrosoft sharedWeb Server Extensions15ISAPIMicrosoft.SharePoint.Client.Runtime.dll" ### Function function GetViewFields() { # Connect to SharePoint Online and get ClientContext object. $clientContext = New-Object Microsoft.SharePoint.Client.ClientContext($url) $credentials = New-Object Microsoft.SharePoint.Client.SharePointOnlineCredentials($username, $securePassword) $clientContext.Credentials = $credentials # Get the SharePoint web $web=$clientContext.Web; # Get the custom list by Title $list=$web.Lists.GetByTitle("Employee Details"); # Get a specific list view by title $view=$list.Views.getByTitle("Vijai View"); # Get all the fields available in the list view $viewFieldColl=$view.ViewFields; $clientContext.Load($viewFieldColl); # Execute the query $clientContext.ExecuteQuery(); # Loop through all the fields foreach($viewField in $viewFieldColl) { # Display the field Write-Host -ForegroundColor Green $viewField } } ### Calling the function GetViewFields
- 93. ©2014 C# CORNER. SHARE THIS DOCUMENT AS IT IS. PLEASE DO NOT REPRODUCE, REPUBLISH, CHANGE OR COPY. Result Figure 8.2.1: Get all the fields 7.11 How to set the default view in the list In this example you will see how to set the default value in the list using the .Net Client Side Object Model in Powershell scripts. Create the ps1 file a) Open a new text file and paste in the following script. b) Save the file as VijaiAnand_CSOM_Powershell_Office365.ps1 in the C:Vijai folder (a folder named Vijai is created in the C drive). c) Open SharePoint 2013 Management Shell as an administrator. d) Type cd “c:Vijai” in the management shell and then click on Enter. e) Type .VijaiAnand_CSOM_Powershell_Office365.ps1 in the management shell and then click on Enter. f) Enter the Office 365 username ([email protected]) and password (*********) in the Credentials pop up. Click on Ok. Script ### Get the user credentials $credential=Get-Credential $username=$credential.UserName $password=$credential.GetNetworkCredential().Password $securePassword = ConvertTo-SecureString $password -AsPlainText -Force
- 94. ©2014 C# CORNER. SHARE THIS DOCUMENT AS IT IS. PLEASE DO NOT REPRODUCE, REPUBLISH, CHANGE OR COPY. ### Input Parameters $url = "https://c986.sharepoint.com/" ### References # Specify the path where the dll's are located. Add-Type -Path "c:Program FilesCommon Filesmicrosoft sharedWeb Server Extensions15ISAPIMicrosoft.SharePoint.Client.dll" Add-Type -Path "c:Program FilesCommon Filesmicrosoft sharedWeb Server Extensions15ISAPIMicrosoft.SharePoint.Client.Runtime.dll" ### Function function SetDefaultView() { # Connect to SharePoint Online and get ClientContext object. $clientContext = New-Object Microsoft.SharePoint.Client.ClientContext($url) $credentials = New-Object Microsoft.SharePoint.Client.SharePointOnlineCredentials($username, $securePassword) $clientContext.Credentials = $credentials # Get the SharePoint web $web=$clientContext.Web; # Get the custom list by Title $list=$web.Lists.GetByTitle("Employee Details"); # Get a specific list view by title $view=$list.Views.getByTitle("Vijai View"); # Set the view as default view $view.DefaultView=$true; # Update the view $view.Update(); # Execute the query $clientContext.ExecuteQuery(); } ### Calling the function
- 95. ©2014 C# CORNER. SHARE THIS DOCUMENT AS IT IS. PLEASE DO NOT REPRODUCE, REPUBLISH, CHANGE OR COPY. SetDefaultView Result “Vijai View” view is set as the default view for the Employee Details list. 7.12 How to add a field to the list view In this example you will see how to add a field to the list view using the .Net Client Side Object Model in Powershell scripts. Create the ps1 file a) Open a new text file and paste in the following script. b) Save the file as VijaiAnand_CSOM_Powershell_Office365.ps1 in the C:Vijai folder (a folder named Vijai is created in the C drive). c) Open SharePoint 2013 Management Shell as an administrator. d) Type cd “c:Vijai” in the management shell and then click on Enter. e) Type .VijaiAnand_CSOM_Powershell_Office365.ps1 in the management shell and then click on Enter. f) Enter the Office 365 username ([email protected]) and password (*********) in the Credentials pop up. Click on Ok. Script ### Get the user credentials $credential=Get-Credential $username=$credential.UserName $password=$credential.GetNetworkCredential().Password $securePassword = ConvertTo-SecureString $password -AsPlainText -Force ### Input Parameters $url = "https://c986.sharepoint.com/" ### References # Specify the path where the dll's are located. Add-Type -Path "c:Program FilesCommon Filesmicrosoft sharedWeb Server Extensions15ISAPIMicrosoft.SharePoint.Client.dll"
- 96. ©2014 C# CORNER. SHARE THIS DOCUMENT AS IT IS. PLEASE DO NOT REPRODUCE, REPUBLISH, CHANGE OR COPY. Add-Type -Path "c:Program FilesCommon Filesmicrosoft sharedWeb Server Extensions15ISAPIMicrosoft.SharePoint.Client.Runtime.dll" ### Function function AddViewField() { # Connect to SharePoint Online and get ClientContext object. $clientContext = New-Object Microsoft.SharePoint.Client.ClientContext($url) $credentials = New-Object Microsoft.SharePoint.Client.SharePointOnlineCredentials($username, $securePassword) $clientContext.Credentials = $credentials # Get the SharePoint web $web=$clientContext.Web; # Get the custom list by Title $list=$web.Lists.GetByTitle("Employee Details"); # Get a specific list view by title $view=$list.Views.getByTitle("Vijai View"); # Add the field to the list view $view.ViewFields.Add("Department"); # Update the view $view.Update(); # Execute the query $clientContext.ExecuteQuery(); } ### Calling the function AddViewField Result Department field is added successfully to the “Vijai View” list view. 7.13 How to delete a field from the list view
- 97. ©2014 C# CORNER. SHARE THIS DOCUMENT AS IT IS. PLEASE DO NOT REPRODUCE, REPUBLISH, CHANGE OR COPY. In this example you will see how to delete a field from the list view using the Client Side Object Model in Powershell scripts. Create the ps1 file a) Open a new text file and paste in the following script. b) Save the file as VijaiAnand_CSOM_Powershell_Office365.ps1 in the C:Vijai folder (a folder named Vijai is created in the C drive). c) Open SharePoint 2013 Management Shell as an administrator. d) Type cd “c:Vijai” in the management shell and then click on Enter. e) Type .VijaiAnand_CSOM_Powershell_Office365.ps1 in the management shell and then click on Enter. f) Enter the Office 365 username ([email protected]) and password (*********) in the Credentials pop up. Click on Ok. Script ### Get the user credentials $credential=Get-Credential $username=$credential.UserName $password=$credential.GetNetworkCredential().Password $securePassword = ConvertTo-SecureString $password -AsPlainText -Force ### Input Parameters $url = "https://c986.sharepoint.com/" ### References # Specify the path where the dll's are located. Add-Type -Path "c:Program FilesCommon Filesmicrosoft sharedWeb Server Extensions15ISAPIMicrosoft.SharePoint.Client.dll" Add-Type -Path "c:Program FilesCommon Filesmicrosoft sharedWeb Server Extensions15ISAPIMicrosoft.SharePoint.Client.Runtime.dll" ### Function function RemoveViewField() { # Connect to SharePoint Online and get ClientContext object. $clientContext = New-Object Microsoft.SharePoint.Client.ClientContext($url)
- 98. ©2014 C# CORNER. SHARE THIS DOCUMENT AS IT IS. PLEASE DO NOT REPRODUCE, REPUBLISH, CHANGE OR COPY. $credentials = New-Object Microsoft.SharePoint.Client.SharePointOnlineCredentials($username, $securePassword) $clientContext.Credentials = $credentials # Get the SharePoint web $web=$clientContext.Web; # Get the custom list by Title $list=$web.Lists.GetByTitle("Employee Details"); # Get a specific list view by title $view=$list.Views.getByTitle("Vijai View"); # Remove the field from the list view $view.ViewFields.Remove("Department"); # Update the view $view.Update(); # Execute the query $clientContext.ExecuteQuery(); } ### Calling the function RemoveViewField Result Department field is removed successfully from the “Vijai View” list view. 7.14 How to delete a list view In this example you will see how to delete a list view using the .Net Client Side Object Model in Powershell scripts. Create the ps1 file a) Open a new text file and paste in the following script. b) Save the file as VijaiAnand_CSOM_Powershell_Office365.ps1 in the C:Vijai folder (a folder named Vijai is created in the C drive). c) Open SharePoint 2013 Management Shell as an administrator. d) Type cd “c:Vijai” in the management shell and then click on Enter.
- 99. ©2014 C# CORNER. SHARE THIS DOCUMENT AS IT IS. PLEASE DO NOT REPRODUCE, REPUBLISH, CHANGE OR COPY. e) Type .VijaiAnand_CSOM_Powershell_Office365.ps1 in the management shell and then click on Enter. f) Enter the Office 365 username ([email protected]) and password (*********) in the Credentials pop up. Click on Ok. Script ### Get the user credentials $credential=Get-Credential $username=$credential.UserName $password=$credential.GetNetworkCredential().Password $securePassword = ConvertTo-SecureString $password -AsPlainText -Force ### Input Parameters $url = "https://c986.sharepoint.com/" ### References # Specify the path where the dll's are located. Add-Type -Path "c:Program FilesCommon Filesmicrosoft sharedWeb Server Extensions15ISAPIMicrosoft.SharePoint.Client.dll" Add-Type -Path "c:Program FilesCommon Filesmicrosoft sharedWeb Server Extensions15ISAPIMicrosoft.SharePoint.Client.Runtime.dll" ### Function function DeleteView() { # Connect to SharePoint Online and get ClientContext object. $clientContext = New-Object Microsoft.SharePoint.Client.ClientContext($url) $credentials = New-Object Microsoft.SharePoint.Client.SharePointOnlineCredentials($username, $securePassword) $clientContext.Credentials = $credentials # Get the SharePoint web $web=$clientContext.Web; # Get the custom list by Title $list=$web.Lists.GetByTitle("Employee Details"); # Get a specific list view by title
- 100. ©2014 C# CORNER. SHARE THIS DOCUMENT AS IT IS. PLEASE DO NOT REPRODUCE, REPUBLISH, CHANGE OR COPY. $view=$list.Views.getByTitle("Vijai View"); # Delete the list view $view.DeleteObject(); # Execute the query $clientContext.ExecuteQuery(); } ### Calling the function DeleteView Result “Vijai View” list view is deleted successfully from the custom list. 8 Perform SharePoint folder tasks using CSOM in Powershell script In this section you will see how to do folder related tasks using SharePoint 2013 .Net Client Side Object Model in Powershell scripts. 8.1 How to get all the top level folders from the website In this example you will see how to get all the top level folders from the website using the .Net Client Side Object Model in Powershell scripts. Create the ps1 file a) Open a new text file and paste in the following script. b) Save the file as VijaiAnand_CSOM_Powershell_Office365.ps1 in the C:Vijai folder (a folder named Vijai is created in the C drive). c) Open SharePoint 2013 Management Shell as an administrator. d) Type cd “c:Vijai” in the management shell and then click on Enter. e) Type .VijaiAnand_CSOM_Powershell_Office365.ps1 in the management shell and then click on Enter. f) Enter the Office 365 username ([email protected]) and password (*********) in the Credentials pop up. Click on Ok. Script
- 101. ©2014 C# CORNER. SHARE THIS DOCUMENT AS IT IS. PLEASE DO NOT REPRODUCE, REPUBLISH, CHANGE OR COPY. ### Get the user credentials $credential=Get-Credential $username=$credential.UserName $password=$credential.GetNetworkCredential().Password $securePassword = ConvertTo-SecureString $password -AsPlainText -Force ### Input Parameters $url = "https://c986.sharepoint.com/" ### References # Specify the path where the dll's are located. Add-Type -Path "c:Program FilesCommon Filesmicrosoft sharedWeb Server Extensions15ISAPIMicrosoft.SharePoint.Client.dll" Add-Type -Path "c:Program FilesCommon Filesmicrosoft sharedWeb Server Extensions15ISAPIMicrosoft.SharePoint.Client.Runtime.dll" ### Function function GetFoldersFromWeb() { # Connect to SharePoint Online and get ClientContext object. $clientContext = New-Object Microsoft.SharePoint.Client.ClientContext($url) $credentials = New-Object Microsoft.SharePoint.Client.SharePointOnlineCredentials($username, $securePassword) $clientContext.Credentials = $credentials # Get the SharePoint web $web=$clientContext.Web; # Get all the top level folder collection from the website $folderColl=$web.Folders; $clientContext.Load($folderColl); # Execute the query $clientContext.ExecuteQuery(); # Loop through all the folders foreach($folder in $folderColl) {
- 102. ©2014 C# CORNER. SHARE THIS DOCUMENT AS IT IS. PLEASE DO NOT REPRODUCE, REPUBLISH, CHANGE OR COPY. # Display the folder name Write-Host -ForegroundColor Green $folder.Name } } ### Calling the function GetFoldersFromWeb Result Figure 9.1.1: Get all the top level folders 8.2 How to get all the top level folders from the list In this example you will see how to get all the top level folders from the list using the .Net Client Side Object Model in Powershell scripts. Create the ps1 file a) Open a new text file and paste in the following script. b) Save the file as VijaiAnand_CSOM_Powershell_Office365.ps1 in the C:Vijai folder (a folder named Vijai is created in the C drive). c) Open SharePoint 2013 Management Shell as an administrator. d) Type cd “c:Vijai” in the management shell and then click on Enter. e) Type .VijaiAnand_CSOM_Powershell_Office365.ps1 in the management shell and then click on Enter.
- 103. ©2014 C# CORNER. SHARE THIS DOCUMENT AS IT IS. PLEASE DO NOT REPRODUCE, REPUBLISH, CHANGE OR COPY. f) Enter the Office 365 username ([email protected]) and password (*********) in the Credentials pop up. Click on Ok. Script ### Get the user credentials $credential=Get-Credential $username=$credential.UserName $password=$credential.GetNetworkCredential().Password $securePassword = ConvertTo-SecureString $password -AsPlainText -Force ### Input Parameters $url = "https://c986.sharepoint.com/" ### References # Specify the path where the dll's are located. Add-Type -Path "c:Program FilesCommon Filesmicrosoft sharedWeb Server Extensions15ISAPIMicrosoft.SharePoint.Client.dll" Add-Type -Path "c:Program FilesCommon Filesmicrosoft sharedWeb Server Extensions15ISAPIMicrosoft.SharePoint.Client.Runtime.dll" ### Function function GetFoldersFromList() { # Connect to SharePoint Online and get ClientContext object. $clientContext = New-Object Microsoft.SharePoint.Client.ClientContext($url) $credentials = New-Object Microsoft.SharePoint.Client.SharePointOnlineCredentials($username, $securePassword) $clientContext.Credentials = $credentials # Get the SharePoint web $web=$clientContext.Web; # Get the list by Title $list=$web.Lists.GetByTitle("Documents"); # Get all the top level folder collection from the list $folderColl=$list.RootFolder.Folders;
- 104. ©2014 C# CORNER. SHARE THIS DOCUMENT AS IT IS. PLEASE DO NOT REPRODUCE, REPUBLISH, CHANGE OR COPY. $clientContext.Load($folderColl); # Execute the query $clientContext.ExecuteQuery(); # Loop through all the folders foreach($folder in $folderColl) { # Display the folder name Write-Host -ForegroundColor Green $folder.Name } } ### Calling the function GetFoldersFromList Result Figure9.2.1: Get all the top level folders from the list 8.3 How to get the subfolders from the list In this example you will see how to get the subfolders from the list using the .Net Client Side Object Model in Powershell scripts. Create the ps1 file a) Open a new text file and paste in the following script. b) Save the file as VijaiAnand_CSOM_Powershell_Office365.ps1 in the C:Vijai folder (a folder named Vijai is created in the C drive). c) Open SharePoint 2013 Management Shell as an administrator. d) Type cd “c:Vijai” in the management shell and then click on Enter.
- 105. ©2014 C# CORNER. SHARE THIS DOCUMENT AS IT IS. PLEASE DO NOT REPRODUCE, REPUBLISH, CHANGE OR COPY. e) Type .VijaiAnand_CSOM_Powershell_Office365.ps1 in the management shell and then click on Enter. f) Enter the Office 365 username ([email protected]) and password (*********) in the Credentials pop up. Click on Ok. Script ### Get the user credentials $credential=Get-Credential $username=$credential.UserName $password=$credential.GetNetworkCredential().Password $securePassword = ConvertTo-SecureString $password -AsPlainText -Force ### Input Parameters $url = "https://c986.sharepoint.com/" ### References # Specify the path where the dll's are located. Add-Type -Path "c:Program FilesCommon Filesmicrosoft sharedWeb Server Extensions15ISAPIMicrosoft.SharePoint.Client.dll" Add-Type -Path "c:Program FilesCommon Filesmicrosoft sharedWeb Server Extensions15ISAPIMicrosoft.SharePoint.Client.Runtime.dll" ### Function function GetSubfoldersFromList() { # Connect to SharePoint Online and get ClientContext object. $clientContext = New-Object Microsoft.SharePoint.Client.ClientContext($url) $credentials = New-Object Microsoft.SharePoint.Client.SharePointOnlineCredentials($username, $securePassword) $clientContext.Credentials = $credentials # Get the SharePoint web $web=$clientContext.Web; # Returns the folder object located at the specified server relative URL $folderColl=$web.GetFolderByServerRelativeUrl("Shared Documents/FolderA").Folders; $clientContext.Load($folderColl);
- 106. ©2014 C# CORNER. SHARE THIS DOCUMENT AS IT IS. PLEASE DO NOT REPRODUCE, REPUBLISH, CHANGE OR COPY. # Execute the query $clientContext.ExecuteQuery(); # Loop through all the folders foreach($folder in $folderColl) { # Display the folder name Write-Host -ForegroundColor Green $folder.Name } } ### Calling the function GetSubfoldersFromList Result Figure9.3.1: Get all the subfolders 8.4 How to delete a folder from the list In this example you will see how to delete a folder from the list using the .Net Client Side Object Model in Powershell scripts. Create the ps1 file a) Open a new text file and paste in the following script. b) Save the file as VijaiAnand_CSOM_Powershell_Office365.ps1 in the C:Vijai folder (a folder named Vijai is created in the C drive). c) Open SharePoint 2013 Management Shell as an administrator. d) Type cd “c:Vijai” in the management shell and then click on Enter. e) Type .VijaiAnand_CSOM_Powershell_Office365.ps1 in the management shell and then click on Enter.
- 107. ©2014 C# CORNER. SHARE THIS DOCUMENT AS IT IS. PLEASE DO NOT REPRODUCE, REPUBLISH, CHANGE OR COPY. f) Enter the Office 365 username ([email protected]) and password (*********) in the Credentials pop up. Click on Ok. Script ### Get the user credentials $credential=Get-Credential $username=$credential.UserName $password=$credential.GetNetworkCredential().Password $securePassword = ConvertTo-SecureString $password -AsPlainText -Force ### Input Parameters $url = "https://c986.sharepoint.com/" ### References # Specify the path where the dll's are located. Add-Type -Path "c:Program FilesCommon Filesmicrosoft sharedWeb Server Extensions15ISAPIMicrosoft.SharePoint.Client.dll" Add-Type -Path "c:Program FilesCommon Filesmicrosoft sharedWeb Server Extensions15ISAPIMicrosoft.SharePoint.Client.Runtime.dll" ### Function function DeleteFolder() { # Connect to SharePoint Online and get ClientContext object. $clientContext = New-Object Microsoft.SharePoint.Client.ClientContext($url) $credentials = New-Object Microsoft.SharePoint.Client.SharePointOnlineCredentials($username, $securePassword) $clientContext.Credentials = $credentials # Get the SharePoint web $web=$clientContext.Web; # Returns the folder object located at the specified server relative URL $folder=$web.GetFolderByServerRelativeUrl("Shared Documents/FolderA/Subfolder1"); # Delete the folder
- 108. ©2014 C# CORNER. SHARE THIS DOCUMENT AS IT IS. PLEASE DO NOT REPRODUCE, REPUBLISH, CHANGE OR COPY. $folder.DeleteObject(); # Execute the query $clientContext.ExecuteQuery(); } ### Calling the function DeleteFolder Result Folder at the specified server relative URL is deleted successfully. 8.5 How to create a new folder in the document library In this example you will see how to create a new folder in the document library using the .Net Client Side Object Model in Powershell scripts. Create the ps1 file a) Open a new text file and paste in the following script. b) Save the file as VijaiAnand_CSOM_Powershell_Office365.ps1 in the C:Vijai folder (a folder named Vijai is created in the C drive). c) Open SharePoint 2013 Management Shell as an administrator. d) Type cd “c:Vijai” in the management shell and then click on Enter. e) Type .VijaiAnand_CSOM_Powershell_Office365.ps1 in the management shell and then click on Enter. f) Enter the Office 365 username ([email protected]) and password (*********) in the Credentials pop up. Click on Ok. Script ### Get the user credentials $credential=Get-Credential $username=$credential.UserName $password=$credential.GetNetworkCredential().Password $securePassword = ConvertTo-SecureString $password -AsPlainText -Force ### Input Parameters
- 109. ©2014 C# CORNER. SHARE THIS DOCUMENT AS IT IS. PLEASE DO NOT REPRODUCE, REPUBLISH, CHANGE OR COPY. $url = "https://c986.sharepoint.com/" ### References # Specify the path where the dll's are located. Add-Type -Path "c:Program FilesCommon Filesmicrosoft sharedWeb Server Extensions15ISAPIMicrosoft.SharePoint.Client.dll" Add-Type -Path "c:Program FilesCommon Filesmicrosoft sharedWeb Server Extensions15ISAPIMicrosoft.SharePoint.Client.Runtime.dll" ### Function function CreateFolder() { # Connect to SharePoint Online and get ClientContext object. $clientContext = New-Object Microsoft.SharePoint.Client.ClientContext($url) $credentials = New-Object Microsoft.SharePoint.Client.SharePointOnlineCredentials($username, $securePassword) $clientContext.Credentials = $credentials # Get the SharePoint web $web=$clientContext.Web; # Adds the folder that is located at the specified URL to the collection # Create a new folder in SharePoint Documents $folder=$web.Folders.Add("Shared Documents/FolderC"); $clientContext.Load($folder); # Execute the query $clientContext.ExecuteQuery(); # Display the folder name and URL Write-Host -ForegroundColor Green "Folder Name: " $folder.Name " URL: " $folder.ServerRelativeUrl; } ### Calling the function CreateFolder Result
- 110. ©2014 C# CORNER. SHARE THIS DOCUMENT AS IT IS. PLEASE DO NOT REPRODUCE, REPUBLISH, CHANGE OR COPY. Figure9.5.1: Create a new folder 8.6 How to get the number of items inside the folder In this example you will see how to get the number of items inside the folder using the .Net Client Side Object Model in Powershell scripts. Create the ps1 file a) Open a new text file and paste in the following script. b) Save the file as VijaiAnand_CSOM_Powershell_Office365.ps1 in the C:Vijai folder (a folder named Vijai is created in the C drive). c) Open SharePoint 2013 Management Shell as an administrator. d) Type cd “c:Vijai” in the management shell and then click on Enter. e) Type .VijaiAnand_CSOM_Powershell_Office365.ps1 in the management shell and then click on Enter. f) Enter the Office 365 username ([email protected]) and password (*********) in the Credentials pop up. Click on Ok. Script ### Get the user credentials $credential=Get-Credential $username=$credential.UserName $password=$credential.GetNetworkCredential().Password $securePassword = ConvertTo-SecureString $password -AsPlainText -Force ### Input Parameters $url = "https://c986.sharepoint.com/" ### References
- 111. ©2014 C# CORNER. SHARE THIS DOCUMENT AS IT IS. PLEASE DO NOT REPRODUCE, REPUBLISH, CHANGE OR COPY. # Specify the path where the dll's are located. Add-Type -Path "c:Program FilesCommon Filesmicrosoft sharedWeb Server Extensions15ISAPIMicrosoft.SharePoint.Client.dll" Add-Type -Path "c:Program FilesCommon Filesmicrosoft sharedWeb Server Extensions15ISAPIMicrosoft.SharePoint.Client.Runtime.dll" ### Function function GetItemCountinFolder() { # Connect to SharePoint Online and get ClientContext object. $clientContext = New-Object Microsoft.SharePoint.Client.ClientContext($url) $credentials = New-Object Microsoft.SharePoint.Client.SharePointOnlineCredentials($username, $securePassword) $clientContext.Credentials = $credentials # Get the SharePoint web $web=$clientContext.Web; # Returns the folder object located at the specified server relative URL $folder=$web.GetFolderByServerRelativeUrl("Shared Documents/FolderA"); $clientContext.Load($folder); # Execute the query $clientContext.ExecuteQuery(); # Display the number of items inside the folder Write-Host -ForegroundColor Green "Number of items inside the folder: " $folder.ItemCount } ### Calling the function GetItemCountinFolder Result
- 112. ©2014 C# CORNER. SHARE THIS DOCUMENT AS IT IS. PLEASE DO NOT REPRODUCE, REPUBLISH, CHANGE OR COPY. Figure9.6.1: Get the count of items 9 Perform SharePoint file tasks using CSOM in Powershell script In this section you will see how to perform file related tasks using SharePoint 2013 .Net Client Side Object Model in Powershell scripts. 9.1 How to get the major version of the file In this example you will see how to get the major version of the file using the .Net Client Side Object Model in Powershell scripts. Create the ps1 file a) Open a new text file and paste in the following script. b) Save the file as VijaiAnand_CSOM_Powershell_Office365.ps1 in the C:Vijai folder (a folder named Vijai is created in the C drive). c) Open SharePoint 2013 Management Shell as an administrator. d) Type cd “c:Vijai” in the management shell and then click on Enter. e) Type .VijaiAnand_CSOM_Powershell_Office365.ps1 in the management shell and then click on Enter. f) Enter the Office 365 username ([email protected]) and password (*********) in the Credentials pop up. Click on Ok. Script ### Input Parameters $url = "https://c986.sharepoint.com/" ### References
- 113. ©2014 C# CORNER. SHARE THIS DOCUMENT AS IT IS. PLEASE DO NOT REPRODUCE, REPUBLISH, CHANGE OR COPY. # Specify the path where the dll's are located. Add-Type -Path "c:Program FilesCommon Filesmicrosoft sharedWeb Server Extensions15ISAPIMicrosoft.SharePoint.Client.dll" Add-Type -Path "c:Program FilesCommon Filesmicrosoft sharedWeb Server Extensions15ISAPIMicrosoft.SharePoint.Client.Runtime.dll" ### Function function GetMajorVersion() { # Connect to SharePoint Online and get ClientContext object. $clientContext = New-Object Microsoft.SharePoint.Client.ClientContext($url) $credentials = New-Object Microsoft.SharePoint.Client.SharePointOnlineCredentials($username, $securePassword) $clientContext.Credentials = $credentials # Get the SharePoint web $web=$clientContext.Web; # Get the list by title $list=$web.Lists.GetByTitle("Documents"); # Get an item by ID $item=$list.GetItemById(19); # Get the file that is represented by the item from a document library $file=$item.File; $clientContext.Load($file); # Execute the query $clientContext.ExecuteQuery(); # Display the major version of the file Write-Host -ForegroundColor Green "Major Version of the file: " $file.MajorVersion } ### Calling the function GetMajorVersion Result
- 114. ©2014 C# CORNER. SHARE THIS DOCUMENT AS IT IS. PLEASE DO NOT REPRODUCE, REPUBLISH, CHANGE OR COPY. Figure10.1.1: Get the major version of the file Reference http://msdn.microsoft.com/en-IN/library/microsoft.sharepoint.client.file.majorversion.aspx 9.2 How to get the minor version of the file In this example you will see how to get the minor version of the file using the .Net Client Side Object Model in Powershell scripts. Create the ps1 file a) Open a new text file and paste in the following script. b) Save the file as VijaiAnand_CSOM_Powershell_Office365.ps1 in the C:Vijai folder (a folder named Vijai is created in the C drive). c) Open SharePoint 2013 Management Shell as an administrator. d) Type cd “c:Vijai” in the management shell and then click on Enter. e) Type .VijaiAnand_CSOM_Powershell_Office365.ps1 in the management shell and then click on Enter. f) Enter the Office 365 username ([email protected]) and password (*********) in the Credentials pop up. Click on Ok. Script ### Get the user credentials $credential=Get-Credential $username=$credential.UserName $password=$credential.GetNetworkCredential().Password $securePassword = ConvertTo-SecureString $password -AsPlainText -Force
- 115. ©2014 C# CORNER. SHARE THIS DOCUMENT AS IT IS. PLEASE DO NOT REPRODUCE, REPUBLISH, CHANGE OR COPY. ### Input Parameters $url = "https://c986.sharepoint.com/" ### References # Specify the path where the dll's are located. Add-Type -Path "c:Program FilesCommon Filesmicrosoft sharedWeb Server Extensions15ISAPIMicrosoft.SharePoint.Client.dll" Add-Type -Path "c:Program FilesCommon Filesmicrosoft sharedWeb Server Extensions15ISAPIMicrosoft.SharePoint.Client.Runtime.dll" ### Function function GetMinorVersion() { # Connect to SharePoint Online and get ClientContext object. $clientContext = New-Object Microsoft.SharePoint.Client.ClientContext($url) $credentials = New-Object Microsoft.SharePoint.Client.SharePointOnlineCredentials($username, $securePassword) $clientContext.Credentials = $credentials # Get the SharePoint web $web=$clientContext.Web; # Get the list by title $list=$web.Lists.GetByTitle("Documents"); # Get an item by ID $item=$list.GetItemById(19); # Get the file that is represented by the item from a document library $file=$item.File; $clientContext.Load($file); # Execute the query $clientContext.ExecuteQuery(); # Display the minor version of the file Write-Host -ForegroundColor Green "Minor Version of the file: " $file.MinorVersion }
- 116. ©2014 C# CORNER. SHARE THIS DOCUMENT AS IT IS. PLEASE DO NOT REPRODUCE, REPUBLISH, CHANGE OR COPY. ### Calling the function GetMinorVersion Result Figure10.2.1: Get the minor version of the file Reference http://msdn.microsoft.com/en-IN/library/microsoft.sharepoint.client.file.minorversion.aspx 9.3 How to check out the file in the document library In this example you will see how to check out the file in the document library using the .Net Client Side Object Model in Powershell scripts. Create the ps1 file a) Open a new text file and paste in the following script. b) Save the file as VijaiAnand_CSOM_Powershell_Office365.ps1 in the C:Vijai folder (a folder named Vijai is created in the C drive). c) Open SharePoint 2013 Management Shell as an administrator. d) Type cd “c:Vijai” in the management shell and then click on Enter. e) Type .VijaiAnand_CSOM_Powershell_Office365.ps1 in the management shell and then click on Enter. f) Enter the Office 365 username ([email protected]) and password (*********) in the Credentials pop up. Click on Ok. Script ### Get the user credentials
- 117. ©2014 C# CORNER. SHARE THIS DOCUMENT AS IT IS. PLEASE DO NOT REPRODUCE, REPUBLISH, CHANGE OR COPY. $credential=Get-Credential $username=$credential.UserName $password=$credential.GetNetworkCredential().Password $securePassword = ConvertTo-SecureString $password -AsPlainText -Force ### Input Parameters $url = "https://c986.sharepoint.com/" ### References # Specify the path where the dll's are located. Add-Type -Path "c:Program FilesCommon Filesmicrosoft sharedWeb Server Extensions15ISAPIMicrosoft.SharePoint.Client.dll" Add-Type -Path "c:Program FilesCommon Filesmicrosoft sharedWeb Server Extensions15ISAPIMicrosoft.SharePoint.Client.Runtime.dll" ### Function function FileCheckOut() { # Connect to SharePoint Online and get ClientContext object. $clientContext = New-Object Microsoft.SharePoint.Client.ClientContext($url) $credentials = New-Object Microsoft.SharePoint.Client.SharePointOnlineCredentials($username, $securePassword) $clientContext.Credentials = $credentials # Get the SharePoint web $web=$clientContext.Web; # Get the list by title $list=$web.Lists.GetByTitle("Documents"); # Get an item by ID $item=$list.GetItemById(19); # Get the file that is represented by the item from a document library $file=$item.File; # Check out the file $file.CheckOut()
- 118. ©2014 C# CORNER. SHARE THIS DOCUMENT AS IT IS. PLEASE DO NOT REPRODUCE, REPUBLISH, CHANGE OR COPY. # Execute the query $clientContext.ExecuteQuery(); } ### Calling the function FileCheckOut Result The specified file is checked out successfully. Reference http://msdn.microsoft.com/en-IN/library/microsoft.sharepoint.client.file.checkout.aspx 9.4 How to get the user login name that has checked out the file In this example you will see how to get the user login name that has checked out the file using the .Net Client Side Object Model in Powershell scripts. Create the ps1 file a) Open a new text file and paste in the following script. b) Save the file as VijaiAnand_CSOM_Powershell_Office365.ps1 in the C:Vijai folder (a folder named Vijai is created in the C drive). c) Open SharePoint 2013 Management Shell as an administrator. d) Type cd “c:Vijai” in the management shell and then click on Enter. e) Type .VijaiAnand_CSOM_Powershell_Office365.ps1 in the management shell and then click on Enter. f) Enter the Office 365 username ([email protected]) and password (*********) in the Credentials pop up. Click on Ok. Script ### Input Parameters $url = "https://c986.sharepoint.com/" ### References
- 119. ©2014 C# CORNER. SHARE THIS DOCUMENT AS IT IS. PLEASE DO NOT REPRODUCE, REPUBLISH, CHANGE OR COPY. # Specify the path where the dll's are located. Add-Type -Path "c:Program FilesCommon Filesmicrosoft sharedWeb Server Extensions15ISAPIMicrosoft.SharePoint.Client.dll" Add-Type -Path "c:Program FilesCommon Filesmicrosoft sharedWeb Server Extensions15ISAPIMicrosoft.SharePoint.Client.Runtime.dll" ### Function function GetCheckedOutByUser() { # Connect to SharePoint Online and get ClientContext object. $clientContext = New-Object Microsoft.SharePoint.Client.ClientContext($url) $credentials = New-Object Microsoft.SharePoint.Client.SharePointOnlineCredentials($username, $securePassword) $clientContext.Credentials = $credentials # Get the SharePoint web $web=$clientContext.Web; # Get the list by title $list=$web.Lists.GetByTitle("Documents"); # Get an item by ID $item=$list.GetItemById(19); # Get the file that is represented by the item from a document library $file=$item.File; # Get the checked out by user object $user=$file.CheckedOutByUser; $clientContext.Load($user); # Execute the query $clientContext.ExecuteQuery(); # Display the file checked out by user Write-Host -ForegroundColor Green "File Checked out: " $user.LoginName } ### Calling the function GetCheckedOutByUser
- 120. ©2014 C# CORNER. SHARE THIS DOCUMENT AS IT IS. PLEASE DO NOT REPRODUCE, REPUBLISH, CHANGE OR COPY. Result Figure10.4.1: Get the login name of the user Reference http://msdn.microsoft.com/en-us/library/microsoft.sharepoint.client.file.checkedoutbyuser.aspx 9.5 How to get the user login name who added the file In this example you will see how to get the user login name that added the file using the .Net Client Side Object Model in Powershell scripts. Create the ps1 file a) Open a new text file and paste in the following script. b) Save the file as VijaiAnand_CSOM_Powershell_Office365.ps1 in the C:Vijai folder (a folder named Vijai is created in the C drive). c) Open SharePoint 2013 Management Shell as an administrator. d) Type cd “c:Vijai” in the management shell and then click on Enter. e) Type .VijaiAnand_CSOM_Powershell_Office365.ps1 in the management shell and then click on Enter. f) Enter the Office 365 username ([email protected]) and password (*********) in the Credentials pop up. Click on Ok. Script ### Get the user credentials $credential=Get-Credential $username=$credential.UserName $password=$credential.GetNetworkCredential().Password $securePassword = ConvertTo-SecureString $password -AsPlainText -Force
- 121. ©2014 C# CORNER. SHARE THIS DOCUMENT AS IT IS. PLEASE DO NOT REPRODUCE, REPUBLISH, CHANGE OR COPY. ### Input Parameters $url = "https://c986.sharepoint.com/" ### References # Specify the path where the dll's are located. Add-Type -Path "c:Program FilesCommon Filesmicrosoft sharedWeb Server Extensions15ISAPIMicrosoft.SharePoint.Client.dll" Add-Type -Path "c:Program FilesCommon Filesmicrosoft sharedWeb Server Extensions15ISAPIMicrosoft.SharePoint.Client.Runtime.dll" ### Function function GetFileAuthor() { # Connect to SharePoint Online and get ClientContext object. $clientContext = New-Object Microsoft.SharePoint.Client.ClientContext($url) $credentials = New-Object Microsoft.SharePoint.Client.SharePointOnlineCredentials($username, $securePassword) $clientContext.Credentials = $credentials # Get the SharePoint web $web=$clientContext.Web; # Get the list by title $list=$web.Lists.GetByTitle("Documents"); # Get an item by ID $item=$list.GetItemById(19); # Get the file that is represented by the item from a document library $file=$item.File; # Get the user who added the file $user=$file.Author; $clientContext.Load($user); # Execute the query $clientContext.ExecuteQuery(); # Display the user login name who added the file
- 122. ©2014 C# CORNER. SHARE THIS DOCUMENT AS IT IS. PLEASE DO NOT REPRODUCE, REPUBLISH, CHANGE OR COPY. Write-Host -ForegroundColor Green "Author: " $user.LoginName } ### Calling the function GetFileAuthor Result Figure10.5.1: Get the login name of the user Reference http://msdn.microsoft.com/en-IN/library/microsoft.sharepoint.client.file.author.aspx 9.6 How to get the check out type associated with the file In this example you will see how to get the check out type associated with the file using the .Net Client Side Object Model in Powershell scripts. Create the ps1 file a) Open a new text file and paste in the following script. b) Save the file as VijaiAnand_CSOM_Powershell_Office365.ps1 in the C:Vijai folder (a folder named Vijai is created in the C drive). c) Open SharePoint 2013 Management Shell as an administrator. d) Type cd “c:Vijai” in the management shell and then click on Enter. e) Type .VijaiAnand_CSOM_Powershell_Office365.ps1 in the management shell and then click on Enter. f) Enter the Office 365 username ([email protected]) and password (*********) in the Credentials pop up. Click on Ok. Script
- 123. ©2014 C# CORNER. SHARE THIS DOCUMENT AS IT IS. PLEASE DO NOT REPRODUCE, REPUBLISH, CHANGE OR COPY. ### Input Parameters $url = "https://c986.sharepoint.com/" ### References # Specify the path where the dll's are located. Add-Type -Path "c:Program FilesCommon Filesmicrosoft sharedWeb Server Extensions15ISAPIMicrosoft.SharePoint.Client.dll" Add-Type -Path "c:Program FilesCommon Filesmicrosoft sharedWeb Server Extensions15ISAPIMicrosoft.SharePoint.Client.Runtime.dll" ### Function function GetCheckOutType() { # Connect to SharePoint Online and get ClientContext object. $clientContext = New-Object Microsoft.SharePoint.Client.ClientContext($url) $credentials = New-Object Microsoft.SharePoint.Client.SharePointOnlineCredentials($username, $securePassword) $clientContext.Credentials = $credentials # Get the SharePoint web $web=$clientContext.Web; # Get the list by title $list=$web.Lists.GetByTitle("Documents"); # Get an item by ID $item=$list.GetItemById(19); # Get the file that is represented by the item from a document library $file=$item.File; $clientContext.Load($file); # Execute the query $clientContext.ExecuteQuery(); # Display the Check out type associated with the file Write-Host -ForegroundColor Green "CheckOutType: " $file.CheckoutType }
- 124. ©2014 C# CORNER. SHARE THIS DOCUMENT AS IT IS. PLEASE DO NOT REPRODUCE, REPUBLISH, CHANGE OR COPY. ### Calling the function GetCheckOutType Result Figure10.6.1: Get the check out type Reference http://msdn.microsoft.com/en-IN/library/microsoft.sharepoint.client.file.checkouttype.aspx 9.7 How to check in the file In this example you will see how to check in the file using the .Net Client Side Object Model in Powershell scripts. Create the ps1 file a) Open a new text file and paste in the following script. b) Save the file as VijaiAnand_CSOM_Powershell_Office365.ps1 in the C:Vijai folder (a folder named Vijai is created in the C drive). c) Open SharePoint 2013 Management Shell as an administrator. d) Type cd “c:Vijai” in the management shell and then click on Enter. e) Type .VijaiAnand_CSOM_Powershell_Office365.ps1 in the management shell and then click on Enter. f) Enter the Office 365 username ([email protected]) and password (*********) in the Credentials pop up. Click on Ok. Script ### Input Parameters $url = "https://c986.sharepoint.com/"
- 125. ©2014 C# CORNER. SHARE THIS DOCUMENT AS IT IS. PLEASE DO NOT REPRODUCE, REPUBLISH, CHANGE OR COPY. ### References # Specify the path where the dll's are located. Add-Type -Path "c:Program FilesCommon Filesmicrosoft sharedWeb Server Extensions15ISAPIMicrosoft.SharePoint.Client.dll" Add-Type -Path "c:Program FilesCommon Filesmicrosoft sharedWeb Server Extensions15ISAPIMicrosoft.SharePoint.Client.Runtime.dll" ### Function function FileCheckIn() { # Connect to SharePoint Online and get ClientContext object. $clientContext = New-Object Microsoft.SharePoint.Client.ClientContext($url) $credentials = New-Object Microsoft.SharePoint.Client.SharePointOnlineCredentials($username, $securePassword) $clientContext.Credentials = $credentials # Get the SharePoint web $web=$clientContext.Web; # Get the list by title $list=$web.Lists.GetByTitle("Documents"); # Get an item by ID $item=$list.GetItemById(19); # Get the file that is represented by the item from a document library $file=$item.File; # Check in the file $file.CheckIn("Checked in using powershell", [Microsoft.SharePoint.Client.CheckInType]::MajorCheckIn); # Execute the query $clientContext.ExecuteQuery(); } ### Calling the function FileCheckIn
- 126. ©2014 C# CORNER. SHARE THIS DOCUMENT AS IT IS. PLEASE DO NOT REPRODUCE, REPUBLISH, CHANGE OR COPY. Result The file is checked in as major version successfully. Reference http://msdn.microsoft.com/en-IN/library/microsoft.sharepoint.client.file.checkin.aspx 9.8 How to get the check in comment of the file In this example you will see how to get the latest check in comment of the file using the .Net Client Side Object Model in Powershell scripts. Create the ps1 file a) Open a new text file and paste in the following script. b) Save the file as VijaiAnand_CSOM_Powershell_Office365.ps1 in the C:Vijai folder (a folder named Vijai is created in the C drive). c) Open SharePoint 2013 Management Shell as an administrator. d) Type cd “c:Vijai” in the management shell and then click on Enter. e) Type .VijaiAnand_CSOM_Powershell_Office365.ps1 in the management shell and then click on Enter. f) Enter the Office 365 username ([email protected]) and password (*********) in the Credentials pop up. Click on Ok. Script ### Input Parameters $url = "https://c986.sharepoint.com/" ### References # Specify the path where the dll's are located. Add-Type -Path "c:Program FilesCommon Filesmicrosoft sharedWeb Server Extensions15ISAPIMicrosoft.SharePoint.Client.dll" Add-Type -Path "c:Program FilesCommon Filesmicrosoft sharedWeb Server Extensions15ISAPIMicrosoft.SharePoint.Client.Runtime.dll" ### Function function GetCheckInComment()
- 127. ©2014 C# CORNER. SHARE THIS DOCUMENT AS IT IS. PLEASE DO NOT REPRODUCE, REPUBLISH, CHANGE OR COPY. { # Connect to SharePoint Online and get ClientContext object. $clientContext = New-Object Microsoft.SharePoint.Client.ClientContext($url) $credentials = New-Object Microsoft.SharePoint.Client.SharePointOnlineCredentials($username, $securePassword) $clientContext.Credentials = $credentials # Get the SharePoint web $web=$clientContext.Web; # Get the list by title $list=$web.Lists.GetByTitle("Documents"); # Get an item by ID $item=$list.GetItemById(19); # Get the file that is represented by the item from a document library $file=$item.File; $clientContext.Load($file); # Execute the query $clientContext.ExecuteQuery(); # Display the file check in comment Write-Host -ForegroundColor Green "File Check In Comment: " $file.CheckInComment } ### Calling the function GetCheckInComment Result Figure10.8.1: Check in comment
- 128. ©2014 C# CORNER. SHARE THIS DOCUMENT AS IT IS. PLEASE DO NOT REPRODUCE, REPUBLISH, CHANGE OR COPY. Reference http://msdn.microsoft.com/en-IN/library/microsoft.sharepoint.client.file.checkincomment.aspx 9.9 How to unpublish the major version of the file In this example you will see how to unpublish the major version of the file using the .Net Client Side Object Model in Powershell scripts. Create the ps1 file a) Open a new text file and paste in the following script. b) Save the file as VijaiAnand_CSOM_Powershell_Office365.ps1 in the C:Vijai folder (a folder named Vijai is created in the C drive). c) Open SharePoint 2013 Management Shell as an administrator. d) Type cd “c:Vijai” in the management shell and then click on Enter. e) Type .VijaiAnand_CSOM_Powershell_Office365.ps1 in the management shell and then click on Enter. f) Enter the Office 365 username ([email protected]) and password (*********) in the Credentials pop up. Click on Ok. Script ### Get the user credentials $credential=Get-Credential $username=$credential.UserName $password=$credential.GetNetworkCredential().Password $securePassword = ConvertTo-SecureString $password -AsPlainText -Force ### Input Parameters $url = "https://c986.sharepoint.com/" ### References # Specify the path where the dll's are located. Add-Type -Path "c:Program FilesCommon Filesmicrosoft sharedWeb Server Extensions15ISAPIMicrosoft.SharePoint.Client.dll" Add-Type -Path "c:Program FilesCommon Filesmicrosoft sharedWeb Server Extensions15ISAPIMicrosoft.SharePoint.Client.Runtime.dll"
- 129. ©2014 C# CORNER. SHARE THIS DOCUMENT AS IT IS. PLEASE DO NOT REPRODUCE, REPUBLISH, CHANGE OR COPY. ### Function function UnPublishFile() { # Connect to SharePoint Online and get ClientContext object. $clientContext = New-Object Microsoft.SharePoint.Client.ClientContext($url) $credentials = New-Object Microsoft.SharePoint.Client.SharePointOnlineCredentials($username, $securePassword) $clientContext.Credentials = $credentials # Get the SharePoint web $web=$clientContext.Web; # Get the list by title $list=$web.Lists.GetByTitle("Documents"); # Get an item by ID $item=$list.GetItemById(19); # Get the file that is represented by the item from a document library $file=$item.File; $file.UnPublish(" Unpublishing the major version using powershell"); # Execute the query $clientContext.ExecuteQuery(); } ### Calling the function UnPublishFile Result The major version of the file is unpublished successfully. Reference http://msdn.microsoft.com/en-IN/library/microsoft.sharepoint.client.file.unpublish.aspx 9.10 How to discard check out of the file
- 130. ©2014 C# CORNER. SHARE THIS DOCUMENT AS IT IS. PLEASE DO NOT REPRODUCE, REPUBLISH, CHANGE OR COPY. In this example you will see how to discard the check out of the file using the .Net Client Side Object Model in Powershell scripts. Create the ps1 file a) Open a new text file and paste in the following script. b) Save the file as VijaiAnand_CSOM_Powershell_Office365.ps1 in the C:Vijai folder (a folder named Vijai is created in the C drive). c) Open SharePoint 2013 Management Shell as an administrator. d) Type cd “c:Vijai” in the management shell and then click on Enter. e) Type .VijaiAnand_CSOM_Powershell_Office365.ps1 in the management shell and then click on Enter. f) Enter the Office 365 username ([email protected]) and password (*********) in the Credentials pop up. Click on Ok. Script ### Get the user credentials $credential=Get-Credential $username=$credential.UserName $password=$credential.GetNetworkCredential().Password $securePassword = ConvertTo-SecureString $password -AsPlainText -Force ### Input Parameters $url = "https://c986.sharepoint.com/" ### References # Specify the path where the dll's are located. Add-Type -Path "c:Program FilesCommon Filesmicrosoft sharedWeb Server Extensions15ISAPIMicrosoft.SharePoint.Client.dll" Add-Type -Path "c:Program FilesCommon Filesmicrosoft sharedWeb Server Extensions15ISAPIMicrosoft.SharePoint.Client.Runtime.dll" ### Function function DiscardCheckOut() { # Connect to SharePoint Online and get ClientContext object. $clientContext = New-Object Microsoft.SharePoint.Client.ClientContext($url)
- 131. ©2014 C# CORNER. SHARE THIS DOCUMENT AS IT IS. PLEASE DO NOT REPRODUCE, REPUBLISH, CHANGE OR COPY. $credentials = New-Object Microsoft.SharePoint.Client.SharePointOnlineCredentials($username, $securePassword) $clientContext.Credentials = $credentials # Get the SharePoint web $web=$clientContext.Web; # Get the list by title $list=$web.Lists.GetByTitle("Documents"); # Get an item by ID $item=$list.GetItemById(19); # Get the file that is represented by the item from a document library $file=$item.File; # Discard check out $file.UndoCheckOut(); # Execute the query $clientContext.ExecuteQuery(); } ### Calling the function DiscardCheckOut Reference http://msdn.microsoft.com/en-IN/library/microsoft.sharepoint.client.file.undocheckout.aspx 9.11 How to delete the file from the document library In this example you will see how to delete the file from the document library using the Client Side Object Model in Powershell scripts. Create the ps1 file a) Open a new text file and paste in the following script. b) Save the file as VijaiAnand_CSOM_Powershell_Office365.ps1 in the C:Vijai folder (a folder named Vijai is created in the C drive). c) Open SharePoint 2013 Management Shell as an administrator.
- 132. ©2014 C# CORNER. SHARE THIS DOCUMENT AS IT IS. PLEASE DO NOT REPRODUCE, REPUBLISH, CHANGE OR COPY. d) Type cd “c:Vijai” in the management shell and then click on Enter. e) Type .VijaiAnand_CSOM_Powershell_Office365.ps1 in the management shell and then click on Enter. f) Enter the Office 365 username ([email protected]) and password (*********) in the Credentials pop up. Click on Ok. Script ### Get the user credentials $credential=Get-Credential $username=$credential.UserName $password=$credential.GetNetworkCredential().Password $securePassword = ConvertTo-SecureString $password -AsPlainText -Force ### Input Parameters $url = "https://c986.sharepoint.com/" ### References # Specify the path where the dll's are located. Add-Type -Path "c:Program FilesCommon Filesmicrosoft sharedWeb Server Extensions15ISAPIMicrosoft.SharePoint.Client.dll" Add-Type -Path "c:Program FilesCommon Filesmicrosoft sharedWeb Server Extensions15ISAPIMicrosoft.SharePoint.Client.Runtime.dll" ### Function function DeleteFile() { # Connect to SharePoint Online and get ClientContext object. $clientContext = New-Object Microsoft.SharePoint.Client.ClientContext($url) $credentials = New-Object Microsoft.SharePoint.Client.SharePointOnlineCredentials($username, $securePassword) $clientContext.Credentials = $credentials # Get the SharePoint web $web=$clientContext.Web; # Get the list by title $list=$web.Lists.GetByTitle("Documents");
- 133. ©2014 C# CORNER. SHARE THIS DOCUMENT AS IT IS. PLEASE DO NOT REPRODUCE, REPUBLISH, CHANGE OR COPY. # Get an item by ID $item=$list.GetItemById(19); # Get the file that is represented by the item from a document library $file=$item.File; # Delete the file $file.DeleteObject(); # Execute the query $clientContext.ExecuteQuery(); } ### Calling the function DeleteFile Result The file is deleted successfully from the document library. Reference http://msdn.microsoft.com/en-IN/library/microsoft.sharepoint.client.file.deleteobject.aspx 10 Perform SharePoint file version tasks using CSOM in Powershell script In this section you will see how to do file version related tasks using the SharePoint 2013 .Net Client Side Object Model in Powershell scripts. 10.1 How to get all the versions for the file In this example you will see how to get all the versions for the file using the .Net Client Side object Model in Powershell scripts. Create the ps1 file a) Open a new text file and paste in the following script.
- 134. ©2014 C# CORNER. SHARE THIS DOCUMENT AS IT IS. PLEASE DO NOT REPRODUCE, REPUBLISH, CHANGE OR COPY. b) Save the file as VijaiAnand_CSOM_Powershell_Office365.ps1 in the C:Vijai folder (a folder named Vijai is created in the C drive). c) Open SharePoint 2013 Management Shell as an administrator. d) Type cd “c:Vijai” in the management shell and then click on Enter. e) Type .VijaiAnand_CSOM_Powershell_Office365.ps1 in the management shell and then click on Enter. f) Enter the Office 365 username ([email protected]) and password (*********) in the Credentials pop up. Click on Ok. Script ### Get the user credentials $credential=Get-Credential $username=$credential.UserName $password=$credential.GetNetworkCredential().Password $securePassword = ConvertTo-SecureString $password -AsPlainText -Force ### Input Parameters $url = "https://c986.sharepoint.com/" ### References # Specify the path where the dll's are located. Add-Type -Path "c:Program FilesCommon Filesmicrosoft sharedWeb Server Extensions15ISAPIMicrosoft.SharePoint.Client.dll" Add-Type -Path "c:Program FilesCommon Filesmicrosoft sharedWeb Server Extensions15ISAPIMicrosoft.SharePoint.Client.Runtime.dll" ### Function function GetFileVersions() { # Connect to SharePoint Online and get ClientContext object. $clientContext = New-Object Microsoft.SharePoint.Client.ClientContext($url) $credentials = New-Object Microsoft.SharePoint.Client.SharePointOnlineCredentials($username, $securePassword) $clientContext.Credentials = $credentials # Get the SharePoint Web $web=$clientContext.Web;
- 135. ©2014 C# CORNER. SHARE THIS DOCUMENT AS IT IS. PLEASE DO NOT REPRODUCE, REPUBLISH, CHANGE OR COPY. # Get the list by title $list=$clientContext.Web.Lists.GetByTitle("Documents") # Get an item by ID $item=$list.GetItemById(23) # Get aall the versions for an item $versionColl=$item.File.Versions; $clientContext.Load($versionColl) # Execute the query $clientContext.ExecuteQuery(); Write-Host -ForegroundColor Green "File Vesrions: " #Loop through all the versions foreach($version in $versionColl) { # Display the version Label and CheckInComment write-host -ForegroundColor Yellow "Label: " $version.VersionLabel " CheckInComment: " $version.CheckInComment } } ### Calling the function GetFileVersions Result Figure11.1.1: Get all the versions for the file 10.2 How to get the file version for the document by version Id
- 136. ©2014 C# CORNER. SHARE THIS DOCUMENT AS IT IS. PLEASE DO NOT REPRODUCE, REPUBLISH, CHANGE OR COPY. In this example you will see how to get the file version for the document by version Id using the .Net Client Side object Model in Powershell scripts. Create the ps1 file a) Open a new text file and paste in the following script. b) Save the file as VijaiAnand_CSOM_Powershell_Office365.ps1 in the C:Vijai folder (a folder named Vijai is created in the C drive). c) Open SharePoint 2013 Management Shell as an administrator. d) Type cd “c:Vijai” in the management shell and then click on Enter. e) Type .VijaiAnand_CSOM_Powershell_Office365.ps1 in the management shell and then click on Enter. f) Enter the Office 365 username ([email protected]) and password (*********) in the Credentials pop up. Click on Ok. Script ### Get the user credentials $credential=Get-Credential $username=$credential.UserName $password=$credential.GetNetworkCredential().Password $securePassword = ConvertTo-SecureString $password -AsPlainText -Force ### Input Parameters $url = "https://c986.sharepoint.com/" ### References # Specify the path where the dll's are located. Add-Type -Path "c:Program FilesCommon Filesmicrosoft sharedWeb Server Extensions15ISAPIMicrosoft.SharePoint.Client.dll" Add-Type -Path "c:Program FilesCommon Filesmicrosoft sharedWeb Server Extensions15ISAPIMicrosoft.SharePoint.Client.Runtime.dll" ### Function function GetFileVersion() { # Connect to SharePoint Online and get ClientContext object. $clientContext = New-Object Microsoft.SharePoint.Client.ClientContext($url)
- 137. ©2014 C# CORNER. SHARE THIS DOCUMENT AS IT IS. PLEASE DO NOT REPRODUCE, REPUBLISH, CHANGE OR COPY. $credentials = New-Object Microsoft.SharePoint.Client.SharePointOnlineCredentials($username, $securePassword) $clientContext.Credentials = $credentials # Get the SharePoint Web $web=$clientContext.Web; # Get the list by title $list=$clientContext.Web.Lists.GetByTitle("Documents") # Get an item by ID $item=$list.GetItemById(23) # Get the version for the document using VersionId $version=$item.File.Versions.GetById(1); $clientContext.Load($version) # Execute the query $clientContext.ExecuteQuery(); # Display the version Label and CheckInComment write-host -ForegroundColor Yellow "Label: " $version.VersionLabel " CheckInComment: " $version.CheckInComment } ### Calling the function GetFileVersion Result Figure11.2.1: Get the file version by version ID
- 138. ©2014 C# CORNER. SHARE THIS DOCUMENT AS IT IS. PLEASE DO NOT REPRODUCE, REPUBLISH, CHANGE OR COPY. 10.3 How to delete a file version by version ID for the document In this example you will see how to delete a file version for the document using the .Net Client Side object Model in Powershell scripts. Create the ps1 file a) Open a new text file and paste in the following script. b) Save the file as VijaiAnand_CSOM_Powershell_Office365.ps1 in the C:Vijai folder (a folder named Vijai is created in the C drive). c) Open SharePoint 2013 Management Shell as an administrator. d) Type cd “c:Vijai” in the management shell and then click on Enter. e) Type .VijaiAnand_CSOM_Powershell_Office365.ps1 in the management shell and then click on Enter. f) Enter the Office 365 username ([email protected]) and password (*********) in the Credentials pop up. Click on Ok. Script ### Get the user credentials $credential=Get-Credential $username=$credential.UserName $password=$credential.GetNetworkCredential().Password $securePassword = ConvertTo-SecureString $password -AsPlainText -Force ### Input Parameters $url = "https://c986.sharepoint.com/" ### References # Specify the path where the dll's are located. Add-Type -Path "c:Program FilesCommon Filesmicrosoft sharedWeb Server Extensions15ISAPIMicrosoft.SharePoint.Client.dll" Add-Type -Path "c:Program FilesCommon Filesmicrosoft sharedWeb Server Extensions15ISAPIMicrosoft.SharePoint.Client.Runtime.dll" ### Function function DeleteFileVersion() {
- 139. ©2014 C# CORNER. SHARE THIS DOCUMENT AS IT IS. PLEASE DO NOT REPRODUCE, REPUBLISH, CHANGE OR COPY. # Connect to SharePoint Online and get ClientContext object. $clientContext = New-Object Microsoft.SharePoint.Client.ClientContext($url) $credentials = New-Object Microsoft.SharePoint.Client.SharePointOnlineCredentials($username, $securePassword) $clientContext.Credentials = $credentials # Get the SharePoint Web $web=$clientContext.Web; # Get the list by title $list=$clientContext.Web.Lists.GetByTitle("Documents") # Get an item by ID $item=$list.GetItemById(23) # Get the version for the document using VersionId $version=$item.File.Versions.GetById(1); # Delete the version $version.DeleteObject(); # Execute the query $clientContext.ExecuteQuery(); } ### Calling the function DeleteFileVersion Result Specified version of the file is deleted successfully. 10.4 How to delete a file version by version label for the document In this example you will see how to delete a file version by version label for the document using the .Net Client Side object Model in Powershell scripts. Create the ps1 file a) Open a new text file and paste in the following script.
- 140. ©2014 C# CORNER. SHARE THIS DOCUMENT AS IT IS. PLEASE DO NOT REPRODUCE, REPUBLISH, CHANGE OR COPY. b) Save the file as VijaiAnand_CSOM_Powershell_Office365.ps1 in the C:Vijai folder (a folder named Vijai is created in the C drive). c) Open SharePoint 2013 Management Shell as an administrator. d) Type cd “c:Vijai” in the management shell and then click on Enter. e) Type .VijaiAnand_CSOM_Powershell_Office365.ps1 in the management shell and then click on Enter. f) Enter the Office 365 username ([email protected]) and password (*********) in the Credentials pop up. Click on Ok. Script ### Get the user credentials $credential=Get-Credential $username=$credential.UserName $password=$credential.GetNetworkCredential().Password $securePassword = ConvertTo-SecureString $password -AsPlainText -Force ### Input Parameters $url = "https://c986.sharepoint.com/" ### References # Specify the path where the dll's are located. Add-Type -Path "c:Program FilesCommon Filesmicrosoft sharedWeb Server Extensions15ISAPIMicrosoft.SharePoint.Client.dll" Add-Type -Path "c:Program FilesCommon Filesmicrosoft sharedWeb Server Extensions15ISAPIMicrosoft.SharePoint.Client.Runtime.dll" ### Function function DeleteFileVersion() { # Connect to SharePoint Online and get ClientContext object. $clientContext = New-Object Microsoft.SharePoint.Client.ClientContext($url) $credentials = New-Object Microsoft.SharePoint.Client.SharePointOnlineCredentials($username, $securePassword) $clientContext.Credentials = $credentials # Get the SharePoint Web $web=$clientContext.Web;
- 141. ©2014 C# CORNER. SHARE THIS DOCUMENT AS IT IS. PLEASE DO NOT REPRODUCE, REPUBLISH, CHANGE OR COPY. # Get the list by title $list=$clientContext.Web.Lists.GetByTitle("Documents") # Get an item by ID $item=$list.GetItemById(23) # Delete the file version object with the specified version Label $version=$item.File.Versions.DeleteByLabel("0.2") # Execute the query $clientContext.ExecuteQuery(); } ### Calling the function DeleteFileVersion Result Specified version of the file is deleted successfully. 10.5 How to restore a specific file version for the document In this example you will see how to restore a specific file version for the document using the .Net Client Side object Model in Powershell scripts. Create the ps1 file a) Open a new text file and paste in the following script. b) Save the file as VijaiAnand_CSOM_Powershell_Office365.ps1 in the C:Vijai folder (a folder named Vijai is created in the C drive). c) Open SharePoint 2013 Management Shell as an administrator. d) Type cd “c:Vijai” in the management shell and then click on Enter. e) Type .VijaiAnand_CSOM_Powershell_Office365.ps1 in the management shell and then click on Enter. f) Enter the Office 365 username ([email protected]) and password (*********) in the Credentials pop up. Click on Ok. Script ### Get the user credentials
- 142. ©2014 C# CORNER. SHARE THIS DOCUMENT AS IT IS. PLEASE DO NOT REPRODUCE, REPUBLISH, CHANGE OR COPY. $credential=Get-Credential $username=$credential.UserName $password=$credential.GetNetworkCredential().Password $securePassword = ConvertTo-SecureString $password -AsPlainText -Force ### Input Parameters $url = "https://c986.sharepoint.com/" ### References # Specify the path where the dll's are located. Add-Type -Path "c:Program FilesCommon Filesmicrosoft sharedWeb Server Extensions15ISAPIMicrosoft.SharePoint.Client.dll" Add-Type -Path "c:Program FilesCommon Filesmicrosoft sharedWeb Server Extensions15ISAPIMicrosoft.SharePoint.Client.Runtime.dll" ### Function function RestoreFileVersion() { # Connect to SharePoint Online and get ClientContext object. $clientContext = New-Object Microsoft.SharePoint.Client.ClientContext($url) $credentials = New-Object Microsoft.SharePoint.Client.SharePointOnlineCredentials($username, $securePassword) $clientContext.Credentials = $credentials # Get the SharePoint Web $web=$clientContext.Web; # Get the list by title $list=$clientContext.Web.Lists.GetByTitle("Documents") # Get an item by ID $item=$list.GetItemById(23) # Restore the file version $version=$item.File.Versions.RestoreByLabel("1.0") # Execute the query $clientContext.ExecuteQuery(); }
- 143. ©2014 C# CORNER. SHARE THIS DOCUMENT AS IT IS. PLEASE DO NOT REPRODUCE, REPUBLISH, CHANGE OR COPY. ### Calling the function RestoreFileVersion Result Specified version of the file is restored successfully. 10.6 How to check if the file version is a current version for the document In this example you will see how to determine if the file version is a current version for the document using the .Net Client Side object Model in Powershell scripts. Create the ps1 file a) Open a new text file and paste in the following script. b) Save the file as VijaiAnand_CSOM_Powershell_Office365.ps1 in the C:Vijai folder (a folder named Vijai is created in the C drive). c) Open SharePoint 2013 Management Shell as an administrator. d) Type cd “c:Vijai” in the management shell and then click on Enter. e) Type .VijaiAnand_CSOM_Powershell_Office365.ps1 in the management shell and then click on Enter. f) Enter the Office 365 username ([email protected]) and password (*********) in the Credentials pop up. Click on Ok. Script ### Get the user credentials $credential=Get-Credential $username=$credential.UserName $password=$credential.GetNetworkCredential().Password $securePassword = ConvertTo-SecureString $password -AsPlainText -Force ### Input Parameters $url = "https://c986.sharepoint.com/" ### References # Specify the path where the dll's are located.
- 144. ©2014 C# CORNER. SHARE THIS DOCUMENT AS IT IS. PLEASE DO NOT REPRODUCE, REPUBLISH, CHANGE OR COPY. Add-Type -Path "c:Program FilesCommon Filesmicrosoft sharedWeb Server Extensions15ISAPIMicrosoft.SharePoint.Client.dll" Add-Type -Path "c:Program FilesCommon Filesmicrosoft sharedWeb Server Extensions15ISAPIMicrosoft.SharePoint.Client.Runtime.dll" ### Function function IsCurrentVersion() { # Connect to SharePoint Online and get ClientContext object. $clientContext = New-Object Microsoft.SharePoint.Client.ClientContext($url) $credentials = New-Object Microsoft.SharePoint.Client.SharePointOnlineCredentials($username, $securePassword) $clientContext.Credentials = $credentials # Get the SharePoint Web $web=$clientContext.Web; # Get the list by title $list=$clientContext.Web.Lists.GetByTitle("Documents") # Get an item by ID $item=$list.GetItemById(23) # Get aall the versions for an item $versionColl=$item.File.Versions; $clientContext.Load($versionColl) # Execute the query $clientContext.ExecuteQuery(); #Loop through all the versions foreach($version in $versionColl) { if($version.IsCurrentVersion) { # Display the version Label and CheckInComment write-host -ForegroundColor Yellow "Current Version of the file: " $version.VersionLabel $cbreak; } } }
- 145. ©2014 C# CORNER. SHARE THIS DOCUMENT AS IT IS. PLEASE DO NOT REPRODUCE, REPUBLISH, CHANGE OR COPY. ### Calling the function IsCurrentVersion Result Figure11.6.1: Check if the version is current version 10.7 How to delete all the file versions for the document In this example you will see how to delete all the file versions for the document using the .Net Client Side object Model in Powershell scripts. Create the ps1 file a) Open a new text file and paste in the following script. b) Save the file as VijaiAnand_CSOM_Powershell_Office365.ps1 in the C:Vijai folder (a folder named Vijai is created in the C drive). c) Open SharePoint 2013 Management Shell as an administrator. d) Type cd “c:Vijai” in the management shell and then click on Enter. e) Type .VijaiAnand_CSOM_Powershell_Office365.ps1 in the management shell and then click on Enter. f) Enter the Office 365 username ([email protected]) and password (*********) in the Credentials pop up. Click on Ok. Script ### Get the user credentials $credential=Get-Credential $username=$credential.UserName $password=$credential.GetNetworkCredential().Password $securePassword = ConvertTo-SecureString $password -AsPlainText -Force
- 146. ©2014 C# CORNER. SHARE THIS DOCUMENT AS IT IS. PLEASE DO NOT REPRODUCE, REPUBLISH, CHANGE OR COPY. ### Input Parameters $url = "https://c986.sharepoint.com/" ### References # Specify the path where the dll's are located. Add-Type -Path "c:Program FilesCommon Filesmicrosoft sharedWeb Server Extensions15ISAPIMicrosoft.SharePoint.Client.dll" Add-Type -Path "c:Program FilesCommon Filesmicrosoft sharedWeb Server Extensions15ISAPIMicrosoft.SharePoint.Client.Runtime.dll" ### Function function DeleteAllVersions() { # Connect to SharePoint Online and get ClientContext object. $clientContext = New-Object Microsoft.SharePoint.Client.ClientContext($url) $credentials = New-Object Microsoft.SharePoint.Client.SharePointOnlineCredentials($username, $securePassword) $clientContext.Credentials = $credentials # Get the SharePoint Web $web=$clientContext.Web; # Get the list by title $list=$clientContext.Web.Lists.GetByTitle("Documents") # Get an item by ID $item=$list.GetItemById(23) # Delete all the versions $item.File.Versions.DeleteAll(); # Execute the query $clientContext.ExecuteQuery(); } ### Calling the function DeleteAllVersions
- 147. ©2014 C# CORNER. SHARE THIS DOCUMENT AS IT IS. PLEASE DO NOT REPRODUCE, REPUBLISH, CHANGE OR COPY. Result All the file versions for the document are deleted successfully. Perform SharePoint group tasks using CSOM in Powershell script In this section you will see how to do group related tasks using the SharePoint 2013 .Net Client Side Object Model in Powershell scripts. 10.8 How to get all the site groups In this example you will see how to get all the site groups using the .Net Client Side Object Model in Powershell scripts. Create the ps1 file a) Open a new text file and paste in the following script. b) Save the file as VijaiAnand_CSOM_Powershell_Office365.ps1 in the C:Vijai folder (a folder named Vijai is created in the C drive). c) Open SharePoint 2013 Management Shell as an administrator. d) Type cd “c:Vijai” in the management shell and then click on Enter. e) Type .VijaiAnand_CSOM_Powershell_Office365.ps1 in the management shell and then click on Enter. f) Enter the Office 365 username ([email protected]) and password (*********) in the Credentials pop up. Click on Ok. Script ### Get the user credentials $credential=Get-Credential $username=$credential.UserName $password=$credential.GetNetworkCredential().Password $securePassword = ConvertTo-SecureString $password -AsPlainText -Force ### Input Parameters $url = "https://c986.sharepoint.com/" ### References
- 148. ©2014 C# CORNER. SHARE THIS DOCUMENT AS IT IS. PLEASE DO NOT REPRODUCE, REPUBLISH, CHANGE OR COPY. # Specify the path where the dll's are located. Add-Type -Path "c:Program FilesCommon Filesmicrosoft sharedWeb Server Extensions15ISAPIMicrosoft.SharePoint.Client.dll" Add-Type -Path "c:Program FilesCommon Filesmicrosoft sharedWeb Server Extensions15ISAPIMicrosoft.SharePoint.Client.Runtime.dll" ### Function function GetSiteGroups() { # Connect to SharePoint Online and get ClientContext object. $clientContext = New-Object Microsoft.SharePoint.Client.ClientContext($url) $credentials = New-Object Microsoft.SharePoint.Client.SharePointOnlineCredentials($username, $securePassword) $clientContext.Credentials = $credentials # Get the SharePoint web $web=$clientContext.Web; # Get all the site groups $groupColl=$web.SiteGroups; $clientContext.Load($groupColl); # Execute the query $clientContext.ExecuteQuery(); # Loop through all the site groups foreach($group in $groupColl) { # Display the group name Write-Host -ForegroundColor Green $group.Title } } ### Calling the function GetSiteGroups Result
- 149. ©2014 C# CORNER. SHARE THIS DOCUMENT AS IT IS. PLEASE DO NOT REPRODUCE, REPUBLISH, CHANGE OR COPY. Figure12.1.1: Get all the site groups 10.9 How to create a new site group In this example you will see how to create a new site group using the .Net Client Side Object Model in Powershell scripts. Create the ps1 file a) Open a new text file and paste in the following script. b) Save the file as VijaiAnand_CSOM_Powershell_Office365.ps1 in the C:Vijai folder (a folder named Vijai is created in the C drive). c) Open SharePoint 2013 Management Shell as an administrator. d) Type cd “c:Vijai” in the management shell and then click on Enter. e) Type .VijaiAnand_CSOM_Powershell_Office365.ps1 in the management shell and then click on Enter. f) Enter the Office 365 username ([email protected]) and password (*********) in the Credentials pop up. Click on Ok. Script ### Get the user credentials $credential=Get-Credential $username=$credential.UserName $password=$credential.GetNetworkCredential().Password $securePassword = ConvertTo-SecureString $password -AsPlainText -Force ### Input Parameters $url = "https://c986.sharepoint.com/"
- 150. ©2014 C# CORNER. SHARE THIS DOCUMENT AS IT IS. PLEASE DO NOT REPRODUCE, REPUBLISH, CHANGE OR COPY. ### References # Specify the path where the dll's are located. Add-Type -Path "c:Program FilesCommon Filesmicrosoft sharedWeb Server Extensions15ISAPIMicrosoft.SharePoint.Client.dll" Add-Type -Path "c:Program FilesCommon Filesmicrosoft sharedWeb Server Extensions15ISAPIMicrosoft.SharePoint.Client.Runtime.dll" ### Function function CreateGroup() { # Connect to SharePoint Online and get ClientContext object. $clientContext = New-Object Microsoft.SharePoint.Client.ClientContext($url) $credentials = New-Object Microsoft.SharePoint.Client.SharePointOnlineCredentials($username, $securePassword) $clientContext.Credentials = $credentials # Get the SharePoint web $web=$clientContext.Web; # Get all the site groups $groupColl=$web.SiteGroups; # Create a new site group $groupCreationInfo=New-Object Microsoft.SharePoint.Client.groupCreationInformation; $groupCreationInfo.Title="Vijai Custom Group"; $groupCreationInfo.Description= " Custom group created using Powershell"; $newGroup=$groupColl.Add($groupCreationInfo); $clientContext.Load($newGroup); # Execute the query $clientContext.ExecuteQuery(); # Display the new group name Write-Host -ForegroundColor Green "New group created successfully: " $newGroup.Title } ### Calling the function CreateGroup
- 151. ©2014 C# CORNER. SHARE THIS DOCUMENT AS IT IS. PLEASE DO NOT REPRODUCE, REPUBLISH, CHANGE OR COPY. Result Figure12.2.1: Create a new site group 10.10 How to set the user as owner for the site group In this example you will see how to set the user as owner for the site group using the .Net Client Side Object Model in Powershell scripts. Create the ps1 file a) Open a new text file and paste in the following script. b) Save the file as VijaiAnand_CSOM_Powershell_Office365.ps1 in the C:Vijai folder (a folder named Vijai is created in the C drive). c) Open SharePoint 2013 Management Shell as an administrator. d) Type cd “c:Vijai” in the management shell and then click on Enter. e) Type .VijaiAnand_CSOM_Powershell_Office365.ps1 in the management shell and then click on Enter. f) Enter the Office 365 username ([email protected]) and password (*********) in the Credentials pop up. Click on Ok. Script ### Get the user credentials $credential=Get-Credential $username=$credential.UserName $password=$credential.GetNetworkCredential().Password $securePassword = ConvertTo-SecureString $password -AsPlainText -Force ### Input Parameters
- 152. ©2014 C# CORNER. SHARE THIS DOCUMENT AS IT IS. PLEASE DO NOT REPRODUCE, REPUBLISH, CHANGE OR COPY. $url = "https://c986.sharepoint.com/" ### References # Specify the path where the dll's are located. Add-Type -Path "c:Program FilesCommon Filesmicrosoft sharedWeb Server Extensions15ISAPIMicrosoft.SharePoint.Client.dll" Add-Type -Path "c:Program FilesCommon Filesmicrosoft sharedWeb Server Extensions15ISAPIMicrosoft.SharePoint.Client.Runtime.dll" ### Function function SetGroupOwner() { # Connect to SharePoint Online and get ClientContext object. $clientContext = New-Object Microsoft.SharePoint.Client.ClientContext($url) $credentials = New-Object Microsoft.SharePoint.Client.SharePointOnlineCredentials($username, $securePassword) $clientContext.Credentials = $credentials # Get the SharePoint web $web=$clientContext.Web; $ownerUser=$web.EnsureUser("i:0#.f|membership|[email protected]"); # Set the user as owner for the site group $group=$web.SiteGroups.GetByName("Owners"); $group.Owner=$ownerUser; # Update the group $group.Update(); $clientContext.Load($group); # Execute the query $clientContext.ExecuteQuery(); } ### Calling the function SetGroupOwner Result
- 153. ©2014 C# CORNER. SHARE THIS DOCUMENT AS IT IS. PLEASE DO NOT REPRODUCE, REPUBLISH, CHANGE OR COPY. Figure12.3.1: Set the user as owner for the site group 10.11 How to set the group as owner for the site group In this example you will see how to set the group as owner for the site group using the .Net Client Side Object Model in Powershell scripts. Create the ps1 file a) Open a new text file and paste in the following script. b) Save the file as VijaiAnand_CSOM_Powershell_Office365.ps1 in the C:Vijai folder (a folder named Vijai is created in the C drive). c) Open SharePoint 2013 Management Shell as an administrator. d) Type cd “c:Vijai” in the management shell and then click on Enter. e) Type .VijaiAnand_CSOM_Powershell_Office365.ps1 in the management shell and then click on Enter. f) Enter the Office 365 username ([email protected]) and password (*********) in the Credentials pop up. Click on Ok. Script ### Input Parameters $url = "https://c986.sharepoint.com/"
- 154. ©2014 C# CORNER. SHARE THIS DOCUMENT AS IT IS. PLEASE DO NOT REPRODUCE, REPUBLISH, CHANGE OR COPY. ### References # Specify the path where the dll's are located. Add-Type -Path "c:Program FilesCommon Filesmicrosoft sharedWeb Server Extensions15ISAPIMicrosoft.SharePoint.Client.dll" Add-Type -Path "c:Program FilesCommon Filesmicrosoft sharedWeb Server Extensions15ISAPIMicrosoft.SharePoint.Client.Runtime.dll" ### Function function SetGroupOwner() { # Connect to SharePoint Online and get ClientContext object. $clientContext = New-Object Microsoft.SharePoint.Client.ClientContext($url) $credentials = New-Object Microsoft.SharePoint.Client.SharePointOnlineCredentials($username, $securePassword) $clientContext.Credentials = $credentials # Get the SharePoint web $web=$clientContext.Web; # Get the specific site group by name $ownerGroup=$web.SiteGroups.GetByName("Owners"); # Set the group as owner for the site group $group=$web.SiteGroups.GetByName("Vijai Custom Group"); $group.Owner=$ownerGroup; # Update the group $group.Update(); # Execute the query $clientContext.ExecuteQuery(); } ### Calling the function SetGroupOwner Result
- 155. ©2014 C# CORNER. SHARE THIS DOCUMENT AS IT IS. PLEASE DO NOT REPRODUCE, REPUBLISH, CHANGE OR COPY. Figure12.4.1: Set the group as owner for the site group 10.12 How to get all the users from the site group In this example you will see how to get all the users from the site group using the .Net Client Side Object Model in Powershell scripts. Create the ps1 file a) Open a new text file and paste in the following script. b) Save the file as VijaiAnand_CSOM_Powershell_Office365.ps1 in the C:Vijai folder (a folder named Vijai is created in the C drive). c) Open SharePoint 2013 Management Shell as an administrator. d) Type cd “c:Vijai” in the management shell and then click on Enter. e) Type .VijaiAnand_CSOM_Powershell_Office365.ps1 in the management shell and then click on Enter. f) Enter the Office 365 username ([email protected]) and password (*********) in the Credentials pop up. Click on Ok. Script ### Get the user credentials $credential=Get-Credential $username=$credential.UserName $password=$credential.GetNetworkCredential().Password $securePassword = ConvertTo-SecureString $password -AsPlainText -Force
- 156. ©2014 C# CORNER. SHARE THIS DOCUMENT AS IT IS. PLEASE DO NOT REPRODUCE, REPUBLISH, CHANGE OR COPY. ### Input Parameters $url = "https://c986.sharepoint.com/" ### References # Specify the path where the dll's are located. Add-Type -Path "c:Program FilesCommon Filesmicrosoft sharedWeb Server Extensions15ISAPIMicrosoft.SharePoint.Client.dll" Add-Type -Path "c:Program FilesCommon Filesmicrosoft sharedWeb Server Extensions15ISAPIMicrosoft.SharePoint.Client.Runtime.dll" ### Function function GetUsersFromGroup() { # Connect to SharePoint Online and get ClientContext object. $clientContext = New-Object Microsoft.SharePoint.Client.ClientContext($url) $credentials = New-Object Microsoft.SharePoint.Client.SharePointOnlineCredentials($username, $securePassword) $clientContext.Credentials = $credentials # Get the SharePoint web $web=$clientContext.Web; # Get the specific site group by name $group=$web.SiteGroups.GetByName("Vijai Custom Group"); # Get all the users who belong to this specific group $userColl=$group.Users $clientContext.Load($userColl); # Execute the query $clientContext.ExecuteQuery(); # Loop through all the users foreach($user in $userColl) { # Display the user loginname Write-Host -ForegroundColor Green $user.LoginName } }
- 157. ©2014 C# CORNER. SHARE THIS DOCUMENT AS IT IS. PLEASE DO NOT REPRODUCE, REPUBLISH, CHANGE OR COPY. ### Calling the function GetUsersFromGroup Result Figure12.5.1: Get all the users from the site group 10.13 How to add a user to the site group In this example you will see how to add a user to the site group using the .Net Client Side Object Model in Powershell scripts. Create the ps1 file a) Open a new text file and paste in the following script. b) Save the file as VijaiAnand_CSOM_Powershell_Office365.ps1 in the C:Vijai folder (a folder named Vijai is created in the C drive). c) Open SharePoint 2013 Management Shell as an administrator. d) Type cd “c:Vijai” in the management shell and then click on Enter. e) Type .VijaiAnand_CSOM_Powershell_Office365.ps1 in the management shell and then click on Enter. f) Enter the Office 365 username ([email protected]) and password (*********) in the Credentials pop up. Click on Ok. Script ### Get the user credentials $credential=Get-Credential $username=$credential.UserName $password=$credential.GetNetworkCredential().Password $securePassword = ConvertTo-SecureString $password -AsPlainText -Force
- 158. ©2014 C# CORNER. SHARE THIS DOCUMENT AS IT IS. PLEASE DO NOT REPRODUCE, REPUBLISH, CHANGE OR COPY. ### Input Parameters $url = "https://c986.sharepoint.com/" ### References # Specify the path where the dll's are located. Add-Type -Path "c:Program FilesCommon Filesmicrosoft sharedWeb Server Extensions15ISAPIMicrosoft.SharePoint.Client.dll" Add-Type -Path "c:Program FilesCommon Filesmicrosoft sharedWeb Server Extensions15ISAPIMicrosoft.SharePoint.Client.Runtime.dll" ### Function function AddUserToGroup() { # Connect to SharePoint Online and get ClientContext object. $clientContext = New-Object Microsoft.SharePoint.Client.ClientContext($url) $credentials = New-Object Microsoft.SharePoint.Client.SharePointOnlineCredentials($username, $securePassword) $clientContext.Credentials = $credentials # Get the SharePoint web $web=$clientContext.Web; $user=$web.EnsureUser("i:0#.f|membership|[email protected]"); # Get the specific site group by name $group=$web.SiteGroups.GetByName("Vijai Custom Group"); # Add a user to the specific group $result=$group.Users.AddUser($user); $clientContext.Load($result); # Execute the query $clientContext.ExecuteQuery(); } ### Calling the function AddUserToGroup
- 159. ©2014 C# CORNER. SHARE THIS DOCUMENT AS IT IS. PLEASE DO NOT REPRODUCE, REPUBLISH, CHANGE OR COPY. Result Figure12.6.1: Add user to the group 10.14 How to remove a user from the site group In this example you will see how to remove a user from the site group using the .Net Client Side Object Model in Powershell scripts. Create the ps1 file a) Open a new text file and paste in the following script. b) Save the file as VijaiAnand_CSOM_Powershell_Office365.ps1 in the C:Vijai folder (a folder named Vijai is created in the C drive). c) Open SharePoint 2013 Management Shell as an administrator. d) Type cd “c:Vijai” in the management shell and then click on Enter. e) Type .VijaiAnand_CSOM_Powershell_Office365.ps1 in the management shell and then click on Enter. f) Enter the Office 365 username ([email protected]) and password (*********) in the Credentials pop up. Click on Ok. Script ### Get the user credentials $credential=Get-Credential $username=$credential.UserName $password=$credential.GetNetworkCredential().Password $securePassword = ConvertTo-SecureString $password -AsPlainText -Force ### Input Parameters
- 160. ©2014 C# CORNER. SHARE THIS DOCUMENT AS IT IS. PLEASE DO NOT REPRODUCE, REPUBLISH, CHANGE OR COPY. $url = "https://c986.sharepoint.com/" ### References # Specify the path where the dll's are located. Add-Type -Path "c:Program FilesCommon Filesmicrosoft sharedWeb Server Extensions15ISAPIMicrosoft.SharePoint.Client.dll" Add-Type -Path "c:Program FilesCommon Filesmicrosoft sharedWeb Server Extensions15ISAPIMicrosoft.SharePoint.Client.Runtime.dll" ### Function function RemoveUserFromGroup() { # Connect to SharePoint Online and get ClientContext object. $clientContext = New-Object Microsoft.SharePoint.Client.ClientContext($url) $credentials = New-Object Microsoft.SharePoint.Client.SharePointOnlineCredentials($username, $securePassword) $clientContext.Credentials = $credentials # Get the SharePoint web $web=$clientContext.Web; $user=$web.EnsureUser("i:0#.f|membership|[email protected]"); $clientContext.Load($user); # Execute the query $clientContext.ExecuteQuery(); # Get the specific site group by name $group=$web.SiteGroups.GetByName("Vijai Custom Group"); # Remove a user the specific group $group.Users.RemoveByLoginName($user.LoginName); # Execute the query $clientContext.ExecuteQuery(); } ### Calling the function RemoveUserFromGroup
- 161. ©2014 C# CORNER. SHARE THIS DOCUMENT AS IT IS. PLEASE DO NOT REPRODUCE, REPUBLISH, CHANGE OR COPY. Result The user is removed successfully from the Vijai Custom Group. 10.15 How to delete a site group In this example you will see how to delete a site group using the .Net Client Side Object Model in Powershell scripts. Create the ps1 file a) Open a new text file and paste in the following script. b) Save the file as VijaiAnand_CSOM_Powershell_Office365.ps1 in the C:Vijai folder (a folder named Vijai is created in the C drive). c) Open SharePoint 2013 Management Shell as an administrator. d) Type cd “c:Vijai” in the management shell and then click on Enter. e) Type .VijaiAnand_CSOM_Powershell_Office365.ps1 in the management shell and then click on Enter. f) Enter the Office 365 username ([email protected]) and password (*********) in the Credentials pop up. Click on Ok. Script ### Get the user credentials $credential=Get-Credential $username=$credential.UserName $password=$credential.GetNetworkCredential().Password $securePassword = ConvertTo-SecureString $password -AsPlainText -Force ### Input Parameters $url = "https://c986.sharepoint.com/" ### References # Specify the path where the dll's are located. Add-Type -Path "c:Program FilesCommon Filesmicrosoft sharedWeb Server Extensions15ISAPIMicrosoft.SharePoint.Client.dll"
- 162. ©2014 C# CORNER. SHARE THIS DOCUMENT AS IT IS. PLEASE DO NOT REPRODUCE, REPUBLISH, CHANGE OR COPY. Add-Type -Path "c:Program FilesCommon Filesmicrosoft sharedWeb Server Extensions15ISAPIMicrosoft.SharePoint.Client.Runtime.dll" ### Function function RemoveGroupFromWeb() { # Connect to SharePoint Online and get ClientContext object. $clientContext = New-Object Microsoft.SharePoint.Client.ClientContext($url) $credentials = New-Object Microsoft.SharePoint.Client.SharePointOnlineCredentials($username, $securePassword) $clientContext.Credentials = $credentials # Get the SharePoint web $web=$clientContext.Web; # Get the specific site group by name $group=$web.SiteGroups.GetByName("Vijai Custom Group"); # Remove a group from the web $web.SiteGroups.Remove($group); # Execute the query $clientContext.ExecuteQuery(); } ### Calling the function RemoveGroupFromWeb Result The specified site group is deleted successfully. 11 Perform SharePoint role tasks using CSOM in Powershell script In this section you will see how to do role related tasks using the SharePoint 2013 .Net Client Side Object Model in Powershell scripts.
- 163. ©2014 C# CORNER. SHARE THIS DOCUMENT AS IT IS. PLEASE DO NOT REPRODUCE, REPUBLISH, CHANGE OR COPY. 11.1 How to get all the permission levels from the website In this example you will see how to get all the roles or permission levels from the website using the .Net Client Side object Model in Powershell scripts. Create the ps1 file a) Open a new text file and paste in the following script. b) Save the file as VijaiAnand_CSOM_Powershell_Office365.ps1 in the C:Vijai folder (a folder named Vijai is created in the C drive). c) Open SharePoint 2013 Management Shell as an administrator. d) Type cd “c:Vijai” in the management shell and then click on Enter. e) Type .VijaiAnand_CSOM_Powershell_Office365.ps1 in the management shell and then click on Enter. f) Enter the Office 365 username ([email protected]) and password (*********) in the Credentials pop up. Click on Ok. Script ### Get the user credentials $credential=Get-Credential $username=$credential.UserName $password=$credential.GetNetworkCredential().Password $securePassword = ConvertTo-SecureString $password -AsPlainText -Force ### Input Parameters $url = "https://c986.sharepoint.com/" ### References # Specify the path where the dll's are located. Add-Type -Path "c:Program FilesCommon Filesmicrosoft sharedWeb Server Extensions15ISAPIMicrosoft.SharePoint.Client.dll" Add-Type -Path "c:Program FilesCommon Filesmicrosoft sharedWeb Server Extensions15ISAPIMicrosoft.SharePoint.Client.Runtime.dll" ### Function function GetPermissionLevels()
- 164. ©2014 C# CORNER. SHARE THIS DOCUMENT AS IT IS. PLEASE DO NOT REPRODUCE, REPUBLISH, CHANGE OR COPY. { # Connect to SharePoint Online and get ClientContext object. $clientContext = New-Object Microsoft.SharePoint.Client.ClientContext($url) $credentials = New-Object Microsoft.SharePoint.Client.SharePointOnlineCredentials($username, $securePassword) $clientContext.Credentials = $credentials # Get the SharePoint Web $web= $clientContext.Web; # Get all the permission levels $roleDefColl=$web.RoleDefinitions; $clientContext.Load($roleDefColl); # Execute the query $clientContext.ExecuteQuery(); # Loop through all the role definitions foreach($roleDef in $roleDefColl) { Write-Host -ForegroundColor Green $roleDef.Name } } ### Calling the function GetPermissionLevels Result Navigate to the SharePoint site. Click on Settings and then click on Site Settings. Click on Site Permissions available under the Users and Permissions section. Click on Permission Levels available in the ribbon interface. You will see all the permission levels available in the website.
- 165. ©2014 C# CORNER. SHARE THIS DOCUMENT AS IT IS. PLEASE DO NOT REPRODUCE, REPUBLISH, CHANGE OR COPY. Figure13.1.1: Get all the roles 11.2 How to create a permission level in the website In this example you will see how to create a new role or permission level in the website using the .Net Client Side object Model in Powershell scripts. Create the ps1 file a) Open a new text file and paste in the following script. b) Save the file as VijaiAnand_CSOM_Powershell_Office365.ps1 in the C:Vijai folder (a folder named Vijai is created in the C drive). c) Open SharePoint 2013 Management Shell as an administrator. d) Type cd “c:Vijai” in the management shell and then click on Enter. e) Type .VijaiAnand_CSOM_Powershell_Office365.ps1 in the management shell and then click on Enter. f) Enter the Office 365 username ([email protected]) and password (*********) in the Credentials pop up. Click on Ok. Script ### Get the user credentials $credential=Get-Credential $username=$credential.UserName $password=$credential.GetNetworkCredential().Password $securePassword = ConvertTo-SecureString $password -AsPlainText -Force ### Input Parameters
- 166. ©2014 C# CORNER. SHARE THIS DOCUMENT AS IT IS. PLEASE DO NOT REPRODUCE, REPUBLISH, CHANGE OR COPY. $url = "https://c986.sharepoint.com/" ### References # Specify the path where the dll's are located. Add-Type -Path "c:Program FilesCommon Filesmicrosoft sharedWeb Server Extensions15ISAPIMicrosoft.SharePoint.Client.dll" Add-Type -Path "c:Program FilesCommon Filesmicrosoft sharedWeb Server Extensions15ISAPIMicrosoft.SharePoint.Client.Runtime.dll" ### Function function CreatePermissionLevel() { # Connect to SharePoint Online and get ClientContext object. $clientContext = New-Object Microsoft.SharePoint.Client.ClientContext($url) $credentials = New-Object Microsoft.SharePoint.Client.SharePointOnlineCredentials($username, $securePassword) $clientContext.Credentials = $credentials # Get the SharePoint Web $web= $clientContext.Web; # Base Permissions that has to be added to the role definition $permissions = New-Object Microsoft.SharePoint.Client.BasePermissions; $permissions.Set([Microsoft.SharePoint.Client.PermissionKind]::ViewListItems); $permissions.Set([Microsoft.SharePoint.Client.PermissionKind]::ViewVersions); # Initialize the role definition $creationInfo = New-Object Microsoft.SharePoint.Client.RoleDefinitionCreationInformation; $creationInfo.Name = "My role"; $creationInfo.Description = "My role created using powershell"; $creationInfo.BasePermissions = $permissions; # Add the role definitin to the site $web.RoleDefinitions.Add($creationInfo); # Execute the query $clientContext.ExecuteQuery(); }
- 167. ©2014 C# CORNER. SHARE THIS DOCUMENT AS IT IS. PLEASE DO NOT REPRODUCE, REPUBLISH, CHANGE OR COPY. ### Calling the function CreatePermissionLevel Result Navigate to the SharePoint site. Click on Settings and then click on Site Settings. Click on Site Permissions available under the Users and Permissions section. Click on Permission Levels available in the ribbon interface. You will see a new role or permission level is created successfully. 11.3 How to update the permission level in the website In this example you will see how to update the permission level in the website using the .Net Client Side object Model in Powershell scripts. Create the ps1 file a) Open a new text file and paste in the following script. b) Save the file as VijaiAnand_CSOM_Powershell_Office365.ps1 in the C:Vijai folder (a folder named Vijai is created in the C drive). c) Open SharePoint 2013 Management Shell as an administrator. d) Type cd “c:Vijai” in the management shell and then click on Enter. e) Type .VijaiAnand_CSOM_Powershell_Office365.ps1 in the management shell and then click on Enter. f) Enter the Office 365 username ([email protected]) and password (*********) in the Credentials pop up. Click on Ok. Script ### Get the user credentials $credential=Get-Credential $username=$credential.UserName $password=$credential.GetNetworkCredential().Password $securePassword = ConvertTo-SecureString $password -AsPlainText -Force ### Input Parameters $url = "https://c986.sharepoint.com/" ### References
- 168. ©2014 C# CORNER. SHARE THIS DOCUMENT AS IT IS. PLEASE DO NOT REPRODUCE, REPUBLISH, CHANGE OR COPY. # Specify the path where the dll's are located. Add-Type -Path "c:Program FilesCommon Filesmicrosoft sharedWeb Server Extensions15ISAPIMicrosoft.SharePoint.Client.dll" Add-Type -Path "c:Program FilesCommon Filesmicrosoft sharedWeb Server Extensions15ISAPIMicrosoft.SharePoint.Client.Runtime.dll" ### Function function UpdatePermissionLevel() { # Connect to SharePoint Online and get ClientContext object. $clientContext = New-Object Microsoft.SharePoint.Client.ClientContext($url) $credentials = New-Object Microsoft.SharePoint.Client.SharePointOnlineCredentials($username, $securePassword) $clientContext.Credentials = $credentials # Get the SharePoint Web $web= $clientContext.Web; # Get the role definition by name $roleDef=$web.RoleDefinitions.GetByName("My Role"); # Update the description $roleDef.Description = " Description updated"; # Add the permissions $permissions = New-Object Microsoft.SharePoint.Client.BasePermissions; $permissions.Set([Microsoft.SharePoint.Client.PermissionKind]::ApproveItems); $permissions.Set([Microsoft.SharePoint.Client.PermissionKind]::CreateAlerts); $roleDef.BasePermissions = $permissions; # Update the permission level $roleDef.Update(); $clientContext.Load($roleDef); # Execute the query $clientContext.ExecuteQuery(); } ### Calling the function UpdatePermissionLevel
- 169. ©2014 C# CORNER. SHARE THIS DOCUMENT AS IT IS. PLEASE DO NOT REPRODUCE, REPUBLISH, CHANGE OR COPY. Result Navigate to the SharePoint site. Click on Settings and then click on Site Settings. Click on Site Permissions available under the Users and Permissions section. Click on Permission Levels available in the ribbon interface. Click on My role permission level. You will see the specified role or permission level is updated successfully as shown in Figure 13.3.1. Figure13.3.1: Update the role 11.4 How to remove the permissions from the permission level In this example you will see how to remove the permissions from the permission level using the .Net Client Side object Model in Powershell scripts. Create the ps1 file a) Open a new text file and paste in the following script. b) Save the file as VijaiAnand_CSOM_Powershell_Office365.ps1 in the C:Vijai folder (a folder named Vijai is created in the C drive). c) Open SharePoint 2013 Management Shell as an administrator. d) Type cd “c:Vijai” in the management shell and then click on Enter. e) Type .VijaiAnand_CSOM_Powershell_Office365.ps1 in the management shell and then click on Enter.
- 170. ©2014 C# CORNER. SHARE THIS DOCUMENT AS IT IS. PLEASE DO NOT REPRODUCE, REPUBLISH, CHANGE OR COPY. f) Enter the Office 365 username ([email protected]) and password (*********) in the Credentials pop up. Click on Ok. Script ### Get the user credentials $credential=Get-Credential $username=$credential.UserName $password=$credential.GetNetworkCredential().Password $securePassword = ConvertTo-SecureString $password -AsPlainText -Force ### Input Parameters $url = "https://c986.sharepoint.com/" ### References # Specify the path where the dll's are located. Add-Type -Path "c:Program FilesCommon Filesmicrosoft sharedWeb Server Extensions15ISAPIMicrosoft.SharePoint.Client.dll" Add-Type -Path "c:Program FilesCommon Filesmicrosoft sharedWeb Server Extensions15ISAPIMicrosoft.SharePoint.Client.Runtime.dll" ### Function function RemovePermission() { # Connect to SharePoint Online and get ClientContext object. $clientContext = New-Object Microsoft.SharePoint.Client.ClientContext($url) $credentials = New-Object Microsoft.SharePoint.Client.SharePointOnlineCredentials($username, $securePassword) $clientContext.Credentials = $credentials # Get the SharePoint Web $web= $clientContext.Web; # Get the role definition by name $roleDef=$web.RoleDefinitions.GetByName("My Role"); # remove the permissions
- 171. ©2014 C# CORNER. SHARE THIS DOCUMENT AS IT IS. PLEASE DO NOT REPRODUCE, REPUBLISH, CHANGE OR COPY. $permissions = New-Object Microsoft.SharePoint.Client.BasePermissions; $permissions.Clear([Microsoft.SharePoint.Client.PermissionKind]::ApproveItems); $roleDef.BasePermissions = $permissions; # Update the permission level $roleDef.Update(); $clientContext.Load($roleDef); # Execute the query $clientContext.ExecuteQuery(); } ### Calling the function RemovePermission Result Navigate to the SharePoint site. Click on Settings and then click on Site Settings. Click on Site Permissions available under the Users and Permissions section. Click on Permission Levels available in the ribbon interface. Click on My role permission level. You will see the permissions are removed successfully from the role. 11.5 How to delete the permission level from the website In this example you will see how to delete the role or permission level from the website using the .Net Client Side object Model in Powershell scripts. Create the ps1 file a) Open a new text file and paste in the following script. b) Save the file as VijaiAnand_CSOM_Powershell_Office365.ps1 in the C:Vijai folder (a folder named Vijai is created in the C drive). c) Open SharePoint 2013 Management Shell as an administrator. d) Type cd “c:Vijai” in the management shell and then click on Enter. e) Type .VijaiAnand_CSOM_Powershell_Office365.ps1 in the management shell and then click on Enter. f) Enter the Office 365 username ([email protected]) and password (*********) in the Credentials pop up. Click on Ok. Script ### Get the user credentials
- 172. ©2014 C# CORNER. SHARE THIS DOCUMENT AS IT IS. PLEASE DO NOT REPRODUCE, REPUBLISH, CHANGE OR COPY. $credential=Get-Credential $username=$credential.UserName $password=$credential.GetNetworkCredential().Password $securePassword = ConvertTo-SecureString $password -AsPlainText -Force ### Input Parameters $url = "https://c986.sharepoint.com/" ### References # Specify the path where the dll's are located. Add-Type -Path "c:Program FilesCommon Filesmicrosoft sharedWeb Server Extensions15ISAPIMicrosoft.SharePoint.Client.dll" Add-Type -Path "c:Program FilesCommon Filesmicrosoft sharedWeb Server Extensions15ISAPIMicrosoft.SharePoint.Client.Runtime.dll" ### Function function DeletePermissionLevel() { # Connect to SharePoint Online and get ClientContext object. $clientContext = New-Object Microsoft.SharePoint.Client.ClientContext($url) $credentials = New-Object Microsoft.SharePoint.Client.SharePointOnlineCredentials($username, $securePassword) $clientContext.Credentials = $credentials # Get the SharePoint Web $web= $clientContext.Web; # Get the role definition by name $roleDef=$web.RoleDefinitions.GetByName("My Role"); # Delete the role definition $roleDef.DeleteObject(); # Execute the query $clientContext.ExecuteQuery(); } ### Calling the function
- 173. ©2014 C# CORNER. SHARE THIS DOCUMENT AS IT IS. PLEASE DO NOT REPRODUCE, REPUBLISH, CHANGE OR COPY. DeletePermissionLevel Result Navigate to the SharePoint site. Click on Settings and then click on Site Settings. Click on Site Permissions available under the Users and Permissions section. Click on Permission Levels available in the ribbon interface. You will see the specified role or permission level is successfully deleted from the website. 12 Perform SharePoint Taxonomy related tasks using CSOM in Powershell Script In this section you will see how to perform taxonomy related tasks using the SharePoint 2013 .Net Client Side Object Model in Powershell scripts. 12.1 How to get all the Term Stores for the provided site In this example you will see how to get all the termstores using the .Net Client Side Object Model in Powershell scripts. Create the ps1 file a) Open a new text file and paste in the following script. b) Save the file as VijaiAnand_CSOM_Powershell_Office365.ps1 in the C:Vijai folder (a folder named Vijai is created in the C drive). c) Open SharePoint 2013 Management Shell as an administrator. d) Type cd “c:Vijai” in the management shell and then click on Enter. e) Type .VijaiAnand_CSOM_Powershell_Office365.ps1 in the management shell and then click on Enter. f) Enter the Office 365 username ([email protected]) and password (*********) in the Credentials pop up. Click on Ok. Script ### Get the user credentials $credential=Get-Credential $username=$credential.UserName $password=$credential.GetNetworkCredential().Password $securePassword = ConvertTo-SecureString $password -AsPlainText -Force
- 174. ©2014 C# CORNER. SHARE THIS DOCUMENT AS IT IS. PLEASE DO NOT REPRODUCE, REPUBLISH, CHANGE OR COPY. ### Input Parameters $url = "https://c986.sharepoint.com/" ### References # Specify the path where the dll's are located. Add-Type -Path "c:Program FilesCommon Filesmicrosoft sharedWeb Server Extensions15ISAPIMicrosoft.SharePoint.Client.dll" Add-Type -Path "c:Program FilesCommon Filesmicrosoft sharedWeb Server Extensions15ISAPIMicrosoft.SharePoint.Client.Runtime.dll" Add-Type -Path "c:Program FilesCommon Filesmicrosoft sharedWeb Server Extensions15ISAPIMicrosoft.SharePoint.Client.Taxonomy.dll" ### Function function GetTaxonomyStores() { # Connect to SharePoint Online and get ClientContext object. $ctx = New-Object Microsoft.SharePoint.Client.ClientContext($url) $credentials = New-Object Microsoft.SharePoint.Client.SharePointOnlineCredentials($username, $securePassword) $ctx.Credentials = $credentials $referencedAssemblies = ( "Microsoft.SharePoint.Client, Version=15.0.0.0, Culture=neutral, PublicKeyToken=71e9bce111e9429c", "Microsoft.SharePoint.Client.Runtime, Version=15.0.0.0, Culture=neutral, PublicKeyToken=71e9bce111e9429c", "Microsoft.SharePoint.Client.Taxonomy, Version=15.0.0.0, Culture=neutral, PublicKeyToken=71e9bce111e9429c", "System.Core, Version=3.5.0.0, Culture=neutral, PublicKeyToken=b77a5c561934e089") $sourceCode = @" using Microsoft.SharePoint.Client; using Microsoft.SharePoint.Client.Taxonomy; using System.Collections.Generic; using System.Linq; public static class QueryHelper
- 175. ©2014 C# CORNER. SHARE THIS DOCUMENT AS IT IS. PLEASE DO NOT REPRODUCE, REPUBLISH, CHANGE OR COPY. { public static void LoadListWithLimtedFields(ClientContext ctx, TaxonomySession taxonomySession) { ctx.Load( taxonomySession.TermStores, termStores => termStores.Include (termStore => termStore.Name) ); } } "@ Add-Type -ReferencedAssemblies $referencedAssemblies -TypeDefinition $sourceCode -Language CSharp; # Get the taxonomy session $taxonomySession=[Microsoft.SharePoint.Client.Taxonomy.TaxonomySession]::GetTaxonomyS ession($ctx); [QueryHelper]::LoadListWithLimtedFields($ctx, $taxonomySession) # Execute the query $ctx.ExecuteQuery() if($taxonomySession -ne $null) { Write-Host -ForegroundColor Green "Termstores available for the taxonomy session" foreach($termStore in $taxonomySession.TermStores) { # Display the termstore name $termStore.Name } } } ### Calling the function GetTaxonomyStores Result
- 176. ©2014 C# CORNER. SHARE THIS DOCUMENT AS IT IS. PLEASE DO NOT REPRODUCE, REPUBLISH, CHANGE OR COPY. Figure14.1.1: Get all the termstores 12.2 How to get all the groups for the termstore In this example you will see how to get all the groups for the specific termstore using the .Net Client Side Object Model in Powershell scripts. Create the ps1 file a) Open a new text file and paste in the following script. b) Save the file as VijaiAnand_CSOM_Powershell_Office365.ps1 in the C:Vijai folder (a folder named Vijai is created in the C drive). c) Open SharePoint 2013 Management Shell as an administrator. d) Type cd “c:Vijai” in the management shell and then click on Enter. e) Type .VijaiAnand_CSOM_Powershell_Office365.ps1 in the management shell and then click on Enter. f) Enter the Office 365 username ([email protected]) and password (*********) in the Credentials pop up. Click on Ok. Script ### Get the user credentials $credential=Get-Credential $username=$credential.UserName $password=$credential.GetNetworkCredential().Password $securePassword = ConvertTo-SecureString $password -AsPlainText -Force ### Input Parameters $url = "https://c986.sharepoint.com/"
- 177. ©2014 C# CORNER. SHARE THIS DOCUMENT AS IT IS. PLEASE DO NOT REPRODUCE, REPUBLISH, CHANGE OR COPY. ### References # Specify the path where the dll's are located. Add-Type -Path "c:Program FilesCommon Filesmicrosoft sharedWeb Server Extensions15ISAPIMicrosoft.SharePoint.Client.dll" Add-Type -Path "c:Program FilesCommon Filesmicrosoft sharedWeb Server Extensions15ISAPIMicrosoft.SharePoint.Client.Runtime.dll" Add-Type -Path "c:Program FilesCommon Filesmicrosoft sharedWeb Server Extensions15ISAPIMicrosoft.SharePoint.Client.Taxonomy.dll" ### Function function GetTermStoreGroups() { # Connect to SharePoint Online and get ClientContext object. $ctx = New-Object Microsoft.SharePoint.Client.ClientContext($url) $credentials = New-Object Microsoft.SharePoint.Client.SharePointOnlineCredentials($username, $securePassword) $ctx.Credentials = $credentials $referencedAssemblies = ( "Microsoft.SharePoint.Client, Version=15.0.0.0, Culture=neutral, PublicKeyToken=71e9bce111e9429c", "Microsoft.SharePoint.Client.Runtime, Version=15.0.0.0, Culture=neutral, PublicKeyToken=71e9bce111e9429c", "Microsoft.SharePoint.Client.Taxonomy, Version=15.0.0.0, Culture=neutral, PublicKeyToken=71e9bce111e9429c", "System.Core, Version=3.5.0.0, Culture=neutral, PublicKeyToken=b77a5c561934e089") $sourceCode = @" using Microsoft.SharePoint.Client; using Microsoft.SharePoint.Client.Taxonomy; using System.Collections.Generic; using System.Linq; public static class QueryHelper { public static void LoadListWithLimtedFields(ClientContext ctx, TermStore termstore) {
- 178. ©2014 C# CORNER. SHARE THIS DOCUMENT AS IT IS. PLEASE DO NOT REPRODUCE, REPUBLISH, CHANGE OR COPY. ctx.Load( termstore.Groups, termGroups => termGroups.Include (termGroup => termGroup.Name) ); } } "@ Add-Type -ReferencedAssemblies $referencedAssemblies -TypeDefinition $sourceCode -Language CSharp; # Get the taxonomy session $taxonomySession=[Microsoft.SharePoint.Client.Taxonomy.TaxonomySession]::GetTaxonomyS ession($ctx); # Get the term store by name $termstore=$taxonomySession.TermStores.GetByName("Taxonomy_DoxF1n/9qNkL60u1n5J+tQ==") ; [QueryHelper]::LoadListWithLimtedFields($ctx, $termstore) # Execute the query $ctx.ExecuteQuery() Write-Host -ForegroundColor Green "Termstore Groups:" # Loop through all the term groups for the termstore foreach($group in $termstore.Groups) { # Display the group name $group.Name } } ### Calling the function GetTermStoreGroups Result
- 179. ©2014 C# CORNER. SHARE THIS DOCUMENT AS IT IS. PLEASE DO NOT REPRODUCE, REPUBLISH, CHANGE OR COPY. Figure14.4.1: Get all the taxonomy groups 12.3 How to create a new group for the term store In this example you will see how to create a new taxonomy group for the termstore using the .Net Client Side Object Model in Powershell scripts. Create the ps1 file a) Open a new text file and paste in the following script. b) Save the file as VijaiAnand_CSOM_Powershell_Office365.ps1 in the C:Vijai folder (a folder named Vijai is created in the C drive). c) Open SharePoint 2013 Management Shell as an administrator. d) Type cd “c:Vijai” in the management shell and then click on Enter. e) Type .VijaiAnand_CSOM_Powershell_Office365.ps1 in the management shell and then click on Enter. f) Enter the Office 365 username ([email protected]) and password (*********) in the Credentials pop up. Click on Ok. Script ### Get the user credentials $credential=Get-Credential $username=$credential.UserName $password=$credential.GetNetworkCredential().Password $securePassword = ConvertTo-SecureString $password -AsPlainText -Force ### Input Parameters $url = "https://c986.sharepoint.com/" ### References # Specify the path where the dll's are located.
- 180. ©2014 C# CORNER. SHARE THIS DOCUMENT AS IT IS. PLEASE DO NOT REPRODUCE, REPUBLISH, CHANGE OR COPY. Add-Type -Path "c:Program FilesCommon Filesmicrosoft sharedWeb Server Extensions15ISAPIMicrosoft.SharePoint.Client.dll" Add-Type -Path "c:Program FilesCommon Filesmicrosoft sharedWeb Server Extensions15ISAPIMicrosoft.SharePoint.Client.Runtime.dll" Add-Type -Path "c:Program FilesCommon Filesmicrosoft sharedWeb Server Extensions15ISAPIMicrosoft.SharePoint.Client.Taxonomy.dll" ### Function function CreateTermGroup() { # Connect to SharePoint Online and get ClientContext object. $ctx = New-Object Microsoft.SharePoint.Client.ClientContext($url) $credentials = New-Object Microsoft.SharePoint.Client.SharePointOnlineCredentials($username, $securePassword) $ctx.Credentials = $credentials # Get the taxonomy session $taxonomySession=[Microsoft.SharePoint.Client.Taxonomy.TaxonomySession]::GetTaxonomyS ession($ctx); # Get the term store by name $termstore=$taxonomySession.TermStores.GetByName("Taxonomy_DoxF1n/9qNkL60u1n5J+tQ==") ; # Create a new guid for group $guid=[System.Guid]::NewGuid() # Create a new group $termGroup=$termStore.CreateGroup("NewGroup",$guid) # Commit all the changes $termStore.CommitAll(); # Execute the query $ctx.ExecuteQuery() } ### Calling the function
- 181. ©2014 C# CORNER. SHARE THIS DOCUMENT AS IT IS. PLEASE DO NOT REPRODUCE, REPUBLISH, CHANGE OR COPY. CreateTermGroup Result A new taxonomy group is created successfully as shown in Figure 14.3.1. Figure14.3.1: Create a new taxonomy group 12.4 How to delete the group from the term store In this example you will see how to delete a specific taxonomy group from the termstore using the .Net Client Side Object Model in Powershell scripts. Create the ps1 file a) Open a new text file and paste in the following script. b) Save the file as VijaiAnand_CSOM_Powershell_Office365.ps1 in the C:Vijai folder (a folder named Vijai is created in the C drive). c) Open SharePoint 2013 Management Shell as an administrator.
- 182. ©2014 C# CORNER. SHARE THIS DOCUMENT AS IT IS. PLEASE DO NOT REPRODUCE, REPUBLISH, CHANGE OR COPY. d) Type cd “c:Vijai” in the management shell and then click on Enter. e) Type .VijaiAnand_CSOM_Powershell_Office365.ps1 in the management shell and then click on Enter. f) Enter the Office 365 username ([email protected]) and password (*********) in the Credentials pop up. Click on Ok. Script ### Get the user credentials $credential=Get-Credential $username=$credential.UserName $password=$credential.GetNetworkCredential().Password $securePassword = ConvertTo-SecureString $password -AsPlainText -Force ### Input Parameters $url = "https://c986.sharepoint.com/" ### References # Specify the path where the dll's are located. Add-Type -Path "c:Program FilesCommon Filesmicrosoft sharedWeb Server Extensions15ISAPIMicrosoft.SharePoint.Client.dll" Add-Type -Path "c:Program FilesCommon Filesmicrosoft sharedWeb Server Extensions15ISAPIMicrosoft.SharePoint.Client.Runtime.dll" Add-Type -Path "c:Program FilesCommon Filesmicrosoft sharedWeb Server Extensions15ISAPIMicrosoft.SharePoint.Client.Taxonomy.dll" ### Function function DeleteTermGroup() { # Connect to SharePoint Online and get ClientContext object. $ctx = New-Object Microsoft.SharePoint.Client.ClientContext($url) $credentials = New-Object Microsoft.SharePoint.Client.SharePointOnlineCredentials($username, $securePassword) $ctx.Credentials = $credentials # Get the taxonomy session
- 183. ©2014 C# CORNER. SHARE THIS DOCUMENT AS IT IS. PLEASE DO NOT REPRODUCE, REPUBLISH, CHANGE OR COPY. $taxonomySession=[Microsoft.SharePoint.Client.Taxonomy.TaxonomySession]::GetTaxonomyS ession($ctx); # Get the term store by name $termstore=$taxonomySession.TermStores.GetByName("Taxonomy_DoxF1n/9qNkL60u1n5J+tQ==") ; # Group Guid $guid=New-Object System.Guid("4b6caff1-6f6b-4c62-87e1-2d077eb62558") # Get the term group by Guid $termGroup=$termStore.GetGroup($guid) # Delete the term group $termGroup.DeleteObject(); # Execute the query $ctx.ExecuteQuery() } ### Calling the function DeleteTermGroup Result The specified taxonomy group is deleted successfully from the termstore. 12.5 How to get all the termsets for the taxonomy group In this example you will see how to get all the termsets for the taxonomy group using the .Net Client Side Object Model in Powershell scripts. Create the ps1 file a) Open a new text file and paste in the following script. b) Save the file as VijaiAnand_CSOM_Powershell_Office365.ps1 in the C:Vijai folder (a folder named Vijai is created in the C drive). c) Open SharePoint 2013 Management Shell as an administrator. d) Type cd “c:Vijai” in the management shell and then click on Enter.
- 184. ©2014 C# CORNER. SHARE THIS DOCUMENT AS IT IS. PLEASE DO NOT REPRODUCE, REPUBLISH, CHANGE OR COPY. e) Type .VijaiAnand_CSOM_Powershell_Office365.ps1 in the management shell and then click on Enter. f) Enter the Office 365 username ([email protected]) and password (*********) in the Credentials pop up. Click on Ok. Script ### Get the user credentials $credential=Get-Credential $username=$credential.UserName $password=$credential.GetNetworkCredential().Password $securePassword = ConvertTo-SecureString $password -AsPlainText -Force ### Input Parameters $url = "https://c986.sharepoint.com/" ### References # Specify the path where the dll's are located. Add-Type -Path "c:Program FilesCommon Filesmicrosoft sharedWeb Server Extensions15ISAPIMicrosoft.SharePoint.Client.dll" Add-Type -Path "c:Program FilesCommon Filesmicrosoft sharedWeb Server Extensions15ISAPIMicrosoft.SharePoint.Client.Runtime.dll" Add-Type -Path "c:Program FilesCommon Filesmicrosoft sharedWeb Server Extensions15ISAPIMicrosoft.SharePoint.Client.Taxonomy.dll" ### Function function GetTermSets() { # Connect to SharePoint Online and get ClientContext object. $ctx = New-Object Microsoft.SharePoint.Client.ClientContext($url) $credentials = New-Object Microsoft.SharePoint.Client.SharePointOnlineCredentials($username, $securePassword) $ctx.Credentials = $credentials # Get the taxonomy session $taxonomySession=[Microsoft.SharePoint.Client.Taxonomy.TaxonomySession]::GetTaxonomyS ession($ctx);
- 185. ©2014 C# CORNER. SHARE THIS DOCUMENT AS IT IS. PLEASE DO NOT REPRODUCE, REPUBLISH, CHANGE OR COPY. # Get the term store by name $termstore=$taxonomySession.TermStores.GetByName("Taxonomy_DoxF1n/9qNkL60u1n5J+tQ==") ; # Group Guid $guid=New-Object System.Guid("da52b879-4c2c-4697-a574-ef5be1255d62") # Get the term group by Guid $termGroup=$termStore.GetGroup($guid) # Get all the termsets $termSetColl=$termGroup.TermSets; $ctx.Load($termSetColl); # Execute the query $ctx.ExecuteQuery() Write-Host -ForegroundColor Green "TermSets:" # Loop through all the term sets foreach($termSet in $termSetColl) { # Display the term set name $termSet.Name } } ### Calling the function GetTermSets Result . Figure14.5.1: Get all the termsets
- 186. ©2014 C# CORNER. SHARE THIS DOCUMENT AS IT IS. PLEASE DO NOT REPRODUCE, REPUBLISH, CHANGE OR COPY. 12.6 How to create a term set for the specified group In this example you will see how to create a new termset for the specified group using the .Net Client Side Object Model in Powershell scripts. Create the ps1 file a) Open a new text file and paste in the following script. b) Save the file as VijaiAnand_CSOM_Powershell_Office365.ps1 in the C:Vijai folder (a folder named Vijai is created in the C drive). c) Open SharePoint 2013 Management Shell as an administrator. d) Type cd “c:Vijai” in the management shell and then click on Enter. e) Type .VijaiAnand_CSOM_Powershell_Office365.ps1 in the management shell and then click on Enter. f) Enter the Office 365 username ([email protected]) and password (*********) in the Credentials pop up. Click on Ok. Script ### Get the user credentials $credential=Get-Credential $username=$credential.UserName $password=$credential.GetNetworkCredential().Password $securePassword = ConvertTo-SecureString $password -AsPlainText -Force ### Input Parameters $url = "https://c986.sharepoint.com/" ### References # Specify the path where the dll's are located. Add-Type -Path "c:Program FilesCommon Filesmicrosoft sharedWeb Server Extensions15ISAPIMicrosoft.SharePoint.Client.dll" Add-Type -Path "c:Program FilesCommon Filesmicrosoft sharedWeb Server Extensions15ISAPIMicrosoft.SharePoint.Client.Runtime.dll" Add-Type -Path "c:Program FilesCommon Filesmicrosoft sharedWeb Server Extensions15ISAPIMicrosoft.SharePoint.Client.Taxonomy.dll" ### Function
- 187. ©2014 C# CORNER. SHARE THIS DOCUMENT AS IT IS. PLEASE DO NOT REPRODUCE, REPUBLISH, CHANGE OR COPY. function CreateTermSet() { # Connect to SharePoint Online and get ClientContext object. $ctx = New-Object Microsoft.SharePoint.Client.ClientContext($url) $credentials = New-Object Microsoft.SharePoint.Client.SharePointOnlineCredentials($username, $securePassword) $ctx.Credentials = $credentials # Get the taxonomy session $taxonomySession=[Microsoft.SharePoint.Client.Taxonomy.TaxonomySession]::GetTaxonomyS ession($ctx); # Get the term store by name $termstore=$taxonomySession.TermStores.GetByName("Taxonomy_DoxF1n/9qNkL60u1n5J+tQ==") ; # Group Guid $guid=New-Object System.Guid("da52b879-4c2c-4697-a574-ef5be1255d62") # Get the term group by Guid $termGroup=$termStore.GetGroup($guid) # New termset name $termSetName = "New TermSet"; # New Term Set GUID $guid=[System.Guid]::NewGuid() # New Term Set LCID $LCID=1033; # Create a new term set $termSetColl=$termGroup.CreateTermSet($termSetName,$guid, $LCID); # Execute the query $ctx.ExecuteQuery() } ### Calling the function
- 188. ©2014 C# CORNER. SHARE THIS DOCUMENT AS IT IS. PLEASE DO NOT REPRODUCE, REPUBLISH, CHANGE OR COPY. CreateTermSet Result A new termset is created successfully for the specified taxonomy group. Figure14.6.1: Create a new term set 12.7 How to delete the term set from the specified group In this example you will see how to delete the termset from the specified group using the .Net Client Side Object Model in Powershell scripts. Create the ps1 file a) Open a new text file and paste in the following script.
- 189. ©2014 C# CORNER. SHARE THIS DOCUMENT AS IT IS. PLEASE DO NOT REPRODUCE, REPUBLISH, CHANGE OR COPY. b) Save the file as VijaiAnand_CSOM_Powershell_Office365.ps1 in the C:Vijai folder (a folder named Vijai is created in the C drive). c) Open SharePoint 2013 Management Shell as an administrator. d) Type cd “c:Vijai” in the management shell and then click on Enter. e) Type .VijaiAnand_CSOM_Powershell_Office365.ps1 in the management shell and then click on Enter. f) Enter the Office 365 username ([email protected]) and password (*********) in the Credentials pop up. Click on Ok. Script ### Get the user credentials $credential=Get-Credential $username=$credential.UserName $password=$credential.GetNetworkCredential().Password $securePassword = ConvertTo-SecureString $password -AsPlainText -Force ### Input Parameters $url = "https://c986.sharepoint.com/" ### References # Specify the path where the dll's are located. Add-Type -Path "c:Program FilesCommon Filesmicrosoft sharedWeb Server Extensions15ISAPIMicrosoft.SharePoint.Client.dll" Add-Type -Path "c:Program FilesCommon Filesmicrosoft sharedWeb Server Extensions15ISAPIMicrosoft.SharePoint.Client.Runtime.dll" Add-Type -Path "c:Program FilesCommon Filesmicrosoft sharedWeb Server Extensions15ISAPIMicrosoft.SharePoint.Client.Taxonomy.dll" ### Function function DeleteTermSet() { # Connect to SharePoint Online and get ClientContext object. $ctx = New-Object Microsoft.SharePoint.Client.ClientContext($url) $credentials = New-Object Microsoft.SharePoint.Client.SharePointOnlineCredentials($username, $securePassword) $ctx.Credentials = $credentials
- 190. ©2014 C# CORNER. SHARE THIS DOCUMENT AS IT IS. PLEASE DO NOT REPRODUCE, REPUBLISH, CHANGE OR COPY. # Get the taxonomy session $taxonomySession=[Microsoft.SharePoint.Client.Taxonomy.TaxonomySession]::GetTaxonomyS ession($ctx); # Get the term store by name $termstore=$taxonomySession.TermStores.GetByName("Taxonomy_DoxF1n/9qNkL60u1n5J+tQ==") ; # Get the term group by name $termGroup=$termStore.Groups.GetByName("Global Navigation"); # Get the term set by name $termSet = $termGroup.TermSets.GetByName("New TermSet"); # Delete the term set $termSet.DeleteObject(); # Execute the query $ctx.ExecuteQuery(); } ### Calling the function DeleteTermSet Result The termset is deleted successfully from the specified taxonomy group. 12.8 How to get all the terms for the termset In this example you will see how to get all the terms for the termset using the .Net Client Side Object Model in Powershell scripts. Create the ps1 file a) Open a new text file and paste in the following script.
- 191. ©2014 C# CORNER. SHARE THIS DOCUMENT AS IT IS. PLEASE DO NOT REPRODUCE, REPUBLISH, CHANGE OR COPY. b) Save the file as VijaiAnand_CSOM_Powershell_Office365.ps1 in the C:Vijai folder (a folder named Vijai is created in the C drive). c) Open SharePoint 2013 Management Shell as an administrator. d) Type cd “c:Vijai” in the management shell and then click on Enter. e) Type .VijaiAnand_CSOM_Powershell_Office365.ps1 in the management shell and then click on Enter. f) Enter the Office 365 username ([email protected]) and password (*********) in the Credentials pop up. Click on Ok. Script ### Get the user credentials $credential=Get-Credential $username=$credential.UserName $password=$credential.GetNetworkCredential().Password $securePassword = ConvertTo-SecureString $password -AsPlainText -Force ### Input Parameters $url = "https://c986.sharepoint.com/" ### References # Specify the path where the dll's are located. Add-Type -Path "c:Program FilesCommon Filesmicrosoft sharedWeb Server Extensions15ISAPIMicrosoft.SharePoint.Client.dll" Add-Type -Path "c:Program FilesCommon Filesmicrosoft sharedWeb Server Extensions15ISAPIMicrosoft.SharePoint.Client.Runtime.dll" Add-Type -Path "c:Program FilesCommon Filesmicrosoft sharedWeb Server Extensions15ISAPIMicrosoft.SharePoint.Client.Taxonomy.dll" ### Function function GetTerms() { # Connect to SharePoint Online and get ClientContext object. $ctx = New-Object Microsoft.SharePoint.Client.ClientContext($url) $credentials = New-Object Microsoft.SharePoint.Client.SharePointOnlineCredentials($username, $securePassword) $ctx.Credentials = $credentials
- 192. ©2014 C# CORNER. SHARE THIS DOCUMENT AS IT IS. PLEASE DO NOT REPRODUCE, REPUBLISH, CHANGE OR COPY. # Get the taxonomy session $taxonomySession=[Microsoft.SharePoint.Client.Taxonomy.TaxonomySession]::GetTaxonomyS ession($ctx); # Get the term store by name $termstore=$taxonomySession.TermStores.GetByName("Taxonomy_DoxF1n/9qNkL60u1n5J+tQ==") ; # Get the term group by name $termGroup=$termStore.Groups.GetByName("Global Navigation"); # Get the term set by name $termSet = $termGroup.TermSets.GetByName("Technology"); # Get all the terms $termColl=$termSet.Terms; $ctx.Load($termColl); # Execute the query $ctx.ExecuteQuery(); Write-Host -ForegroundColor Green "Terms:" # Loop through all the terms foreach($term in $termColl) { # Display the term name $term.Name } } ### Calling the function GetTerms Result
- 193. ©2014 C# CORNER. SHARE THIS DOCUMENT AS IT IS. PLEASE DO NOT REPRODUCE, REPUBLISH, CHANGE OR COPY. Figure14.8.1: Get all the terms 12.9 How to create a new term for the termset In this example you will see how to create a new term for the termset using the .Net Client Side Object Model in Powershell scripts. Create the ps1 file a) Open a new text file and paste in the following script. b) Save the file as VijaiAnand_CSOM_Powershell_Office365.ps1 in the C:Vijai folder (a folder named Vijai is created in the C drive). c) Open SharePoint 2013 Management Shell as an administrator. d) Type cd “c:Vijai” in the management shell and then click on Enter. e) Type .VijaiAnand_CSOM_Powershell_Office365.ps1 in the management shell and then click on Enter. f) Enter the Office 365 username ([email protected]) and password (*********) in the Credentials pop up. Click on Ok. Script ### Get the user credentials $credential=Get-Credential $username=$credential.UserName $password=$credential.GetNetworkCredential().Password $securePassword = ConvertTo-SecureString $password -AsPlainText -Force ### Input Parameters $url = "https://c986.sharepoint.com/"
- 194. ©2014 C# CORNER. SHARE THIS DOCUMENT AS IT IS. PLEASE DO NOT REPRODUCE, REPUBLISH, CHANGE OR COPY. ### References # Specify the path where the dll's are located. Add-Type -Path "c:Program FilesCommon Filesmicrosoft sharedWeb Server Extensions15ISAPIMicrosoft.SharePoint.Client.dll" Add-Type -Path "c:Program FilesCommon Filesmicrosoft sharedWeb Server Extensions15ISAPIMicrosoft.SharePoint.Client.Runtime.dll" Add-Type -Path "c:Program FilesCommon Filesmicrosoft sharedWeb Server Extensions15ISAPIMicrosoft.SharePoint.Client.Taxonomy.dll" ### Function function CreateTerm() { # Connect to SharePoint Online and get ClientContext object. $ctx = New-Object Microsoft.SharePoint.Client.ClientContext($url) $credentials = New-Object Microsoft.SharePoint.Client.SharePointOnlineCredentials($username, $securePassword) $ctx.Credentials = $credentials # Get the taxonomy session $taxonomySession=[Microsoft.SharePoint.Client.Taxonomy.TaxonomySession]::GetTaxonomyS ession($ctx); # Get the term store by name $termstore=$taxonomySession.TermStores.GetByName("Taxonomy_DoxF1n/9qNkL60u1n5J+tQ==") ; # Get the term group by name $termGroup=$termStore.Groups.GetByName("Global Navigation"); # Get the term set by name $termSet = $termGroup.TermSets.GetByName("Technology"); # String Variable - New term name $termName = "New Term"; # Guid - New Term GUID $guid=[System.Guid]::NewGuid()
- 195. ©2014 C# CORNER. SHARE THIS DOCUMENT AS IT IS. PLEASE DO NOT REPRODUCE, REPUBLISH, CHANGE OR COPY. # Int Variable - New Term LCID $LCID=1033; # Create a new term $newTerm=$termSet.CreateTerm($termName,$LCID, $guid); # Execute the query $ctx.ExecuteQuery(); } ### Calling the function CreateTerm Result A new term is created successfully for the specified termset. Figure14.9.1: Create a new term
- 196. ©2014 C# CORNER. SHARE THIS DOCUMENT AS IT IS. PLEASE DO NOT REPRODUCE, REPUBLISH, CHANGE OR COPY. 12.10 How to delete the term from the term set In this example you will see how to delete the term from the termset using the .Net Client Side Object Model in Powershell scripts. Create the ps1 file a) Open a new text file and paste in the following script. b) Save the file as VijaiAnand_CSOM_Powershell_Office365.ps1 in the C:Vijai folder (a folder named Vijai is created in the C drive). c) Open SharePoint 2013 Management Shell as an administrator. d) Type cd “c:Vijai” in the management shell and then click on Enter. e) Type .VijaiAnand_CSOM_Powershell_Office365.ps1 in the management shell and then click on Enter. f) Enter the Office 365 username ([email protected]) and password (*********) in the Credentials pop up. Click on Ok. Script ### Get the user credentials $credential=Get-Credential $username=$credential.UserName $password=$credential.GetNetworkCredential().Password $securePassword = ConvertTo-SecureString $password -AsPlainText -Force ### Input Parameters $url = "https://c986.sharepoint.com/" ### References # Specify the path where the dll's are located. Add-Type -Path "c:Program FilesCommon Filesmicrosoft sharedWeb Server Extensions15ISAPIMicrosoft.SharePoint.Client.dll" Add-Type -Path "c:Program FilesCommon Filesmicrosoft sharedWeb Server Extensions15ISAPIMicrosoft.SharePoint.Client.Runtime.dll" Add-Type -Path "c:Program FilesCommon Filesmicrosoft sharedWeb Server Extensions15ISAPIMicrosoft.SharePoint.Client.Taxonomy.dll" ### Function
- 197. ©2014 C# CORNER. SHARE THIS DOCUMENT AS IT IS. PLEASE DO NOT REPRODUCE, REPUBLISH, CHANGE OR COPY. function DeleteTerm() { # Connect to SharePoint Online and get ClientContext object. $ctx = New-Object Microsoft.SharePoint.Client.ClientContext($url) $credentials = New-Object Microsoft.SharePoint.Client.SharePointOnlineCredentials($username, $securePassword) $ctx.Credentials = $credentials # Get the taxonomy session $taxonomySession=[Microsoft.SharePoint.Client.Taxonomy.TaxonomySession]::GetTaxonomyS ession($ctx); # Get the term store by name $termstore=$taxonomySession.TermStores.GetByName("Taxonomy_DoxF1n/9qNkL60u1n5J+tQ==") ; # Get the term group by name $termGroup=$termStore.Groups.GetByName("Global Navigation"); # Get the term set by name $termSet = $termGroup.TermSets.GetByName("Technology"); # Get the term by name $term = $termSet.Terms.GetByName("New Term"); # Delete the term $term.DeleteObject(); # Execute the query $ctx.ExecuteQuery(); } ### Calling the function DeleteTerm Result The specified term is deleted successfully from the termset.
- 198. ©2014 C# CORNER. SHARE THIS DOCUMENT AS IT IS. PLEASE DO NOT REPRODUCE, REPUBLISH, CHANGE OR COPY. 12.11 How to create a copy of the term within the termset In this example you will see how to create a copy of the term within the termset using the .Net Client Side Object Model in Powershell scripts. Create the ps1 file a) Open a new text file and paste in the following script. b) Save the file as VijaiAnand_CSOM_Powershell_Office365.ps1 in the C:Vijai folder (a folder named Vijai is created in the C drive). c) Open SharePoint 2013 Management Shell as an administrator. d) Type cd “c:Vijai” in the management shell and then click on Enter. e) Type .VijaiAnand_CSOM_Powershell_Office365.ps1 in the management shell and then click on Enter. f) Enter the Office 365 username ([email protected]) and password (*********) in the Credentials pop up. Click on Ok. Script ### Get the user credentials $credential=Get-Credential $username=$credential.UserName $password=$credential.GetNetworkCredential().Password $securePassword = ConvertTo-SecureString $password -AsPlainText -Force ### Input Parameters $url = "https://c986.sharepoint.com/" ### References # Specify the path where the dll's are located. Add-Type -Path "c:Program FilesCommon Filesmicrosoft sharedWeb Server Extensions15ISAPIMicrosoft.SharePoint.Client.dll" Add-Type -Path "c:Program FilesCommon Filesmicrosoft sharedWeb Server Extensions15ISAPIMicrosoft.SharePoint.Client.Runtime.dll" Add-Type -Path "c:Program FilesCommon Filesmicrosoft sharedWeb Server Extensions15ISAPIMicrosoft.SharePoint.Client.Taxonomy.dll" ### Function
- 199. ©2014 C# CORNER. SHARE THIS DOCUMENT AS IT IS. PLEASE DO NOT REPRODUCE, REPUBLISH, CHANGE OR COPY. function CopyTerm() { # Connect to SharePoint Online and get ClientContext object. $ctx = New-Object Microsoft.SharePoint.Client.ClientContext($url) $credentials = New-Object Microsoft.SharePoint.Client.SharePointOnlineCredentials($username, $securePassword) $ctx.Credentials = $credentials # Get the taxonomy session $taxonomySession=[Microsoft.SharePoint.Client.Taxonomy.TaxonomySession]::GetTaxonomyS ession($ctx); # Get the term store by name $termstore=$taxonomySession.TermStores.GetByName("Taxonomy_DoxF1n/9qNkL60u1n5J+tQ==") ; # Get the term group by name $termGroup=$termStore.Groups.GetByName("Global Navigation"); # Get the term set by name $termSet = $termGroup.TermSets.GetByName("Technology"); # Get the term by name $term = $termSet.Terms.GetByName("Silverlight"); # Make a copy of the term within the termset # Need to pass a bool parameter - whether to copy the child terms or not $copyTerm=$term.Copy($false); # Execute the query $ctx.ExecuteQuery(); } ### Calling the function CopyTerm Result
- 200. ©2014 C# CORNER. SHARE THIS DOCUMENT AS IT IS. PLEASE DO NOT REPRODUCE, REPUBLISH, CHANGE OR COPY. The specified term is copied to the same termset as shown in Figure 14.11.1. Figure14.11.1: Create a copy of the term 12.12 How to deprecate the specified term In this example you will see how to deprecate the specified term using the .Net Client Side Object Model in Powersehell script. Create the ps1 file a) Open a new text file and paste in the following script. b) Save the file as VijaiAnand_CSOM_Powershell_Office365.ps1 in the C:Vijai folder (a folder named Vijai is created in the C drive). c) Open SharePoint 2013 Management Shell as an administrator. d) Type cd “c:Vijai” in the management shell and then click on Enter.
- 201. ©2014 C# CORNER. SHARE THIS DOCUMENT AS IT IS. PLEASE DO NOT REPRODUCE, REPUBLISH, CHANGE OR COPY. e) Type .VijaiAnand_CSOM_Powershell_Office365.ps1 in the management shell and then click on Enter. f) Enter the Office 365 username ([email protected]) and password (*********) in the Credentials pop up. Click on Ok. Script ### Get the user credentials $credential=Get-Credential $username=$credential.UserName $password=$credential.GetNetworkCredential().Password $securePassword = ConvertTo-SecureString $password -AsPlainText -Force ### Input Parameters $url = "https://c986.sharepoint.com/" ### References # Specify the path where the dll's are located. Add-Type -Path "c:Program FilesCommon Filesmicrosoft sharedWeb Server Extensions15ISAPIMicrosoft.SharePoint.Client.dll" Add-Type -Path "c:Program FilesCommon Filesmicrosoft sharedWeb Server Extensions15ISAPIMicrosoft.SharePoint.Client.Runtime.dll" Add-Type -Path "c:Program FilesCommon Filesmicrosoft sharedWeb Server Extensions15ISAPIMicrosoft.SharePoint.Client.Taxonomy.dll" ### Function function DeprecateTerm() { # Connect to SharePoint Online and get ClientContext object. $ctx = New-Object Microsoft.SharePoint.Client.ClientContext($url) $credentials = New-Object Microsoft.SharePoint.Client.SharePointOnlineCredentials($username, $securePassword) $ctx.Credentials = $credentials # Get the taxonomy session $taxonomySession=[Microsoft.SharePoint.Client.Taxonomy.TaxonomySession]::GetTaxonomyS ession($ctx);
- 202. ©2014 C# CORNER. SHARE THIS DOCUMENT AS IT IS. PLEASE DO NOT REPRODUCE, REPUBLISH, CHANGE OR COPY. # Get the term store by name $termstore=$taxonomySession.TermStores.GetByName("Taxonomy_DoxF1n/9qNkL60u1n5J+tQ==") ; # Get the term group by name $termGroup=$termStore.Groups.GetByName("Global Navigation"); # Get the term set by name $termSet = $termGroup.TermSets.GetByName("Technology"); # Get the term by name which has to be deprecated $term = $termSet.Terms.GetByName("Silverlight"); # Deprecate the term $term.Deprecate($true); # Execute the query $ctx.ExecuteQuery(); } ### Calling the function DeprecateTerm Result The specified term is deprecated as shown in Figure 14.12.1.
- 203. ©2014 C# CORNER. SHARE THIS DOCUMENT AS IT IS. PLEASE DO NOT REPRODUCE, REPUBLISH, CHANGE OR COPY. Figure14.12.1: Deprecate the specified term 12.13 How to get all the labels for specified term In this example you will see how to get all the labels for a specified term using the .Net Client Side Object Model in Powersehll script. Create the ps1 file a) Open a new text file and paste in the following script. b) Save the file as VijaiAnand_CSOM_Powershell_Office365.ps1 in the C:Vijai folder (a folder named Vijai is created in the C drive). c) Open SharePoint 2013 Management Shell as an administrator. d) Type cd “c:Vijai” in the management shell and then click on Enter. e) Type .VijaiAnand_CSOM_Powershell_Office365.ps1 in the management shell and then click on Enter. f) Enter the Office 365 username ([email protected]) and password (*********) in the Credentials pop up. Click on Ok.
- 204. ©2014 C# CORNER. SHARE THIS DOCUMENT AS IT IS. PLEASE DO NOT REPRODUCE, REPUBLISH, CHANGE OR COPY. Script ### Get the user credentials $credential=Get-Credential $username=$credential.UserName $password=$credential.GetNetworkCredential().Password $securePassword = ConvertTo-SecureString $password -AsPlainText -Force ### Input Parameters $url = "https://c986.sharepoint.com/" ### References # Specify the path where the dll's are located. Add-Type -Path "c:Program FilesCommon Filesmicrosoft sharedWeb Server Extensions15ISAPIMicrosoft.SharePoint.Client.dll" Add-Type -Path "c:Program FilesCommon Filesmicrosoft sharedWeb Server Extensions15ISAPIMicrosoft.SharePoint.Client.Runtime.dll" Add-Type -Path "c:Program FilesCommon Filesmicrosoft sharedWeb Server Extensions15ISAPIMicrosoft.SharePoint.Client.Taxonomy.dll" ### Function function GetLabels() { # Connect to SharePoint Online and get ClientContext object. $ctx = New-Object Microsoft.SharePoint.Client.ClientContext($url) $credentials = New-Object Microsoft.SharePoint.Client.SharePointOnlineCredentials($username, $securePassword) $ctx.Credentials = $credentials # Get the taxonomy session $taxonomySession=[Microsoft.SharePoint.Client.Taxonomy.TaxonomySession]::GetTaxonomyS ession($ctx); # Get the term store by name
- 205. ©2014 C# CORNER. SHARE THIS DOCUMENT AS IT IS. PLEASE DO NOT REPRODUCE, REPUBLISH, CHANGE OR COPY. $termstore=$taxonomySession.TermStores.GetByName("Taxonomy_DoxF1n/9qNkL60u1n5J+tQ==") ; # Get the term group by name $termGroup=$termStore.Groups.GetByName("Global Navigation"); # Get the term set by name $termSet = $termGroup.TermSets.GetByName("Technology"); # Get the term by name $term = $termSet.Terms.GetByName("SharePoint 2013"); # Get all the labels for the term $labelColl=$term.Labels; $ctx.Load($labelColl); # Execute the query $ctx.ExecuteQuery(); Write-Host -ForegroundColor Green "Labels:" # Loop through all the label foreach($label in $labelColl) { # Display the label name $label.Value } } ### Calling the function GetLabels Result
- 206. ©2014 C# CORNER. SHARE THIS DOCUMENT AS IT IS. PLEASE DO NOT REPRODUCE, REPUBLISH, CHANGE OR COPY. Figure14.13.1: Get all the labels 12.14 How to create a new label for specified term In this example you will see how to create a new label for a specified term using the .Net Client Side Object Model in Powershell scripts. Create the ps1 file a) Open a new text file and paste in the following script. b) Save the file as VijaiAnand_CSOM_Powershell_Office365.ps1 in the C:Vijai folder (a folder named Vijai is created in the C drive). c) Open SharePoint 2013 Management Shell as an administrator. d) Type cd “c:Vijai” in the management shell and then click on Enter. e) Type .VijaiAnand_CSOM_Powershell_Office365.ps1 in the management shell and then click on Enter. f) Enter the Office 365 username ([email protected]) and password (*********) in the Credentials pop up. Click on Ok. Script ### Get the user credentials $credential=Get-Credential $username=$credential.UserName $password=$credential.GetNetworkCredential().Password $securePassword = ConvertTo-SecureString $password -AsPlainText -Force ### Input Parameters $url = "https://c986.sharepoint.com/" ### References # Specify the path where the dll's are located. Add-Type -Path "c:Program FilesCommon Filesmicrosoft sharedWeb Server Extensions15ISAPIMicrosoft.SharePoint.Client.dll" Add-Type -Path "c:Program FilesCommon Filesmicrosoft sharedWeb Server Extensions15ISAPIMicrosoft.SharePoint.Client.Runtime.dll" Add-Type -Path "c:Program FilesCommon Filesmicrosoft sharedWeb Server Extensions15ISAPIMicrosoft.SharePoint.Client.Taxonomy.dll"
- 207. ©2014 C# CORNER. SHARE THIS DOCUMENT AS IT IS. PLEASE DO NOT REPRODUCE, REPUBLISH, CHANGE OR COPY. ### Function function CreateLabel() { # Connect to SharePoint Online and get ClientContext object. $ctx = New-Object Microsoft.SharePoint.Client.ClientContext($url) $credentials = New-Object Microsoft.SharePoint.Client.SharePointOnlineCredentials($username, $securePassword) $ctx.Credentials = $credentials # Get the taxonomy session $taxonomySession=[Microsoft.SharePoint.Client.Taxonomy.TaxonomySession]::GetTaxonomyS ession($ctx); # Get the term store by name $termstore=$taxonomySession.TermStores.GetByName("Taxonomy_DoxF1n/9qNkL60u1n5J+tQ==") ; # Get the term group by name $termGroup=$termStore.Groups.GetByName("Global Navigation"); # Get the term set by name $termSet = $termGroup.TermSets.GetByName("Technology"); # Get the term by name $term = $termSet.Terms.GetByName("SharePoint 2013"); # String Variable - New label name $labelName = "Office 365"; # Bool variable - IsDefault $isDefault=$false # Int Variable - New label LCID $LCID=1033; # Create a new label for the term $newLabel=$term.CreateLabel($labelName, $LCID, $isDefault); # Execute the query
- 208. ©2014 C# CORNER. SHARE THIS DOCUMENT AS IT IS. PLEASE DO NOT REPRODUCE, REPUBLISH, CHANGE OR COPY. $ctx.ExecuteQuery(); } ### Calling the function CreateLabel Result Figure14.14.1: Create a new label 12.15 How to delete the label for specified term In this example you will see how to delete the label for a specified term using the .Net Client Side Object Model in Powershell scripts. Create the ps1 file a) Open a new text file and paste in the following script. b) Save the file as VijaiAnand_CSOM_Powershell_Office365.ps1 in the C:Vijai folder (a folder named Vijai is created in the C drive). c) Open SharePoint 2013 Management Shell as an administrator.
- 209. ©2014 C# CORNER. SHARE THIS DOCUMENT AS IT IS. PLEASE DO NOT REPRODUCE, REPUBLISH, CHANGE OR COPY. d) Type cd “c:Vijai” in the management shell and then click on Enter. e) Type .VijaiAnand_CSOM_Powershell_Office365.ps1 in the management shell and then click on Enter. f) Enter the Office 365 username ([email protected]) and password (*********) in the Credentials pop up. Click on Ok. Script ### Get the user credentials $credential=Get-Credential $username=$credential.UserName $password=$credential.GetNetworkCredential().Password $securePassword = ConvertTo-SecureString $password -AsPlainText -Force ### Input Parameters $url = "https://c986.sharepoint.com/" ### References # Specify the path where the dll's are located. Add-Type -Path "c:Program FilesCommon Filesmicrosoft sharedWeb Server Extensions15ISAPIMicrosoft.SharePoint.Client.dll" Add-Type -Path "c:Program FilesCommon Filesmicrosoft sharedWeb Server Extensions15ISAPIMicrosoft.SharePoint.Client.Runtime.dll" Add-Type -Path "c:Program FilesCommon Filesmicrosoft sharedWeb Server Extensions15ISAPIMicrosoft.SharePoint.Client.Taxonomy.dll" ### Function function DeleteLabel() { # Connect to SharePoint Online and get ClientContext object. $ctx = New-Object Microsoft.SharePoint.Client.ClientContext($url) $credentials = New-Object Microsoft.SharePoint.Client.SharePointOnlineCredentials($username, $securePassword) $ctx.Credentials = $credentials # Get the taxonomy session
- 210. ©2014 C# CORNER. SHARE THIS DOCUMENT AS IT IS. PLEASE DO NOT REPRODUCE, REPUBLISH, CHANGE OR COPY. $taxonomySession=[Microsoft.SharePoint.Client.Taxonomy.TaxonomySession]::GetTaxonomyS ession($ctx); # Get the term store by name $termstore=$taxonomySession.TermStores.GetByName("Taxonomy_DoxF1n/9qNkL60u1n5J+tQ==") ; # Get the term group by name $termGroup=$termStore.Groups.GetByName("Global Navigation"); # Get the term set by name $termSet = $termGroup.TermSets.GetByName("Technology"); # Get the term by name $term = $termSet.Terms.GetByName("SharePoint 2013"); # Get the label for the term $label = $term.Labels.GetByValue("Office 365"); # Delete the label $label.DeleteObject(); # Execute the query $ctx.ExecuteQuery(); } ### Calling the function DeleteLabel Result The specified label is deleted successfully for the term.
- 211. ©2014 C# CORNER. SHARE THIS DOCUMENT AS IT IS. PLEASE DO NOT REPRODUCE, REPUBLISH, CHANGE OR COPY. Summary: In this book we covered nearly all the basic operations that can be performed with Powershell scripts using the SharePoint 2013 .Net Client Side Object Model. This book is only the beginning, there are many things that can be done and now you are ready to develop advanced solutions with Powershells script using the .Net Client Side Object Model. Thanks for Reading!!!!!!!