SlideShare a Scribd company logo
A Guide to Building an AI and ML
Model Using KNIME and Python
Introduction
• Software engineers widely use the Python programming language. Since its
creation by Guido Van Rossum in 1991, it has consistently been among the
most popular programming languages, alongside C, Java, etc. Python has
emerged as the clear frontrunner in our efforts to determine the best
programming language for Artificial Intelligence and neural networks.
• On the other hand, the KNIME Analytics Platform is free, open-source
software for producing scientific data. Because of its user-friendliness,
accessibility, and commitment to openness, KNIME has made data science
workflow design and reusable component creation within the realm of
possibility for a wide range of professionals and enthusiasts. Regarding
the Machine Learning automation process, the KNIME Analytics platform
is one of the most well-liked open-source systems utilized today.
• There has been a steady increase in the adoption of AI globally. An
estimated 35% of companies are currently using Artificial Intelligence, and
an additional 42% are exploring the use of AI in their business. There has
been a steady increase in AI adoption since 2021, up four points.
Why KNIME for AI and ML?
• KNIME is an advanced analytics software with a graphical user
interface and a workflow editor. This implies that working with KNIME
and gaining insights does not need coding expertise. Data
manipulation, transformation, and mining are all within your reach, in
addition to more fundamental I/O operations. It streamlines the
procedures by combining all the steps into one single workflow.
• Setting Up Your System
• To start with KNIME, you must first download the software and set it
up on your computer.
Step 1: Navigate to www.knime.com/downloads.
Step 2: Figure Out Which Version Is Best for Your Computer
Step 3: Set the platform’s working directory and the location of
KNIME’s files.
Creating the First Workflow
• First, we’ll define some words that will be useful as we explore KNIME, and
then we’ll look at how to create a new project in KNIME.
• Workflow: A workflow is defined by a set of linked nodes. Connecting
nodes can create a process via their input and output ports.
• Inputs: The data the node processes through its node ports are its inputs,
and the data it produces is its output. You can modify the unique
parameters for each node in a configuration dialog.
• Node: A node has four possible states. Below each node, a traffic light
indicates the node’s state.
• Components: These are KNIME nodes that you generate using a KNIME
workflow. They abstract and encapsulate functionality, have the ability to
speak for themselves, and have complex, interactive views of their own.
• Metanodes: You can use metanodes to better organize your workflows by
collapsing a portion of a bigger workflow into a gray box that conceals that
capability.
Continue
• Using the workflow coach in the upper left corner, you can see what share
of the KNIME community endorses a specific node. The node repository
lets you see all possible nodes in a particular process. After you’ve made
your first workflow, click “Browse Example Workflows” to see how others
have used the platform.
• You may build up a process by following these steps.
• Step 1: Select New from the File menu.
• Step 2: In your platform, create a new KNIME Workflow called
“Introduction.”
• Step 3: When you click Finish, your first KNIME process should have been
successfully established.
Introducing KNIME
When working inside the current Data Science
framework, KNIME is a tool that can help us
solve any problem we can imagine. KNIME can
handle anything from simple visualizations and
linear regressions to complex Deep Learning.
Importing the Data Files
• Let us begin by importing our data, which is the first and most significant
step in comprehending the situation.
• Drag the “file reader” node into the workflow and double-click it. Next, go
to the File you want to import into your process.
• Let us visualize some key columns and investigate their relationship.
Correlation assists us in determining which columns may be connected and
have a more substantial prediction capacity to aid us in our outcomes.
• To make a correlation matrix, we search for “Linear Correlation” in the
node repository and drag it into our process.
• We will link the file reader’s output to the node “Linear Correlation” input
after dragging and dropping it as indicated.
• On the uppermost screen, click the green “Execute” button. To produce the
graphic, right-click the correlation node and choose “View: Correlation
Matrix.”
• By hovering over a particular cell, you may choose the elements that are
relevant and necessary for improved forecasts.
• We will next show its range and trends to comprehend the dataset better.
Visualization and Analysis
• One of the most important things we’d want to learn from our data is which item sells
the most compared to the others.
• There are two possible interpretations of the data:
• The scatterplot
• Look for “Scatter Plot” under the Views tab in our node repository. Drag and drag it into
your process, then link the output of File Reader to this node.
• Next, set your node to determine the number of rows of data you need and desire to
see.
• Select View: Scatter Plot after clicking Execute.
• Pie Chart
• A pie chart will be used to comprehend our database’s average sales forecast for all
product kinds.
• Connect the Pie Chart node under Views to your File Reader by clicking on it. Please
select the columns for segregation and your desired aggregating techniques, then apply
them.
• This graph illustrates how sales were distributed on average across all types of items.
“Starchy Foods” had the highest average sales percentage of 7.7%.
How Do You Clean Your Data?
• Before training your Model, you may also add Data Cleaning and Feature
Extraction to your strategy.
Finding Missing Values
• We need to know which values are missing before we can attribute them.
• Return to the node repository and look for the node “Missing Values.”
Imputations
• Select the Missing node Value and click configure to attribute values.
Choose the proper imputations for your data based on its kind, and then
click “Apply.”
• When we run it, our dataset with imputed values is available on the node’s
output port, “Missing Value.”
Training Your First Model
• Let’s look at how to create a Machine Learning model in KNIME.
Implementing a Linear Model
• To begin, we will train a Linear Model that includes all of the dataset’s features to learn how to
choose features and create a model.
• Drag the “Linear Regression Learner” to your workflow from your node repository. Then, connect
the clean data you obtained in the “Output Port” of the “Missing Value” node.
• This should be your current screen visual. Exclude the Item Identifier from the settings tab and
choose the target variable at the top. After you finish this operation, you must import your Test
data to execute your Model.
• Drag and drag another file reader into your process and choose your system’s test data.
• As we can see, the Test data also include missing values. We’ll run it through the “Missing Value”
node just as we did with the Training data.
• After we’ve cleaned up our Test data, we’ll add a new node called “Regression Predictor.”
• Connect the learner’s output to the predictor’s input to load your Model into the predictor. Load
your test data into the predictor’s second input.
• Under the “Analytics” tab, KNIME may also train specific, very specialized models. This is not a
complete list.
1. Clustering
2. Neural Networks
3. Ensemble Learners
4. Naïve Bayes
Submitting Your Solution
• The result is nearly ready for submission when you run your predictor now.
• Drag the node “Column Filter” from your node repository into your workflow. Connect
your predictor’s output to the column filter and configure it to filter out the necessary
columns. In this situation, you’ll require an Item Identifier, Outlet Identifier, and Outlet
Sales Prediction.
• Execute the “Column Filter,” then look for the node “CSV Writer” and save your forecasts
to your hard disc.
• Adjust the path to point to where you want the.csv File to be saved, then run this node.
Finally, open the.csv File and change the column names to match our solution. Submit
your answer by compressing the.csv File into an a.zip File!
• The final workflow diagram created is shown below.
• When it comes to portability, KNIME workflows are helpful. They may be given to friends
or colleagues to collaborate on, increasing the usefulness of your product!
• Choose File -> Export KNIME Workflow to export a KNIME workflow.
• After that, pick the appropriate process to export and click finalize!
• This will generate an a.knwf File you can share with anybody and have them view it with
a single click!
Limitations
• The visualizations are not as clean and
polished as in other open-source tools. (For
example, RStudio)
• Version upgrades are not widely supported;
you must reinstall the program.
Pros and Cons Of using KNIME
• Access to all current and future data science, Machine Learning, and
Artificial Intelligence advancements.
• Avoid locking your data science IP into a proprietary format that
exposes it to price fluctuations.
• Make data science accessible on all platforms, not just Windows.
Why Use Python for AI and Machine Learning?
Python’s benefits as a language for AI and ML applications include that
it is easy to learn and use, is platform-independent, has an extensive
and active community, and has access to several AI and ML libraries
and frameworks. They help make the language more widely spoken.
Thus, building ML models in Python is quite convenient.
Simple and Consistent
Python has straightforward code. Its simplicity helps developers to
construct dependable systems despite Machine Learning’s complicated
algorithms and procedures. Developers may concentrate on ML
problems instead of linguistic quirks.
Extensive Selection of Libraries and Frameworks
AI and ML algorithm implementation is difficult and time-consuming.
Developers need a well-structured and tested environment to create
the most excellent code.
Platform Independence
Platform independence means a programming language or framework
may be used on one computer and another without modification.
Python’s success comes from being platform-independent. Linux,
Windows, and macOS support Python.
Great Community and Popularity
• According to Stack Overflow’s Developer Survey 2020, Python is one of the five most popular
programming languages. You may employ a development business with the appropriate skill set
to construct your AI-based project.
Pros and Cons of Using Python
Pros
• Python may be read and written with relative ease.
• Increased efficiency thanks to Python.
• Python’s library support is extensive.
• Python has a thriving community and is available at no cost.
• Python can be used everywhere, which makes it ideal for mobile applications.
Cons
• There is a top speed in Python that you can’t exceed.
• In the realm of mobile computing, Python does not excel.
• Python is not immune to runtime mistakes.
• Python programming language is quite memory intensive.
• Testing in Python is challenging.
Conclusion
• Python is fantastic because of its many helpful frameworks, modules,
and user community. It’s an excellent language for beginners since it’s
straightforward and has a high standard for readability and
compatibility, and KNIME offers an environment conducive to almost
any kind of investigation. We hope you now understand the ML
implementation done using KNIME and ML implementation done
using Python.

More Related Content

Similar to Building an AI and ML Model Using KNIME and Python.pptx (20)

PDF
KNIME Data Science Learnathon: From Raw Data To Deployment
KNIMESlides
 
PDF
From_SPSS Modeler_to_KNIME_v4.7_ebook.pdf
VeniAgustina1
 
PDF
What's New in KNIME Analytics Platform 4.0 and KNIME Server 4.9
KNIMESlides
 
PPTX
KNIME Data Connect - 5th December 2024 (Arief).pptx
DwiCahya58
 
PDF
KNIME_Server_ProductSheet_122020.pdf
LeangsengLim1
 
PDF
Heterogeneous Data Mining with Spark
KNIMESlides
 
PPTX
ML whitepaper v0.2
Nathaniel Shimoni
 
PDF
Your Flight is Boarding Now!
MeetupDataScienceRoma
 
PDF
Open Source Story and what’s new in KNIME Software
KNIMESlides
 
PDF
How Do You Build and Validate 1500 Models and What Can You Learn from Them?
Greg Landrum
 
PDF
Let’s talk about reproducible data analysis
Greg Landrum
 
PPTX
From Raw Data to Deployment
KNIMESlides
 
PDF
What's New in KNIME Analytics Platform 4.1
KNIMESlides
 
PPTX
Knime (Konstanz Information Miner)
Kiran Buriro
 
PDF
Sharing and Deploying Data Science with KNIME Server
KNIMESlides
 
PPTX
KNIME_Introduction_panduan mengggunakan knimepptx
muhajirin10
 
PDF
Guided Automation- A Blueprint for Interactive Automated Machine Learning
KNIMESlides
 
PPTX
Introduction to knime
Bernardo Najlis
 
PDF
KNIME Data Science Learnathon: From Raw Data To Deployment - Dublin - June 2019
KNIMESlides
 
PDF
From_Alteryx_to_KNIME_4.5.pdf
VitorFerraz12
 
KNIME Data Science Learnathon: From Raw Data To Deployment
KNIMESlides
 
From_SPSS Modeler_to_KNIME_v4.7_ebook.pdf
VeniAgustina1
 
What's New in KNIME Analytics Platform 4.0 and KNIME Server 4.9
KNIMESlides
 
KNIME Data Connect - 5th December 2024 (Arief).pptx
DwiCahya58
 
KNIME_Server_ProductSheet_122020.pdf
LeangsengLim1
 
Heterogeneous Data Mining with Spark
KNIMESlides
 
ML whitepaper v0.2
Nathaniel Shimoni
 
Your Flight is Boarding Now!
MeetupDataScienceRoma
 
Open Source Story and what’s new in KNIME Software
KNIMESlides
 
How Do You Build and Validate 1500 Models and What Can You Learn from Them?
Greg Landrum
 
Let’s talk about reproducible data analysis
Greg Landrum
 
From Raw Data to Deployment
KNIMESlides
 
What's New in KNIME Analytics Platform 4.1
KNIMESlides
 
Knime (Konstanz Information Miner)
Kiran Buriro
 
Sharing and Deploying Data Science with KNIME Server
KNIMESlides
 
KNIME_Introduction_panduan mengggunakan knimepptx
muhajirin10
 
Guided Automation- A Blueprint for Interactive Automated Machine Learning
KNIMESlides
 
Introduction to knime
Bernardo Najlis
 
KNIME Data Science Learnathon: From Raw Data To Deployment - Dublin - June 2019
KNIMESlides
 
From_Alteryx_to_KNIME_4.5.pdf
VitorFerraz12
 

Recently uploaded (20)

PPTX
How to Configure Access Rights of Manufacturing Orders in Odoo 18 Manufacturing
Celine George
 
PPTX
CONVULSIVE DISORDERS: NURSING MANAGEMENT.pptx
PRADEEP ABOTHU
 
PPTX
How to Manage Promotions in Odoo 18 Sales
Celine George
 
PPT
digestive system for Pharm d I year HAP
rekhapositivity
 
PPTX
Growth and development and milestones, factors
BHUVANESHWARI BADIGER
 
PPTX
LEGAL ASPECTS OF PSYCHIATRUC NURSING.pptx
PoojaSen20
 
PPTX
How to Define Translation to Custom Module And Add a new language in Odoo 18
Celine George
 
PPTX
Optimizing Cancer Screening With MCED Technologies: From Science to Practical...
i3 Health
 
PPTX
Optimizing Cancer Screening With MCED Technologies: From Science to Practical...
i3 Health
 
PDF
CONCURSO DE POESIA “POETUFAS – PASSOS SUAVES PELO VERSO.pdf
Colégio Santa Teresinha
 
PPTX
Accounting Skills Paper-I, Preparation of Vouchers
Dr. Sushil Bansode
 
PPTX
Nutri-QUIZ-Bee-Elementary.pptx...................
ferdinandsanbuenaven
 
PDF
community health nursing question paper 2.pdf
Prince kumar
 
PDF
ARAL-Orientation_Morning-Session_Day-11.pdf
JoelVilloso1
 
PPSX
HEALTH ASSESSMENT (Community Health Nursing) - GNM 1st Year
Priyanshu Anand
 
PPTX
Capitol Doctoral Presentation -July 2025.pptx
CapitolTechU
 
PPTX
SCHOOL-BASED SEXUAL HARASSMENT PREVENTION AND RESPONSE WORKSHOP
komlalokoe
 
PPTX
Gall bladder, Small intestine and Large intestine.pptx
rekhapositivity
 
PPTX
HEAD INJURY IN CHILDREN: NURSING MANAGEMENGT.pptx
PRADEEP ABOTHU
 
PPTX
ASRB NET 2023 PREVIOUS YEAR QUESTION PAPER GENETICS AND PLANT BREEDING BY SAT...
Krashi Coaching
 
How to Configure Access Rights of Manufacturing Orders in Odoo 18 Manufacturing
Celine George
 
CONVULSIVE DISORDERS: NURSING MANAGEMENT.pptx
PRADEEP ABOTHU
 
How to Manage Promotions in Odoo 18 Sales
Celine George
 
digestive system for Pharm d I year HAP
rekhapositivity
 
Growth and development and milestones, factors
BHUVANESHWARI BADIGER
 
LEGAL ASPECTS OF PSYCHIATRUC NURSING.pptx
PoojaSen20
 
How to Define Translation to Custom Module And Add a new language in Odoo 18
Celine George
 
Optimizing Cancer Screening With MCED Technologies: From Science to Practical...
i3 Health
 
Optimizing Cancer Screening With MCED Technologies: From Science to Practical...
i3 Health
 
CONCURSO DE POESIA “POETUFAS – PASSOS SUAVES PELO VERSO.pdf
Colégio Santa Teresinha
 
Accounting Skills Paper-I, Preparation of Vouchers
Dr. Sushil Bansode
 
Nutri-QUIZ-Bee-Elementary.pptx...................
ferdinandsanbuenaven
 
community health nursing question paper 2.pdf
Prince kumar
 
ARAL-Orientation_Morning-Session_Day-11.pdf
JoelVilloso1
 
HEALTH ASSESSMENT (Community Health Nursing) - GNM 1st Year
Priyanshu Anand
 
Capitol Doctoral Presentation -July 2025.pptx
CapitolTechU
 
SCHOOL-BASED SEXUAL HARASSMENT PREVENTION AND RESPONSE WORKSHOP
komlalokoe
 
Gall bladder, Small intestine and Large intestine.pptx
rekhapositivity
 
HEAD INJURY IN CHILDREN: NURSING MANAGEMENGT.pptx
PRADEEP ABOTHU
 
ASRB NET 2023 PREVIOUS YEAR QUESTION PAPER GENETICS AND PLANT BREEDING BY SAT...
Krashi Coaching
 
Ad

Building an AI and ML Model Using KNIME and Python.pptx

  • 1. A Guide to Building an AI and ML Model Using KNIME and Python
  • 2. Introduction • Software engineers widely use the Python programming language. Since its creation by Guido Van Rossum in 1991, it has consistently been among the most popular programming languages, alongside C, Java, etc. Python has emerged as the clear frontrunner in our efforts to determine the best programming language for Artificial Intelligence and neural networks. • On the other hand, the KNIME Analytics Platform is free, open-source software for producing scientific data. Because of its user-friendliness, accessibility, and commitment to openness, KNIME has made data science workflow design and reusable component creation within the realm of possibility for a wide range of professionals and enthusiasts. Regarding the Machine Learning automation process, the KNIME Analytics platform is one of the most well-liked open-source systems utilized today. • There has been a steady increase in the adoption of AI globally. An estimated 35% of companies are currently using Artificial Intelligence, and an additional 42% are exploring the use of AI in their business. There has been a steady increase in AI adoption since 2021, up four points.
  • 3. Why KNIME for AI and ML? • KNIME is an advanced analytics software with a graphical user interface and a workflow editor. This implies that working with KNIME and gaining insights does not need coding expertise. Data manipulation, transformation, and mining are all within your reach, in addition to more fundamental I/O operations. It streamlines the procedures by combining all the steps into one single workflow. • Setting Up Your System • To start with KNIME, you must first download the software and set it up on your computer. Step 1: Navigate to www.knime.com/downloads. Step 2: Figure Out Which Version Is Best for Your Computer Step 3: Set the platform’s working directory and the location of KNIME’s files.
  • 4. Creating the First Workflow • First, we’ll define some words that will be useful as we explore KNIME, and then we’ll look at how to create a new project in KNIME. • Workflow: A workflow is defined by a set of linked nodes. Connecting nodes can create a process via their input and output ports. • Inputs: The data the node processes through its node ports are its inputs, and the data it produces is its output. You can modify the unique parameters for each node in a configuration dialog. • Node: A node has four possible states. Below each node, a traffic light indicates the node’s state. • Components: These are KNIME nodes that you generate using a KNIME workflow. They abstract and encapsulate functionality, have the ability to speak for themselves, and have complex, interactive views of their own. • Metanodes: You can use metanodes to better organize your workflows by collapsing a portion of a bigger workflow into a gray box that conceals that capability.
  • 5. Continue • Using the workflow coach in the upper left corner, you can see what share of the KNIME community endorses a specific node. The node repository lets you see all possible nodes in a particular process. After you’ve made your first workflow, click “Browse Example Workflows” to see how others have used the platform. • You may build up a process by following these steps. • Step 1: Select New from the File menu. • Step 2: In your platform, create a new KNIME Workflow called “Introduction.” • Step 3: When you click Finish, your first KNIME process should have been successfully established.
  • 6. Introducing KNIME When working inside the current Data Science framework, KNIME is a tool that can help us solve any problem we can imagine. KNIME can handle anything from simple visualizations and linear regressions to complex Deep Learning.
  • 7. Importing the Data Files • Let us begin by importing our data, which is the first and most significant step in comprehending the situation. • Drag the “file reader” node into the workflow and double-click it. Next, go to the File you want to import into your process. • Let us visualize some key columns and investigate their relationship. Correlation assists us in determining which columns may be connected and have a more substantial prediction capacity to aid us in our outcomes. • To make a correlation matrix, we search for “Linear Correlation” in the node repository and drag it into our process. • We will link the file reader’s output to the node “Linear Correlation” input after dragging and dropping it as indicated. • On the uppermost screen, click the green “Execute” button. To produce the graphic, right-click the correlation node and choose “View: Correlation Matrix.” • By hovering over a particular cell, you may choose the elements that are relevant and necessary for improved forecasts. • We will next show its range and trends to comprehend the dataset better.
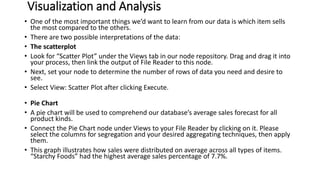
  • 8. Visualization and Analysis • One of the most important things we’d want to learn from our data is which item sells the most compared to the others. • There are two possible interpretations of the data: • The scatterplot • Look for “Scatter Plot” under the Views tab in our node repository. Drag and drag it into your process, then link the output of File Reader to this node. • Next, set your node to determine the number of rows of data you need and desire to see. • Select View: Scatter Plot after clicking Execute. • Pie Chart • A pie chart will be used to comprehend our database’s average sales forecast for all product kinds. • Connect the Pie Chart node under Views to your File Reader by clicking on it. Please select the columns for segregation and your desired aggregating techniques, then apply them. • This graph illustrates how sales were distributed on average across all types of items. “Starchy Foods” had the highest average sales percentage of 7.7%.
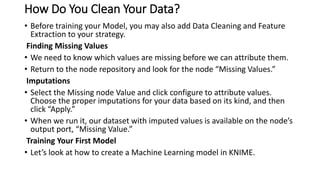
  • 9. How Do You Clean Your Data? • Before training your Model, you may also add Data Cleaning and Feature Extraction to your strategy. Finding Missing Values • We need to know which values are missing before we can attribute them. • Return to the node repository and look for the node “Missing Values.” Imputations • Select the Missing node Value and click configure to attribute values. Choose the proper imputations for your data based on its kind, and then click “Apply.” • When we run it, our dataset with imputed values is available on the node’s output port, “Missing Value.” Training Your First Model • Let’s look at how to create a Machine Learning model in KNIME.
  • 10. Implementing a Linear Model • To begin, we will train a Linear Model that includes all of the dataset’s features to learn how to choose features and create a model. • Drag the “Linear Regression Learner” to your workflow from your node repository. Then, connect the clean data you obtained in the “Output Port” of the “Missing Value” node. • This should be your current screen visual. Exclude the Item Identifier from the settings tab and choose the target variable at the top. After you finish this operation, you must import your Test data to execute your Model. • Drag and drag another file reader into your process and choose your system’s test data. • As we can see, the Test data also include missing values. We’ll run it through the “Missing Value” node just as we did with the Training data. • After we’ve cleaned up our Test data, we’ll add a new node called “Regression Predictor.” • Connect the learner’s output to the predictor’s input to load your Model into the predictor. Load your test data into the predictor’s second input. • Under the “Analytics” tab, KNIME may also train specific, very specialized models. This is not a complete list. 1. Clustering 2. Neural Networks 3. Ensemble Learners 4. Naïve Bayes
  • 11. Submitting Your Solution • The result is nearly ready for submission when you run your predictor now. • Drag the node “Column Filter” from your node repository into your workflow. Connect your predictor’s output to the column filter and configure it to filter out the necessary columns. In this situation, you’ll require an Item Identifier, Outlet Identifier, and Outlet Sales Prediction. • Execute the “Column Filter,” then look for the node “CSV Writer” and save your forecasts to your hard disc. • Adjust the path to point to where you want the.csv File to be saved, then run this node. Finally, open the.csv File and change the column names to match our solution. Submit your answer by compressing the.csv File into an a.zip File! • The final workflow diagram created is shown below. • When it comes to portability, KNIME workflows are helpful. They may be given to friends or colleagues to collaborate on, increasing the usefulness of your product! • Choose File -> Export KNIME Workflow to export a KNIME workflow. • After that, pick the appropriate process to export and click finalize! • This will generate an a.knwf File you can share with anybody and have them view it with a single click!
  • 12. Limitations • The visualizations are not as clean and polished as in other open-source tools. (For example, RStudio) • Version upgrades are not widely supported; you must reinstall the program.
  • 13. Pros and Cons Of using KNIME • Access to all current and future data science, Machine Learning, and Artificial Intelligence advancements. • Avoid locking your data science IP into a proprietary format that exposes it to price fluctuations. • Make data science accessible on all platforms, not just Windows.
  • 14. Why Use Python for AI and Machine Learning? Python’s benefits as a language for AI and ML applications include that it is easy to learn and use, is platform-independent, has an extensive and active community, and has access to several AI and ML libraries and frameworks. They help make the language more widely spoken. Thus, building ML models in Python is quite convenient. Simple and Consistent Python has straightforward code. Its simplicity helps developers to construct dependable systems despite Machine Learning’s complicated algorithms and procedures. Developers may concentrate on ML problems instead of linguistic quirks.
  • 15. Extensive Selection of Libraries and Frameworks AI and ML algorithm implementation is difficult and time-consuming. Developers need a well-structured and tested environment to create the most excellent code. Platform Independence Platform independence means a programming language or framework may be used on one computer and another without modification. Python’s success comes from being platform-independent. Linux, Windows, and macOS support Python.
  • 16. Great Community and Popularity • According to Stack Overflow’s Developer Survey 2020, Python is one of the five most popular programming languages. You may employ a development business with the appropriate skill set to construct your AI-based project. Pros and Cons of Using Python Pros • Python may be read and written with relative ease. • Increased efficiency thanks to Python. • Python’s library support is extensive. • Python has a thriving community and is available at no cost. • Python can be used everywhere, which makes it ideal for mobile applications. Cons • There is a top speed in Python that you can’t exceed. • In the realm of mobile computing, Python does not excel. • Python is not immune to runtime mistakes. • Python programming language is quite memory intensive. • Testing in Python is challenging.
  • 17. Conclusion • Python is fantastic because of its many helpful frameworks, modules, and user community. It’s an excellent language for beginners since it’s straightforward and has a high standard for readability and compatibility, and KNIME offers an environment conducive to almost any kind of investigation. We hope you now understand the ML implementation done using KNIME and ML implementation done using Python.