SlideShare a Scribd company logo
"Docker best practice", Станислав Коленкин (senior devops, DataArt)
New York USA
London UK
Munich Germany
Zug Switzerland
Docker Containers. Best practices.
by Stanislav Kolenkin, Senior DevOps.
What is container? Docker?
3
• Hardware can’t be replicated, Software can be.
• Container is a software App with all required to execute it
• Packed container always runs the same, regardless of the environment
• There is Unix and Windows versions
• No conflicts
Dockerfile
4
• One container - one process
• That process ID is always 1
• On docker stop -> SIGTERM (graceful exit)
• After 10 seconds -> SIGKILL (hard exit), signal handlers won’t fire
Dockerfile
5
1 - Use dumb-init
“dumb-init is a simple process supervisor and init system designed to run as
PID 1 inside minimal container environments (such as Docker).”
2 - Use supervisord when you need to run several services in a single
container
supervisord is a quite useful bit when it comes to running more than one
processes in your docker container
Dockerfile
6
Use named volumes over host volumes, whenever possible
Docker knows two types of volumes: named volumes and host volumes.
Use named volumes over other wherever possible:
1. NV can be directly controlled (created, removed) via `docker volume`
2. NV are independent of any paths on the host
3. NV can be backed up and restored easily
4. NV will automatically be created by your docker-compose file
Dockerfile
7
Write a useful entrypoint script
Writing entry point scripts is a high art and usually requires wizardry in shell
scripting. Especially when linking containers (e.g. a web app and a
database) in a docker-compose file, there’s a lot of potential problems to
solve for a good startup script:
1. Check preconditions before you fire up your main process
2. Make use commands and args in your entrypoint script
3. Use exec in your entrypoint script
Dockerfile
8
Don’t use root user, when possible
● It is Secure
● When your service facing internet, it is a requirement
● It will not grant some malicious script privileged execution
When using dev containers, use a welcome message
Layers
Before we can talk about how to trim down the size of your images, we
need to discuss layers. The concept of image layers involves all sorts of
low-level technical details about things like root filesystems, copy-on-write
and union mounts -- luckily those topics have been covered pretty well
elsewhere so I won't rehash those details here. For our purposes, the
important thing to understand is that each instruction in your Dockerfile
results in a new image layer being created.
9
Layers
10
For more detailed description and actions, refer to Appendix section 1.
Reduce Docker Image Sizes
11
Clean your apt/yum cache and do it in a right way.
Use a smaller base image:
- Image size equals the sum of the sizes of the images that make up it
- Each additional instruction in Dockerfile increases the size of the
image.
Don’t install debug tools like vim/curl.
Use  -- no-install-recommends on apt-get install
But how do I debug?
For more detailed description and actions, refer to Appendix section 2
Reduce Docker Image Sizes
12
In the end of this section it is needed to say that in my experience the
optimal number of layers is 12.
Yes, the overlay2 driver supports 128 layers but it's better to avoid it.
Especially you will feel it when you use the rolling update mechanism in
Kubernetes. Many layers will affect the imaging speed and launch speed.
Use the following utilities for writing your Dockerfiles:
● FromLatest.io
● imagelayers.io
Difference between save and export
13
Docker is based on so called images. These images are comparable to
virtual machine images and contain files, configurations and installed
programs. And just like virtual machine images you can start instances of
them. A running instance of an image is called container. You can make
changes to a container (e.g. delete a file), but these changes will not affect
the image. However, you can create a new image from a running container
(and all it changes) using docker commit <container-id> <image-name>.
For more detailed description and actions, refer to Appendix section 3.
Multi-stage builds
14
Multi-stage builds are a new feature requiring Docker 17.05 or higher on the
daemon and client. Multistage builds are useful to anyone who has
struggled to optimize Dockerfiles while keeping them easy to read and
maintain.
With a statically compiled language like Golang people tended to derive their
Dockerfiles from the Golang "SDK" image, add source, do a build then push
it to the Docker Hub. Unfortunately the size of the resulting image was quite
large - at least 670mb.
Multi-stage builds
15
A workaround which is informally called the builder pattern involves using
two Docker images - one to perform a build and another to ship the results
of the first build without the penalty of the build-chain and tooling in the first
image.
As a result of this approach, we will have images without extra packages
and, accordingly, of smaller size. Also we do not need copy file to the host
system from one image and then to the current image.
For more detailed description and actions, refer to Appendix section 4.
Docker Security
16
Below are five common scenarios where deploying Docker images open up
new kinds of security issues you might not have considered, and some great
tools and advice that you can use to ensure you aren’t leaving the barn
doors open when you deploy.
1 - Image Authenticity
2 - Excess Privileges
3 - System Security
4 - Limit Available Resource Consumption
5 - Large Attack Surfaces
Docker Security
17
Image Authenticity included the following points:
1.1 - Use Private or Trusted Repositories
1.2 - Use Docker Content Trust
1.3 - Docker Bench Security (MacOS doesn’t support)
Docker Security
18
1.1 Use Private or Trusted Repositories
You can use private and trusted repositories such as Docker Hub’s official
repositories.
Docker Cloud and Docker Hub can scan images in private repositories to
verify that they are free from known security vulnerabilities or exposures,
and report the results of the scan for each image tag.
As a result, by using the official repositories, you can know that your
containers are safe to use and don’t contain malicious code.
Docker Security
19
1.2 Use Docker Content Trust
Before a publisher pushes an image to a remote registry, Docker Engine
signs the image locally with the publisher’s private key. When you later pull
this image, Docker Engine uses the publisher’s public key to verify that the
image you are about to run is exactly what the publisher created, has not
been tampered with and is up to date.
To summarize, the service protects against image forgery, replay attacks,
and key compromises. I strongly encourage you to check out the article, as
well as the official documentation.
Docker Security
20
1.3 Docker Bench Security
Checks for dozens of common best practices around deploying Docker
containers in production.
The tool was based on the recommendations in the CIS Docker 1.13
Benchmark, and run checks against the following six areas:
1. Host configuration
2. Docker daemon configuration
3. Docker daemon configuration files
4. Container images and build files
5. Container runtime
6. Docker security operations
Docker Security
21
Docker Security
22
2 Excess Privileges
With respect to Docker I’m specifically focused on two points:
2.1 - Containers running in privileged mode
2.2 - Excess privileges used by containers
Starting with the first point, you can run a Docker container with the --
privileged switch.
What this does is give extended privileges to this container. But it is not
good.
gives all capabilities to the container, and it also lifts all the limitations
enforced by the device cgroup controller. In other words, the container can
then do almost everything that the host can do. This flag exists to allow
special use-cases, like running Docker within Docker.
Docker Security
23
Container breakout to the host: Containers might run as a root user,
making it possible to use privilege escalation to break the “containment” and
access the host’s operating system.
● Kernel vulnerabilities.
● Bad configuration.
● Mounted filesystems.
● Mounted Docker socket.
Docker Security
24
Drop Unnecessary Privileges and Capabilities
● Privileges
● CAP_SYS_ADMIN
● For the container privilege were the equivalents of the normal user, create
an isolated user namespace for your containers. If possible, avoid
containers with uid 0.
● trusted repository.
● /var/run/docker.sock, / proc, / dev, etc
For more detailed description and actions, refer to Appendix section 5
Docker Security
25
3 - System Security
In a compromised system, isolation and other security mechanisms of
containers are unlikely to help. In addition, the system is designed in such a
way that the containers use the host's core. For many reasons you already
know, this increases the efficiency of work, but from the security point of
view, this feature is a threat that must be dealt with.
Docker Security
26
Approaches to the security of the host:
● Make sure the configuration of the host and the Docker engine are secure
(access is limited and provided only to authenticated users, the
communication channel is encrypted, etc.). To test the configuration for
compliance with the best practices, I recommend using the Docker bench
audit tool.
Docker Security
27
● Update the system in a timely manner, subscribe to the security mailing
list for the operating system and other installed software, especially if it is
installed from third-party repositories (for example, container orchestration
systems, one of which you've probably already installed).
● Use minimal host-based systems specifically designed for use with
containers, such as CoreOS, Red Hat Atomic, RancherOS, etc. This will
reduce the attack surface, as well as take advantage of such convenient
features as, for example, performing system services in containers.
Docker Security
28
● To prevent undesirable operations on both the host and containers, you
can use the Mandatory Access Control system. This will help you with
tools such as Seccomp, AppArmor or SELinux.
Docker Security
29
4 - Limit Available Resource Consumption
On average, containers are much more numerous than virtual
machines. They are lightweight, which allows you to run a lot of containers,
even on a very modest hardware. This is definitely an advantage, but the
reverse side of the coin is a serious competition for the resources of the
host. Errors in the software, design flaws and hacker attacks can lead to
denial of service. To prevent them, you must properly configure resource
limits.
For more detailed description and actions, refer to Appendix section 6
Docker Security
30
5 - Large Attack Surfaces
Containers are isolated black boxes. If they perform their functions, it's
easy to forget which programs of which versions are running inside. The
container can perfectly handle its duties from the viewpoint of view, while
using vulnerable software. These vulnerabilities can be fixed for a long time
in the upstream, but not in your local image. If you do not take appropriate
measures, problems of this kind may long remain unnoticed.
Docker Security
31
● Advanced troubleshooting with sysdig
● More advanced troubleshooting with perf
● slabtop
For more detailed description and actions, refer to Appendix section 7
Q&A
Appendix 1: Layers
33
Let's look at an example Dockerfile to see this in action:
FROM ubuntu:latest
LABEL mantainer="Stanislav Kolenkin stas.kolenkin@gmail.com"
RUN apt-get update
RUN apt-get install -y python python-pip wget
Appendix 1: Layers
34
Let's build this image and check number of layers:
docker build -t . test
….
done.
---> ce11bc61d46c
Removing intermediate container 9b0787022031
Successfully built ce11bc61d46c
Successfully tagged test:latest
Appendix 1: Layers
35
Appendix 1: Layers
36
Appendix 1: Layers
37
Appendix 1: Layers
38
Let’s give it a shot and optimize our Image:
cat Dockerfile
FROM ubuntu:latest
LABEL mantainer="Stanislav Kolenkin stas.kolenkin@gmail.com"
RUN apt-get update && apt-get install -y python python-pip wget vim
Appendix 1: Layers
39
Appendix 1: Layers
40
Let's look at the output of the docker history command and check number of
layers:
We often talk about layers and images as if they are different things. But, in
fact, every layer is already an image, and the layer of the image is just a
collection of other images.
Appendix 1: Layers
41
We can run container the following:
docker run -it sample:latest /bin/bash
or
docker run -it d355ed3537e9 /bin/bash
Both are images based on which containers can be launched. The only
difference is that the first one is named, and the second one is not. This
ability to run containers from any layer can be very useful when debugging
your Dockerfile
Appendix 1: Layers
42
Appendix 2: Reduce Docker Image Sizes
43
Clean your apt/yum cache and do it in a right way:
Cleaning command should be put in the same layer where package
installation commands reside.
FROM ubuntu:latest
LABEL mantainer="Stanislav Kolenkin stas.kolenkin@gmail.com"
RUN apt-get update && 
apt-get install -y python python-pip wget vim && 
apt-get remove python-pip && 
rm -rf /var/lib/apt/lists/*
Appendix 2: Reduce Docker Image Sizes
Use a smaller base image
- Image size equals the sum of the sizes of the images that make up it
- Each additional instruction in Dockerfile increases the size of the image.
Ubuntu image will set you to 128MB on the outset. Consider using a
smaller base image. For each apt-get install or yum install line you add in
your Dockerfile you will be increasing the size of the image by that library
size. Realize that you probably don’t need many of those libraries you are
installing.
Consider using an alpine base image (only 5MB in size). Most likely,
there are alpine tags for the programming language you are using. For
example, Python has 2.7-alpine(~50MB) and 3.5-alpine(~65MB).
44
Appendix 2: Reduce Docker Image Sizes
Consider using an alpine base image (only 5MB in size). Most likely,
there are alpine tags for the programming language you are using. For
example, Python has 2.7-alpine(~50MB) and 3.5-alpine(~65MB).
45
Appendix 2: Reduce Docker Image Sizes
46
Appendix 2: Reduce Docker Image Sizes
47
Appendix 2: Reduce Docker Image Sizes
48
Don’t install debug tools like vim/curl:
Many developers installs vim and curl in their Dockerfile for debug
purposes. Do so only if application depends on it. This defeats the
purpose of using a small base image.
But how do I debug?
One technique is to have a development Dockerfile and a production
Dockerfile. During development, have all of the tools you need, and then
when deploying to production remove the development tools.
Appendix 2: Reduce Docker Image Sizes
49
Use — no-install-recommends on apt-get install
Adding — no-install-recommends to apt-get install -y can help
dramatically reduce the size by avoiding installing packages that aren’t
technically dependencies but are recommended to be installed
alongside packages.
--no-install-recommends in the apt-get
Appendix 2: Reduce Docker Image Sizes
50
RUN apt-get update && 
apt-get install -y --no-install-recommends curl python-pip && 
pip install requests && 
apt-get remove -y python-pip curl && 
rm -rf /var/lib/apt/lists/*
Appendix 2: Reduce Docker Image Sizes
51
Add rm -rf /var/lib/apt/lists/* to same layer as apt-get installs
Add rm -rf /var/lib/apt/lists/* at the end of the apt-get -y install to clean up
after install packages.
For yum, add yum clean all
Also, if you are install wget or curl in order to download some package,
remember to combine them all in one RUN statement. Then at the end
of the run statement, apt-get remove curl or wget once you no longer
need them. This advice goes for any package that you only need
temporarily.
Appendix 2: Reduce Docker Image Sizes
52
Flatten docker image/containers
So it is only possible to “flatten” a Docker container, not an image. So we
need to start a container from an image first. Then we can export and import
the container in one line:
docker run -it ubuntu bash -c "exit"
docker ps -a | grep ubuntu
bda68042f324 ubuntu "bash -c exit"
2 seconds ago Exited (0) 8 seconds ago keen_turing
Appendix 2: Reduce Docker Image Sizes
53
docker export bda68042f324 | docker import -
img_size_optim_flatten:latest
sha256:8d46bbdbc23b5dd094afcd3df0e2adddbddf1a2f6d5eb1abeb6f50e95
89e6331
docker images | grep img_size_optim_flatten
img_size_optim_flatten latest
8d46bbdbc23b 31 seconds ago 85.8MB
Appendix 2: Reduce Docker Image Sizes
54
Appendix 2: Reduce Docker Image Sizes
55
The image size is now 85.8MB
● The image has 1 layer.
Complicated to use the cache mechanism… as it’s based on layers and
RUN instructions.
Appendix 2: Reduce Docker Image Sizes
56
Appendix 2: Reduce Docker Image Sizes
57
docker-squash is a utility to squash multiple docker layers into one in order
to create an image with fewer and smaller layers.
It retains Dockerfile commands such as PORT, ENV, etc.. so that squashed
images work the same as they were originally built. In addition, deleted files
in later layers are actually purged from the image when squashed.
It's designed to support a workflow where you would squash the image just
before pushing it to a registry. Before squashing the image, you would
remove any build time dependencies, extra files (apt caches, logs, private
keys, etc..) that you would not want to deploy. The defaults also preserve
your base image so that its contents are not repeatedly transferred when
pushing and pulling images.
Appendix 2: Reduce Docker Image Sizes
58
Appendix 2: Reduce Docker Image Sizes
59
Run docker-squash and check size.
Appendix 2: Reduce Docker Image Sizes
60
Note that docker-engine since version 1.13 in the experimental mode
contains the ability to assemble already compressed images. To do this, add
the -squash option to the build command, but performing a docker-squash
would usually give a smaller size of the image.
Appendix 2: Reduce Docker Image Sizes
61
Use the following utilities for writing your Dockerfiles:
● FromLatest.io
● imagelayers.io
Appendix 2: Reduce Docker Image Sizes
62
Appendix 2: Reduce Docker Image Sizes
63
Appendix 3: Difference between save and export
64
Let’s make an example:
docker pull busybox
docker images |grep busybox
docker run busybox mkdir /home/test
docker ps -a |grep busybox
docker commit CONTAINER-ID busybox-1
docker images |grep busybox
docker run busybox [ -d /home/test ] && echo 'Directory found' || echo 'Directory not
found'
docker run busybox-1 [ -d /home/test ] && echo 'Directory found' || echo 'Directory not
found'
Appendix 3: Difference between save and export
65
Appendix 3: Difference between save and export
66
Now we have two different images (busybox and busybox-1) and we have a
container made from busybox which also contains the change (the new
folder /home/test). Let’s see how we can persist our changes.
Export
Export is used to persist a container (not an image). So we need the
container id which we can see like this:
docker ps -a
docker export CONTAINER-ID > export.tar
The result is a TAR-file which should be around 1.2 MB big (slightly smaller
than the one from save).
Appendix 3: Difference between save and export
67
SAVE
Save is used to persist an image (not a container). It is needed to set image
name. Like this:
docker images
docker save busybox-1 > /home/save.tar
The result is a TAR-file which should be around 1.3 MB big (slightly bigger
than the one from export).
Appendix 3: Difference between save and export
68
The difference
Now after we created our TAR-files, let’s see what we have. First of all we
clean up a little bit – we remove all containers and images we have right
now:
docker ps -a |grep busybox
docker rm CONTAINER-ID
docker images|grep busybox
docker rmi busybox-1
docker rmi busybox
Appendix 3: Difference between save and export
69
Appendix 3: Difference between save and export
70
Start with export from the container that was done earlier.
Import it like this:
cat export.tar | sudo docker import - busybox-1-export:latest
docker images |grep busybox
docker run busybox-1-export [ -d /home/test ] && echo 'Directory found' ||
echo 'Directory not found'
Appendix 3: Difference between save and export
71
Appendix 3: Difference between save and export
72
We start with our export we did from the container. We can import it like this:
docker load < save.tar
docker images |grep busybox-1
docker run busybox-1 [ -d /home/test ] && echo 'Directory found' || echo
'Directory not found'
Appendix 3: Difference between save and export
73
Appendix 3: Difference between save and export
74
So what’s the difference between both?
Well, as we saw the exported version is slightly smaller. That is because it is
flattened, which means it lost its history and meta-data. We can see this by
the following command:
alias dockviz="docker run -it --rm -v
/var/run/docker.sock:/var/run/docker.sock nate/dockviz"
dockviz images -t |grep busybox
Appendix 3: Difference between save and export
75
Exported-imported image has lost all of its history whereas the saved-loaded
image still have its history and layers. This means that you cannot do any
rollback to a previous layer if you export-import it while you can still do this if
you save-load the whole (complete) image.
Appendix 4: Multi-stage builds
76
Dockerfile.multi
FROM golang:1.7.3
WORKDIR /go/src/github.com/alexellis/href-counter/
RUN go get -d -v golang.org/x/net/html
COPY app.go .
RUN CGO_ENABLED=0 GOOS=linux go build -a -installsuffix cgo -o app .
FROM alpine:latest
RUN apk --no-cache add ca-certificates
WORKDIR /root/
COPY --from=0 /go/src/github.com/alexellis/href-counter/app .
CMD ["./app"]
Appendix 4: Multi-stage builds
77
Appendix 4: Multi-stage builds
78
As you can see, the two preparatory stages here use golang to build the
application, but the resulting image will be compact and without golang.
Appendix 4: Multi-stage builds
79
By default, the stages are unnamed. In this example, we will assign a name to the form and
use it in the COPY statement.
FROM golang:1.7.3 as builder
WORKDIR /go/src/github.com/alexellis/href-counter/
RUN go get -d -v golang.org/x/net/html
COPY app.go .
RUN CGO_ENABLED=0 GOOS=linux go build -a -installsuffix cgo -o app .
FROM alpine:latest
RUN apk --no-cache add ca-certificates
WORKDIR /root/
COPY --from=builder /go/src/github.com/alexellis/href-counter/app .
CMD ["./app"]
Appendix 4: Multi-stage builds
80
As a result of this approach, we will have images without extra packages
and, accordingly, of smaller size. Also we do not need copy file to the host
system from one image and then to the current image.
Appendix 5: Docker Security
81
You can add or remove privileges use of the --cap-drop and --cap-add
flags.
For in-depth coverage of these options, refer to the “Runtime privilege and
Linux capabilities” section of the documentation.
If you create a container without a namespace, then by default the
processes running inside the container will work from the host's point of view
on behalf of the superuser.
Appendix 6: Docker Security
82
Standart limits:
--blkio-weight uint16 Block IO (relative weight), between 10 and 1000, or 0 to disable (default 0)
--blkio-weight-device list Block IO weight (relative device weight) (default [])
--device-read-bps list Limit read rate (bytes per second) from a device (default [])
--device-read-iops list Limit read rate (IO per second) from a device (default [])
--device-write-bps list Limit write rate (bytes per second) to a device (default [])
--device-write-iops list Limit write rate (IO per second) to a device (default [])
--kernel-memory bytes Kernel memory limit
--label-file list Read in a line delimited file of labels
-m, --memory bytes Memory limit
--memory-reservation bytes Memory soft limit
--memory-swap bytes Swap limit equal to memory plus swap: '-1' to enable unlimited swap
--pids-limit int Tune container pids limit (set -1 for unlimited)
--ulimit ulimit Ulimit options (default [])
Appendix 7: Debugging
83
Appendix 7: Debugging
84
sysdig -pcontainer -c topprocs_cpu
Appendix 7: Debugging
85
csysdig -vcontainers
Appendix 7: Debugging
86
More advanced troubleshooting with perf
At this point, it’s worth switching troubleshooting tools once again and go
one level deeper, this time using perf, the performance tracking tool shipped
with the kernel. Its interface is a bit hostile, but it does a wonderful job at
profiling the kernel activity.
To get a clue about where those lstat() system calls are spending their time,
we can just grab the pid of the worker process and pass it to perf top, which
has been previously set up with kernel debugging symbols
Perf will then instrument the execution of the worker process, and will show
us which functions, either in user space or in kernel space (executing on
behalf of the process) the majority of time is spent in.
Appendix 7: Debugging
87
slabtop
The Linux kernel needs to allocate memory for temporary objects such as
task or device structures and inodes. The caching memory allocator
manages caches of these types of objects. The modern Linux kernel
implements this caching memory allocator to hold the caches called the
slabs. Different types of slab caches are maintained by the slab allocator.
This article concentrates on the slabtop command which shows real-time
kernel slab cache information.
Appendix 7: Debugging
88
"Docker best practice", Станислав Коленкин (senior devops, DataArt)

More Related Content

What's hot (20)

PDF
Testing Docker Images Security -All day dev ops 2017
Jose Manuel Ortega Candel
 
PDF
Docker, Linux Containers, and Security: Does It Add Up?
Jérôme Petazzoni
 
PPTX
Docker container a-brief_introduction_2016-01-30
Khelender Sasan
 
PDF
Testing Docker Security Linuxlab 2017
Jose Manuel Ortega Candel
 
PDF
Veer's Container Security
Jim Barlow
 
PPTX
Container security
Anthony Chow
 
PDF
Testing Docker Images Security
Jose Manuel Ortega Candel
 
PDF
Docker Container Introduction
Innfinision Cloud and BigData Solutions
 
PDF
Container Security: How We Got Here and Where We're Going
Phil Estes
 
PDF
Introduction to Docker and deployment and Azure
Jérôme Petazzoni
 
PDF
Docker and kernel security
smart_bit
 
PDF
Docker dev ops for cd meetup 12-14
Simon Storm
 
PDF
How secure is your Docker Container pipeline?
Manideep Konakandla
 
PDF
Breaking and fixing_your_dockerized_environments_owasp_appsec_usa2016
Manideep Konakandla
 
PPTX
Hands on introduction to docker security for docker newbies
Yigal Elefant
 
PDF
24 23 jun17 2may17 16231 ijeecs latest_version (1) edit septian
IAESIJEECS
 
PDF
Rooting Out Root: User namespaces in Docker
Phil Estes
 
PPTX
Docker introduction for the beginners
Juneyoung Oh
 
PDF
Why everyone is excited about Docker (and you should too...) - Carlo Bonamic...
Codemotion
 
PPTX
Devoxx France 2015 - The Docker Orchestration Ecosystem on Azure
Patrick Chanezon
 
Testing Docker Images Security -All day dev ops 2017
Jose Manuel Ortega Candel
 
Docker, Linux Containers, and Security: Does It Add Up?
Jérôme Petazzoni
 
Docker container a-brief_introduction_2016-01-30
Khelender Sasan
 
Testing Docker Security Linuxlab 2017
Jose Manuel Ortega Candel
 
Veer's Container Security
Jim Barlow
 
Container security
Anthony Chow
 
Testing Docker Images Security
Jose Manuel Ortega Candel
 
Docker Container Introduction
Innfinision Cloud and BigData Solutions
 
Container Security: How We Got Here and Where We're Going
Phil Estes
 
Introduction to Docker and deployment and Azure
Jérôme Petazzoni
 
Docker and kernel security
smart_bit
 
Docker dev ops for cd meetup 12-14
Simon Storm
 
How secure is your Docker Container pipeline?
Manideep Konakandla
 
Breaking and fixing_your_dockerized_environments_owasp_appsec_usa2016
Manideep Konakandla
 
Hands on introduction to docker security for docker newbies
Yigal Elefant
 
24 23 jun17 2may17 16231 ijeecs latest_version (1) edit septian
IAESIJEECS
 
Rooting Out Root: User namespaces in Docker
Phil Estes
 
Docker introduction for the beginners
Juneyoung Oh
 
Why everyone is excited about Docker (and you should too...) - Carlo Bonamic...
Codemotion
 
Devoxx France 2015 - The Docker Orchestration Ecosystem on Azure
Patrick Chanezon
 

Similar to "Docker best practice", Станислав Коленкин (senior devops, DataArt) (20)

PPTX
Tips and best practices for Docker
Calidad Infotech
 
PDF
Dockers & kubernetes detailed - Beginners to Geek
wiTTyMinds1
 
PDF
Docker for developers
andrzejsydor
 
PDF
Docker primer and tips
Samuel Chow
 
PPTX
Docker best Practices
jeetendra mandal
 
PDF
Docker Best Practices Workshop
Ahmed AbouZaid
 
PDF
Securing Containers From Day One | null Ahmedabad Meetup
Kumar Ashwin
 
PDF
Securing Containers From Day One | null Ahmedabad Meetup
Kumar Ashwin
 
PDF
Docker Security - Secure Container Deployment on Linux
Michael Boelen
 
PDF
OSDC 2016 - Inspecting Security of Docker formatted Container Images to find ...
NETWAYS
 
PDF
Perspectives on Docker
RightScale
 
PDF
Up and running with docker
Michelle Liu
 
PDF
Real-World Docker: 10 Things We've Learned
RightScale
 
PDF
Docker security
Janos Suto
 
PDF
Docker London: Container Security
Phil Estes
 
PPTX
Getting Started with Docker
Geeta Vinnakota
 
PDF
Docker in the Enterprise
Saul Caganoff
 
PDF
Docker container security
Thoughtworks
 
PPTX
Docker Security workshop slides
Docker, Inc.
 
Tips and best practices for Docker
Calidad Infotech
 
Dockers & kubernetes detailed - Beginners to Geek
wiTTyMinds1
 
Docker for developers
andrzejsydor
 
Docker primer and tips
Samuel Chow
 
Docker best Practices
jeetendra mandal
 
Docker Best Practices Workshop
Ahmed AbouZaid
 
Securing Containers From Day One | null Ahmedabad Meetup
Kumar Ashwin
 
Securing Containers From Day One | null Ahmedabad Meetup
Kumar Ashwin
 
Docker Security - Secure Container Deployment on Linux
Michael Boelen
 
OSDC 2016 - Inspecting Security of Docker formatted Container Images to find ...
NETWAYS
 
Perspectives on Docker
RightScale
 
Up and running with docker
Michelle Liu
 
Real-World Docker: 10 Things We've Learned
RightScale
 
Docker security
Janos Suto
 
Docker London: Container Security
Phil Estes
 
Getting Started with Docker
Geeta Vinnakota
 
Docker in the Enterprise
Saul Caganoff
 
Docker container security
Thoughtworks
 
Docker Security workshop slides
Docker, Inc.
 
Ad

More from DataArt (20)

PDF
DataArt Custom Software Engineering with a Human Approach
DataArt
 
PDF
DataArt Healthcare & Life Sciences
DataArt
 
PDF
DataArt Financial Services and Capital Markets
DataArt
 
PDF
About DataArt HR Partners
DataArt
 
PDF
Event management в IT
DataArt
 
PDF
Digital Marketing from inside
DataArt
 
PPTX
What's new in Android, Igor Malytsky ( Google Post I|O Tour)
DataArt
 
PDF
DevOps Workshop:Что бывает, когда DevOps приходит на проект
DataArt
 
PDF
IT Talk Kharkiv: «‎Soft skills в IT. Польза или вред? Максим Бастион, DataArt
DataArt
 
PDF
«Ноль копеек. Спастись от выгорания» — Сергей Чеботарев (Head of Design, Han...
DataArt
 
PDF
Communication in QA's life
DataArt
 
PDF
Нельзя просто так взять и договориться, или как мы работали со сложными людьми
DataArt
 
PDF
Знакомьтесь, DevOps
DataArt
 
PDF
DevOps in real life
DataArt
 
PDF
Codeless: автоматизация тестирования
DataArt
 
PDF
Selenoid
DataArt
 
PDF
Selenide
DataArt
 
PDF
A. Sirota "Building an Automation Solution based on Appium"
DataArt
 
PDF
Эмоциональный интеллект или как не сойти с ума в условиях сложного и динамичн...
DataArt
 
PPTX
IT talk: Как я перестал бояться и полюбил TestNG
DataArt
 
DataArt Custom Software Engineering with a Human Approach
DataArt
 
DataArt Healthcare & Life Sciences
DataArt
 
DataArt Financial Services and Capital Markets
DataArt
 
About DataArt HR Partners
DataArt
 
Event management в IT
DataArt
 
Digital Marketing from inside
DataArt
 
What's new in Android, Igor Malytsky ( Google Post I|O Tour)
DataArt
 
DevOps Workshop:Что бывает, когда DevOps приходит на проект
DataArt
 
IT Talk Kharkiv: «‎Soft skills в IT. Польза или вред? Максим Бастион, DataArt
DataArt
 
«Ноль копеек. Спастись от выгорания» — Сергей Чеботарев (Head of Design, Han...
DataArt
 
Communication in QA's life
DataArt
 
Нельзя просто так взять и договориться, или как мы работали со сложными людьми
DataArt
 
Знакомьтесь, DevOps
DataArt
 
DevOps in real life
DataArt
 
Codeless: автоматизация тестирования
DataArt
 
Selenoid
DataArt
 
Selenide
DataArt
 
A. Sirota "Building an Automation Solution based on Appium"
DataArt
 
Эмоциональный интеллект или как не сойти с ума в условиях сложного и динамичн...
DataArt
 
IT talk: Как я перестал бояться и полюбил TestNG
DataArt
 
Ad

Recently uploaded (20)

PPTX
grade 5 lesson matatag ENGLISH 5_Q1_PPT_WEEK4.pptx
SireQuinn
 
PPTX
SPINA BIFIDA: NURSING MANAGEMENT .pptx
PRADEEP ABOTHU
 
PPTX
How to Create a PDF Report in Odoo 18 - Odoo Slides
Celine George
 
PDF
CONCURSO DE POESIA “POETUFAS – PASSOS SUAVES PELO VERSO.pdf
Colégio Santa Teresinha
 
PPTX
2025 Winter SWAYAM NPTEL & A Student.pptx
Utsav Yagnik
 
PPTX
Cultivation practice of Litchi in Nepal.pptx
UmeshTimilsina1
 
PDF
DIGESTION OF CARBOHYDRATES,PROTEINS,LIPIDS
raviralanaresh2
 
PDF
CEREBRAL PALSY: NURSING MANAGEMENT .pdf
PRADEEP ABOTHU
 
PDF
LAW OF CONTRACT (5 YEAR LLB & UNITARY LLB )- MODULE - 1.& 2 - LEARN THROUGH P...
APARNA T SHAIL KUMAR
 
PDF
Chapter-V-DED-Entrepreneurship: Institutions Facilitating Entrepreneurship
Dayanand Huded
 
PDF
The Different Types of Non-Experimental Research
Thelma Villaflores
 
PDF
The History of Phone Numbers in Stoke Newington by Billy Thomas
History of Stoke Newington
 
PPTX
Stereochemistry-Optical Isomerism in organic compoundsptx
Tarannum Nadaf-Mansuri
 
PDF
Lesson 2 - WATER,pH, BUFFERS, AND ACID-BASE.pdf
marvinnbustamante1
 
PDF
The dynastic history of the Chahmana.pdf
PrachiSontakke5
 
PDF
SSHS-2025-PKLP_Quarter-1-Dr.-Kerby-Alvarez.pdf
AishahSangcopan1
 
PPTX
Soil and agriculture microbiology .pptx
Keerthana Ramesh
 
PDF
Dimensions of Societal Planning in Commonism
StefanMz
 
PPSX
HEALTH ASSESSMENT (Community Health Nursing) - GNM 1st Year
Priyanshu Anand
 
PDF
The Constitution Review Committee (CRC) has released an updated schedule for ...
nservice241
 
grade 5 lesson matatag ENGLISH 5_Q1_PPT_WEEK4.pptx
SireQuinn
 
SPINA BIFIDA: NURSING MANAGEMENT .pptx
PRADEEP ABOTHU
 
How to Create a PDF Report in Odoo 18 - Odoo Slides
Celine George
 
CONCURSO DE POESIA “POETUFAS – PASSOS SUAVES PELO VERSO.pdf
Colégio Santa Teresinha
 
2025 Winter SWAYAM NPTEL & A Student.pptx
Utsav Yagnik
 
Cultivation practice of Litchi in Nepal.pptx
UmeshTimilsina1
 
DIGESTION OF CARBOHYDRATES,PROTEINS,LIPIDS
raviralanaresh2
 
CEREBRAL PALSY: NURSING MANAGEMENT .pdf
PRADEEP ABOTHU
 
LAW OF CONTRACT (5 YEAR LLB & UNITARY LLB )- MODULE - 1.& 2 - LEARN THROUGH P...
APARNA T SHAIL KUMAR
 
Chapter-V-DED-Entrepreneurship: Institutions Facilitating Entrepreneurship
Dayanand Huded
 
The Different Types of Non-Experimental Research
Thelma Villaflores
 
The History of Phone Numbers in Stoke Newington by Billy Thomas
History of Stoke Newington
 
Stereochemistry-Optical Isomerism in organic compoundsptx
Tarannum Nadaf-Mansuri
 
Lesson 2 - WATER,pH, BUFFERS, AND ACID-BASE.pdf
marvinnbustamante1
 
The dynastic history of the Chahmana.pdf
PrachiSontakke5
 
SSHS-2025-PKLP_Quarter-1-Dr.-Kerby-Alvarez.pdf
AishahSangcopan1
 
Soil and agriculture microbiology .pptx
Keerthana Ramesh
 
Dimensions of Societal Planning in Commonism
StefanMz
 
HEALTH ASSESSMENT (Community Health Nursing) - GNM 1st Year
Priyanshu Anand
 
The Constitution Review Committee (CRC) has released an updated schedule for ...
nservice241
 

"Docker best practice", Станислав Коленкин (senior devops, DataArt)

  • 2. New York USA London UK Munich Germany Zug Switzerland Docker Containers. Best practices. by Stanislav Kolenkin, Senior DevOps.
  • 3. What is container? Docker? 3 • Hardware can’t be replicated, Software can be. • Container is a software App with all required to execute it • Packed container always runs the same, regardless of the environment • There is Unix and Windows versions • No conflicts
  • 4. Dockerfile 4 • One container - one process • That process ID is always 1 • On docker stop -> SIGTERM (graceful exit) • After 10 seconds -> SIGKILL (hard exit), signal handlers won’t fire
  • 5. Dockerfile 5 1 - Use dumb-init “dumb-init is a simple process supervisor and init system designed to run as PID 1 inside minimal container environments (such as Docker).” 2 - Use supervisord when you need to run several services in a single container supervisord is a quite useful bit when it comes to running more than one processes in your docker container
  • 6. Dockerfile 6 Use named volumes over host volumes, whenever possible Docker knows two types of volumes: named volumes and host volumes. Use named volumes over other wherever possible: 1. NV can be directly controlled (created, removed) via `docker volume` 2. NV are independent of any paths on the host 3. NV can be backed up and restored easily 4. NV will automatically be created by your docker-compose file
  • 7. Dockerfile 7 Write a useful entrypoint script Writing entry point scripts is a high art and usually requires wizardry in shell scripting. Especially when linking containers (e.g. a web app and a database) in a docker-compose file, there’s a lot of potential problems to solve for a good startup script: 1. Check preconditions before you fire up your main process 2. Make use commands and args in your entrypoint script 3. Use exec in your entrypoint script
  • 8. Dockerfile 8 Don’t use root user, when possible ● It is Secure ● When your service facing internet, it is a requirement ● It will not grant some malicious script privileged execution When using dev containers, use a welcome message
  • 9. Layers Before we can talk about how to trim down the size of your images, we need to discuss layers. The concept of image layers involves all sorts of low-level technical details about things like root filesystems, copy-on-write and union mounts -- luckily those topics have been covered pretty well elsewhere so I won't rehash those details here. For our purposes, the important thing to understand is that each instruction in your Dockerfile results in a new image layer being created. 9
  • 10. Layers 10 For more detailed description and actions, refer to Appendix section 1.
  • 11. Reduce Docker Image Sizes 11 Clean your apt/yum cache and do it in a right way. Use a smaller base image: - Image size equals the sum of the sizes of the images that make up it - Each additional instruction in Dockerfile increases the size of the image. Don’t install debug tools like vim/curl. Use  -- no-install-recommends on apt-get install But how do I debug? For more detailed description and actions, refer to Appendix section 2
  • 12. Reduce Docker Image Sizes 12 In the end of this section it is needed to say that in my experience the optimal number of layers is 12. Yes, the overlay2 driver supports 128 layers but it's better to avoid it. Especially you will feel it when you use the rolling update mechanism in Kubernetes. Many layers will affect the imaging speed and launch speed. Use the following utilities for writing your Dockerfiles: ● FromLatest.io ● imagelayers.io
  • 13. Difference between save and export 13 Docker is based on so called images. These images are comparable to virtual machine images and contain files, configurations and installed programs. And just like virtual machine images you can start instances of them. A running instance of an image is called container. You can make changes to a container (e.g. delete a file), but these changes will not affect the image. However, you can create a new image from a running container (and all it changes) using docker commit <container-id> <image-name>. For more detailed description and actions, refer to Appendix section 3.
  • 14. Multi-stage builds 14 Multi-stage builds are a new feature requiring Docker 17.05 or higher on the daemon and client. Multistage builds are useful to anyone who has struggled to optimize Dockerfiles while keeping them easy to read and maintain. With a statically compiled language like Golang people tended to derive their Dockerfiles from the Golang "SDK" image, add source, do a build then push it to the Docker Hub. Unfortunately the size of the resulting image was quite large - at least 670mb.
  • 15. Multi-stage builds 15 A workaround which is informally called the builder pattern involves using two Docker images - one to perform a build and another to ship the results of the first build without the penalty of the build-chain and tooling in the first image. As a result of this approach, we will have images without extra packages and, accordingly, of smaller size. Also we do not need copy file to the host system from one image and then to the current image. For more detailed description and actions, refer to Appendix section 4.
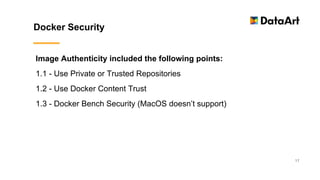
  • 16. Docker Security 16 Below are five common scenarios where deploying Docker images open up new kinds of security issues you might not have considered, and some great tools and advice that you can use to ensure you aren’t leaving the barn doors open when you deploy. 1 - Image Authenticity 2 - Excess Privileges 3 - System Security 4 - Limit Available Resource Consumption 5 - Large Attack Surfaces
  • 17. Docker Security 17 Image Authenticity included the following points: 1.1 - Use Private or Trusted Repositories 1.2 - Use Docker Content Trust 1.3 - Docker Bench Security (MacOS doesn’t support)
  • 18. Docker Security 18 1.1 Use Private or Trusted Repositories You can use private and trusted repositories such as Docker Hub’s official repositories. Docker Cloud and Docker Hub can scan images in private repositories to verify that they are free from known security vulnerabilities or exposures, and report the results of the scan for each image tag. As a result, by using the official repositories, you can know that your containers are safe to use and don’t contain malicious code.
  • 19. Docker Security 19 1.2 Use Docker Content Trust Before a publisher pushes an image to a remote registry, Docker Engine signs the image locally with the publisher’s private key. When you later pull this image, Docker Engine uses the publisher’s public key to verify that the image you are about to run is exactly what the publisher created, has not been tampered with and is up to date. To summarize, the service protects against image forgery, replay attacks, and key compromises. I strongly encourage you to check out the article, as well as the official documentation.
  • 20. Docker Security 20 1.3 Docker Bench Security Checks for dozens of common best practices around deploying Docker containers in production. The tool was based on the recommendations in the CIS Docker 1.13 Benchmark, and run checks against the following six areas: 1. Host configuration 2. Docker daemon configuration 3. Docker daemon configuration files 4. Container images and build files 5. Container runtime 6. Docker security operations
  • 22. Docker Security 22 2 Excess Privileges With respect to Docker I’m specifically focused on two points: 2.1 - Containers running in privileged mode 2.2 - Excess privileges used by containers Starting with the first point, you can run a Docker container with the -- privileged switch. What this does is give extended privileges to this container. But it is not good. gives all capabilities to the container, and it also lifts all the limitations enforced by the device cgroup controller. In other words, the container can then do almost everything that the host can do. This flag exists to allow special use-cases, like running Docker within Docker.
  • 23. Docker Security 23 Container breakout to the host: Containers might run as a root user, making it possible to use privilege escalation to break the “containment” and access the host’s operating system. ● Kernel vulnerabilities. ● Bad configuration. ● Mounted filesystems. ● Mounted Docker socket.
  • 24. Docker Security 24 Drop Unnecessary Privileges and Capabilities ● Privileges ● CAP_SYS_ADMIN ● For the container privilege were the equivalents of the normal user, create an isolated user namespace for your containers. If possible, avoid containers with uid 0. ● trusted repository. ● /var/run/docker.sock, / proc, / dev, etc For more detailed description and actions, refer to Appendix section 5
  • 25. Docker Security 25 3 - System Security In a compromised system, isolation and other security mechanisms of containers are unlikely to help. In addition, the system is designed in such a way that the containers use the host's core. For many reasons you already know, this increases the efficiency of work, but from the security point of view, this feature is a threat that must be dealt with.
  • 26. Docker Security 26 Approaches to the security of the host: ● Make sure the configuration of the host and the Docker engine are secure (access is limited and provided only to authenticated users, the communication channel is encrypted, etc.). To test the configuration for compliance with the best practices, I recommend using the Docker bench audit tool.
  • 27. Docker Security 27 ● Update the system in a timely manner, subscribe to the security mailing list for the operating system and other installed software, especially if it is installed from third-party repositories (for example, container orchestration systems, one of which you've probably already installed). ● Use minimal host-based systems specifically designed for use with containers, such as CoreOS, Red Hat Atomic, RancherOS, etc. This will reduce the attack surface, as well as take advantage of such convenient features as, for example, performing system services in containers.
  • 28. Docker Security 28 ● To prevent undesirable operations on both the host and containers, you can use the Mandatory Access Control system. This will help you with tools such as Seccomp, AppArmor or SELinux.
  • 29. Docker Security 29 4 - Limit Available Resource Consumption On average, containers are much more numerous than virtual machines. They are lightweight, which allows you to run a lot of containers, even on a very modest hardware. This is definitely an advantage, but the reverse side of the coin is a serious competition for the resources of the host. Errors in the software, design flaws and hacker attacks can lead to denial of service. To prevent them, you must properly configure resource limits. For more detailed description and actions, refer to Appendix section 6
  • 30. Docker Security 30 5 - Large Attack Surfaces Containers are isolated black boxes. If they perform their functions, it's easy to forget which programs of which versions are running inside. The container can perfectly handle its duties from the viewpoint of view, while using vulnerable software. These vulnerabilities can be fixed for a long time in the upstream, but not in your local image. If you do not take appropriate measures, problems of this kind may long remain unnoticed.
  • 31. Docker Security 31 ● Advanced troubleshooting with sysdig ● More advanced troubleshooting with perf ● slabtop For more detailed description and actions, refer to Appendix section 7
  • 32. Q&A
  • 33. Appendix 1: Layers 33 Let's look at an example Dockerfile to see this in action: FROM ubuntu:latest LABEL mantainer="Stanislav Kolenkin [email protected]" RUN apt-get update RUN apt-get install -y python python-pip wget
  • 34. Appendix 1: Layers 34 Let's build this image and check number of layers: docker build -t . test …. done. ---> ce11bc61d46c Removing intermediate container 9b0787022031 Successfully built ce11bc61d46c Successfully tagged test:latest
  • 38. Appendix 1: Layers 38 Let’s give it a shot and optimize our Image: cat Dockerfile FROM ubuntu:latest LABEL mantainer="Stanislav Kolenkin [email protected]" RUN apt-get update && apt-get install -y python python-pip wget vim
  • 40. Appendix 1: Layers 40 Let's look at the output of the docker history command and check number of layers: We often talk about layers and images as if they are different things. But, in fact, every layer is already an image, and the layer of the image is just a collection of other images.
  • 41. Appendix 1: Layers 41 We can run container the following: docker run -it sample:latest /bin/bash or docker run -it d355ed3537e9 /bin/bash Both are images based on which containers can be launched. The only difference is that the first one is named, and the second one is not. This ability to run containers from any layer can be very useful when debugging your Dockerfile
  • 43. Appendix 2: Reduce Docker Image Sizes 43 Clean your apt/yum cache and do it in a right way: Cleaning command should be put in the same layer where package installation commands reside. FROM ubuntu:latest LABEL mantainer="Stanislav Kolenkin [email protected]" RUN apt-get update && apt-get install -y python python-pip wget vim && apt-get remove python-pip && rm -rf /var/lib/apt/lists/*
  • 44. Appendix 2: Reduce Docker Image Sizes Use a smaller base image - Image size equals the sum of the sizes of the images that make up it - Each additional instruction in Dockerfile increases the size of the image. Ubuntu image will set you to 128MB on the outset. Consider using a smaller base image. For each apt-get install or yum install line you add in your Dockerfile you will be increasing the size of the image by that library size. Realize that you probably don’t need many of those libraries you are installing. Consider using an alpine base image (only 5MB in size). Most likely, there are alpine tags for the programming language you are using. For example, Python has 2.7-alpine(~50MB) and 3.5-alpine(~65MB). 44
  • 45. Appendix 2: Reduce Docker Image Sizes Consider using an alpine base image (only 5MB in size). Most likely, there are alpine tags for the programming language you are using. For example, Python has 2.7-alpine(~50MB) and 3.5-alpine(~65MB). 45
  • 46. Appendix 2: Reduce Docker Image Sizes 46
  • 47. Appendix 2: Reduce Docker Image Sizes 47
  • 48. Appendix 2: Reduce Docker Image Sizes 48 Don’t install debug tools like vim/curl: Many developers installs vim and curl in their Dockerfile for debug purposes. Do so only if application depends on it. This defeats the purpose of using a small base image. But how do I debug? One technique is to have a development Dockerfile and a production Dockerfile. During development, have all of the tools you need, and then when deploying to production remove the development tools.
  • 49. Appendix 2: Reduce Docker Image Sizes 49 Use — no-install-recommends on apt-get install Adding — no-install-recommends to apt-get install -y can help dramatically reduce the size by avoiding installing packages that aren’t technically dependencies but are recommended to be installed alongside packages. --no-install-recommends in the apt-get
  • 50. Appendix 2: Reduce Docker Image Sizes 50 RUN apt-get update && apt-get install -y --no-install-recommends curl python-pip && pip install requests && apt-get remove -y python-pip curl && rm -rf /var/lib/apt/lists/*
  • 51. Appendix 2: Reduce Docker Image Sizes 51 Add rm -rf /var/lib/apt/lists/* to same layer as apt-get installs Add rm -rf /var/lib/apt/lists/* at the end of the apt-get -y install to clean up after install packages. For yum, add yum clean all Also, if you are install wget or curl in order to download some package, remember to combine them all in one RUN statement. Then at the end of the run statement, apt-get remove curl or wget once you no longer need them. This advice goes for any package that you only need temporarily.
  • 52. Appendix 2: Reduce Docker Image Sizes 52 Flatten docker image/containers So it is only possible to “flatten” a Docker container, not an image. So we need to start a container from an image first. Then we can export and import the container in one line: docker run -it ubuntu bash -c "exit" docker ps -a | grep ubuntu bda68042f324 ubuntu "bash -c exit" 2 seconds ago Exited (0) 8 seconds ago keen_turing
  • 53. Appendix 2: Reduce Docker Image Sizes 53 docker export bda68042f324 | docker import - img_size_optim_flatten:latest sha256:8d46bbdbc23b5dd094afcd3df0e2adddbddf1a2f6d5eb1abeb6f50e95 89e6331 docker images | grep img_size_optim_flatten img_size_optim_flatten latest 8d46bbdbc23b 31 seconds ago 85.8MB
  • 54. Appendix 2: Reduce Docker Image Sizes 54
  • 55. Appendix 2: Reduce Docker Image Sizes 55 The image size is now 85.8MB ● The image has 1 layer. Complicated to use the cache mechanism… as it’s based on layers and RUN instructions.
  • 56. Appendix 2: Reduce Docker Image Sizes 56
  • 57. Appendix 2: Reduce Docker Image Sizes 57 docker-squash is a utility to squash multiple docker layers into one in order to create an image with fewer and smaller layers. It retains Dockerfile commands such as PORT, ENV, etc.. so that squashed images work the same as they were originally built. In addition, deleted files in later layers are actually purged from the image when squashed. It's designed to support a workflow where you would squash the image just before pushing it to a registry. Before squashing the image, you would remove any build time dependencies, extra files (apt caches, logs, private keys, etc..) that you would not want to deploy. The defaults also preserve your base image so that its contents are not repeatedly transferred when pushing and pulling images.
  • 58. Appendix 2: Reduce Docker Image Sizes 58
  • 59. Appendix 2: Reduce Docker Image Sizes 59 Run docker-squash and check size.
  • 60. Appendix 2: Reduce Docker Image Sizes 60 Note that docker-engine since version 1.13 in the experimental mode contains the ability to assemble already compressed images. To do this, add the -squash option to the build command, but performing a docker-squash would usually give a smaller size of the image.
  • 61. Appendix 2: Reduce Docker Image Sizes 61 Use the following utilities for writing your Dockerfiles: ● FromLatest.io ● imagelayers.io
  • 62. Appendix 2: Reduce Docker Image Sizes 62
  • 63. Appendix 2: Reduce Docker Image Sizes 63
  • 64. Appendix 3: Difference between save and export 64 Let’s make an example: docker pull busybox docker images |grep busybox docker run busybox mkdir /home/test docker ps -a |grep busybox docker commit CONTAINER-ID busybox-1 docker images |grep busybox docker run busybox [ -d /home/test ] && echo 'Directory found' || echo 'Directory not found' docker run busybox-1 [ -d /home/test ] && echo 'Directory found' || echo 'Directory not found'
  • 65. Appendix 3: Difference between save and export 65
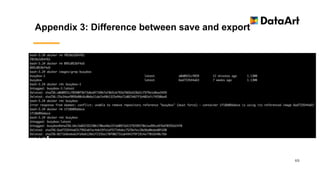
  • 66. Appendix 3: Difference between save and export 66 Now we have two different images (busybox and busybox-1) and we have a container made from busybox which also contains the change (the new folder /home/test). Let’s see how we can persist our changes. Export Export is used to persist a container (not an image). So we need the container id which we can see like this: docker ps -a docker export CONTAINER-ID > export.tar The result is a TAR-file which should be around 1.2 MB big (slightly smaller than the one from save).
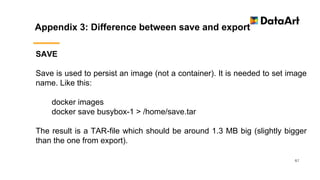
  • 67. Appendix 3: Difference between save and export 67 SAVE Save is used to persist an image (not a container). It is needed to set image name. Like this: docker images docker save busybox-1 > /home/save.tar The result is a TAR-file which should be around 1.3 MB big (slightly bigger than the one from export).
  • 68. Appendix 3: Difference between save and export 68 The difference Now after we created our TAR-files, let’s see what we have. First of all we clean up a little bit – we remove all containers and images we have right now: docker ps -a |grep busybox docker rm CONTAINER-ID docker images|grep busybox docker rmi busybox-1 docker rmi busybox
  • 69. Appendix 3: Difference between save and export 69
  • 70. Appendix 3: Difference between save and export 70 Start with export from the container that was done earlier. Import it like this: cat export.tar | sudo docker import - busybox-1-export:latest docker images |grep busybox docker run busybox-1-export [ -d /home/test ] && echo 'Directory found' || echo 'Directory not found'
  • 71. Appendix 3: Difference between save and export 71
  • 72. Appendix 3: Difference between save and export 72 We start with our export we did from the container. We can import it like this: docker load < save.tar docker images |grep busybox-1 docker run busybox-1 [ -d /home/test ] && echo 'Directory found' || echo 'Directory not found'
  • 73. Appendix 3: Difference between save and export 73
  • 74. Appendix 3: Difference between save and export 74 So what’s the difference between both? Well, as we saw the exported version is slightly smaller. That is because it is flattened, which means it lost its history and meta-data. We can see this by the following command: alias dockviz="docker run -it --rm -v /var/run/docker.sock:/var/run/docker.sock nate/dockviz" dockviz images -t |grep busybox
  • 75. Appendix 3: Difference between save and export 75 Exported-imported image has lost all of its history whereas the saved-loaded image still have its history and layers. This means that you cannot do any rollback to a previous layer if you export-import it while you can still do this if you save-load the whole (complete) image.
  • 76. Appendix 4: Multi-stage builds 76 Dockerfile.multi FROM golang:1.7.3 WORKDIR /go/src/github.com/alexellis/href-counter/ RUN go get -d -v golang.org/x/net/html COPY app.go . RUN CGO_ENABLED=0 GOOS=linux go build -a -installsuffix cgo -o app . FROM alpine:latest RUN apk --no-cache add ca-certificates WORKDIR /root/ COPY --from=0 /go/src/github.com/alexellis/href-counter/app . CMD ["./app"]
  • 78. Appendix 4: Multi-stage builds 78 As you can see, the two preparatory stages here use golang to build the application, but the resulting image will be compact and without golang.
  • 79. Appendix 4: Multi-stage builds 79 By default, the stages are unnamed. In this example, we will assign a name to the form and use it in the COPY statement. FROM golang:1.7.3 as builder WORKDIR /go/src/github.com/alexellis/href-counter/ RUN go get -d -v golang.org/x/net/html COPY app.go . RUN CGO_ENABLED=0 GOOS=linux go build -a -installsuffix cgo -o app . FROM alpine:latest RUN apk --no-cache add ca-certificates WORKDIR /root/ COPY --from=builder /go/src/github.com/alexellis/href-counter/app . CMD ["./app"]
  • 80. Appendix 4: Multi-stage builds 80 As a result of this approach, we will have images without extra packages and, accordingly, of smaller size. Also we do not need copy file to the host system from one image and then to the current image.
  • 81. Appendix 5: Docker Security 81 You can add or remove privileges use of the --cap-drop and --cap-add flags. For in-depth coverage of these options, refer to the “Runtime privilege and Linux capabilities” section of the documentation. If you create a container without a namespace, then by default the processes running inside the container will work from the host's point of view on behalf of the superuser.
  • 82. Appendix 6: Docker Security 82 Standart limits: --blkio-weight uint16 Block IO (relative weight), between 10 and 1000, or 0 to disable (default 0) --blkio-weight-device list Block IO weight (relative device weight) (default []) --device-read-bps list Limit read rate (bytes per second) from a device (default []) --device-read-iops list Limit read rate (IO per second) from a device (default []) --device-write-bps list Limit write rate (bytes per second) to a device (default []) --device-write-iops list Limit write rate (IO per second) to a device (default []) --kernel-memory bytes Kernel memory limit --label-file list Read in a line delimited file of labels -m, --memory bytes Memory limit --memory-reservation bytes Memory soft limit --memory-swap bytes Swap limit equal to memory plus swap: '-1' to enable unlimited swap --pids-limit int Tune container pids limit (set -1 for unlimited) --ulimit ulimit Ulimit options (default [])
  • 84. Appendix 7: Debugging 84 sysdig -pcontainer -c topprocs_cpu
  • 86. Appendix 7: Debugging 86 More advanced troubleshooting with perf At this point, it’s worth switching troubleshooting tools once again and go one level deeper, this time using perf, the performance tracking tool shipped with the kernel. Its interface is a bit hostile, but it does a wonderful job at profiling the kernel activity. To get a clue about where those lstat() system calls are spending their time, we can just grab the pid of the worker process and pass it to perf top, which has been previously set up with kernel debugging symbols Perf will then instrument the execution of the worker process, and will show us which functions, either in user space or in kernel space (executing on behalf of the process) the majority of time is spent in.
  • 87. Appendix 7: Debugging 87 slabtop The Linux kernel needs to allocate memory for temporary objects such as task or device structures and inodes. The caching memory allocator manages caches of these types of objects. The modern Linux kernel implements this caching memory allocator to hold the caches called the slabs. Different types of slab caches are maintained by the slab allocator. This article concentrates on the slabtop command which shows real-time kernel slab cache information.