


![15
Volume - similar to a container volume in Docker, but a Kubernetes volume applies to a
whole pod and is mounted on all containers in the pod. Kubernetes guarantees data is
preserved across container restarts. The volume will be removed only when the pod gets
destroyed. Also, a pod can have multiple volumes (possibly of different types) associated.
Kubernetes commands
Overview of kubectl
The kubectl command line tool lets you control Kubernetes clusters. For configuration, kubectl
looks for a file named config in the $HOME/.kube directory. You can specify other kubeconfig
files by setting the KUBECONFIG environment variable or by setting the --kubeconfig flag.
Syntax
kubectl [command] [TYPE] [NAME] [flags]
Where command, TYPE, NAME, and flags are:
Command: Specifies the operation that you want to perform on one or more resources,
for example create, get, describe, and delete.
TYPE: Specifies the resource type. Resource types are case-insensitive and you can
specify the singular, plural, or abbreviated forms. For example, the following commands
produce the same output:
kubectl get pod pod1
kubectl get pods pod1
kubectl get po pod1
NAME: Specifies the name of the resource. Names are case-sensitive. If the name is
omitted, details for all resources are displayed, for example kubectl get pods.
When performing an operation on multiple resources, you can specify each resource by type
and name or specify one or more files:
o To specify resources by type and name:](https://image.slidesharecdn.com/kubernetesfromscratch-220603162920-2dbb037d/85/Kubernetes-From-Scratch-pdf-15-320.jpg)


![29
- Install Docker on the nodes
Install the package dependencies for docker-ce.
# yum install -y yum-utils device-mapper-persistent-data
Add the docker repository to the system and install docker-ce using the yum command.
# yum-config-manager --add-repo https://download.docker.com/linux/centos/docker-
ce.repo
# yum install -y docker-ce
- Enable Docker on the nodes
Enable and start the Docker utility on both the nodes by running the following command on
each:
# systemctl enable docker
# systemctl start docker
- Add the Kubernetes signing key on the nodes
Add the kubernetes repository and key to the centos 7 system by running the following
command.
# cat <<EOF > /etc/yum.repos.d/kubernetes.repo
[kubernetes]
name=Kubernetes
baseurl=https://packages.cloud.google.com/yum/repos/kubernetes-el7-x86_64
enabled=1
gpgcheck=1
repo_gpgcheck=1](https://image.slidesharecdn.com/kubernetesfromscratch-220603162920-2dbb037d/85/Kubernetes-From-Scratch-pdf-29-320.jpg)


![40
Create Deployment
# kubectl create –f Deployment.yaml –record
-–record to see the deployments by command # kubectl rollout status deployment/Deployment
Deployment "Deployment" created successfully.
Fetch the Deployment
# kubectl get deployments
# kubectl get deploy -o wide
NAME DESIRED CURRENT UP-TO-DATE AVILABLE AGE
Deployment 3 3 3 3 20s
Check the Status of Deployment
# kubectl rollout status deployment/Deployment
Updating the Deployment
# kubectl apply –f Deployment.yaml (after update the new version inside the yaml file)
# kubectl set image deployment/Deployment tomcat=tomcat:6.0
Rolling Back to Previous Deployment
# kubectl rollout undo deployment/Deployment –to-revision=2
Check rollout history
# kubectl rollout history deployment/Deployment
Get ReplicaSet
# kubectl get replicaset
[root@master ~]# kubectl get replicaset
NAME DESIRED CURRENT READY AGE
Tomcat-ReplicaSet 3 3 3 2d14h](https://image.slidesharecdn.com/kubernetesfromscratch-220603162920-2dbb037d/85/Kubernetes-From-Scratch-pdf-40-320.jpg)
![41
Delete ReplicaSet (it will also delete all underlying Pods)
# kubectl delete ReplicaSet < ReplicaSet name>
[root@master ~]# delete replicaset Tomcat-ReplicaSet
Scaling the Deployment
# kubectl scale --replicas=6 –f Deployment.yaml
To deploy from local image include imagePullPolicy: Never in the deployment yaml file
spec:
containers:
- name: nginx-web
image: nginx
resources:
limits:
memory: "100Mi"
cpu: "100m"
imagePullPolicy: Never
Assign Pods to Nodes
1- Assign label to your nodes
List the nodes in your cluster, along with their labels:
# kubectl get nodes --show-labels
Chose one of your nodes, and add a label to it:
# kubectl label nodes centos type=Master
Verify that your chosen node has a type=Master label:
2- In the YAML file add selector of nodeSelector with the label
spec:
containers:
- name: nginx
image: nginx
nodeSelector:](https://image.slidesharecdn.com/kubernetesfromscratch-220603162920-2dbb037d/85/Kubernetes-From-Scratch-pdf-41-320.jpg)
![42
type: Master
Apply your deployment
# kubectl apply -f Deployment.yaml
To get into Pod Shell
# kubectl exec --stdin --tty <Pod Name> -- /bin/bash
[root@master ~]# kubectl exec --stdin --tty pod/nginx-deployment-597fbc7d6f-
jhwf2 -- /bin/bash
root@nginx-deployment-597fbc7d6f-jhwf2:/# ls
Kubernetes Networking
Networking in any architecture or technology is very essential to understand if you want to
deploy the applications over the network and also understanding how the network works that
will help you to troubleshoot if you have any network issue. So we must know exactly what is
happening in the network and how all the connections are establishing for the communication
over the network.
This is a basic kubernetes architecture where you have some worker nodes, and few pods are
running on it with couple of containers. When you have these many components, how all these
components are establishing its connection to make the application accessible over the
network? The answer is that happens only through kubernetes networking.
Types of Kubernetes Networking](https://image.slidesharecdn.com/kubernetesfromscratch-220603162920-2dbb037d/85/Kubernetes-From-Scratch-pdf-42-320.jpg)

![44
cluster.
NodePort - It will open a ports on each nodes and traffic will be forwarded to the service
through random port. And I can access the service (Pod) with the node IP + Defined port.
LoadBalancer - It is a type that forwards all external traffic to a service through this type. And I
can access the service (Pod) with the node name only.
External Name - it is a type used to access a service internally that is hosted outside cluster
through DNS CName or A record...
LoadBalancer service is not in kubernetes by default, to use it we must create ingress
network.
Ingress Policy
Ingress exposes HTTP and HTTPS routes from outside the cluster to services within the cluster.
Traffic routing is controlled by rules defined on the Ingress resource.
internet
|
[ Ingress ]
--|-----|--
[ Services ]
An Ingress may be configured to give Services externally-reachable URLs, load balance traffic,
terminate SSL / TLS, and offer name based virtual hosting.
An Ingress controller is responsible for fulfilling the Ingress, usually with a load
balancer, though it may also configure your edge router or additional frontends to help
handle the traffic.
An Ingress does not expose arbitrary ports or protocols. Exposing services other than
HTTP and HTTPS to the internet typically uses a service of type Service.Type=NodePort
or Service.Type=LoadBalancer.](https://image.slidesharecdn.com/kubernetesfromscratch-220603162920-2dbb037d/85/Kubernetes-From-Scratch-pdf-44-320.jpg)


![67
rules:
- apiGroups: ["", "extensions", "apps"]
resources: ["deployments", "replicasets", "pods"]
verbs: ["get", "list", "watch", "create", "update", "patch", "delete"] # You
can also use ["*"]
Create the Role in the cluster using the kubectl create role command:
kubectl create -f role-deployment-manager.yaml
Step 4: Bind the role to the employee user
Create a rolebinding-deployment-manager.yaml file with the content below. In this file,
we are binding the deployment-manager Role to the User Account employee inside the
office namespace:
kind: RoleBinding
apiVersion: rbac.authorization.k8s.io/v1beta1
metadata:
name: deployment-manager-binding
namespace: office
subjects:
- kind: User
name: employee
apiGroup: ""
roleRef:
kind: Role
name: deployment-manager
apiGroup: ""
Deploy the RoleBinding by running the kubectl create command:
kubectl create -f rolebinding-deployment-manager.yaml
Step 5: Test the RBAC rule
Now you should be able to execute the following commands without any issues:
kubectl --context=employee-context run --image bitnami/dokuwiki
mydokuwiki
kubectl --context=employee-context get pods](https://image.slidesharecdn.com/kubernetesfromscratch-220603162920-2dbb037d/85/Kubernetes-From-Scratch-pdf-67-320.jpg)


Kubernetes From Scratch .pdf
- 1. 1 Kubernetes From Scratch By: Eng. Mohamed ElEmam Email: [email protected]
- 2. 2 Kubernetes What is Kubernetes? Kubernetes is an open source orchestration tool developed by Google for managing micro- services or containerized applications across a distributed cluster of nodes. Kubernetes provides highly resilient infrastructure with zero downtime deployment capabilities, automatic rollback, scaling, and self-healing of containers (which consists of auto-placement, auto-restart, auto-replication, and scaling of containers on the basis of CPU usage). Kubernetes created from Borg & Omega projects by google as they use it to orchestrate they data center since 2003. Google open-sourced kubernetes at 2014. What is Orchestration Do? Configuring and scheduling of containers. Provisioning and deployments of containers. High Availability of containers. Configuration of the applications that run in containers. Scaling of containers to equally balance the application workloads across infrastructure. Allocation of HW resources between containers. Load balancing, traffic routing and service discovery of containers. Health monitoring of containers. Securing the interactions between containers. Famous Container Orchestrator Docker Swarm Mesos (Mesos Sphere)
- 3. 3 Normand Cloud Foundry Cattel Cloud (Azure, Amazon, Google, Alibaba, IBM) Kubernetes Components and Architecture K8s Master Node: the master server that will create the cluster and it has all the components and service that manage, plan, schedule and monitor all the worker nodes. Worker Node: the server that has host the applications as Pods and containers. Can make more than master server to make HA for the K8s components Kubernetes Master Node Components Below are the main components on the master node: API server – is the primary management components of kubernetes and is responsible for orchestrating all operations (scaling, updates, and so on) in the cluster. It also acts as the gateway to the cluster, so the API server must be accessible by clients from outside the cluster integration with CLI and GUI.
- 4. 4 Controller-manager - The Controller Manager is the engine that runs the core control loops, create Pods, watches the state of the cluster, and makes changes to drive status toward the desired state. Replication-Controller - A ReplicationController ensures that a specified number of pod replicas are running at any one time. It makes sure that a pod is always up and available. Node Controller - The node controller is a Kubernetes master component which manages various aspects of nodes. Scheduler - is identify the right node to place a container on based resource limitations or guarantees, taints, tolerations and affinity/anti-affinity roles. etcd cluster - etcd is a critical part of the Kubernetes. etcd database that stores the state of the cluster, including node and workload information in a key/value format. Add-ons: DNS: all Kubernetes clusters should have cluster DNS to resolve name of the containers inside master node as all the above components is containers inside master node Web UI: web-based UI for Kubernetes clusters. It allows users to manage and troubleshoot applications running in the cluster, as well as the cluster itself. Container runtime: The container runtime is the software that is responsible for running containers. Kubernetes supports several container runtimes: Docker , containerd , CRI-O Node (worker) components Below are the main components on a (worker) node: kubelet - the main service on a node, connect between Master and Node and ensuring that pods and their containers are healthy and running in the desired state. This component also reports to the master on the health of the host where it is running. kube-proxy - a proxy service that runs on each worker node to deal with individual host subnetting and expose services to the external world. It performs request forwarding to the correct pods/containers across the various isolated networks in a cluster. Kubectl kubectl command is a line tool that interacts with kube-apiserver and send commands to the master node. Each command is converted into an API call.
- 5. 5 Architecture Big Picture: Master Node responsible for the k8s and 4 workers have the Pods and containers
- 6. 6 Kubernetes Concepts Making use of Kubernetes requires understanding the different abstractions it uses to represent the state of the system, such as services, pods, volumes, namespaces, and deployments. Pod - generally refers to one or more containers that should be controlled as a single application. Pods that run a single container. The "one-container-per-Pod" model is the most common Kubernetes use case; in this case, you can think of a Pod as a wrapper around a single container; Kubernetes manages Pods rather than managing the containers directly. Pods that run multiple containers that need to work together. A Pod can encapsulate an application composed of multiple co-located containers that are tightly coupled and need to share resources. These co-located containers form a single cohesive unit of service—for example, one container serving data stored in a shared volume to the public, while a separate sidecar container refreshes or updates those files. The Pod wraps these containers, storage resources, and an ephemeral network identity together as a single unit.
- 7. 7 Note: Grouping multiple co-located and co-managed containers in a single Pod is a relatively advanced use case. You should use this pattern only in specific instances in which your containers are tightly coupled. Every Pod has 1 IP address and it has MAC address and we can allocate resource for it (CPUs, RAM, Network …etc,). Communication between containers in different Pods via Pods IPs not container IP. Deployment – it provides declarative updates to applications, a deployment allows you to describe an application’s life cycle, such as which images to use for the app, the number of pods there should be, and the way in which they should be updated. Deploy a replica set or pod Update pods and replica sets Rollback to previous deployment versions Scale a deployment Pause or continue a deployment
- 8. 8 Service – Allows you to dynamically access a group of replica Pods via IP and Port from your network and define name for the service. Pods are volatile, that is Kubernetes does not guarantee a given physical pod will be kept alive (for instance, the replication controller might kill and start a new set of pods). Instead, a service represents a logical set of pods and acts as a gateway, allowing (client) pods to send requests to the service without needing to keep track of which physical pods actually make up the service. Namespace – it’s like resource pool in VMware or tenant in azure, it’s a virtual cluster (a single physical cluster can run multiple virtual ones) Intended for environments with many users spread across multiple teams or projects, for isolation of concerns. Resources inside a namespace must be unique and cannot access resources in a different namespace. Also, a namespace can be allocated a resource quota to avoid consuming more than its share of the physical cluster’s overall resources (CPU, RAM, and Security).
- 9. 9 Desired State - describes the desired state of a pod or a replica set, in a yaml file. The deployment controller then gradually updates the environment (for example, creating or deleting replicas or replicas image version upgrading or rollback via replication controller) until the current state matches the desired state specified in the deployment file. For example, if the yaml file defines 3 replicas for a pod but only two is currently running (current state), an extra one will get created. Note that replicas managed via a deployment should not be manipulated directly, only via new deployments. Secret - At the application level, Kubernetes secrets can store sensitive information (such as passwords, SSH keys, API keys or tokens) per cluster (a virtual cluster if using namespaces, physical otherwise). Kubernetes Secret can be injected into a Pod container either as an environment variable or mounted as a file. Using Kubernetes Secrets allows us to abstract sensitive data and configuration from application deployment. Note that secrets are accessible from any pod in the same cluster. Network policies for access to pods can be defined in a deployment. A network policy specifies how pods are allowed to communicate with each other and with other network endpoints. Note that storing sensitive data in a Kubernetes Secret does not make it secure. By default, all data in Kubernetes Secrets is stored as a plaintext encoded with base64. CoreDNS - CoreDNS is a flexible, extensible DNS server that can serve as the Kubernetes cluster DNS. Like Kubernetes, the CoreDNS project is hosted by the CNCF. You can use CoreDNS instead of kube-dns in your cluster by replacing kube-dns in an existing deployment, or by using tools like kubeadm that will deploy and upgrade the cluster for you Node-Proxy - a proxy service that runs on each worker node to deal with individual host subnetting and expose services to the external world. It performs request forwarding to the correct pods/containers across the various isolated networks in a cluster. Replica Set & Deployment - A ReplicaSet is a set of Pod templates that describes a set of Pod replicas. It uses a template that describes what each Pod must contain. The ReplicaSet ensures that a specified number of Pod replicas are running at any time.
- 10. 10 You can define a deployment to create a ReplicaSet or to remove deployments and adopt all their resources with new deployments. When you revise a deployment, a ReplicaSet is created that describes the state that you want. During a rollout, the deployment controller changes the actual state to the state that you want at a controlled rate. Each deployment revision can also be rolled back. Deployments can also be scaled. ReplicaSet is a part of Deployment. Daemon Set - Aggregating service logs, collecting node metrics, or running a networked storage cluster all require a container to be replicated across all nodes. In Kubernetes, this is done with a DaemonSet. A DaemonSet ensures that an instance of a specific pod is running on all (or a selection of) nodes in a cluster. This page gathers resources on how to use and deploying a daemon to all nodes. DaemonSet are used to ensure that some or all of your K8S nodes run a copy of a pod, which allows you to run a daemon on every node. Why use DaemonSets? To run a daemon for cluster storage on each node , such as: glusterd
- 11. 11 To run a daemon for logs collection on each node, such as: logstash To run a daemon for node monitoring on ever note, such as: collectd Label - Labels are key/value pairs that are attached to Kubernetes objects, such as pods (this is usually done indirectly via deployments). Labels are intended to be used to specify identifying attributes of objects that are meaningful and relevant to users. Labels can be used to organize and to select subsets of objects. Some labels are required for every deployment resource: (application, version, release, stage) can add Owner Contain identifying information and are a used by selector queries or within selector sections in object definitions. Example deployment metadata: Let’s create a pod that initially has one label (stage=production): # kubectl apply -f https://raw.githubusercontent.com/openshift- evangelists/kbe/main/specs/labels/pod.yaml # kubectl get pods --show-labels NAME READY STATUS RESTARTS AGE LABELS labelex 1/1 Running 0 10m stage= production
- 12. 12 In above get pods command note the --show-labels option that output the labels of an object in an additional column. You can add a label to the pod as: # kubectl label pods labelex owner= Ahmed # kubectl get pods --show-labels NAME READY STATUS RESTARTS AGE LABELS labelex 1/1 Running 0 16m stage= production,owner= Ahmed Selector - let me apply policy on labels To use a label for filtering and apply policy, for example to list only pods that have an owner that equals Ahmed, use the --selector option: # kubectl get pods --selector owner=Ahmed NAME READY STATUS RESTARTS AGE labelex 1/1 Running 0 27m The --selector option can be abbreviated to -l, so to select pods that are labelled with stage= production, do: # kubectl get pods -l stage= production NAME READY STATUS RESTARTS AGE labelex 1/1 Running 0 27m Now, let’s list all pods that are either labelled with stage=development or with stage =production: $ kubectl get pods -l stage in (production, development)' NAME READY STATUS RESTARTS AGE labelex 1/1 Running 0 43m labelexother 1/1 Running 0 3m
- 13. 13 Annotations - Are used for non-identifying information. Stuff not used internally by k8s. You can’t specify selectors over them within Kubernetes, but they can be used by external tools and libraries. As the internal performance of Kubernetes is not negatively impacted by huge annotations, the keys and values are not constrained like labels. Affinity, Anti Affinity - nodeSelector provides a very simple way to constrain pods to nodes with particular labels. The affinity/anti-affinity feature, greatly expands the types of constraints you can express. The key enhancements are The affinity/anti-affinity language is more expressive. The language offers more matching rules besides exact matches created with a logical AND operation; You can indicate that the rule is "soft"/"preference" rather than a hard requirement, so if the scheduler can't satisfy it, the pod will still be scheduled; You can constrain against labels on other pods running on the node (or other topological domain), rather than against labels on the node itself, which allows rules about which pods can and cannot be co-located. The affinity feature consists of two types of affinity, "node affinity" and "inter- pod affinity/anti-affinity". Node affinity is like the existing nodeSelector (but with the first two benefits listed above), while inter-pod affinity/anti-affinity constrains against pod labels rather than node labels, as described in the third item listed above, in addition to having the first and second properties listed above. Taints, Tolerations - Taints are used to repel Pods from specific nodes. This is quite similar to the node anti-affinity, however, taints and tolerations take a slightly different
- 14. 14 approach. Instead of applying the label to a node, we apply a taint that tells a scheduler to repel Pods from this node if it does not match the taint. Only those Pods that have a toleration for the taint can be let into the node with that taint. Tolerations are applied to pods, and allow (but do not require) the pods to schedule onto nodes with matching taints. Taints and tolerations work together to ensure that pods are not scheduled onto inappropriate nodes. One or more taints are applied to a node; this marks that the node should not accept any pods that do not tolerate the taints. You add a taint to a node using kubectl taint. For example, # kubectl taint nodes node1 key=value:NoSchedule Above example places a taint on node node1. The taint has key key, value value, and taint effect NoSchedule. This means that no pod will be able to schedule onto node1 unless it has a matching toleration. To remove the taint added by the command above, you can run: # kubectl taint nodes node1 key:NoSchedule- Use Cases for Taints and Tolerations: Dedicated node, Nodes with special hardware Config-map - ConfigMaps bind configuration files, command-line arguments, environment variables, port numbers, and other configuration artifacts to your Pods' containers and system components at runtime. ConfigMaps enable you to separate your configurations from your Pods and components, which helps keep your workloads portable. Instead of repeat Pods configurations in yaml file for each Pod, We can let the yaml file read the configuration from ConfigMap file.
- 15. 15 Volume - similar to a container volume in Docker, but a Kubernetes volume applies to a whole pod and is mounted on all containers in the pod. Kubernetes guarantees data is preserved across container restarts. The volume will be removed only when the pod gets destroyed. Also, a pod can have multiple volumes (possibly of different types) associated. Kubernetes commands Overview of kubectl The kubectl command line tool lets you control Kubernetes clusters. For configuration, kubectl looks for a file named config in the $HOME/.kube directory. You can specify other kubeconfig files by setting the KUBECONFIG environment variable or by setting the --kubeconfig flag. Syntax kubectl [command] [TYPE] [NAME] [flags] Where command, TYPE, NAME, and flags are: Command: Specifies the operation that you want to perform on one or more resources, for example create, get, describe, and delete. TYPE: Specifies the resource type. Resource types are case-insensitive and you can specify the singular, plural, or abbreviated forms. For example, the following commands produce the same output: kubectl get pod pod1 kubectl get pods pod1 kubectl get po pod1 NAME: Specifies the name of the resource. Names are case-sensitive. If the name is omitted, details for all resources are displayed, for example kubectl get pods. When performing an operation on multiple resources, you can specify each resource by type and name or specify one or more files: o To specify resources by type and name:
- 16. 16 To group resources if they are all the same type: TYPE1 name1 name2 name<#>. Example: kubectl get pod example-pod1 example-pod2 To specify multiple resource types individually: TYPE1/name1 TYPE1/name2 TYPE2/name3 TYPE<#>/name<#>. Example: kubectl get pod/example-pod1 replicationcontroller/example- rc1 o To specify resources with one or more files: -f file1 -f file2 -f file<#> Use YAML rather than JSON since YAML tends to be more user-friendly, especially for configuration files. Example: kubectl get pod -f ./pod.yaml flags: Specifies optional flags. For example, you can use the -s or --server flags to specify the address and port of the Kubernetes API server. Caution: Flags that you specify from the command line override default values and any corresponding environment variables. If you need help, just run kubectl help from the terminal window. Top Commands #Kubernetes Commands Helper setup to edit .yaml files with Vim: VIM Setup for Yaml files List of general purpose commands for Kubernetes management: PODS Create Deployments Scaling PODs POD Upgrade / History Services Volumes Secrets
- 17. 17 ConfigMaps Ingress Horizontal Pod Autoscalers Scheduler Taints and Tolerations Troubleshooting Role Based Access Control (RBAC) Security Contexts Pod Security Policies Network Policies VIM Setup for Yaml files Put the following lines in ~/.vimrc: " Yaml file handling autocmd FileType yaml setlocal ts=2 sts=2 sw=2 expandtab filetype plugin indent on autocmd FileType yaml setl indentkeys-=<:> " Copy paste with ctr+c, ctr+v, etc :behave mswin :set clipboard=unnamedplus :smap <Del> <C-g>"_d :smap <C-c> <C-g>y :smap <C-x> <C-g>x :imap <C-v> <Esc>pi :smap <C-v> <C-g>p :smap <Tab> <C-g>1>
- 18. 18 :smap <S-Tab> <C-g>1< Keyboard hints: ctrl + f: auto indent line (requires INSERT mode) PODS $ kubectl get pods $ kubectl get pods --all-namespaces $ kubectl get pod monkey -o wide $ kubectl get pod monkey -o yaml $ kubectl describe pod monkey Create Deployments Create single deployment: $ kubectl run nginx --image=nginx –record Scaling PODs $ kubectl scale deployment/POD_NAME --replicas=N POD Upgrade and history List history of deployments $ kubectl rollout history deployment/DEPLOYMENT_NAME Jump to specific revision $ kubectl rollout undo deployment/DEPLOYMENT_NAME --to-revision=N Services List services $ kubectl get services Expose PODs as services (creates endpoints) $ kubectl expose deployment nginx --port=80 --type=NodePort Volumes Lits Persistent Volumes and Persistent Volumes Claims:
- 19. 19 $ kubectl get pv $ kubectl get pvc Secrets $ kubectl get secrets $ kubectl create secret generic --help $ kubectl create secret generic mysql --from-literal=password=root $ kubectl get secrets mysql -o yaml ConfigMaps $ kubectl create configmap foobar --from-file=config.js $ kubectl get configmap foobar -o yaml DNS List DNS-PODs: $ kubectl get pods --all-namespaces |grep dns Check DNS for pod nginx (assuming a busybox POD/container is running) $ kubectl exec -ti busybox -- nslookup nginx Note: kube-proxy running in the worker nodes manage services and set iptables rules to direct traffic. Ingress Commands to manage Ingress for ClusterIP service type: $ kubectl get ingress $ kubectl expose deployment ghost --port=2368 Spec for ingress: backend Horizontal Pod Autoscaler When heapster runs: $ kubectl get hpa
- 20. 20 $ kubectl autoscale --help DaemonSets $ kubectl get daemonsets $ kubectl get ds Scheduler NodeSelector based policy: $ kubectl label node minikube foo=bar Node Binding through API Server: $ kubectl proxy $ curl -H "Content-Type: application/json" -X POST --data @binding.json http://localhost:8001/api/v1/namespaces/default/pods/foobar-sched/binding Tains and Tolerations $ kubectl taint node master foo=bar:NoSchedule Troubleshooting $ kubectl describe $ kubectl logs $ kubectl exec $ kubectl get nodes --show-labels $ kubectl get events Docs Cluster: https://kubernetes.io/docs/tasks/debug-application-cluster/debug-cluster/ https://github.com/kubernetes/kubernetes/wiki/Debugging-FAQ Role Based Access Control Role ClusterRule Binding
- 21. 21 ClusterRoleBinding $ kubectl create role fluent-reader --verb=get --verb=list --verb=watch --resource=pods $ kubectl create rolebinding foo --role=fluent-reader --user=minikube $ kubectl get rolebinding foo -o yaml Security Contexts Docs: https://kubernetes.io/docs/tasks/configure-pod-container/security-context/ spec securityCOntext o runAsNonRoot: true Pod Security Policies Docs: https://github.com/kubernetes/kubernetes/blob/master/examples/podsecuritypolicy/rbac/READ ME.md Network Policies Network isolation at Pod level by using annotations $ kubectl annotate ns <namespace> "net.beta.kubernetes.io/network-policy={"ingress": {"isolation": "DefaultDeny"}}" More about Network Policies as a resource: https://kubernetes.io/docs/tasks/administer-cluster/declare-network-policy/ Kubeadm Kubeadm is a tool built to provide kubeadm init and kubeadm join as best-practice “fast paths” for creating Kubernetes clusters. Kubeadm performs the actions necessary to get a minimum viable cluster up and running. By design, it cares only about bootstrapping, not about provisioning machines. Likewise, installing various nice-to-have addons, like the Kubernetes Dashboard, monitoring solutions, and cloud- specific addons, is not in scope.
- 22. 22 Instead, we expect higher-level and more tailored tooling to be built on top of kubeadm, and ideally, using kubeadm as the basis of all deployments will make it easier to create conformant clusters. Kubernetes YAML As stated on the Wikipedia page for JSON, YAML (Yet Another Markup Language) is a superset of JSON, which means that it has all the functionality of JSON, but it also extends this functionality to some degree. YAML is basically a wrapper around JSON, doing everything that JSON can do and then some. YAML VS JSON The YAML file takes less space than the JSON file. YAML requires less characters than JSON does. YAML allows for comments, while JSON doesn’t. YAML Syntax YAML files consist of maps (or dictionaries) of key-value pairs. A YAML map is simply an object, containing keys and values. Here’s a map of three key-value pairs: key1: value1 key2: value2 key3: value3 A single key can itself contain a map: key1: subkey1: subvalue1 subkey2: subvalue2 subkey3: subvalue3 YAML also has lists (are just an array of values for a particular key):
- 23. 23 list: - item1 - item2 - item3 Lists can also contain maps: list: - item1 - mapItem1: value mapItem2: value Kubernetes YAML Basics There are a few required fields in every Kubernetes YAML file to work: apiVersion - Which version of the Kubernetes API you're using to create this object Kind - What kind of object you want to create metadata - Data that helps uniquely identify the object, including a name string, UID, and optional namespace spec - What state you desire for the object Let’s take another look at our deployment.yaml apiVersion: v1 kind: pod metadata: name: website labels: name: web spec: containers: - name: web-server image: nginx resources: limits: memory: "128Mi" cpu: "500m" ports: - containerPort: 80 apiVersions Which apiVersion should I use? Kind apiVersion CertificateSigningRequest certificates.k8s.io/v1beta1
- 24. 24 ClusterRoleBinding rbac.authorization.k8s.io/v1 ClusterRole rbac.authorization.k8s.io/v1 ComponentStatus v1 ConfigMap v1 ControllerRevision apps/v1 CronJob batch/v1beta1 DaemonSet extensions/v1beta1 Deployment extensions/v1beta1 Endpoints v1 Event v1 HorizontalPodAutoscaler autoscaling/v1 Ingress extensions/v1beta1 Job batch/v1 LimitRange v1 Namespace v1 NetworkPolicy extensions/v1beta1 Node v1 PersistentVolumeClaim v1 PersistentVolume v1 PodDisruptionBudget policy/v1beta1 Pod v1 PodSecurityPolicy extensions/v1beta1 PodTemplate v1 ReplicaSet extensions/v1beta1 ReplicationController v1 ResourceQuota v1 RoleBinding rbac.authorization.k8s.io/v1 Role rbac.authorization.k8s.io/v1 Secret v1 ServiceAccount v1 Service v1 StatefulSet apps/v1 v1 This was the first stable release of the Kubernetes API. It contains many core objects. apps/v1 apps is the most common API group in Kubernetes, with many core objects being drawn from it and v1. It includes functionality related to running applications on Kubernetes, like Deployments, RollingUpdates, and ReplicaSets. autoscaling/v1 This API version allows pods to be autoscaled based on different resource usage metrics.
- 25. 25 This stable version includes support for only CPU scaling, but future alpha and beta versions will allow you to scale based on memory usage and custom metrics. batch/v1 The batch API group contains objects related to batch processing and job-like tasks (rather than application-like tasks like running a webserver indefinitely). This apiVersion is the first stable release of these API objects. batch/v1beta1 A beta release of new functionality for batch objects in Kubernetes, notably including CronJobs that let you run Jobs at a specific time or periodicity. apiVersion: v1 kind: Pod metadata: name: rss-site labels: app: web When I write that apiversion in YAML file : group/v APIVersions Reference link https://kubernetes.io/docs/reference/generated/kubernetes- api/v1.18/#-strong-api-overview-strong- Kind What kindly of object you want to create: To check all kinds available to create: # kubectl api-resources
- 26. 26 Hints: vsCode is an excellent tool to make the YAML file. You can use Helm or Bitnami as chart and ready apps You can use container platform and service catalog. Kubectl Autocomplete # source <(kubectl completion bash) # setup autocomplete in bash into the current shell, bash-completion package should be installed first. # echo "source <(kubectl completion bash)" >> ~/.bashrc # add autocomplete permanently to your bash shell. Install kubernetes Step 1 - Kubernetes Installation The three-node cluster that we will be forming in this example will consist of a Master node and a Two Slave nodes, therefore, follow the steps described below to install Kubernetes on the CentOS nodes. Kubernetes will be installed as a container so we must install Docker engine
- 27. 27 All nodes need to have Kubernetes installed on them. We will prepare all servers for Kubernetes installation by changing the existing configuration on servers, and also installing some packages, including docker-ce and kubernetes itself. - Configure Hosts File # vim /etc/hosts Add all servers IPs master and workers to the hosts file below. 192.168.179.133 k8s-master 192.168.179.131 node01 192.168.179.132 node02 Save and exit. -Configure Firewall The nodes, containers, and pods need to be able to communicate across the cluster to perform their functions. Firewalld is enabled in CentOS by default on the front-end. Add the following ports by entering the listed commands. On the Master Node enter: # firewall-cmd --permanent --add-port=6443/tcp # firewall-cmd --permanent --add-port=2379-2380/tcp # firewall-cmd --permanent --add-port=10250/tcp # firewall-cmd --permanent --add-port=10251/tcp # firewall-cmd --permanent --add-port=10252/tcp # firewall-cmd --permanent --add-port=10255/tcp # firewall-cmd --reload Enter the following commands on each worker node: # firewall-cmd --permanent --add-port=10251/tcp # firewall-cmd --permanent --add-port=10252/tcp # firewall-cmd –reload To list all firewall rules
- 28. 28 # firewall-cmd --list-all Update Iptables Settings Set the net.bridge.bridge-nf-call-iptables to ‘1’ in your sysctl config file. This ensures that packets are properly processed by IP tables during filtering and port forwarding. # cat <<EOF > /etc/sysctl.d/k8s.conf net.bridge.bridge-nf-call-ip6tables = 1 net.bridge.bridge-nf-call-iptables = 1 EOF sysctl --system - Enable br_netfilter Kernel Module The br_netfilter module is required for kubernetes installation. Enable this kernel module so that the packets traversing the bridge are processed by iptables for filtering and for port forwarding, and the kubernetes pods across the cluster can communicate with each other. Run the command below to enable the br_netfilter kernel module. # modprobe br_netfilter # echo '1' > /proc/sys/net/bridge/bridge-nf-call-iptables -Disable SELinux # sudo setenforce 0 # sudo sed -i ‘s/^SELINUX=enforcing$/SELINUX=permissive/’ /etc/selinux/config - Disable SWAP If swap is not disabled, kubelet service will not start on the masters and nodes, for Platform9 Managed Kubernetes version 3.3 and above. # swapoff –a And then edit the '/etc/fstab' file. Comment the swap line UUID as below.
- 29. 29 - Install Docker on the nodes Install the package dependencies for docker-ce. # yum install -y yum-utils device-mapper-persistent-data Add the docker repository to the system and install docker-ce using the yum command. # yum-config-manager --add-repo https://download.docker.com/linux/centos/docker- ce.repo # yum install -y docker-ce - Enable Docker on the nodes Enable and start the Docker utility on both the nodes by running the following command on each: # systemctl enable docker # systemctl start docker - Add the Kubernetes signing key on the nodes Add the kubernetes repository and key to the centos 7 system by running the following command. # cat <<EOF > /etc/yum.repos.d/kubernetes.repo [kubernetes] name=Kubernetes baseurl=https://packages.cloud.google.com/yum/repos/kubernetes-el7-x86_64 enabled=1 gpgcheck=1 repo_gpgcheck=1
- 30. 30 gpgkey=https://packages.cloud.google.com/yum/doc/yum-key.gpg https://packages.cloud.google.com/yum/doc/rpm-package-key.gpg EOF - Install Kubeadm Now install the kubernetes packages kubeadm, kubelet, and kubectl using the yum command below. # yum install -y kubelet kubeadm kubectl You can check the version number of Kubeadm and also verify the installation through the following command: # kubeadm version After the installation is complete, restart all those servers. Log in again to the server and start the services, docker and kubelet. # systemctl start docker && systemctl enable docker # systemctl start kubelet && systemctl enable kubelet - Change the cgroup-driver We need to make sure the docker-ce and kubernetes are using same 'cgroup'. Check docker cgroup using the docker info command. # docker info | grep -i cgroup And you see the docker is using 'cgroupfs' as a cgroup-driver. Now run the command below to change the kuberetes cgroup-driver to 'cgroupfs'. # sed -i 's/cgroup-driver=systemd/cgroup-driver=cgroupfs/g' /etc/systemd/system/kubelet.service.d/10-kubeadm.conf Step 2 - Kubernetes Cluster Initialization In this step, we will initialize the kubernetes master cluster configuration.
- 31. 31 Move the shell to the master server 'master' and run the command below to set up the kubernetes master. # kubeadm init --apiserver-advertise-address=10.0.15.10 --pod-network- cidr=10.244.0.0/16 --apiserver-advertise-address = determines which IP address Kubernetes should advertise its API server on. --pod-network-cidr = specify the range of IP addresses for the pod network. We're using the 'flannel' virtual network. If you want to use another pod network such as weave-net or calico, change the range IP address. When the Kubernetes initialization is complete, you will get the result as below. Copy the 'kubeadm join ... ... ...' command to your text editor. The command will be used to register new nodes to the kubernetes cluster. Now in order to use Kubernetes, we need to run some commands as on the result. Create new '.kube' configuration directory and copy the configuration 'admin.conf'. # mkdir -p $HOME/.kube sudo cp -i /etc/kubernetes/admin.conf $HOME/.kube/config sudo chown $(id -u):$(id -g) $HOME/.kube/config Next, deploy the flannel network to the kubernetes cluster using the kubectl command. # kubectl apply -f https://raw.githubusercontent.com/coreos/flannel/master/Documentation/kube- flannel.yml The flannel network has been deployed to the Kubernetes cluster. Wait for a minute and then check kubernetes node and pods using commands below. # kubectl get nodes
- 32. 32 # kubectl get pods --all-namespaces And you will get the ‘master' node is running as a 'master' cluster with status 'ready', and you will get all pods that are needed for the cluster, including the 'kube-flannel-ds' for network pod configuration. Make sure all kube-system pods status is 'running'. Kubernetes cluster master initialization and configuration has been completed. Step 3 - Adding node1 and node2 to the Cluster In this step, we will add node1 and node2 to join the 'master' cluster. Connect to the node1 server and run the kubeadm join command as we copied on the top. # kubeadm join 192.168.179.133:6443 --token l12jxw.3c960ner9320dpg8 --discovery- token-ca-cert-hash sha256:af54557ca10c0702f6e29bf4d7d96a76eea38e8c85a1bc5cfd6d56ee9d9a1dd7
- 33. 33 Connect to the node2 server and run the kubeadm join command as we copied on the top. Wait for some minutes and back to the ‘master' master cluster server check the nodes and pods using the following command. # kubectl get nodes # kubectl get pods --all-namespaces Node1 and Node2 have been added to the kubernetes cluster. Step 4 - Create First Pod In this step, we will do a test by deploying the Nginx pod to the kubernetes cluster. Configure the yaml file of deployment and if want to publish it from external network must to configure service yaml file Pod yaml apiVersion: v1
- 34. 34 kind: Pod metadata: name: website labels: name: web spec: containers: - name: web-server image: nginx resources: limits: memory: "128Mi" cpu: "500m" ports: - containerPort: 80 Service yaml apiVersion: v1 kind: Service metadata: name: Publish-website spec: selector: name: web type: NodePort ports: - name: http port: 80 targetPort: 80 nodePort: 30003 protocol: TCP Above example selector name is the label name on the pod deployment yaml file Publish containers from nodeport type use ports from 30000 to 32000. Create new deployment named 'nginx' using the kubectl command. # kubectl create -f website.yaml To see details of the 'nginx' deployment sepcification, run the following command. # kubectl describe deployment nginx
- 35. 35 Next, we will expose the nginx pod accessible via the internet. And we need to create new service NodePort for this. # kubectl create -f service.yaml If I want to change anything in yaml configuration and reapply it use command. # kubectl apply -f service.yaml Make sure there is no error. Now check the nginx service nodeport and IP using the kubectl command below. # kubectl get pods # kubectl get svc # kubectl describe svc Now you will get the nginx pod is now running under cluster IP address ‘10.109.154.222’ port 80, and the node main IP address '192.168.179.131' on port '30003'. The Nginx Pod has now been deployed under the Kubernetes cluster and it's accessible via the internet, now access from the web browser. http://192.168.179.131:30003/ Kubernetes Namespace
- 36. 36 What is a Namespace? You can think of a Namespace as a virtual cluster inside your Kubernetes cluster. You can have multiple namespaces inside a single Kubernetes cluster, and they are all logically isolated from each other. They can help you and your teams with organization, security, and even performance! In most Kubernetes distributions, the cluster comes out of the box with a Namespace called “default.” In fact, there are actually three namespaces that Kubernetes ships with: default, kube- system (used for Kubernetes components), and kube-public (used for public resources). Kube- public isn’t really used for much right now, and it’s usually a good idea to leave kube-system alone Functionality of Namespace Following are some of the important functionalities of a Namespace in Kubernetes − Namespaces help pod-to-pod communication using the same namespace. Namespaces are virtual clusters that can sit on top of the same physical cluster. They provide logical separation between the teams and their environments. Create a Namespace The following command is used to create a namespace. apiVersion: v1 kind: Namespace metadata name: MicroFinance Control the Namespace The following command is used to control the namespace. # kubectl create –f namespace.yml ---------> 1 # kubectl get namespace -----------------> 2 # kubectl get namespace <Namespace name> ------->3 # kubectl describe namespace <Namespace name> ---->4 # kubectl delete namespace <Namespace name> In the above code, We are using the command to create a namespace.
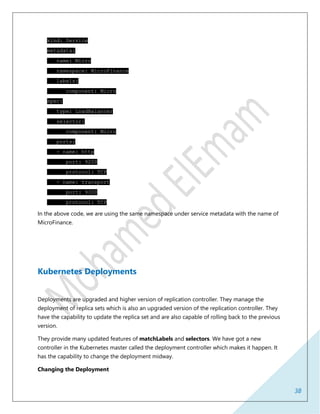
- 37. 37 This will list all the available namespace. This will get a particular namespace whose name is specified in the command. This will describe the complete details about the service. This will delete a particular namespace present in the cluster. This is a sample resource quota limit for namespace apiVersion: v1 kind: ResourceQouta metadata: name: compute-qouta namespace: prod spec: hard: pods: "10" requests.cpu: "4" requests.memory: 5Gi limits.cpu: "10" limits.memory: 10Gi This is the output after apply limits on namespace # kubectl describe namespace prod Using Namespace in Service - Example Following is an example of a sample file for using namespace in service. apiVersion: v1
- 38. 38 kind: Service metadata: name: Micro namespace: MicroFinance labels: component: Micro spec: type: LoadBalancer selector: component: Micro ports: - name: http port: 9200 protocol: TCP - name: transport port: 9300 protocol: TCP In the above code, we are using the same namespace under service metadata with the name of MicroFinance. Kubernetes Deployments Deployments are upgraded and higher version of replication controller. They manage the deployment of replica sets which is also an upgraded version of the replication controller. They have the capability to update the replica set and are also capable of rolling back to the previous version. They provide many updated features of matchLabels and selectors. We have got a new controller in the Kubernetes master called the deployment controller which makes it happen. It has the capability to change the deployment midway. Changing the Deployment
- 39. 39 Updating − The user can update the ongoing deployment before it is completed. In this, the existing deployment will be settled and new deployment will be created. Deleting − The user can pause/cancel the deployment by deleting it before it is completed. Recreating the same deployment will resume it. Rollback − We can roll back the deployment or the deployment in progress. The user can create or update the deployment by using DeploymentSpec.PodTemplateSpec = oldRC.PodTemplateSpec. Deployment Strategies Deployment strategies help in defining how the new RC should replace the existing RC. Recreate − This feature will kill all the existing RC and then bring up the new ones. This results in quick deployment however it will result in downtime when the old pods are down and the new pods have not come up. Rolling Update − This feature gradually brings down the old RC and brings up the new one. This results in slow deployment, however there is no deployment. At all times, few old pods and few new pods are available in this process. The configuration file of Deployment looks like this. apiVersion: extensions/v1beta1 --------------------->1 kind: Deployment --------------------------> 2 metadata: name: Tomcat-ReplicaSet spec: replicas: 3 template: metadata: lables: app: Tomcat-ReplicaSet tier: Backend spec: containers: - name: Tomcatimage: tomcat: 8.0 ports: - containerPort: 7474 In the above code, the only thing which is different from the replica set is we have defined the kind as deployment.
- 40. 40 Create Deployment # kubectl create –f Deployment.yaml –record -–record to see the deployments by command # kubectl rollout status deployment/Deployment Deployment "Deployment" created successfully. Fetch the Deployment # kubectl get deployments # kubectl get deploy -o wide NAME DESIRED CURRENT UP-TO-DATE AVILABLE AGE Deployment 3 3 3 3 20s Check the Status of Deployment # kubectl rollout status deployment/Deployment Updating the Deployment # kubectl apply –f Deployment.yaml (after update the new version inside the yaml file) # kubectl set image deployment/Deployment tomcat=tomcat:6.0 Rolling Back to Previous Deployment # kubectl rollout undo deployment/Deployment –to-revision=2 Check rollout history # kubectl rollout history deployment/Deployment Get ReplicaSet # kubectl get replicaset [root@master ~]# kubectl get replicaset NAME DESIRED CURRENT READY AGE Tomcat-ReplicaSet 3 3 3 2d14h
- 41. 41 Delete ReplicaSet (it will also delete all underlying Pods) # kubectl delete ReplicaSet < ReplicaSet name> [root@master ~]# delete replicaset Tomcat-ReplicaSet Scaling the Deployment # kubectl scale --replicas=6 –f Deployment.yaml To deploy from local image include imagePullPolicy: Never in the deployment yaml file spec: containers: - name: nginx-web image: nginx resources: limits: memory: "100Mi" cpu: "100m" imagePullPolicy: Never Assign Pods to Nodes 1- Assign label to your nodes List the nodes in your cluster, along with their labels: # kubectl get nodes --show-labels Chose one of your nodes, and add a label to it: # kubectl label nodes centos type=Master Verify that your chosen node has a type=Master label: 2- In the YAML file add selector of nodeSelector with the label spec: containers: - name: nginx image: nginx nodeSelector:
- 42. 42 type: Master Apply your deployment # kubectl apply -f Deployment.yaml To get into Pod Shell # kubectl exec --stdin --tty <Pod Name> -- /bin/bash [root@master ~]# kubectl exec --stdin --tty pod/nginx-deployment-597fbc7d6f- jhwf2 -- /bin/bash root@nginx-deployment-597fbc7d6f-jhwf2:/# ls Kubernetes Networking Networking in any architecture or technology is very essential to understand if you want to deploy the applications over the network and also understanding how the network works that will help you to troubleshoot if you have any network issue. So we must know exactly what is happening in the network and how all the connections are establishing for the communication over the network. This is a basic kubernetes architecture where you have some worker nodes, and few pods are running on it with couple of containers. When you have these many components, how all these components are establishing its connection to make the application accessible over the network? The answer is that happens only through kubernetes networking. Types of Kubernetes Networking
- 43. 43 1. Container to Container Communication: When you have one or more containers within a pod that shares the same host networking. So pods will get its own IP address, all container shares same ip address but it works on different port. Communication between containers happens within the pod itself on different port. So all containers will be able to communicate each other by default. 2. Pod to Pod communication: As said earlier, each pods will get its own ip address. There are sub types within Pod to Pod communication, that is. Intra-node Pod Network - Communication of pods running on a single node. Inter-node Pod Network - Communication of pods running in different nodes. On the first case, each pod running on single worker node will have the communication by default, because all ip address of pods will be different and assigned from your local network. Since it shares the same host. On the second case, when you have pod running on multiple worker nodes, communication between these pods happens through network plugin that will create some route tables. It forwards the traffic from any pod to any destination pods. 3. Pod to Service Communication: Service is kubernetes resource type that expose our application to outside the cluster. Through which pod can send the traffic to services. 4 External to Service Communication: In order to access our application from outside the cluster, external traffic should be allowed to reach the server within the cluster... This can be achieved using these different types. a. ClusterIP b. NodePort c. LoadBalancer d. Extername Each types has its own function and purpose. Cluster IP - It is the default kubernetes service used for internal communication within the
- 44. 44 cluster. NodePort - It will open a ports on each nodes and traffic will be forwarded to the service through random port. And I can access the service (Pod) with the node IP + Defined port. LoadBalancer - It is a type that forwards all external traffic to a service through this type. And I can access the service (Pod) with the node name only. External Name - it is a type used to access a service internally that is hosted outside cluster through DNS CName or A record... LoadBalancer service is not in kubernetes by default, to use it we must create ingress network. Ingress Policy Ingress exposes HTTP and HTTPS routes from outside the cluster to services within the cluster. Traffic routing is controlled by rules defined on the Ingress resource. internet | [ Ingress ] --|-----|-- [ Services ] An Ingress may be configured to give Services externally-reachable URLs, load balance traffic, terminate SSL / TLS, and offer name based virtual hosting. An Ingress controller is responsible for fulfilling the Ingress, usually with a load balancer, though it may also configure your edge router or additional frontends to help handle the traffic. An Ingress does not expose arbitrary ports or protocols. Exposing services other than HTTP and HTTPS to the internet typically uses a service of type Service.Type=NodePort or Service.Type=LoadBalancer.
- 45. 45 Prerequisites You must have an ingress controller to satisfy an Ingress. Only creating an Ingress resource has no effect. You may need to deploy an Ingress controller such as ingress-nginx. The Ingress Resource A minimal Ingress resource example: apiVersion: extensions/v1beta1 kind: Ingress metadata: name: test-ingress namespace: critical-space annotations: nginx.ingress.kubernetes.io/rewrite-target: / spec: rules: - http: paths: - path: /website backend: serviceName: website-service servicePort: 80 Then I make deployment with type LoadBalancer apiVersion: v1 kind: Service metadata: name: mywebsite spec: ports: - name: http port: 80 protocol: TCP targetPort: 80 type: LoadBalancer selector:
- 46. 46 name: mywebsite Ingress and egress The bulk of securing network traffic typically revolves around defining egress and ingress rules. From the point of view of a Kubernetes pod, ingress is incoming traffic to the pod, and egress is outgoing traffic from the pod. In Kubernetes network policy, you create ingress and egress “allow” rules independently (egress, ingress, or both). Kubernetes NodePort vs LoadBalancer vs Ingress? When should I use what? They are all different ways to get external traffic into your cluster ClusterIP A ClusterIP service is the default Kubernetes service. It gives you a service inside your cluster that other apps inside your cluster can access. There is no external access. The YAML for a ClusterIP service looks like this: apiVersion: v1 kind: Service metadata: name: my-internal-service spec: selector: app: my-app type: ClusterIP ports: - name: http port: 80 targetPort: 80 protocol: TCP If you can’t access a ClusterIP service from the internet, Turns out you can access it using the Kubernetes proxy!
- 47. 47 Start the Kubernetes Proxy: kubectl proxy --port=8080 Now, you can navigate through the Kubernetes API to access this service using this scheme: http://localhost:8080/api/v1/proxy/namespaces/<NAMESPACE>/services/<SERVICE- NAME>:<PORT-NAME>/ So to access the service we defined above, you could use the following address: http://localhost:8080/api/v1/proxy/namespaces/default/services/my-internal-service:http/ When would you use this? There are a few scenarios where you would use the Kubernetes proxy to access your services. Debugging your services, or connecting to them directly from your laptop for some reason Allowing internal traffic, displaying internal dashboards, etc. Because this method requires you to run kubectl as an authenticated user, you should NOT use this to expose your service to the internet or use it for production services. NodePort A NodePort service is the most primitive way to get external traffic directly to your service. NodePort, as the name implies, opens a specific port on all the Nodes (the VMs), and any traffic that is sent to this port is forwarded to the service.
- 48. 48 The YAML for a NodePort service looks like this: apiVersion: v1 kind: Service metadata: name: my-nodeport-service spec: selector: app: my-app type: NodePort ports: - name: http port: 80 targetPort: 80 nodePort: 30036 protocol: TCP NodePort service has two differences from a normal “ClusterIP” service. First, the type is “NodePort.” There is also an additional port called the NodePort that specifies which port to open on the nodes. If you don’t specify this port, it will pick a random port. Most of the time you should let Kubernetes choose the port; there are many caveats to what ports are available for you to use. When would you use this? There are many downsides to this method: You can only have one service per port You can only use ports 30000–32767 If your Node/VM IP address change, you need to deal with that For these reasons, I don’t recommend using this method in production to directly expose your service. If you are running a service that doesn’t have to be always available, or you are very cost sensitive, this method will work for you. A good example of such an application is a demo app or something temporary.
- 49. 49 LoadBalancer A LoadBalancer service is the standard way to expose a service to the internet. This will spin up a Network Load Balancer that will give you a single IP address that will forward all traffic to your service. When would you use this? If you want to directly expose a service, this is the default method. All traffic on the port you specify will be forwarded to the service. There is no filtering, no routing, etc. This means you can send almost any kind of traffic to it, like HTTP, TCP, UDP, Websockets, gRPC, or whatever. The big downside is that each service you expose with a LoadBalancer will get its own IP address, and you have to pay for a LoadBalancer per exposed service, which can get expensive! Ingress Unlike all the above examples, Ingress is actually NOT a type of service. Instead, it sits in front of multiple services and act as a “smart router” or entry point into your cluster. You can do a lot of different things with an Ingress, and there are many types of Ingress controllers that have different capabilities.
- 50. 50 The YAML for an Ingress object with a L7 HTTP Load Balancer might look like this: apiVersion: extensions/v1beta1 kind: Ingress metadata: name: my-ingress spec: backend: serviceName: other servicePort: 8080 rules: - host: foo.mydomain.com http: paths: - backend: serviceName: foo servicePort: 8080 - host: mydomain.com http: paths: - path: /bar/* backend: serviceName: bar servicePort: 8080 When would you use this? Ingress is probably the most powerful way to expose your services, but can also be the most complicated. There are many types of Ingress controllers, from the Google Cloud Load Balancer, Nginx, Contour, Istio, and more. There are also plugins for Ingress controllers, like the cert- manager, that can automatically provision SSL certificates for your services. Ingress is the most useful if you want to expose multiple services under the same IP address, and these services all use the same L7 protocol (typically HTTP). You only pay for one load balancer if you are using the native GCP integration, and because Ingress is “smart” you can get a lot of features out of the box (like SSL, Auth, Routing, etc).
- 51. 51 Kubernetes Storage Persistent volume claim (PVC) A Persistent Volume Claim (PVC) is a claim request for some storage space by users. Persistent volume (PV) A Persistent Volume (PV) is a piece of storage in the cluster that has been provisioned by an administrator or dynamically provisioned using Storage Classes. In simple words, Persistent Volume is a solution to store data of our containers permanently even after the pods got deleted. How it is different from other kubernetes volume types? Let’s say you have multiple pod running on different nodes and you used hostpath volume type. Your data written by pod 1 running on worker node 1 will be resides only on worker node 1 and that cannot be access by pod 2 running on worker node 2. Similarly pod 1 cannot access data written by pod 2 on worker node 2. Right? Since hostpath is a type that writes data only on your local node directory. It’s not kind of a shared volume. Other example is, let’s say you have one pod running on worker node1 and your pod written some data now on local worker node1.
- 52. 52 But Due to some reasons your pod is rescheduled to run on worker node 2, how about your data written on worker node1? Your pod will be running on worker node 2 now, but your data won’t be available here on worker node 2 since your data written by pod1 exists only on worker node1. So we must have shared volume that should be accessible across all worker nodes only when pods need it. In this case, persistent volume and persistent volume claim can be used at the kubernetes cluster level. But there is a traditional method to have shared volume across worker nodes at operating system level by mounting some volume through nfs, fc, iscsi on all worker nodes that can share the same volume. This example is discussed in the previous article. Before I explain you how to create persistent volume and persistent volume claim, Let me explain you what is actually happening in persistent volume and how it works? In a legacy infrastructure environment, when you need additional storage space to your server, you will reach out to the storage administrator for the space. So there would be a storage administrator who allocates some storage space from storage device to your server as you requested. Similarly, in kubernetes. Persistent volume is a resource type through which you can
- 53. 53 get your storage space allocated to your kubernetes cluster. Let's say you got some 10G persistent volume allocated to your kubernetes cluster. Obviously that should be through any one of the kubernetes volume types. Might be through ISCSI, FC, NFS, or any other cloud providers. From which you can claim some space you want for your pod using persistent volume claim. Let's say you want 5 GB for your pod. You can use persistent volume claim to request 5 GB space from your persistent volume. Now you persistent volume will allocates the space you requested using persistent volume when it is find suitable, now you can use that volume claim in your deployment. Let’s see how to create Persistent Volume. Create a yaml file for persistent volume to get the storage space for our kubernetes cluster. Create a yaml file to claim the space using peristent volume claim as per our requirement. Define the persistent volume claim in your pod deployment file. Already I have a single pod running on worker node 1 with two containers. Sample deployment file is given below. It doesn’t have any volume specification. Let's see how to use persistent volume and claim. kind: Deployment apiVersion: apps/v1 metadata: name: ebay-app spec: selector: matchLabels: environment: dev app: ebay replicas: 1 template: metadata: labels: environment: dev
- 54. 54 app: ebay spec: containers: - name: container1-nginx image: nginx - name: container2-tomcat image: tomcat I have an nfs server that acts as a storage and exported a volume named /nfsdata from 192.168.1.7. Traditional way is to mount the share in all worker nodes, instead we will be using this share through persistent volume. Right. So create a persistent volume yaml file. #cat nfs_pv.yaml apiVersion: v1 kind: PersistentVolume metadata: name: ebay-pv spec: capacity: storage: 20Gi volumeMode: Filesystem accessModes: - ReadWriteOnce persistentVolumeReclaimPolicy: Recycle storageClassName: ebaystorage mountOptions: - nfsvers=4.1 nfs: path: /nfsdata server: 192.168.1.7 Persistent Volume supports three types of Reclaim Policy Retain Delete Recycle Persistent Volume supports three types of access modes ReadWriteOnce ReadOnlyMany ReadWriteMany Let’s apply the changes and verify it. user1@kubernetes-master:~/codes/pv$ kubectl apply -f nfs_pv.yaml persistentvolume/ebay-pv created user1@kubernetes-master:~/codes/pv$ kubectl get pv NAME CAPACITY ACCESS MODES RECLAIM POLICY STATUS CLAIM STORAGECLASS REASON AGE
- 55. 55 ebay- pv 20Gi RWO Recycle Available ebaystora ge 24s Above output shows that pv "ebay-pv" is created as expected and it is available for claim. Let’s create persistent volume claim: user1@kubernetes-master:~/codes/ebay$ cat pvc.yaml apiVersion: v1 kind: PersistentVolumeClaim metadata: name: myclaim spec: storageClassName: ebaystorage accessModes: - ReadWriteOnce resources: requests: storage: 20G Claim can be given from kubernetes cluster only when it finds suitable any Storageclassname and accessmode are same as specified in this claim file, if any persistent volume doesn’t have these storageclassname or accessmode, then persistent volume claim will not be processed. Let’s apply this and verify it. user1@kubernetes-master:~/codes/ebay$ kubectl apply -f pvc.yaml persistentvolumeclaim/myclaim created user1@kubernetes-master:~/codes/ebay$ kubectl get pvc NAME STATUS VOLUME CAPACITY ACCESS MODES STORAGECLASS AGE myclaim Bound ebay-pv 20Gi RWO ebaystorage 15s So our claim is validated and allocated for us. Now we can use this claim to our pods. Edit your deployment file as below to define the volume specification. I will be using this volume only for my first container. user1@kubernetes-master:~/codes/ebay$ cat httpd-basic-deployment.yaml kind: Deployment apiVersion: apps/v1 metadata: name: ebay-app spec: selector: matchLabels: environment: dev app: ebay
- 56. 56 replicas: 1 template: metadata: labels: environment: dev app: ebay spec: volumes: - name: myvolume persistentVolumeClaim: claimName: myclaim containers: - name: container1-nginx image: nginx volumeMounts: - name: myvolume mountPath: "/tmp/persistent" - name: container2-tomcat image: tomcat Just apply the changes. user1@kubernetes-master:~/codes/ebay$ kubectl apply -f httpd-basic- deployment.yaml deployment.apps/ebay-app configured Use "describe" option to find the volume parameters and confirm the claim is successful. it should looks like this. user1@kubernetes-master:~/codes/ebay$ kubectl describe pods ebay-app ........trimmed some content...... Volumes: myvolume: Type: PersistentVolumeClaim (a reference to a PersistentVolumeClaim in the same namespace) ClaimName: myclaim ReadOnly: false default-token-2tqkb: Type: Secret (a volume populated by a Secret) SecretName: default-token-2tqkb Optional: false ........trimmed some content...... That’s it, we have successfully created persistent volume persistent volume claim. Now when your pod is rescheduled to other worker node, your data will be still available. Kubernetes Volumes What is Kubernetes Volumes? Kubernetes Volumes are used to store data that should be accessible across all your containers running in a pod based on the requirement.
- 57. 57 What are the types of Kubernetes Volumes? Kubernetes supports many kind of storage types, these are determined by how it is created and assigned to pods. Local Node Types - emptyDIR, hostpath, local File Sharing types - nfs Storage types - fc, iscsi Special Purpose Types - Secret, Git repo Cloud Provider types - Vsphere, Cinder, awsElasticBlockStore, azureDisk, gcepersistentDisk Distributed filesystem types - glusterfs, cephfs Special type - persistent volume, persistent volume claim Note: emptyDIR - It’s a type of storage types that writes data only in memory till the pods running. So you data will be erased when the pod is deleted. So it’s not a persistent kind of types. hostpath, local, fc and other types are persistent kind only, but volume won’t be available across the nodes. It will be available only on local nodes. So we may need to setup something shared volume using traditional storage mount across all the nodes. Persistent volume type volumes can be accessible across all the nodes. How to use kubernetes volumes to pod and containers? Use an option "Volumes" along with name and types as below in a deployment file for the entire PODS and use the "volumeMounts" along with mountPath where the volume to be mounted for the container. We must use the volume name unique and exactly as specified in specification for the containers. If not you will end up with error. Example: spec: volumes: - name: volume hostPath: path: /mnt/data containers: - name: container1-nginx image: nginx volumeMounts: - name: volume mountPath: "/var/nginx-data" - name: container2-tomcat image: tomcat
- 58. 58 Above example tells that, volume name "volume" specified in "spec" section with Path "/mnt/data" will be used as a volume for this entire pod. It will be mounted only on container "container1-nginx" since it is claimed to be mounted on path "/var/nginx-data" using "volumeMounts" option. How to assign a single volume to specific container in a pod? In order to use a volume only to specific container running in a pod, we must use volume mounts option. So that particular container will use the volume specified in spec. kind: Deployment apiVersion: apps/v1 metadata: name: ebay-app spec: selector: matchLabels: environment: dev app: ebay replicas: 1 template: metadata: labels: environment: dev app: ebay spec: volumes: - name: volume hostPath: path: /mnt/data containers: - name: container1-nginx image: nginx volumeMounts: - name: volume mountPath: "/var/nginx-data" - name: container2-tomcat image: tomcat
- 59. 59 So we have claimed the volume name "volume" from specification and mapped to the container "container1-nginx" that would mount the volume under "/var/nginx-data", this volume will be only available to the first container "container1-nginx" not to the second container "container2- tomcat". This is how we can assign a single volume to specific container in a pod. How to share a same volume to all containers within a pod? In order to share a same volume to all containers running in a pod, we must use volume mounts option in all containers. kind: Deployment apiVersion: apps/v1 metadata: name: ebay-app spec: selector: matchLabels: environment: dev app: ebay replicas: 1 template: metadata: labels: environment: dev app: ebay spec: volumes: - name: volume hostPath: path: /mnt/data containers: - name: container1-nginx image: nginx volumeMounts: - name: volume
- 60. 60 mountPath: "/var/nginx-data" - name: container2-tomcat image: tomcat volumeMounts: - name: volume mountPath: "/var/tomcat-data" This time, we have used volumeMount option for both containers with different path, as per the code definition, same volume "volume" will be mount on both containers in path "/var/nginx- data" on container1-nginx and "/var/tomcat-data" on container2-tomcat respectively. How to assign a dedicated volumes to each container in a pod? In order to assign a dedicated volumes to each containers running in a pod, we must use volumes and volumemounts option in all containers accordingly as per the example given below. kind: Deployment apiVersion: apps/v1 metadata: name: ebay-app spec: selector: matchLabels: environment: dev app: ebay replicas: 1 template: metadata: labels: environment: dev app: ebay spec: volumes: - name: volume1 hostPath: path: /mnt/data1 - name: volume2
- 61. 61 hostPath: path: /mnt/data2 containers: - name: container1-nginx image: nginx volumeMounts: - name: volume1 mountPath: "/var/nginx-data" - name: container2-tomcat image: tomcat volumeMounts: - name: volume2 mountPath: "/var/tomcat-data" As per the above example, volume1 will be used by the first container "container1-nginx" and volume2 will be used by the second container "container2-tomcat". This is how we can assign dedicated volumes to each containers running in a pod. How to assign a shared volume across all pods running on different worker nodes? Why do we actually need this setup is, so far we have seen volumes that is used only on single pod running on one worker node. So your data won’t be available when pod is rescheduled to other node since your hostpath you have used is local directory. If you want your data to be available for all worker nodes, we must have shared volumes concepts to overcome such situation. We can use a special type ie PersistentVolume and PersistentVolumeClaim or our traditional approach that mount a shared volume from storage and use that mounted path in the deployment file. You can checkout this video for the traditional approach and will explain you about persistentvolume and persistentvolume claim in the next article. To get all persistent volumes # kubectl get persistentvolume To get all persistent volumes Claims # kubectl get persistentvolumeclaims -o wide
- 62. 62 Kubernetes Security Role-Based Access Control (RBAC) In order to fully grasp the idea of RBAC, we must understand that three elements are involved: Subjects: The set of users and processes that want to access the Kubernetes API. Resources: The set of Kubernetes API Objects available in the cluster. Examples include Pods, Deployments, Services, Nodes, and PersistentVolumes, among others. Verbs: The set of operations that can be executed to the resources above. Different verbs are available (examples: get, watch, create, delete, etc.), but ultimately all of them are Create, Read, Update or Delete (CRUD) operations. With these three elements in mind, the key idea of RBAC is the following: We want to connect subjects, API resources, and operations. In other words, we want to specify, given a user, which operations can be executed over a set of resources. So, if we think about connecting these three types of entities, we can understand the different RBAC API Objects available in Kubernetes. Roles: Will connect API Resources and Verbs. These can be reused for different subjects. These are binded to one namespace (we cannot use wildcards to represent more than one, but we can deploy the same role object in different namespaces). If we want the role to be applied cluster-wide, the equivalent object is called ClusterRoles.
- 63. 63 RoleBinding: Will connect the remaining entity-subjects. Given a role, which already binds API Objects and verbs, we will establish which subjects can use it. For the cluster- level, non-namespaced equivalent, there are ClusterRoleBindings. In the example below, we are granting the user jsalmeron the ability to read, list and create pods inside the namespace test. This means that jsalmeron will be able to execute these commands: But not these: Example yaml files:
- 64. 64 Another interesting point would be the following: now that the user can create pods, can we limit how many? In order to do so, other objects, not directly related to the RBAC specification, allow configuring the amount of resources: ResourceQuota and LimitRanges. It is worth checking them out for configuring such a vital aspect of the cluster. Users and… ServiceAccounts? One topic that many Kubernetes users struggle with is the concept of subjects, but more specifically the difference between regular users and ServiceAccounts. In theory it looks simple: Users: These are global, and meant for humans or processes living outside the cluster. ServiceAccounts: These are namespaced and meant for intra-cluster processes running inside pods. Both have in common that they want to authenticate against the API in order to perform a set of operations over a set of resources (remember the previous section), and their domains seem to be clearly defined. They can also belong to what is known as groups, so a RoleBinding can bind more than one subject (but ServiceAccounts can only belong to the “system:serviceaccounts” group). However, the key difference is a cause of several headaches: users do not have an associated Kubernetes API Object. That means that while this operation exists: This one doesn’t: This has a vital consequence: if the cluster will not store any information about users, then, the administrator will need to manage identities outside the cluster. There are different ways to do so: TLS certificates, tokens, and OAuth2, among others. In addition, we would need to create kubectl contexts so we could access the cluster with these new credentials. In order to create the credential files, we could use the kubectl config commands (which do not require any access to the Kubernetes API, so they could be executed by any user). Watch the video above to see a complete example of user creation with TLS certificates. Possible operations over these resources are:
- 65. 65 create get delete list update edit watch exec Use case: Create user with limited namespace access In this example, we will create the following User Account: Username: employee Group: bitnami We will add the necessary RBAC policies so this user can fully manage deployments (i.e. use kubectl run command) only inside the office namespace. At the end, we will test the policies to make sure they work as expected. Step 1: Create the office namespace Execute the kubectl create command to create the namespace (as the admin user): kubectl create namespace office Step 2: Create the user credentials As previously mentioned, Kubernetes does not have API Objects for User Accounts. Of the available ways to manage authentication (see Kubernetes official documentation for a complete list), we will use OpenSSL certificates for their simplicity. The necessary steps are: Create a private key for your user. In this example, we will name the file employee.key: openssl genrsa -out employee.key 2048 Create a certificate sign request employee.csr using the private key you just created (employee.key in this example). Make sure you specify your username and group in the - subj section (CN is for the username and O for the group). As previously mentioned, we will use employee as the name and bitnami as the group:
- 66. 66 openssl req -new -key employee.key -out employee.csr -subj "/CN=employee/O=bitnami" Locate your Kubernetes cluster certificate authority (CA). This will be responsible for approving the request and generating the necessary certificate to access the cluster API. Its location is normally /etc/kubernetes/pki/. In the case of Minikube, it would be ~/.minikube/. Check that the files ca.crt and ca.key exist in the location. Generate the final certificate employee.crt by approving the certificate sign request, employee.csr, you made earlier. Make sure you substitute the CA_LOCATION placeholder with the location of your cluster CA. In this example, the certificate will be valid for 500 days: openssl x509 -req -in employee.csr -CA CA_LOCATION/ca.crt -CAkey CA_LOCATION/ca.key -CAcreateserial -out employee.crt -days 500 Save both employee.crt and employee.key in a safe location (in this example we will use /home/employee/.certs/). Add a new context with the new credentials for your Kubernetes cluster. This example is for a Minikube cluster but it should be similar for others: kubectl config set-credentials employee --client- certificate=/home/employee/.certs/employee.crt --client- key=/home/employee/.certs/employee.key kubectl config set-context employee-context --cluster=minikube -- namespace=office --user=employee Now you should get an access denied error when using the kubectl CLI with this configuration file. This is expected as we have not defined any permitted operations for this user. kubectl --context=employee-context get pods Step 3: Create the role for managing deployments Create a role-deployment-manager.yaml file with the content below. In this yaml file we are creating the rule that allows a user to execute several operations on Deployments, Pods and ReplicaSets (necessary for creating a Deployment), which belong to the core (expressed by "" in the yaml file), apps, and extensions API Groups: kind: Role apiVersion: rbac.authorization.k8s.io/v1beta1 metadata: namespace: office name: deployment-manager
- 67. 67 rules: - apiGroups: ["", "extensions", "apps"] resources: ["deployments", "replicasets", "pods"] verbs: ["get", "list", "watch", "create", "update", "patch", "delete"] # You can also use ["*"] Create the Role in the cluster using the kubectl create role command: kubectl create -f role-deployment-manager.yaml Step 4: Bind the role to the employee user Create a rolebinding-deployment-manager.yaml file with the content below. In this file, we are binding the deployment-manager Role to the User Account employee inside the office namespace: kind: RoleBinding apiVersion: rbac.authorization.k8s.io/v1beta1 metadata: name: deployment-manager-binding namespace: office subjects: - kind: User name: employee apiGroup: "" roleRef: kind: Role name: deployment-manager apiGroup: "" Deploy the RoleBinding by running the kubectl create command: kubectl create -f rolebinding-deployment-manager.yaml Step 5: Test the RBAC rule Now you should be able to execute the following commands without any issues: kubectl --context=employee-context run --image bitnami/dokuwiki mydokuwiki kubectl --context=employee-context get pods
- 68. 68 If you run the same command with the --namespace=default argument, it will fail, as the employee user does not have access to this namespace. kubectl --context=employee-context get pods --namespace=default Now you have created a user with limited permissions in your cluster. Secrets Secret - At the application level, Kubernetes secrets can store sensitive information (such as passwords, SSH keys, API keys or tokens) per cluster (a virtual cluster if using namespaces, physical otherwise). Kubernetes Secret can be injected into a Pod container either as an environment variable or mounted as a file. Using Kubernetes Secrets allows us to abstract sensitive data and configuration from application deployment. Note that secrets are accessible from any pod in the same cluster. Network policies for access to pods can be defined in a deployment. A network policy specifies how pods are allowed to communicate with each other and with other network endpoints. Note that storing sensitive data in a Kubernetes Secret does not make it secure. By default, all data in Kubernetes Secrets is stored as a plaintext encoded with base64. There are multiple ways of creating secrets in Kubernetes. Creating from txt files. Creating from yaml file. Creating From Text File In order to create secrets from a text file such as user name and password, we first need to store them in a txt file and use the following command. $ kubectl create secret generic tomcat-passwd –-from-file = ./username.txt – fromfile = ./.password.txt Creating From Yaml File apiVersion: v1
- 69. 69 kind: Secret metadata: name: tomcat-pass type: Opaque data: password: <User Password> username: <User Name> Creating the Secret $ kubectl create –f Secret.yaml secrets/tomcat-pass Using Secrets Once we have created the secrets, it can be consumed in a pod or the replication controller as − Environment Variable Volume As Environment Variable In order to use the secret as environment variable, we will use env under the spec section of pod yaml file. env: - name: SECRET_USERNAME valueFrom: secretKeyRef: name: mysecret key: tomcat-pass As Volume spec: volumes: - name: "secretstest" secret: secretName: tomcat-pass containers: - image: tomcat:7.0 name: awebserver volumeMounts: - mountPath: "/tmp/mysec" name: "secretstest"
- 70. 70 Secret Configuration as Environment Variable apiVersion: v1 kind: ReplicationController metadata: name: appname spec: replicas: replica_count template: metadata: name: appname spec: nodeSelector: resource-group: containers: - name: appname image: imagePullPolicy: Always ports: - containerPort: 3000 env: -----------------------------> 1 - name: ENV valueFrom: configMapKeyRef: name: appname key: tomcat-secrets In the above code, under the env definition, we are using secrets as environment variable in the replication controller. Secrets as Volume Mount apiVersion: v1 kind: pod metadata: name: appname spec: metadata: name: appname spec: volumes: - name: "secretstest" secret: secretName: tomcat-pass containers: - image: tomcat: 8.0 name: awebserver volumeMounts: - mountPath: "/tmp/mysec" name: "secretstest"
- 71. 71 Kubernetes Logging & Monitoring Monitoring is one of the key component for managing large clusters. For this, we have a number of tools. Monitoring with Prometheus It is a monitoring and alerting system. It was built at SoundCloud and was open sourced in 2012. It handles the multi-dimensional data very well. Sematext Docker Agent It is a modern Docker-aware metrics, events, and log collection agent. It runs as a tiny container on every Docker host and collects logs, metrics, and events for all cluster node and containers. It discovers all containers (one pod might contain multiple containers) including containers for Kubernetes core services, if the core services are deployed in Docker containers. After its deployment, all logs and metrics are immediately available out of the box. Kubernetes Log Kubernetes containers’ logs are not much different from Docker container logs. However, Kubernetes users need to view logs for the deployed pods. Hence, it is very useful to have Kubernetes-specific information available for log search, such as − Kubernetes namespace Kubernetes pod name Kubernetes container name Docker image name Kubernetes UID